When you click on links to various merchants on this site and make a purchase, this can result in this site earning a commission. Affiliate programs and affiliations include, but are not limited to, the eBay Partner Network.
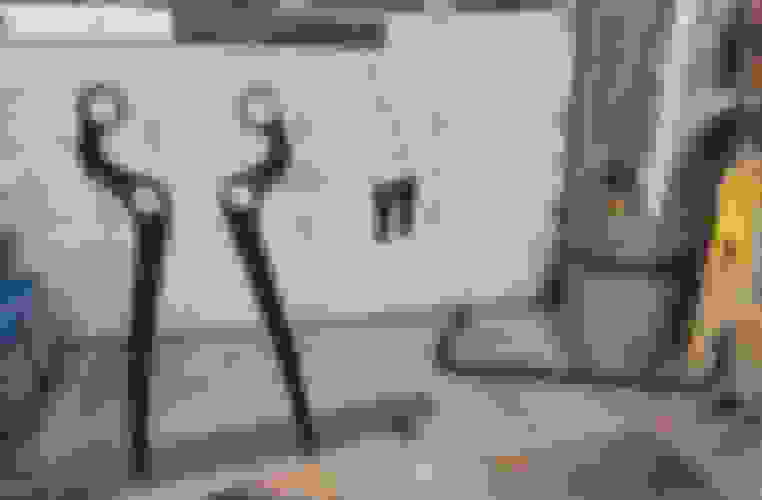
that's an awesome ziptie job! that might last longer than the oem.
Hah. I did go a little overboard, but had to make it wife approved as she drives the G sometimes to run errands.
I ended up replacing the pedal today. Took all of 5 minutes and 4 of those minutes were cutting off all the zip ties! . Definitely the cheapest MB part ever at $10.
I decided to just swap with the normal OE style part instead of upgrading to the electric pedal due to the cost and the amount of work needed for the retrofit. The pedal is around $200 from FCP Euro and you'll still need to extend the throttle connector, and retrofit the kick-down switch to the new pedal assembly. I don't feel the effort and cost would be worth it unless I really wanted the aluminum AMG pedal look, which I honestly don't care about at all.
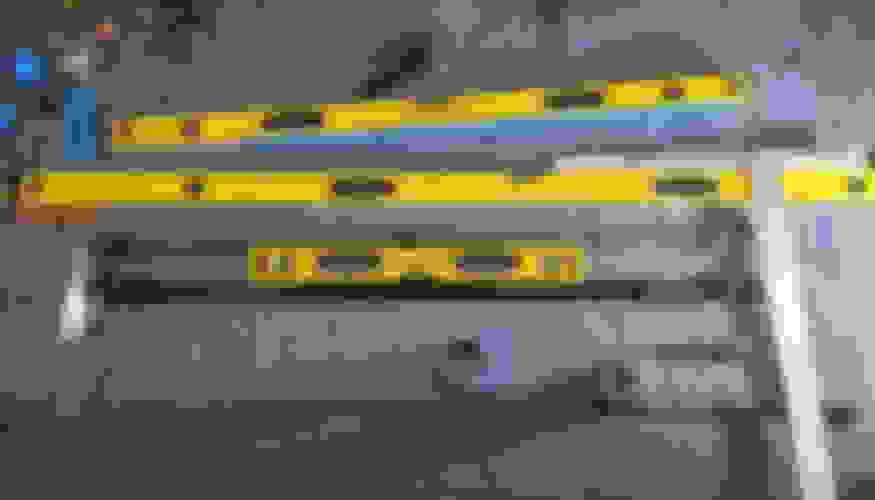
Taking a few hour road trip tomorrow and wanted to finally change out the Drag Link as the clunking and steering wobble has been getting pretty bad. Take 2!
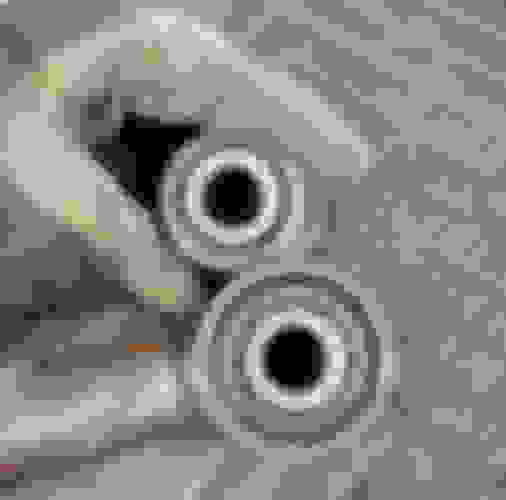
Purchased a larger ball joint press from Harbor Freight to get the passenger side out. Also needed the smaller size one, also from Harbor Fright, to get the driver's side one out.
Lined the 2 up equally spaced apart, and used some squares to adjust the new one to be exactly the same length as the old one. Also positioned the ball joint directions to match.
Got everything installed. Ball Joint nut tightened to 140nm. Hand tightened the jam nut using knuckle busters to hold the larger nut, and used my largest metric adjustable wrench to get the jam nut. Marked everything with a paint pen to make sure things don't come loose.
Took a quick drive on a nearby super bumpy road and am happy to report that the clunk and steering wobble seems to be gone. There is definitely still some motion there but I believe that is just the normal dynamic of the solid axles.
Next up with swapping out the swivel ball seals before the cold weather sets in. I'm thinking I may just replace them with the split-type seal for now and use RTV to replace the paper gasket, then get back in there next year with the one piece seals. Anyone have input on this?
Shiann
Did you have any 'rubber' between the bottom mounts on the Eurowise Fox front shocks install. I am concerned that it is metal on metal whereas the original set up is rubber bushes on both sides of the bottom mount. I suspect that may have a contributing factor to the subsequent failure of your Fox shocks. I must admit I am not convinced that the Eurowise kit is fit for purpose. I am interested in you thoughts and am loving your posts. I wish my work shop was a comprehensive as yours. Fuel bill for my trip was close to A$ 9000 as you pay top dollar for fuel in remote outback Australia. Alos needed to carry some octane boosters as 98 RON was not that common.
Attached is a photo in Broome. No snow driving for us in Oz but plenty of beach driving.
DVR
Hey DVR,
I wish my adventures were as epic as yours!
As far as the Eurowise eyelet to stem adapters, I don't think the adapters being hard mounted to the chassis is an issue. The bottom of the shock eyelet has a rubber bushing already so I doubt this is the reason for my premature shock failure. I believe the reason is putting the braided hose at too severe of an angle as I did not want to cut the inner metal fender liners of my G. I twisted the reservoirs back and the line was probably compromised after many miles or transferring fluid this way. This is why I sourced longer braided lines from Fox so I can position the reservoirs wherever I would like to mount them. Easier access to the adjustment knob, no harsh angles for the braided line, no cutting needed on the inner fender. Putting some type of foam or rubber between the Eurowise adapter and the frame probably would be a good idea to isolate the 2 metal pieces from rusting. A closed cell foam would be the best as it won't hold water.
The Eurowise kit also uses off the shelf Jeep JK shocks for the revised G kit. I'm not sure if there are any differences to the damping profiles between this kit and the original G kit, but the G is definitely a lot heavier. Also, this kit runs the JK REAR shocks in the FRONT of the G, which seems like they looked for a shock that would bolt on (for the most part), not necessarily tuned for the weight distribution of the G. I've never ridden in another G with Fox shocks though so can't comment on how comfortable or not they are. I don't think the ride really is comfortable, but I attribute this more to my G63 stiffer springs, which was a mistake. If I had to go back in time, knowing I would have to rebuild in less than a year, I would have saved a little bit more and went for the King shocks or something more simple without a remote reservoir.
Since my other car has basically been out of commission being repaired slowly for the past 4 months, the G has served as the daily driver for commuting to work in NYC. Talk about a lot of gas. The G currently has ~112000 miles on it, still averaging right around 12mpg. Total running costs over the past 22k miles have been right under $1/mile, including gas, all maintenance and modifications, taxes, registration, loan interest payments, specialty tools etc. That cost does not include the purchase cost of the G, nor the estimated current sale value, which ironically lowers the cost/mile by about half due to how much the G has appreciated over the past 18 months.
I'll finally get to tear into the G this weekend and will start with the rear end, replacing the panhard bushings, making sure all bolts/nuts are tight, inspecting all the rubber bushings, and also adding some centering washers to the Fox shocks bottom eyelet. Then I'll go ahead and replace the front/rear diff fluid, along with the transfer case fluid with Amsoil in the correct weights and formulas. Both rear doors are acting funny so I'll have to take them apart to find out why the interior handles don't work anymore. I'll take the door handles and lock assemblies apart to clean and lubricate, as well as add some more sound deadening material in there as the last time I was in there I didn't take that step.
The front end will be a longer task, but I'll be replacing all the rubber bushings at once, including adding in the caster correction bushings. I'll make a template out of plywood and a 3D printed dowel to make sure the orientation of the bushings is correct, but this should be relatively straight forward.
After that I also purchased a new steering column rubber boot and the split-type swivel ball seals from fourbyfourclub and will be tackling that soon after the front end is addressed (or probably at the same time). I still do have a steering clunk so may just purchase a new steering tie rod linkage from FCP and do an oil change before the holidays start.
Once the holidays start, there will be lots of road trips to see friends and family all over the east coast, so lots of motoring miles to be had. Plan is to build a plywood shelf/floor for the rear and maybe some pull out drawers if I have time and I'll be sure to document the process.
Lots to do and not much time to do it, like always.
Speaking of gas, my truck, which has 225,000 miles, is getting better MPG after replacing all oxygen sensors.
I've never had any issue with the original sensors, but just got them replaced as a preventative maintenance.
I still have to drive more to get accurate numbers, but I think I am getting +2 MPG on the freeway, from 13 MPH to +15 MPH.
I know 2 miles more doesn't sound much, but it's over 15% improvement.
Are new oxygen sensors supposed to help with better gas efficiency?
In theory, if the o2 sensors are reading a leaner exhaust mixture, the ECU would compensate by adding more fuel across the fuel map. It could also look something like if the sensors are reading a larger range of numbers the numerical averaging would be all over the place, and the ECU may also compensate for this by dumping more fuel in. This is something I never considered but may be a good maintenance item at the ~100k mark. The highest MPG I've ever seen is 14mpg, so honestly ANY bump of 1-2mpg would be a welcome addition. Thanks for the suggestion!
Since my other car has basically been out of commission being repaired slowly for the past 4 months, the G has served as the daily driver for commuting to work in NYC. Talk about a lot of gas. The G currently has ~112000 miles on it, still averaging right around 12mpg. Total running costs over the past 22k miles have been right under $1/mile, including gas, all maintenance and modifications, taxes, registration, loan interest payments, specialty tools etc. That cost does not include the purchase cost of the G, nor the estimated current sale value, which ironically lowers the cost/mile by about half due to how much the G has appreciated over the past 18 months.
I'll finally get to tear into the G this weekend and will start with the rear end, replacing the panhard bushings, making sure all bolts/nuts are tight, inspecting all the rubber bushings, and also adding some centering washers to the Fox shocks bottom eyelet. Then I'll go ahead and replace the front/rear diff fluid, along with the transfer case fluid with Amsoil in the correct weights and formulas. Both rear doors are acting funny so I'll have to take them apart to find out why the interior handles don't work anymore. I'll take the door handles and lock assemblies apart to clean and lubricate, as well as add some more sound deadening material in there as the last time I was in there I didn't take that step.
The front end will be a longer task, but I'll be replacing all the rubber bushings at once, including adding in the caster correction bushings. I'll make a template out of plywood and a 3D printed dowel to make sure the orientation of the bushings is correct, but this should be relatively straight forward.
After that I also purchased a new steering column rubber boot and the split-type swivel ball seals from fourbyfourclub and will be tackling that soon after the front end is addressed (or probably at the same time). I still do have a steering clunk so may just purchase a new steering tie rod linkage from FCP and do an oil change before the holidays start.
Once the holidays start, there will be lots of road trips to see friends and family all over the east coast, so lots of motoring miles to be had. Plan is to build a plywood shelf/floor for the rear and maybe some pull out drawers if I have time and I'll be sure to document the process.
Lots to do and not much time to do it, like always.
Cheers!
You've done a ton of work on your G's suspension. In contrast, I haven't done ANY suspension related work on my 2008 G55 since I purchased it in 2017 w/ 104k miles. It now has 135k miles.
Prior to my ownership, records indicate the following:
1. Front inner and outer tie rod ends (104k miles)
2. Engine and transmission mounts (104k miles)
3. Steering shock absorber (463-463-01-32) (99k miles)
4. Drag link (463-463-11-15) (99k miles)
5. Tie rod (not sure which one) (463-330-07-03) (99k miles)
6. Drive shaft (463-410-08-02) (80k miles)
7. Steering damper (463-463-00-32) (58k miles)
8. Steering shock absorber (463-463-01-32) 58k miles)
I would be grateful for your thoughts on what I should be looking for in terms of wear/tear and prevantative maintenance. HUGE thanks.
You've done a ton of work on your G's suspension. In contrast, I haven't done ANY suspension related work on my 2008 G55 since I purchased it in 2017 w/ 104k miles. It now has 135k miles.
Prior to my ownership, records indicate the following:
1. Front inner and outer tie rod ends (104k miles)
2. Engine and transmission mounts (104k miles)
3. Steering shock absorber (463-463-01-32) (99k miles)
4. Drag link (463-463-11-15) (99k miles)
5. Tie rod (not sure which one) (463-330-07-03) (99k miles)
6. Drive shaft (463-410-08-02) (80k miles)
7. Steering damper (463-463-00-32) (58k miles)
8. Steering shock absorber (463-463-01-32) 58k miles)
I would be grateful for your thoughts on what I should be looking for in terms of wear/tear and preventative maintenance. HUGE thanks.
Do you know the location history of your G prior to your purchase? Since you're in NoVa, the more temperate climate is more temperate than mine has been in, which is ~10 years in FL, then ~2 years in MA, ~1 year in VT, ~1 year in MD, and now ~1.5 years in NJ.
I think the timing of my purchase just so happened to fall right where most rubber and suspension components need to start being replaced (~100k miles). Pretty much means everything that was done prior to your ownership, I have had to do since my purchase. All a good learning experience!
I think in your case, a good move would be to inspect the rubber components of the front and rear radius arms, as well as the front sway bar. Next will be to inspect the front swivel ball wipe seals for leaking. Other than that, I would only look to tackle things if you hear/feel rattling or clunking. The only other thing based on your G's prior maintenance may be to inspect the steering damper.
For reference, before I swapped out the shocks from the OE G55 setup to the Fox 2.0 setup, there were no noticeable clunks or rattles. Changing over to the much softer Fox shocks probably pushed some of the other components to fail more prematurely, but everything was probably at the end of its life anyway.
You've done a ton of work on your G's suspension. In contrast, I haven't done ANY suspension related work on my 2008 G55 since I purchased it in 2017 w/ 104k miles. It now has 135k miles.
Prior to my ownership, records indicate the following:
1. Front inner and outer tie rod ends (104k miles)
2. Engine and transmission mounts (104k miles)
3. Steering shock absorber (463-463-01-32) (99k miles)
4. Drag link (463-463-11-15) (99k miles)
5. Tie rod (not sure which one) (463-330-07-03) (99k miles)
6. Drive shaft (463-410-08-02) (80k miles)
7. Steering damper (463-463-00-32) (58k miles)
8. Steering shock absorber (463-463-01-32) 58k miles)
I would be grateful for your thoughts on what I should be looking for in terms of wear/tear and prevantative maintenance. HUGE thanks.
I have 225,000 miles on my 2004, I have replaced steering damper, front shocks and tie rod, but everything else still looks/works fine.
From your list, 3,7 and 8 are the same part, and 6 was probably related to the same issue of wobbling at 60 MPH.
Got some time to start tackling some of the suspension reconditioning I wanted to finish before the snow and freezing temperatures hit the Northeast.
First decided to tackle the rear suspension since it's simpler by far and I also only had a few hours to work on everything.
Truck back end up on jack stands and the tires removed with the remaining foliage looking pretty grand:
First problem I wanted to tackle was adding washers/shims to both ends of the Fox shock eyelet mounts (bottom) that I noticed started slipping to the sides and not staying centered. This was causing a weird clunk noise and I don't understand why it was designed like this.
Passenger side slipped all the way to one side. Driver side started to slip but not as bad. Also disappointed to see some oil/grease on the shock shaft, probably a slow leak out of the bottom seals.
Took some measurements and went to my local hardware store and found a combination of washers and bearing shims that worked pretty perfectly to center the shock eyelet. FYI it's a 0.75" diameter and the space on both sides is roughly 11mm, so 44mm in washers/spacers needed in total. FYI for anyone with Fox shocks and notices the same issue. These washers are only Grade 5 and plated, so I'll order some stainless steel replacements from McMaster with my next order and replace at some point down the road.
Next up was replacing the bushings on the rear Panhard bar. The bolts weren't that difficult to remove with a large 1/2" breaker bar to crack the bolts loose, then the 1/2" air impact to drive them out.
Access to the passenger side bolt was annoying, but pretty easy after the suspension is allowed to drop.
Pressing the bushings out in a similar fashion to the front bar worked like a charm, took maybe 15 minutes total to press out the old ones and the new ones in.
Next up is tackling the front suspension and swivel ball seals, all of which will be a serious pain I'm sure. I'll also need to change the oil, rotate the tires, and swap out all the other fluids.
And yes, there is still a good amount of surface rust on the metal parts under the G. I'll address that in the spring with a wire wheel and rust converter. Just didn't have time to get it done this summer with everything going on, and will need to have the G up on jack stands for a few days while the paint cures. Everything is just at the surface, and some of the current undercoating starting to peel, but nothing major under there.
I finally ended up fixing the other car (Volvo S60 T5M66) and getting it back on the road (clutch + flywheel +pp failure and complete suspension + steering overhaul) so the G will now see a lot less commuting miles, which is a great thing given the price of gas these days. Will be taking the G on at least 1 long road trip at the end of the year so looking forward to getting everything sorted with the suspension so I can start working on some interior things and more permanent rear storage.
Cheers!
Shiann
Thanks for the update. The info on the rear shocks is interesting as I hadn't done a dry run on fitting the back shocks. I have trimmed the metal on the front of my rig to accommodate the remote reservoirs and manufactured some neoprene washers so the bottom mount is not metal on metal. I am just awaiting delivery of some longer Grade 8.8 cup head bolts as the ones that come with the Fox kit are too short once I install the neoprene washers. I will post a photo of my mods once everything is arrived and ready for instal.
Thanks for the update. The info on the rear shocks is interesting as I hadn't done a dry run on fitting the back shocks. I have trimmed the metal on the front of my rig to accommodate the remote reservoirs and manufactured some neoprene washers so the bottom mount is not metal on metal. I am just awaiting delivery of some longer Grade 8.8 cup head bolts as the ones that come with the Fox kit are too short once I install the neoprene washers. I will post a photo of my mods once everything is arrived and ready for install.
DVR
Nice. Yes, the cup head bolts that are supplied with the Eurowise kit are too short for good practice. There should be at least 2 full threads after the nylon locking part of the nut end. I didn't think of finding new bolts for this but that is something I will do when I remove my front shocks to rebuild with longer braided lines.
This is also something I would recommend you do if you can deal with your G being down a little bit longer and can rebuild the shocks and/or know a shop that can. Then again, you already cut your inner fender liners so you probably won't have any issues with the lines being stretched or kinked. The longer lines will allow you to mount the reservoirs basically anywhere and avoid any issues with the lines and/or damage to the reservoirs from being in the wheel well. (Then again, if things are getting damaged in the upper part of the wheel well, there are probably bigger issues. I plan to remount my reservoirs in the engine bay for easier access. The same can be done for the rears to mount the reservoirs to the inner frame but that is less critical.
I would also recommend, while the back springs are out, to swap out the panhard bar/bushings as access is much easier. The other rubber bushings for the front and rear are also a good idea if they have not been replaced in the past.
Good luck with the install and feel free to reach out if you run into any issues.
Happy Thanksgiving everyone. We're doing the family thing tomorrow and friends thing Saturday, so I got a free day to work on the G. Weather turned out to be great, right around 50 which is uncharacteristic for the Northeast at this time of year.
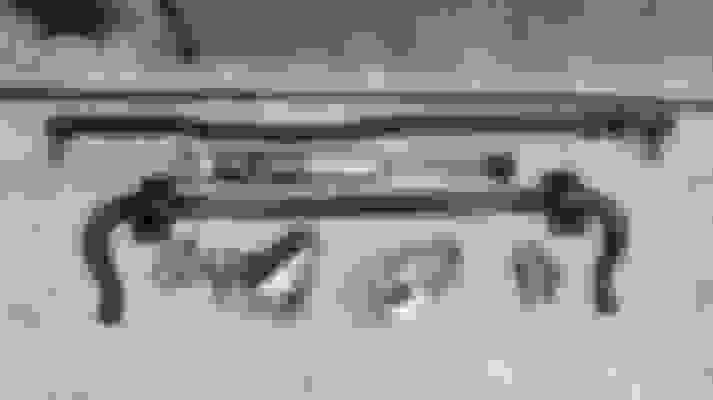
Dug everything out and laid it out for inspiration.
Front and Rear Diff Fluid, Transfer Case Fluid, Fox Shock rebuild kit, Fox Shock extended reservoir lines, Bronze bushings for the Fox Shock top eyelet mount, Steering Shaft Boot, Radius Arm Eccentric Bushings (caster correction), Sway bar updated mounts, sway bar endlink bushings, Radius arm to frame bushings, and split Swivel Ball Seals.
Another great day to work outside on the G. This time the front end.
Radius arms took maybe 3 hours to get out. I was taking my time and learning as I went along. The process was pretty straight forward. I had to drop the sway bar mounting brackets first and let it hang down while removing the radius arms. The sway bar to endlink bolts can't be removed with the radius arms in place, and the endlinks are impossible to remove without removing the radius arm first. I also did a lot of cleaning while I was down there as my swivel ***** have been leaking pretty badly. Lots of grease everywhere.
Also had to remove the steering tie rod, steering damper, sway bar, sway bar endlinks, and shields around the radius arm to frame mounting points. I'm happy to note that it looks like the steering tie rod is relatively new. I still had a weird intermittent clunk every now and then that I have been trying to figure out, but it's probably not the steering tie rod. I"ll check the steering box and shaft joints now.
My radius arms were in pretty rough cosmetic shape. Lots of rust that was more than just surface. I decided to get out the grinder with a flap disk and the wire wheel to clean it up. I did the same to the sway bar and the sway bar endlinks also.
Radius arm bushings pressed out easily, but the outer steel sleeve doesn't come with it (I didn't have a 70mm OD socket to press the sleeve out, so I had to cut a slit with a hack saw and pry it out. The process wasn't terrible and took about 1 hour to remove all 4. I marked the vertical position on the arms before I removed them from the G, and used a punch to mark the location next to the front bushing cutout on both L and R radius arms. I don't expect alignment to be too difficult.
Pressed the endlink bushings out along with the sway bar end bushings. Both were easy to press out and took little force.
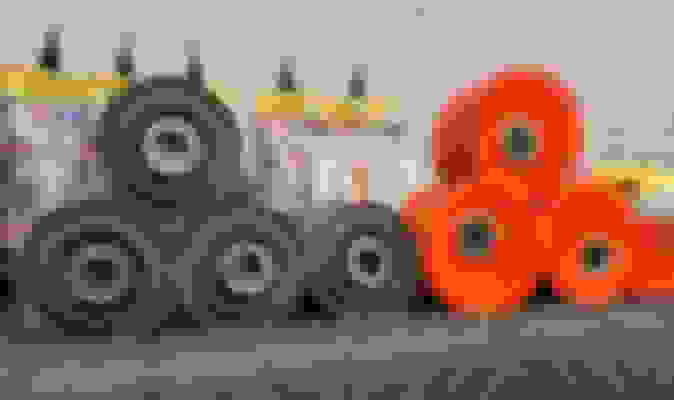
All bushings removed next to the new parts that will be going in.
A few closeups of the old vs new. These are the sway bar endlink bushings. They look pretty good overall, but since it would be impossible to replace them without later removing the radius arms again, I ended up chaging them anyway. It also looks like the style has been updated slightly.
The radius arm to frame bushings, on the other hand, were pretty beat up. You can see how squished they are compared to the new ones. I have a good feeling that these bushings are the reason for the steering shake/vibration I was feeling over large bumps. It felt like the axle was shaking and moving in ways it wasn't supposed to. These bushings, along with the nuts holding the radius arms on being relatively loose were probably the reason I was getting all that undesired motion in the axle and subsequently into the steering.
Radius arm bushings overall weren't that bad. The inner rubber was starting to separate from the metal sleeves and there were some cracks from dry rot, but overall not bad for 15 year old rubber bushings.
After cleaning up all the parts, I decided to paint everything using Steel-it Black. This won't be perfect, but it'll be better than what it was before. I didn't use the grinder and flap disk heavily on the sway bar and endlinks, but did go to town on the radius arms. I may add a second coat tomorrow but have not decided as I would have to wait for it to dry before reinstalling, but we will see.
My temp painting rack and how everything will be drying tonight.
Looking to have everything back together by latest Sunday if I need the extra time. It will also be nice to change all the fluids as they were last changed by the previous owner 30k miles ago, and finally fixing those swivel ball seals. The split seals are for ease of service and I plan to replace them down the road if and when the axles need to come out. There's just too much grease getting past the seals and I need the truck to be reliable for the big road trip down south at the end of this year.
Thanks for reading. Happy Turkey day, and hope every one is enjoying and relaxing.
Do you happen to have the part# for all the bushings and the swaybar mount? Confused by all the different options on EPC...
Sorry, but I do not. I purchased all of my parts from Vlad at Fourbyfourclub. The parts didn't come in OE boxes so I never saw the OE P/Ns. I found going through EPC, that Vlad's prices were slightly higher for many things (not everything), but when you add in shipping it all ended up being a wash. There have been others who have had issues with Vlad either not shipping promptly or with poor communication, but I have always had very prompt service and great communication with him from the handful of orders I have placed.
The weekend is now over and it was time to finish putting the G back together. I spent about 12 hours today getting the truck back on the road and it was definitely not a fun day. Temperatures dipped over the past week and today was a balmy 38 degrees. A far cry from the 55 degrees the other day when I took everything apart.
Started the day by draining the front diff fluid. This was mostly a sanity check to make sure that there wasn't any swivel ball grease getting into the diff fluid. The chances of this were low, and this is still not a 100% check that the inner axle seal isn't leaking, but it's something at least. Fluid was about 30k miles old and looked pretty good and clean. I replaced it with Amsoil Severe Gear 75W-90.
Next up was to tackle replacing the swivel ball seals with the split type.
Took off the seal cover plate and found a pretty good sign of why my swivel ***** were leaking. The gasket was trash, hard, brittle, and cracked in a bunch of places. Definitely no chance of any grease being held in there with what was left of this seal! I took everything apart, cleaned everything as well as I could, then cleaned it all again. I took out the inner ring also and cleaned that until all that was left was the blue marine grease I have been using in the swivel *****. The paper gasket was torn in a bunch of places also, so I scraped it off with a razer blade and cleaned all the mating surfaces.
I had a really tough time stretching the new swivel ball split type seal, but then remembered to heat it in boiling water in order to soften it. It also didn't help that it was close to freezing temperatures today. Soaked it in some boiled water for ~5 minutes.
I positioned the staple at the top of the swivel ball, along with the corresponding holes in the split ring, and started at the top wedging the seal into position while stretching the rest of it around the ball and seating it with the cover plate. This process was pretty tedious but after figuring out a method, it went pretty quickly.
One side down, the second to go. I cleaned and cleaned as much as I could. I'm hoping that it all stays clean-ish over time. The first side took maybe 1 hour with lots of trial and error. The second side took maybe 20 minutes after figuring out a process to correctly seat the seal while stretching it.
I refilled both swivel ***** with marine grease.
PSA: If your swivel ***** are leaking and the seals have never been replaced, it's probably time. My G is 16 years old and the seals have most likely never been changed. As you can see, they were completely trashed and severely discolored, brittle, and did absolutely nothing to keep the grease in, or water out. Package on the left is the P/N for the split type seal. I purchased from Vlad @ fourbyfourclub as the prices were all about the same compared to a dealer.
Next up was installing the bushings in the sway bar links. I used a hydraulic press for this and it worked ok. Not sure if there is another way to do this.
Installed the same bushings in the sway bar ends in the same method. Note: I forgot to install the sway bar mounting bushings at this stage, that I discovered later when I went to bolt up the sway bar to the radius arms. A waste of a solid hour. Don't make my mistake!!
Next up was the Caster Correction Eccentric Bushings for the front Radius Arms. I drew up a template and it worked ok, but in hindsight, I should have made a template out of wood with long bolts to ensure perfect fitment.
Radius arm bushings installed and ready to go onto the G.
What a pain in the rear. Installation took around an hour of each side. The poly caster correction bushings are wider than OEM, so getting the arms into position was difficult. Since you have to squeeze the bushings into the axle mounts, they end up moving a little, which means aligning the front bolts isn't so straight forward. Also, the rear radius arm to frame bushings were the most difficult to align correctly and install. Positioning the arms close to horizontal to be able to push in the rear bushing took the longest time. I actually had to use spring compressors to shorten the front springs, while prying the radius arm down to be able to fit the bushing in. Doing this outside, on the ground, in the cold, at night is definitely not something that can be considered a good time.
The mistake I made was not installing the sway bar mounting bushings before bolting on the sway bar. In the OE setup, the sway bar to link bolts can't be removed without removing links from the frame, or removing the radius arms. Very poor design here. I reversed the bolts when installing, but the reason for the OE bolt direction is most likely due to the clearance between the arm and the radius arm. With the bolt head closer to the radius arm, there is roughly 1/4" clearance. With the bolt/nut reversed, the clearance is more like 1/8". We'll see if this ends up being an issue. Accessing the sway bar link to frame mounting bolts is a real challenge but can be done with the right tools. You'll need a 19mm offset box wrench to hold the nut, and a shallow 19mm socket with a flex ratchet to get around the radius arm.
Finally finished around 11pm.
Went for a test drive on some local roads that are pretty bad with ruts, cracks, potholes, etc. I am glad to say that the steering vibration/body vibration when going over bad road surfaces is mostly gone. After changing everything, I'm positive the culprit for my issues were the Radius Arm to Frame bushings. They were pretty deformed and cracking. Since the attachment hardware here is a nut that bottoms out on shoulder, the stability of the radius arm, and thus the axle, is completely dependent on these bushings being the proper elasticity and the correct size (to compress as expected).
I wouldn't want to do this job again, but I could most likely do it again in half the time. Just how it goes. If I were to do this all again, I would go with the Hardrace Rubber eccentric caster correction bushings instead of the poly type (if you're set on going with eccentric bushings). They were very easy to install and could be pressed in by hand with a little grease, but they ended up moving slightly when installing on the axle, which was a major issue and cause for a lot of headaches. I don't notice any benefits yet to having the eccentric bushings, but will get a printout of the caster angle when I go for an alignment.
Anyway, cheers everyone, and if there are any questions or comments on anything, feel free to ask away.
Great job shiann, and thank you for posting all the details.
I've bought split type seals and staple a long time ago, but never had urgency to do it and was also told that the split type seal was useless.
Can you be a little more specific with the procedure? or is it pretty much all?
I thought there were more gasket and/or seal retainer before you get to the actual seal which you've replaced with the split type seal.
However, per your photos, all you had to do was to remove the cover plate.
Also, how do you install and finish the staple?
Thank you in advance.
I've heard both sides of the split vs non-split seal type. I understand the differences and for normal driving and infrequent trips into deep water, I feel the split type should be ok, especially considering how much more simple the replacement process is than removing the hub, cv, and driveshaft completely. The main downside for normal driving conditions would be water splashing in through the split which is unavoidable. I feel this will be very little water as a whole and I plan to check the swivel ball grease regularly to make sure the grease color/consistency is still up to par.
That being said, if I encounter a situation where I do need to remove the hub, cv, and axle for anything, such as an inner axle seal, then I'll replace them with the non-split type. As a note, I did not replace the paper gasket as that's not possible without removing the hub. I've heard people using RTV to seal the hub but since the only thing that can leak out is the grease, I decided to leave it as a face to face mate. If in the event that I find too much water is entering through the ring sealing surface, I'll open it back up and add RTV. I did take extra care to clean up the sealing surfaces so hope that is enough.
I didn't take any more pictures of the process due to my hands being covered with grease, but here is a more detailed breakdown
1. Boil a pot of water (add some salt) and have it off to the side. I placed the new seals in and let them sit, with the staple already installed.
2. Grab a roll of paper towels and use freely to clean up the grease
3. Wear rubber gloves and have several sets at the ready in case they rip
4. Begin by cleaning everything around the swivel ball as well as you can. The less dirt/grime that enters the swivel ball the better.
5. Mark the sealing ring and the housing with a paint marker, punch, sharpie, etc so you install in the same alignment. Marking near the steering stop limiter makes sense so there is no question where the limiter bolt goes
6. Begin removing the the bolts. These should all break loose pretty easily and come out without issues. My bolts looked virtually brand new on the inside/threads, but the bolt heads were covered with years of grease and wax undercoating
7. Pull the ring away from the swivel hub and begin removing the paper gasket and seal. I used a pick with a right angle to get into the small spaces, but a small screw driver would work just as well
8. If your paper gasket is still in good shape, you can probably just leave it there.
9. Remove the inner split sealing ring from the swivel ball and clean it very well, I used a combination of paper towels and a razor blade to get off all of the dried on gunk. I also did my best to remove as much rust discoloration as possible.
10. Clean out the ring and sealing surfaces with paper towels, doing your best to wipe the dirt/grime/rust out of the hub, and not into the hub. I made sure all the lip sealing surfaces were as clean as I could get them and clean enough to seal correctly.
11. Grease up the metal sealing ring and insert back into the hub. I positioned the staple insert holes to the top of the swivel ball.
12. Take your swivel ball seal out of the hot water, and dry it off completely. I added grease to the seal before inserting.
13. Insert the seal starting with the staple in the holes in the inner metal ring.
13a. When I first put the seal in place, I though there was no way the seal was the correct part as it is way way way too small to fit without stretching. This is why heating it up is very important.
14. Making sure the seal does not pop out, start attaching the outer metal ring starting with the top bolt.
15. Tighten it down partially just enough to make sure the seal with staple does not pop out.
16. I gradually worked my way around bolt by bolt to stretch the seal around the swivel ball and into the correct location before partially tightening down the corresponding bolt to hold the seal in place.
17. I used a combination of the right angle pic (the back smooth side) and a plastic panel popper to hold the seal in the correct location before tightening down the bolt.
18. This was an annoying process and takes a little bit of experimentation to see what the best way is with the tools you have, but in the end the seal should sit well around the ball and the stretch provides the sealing properties. Many times I held the seal down with a tool between the sealing surfaces and tightened the bolts down until the tool was basically clamped in there, then gently pulled the tool out. The thinner and stronger the tool, the better, but of course no sharp edges!
19. After you fully seat the outer ring, tighten the bolts to 20-25 nm
I attached the service manuals I read through that have some details.
Thank you for your detailed instruction.
I have a couple of questions,
There is no mention of putting back the paper gasket in the service manual, should I still buy it or just do without it?
You've rotated the position of the metal ring to make the split to be on the top, did you think that was better than at the bottom?
Do I really need to take the wheel out?
You cannot replace the paper gasket unless you remove the hub. It would also be possible to cut the paper gasket and put the gasket back on in a "split style". This may be more affective in the end than compared to not having a paper gasket and in hindsight, probably the better option. I'm not worried about grease leaking out through the ring face, but more concerned about water entering through that face. An RTV seal may make more sense as it would keep water out (the paper gasket can technically absorb water)
I rotated the metal ring to position the staple holes to the top. In theory this will help seal out when wading into water deeper than the hubs. In the same frame of reference, water will probably be able to enter more easily from the top from rain/splashing compared to if it was located on the bottom. Time will tell and I will probably have to reposition it in the not too distant future. I plan to check the swivel ***** frequently.
Taking the wheel off makes the process much easier. You can do it with the wheel on and just driving onto ramps, but it would not be as comfortable.
Hey � I don�t want to hijack your thread but in reference to your earlier posts about your sound system, do you think you could help me get some thing designed for my 2011? I ordered an android auto CarPlay unit but I am having doubts about it due to long boot times.
The other challenge is working around fiber optic which is some thing I won�t have to do if I stick with the android auto unit. All the audio shops near me have quoted me about $3500 to rewire the vehicle with new speakers, or $3200 to use DSP Amps


 10-23-2021 | 01:03 AM
 . Definitely the cheapest MB part ever at $10.