When you click on links to various merchants on this site and make a purchase, this can result in this site earning a commission. Affiliate programs and affiliations include, but are not limited to, the eBay Partner Network.
For Christmas, my G got a nice wash and spray ceramic coating.
114k miles
Nothing special, just a hand soap wash with a pressure washer. Didn't bring my foam cannon this time around but will next time!
The G was incredibly dirty. It's been several months since the last proper wash.
After adding on some temp ceramic spray. We'll see how well it works. Surface seems pretty slick overall but swirl marks are still a-plenty.
This is probably the cleanest the G has been all year.
Didn't have the supplies and/or time to do a complete proper detail job. Still need to fully claybar the G, then compound and polish all the panels. After that will be a proper ceramic coat to fully protect the paint, but will also have to do a good amount of paint touch up to the front end due to rock chips. Lots of imperfections all around, including some small bubbling rust spots. I'll have to address all of those spots next year.
For now, the G looks pretty good for being 16 years old and lots of miles in the past year.
Seems like my steering box is clunking more now after the steering tie rod change. I'll have to take a look at the adjustment procedure see if that helps.
I'll also have to redo the finish on the brush guard as well as all the other metal cage parts as the plastidip finish from 18 months ago is finally starting to show its age/wear. I'll remove them this winter for proper powder coating since I now have the space and time to do that.
The only real other exterior changes I'm looking at is refinishing the wheels in a darker gunmetal color, possibly with wheel spacers, or I may just switch over to a set of AlphaEquipt Echo wheels. Then I'll be rhino lining the side steps, adding mud flaps, and finishing up the LED light retrofit for the rear as well as adding proper LED pod style fog lights and reverse/rear fog lights. All 4 fender flares will need a repaint so I may try doing that myself since I have an HVLP spray setup that I've been wanting to try out.
Switching out the windshield glass is also high on the list for early next year as this current one has way too many large chips and is pretty much sand blasted. I'll inspect the windshield surround area when this happens. Everything else will be preventative maintenance, taking care of the rust issues, any engine/drivetrain issues that arise, replacing all the rear radius arm bushings, and focusing on the interior to finish up what is left - replace the headliner, switch out the sunroof for a glass panel, finish up the interior trim bits, and build out the rear for more organized storage.
Haven't really been driving the G recently during the normal commuting days (to save $ in gas and parking in the city is just easier with a smaller car) now that the other car is fixed and working well.
A few things that I was waiting to address, but was putting it off until the spring.
1. Rear Driver's window regulator was acting up and started having issues closing all the way up.
2. Both rear door inner handles do not work to open the doors.
The wife came back from picking up the kid today and accidently lowered the problem window and it didn't come back up.
I went out to try to pull it back up but the travel was limited and would not close, so time to rip the whole thing apart!
I found the issue with the rear door handle. Taking a guess the issue on the passenger rear door is the same also. The support bracket is toast but I think I'm going to try to repair it, straighten it out, fill with 3D printed supports, and glue the whole thing up. I'm not in favor of spending ~$130 each for new door handles due to a flawed design, so I'll try fixing it first as I usually do. If anyone has a source for new rear door handles with the updated reinforced cable supports for cheaper, let me know!
Sun went down quickly as I started tearing the door apart. I was pretty familiar with everything since my speaker install so disassembly took maybe 10 minutes.
I thought maybe there was a binding issue somewhere, but after not seeing any obstructions (peeling sound deadening material), I clamped up the window and took out the regulator.
Ahh, why do these things suck so bad...
I ran it out of the door and it was still clearly jamming up and not reaching the top of the slide travel, so more digging...
I'm pretty sure the cabling is supposed to be wrapped neatly around that geared wheel, and not a bird's nest.
Turns out the main culprit was a broken cable end. The plastic parts broke causing the cable sheath to get pulled into the cable winding wheel and messing everything up.
Did my best using pliers to straighten the cable out.
And with much effort, I rewound the cable and created my own cable sheath termination point using duct tape and a copious amount of zip ties. I located the new cable sheath termination so the springs were both partially compressed in its resting state to keep some preload on the cable.
I did all this just to get the window back closed as it's pretty cold here in NJ and rain in the winter is a normal occurrence. I'll also be gone for a few days and the wife will need to be able to drive around.
Surprisingly, the whole contraption works ok now. I only cycled the window once as I didn't want to push my luck. I'll replace the ripped up vapor barrier, as well as fully sound deaden the door skin next time I open it up to replace the regulator.
Anyone have a good source for ordering these contraptions? Vlad @ fourbyfourclub has it for $385 without the motor and the OE price is in the $500 range. I've seen a few on google search from places like carparts.com and partsgeek.com for way cheaper, I'm just not sure I trust them. Any input here would be appreciated!
Getting everything back together went pretty smoothly and took maybe 10 minutes.
Did you snag the part number when you had it out? If you can reference the # and just find the cheapest I'd go that route. the rear windows on my truck rarely go down so I wouldn't worry too much on getting an aftermarket new unit.
Haven't really been driving the G recently during the normal commuting days (to save $ in gas and parking in the city is just easier with a smaller car) now that the other car is fixed and working well.
A few things that I was waiting to address, but was putting it off until the spring.
1. Rear Driver's window regulator was acting up and started having issues closing all the way up.
2. Both rear door inner handles do not work to open the doors.
The wife came back from picking up the kid today and accidently lowered the problem window and it didn't come back up.
I went out to try to pull it back up but the travel was limited and would not close, so time to rip the whole thing apart!
I found the issue with the rear door handle. Taking a guess the issue on the passenger rear door is the same also. The support bracket is toast but I think I'm going to try to repair it, straighten it out, fill with 3D printed supports, and glue the whole thing up. I'm not in favor of spending ~$130 each for new door handles due to a flawed design, so I'll try fixing it first as I usually do. If anyone has a source for new rear door handles with the updated reinforced cable supports for cheaper, let me know!
Sun went down quickly as I started tearing the door apart. I was pretty familiar with everything since my speaker install so disassembly took maybe 10 minutes.
I thought maybe there was a binding issue somewhere, but after not seeing any obstructions (peeling sound deadening material), I clamped up the window and took out the regulator.
Ahh, why do these things suck so bad...
I ran it out of the door and it was still clearly jamming up and not reaching the top of the slide travel, so more digging...
I'm pretty sure the cabling is supposed to be wrapped neatly around that geared wheel, and not a bird's nest.
Turns out the main culprit was a broken cable end. The plastic parts broke causing the cable sheath to get pulled into the cable winding wheel and messing everything up.
Did my best using pliers to straighten the cable out.
And with much effort, I rewound the cable and created my own cable sheath termination point using duct tape and a copious amount of zip ties. I located the new cable sheath termination so the springs were both partially compressed in its resting state to keep some preload on the cable.
I did all this just to get the window back closed as it's pretty cold here in NJ and rain in the winter is a normal occurrence. I'll also be gone for a few days and the wife will need to be able to drive around.
Surprisingly, the whole contraption works ok now. I only cycled the window once as I didn't want to push my luck. I'll replace the ripped up vapor barrier, as well as fully sound deaden the door skin next time I open it up to replace the regulator.
Anyone have a good source for ordering these contraptions? Vlad @ fourbyfourclub has it for $385 without the motor and the OE price is in the $500 range. I've seen a few on google search from places like carparts.com and partsgeek.com for way cheaper, I'm just not sure I trust them. Any input here would be appreciated!
Getting everything back together went pretty smoothly and took maybe 10 minutes.
Cheers!
great job. Partsgeek is fine to order from as well as newparts.com
I added sound deadening to my doors and didn�t see a diff. Most sound comes from the floor and roof I feel. Course if you plan to do those over time do the doors when you can and now you be a good time.
I have wind noise on one of my rear doors think most is coming from the window upper inner channel area. When the window opens and is closed back the top channel area rubber gets rolled up some. I have messed some with pulling it down and lining up better but even then it seems a little better. I need to take a heat gun to it and get it straight to stop getting rolled up on. May just have to replace.
I think most the wind noise comes from the main door weather seal to the body, but it all looks lined up. 🤷🏻♂️
Wow I didnt realize our regulators are that expensive. But maybe it has to do with supply chain issues were having...
Heres a generic brand with motor for under $200 click. However in my limited experience with window regulators, the genuine brand still is the best
I saw those but didn't know how legit the sources were. I plan on keeping my OE window motors for now and keeping the aftermarket motor as a spare.
Originally Posted by almostordinary
G'damn.... good temp solve.
Did you snag the part number when you had it out? If you can reference the # and just find the cheapest I'd go that route. the rear windows on my truck rarely go down so I wouldn't worry too much on getting an aftermarket new unit.
Yeah an aftermarket is the best way to go. I like going with OEM or better parts, but not for window regulators!
Originally Posted by black06c230
great job. Partsgeek is fine to order from as well as newparts.com
I added sound deadening to my doors and didn’t see a diff. Most sound comes from the floor and roof I feel. Course if you plan to do those over time do the doors when you can and now you be a good time.
I have wind noise on one of my rear doors think most is coming from the window upper inner channel area. When the window opens and is closed back the top channel area rubber gets rolled up some. I have messed some with pulling it down and lining up better but even then it seems a little better. I need to take a heat gun to it and get it straight to stop getting rolled up on. May just have to replace.
I think most the wind noise comes from the main door weather seal to the body, but it all looks lined up. 🤷🏻♂️
Thanks for the info! I'll get the parts on order to replace when it comes in.
I added 1 layer to the rear doors way back when I installed my rear door speakers. I didn't feel like they did anything. It's more of a "while I'm in there" type of thing for sure! I don't expect it to do much but any little improvement is welcome. I did find that fully sound treating the front doors did help, not only to reduce road noise, but also to improve the quality of the speakers. I did 2 layers of foil backed butyl material, then 1 layer of closed-cell foam on top. I went as far up the door as I could, but will probably fully disassemble the door innards and do a better job.
I also have the same types of wind noise I've been tracking down. I added a thin rubber z-shaped trim to close up the door gaps, but should do a better job of sealing up all around the doors. I heard that greasing up the door seals will also help since they're pretty old and expensive to replace with new. I also plan to fully sound treat the roof when I take the head liner out, but I've been saying that since I got the G almost 2 years ago. So many little never ending projects with these older trucks!
Not much has been going on with the G the past few weeks. It's been too cold outside to do any meaningful work, however, with yesterday's surprise 50 degree sunny day, I took advantage and got some work done.
Received the new window regulator and it looked perfect. Ordered the part from carparts . com and it came out to $210 shipped vs ~$500 from a OE Mercedes parts supplier. Part looked exactly the same sans motor.
Started by disassembling the door. This only took a few minutes after knowing how everything goes together.
Old vs New. I had to swap the window motor over as mine still works fine. Parts look exactly the same, so save yourself some money in the future and don't buy the OE Mercedes parts.
Added 2 layers of foil lined butyl material, then added a closed cell foam layer on top of that. Layered all the way up the door skin as far as I could go.
While I was in there, I decided to finally replace my rear door puddle lights. I purchased new LED bulbs with the interior light kit, but the housings were trash, so these new housings have been sitting on my shelf forever, purchased from ebay. They fit a little bit tight, but I pushed them in and added some butyl material to keep them from rattling around. I also added foam around the wire and fabric taped it to prevent the wire from rattling around in the door panel.
My rear door handle buttons have been sticking a lot recently. I lubed them often from the outside but they were never consistent. Took them apart and found the issue. The sealing o-ring was gone. I took everything apart, cleaned everything, went to the hardware store and found the correct sized o-rings, and reassembled everything using silicone paste for lubrication.
New replacement o-ring.
Here is the size of the o-ring I purchased. You can get the 19mm metric or 3/4" standard o-rings as they are virtually the same size. I went with the cheaper 3/4" ones.
Reassembled everything and they work great now! I'll be doing the same for the front door handles as well as the same sound treatment when I get a chance to take them apart, as well as ordering new weather barriers all around in the summer.
My inner rear door handles both also don't work. Found the issue with both. I REALLY don't feel like spending $130 each for new replacement parts with new reinforced brackets, so I'll be 3D printing a new cable holder bracket for both sides to fix this.
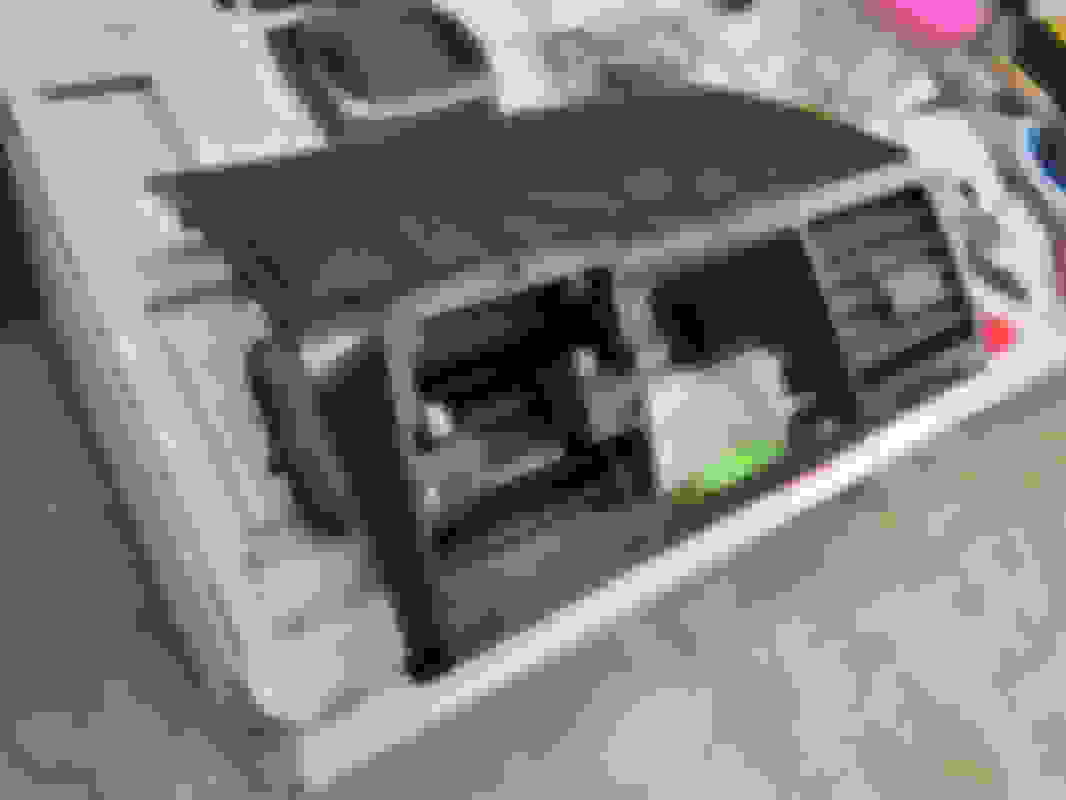
Trash parts. If anyone needs any parts harvested from a window regulator (cable and winding wheel is trash) or a puddle light (connector), let me know or else they're going in the trash.
It snowed a good 3 inches today but was still above freezing, so I dug out the power washer and hooked it up to the hot water supply and washed off the G to really clean it up and wash away the winter grime. Much easier than brushing everything off!
Are you planning to sell the handle brackets? I�m assuming that will be a once and for all fix? I�m always delicate with my handles as you can feel they�re always on the brink of giving out, lol.
Also, how hard was the window regulator swap compared to a door lock actuator? I�ve done the lock twice now and while I can do it, not sure I can tackle a much more complicated job.
Lastly, I need to replace the window switch� any tips on how it comes out? I think I see yours sitting on your seat in the first photo.
Hey,
The bracket should be a one time fix, very similar to the new interior handle bracket design (that is supposed to be reinforced. I'll make mine pretty solid with a few locations to insert a metal rod.
The rear window regulators are much easier than the door lock actuators.
1. Remove the inner door panel
2. Remove the plastic weather liner
3. Remove the speaker bracket (5 total screws - 2 left side, 2 right side, 1 bottom) - Let it dangle there if you can't unhook the wires easily and support it with a small stool)
4. Lower the window so you can see the window mounting bracket
5. Remove 9 screws total to remove the whole window regulator assembly (2 upper, 2 middle, 2 for the window, and 3 connecting the regulator bracket (one of my bolts on the passenger side was completely seized, although it looked clean. PB Blaster and using an impact with a new bit couldn't get it out, so I will have to drill it out in the future)
6. There is a cable clip on the inside of the door. It's a rubber thing that has the captured side right near the middle of the door. Both of mine were broken so I zip tied the cable back in this location.
7. Disconnect the window regulator (this connector is on there really tight and on a really cheap bracket, so do so carefully. I held the base of the connector with pliers as I pulled on the plug.
8. Snake the whole assembly out of the lower speaker bracket hole in the door.
9. Replace the motor if you need to, and reinstall in the reverse order.
10. While you're in there, lube up the locking mechanism and clean out the door handle button.
For the window switch, there is a blue gate at the bottom of the switch that pulls forwards (towards the front of the car) and the switch falls out of the door panel. To disconnect the wires from the switch, it is just a simple connector that removes without any clips, pulling towards the back of the car. It is awkward to hold the door panel and do this, so I remove the whole switch using the blue gate.
Do you have a link to the puddle lights? My two front ones bit the bucket a couple months back. Did you have to disassemble the entire door to replace them or is this doable just from the outside?
Been low hanging fruit on my to do list, but would be great to tackle one weekend.
I am sure shiann will reply soon, but you'd need to remove the door panel to connect the wire.
Or, you can just remove the housing from the bottom and cut the wire and connect it.
Do you have a link to the puddle lights? My two front ones bit the bucket a couple months back. Did you have to disassemble the entire door to replace them or is this doable just from the outside?
Been low hanging fruit on my to do list, but would be great to tackle one weekend.
Hey Ian,
Yeah, you have to basically disassemble the entire door to get enough space to stick your hand in there to make the connection. I believe the front doors have the connector accessible near the door module from the outside of the door panel, but on the rear doors, it's on that same wiring harness but inside the door panel. If you want to just solder in the new housing, you can cut and splice and not remove the door panel. This can be done from underneath.
I've had 1 of them installed for 15 months now in the driver's front door and it's been great. Pretty bright and helps when it's dark out.
Looks like there are several vendors for it now if you search "W463 Courtesy Light"
Buying LED bulbs would be the cheap way out. I had bulbs that worked that I purchased from Amazon here - but 3/4 of my bulb housings were trash and it was cheaper to go the ebay route.
"ZPL5631 (18 Bulbs) Deluxe LED Interior Light Kit 6000K Xenon White Dome Light Bulbs Replacement for 2001-2008 Mercedes Benz G Class W463" by ZIYO https://smile.amazon.com/gp/product/...?ie=UTF8&psc=1
Just installed my Front passenger vanity flood lights (cut and soldered) and my back passenger did these at the plug, had to take the door off to fix a stuck door button.
This is the stock part number 463-820-00-01, cost $15 shipped from a local MB dealership for anyone that ends up needing them, they are sold individually.
Things have been super busy at work and life, so not much has been going on with the G this past month. A few updates:
Had an afternoon to tackle a few projects on the G. Steering shaft boot was shredded and needed to be replaced. The OE Siren has been going off randomly both while sitting and while driving, which points to a failing battery. A new siren fixes this issue apparently. Last is to redo the top shock mounts for my front Fox 2.0. More on this later. I found the correct parts from Fox to replace the crap setup I had previously.
Front passenger shock has been slowly leaking but still works for now. I'll have to postpone the shock rebuild till I have more time and can have the G down for more than a day. For being ~1.5 years old, these things look pretty beat up.
Here you can see the top mount that came with the Eurowise kit when I ordered mid 2020. I had several conversations with Fox and it turns out, what Eurowise did on these early kits was removed a jeep rear top mounting bar from the bushing, and just said it would be good enough. I didn't have a choice so made the best of my situation and added oversized washers on both sides to hold it on. I had bad bushing squeezeout on both sides and couldn't torque the bolts properly. Fast forward 18 months and the bolts came off with barely any force, but the hardware never moved. The rubber really gave out and caused some very uncomfortable chassis shaking when driving over bad roads. Bad road surfaces around corners was downright scary even going 20mph. I was able to track down correctly sized rubber bushings and a proper 16mm ID sleeve that fit in those bushings, so purchased them.
After cutting off the old rubber top mounts, compared to the new parts. If anyone ever has the same situation as I did, here are the part numbers from Fox:
Rubber Bushing: Fox 014-11-002A - $6.99/each
Metal Sleeve: Fox 213-28-005-B - $7.00/each
Added some waterproof marine grease to aid pressing the bushing in, as well as reduce the chance of any squeaking in the future. Also did the same for the inner hole for the sleeve. My medium sized arbor $5 garage sale arbor press worked great for this.
New rubber bushing and sleeve pressed in and ready for install.
Did some cleanup work on the exterior body of the shock as it looked terrible and I wanted to clean off all the gunk to watch out for future leaks. Ripped off all the stickers as they were twisted and torn.
Shocks reinstalled the correct way this time. I kept the washers in there just because I had them already. Torqued to 45 ft-lbs and marked the bolts/nut.
Since I had to disconnect the steering shaft for the driver's side shock removal, I wanted to replace the old steering shaft boot. Mine was completely torn at the bellow area. New part was only $24 from Vlad @ fourbyfourclub.
Inner part of the boot is held in by this metal flange piece that you access from the footwell. Just remove the lower section and it's wide open. The whole thing was bonded on using the stickiest stuff I have ever touched. Glad I was wearing rubber gloves during this. I didn't replace the RTV/Glue as there was still plenty left. The boot slips over the steering shaft and seats down pretty easily and secured using 3 nuts.
New boot in place. It's a little annoying to get around all the stuff in the area, but not too bad.
Last thing I wanted to tackle was replacing the siren, but didn't have time to remove the headlight to access it. I did find it after removing the driver fender liner. I'll have to leave this for another day.
It has been roughly 4 months and 5k miles since I replaced my swivel ball seals with the split type and there was quite a mess. None of it was runny and the blue marine grease I used was still pretty sticky, just more is working its way out of the seals than I imagined. I'll have to keep an eye on this and refill more regularly.
Passenger side was slightly worse with more clumps of grease all around, but still nothing runny or milky colored.
I've been tackling some home improvement projects the past few months that finally lead me to building a work table with my table saw and a hose setup for dust collection. I bit the bullet and picked up a Festool sander and found it worked great for sanding, was fast and aggressive when needed, but the vibration and speed control were very easy to handle. Then it occurred to me that I still had to refinish the side AC vents that I removed 15 months ago when installing my Polk tweeters. With dust collection, sanding took no time and the surface looked great. I have some more repair work and reinforcing to do, but should have these finished up, repainted, reassembled, and installed in the coming weeks. I'll have to rewire the tweeters and door speakers when I do the install, but that shouldn't be that bad.
Removing the headlights is a pain, mostly because the screws holding in the shroud and the headlamp assembly are super easy to drop into the fender liner cavity during the removal process. I lost two just last night while replacing the stock parking lamp bulbs with LED's.
Oh, and getting the hose that feeds the headlamp washer back onto the nozzle (nipple?) is a NIGHTMARE. First of all, they use thick, high pressure tubing (it's literally almost an inch thick) for low pressure washer fluid, and secondly, it's impossible to actually get it to attach to the nozzle. I gave up trying to reattach it to my driver side washer after three hours. What a disaster.
Anyways, just be careful.
Thanks for the tips. I've removed my headlights plenty of times now and the process isn't bad. I think it's mostly because the high pressure tubing on mine has a little bit more slack on it so it's not too difficult to swing out of the way. I've never removed them as it hasn't been necessary yet.
Got an hour today during my lunch break to finally replace the siren. It's been acting up more and more recently, going off in the middle of the night or while driving. It's been annoying at best for sure. Wife complained twice about it in one day, so it's time to fix it!
Bar lowered and headlight out in maybe 10 minutes. All the hardware used here is getting pretty rusty, so I'll start sourcing some black stainless hardware to replace.
Old (left) and new (right) sirens are slightly different, but plug is correct and the hardware used is the same size. I had a spare washer/nut in my spare parts collection to use, but it is something to know if you also have to also do the siren replacement.
Squeezing your hands and tools in there is a little bit tight, but not too bad. I would imagine a lot of this has to do with the secondary air injection pump being located in the same space on the G55. 13mm ratcheting wrench for the hardware.
The only difference now with the new alarm is when hitting the lock and unlock buttons on the key fob, there is an audible chirp from the siren that wasn't there before. I have no idea if this was somehow added to the new siren, or if the old one was supposed to do it also, just didn't anymore. Siren itself sounds about the same pitch and volume.
Swapping the siren out was much quicker than anticipated, maybe 30 minutes total, so I dug out the pressure washer and started to wash away all the salt from the winter. Not a fancy wash, just rinse, foam cannon, scrub it the dirt away, power wash the undercarriage the best I could.
At some point this summer, I'll be removing the brush guard to either paint (DIY) or powdercoat. I'll probably lose the rear tail light guards and turn signal guards at the same time.
Lots of projects in queue for this year and hopefully some fun modifications and more time spent off the pavement!
We've only driven the G maybe 3 tanks in the past month, which is great given gas prices. Wife said she got a random CEL. I read it the other day and it said Misfire on Cylinder 2. I cleared it and she drove round for the rest of the day. The next day it came back up, so I decided to take a closer look.
Took out the MBII scanner and it didn't tell me anything else I already didn't know.
I figured I would look over the coil packs, coil wires, and spark plugs for cylinder 1 and 2 and see if I could see any issues.
Pretty quickly I found Plug Wire B on Cylinder 2 really loose and pretty corroded. You can see the tip of the spark plug caked in corrosion and some of the white powder on the exhaust manifold.
Removed the wire to find the inside completely caked in the white stuff. Seems like the plug may have never been clipped on tightly enough, or it had wiggled its way loose over the past 30k miles we've had the G.
Started using a pick, then a screw driver, then a scratch pad, then just a small round file. Got as much of the gunk off as possible. Cleaned everything pretty well, but the plug wire still did not clip onto the spark plug, although definitely better sitting/connecting than before.
Swapped the coils for Cylinder 1 and 2, as well as the B wires to make sure any failures would follow the wire. I ordered a new wire from FCPEuro anyway that should get here this weekend, so I'll replace it when it gets here. Wife drove around and it hasn't come back yet, so hope this temp fix works well enough for now. I plan to examine all the plug wires next time I swap out this corroded one to check just in case.
Also got a minute to paint the side AC vent covers when I was painting a few other things black. These should be ready to go back onto the car in a week or 2 when I have enough time to rewire the front speakers + tweeters. 18 months of no AC vents and side cup holders!
Not much to update as of late. Been super busy at work and other house related tasks.
For the Cylinder 2 misfire, I swapped the suspected defective plug wire over to Cylinder 1 and ran the G for another few days. Sure enough, a Cylinder 1 misfire CEL popped up relatively quickly. Turns out the plug wire wasn't attaching well onto the spark plug head. A new plug wire solved the issue and I've had no CEL's since.
Also started digging back into the audio system. I'm changing the wiring for the front components to nice twisted pair cables to block out any alternator noise. I'm in the middle of this process, but replacing the line between the tweeter and the crossover allowed me to finally replace the AC vent cover! Passenger side first since it was easier. Plan to finally reinstall the driver side vent with cup holder also in the coming days. I didn't bother with the back screws and actually had to remove the panel nut parts on the bottom side of the tweeter cover. I just used some 3M double sided VBH tape and stuck it to the dash.
I've also got back to working on the custom wireless charging phone adapter project I started a while ago. I'm using an iOttie iTap2 as the base, and attaching to the vent in a custom manner that is solid and better suited to the G. My phone is a Note 20 Ultra so a solid mount was necessary. I've already 3D printed a dozen or so iterations to make sure it fits on the dash seamlessly, as well as charges correctly. When I do the final install, I'll update with more pictures. I'll test this design a bunch and may offer it for sale as some of my other custom 3D printed solutions.
Also purchased a new air compressor for the G. My old Viair 70p that I purchased back in 2014 has worked well enough, but the new larger tire sizes (32" KO2's) make the filling experience really long so it will go back to the Volvo.
I purchased a Smittybilt 2781. I'll do the popular modifications with a fitting swap, as well as a pressure switch. I do plan to hard mount the compressor somewhere on the G eventually, install a small air tank, and air chucks, but that will be a project for later down the line.
Made some good progress on the 3D printed phone charger mount today.
I printed the parts in PLA for now just to test a few things like, size, shape, assembly procedure, function. I'll adjust and tweak things over time as I start using the mount on a long upcoming road trip. Eventually, I'll 3D print it using resin or something more cosmetic and stronger than the standard stuff. I also didn't bother fully repairing and repainting the center AC Vent/Diff Surround/Speaker Cover as I know this whole piece will probably have to come off several times. I'll eventually refinish it also like I did with the side vents in the same matte black color.
I used a 'low profile' right angle USB connector for the iOttie and ran it through the vent, and behind the dash to under the glove box area, where I connected to a 12V USB adapter. I installed a 12V barrel style outlet piggybacking off one of the unused fuses under the glove box. I used a dual port charger and ran a second USB-C charging line to the glove box. Works like a charm, just hope the cable is rated high enough to charge my phone at a fast enough rate.
Some things I already know I want to tweak:
1. Mounting base could use some adjusting to the shape to fit perfectly.
2. The whole thing sits a little bit too far off the vent surface. I'll look to make it slimmer overall.
3. I do want to angle it slightly towards the driver and leaned back also, not straight up and down.
4. Assembling the base onto the vent isn't the best process. I'll have to come up with something different.
5. The charging pod is held on by pins and magnets, but I want to use screws next time.
6. Running the right angle USB cable through the vent is a real challenge. I'll have to come up with something better.
I also added in a stand-alone cheap TPMS system that has sensors that just screw onto the valve stem. They sure look goofy, but at least this will give me some peace of mind knowing the tire pressures.
Just finished up a round trip down the coast to Florida to visit family. Went down with the family and came back up solo.
Total Miles: 2,359 miles
Total Gallons: 182.6 gallons
Avg MPG: 12.9 MPG
The G did pretty good like usual as a road trip car. Easy to drive, comfortable for cruising, not too loud inside, and plenty of space for all of the stuff you end up bringing. The front seats could use some more padding and I definitely need to find a way to raise up the front of the seat to angle it backwards slightly. I'm not willing to pay for seat jackers so I'll make my own for a few $. My front seat multi-comfort bladder doesn't work so maybe if that was fixed it would help support under my legs.
Most of the trip was very uneventful. We decided to stop at as many Costco gas stations down 95 as possible to save a few pennies on gas, as well as guaranteeing clean bathrooms, predictable food, and unlimited snacks at normal prices.
On my solo trip back up the east coast, I took a slight detour around Washing DC and did some beach exploring in Virginia/Maryland at Assateague Island. Got a year long OSV permit so will definitely be coming back.
This was my first time driving on soft sand, so I aired down to 18psi but really didn't need to. Took a second lap around after airing back up and didn't have an issue. Total beach driving was very short as a majority of the hook was closed due to nesting birds. Next time I guess. I did get to use the new Smittybilt air compressor and will definitely be doing the pressure switch mod in the near future.
Found an empty small stretch and parked up and had lunch on the beach.
On my way up past Philly, met a fellow G owner who was selling a set of OE G55 18"x9.5" AMG wheels in pretty great condition. Price was pretty fair so grabbed them up as I wanted to have a matching 5th spare. Will probably end up selling the remaining 2-3 extras so if you're looking for a single to use as a spare, send me a PM. Tires are Yokohama's that have an ok amount of tread left, but have a manufacture date of 2010, so way to hard to use. And if you needed to know, all 4 fit across in the rear tilted slightly. I strapped the 4 together and tied them down to the cargo tie down points.
Got home and spent the weekend on some quick needed maintenance.
Oil Change, Regreased the swivel *****, and rotated the tires. Vacuumed everything and cleaned the interior.
When inspecting the swivel *****, looks like the goopy mess inside is a mixture of the blue marine grease I've been using, and black goop. All was still pretty thick and not runny, and there's no ticking or any noise from the CV's. I also got a light in there and rotated the boots and didn't see any cracks, so this is probably pointing to a slow leaking inner axle seal. I'll weigh my options and may also attempt to reseal the swivel ball seal flange as water may be entering through there - I removed but didn't reinstall the paper gasket and decided not to use any gasket maker when I installed the split-type seals. Anyway, I pumped in about 3/4 tube in each side to fill them up.
I also removed the rear tail light signal guard bars, as well as the front turn signal cages. I'm thinking of leaving them off and selling as I like the cleaner look without them. The brush guard was removed to repaint it as the plastidip is now finally on its last legs 2 years later. I'll get a local shop to quote powder coating also as it may make more sense.
While rotating the tires, I test fitted the newly acquired wheels to see if I would like the look of black wheels with a sliver painted lip. I do have to say it does look more modern and the wheels are in A LOT better shape than my current wheels, but I'm thinking it looks a little too modern for the retro/throwback look I have been going for. Still undecided so will weigh the two back and forth. Either way, I will have to run my current KO2's as the Yoko's are too old, hard, and starting to dry rot.
I have a slew of projects planned for the G in the coming weeks, both repairs and finishing up projects that I've put off forever. Stay tuned.
Passed this milestone the other day. Miles have been slower recently due to gas prices and not needing the G as a daily commuter, but its still getting driven quite often.
I also finally put the driver side vent back on after repairing and refinishing. This vent also got the vent mounted cup holder so there will finally be a place to put small drinks again! The whole process of putting the vents back on also required a full rewire of the font speakers/tweeters using the OE wiring, so that process took a long time but was definitely worth it. The system still needs a larger subwoofer, but that is a project for another day.
I removed the front turn signal cages to get rid of some of the extra 'stuff' on the G. After removing, there were 10mm holes left in the sheet metal. Found some rubber plugs that fit and were low profile. Also replaced the phillips head screws with allen heads.
Took some time to polish the front fender wings to clean up some of the cloudiness in the paint. Not sure about the history of the paint on this car, but there are lots of questionable things I always end up finding.
Also picked up a set of G550 springs that look basically new. Hope to get these installed on the G before the cold weather sets in to give a more comfortable ride for our long roadtrips, and to be able to use the softer settings on the Fox 2.0's.
Hope to have more time to work on the G in the coming months.
List of things I want to get done before winter sets in:
1. Mud Flaps Front and Rear
2. ORC Floor Mats
3. G550 Springs
4. Swap to the Black Wheels
5. Retrofit the Diode Dynamic Spot Lights for Reverse Lights
6. Fix the rear inner door handles
7. Replace the front exterior door button o-rings
8. Repatch/seal chips in the windshield
9. Finally refinish the headliner
I removed the front turn signal cages to get rid of some of the extra 'stuff' on the G. After removing, there were 10mm holes left in the sheet metal. Found some rubber plugs that fit and were low profile. Also replaced the phillips head screws with allen heads.
Mind sharing where you found the low-profile rubber plugs? Have been wanting to remove my cages since purchase 5 years ago!
Mercedes SLR McLaren 722 S Is Extremely Rare Example Modified by McLaren
Slideshow: A one-of-one U.S.-spec Mercedes-Benz SLR McLaren Roadster became even rarer after a factory-backed transformation at McLaren's headquarters.