When you click on links to various merchants on this site and make a purchase, this can result in this site earning a commission. Affiliate programs and affiliations include, but are not limited to, the eBay Partner Network.
So since NJ MVC management is completely incompetent and useless, I still haven't been able to register the truck even though MVC braches opened starting last week!
I got to my nearest location first day they were open at opening time, 8AM, and there were roughly 600 people in line waiting already. Who would have thought that closing an essential service such as the DMV for nearly 4 months would cause problems?
Anyhow, I'm not willing to start waiting in line at midnight the night before and 'camping' out (the only way to make sure your in line early enough since they only take ~100-200 customers MAX per day per location), so I'll wait till the madness dies down a little bit. Also, in NJ, there is only one other way to register a private party sale, and it is 1 single business/location that does tags and registrations, but they are down close to Philly and now are also super backed up. Mine is also out of state so will need a title transfer, complicating things.
I haven't been with the truck since making the trek back north, but of course, that hasn't stopped me from researching new projects for the truck and things to potentially buy!
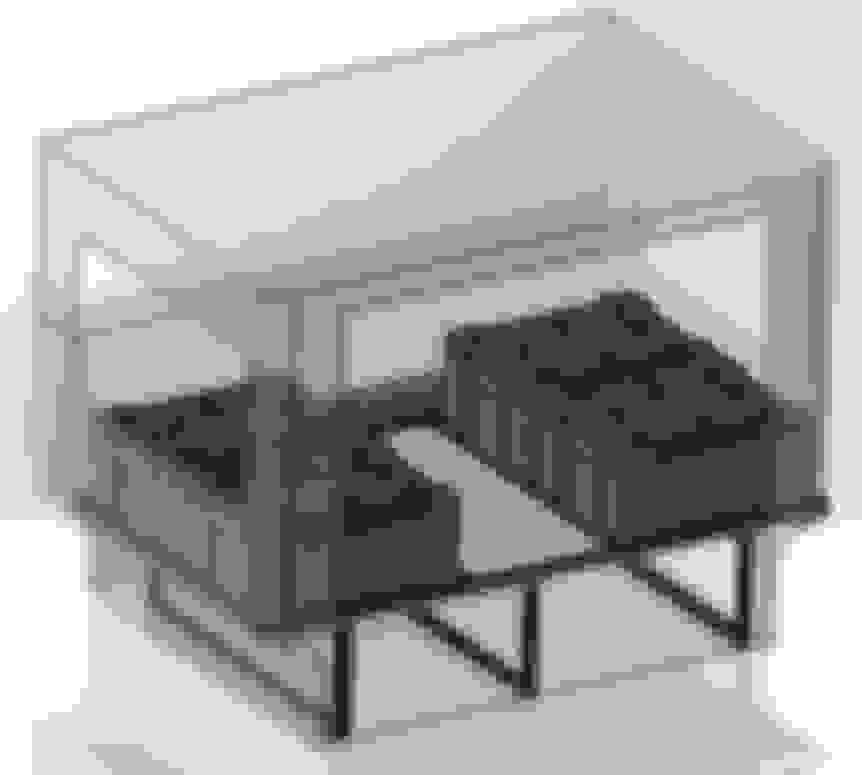
I started designing a custom rear storage/drawer system. The W463 cargo area isn't exact as I didn't get a chance to measure, but made my best guesses for dimensions from pictures and what I could find here and on clubwagen. I'll measure when I'm back with the truck next month.
I plan to make the lower drawers and frame out of 80/20. Top panel will be plywood wrapped in carpet. I'm playing around with different options/arrangements and seeing what makes the most sense for how I plan to use the vehicle over the next few years. The top panel will be able to securely accommodate 4 Front Runner Wolf Packs. The center open space will be free for other long part storage. I could go higher in the future with more drawers/shelves, but I want to keep the overall height of this system below the rear windows for now.
I"m going through several different options such as:
- Camping folding table storage
- Behind the seat water tank (Front Runner Slanted Water Tank 50L)
- Custom Subwoofer Box behind the seat (mostly dead space back there) and removing the bench subwoofer
- If removing the bench subwoofer, adding a fixed compressor setup in the space with external air line connections.
- Slide out prep table/surface for a cooktop/cutting board
- Permanent location for a portable battery power system such as a GoalZero Yeti or Jackery Explorer that's easily accessible/removable
- Possible dual battery setup using the OE CD changer location for a second battery
- Different fridge/cooler options
- I'll probably go with the Frontrunner Slimline full size rack with ladder in the future, but not for several years.
- Future solar panel options to take advantage of the large flat roof (for the portable battery)
For lighting upgrades, I've narrowed down the first few I want to do:
- Diode Dynamics SS3 Pro SAE/DOT Fogs in Amber in the OE foglight location
- Diode Dynamics Light Bar 12" SAE/DOT in White Pair on the front brush guard
- When I get the roof rack, switch to a 40" LED bar up top
- Multi switch relay system to clean up the wiring such as the Switch Pros SP-9100, but cheaper!
It's definitely not a smart thing to browse websites like ORC, Frontrunner, Vikingoffroad, Jackwagon, Gwagonaccessories, etc.
Also while searching, I found that ORC makes an Auxiliary Fuel Tank you can get for the W463! Has anyone considered this or have it? It would be a dream to be able to cover longer distances between fill-ups, although the cost of ~$3k is pretty steep, not including designing a custom system to fill the Aux tank and pump over to the main tank. I think for that price, I'll be satisfied with just filling up every ~300 miles or so.
Any feedback/suggestions would be appreciated!
I'll try next week to register the truck and see if getting there at 6AM is early enough.
Bummer on the DMV. Insane. Id recommend just getting to the lot at 5a, and bring a book or watch some YouTube then stand at the door once you see another car pull in.
Re: the aux tank, this would be amazing but for that price, I'll just keep two 5Gal waivan jerry cans on the roof rack once my Gobi gets in.
Good stuff on the rear storage. There are actually some really good YouTube videos on some nice builds with MDF and metal... maybe worth the watch at 5a in the DMV parking lot
TODAY WAS THE DAY! 127 days after purchasing the truck, I was finally able to get my registration, title, and plates!
I went to the furthest/least populated NJMVC location for titles and registrations (Washington, NJ). Woke up at 4AM and drove out there, getting in line at 6AM. There were 32 people in front of me, and by opening time (8AM), the line was ~150 people long. I was out with everything finished up around 8:45AM, so pretty painless overall. The staff there was amazing and organized, which was not the normal NJMVC experience.
Got back to the truck and had to put it back together, since last I left it, I was in the middle of disassembling the interior to remove the headliner. Everything went back in smoothly, finished mounting the front brush guard with the custom hardware, remounted the fog lights, and it was done!
Drove over to the local Mercedes dealership and ordered a second key fob. Not cheap at ~290 after tax (P/N 169-905-27-00-9999, but good to have peace of mind in case one of the fobs breaks.
First "legal" drive was just how I remembered it from so many months ago! The G55's suspension was pretty stiff, but not too uncomfortable. Power was intoxicating. Exhaust sound is excellent. Driving position takes some getting used to, but is excellent also. All of the sound system upgrades I made worked very well while cruising, but is still drowned out by the exhaust and road noise.
The plastidip worked out pretty well to cover all the chrome bits. When we move back to NJ in a few months, I'll spray them with a 2k satin black and a 2k satin clear. Powdercoat would be more durable, but I plan to paint a lot of the other bare plastic bits so will want them all to match. I'm also digging the look of no rear spare for now, but when KO2's go on, I'll have to figure out a secure solution with the larger tire and the rear cover.
The truck is terribly dirty, but I'll take care of that this weekend, along with a lot of small simple things that can be done. I can also finally begin fixing the glove box's broken handle.
It's not a perfect example, but it's exactly what I wanted, and I'll continue to restore it and take it on many adventures for many years to come!
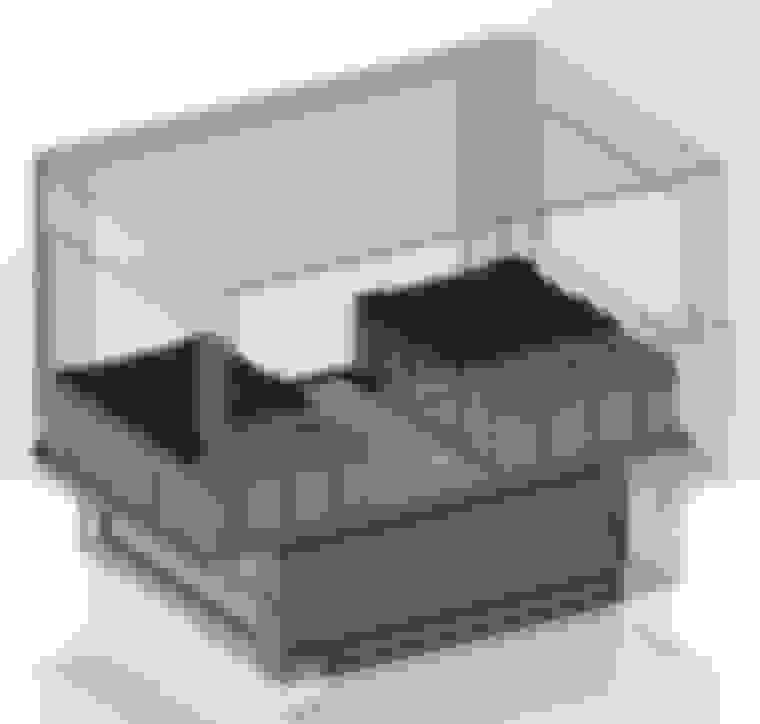
Also, since I now have the truck with me, I took some more measurements and made some corrections to my rear cargo area design. I'll probably make a complete 3D interior model of the W463 to play around with all different kinds of configurations with removing the rear seats also. Just a quick teaser:
Small updates. I'm closing in on 90k miles! Finally finished the first tank of gas yesterday (that I originally filled up in March!) and averaged a fantastic 10 mpg. This second tank is going to go much faster this time around. Loving every minute driving the thing and the wife and the kid love it too. Definitely get looks when you drive around Brooklyn and NYC.
I've been swamped at work for the past few weeks so just doing some small design projects on the side and nothing major with the truck.
First order of business was to fix my glove box handle that broke, was fixed by one of the previous owners a while back, broke again, and now had nothing left to fix. I went about redesigning the hinge mechanism with 3D printed parts to be glued onto the glove box and onto the handle. The design took a good amount of time due to the weird curves and angles, but I have a design that I'm pretty sure will work well. Printing out the parts now to test fit, then waiting on some better CA glue and a SS dowel pin to come in to finish it off.
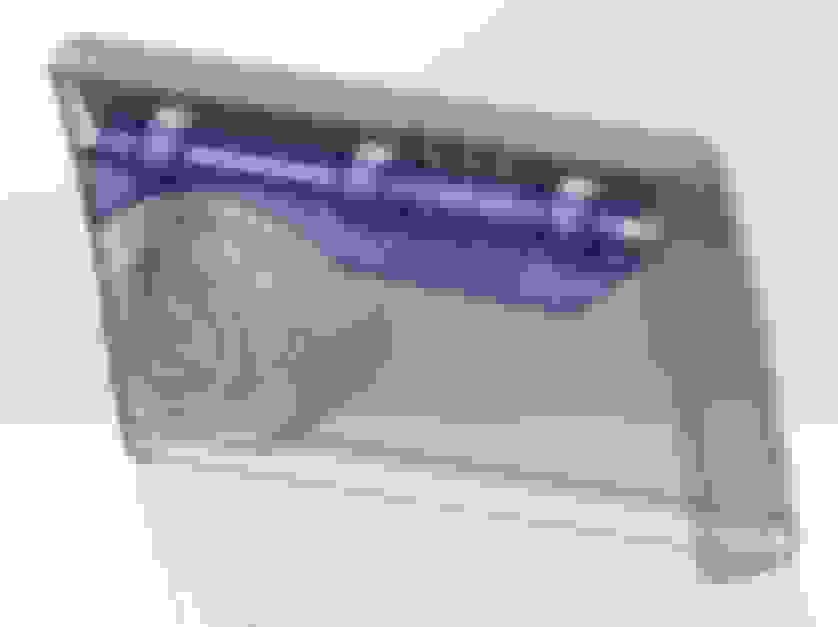
The clear shape is the glove box handle with the locking features. The grey piece will be glued to the handle, the blue piece will be glued to the glove box, and a SS pin will be used as the hinge mechanism. I can't imagine this will break again without the entire handle breaking in half. Lawrence1! When I confirm that everything works, I'll send some parts your way.
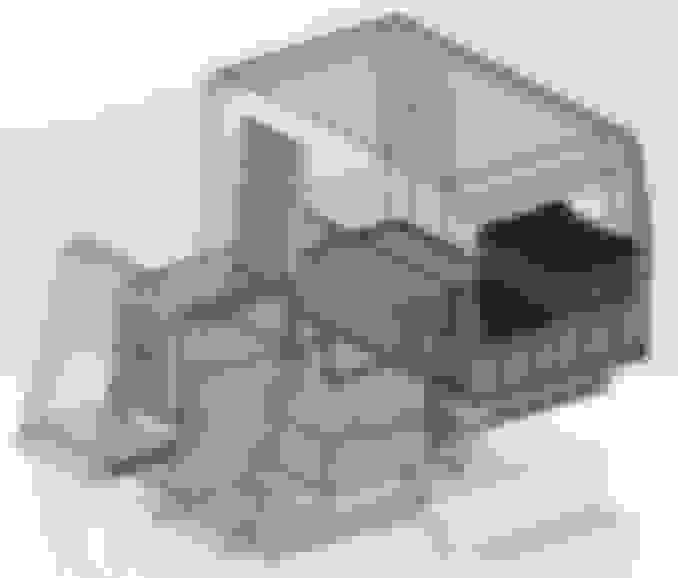
Also spent some more time measuring the interior of the W463 to play with different configurations on a storage system/drawer/shelf build. Still a lot to play with but have some of the basics down. Lots more to design here but this build won't be happening until the winter anyway at earliest. The purpose of this fixed storage system is more for better organization for long road trips with the family. We'll be taking a lot more of those in the near future and staying better organized, as well as having some creature comforts is always the best plan.
Currently has:
1. Platform over the wheel wells in the cargo area
2. Fixed space for 3 Front Runner Wolf Packs
3. Space under the platform for one small and one large drawer
4. Space for a Dometic CFX3 45L where the 1/3 seat normally sits
5. 80/20 struts all around the platform for eye hooks/anchors
I'll also be ordering the front component speaker set from Polk (DB6502) in the coming week, so will have to tackle that project and reconfigure the custom amp setup. At the same time I'll refinish and repaint the 2 AC Vent/Speaker Covers as both of mine are falling apart. The speaker system is performing excellent. At moderate listening levels, it's a definite improvement over the OE system even with the exhaust and road noise. Turned up, it's night and day with really nice low end fill. When the DB6502's finally go in the front, the highs and mids should be much more clear as well.
I'm actually thinking through how I could possibly create a plug and play staged system for other owners in the future. Something like, Stage 1: Upgraded Speakers that bolt and plug right in to OE locations. Stage 2: Upgraded Subwoofer package that will plug right into existing OE harnesses just having to run power+ground. Stage 3: Full custom plug and play amplifier + dsp where the only wires you'll need to run is power/ground. Would there be any interest in something like this? I have no idea of what the cost would be yet, nor the complexity of making a plug and play solution, but I'm pretty sure it should be possible.
I'm also designing a phone mount to be located where the Differential buttons are located. I have an iOttie iTap 2 Wireless Magnetic Charger that I want to mount in this location so I can use my phone in landscape mode. I think this will fit the layout of the W463 interior much better than all of the other phone mount solutions I've seen up till now. I plan to move the differential buttons to the glove box and make a custom housing for them to sit in. This design project is well under way already so I should have some results to share soon.
Also putting together the list of things needed for refreshing the suspension with Fox 2.0's. Not going with a lift at this time so will have to figure out how that can happen, but this being the family hauler and road trip car, softer suspension is a top priority.
It's been great putting miles on the truck finally and I'm excited to continue to be able to take on some interesting/unique design/build projects to share with the community.
Small updates. I'm closing in on 90k miles! Finally finished the first tank of gas yesterday (that I originally filled up in March!) and averaged a fantastic 10 mpg. This second tank is going to go much faster this time around. Loving every minute driving the thing and the wife and the kid love it too. Definitely get looks when you drive around Brooklyn and NYC.
I've been swamped at work for the past few weeks so just doing some small design projects on the side and nothing major with the truck.
First order of business was to fix my glove box handle that broke, was fixed by one of the previous owners a while back, broke again, and now had nothing left to fix. I went about redesigning the hinge mechanism with 3D printed parts to be glued onto the glove box and onto the handle. The design took a good amount of time due to the weird curves and angles, but I have a design that I'm pretty sure will work well. Printing out the parts now to test fit, then waiting on some better CA glue and a SS dowel pin to come in to finish it off.
The clear shape is the glove box handle with the locking features. The grey piece will be glued to the handle, the blue piece will be glued to the glove box, and a SS pin will be used as the hinge mechanism. I can't imagine this will break again without the entire handle breaking in half. Lawrence1! When I confirm that everything works, I'll send some parts your way.
Also spent some more time measuring the interior of the W463 to play with different configurations on a storage system/drawer/shelf build. Still a lot to play with but have some of the basics down. Lots more to design here but this build won't be happening until the winter anyway at earliest. The purpose of this fixed storage system is more for better organization for long road trips with the family. We'll be taking a lot more of those in the near future and staying better organized, as well as having some creature comforts is always the best plan.
Currently has:
1. Platform over the wheel wells in the cargo area
2. Fixed space for 3 Front Runner Wolf Packs
3. Space under the platform for one small and one large drawer
4. Space for a Dometic CFX3 45L where the 1/3 seat normally sits
5. 80/20 struts all around the platform for eye hooks/anchors
I'll also be ordering the front component speaker set from Polk (DB6502) in the coming week, so will have to tackle that project and reconfigure the custom amp setup. At the same time I'll refinish and repaint the 2 AC Vent/Speaker Covers as both of mine are falling apart. The speaker system is performing excellent. At moderate listening levels, it's a definite improvement over the OE system even with the exhaust and road noise. Turned up, it's night and day with really nice low end fill. When the DB6502's finally go in the front, the highs and mids should be much more clear as well.
I'm actually thinking through how I could possibly create a plug and play staged system for other owners in the future. Something like, Stage 1: Upgraded Speakers that bolt and plug right in to OE locations. Stage 2: Upgraded Subwoofer package that will plug right into existing OE harnesses just having to run power+ground. Stage 3: Full custom plug and play amplifier + dsp where the only wires you'll need to run is power/ground. Would there be any interest in something like this? I have no idea of what the cost would be yet, nor the complexity of making a plug and play solution, but I'm pretty sure it should be possible.
I'm also designing a phone mount to be located where the Differential buttons are located. I have an iOttie iTap 2 Wireless Magnetic Charger that I want to mount in this location so I can use my phone in landscape mode. I think this will fit the layout of the W463 interior much better than all of the other phone mount solutions I've seen up till now. I plan to move the differential buttons to the glove box and make a custom housing for them to sit in. This design project is well under way already so I should have some results to share soon.
Also putting together the list of things needed for refreshing the suspension with Fox 2.0's. Not going with a lift at this time so will have to figure out how that can happen, but this being the family hauler and road trip car, softer suspension is a top priority.
It's been great putting miles on the truck finally and I'm excited to continue to be able to take on some interesting/unique design/build projects to share with the community.
Amazing skillset to be able to design this stuff from scratch. Looking forward to any progress on the handle and everything else that you're working on. keep up the good work!
I was able to finish up my glove box repair today.
Made a few more changes to the 3D design after printing out the first set, modifying them to allow for a better fit into the OE glove box parts, and more clearance for the hinge to rotate.
Below are the 2 separate 3D printed hinge parts. You can see I made 3 hinge points I added into the design. To the right you can see the Handle Hinge part being super glued onto the inside of the handle. I used the SS rod to align everything and make sure it was sitting in the correct position.
Below, I did the same thing for the hinge on the glove box side. As you can see, the OE hinge hole on the right side of my glove box was broken. I used what was left of the hole to line up the rod with the new 3D printed part when gluing.
Right side is everything assembled. I left the rod long on purpose to be able to remove it easily during this trial fit session. I'll cut it tomorrow and hide it away in there. The handle is a little bit 'sticky' so I'll file or drill out the holes to make it nicer and then add some grease in there.
Glove box is officially fixed now! It sure beats spending ~$500 on a new glove box and was a fun project to tackle. Lawrence1, PM me and hope we can fix your handle too.
Next custom interior project on the list is to retrofit the Differential Buttons into the glove box with a custom fit housing. Then work on a mounting plate for the Differential Button location to fit my magnetic wireless charger phone mount.
If anyone has any crazy project ideas where you think I can help, let me know. I have a pretty endless list of things to do now, but can always make time to entertain a new idea.
I've been having a blast "daily driving" the G55k for the past almost 2 weeks now. Even around Brooklyn/NYC roads that are TERRIBLE, it is still super enjoyable and puts a smile on my face every time I get in.
One photo the other day.
I�m glad to read that things are working out for you, I like all the write ups & progress re your rig. Great job btw.
I was able to finish up my glove box repair today.
Made a few more changes to the 3D design after printing out the first set, modifying them to allow for a better fit into the OE glove box parts, and more clearance for the hinge to rotate.
Below are the 2 separate 3D printed hinge parts. You can see I made 3 hinge points I added into the design. To the right you can see the Handle Hinge part being super glued onto the inside of the handle. I used the SS rod to align everything and make sure it was sitting in the correct position.
Below, I did the same thing for the hinge on the glove box side. As you can see, the OE hinge hole on the right side of my glove box was broken. I used what was left of the hole to line up the rod with the new 3D printed part when gluing.
Right side is everything assembled. I left the rod long on purpose to be able to remove it easily during this trial fit session. I'll cut it tomorrow and hide it away in there. The handle is a little bit 'sticky' so I'll file or drill out the holes to make it nicer and then add some grease in there.
Glove box is officially fixed now! It sure beats spending ~$500 on a new glove box and was a fun project to tackle. Lawrence1, PM me and hope we can fix your handle too.
Next custom interior project on the list is to retrofit the Differential Buttons into the glove box with a custom fit housing. Then work on a mounting plate for the Differential Button location to fit my magnetic wireless charger phone mount.
If anyone has any crazy project ideas where you think I can help, let me know. I have a pretty endless list of things to do now, but can always make time to entertain a new idea.
I've been having a blast "daily driving" the G55k for the past almost 2 weeks now. Even around Brooklyn/NYC roads that are TERRIBLE, it is still super enjoyable and puts a smile on my face every time I get in.
a few new goodies arrived on Friday. Will be installing in a week or 2 when I get a set of G63 springs.
Fox apparently temporarily discontinued the Fox 2.0 Performance Adjustable Shock kit for the W463. I contacted Jack @ JackWagonOverlanding and he had a line on a pieced together kit from Eurowise. The kit now comes with installation brackets and length correct shocks, but not a dedicated set for the W463. This should still be a straight forward install since the changes are very minor.
Yup, that�s what I wrote before in one of the Fox thread that Fox discontinued making shocks for W463, my rear shocks came from Eurowise as well. They had to build my rear shocks but fronts are the same. Installed mine 2 wks ago & very happy w the set up. Jack was very easy to work with & Always kept me updated. 👍🏼
Yup, that�s what I wrote before in one of the Fox thread that Fox discontinued making shocks for W463, my rear shocks came from Eurowise as well. They had to build my rear shocks but fronts are the same. Installed mine 2 wks ago & very happy w the set up. Jack was very easy to work with & Always kept me updated. 👍🏼
Anything interesting to note about the install? I read over the install notes provided on the Eurowise website and they recommend for the fronts to have the remote reservoirs pointing out into the wheel wells and trimming the metal back. I'm definitely not going to do that. For some reason Eurowise provided me with 2 sets of additional brackets, so something's not adding up. But It should be simple to figure out once I get under the truck.
I"m guessing this is to get the shocks further away from the exhaust manifold/collector pipe. I'll probably just fab up a quick metal heat shield for this area or try running the reservoirs horizontal in the wheel well. In the end, I plan on trying to use servo motors in a custom designed housing to control adjusting the damping value of the shocks and running the servos off an Arduino from inside the cabin, so accessing the knobs isn't that important. I have a few weeks till I get time to get a set of G63 springs and a free weekend to install the suspension, so I'll work on designing the shock/servo side now.
Hey @shiann on the passenger side there is a bit of metal that extends further that acts as a heatshield for the exhaust, you can simply bend it back by hand for clearance, then when you mount the shock reservoir w the included bracket, just clock it back a bit so it has clearance on each side.
I pulled out my cutting blade and started to go to work then just put some elbow grease into bending the shield and it's been perfect.
Great. Thanks Ian! Any issue yet in running the reservoirs close to the exhuast? I think I may add in some more insulation in this area to avoid any future issues.
I do wish the braided hoses from the shock body to the reservoirs were longer for remote mounting. This would make things much easier. Maybe this is something I can do in the future when rebuilding the shocks.
In other news, I started working on a design to mount a servo motor to the Fox Adjustable knobs. Nothing will be worked through until I find a servo motor that can produce the torque needed to turn the knobs (The force is quite high), but 3D CAD images area always nice right?
Lots of design projects (not real work related - all fun truck related) going on now so this will probably take a back seat until the others are finished.
No issues overheating at all. Spent a few hours in the convection oven known as Hungry Valley in 100+ degree temps then an hour on the highway home and everything performed like a charm.
Agree w you on the hoses, would have been a lot easier to mount them to the body perpendicular to the shock.
And agree the knobs are extremely heavy to engage. Wonder if there's a way to loosen them in the assembly somehow to not require so much force to engage them.
Shiann - any chance you would be willing to make another amp holder? Working on my system and trying to decide if I want to tackle the headliner myself or just have it removed and do the sound deadening myself then have upholstery shop install.
Shiann - any chance you would be willing to make another amp holder? Working on my system and trying to decide if I want to tackle the headliner myself or just have it removed and do the sound deadening myself then have upholstery shop install.
thanks
Mick
Hey Mick,
Yeah, I could make another amp mounting plate for you. Do you have any idea which amp(s) you're going with? The size of the amp would dictate the size of the plate as well as the height of the spacers so everything can fit under the seat. Also, I'm guessing you'll be running all new wires to all the speaker locations? Send me a PM and we can work out the details further.
Yeah, I could make another amp mounting plate for you. Do you have any idea which amp(s) you're going with? The size of the amp would dictate the size of the plate as well as the height of the spacers so everything can fit under the seat. Also, I'm guessing you'll be running all new wires to all the speaker locations? Send me a PM and we can work out the details further.
I went to a Mercedes dealer near me the other week right after getting the registration finalized to order a replacement key. When I purchased the truck, it only came with 1 key, so I never wanted to get stuck if the key decided to stop working or I damaged/lost it.
I didn't get any choice in replacement keys P/Ns. Seems like MBUSA only issues one type of replacement key for the older W463's. At least that was my experience. I read that some other members had success ordering the new Chrome style key, but my dealer would not allow me to.
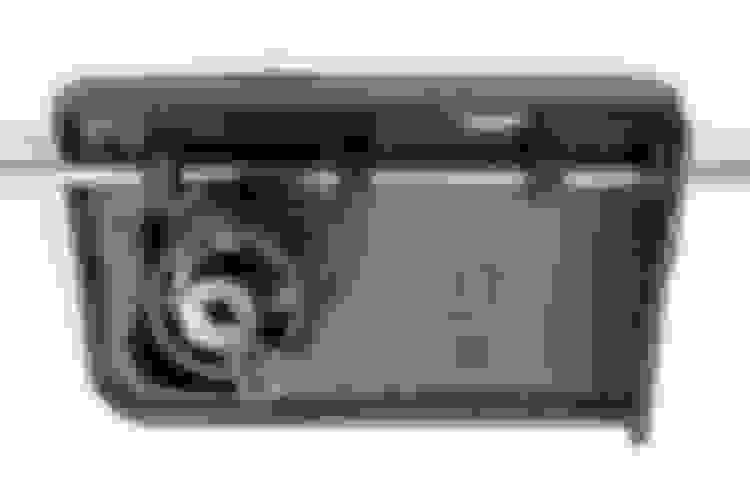
This is my current key. A little bit worn but not bad. I actually wanted an exact replacement of this style key since I like how small/thin it is. Now that I have the second key, I'll probably order one of those Amazon special case replacements to refurb the key and continue to use this one.
After ordering the key, I made it over to pick it up 2 weeks later. The P/N they ordered for the replacement key was A169-905-27-00-9999. Price was $290 after tax without the key blank (I already had a spare key blank for this newer style key)
So the key looks and is shaped almost exactly like the chrome key that the newer trucks come with. I wanted to spice up the bland key back and ordered the Affalterbach key "knockoff" back from Amazon. Order link here. It arrived today and obviously didn't fit, although the shape was so so close. I took out a file and started reshaping the edges and removing some material in hopes that I could get it to fit. Negative. I was able to get the part to fit correctly but the clip would not engage. Oh well. The part was cheap ($13) so no big deal.
I also ordered this silicone carbon fiber look case for the key. It fits pretty well and looks fine overall. I just wanted something to protect the key as I will end up dropping it. For now, it goes with the interior theme of matte looking carbon fiber vinyl, but I'll probably end up scrapping it after I stop using this replacement key.
I wanted to ask the forum for advice about taking care of some body rust issues I have. I'm looking to address these areas to eliminate the rust and prevent any issues in the future, but they do not have to be perfect cosmetically. I know that if I want it perfect, I will most likely have to dig deep into body work and repaint.
The first area is on the rear door. The PO hit something with the rear tire carrier, denting it and pushing the wheel into the back door, causing a good sized dent and chipping the paint as shown. I believe the first area with a 'rust drip' can most likely be taken care of by a quick polish and paint seal, but he second paint chip will need good amount of work, given the flaking paint chip, as well as the chip location on the panel bend. Would the solution to this be sanding off the flaking paint and rust spot, then using epoxy primer and body filler to smooth, then repainting be the only real option?
The next area is on the roof. The sunroof cap has a major clear coat failure but no rust spots. This will be addressed when I determine everything that has to be painted (doing it all at once). There are 2 rust spots on the passanger side. Below shows them in better detail. Both of these are not ideal, nor do I know how they happened (prior to my ownership), but is there any temporary fix for these spots that does not involve major body work and repainting the whole roof? The second spot that is the more major rust spot has actually eaten away some of the metal so body filler is probably necessary.
The last spot is in under the windshield. There are some small rust bubbles forming. I have not gotten a chance to check closely under the the rubber seal but will investigate more soon. I would think this small of a spot should be fine as long as I keep an eye on it? I will (soon) need a new windshield since the current one has 4-5 pretty bad chips/bulls eyes, so having the windshield out will give me a chance to look closer all around the windshield frame and target any necessary areas. What would be the best process for this? As in treating the area to best prevent future rust when I do have the windshield out?
Thanks all! Will be finally able to get under the truck this weekend to check over all of the rust under there (minor) and start addressing it when I am replacing the shocks and springs.
Ouch, all of it looks fairly straight forward just need to remove some more paint to make sure you uncover it all.
Paint/Body work is the only thing I will only do on my motorcycle builds... and it's 8/10 on my best try.
The one pice that is the most concerning is by the sunroof, I can't tell much from the piece under the glass.
For the sunroof, I'd tackle that when you do the headliner, might be worth dropping the sunroof.
You can drop the sunroof yourself, but be prepared to be on your back with your feet/legs supporting the weight (so bring a buddy).
I took mine off to inspect everything and found two busted drain lines... i'd take the SR off to make sure there's nothing hiding underneath and you don't miss anything.
Yeah, I was hoping there would be a quick fix for now to stop the rust from spreading and doing a full repaint several years down the line, but looks like this becomes a priority now, especially the rust spot by the sunroof. I'll have to grind, acid etch, neutralize, epoxy sealer, body filler, primer, paint, clear. Looks like I"ll just end up doing the whole roof and whole rear door. And I'll take a very close look around the windshield and treat accordingly when I have the windshield out. Add it to the list! What I really want to try to do is add a glass sunroof like Kobzarhomes did. That would be awesome.
But one step at a time. Grind away the rust on the chips near the sunroof and treat the area, and seal it with POR-15 until I have the time and space to do a full repaint of the roof. Do the same for the rear door chip and put the spare back on. Then change out the suspension, and tackle any of the major rust areas under the car at the same time before the winter.
Good idea. If you're still doing the headliner the sunroof would be best tackled then.
Especially before winter rolls around in the NE and salt gets any chance of touching those spots. Even may be worth hitting with rust converter and spray just to contain the spread if winter gets to you before you can tackle the project(s)
Just to finish this topic out, I made some updates to the glove box hinge replacement.
After gluing everything in, I realized that my glove box handle does not 'spring back' to it's original closed position. I had originally thought the spring itself was located inside the glovebox latch, not on the handle. I didn't have any hinge or spring to reference off of, so I thought it was fine.
I have been talking to another member for a few months now about helping fix his glove box hinge also since his failure is almost the same as mine, but I decided to add torsion springs into the handle and hope the springs are beefy enough to pull the handle back in.
Here is how the springs should work with the hinge assembly:
The springs are rated for a maximum of 1.375 in-lbs, so with 3 of them in there, that's a max of 4.125 in-lbs. I have no idea how that translates to actual force on the handle since I haven't measured it, but hoping it will work!
If anyone else has the same type of glove box failure as I did and would like to try to fix it before ponying up ~$4-500 to by a new glove box, send me a PM.
Be sure to check the gaskets around the rear door. They are notorious for rusting. I shoot WD40 corrosion inhibiting spray behind them every few weeks. The oil actually leaks through a seam in the rear door when I spray the gaskets on the door itself. Not great construction lol.
If you have a garage, consider getting a dehumidifier for it. I run one every night to reduce ambient humidity to roughly 35%, which should evaporate most pooled water (though water behind the door gaskets for example may not fully evaporate even after 10+ hours overnight) and slow corrosion.
 07-13-2020, 11:23 PM