When you click on links to various merchants on this site and make a purchase, this can result in this site earning a commission. Affiliate programs and affiliations include, but are not limited to, the eBay Partner Network.
How-to Rebuild Mercedes ITC Transfer Case: Part 2 of 3
How-to Rebuild Mercedes ITC Transfer Case: Part 2 of 3
This is Part 2 of the multi-part article. This post covers ITC disassembly and cleanup. Part 3 covers assembly and installation. The previous Part 1 covers introduction, what you need or want for the job, and ITC removal.
ITC Disassembly
The process may be involved depending on the degree of repairs. You may want to clean road debris and dirt before disassembly.
Remove HW8 plugs and drain old fluid. Around 0.5 qt will come out.
Place 2-3 layers of carton (FedEx box) on the work surface. It will protect the workbench from scratches and contain spils.
Remove 17x E10 bolts and patiently pry the ITC halves apart in the designated places. Work evenly from all 3 sides with a large flat screwdriver or pry bar. Avoid prying in the seam to not damage the surface.
Carefully take ITC halves apart. Set the top half aside.
ITC Base Half
Start with the base half. Remove 2 sprockets with the chain over them. Need to lift the entire group at once.
Remove the retention ring from the input shaft.
Remove the input shaft washer.
Remove the snap ring.
Position the base half (on wood blocks) so that the input shaft may exit. Gently tap with deadblow the input shaft out. Control it to not drop and dent.
Turn the base half over. With large snap ring pliers (3" spread), remove the input snap ring to expose the input seal.
Pry the input shaft seal out. I used a large flat screwdriver.
Remove the input bearing washer.
I stopped here and left the input bearing and its snap ring in place. But you can remove them easily if needed. Use a bearing driver or a 3" PVC pipe in either direction.
Now to the front output shaft. It is short, but PITA to remove. Use a ring compressor to clamp the retention ring into the shaft and whack the shaft out with a deadblow (one crisp and powerful shot). I did not have a ring compressor, so I made it from a suitable steel ribbon. I found a Raco Old Work Switch Box Support (Home Depot SKU # 587852, UPC # 05016900977, $0.73) laying around. Rolled one part of it around the shaft and cut to fit allowing 1/16 inch gap, no overlap. Then bent the bottom edge 1/16 inch inward at about 30-degree angle using small pliers. Used 2 strong zip-ties to hold tight around the shaft. Align the ring compressor gap with the gap in the ring. Gently tap with a screwdriver down compressing the ring. The contraption will begin sinking in the seam. Continue tapping around the circumference (follow the shaft grooves) until the entire ribbon sinks in and compresses the retention ring. Verify that no side popped out. Once confident, position the base half on wood blocks to allow shaft exit and give it one crisp and powerful blow (rubber mallet or deadblow). Hold the shaft to not hit the floor.
I stopped here and left the front output bearing in place.
ITC Top Half
Continue to the top half. Remove the magnet. It is retained with a drop of RTV silicone.
Remove the differential gear assembly.
Remove (carefully pull out) the plastic shroud.
Now to the rear output shaft. It is recessed, but less complicated to remove than the front output shaft. The diameter of the retention ring is larger, and it is easier to clamp. Because I did not have a ring compressor, I made another one from the other half of the Raco bracket. I did not need to cut it - it ended up of a perfect length. Follow the same procedure as above and whack the output shaft with one good blow. Hold the shaft to avoid dropping on floor.
I did not remove ball bearings, but it is reasonably easy to hammer them out.
ITC Cleanup and Repair
Once you took the ITC apart down to the level you want, it is time to clean and repair. Fortunately, I did not need to repair anything, but other forum members carried out some impressive repairs. In Part 3 of this article, I list useful resources and links to a few post. Interestingly, Mercedes does not tinker with ITC repairs - they replace it if necessary. Of course, under warranty there is no impact to the owner, but post warranty this can run $7K+ in parts and labor. The most common problem appears to be (1) leaking seals, (2) stretched chain, (3) broken chain guide, and (4) bad bearings. Depending on your issue, your repairs may be more or less involved. Mine was a trivial problem of leaking input seal. I replaced all 3 seals, which shall give me confidence for years to come. I will discuss the seal installation in Part 3.
Cleanup is very important to ensure problem-free operation. The case halves and all parts shall be thoroughly cleaned. I used 2 primary approaches:
Exterior cleanup with metal brush and degreaser.
Interior cleanup with brake cleaner and compressed air.
Cleaning exterior is good to ensure debris do not get inside the case during reassembly. It is also a good idea to permit quick identification if leaks develop. I covered bearings with paper towels to protect against grit and brush shedding. I used rough metal brush to give the exterior a good scrubbing.
With paper towel + solvent if needed, remove all original RTV silicone. Ensure the surfaces on both halves are pristinely clean. I used fine metal brush.
I spent extra time with case bearings, probably 2 hours doing just that. Plenty of brake parts cleaner and blowing. I made sure that case bearings are crisp and cleanly spin without grit. When totally dry and free of lubricant, they won't spin as much, but shall not give you an impression of any contamination. A portable air compressor with a nozzle is very handy.
I did not mess with the needle bearings inside the sprockets and the differential gear assembly. Interestingly, these bearings still had thick grease packed in them despite 8 years of service floating in ATF. I took this as a hint to not mess with them. I did pack some more green Mercedes Hi-Temp Bearing Grease (p/n 002989005110 $5.06).
After removing the transfer case from the vehicle, the flanges that bolt to drive shafts have to be removed from the splined shafts so that the case can be opened up. How do these come off?
The last picture in part one shows the transfer case with the flange and case together, the first picture in part two shows the flange removed and the case cover removed. How did you get the flange off so the cover would come off?
The flanges are integral part of the shafts and do not separate. After ITC removal from vehicle, unbolt 17x E10 bolts and pry the ITC halves open. The front output shaft will be retained in the base housing, and the rear output shaft will be retained in the top half (cover). Hope this helps.
Everything was going well with my rebuild process and when I was finishing reinstalling the pieces this plastic shroud broke off. Any thoughts on how critical that little piece on the bottom is and if I'd be better off just putting it in there without that broken piece, looks like it might be there to help hold a bearing in place. Any ideas on a source to order a replacement if it's necessary? Not sure a plastic repair would hold up and would worry about it breaking off and causing problems.
I am sorry for the mishap. As far as I can tell, the broken plastic leg performs 2 functions: support and fluid routing. The leg is 1 of 3 supporting points. I think it can hold with the remaining 2 just fine. However, the fluid routing to the bearing may be negatively impacted. The fluid gets caught by the small square funnel on top and from rotation and routed inside the leg to the bearing. I recommend replacing or repairing this plastic shroud. Replacement appears to be available from Cobra at $100. I did not search the Web much. Regarding repair, chances are very good that you can repair this with some chem-resistant resin and reinforcement. The leg carries no weight on it, and so the repair shall hold just fine. If you decide to repair, make sure you do not obstruct the V channel for fluid to drain freely to the bearing. Hope this helps.
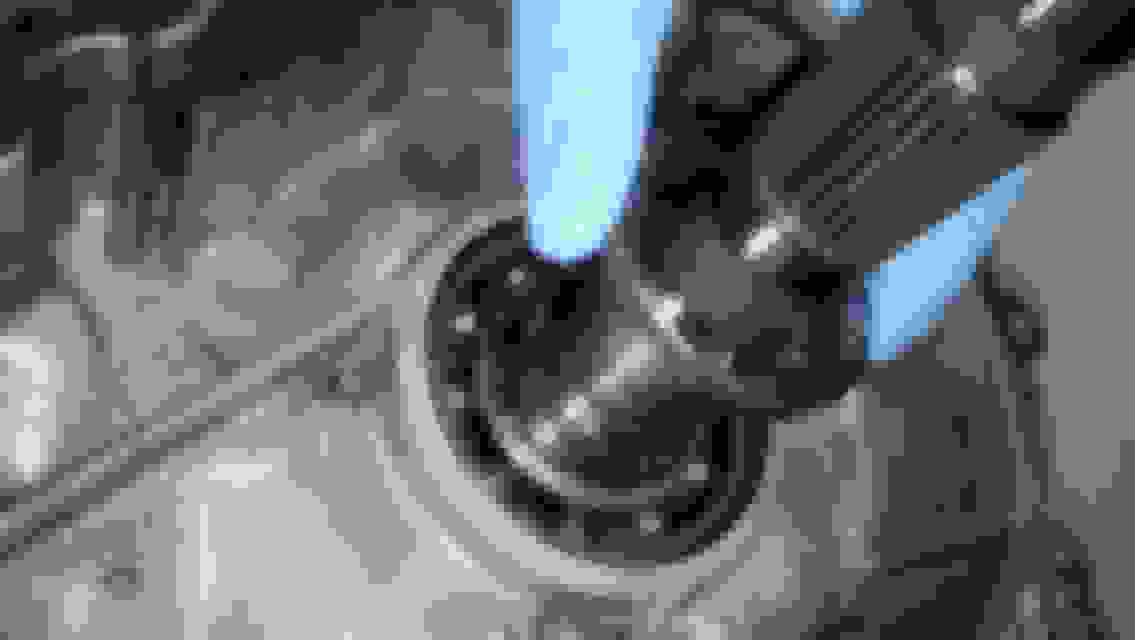
That is super helpful I didn't know the name of the part and it had no part number listed on it so that link is great I may just order it not sure I would be confident in my plastic repair skills. My last question is as I prepare to remount the transfer case is there any lubrication I need to do where it connects back to the transmission (image below)? Also, should I put RTV where the surfaces mate?
No need for any RTV or another sealant - the transmission and ITC mate dry. Just some standard cleaning the surface from debris and oil is okay. The shaft splines shall be lubed by Mercedes Long-Life Grease (p/n A000989635109) or another thick quality grease like the wheel bearing grease. You will be okay if you have some original grease left in there. It is to prevent corrosion mostly, not much temp or friction in this spot. Best of luck!
I've got it all together now and the rtv is curing. Is there a way to bench test it now fully assembled? When I hand turn the input shaft that connects to the transmission it seems to pass power straight through as I look into the fill plug the chain does not turn. If I hand turn the other side the chain moves and seems to spin well so I assume it's good to install and is defaulted into 2 wheel mode so it's just passing power through in it's current set-up, but was wondering if there is a mechanical way to test that it correctly transfers when switching to 4WD or do I just need to reinstall and drive it? Just knowing how difficult it was to remove would hate to find out I screwed something up and have to start over.
Mercedes SLR McLaren 722 S Is Extremely Rare Example Modified by McLaren
Slideshow: A one-of-one U.S.-spec Mercedes-Benz SLR McLaren Roadster became even rarer after a factory-backed transformation at McLaren's headquarters.