When you click on links to various merchants on this site and make a purchase, this can result in this site earning a commission. Affiliate programs and affiliations include, but are not limited to, the eBay Partner Network.
Replacing headlight projectors to Morimoto EvoX-R 2.0
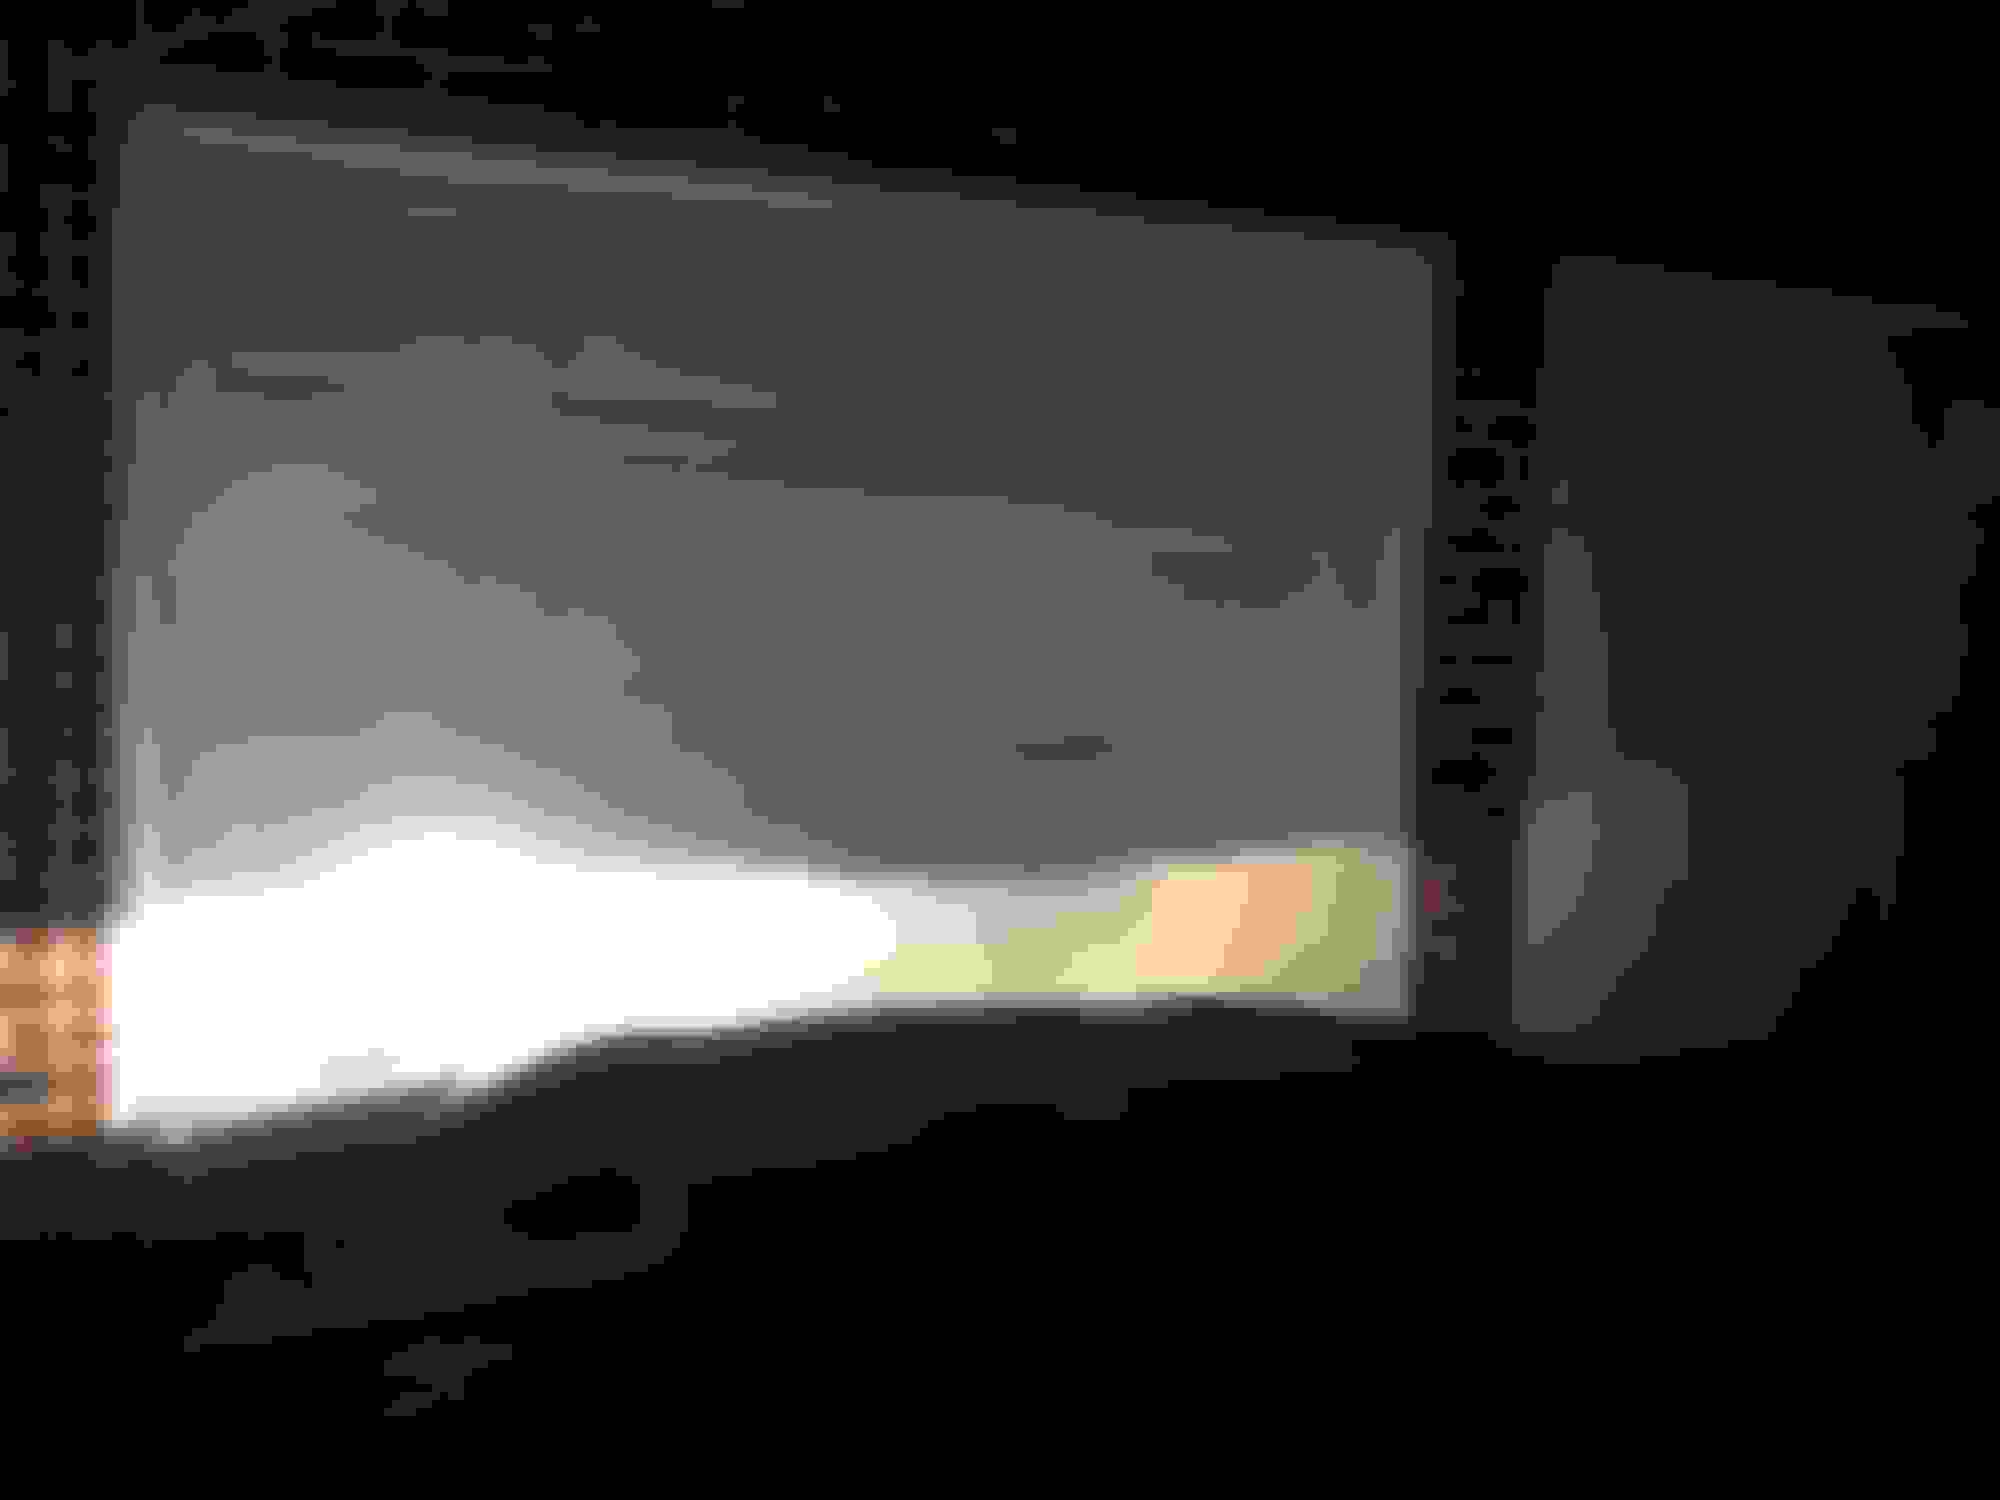
My 2007 GL450�s headlights had become unbearably faded overtime. Changing Xenon HID bulbs to best ones didn�t make any difference. I finally decided to change the projectors. I could only do one side this weekend. It definitely is a huge improvement. I took a picture after left side is new projectors and right side is old. See the difference.
It is a pretty dramatic improvement and it is a straightforward retrofit. The lenses come off pretty easily and the projectors mostly bolt in. The only complications are that you have to do a minor amount of grinding to the bracket to get some clearance and (I think) only two of the four mounting holes line up so you have to drill two new holes per side into the mounting bracket. Otherwise it is plug and play. I used Philips White Vision bulbs which give you a nice white color. I’d tempted by Osram CBB bulbs if I were doing them now although they are pricey. Note that you need D1S bulbs (not the more common D2S).
I'm also in the process of doing this with the same projectors.
What bulbs are you using?
Any words of advice before I destroy my GL550 headlights? Haha
I an using the same Osram bulbs that were installed about a year ago. I knew that bulbs are not a problem as I changed them last year but no improvement at all.
Word of advice ! haha
well, my struggles were to take apart the lense and housing and putting them together. I used heat gun to melt the adhesive and used silicon to seal it again as it won't fit perfectly after being taken apart. Drilling holes in aluminum for rotating/active lights system is another task.
Finally an unexpected struggle was that wiring insulation on 12 year old car has become brittle and would fall off with minor touch or bending. I had to wrap those areas in electrical tape and heat gun it to melt and stick to exposed wire.
That's a pretty dramatic difference. Out on the road, is it still a big difference?
Question... if the plastic lens on the outside was faded/discolored from UV exposure... why replace the part on the inside? Or did you also replace the outer lens?
Had you tried polishing the outer, plastic lens?
Last edited by DennisG01; Jan 21, 2019 at 12:12 PM.
The projectors deteriorate too and lose a lot of their ability to reflect necessitating going into the lights to replace them. If the covers are cloudy, they need to get sanded/polished as well.
I'd say the improvement in lighting on the road is greater than it looks on that wall shot. I didn't know I had the adaptive lighting until I put in the new projectors because the light output is so much better.
The best way to open the lights is to put the light into a oven heated to ~230F for about 10 minutes. I put them on cardboard to keep them from touching the hot racks. The hardest part is getting the initial separation - corners are a good place to start. Once you get it started, it usually gives way pretty easily. GL lights are sealed with butyl, which is relatively easy to get opened. You may need to put them back into the oven for a few more minutes if you can't get it on the first try and it starts to cool off. This video is a good description of the process:
I purchased a spreader like the depicted in the video, but it's not required to get them open but makes it easier without gouging up the light.. The Morimoto retro rubber they and others sell is great for resealing (although Morimoto bulbs aren't very good - don't cheap out and get those instead of Philips/Osram. You get what you pay for with bulbs).
Ah, thanks for the clarification. That makes more sense, now.
Butyl... Actually, I'm glad to hear that. Working in the marine industry, I'm very familiar with the use of butyl rubber. It's an excellent sealant that never fully hardens. It far outlasts silicones and even polysulfides. If one wanted, it's easy to get by searching for "butyl rubber tape".
That's a pretty dramatic difference. Out on the road, is it still a big difference?
Question... if the plastic lens on the outside was faded/discolored from UV exposure... why replace the part on the inside? Or did you also replace the outer lens?
Had you tried polishing the outer, plastic lens?
Yes, it is big difference out on the road. The car is driveable in night now only with one projector replaced. I will try to take a picture and post it.
Outside lense was not faded at all and that was a surprise on this car which has been exposed to Houston heat for 12 years. The light output on the road slowly faded despite a good condition lense. High beams worked perfectly.
Not bad for not knowing much about electronics.
I'm almost finished with the drivers side (left) headlight. Mine took a bit longer as I ordered LED switchback strips from Lightwerkz to replace my turn signals in the headlight.
Still a couple wiring issues but it's coming along great. I'll post a video of it. The EvoXR are like night and day difference.
Lightwerkz has the absolute best customer service. They replied to all my wiring emails.
Lastly, my interior lighting is almost done. I'd like to change all the orange/amber buttons to white.
Wow! that interior lighting looks so cool !!!
I'd love to do interior lighting someday.
I am done with both sides. I am so glad that I did the switch. One might get away just with replacing projector lenses.
Wow! that interior lighting looks so cool !!!
I'd love to do interior lighting someday.
I am done with both sides. I am so glad that I did the switch. One might get away just with replacing projector lenses.
My projector bowl was shot. I definitely would've just replaced the lens if it wasnt bad but I figured if they're known to stop reflecting, I might as well change the whole projector.
The interior ambient lighting (waterfall lighting) was extremely easy. Only if you have factory ambient lighting.
Interior lighting looks good, where did you get the RGB replacement LED's and do you have a post/DIY for replacing them? I have the interior ambient light package on mine too.
Mine had active headlights that turn with steering. The new projectors didn't come with holes to mount the turning mechanism. so I had to drill holes for that. It is possible that I ordered the wrong set. I will try to link my video here so that you can see. The audio codec in video didn't work so it is audio-less but you will get the idea.
Mine had active headlights that turn with steering. The new projectors didn't come with holes to mount the turning mechanism. so I had to drill holes for that. It is possible that I ordered the wrong set. I will try to link my video here so that you can see. The audio codec in video didn't work so it is audio-less but you will get the idea.
Hi, im new to the forum. First, thank you for all the info, it really motivated me to perform this job. I�m posting cuz I encounter a problem. By mistake I broke the clips from what I assume is the AFS motor that moves a rod to steer the projectors. It is still attached to the rod but it wont stay fixed to the headlight. I tried superglue but it wont hold. Can you suggest me something stronger that could hold it in place so it would be water tight. Besides that, the improvement is real and I�m still glad I did it
I have had good results with jbweld in past.
I am not exactly sure which part is broken, but if both are plastic, you can heat up a U clip and melt insert on both sides once you align broken pieces.
if one part is metal and other is plastic, then JB weld or any strongest glue you can find on hardware store shelf.
good luck.
Mercedes SLR McLaren 722 S Is Extremely Rare Example Modified by McLaren
Slideshow: A one-of-one U.S.-spec Mercedes-Benz SLR McLaren Roadster became even rarer after a factory-backed transformation at McLaren's headquarters.