When you click on links to various merchants on this site and make a purchase, this can result in this site earning a commission. Affiliate programs and affiliations include, but are not limited to, the eBay Partner Network.
Thank you for that information. My vehicle is pre-Adblue and the DPF regeneration is not giving any trouble. I was curious to get an idea of how much fuel is burnt and lost in the DPF regeneration process.
Yeah, I am getting about 4 MPG better after the removal.
That's quite the improvement over the stock fuel consumption and then that's also over and above improved reliability I expect!
So far my only complaint has been massive oil consumption (which is not related to the DPF delete). I finally decided to try replacing the CVV to see if that would help - and when removing the air intake to access the CVV, I found the intake seal was trashed (see photos). I'm hoping this could be the culprit!
I'll report back after driving a few days to see if oil consumption is reduced. I re-seated the intake gasket best I could and will have to drive with it for a few days until my replacement arrives. Sure hope this helps. 3 quarts of oil per fill-up of fuel is getting expensive!
This is all good info gents. I'm new to GL and working on the swirls flap and oil cooler right now. Down the road the EGR/DPF delete seems inevitable so it will be nice to look intokinto this thread and pick your brains perhapsperhaps.
Wonder if it's worth a while to have the swirl flaps blocked open now that I have the intake out? I wouldn't be doing the EGR/DPF at this point. Does that even make sense to have them blocked open or will I have a bunch of codes and problems if the ECU is not remapped?
Don't do that. Unless you don't mind the constant CEL you'll have. After 2010, they added intake runner positon sensors. If you block them open you'll have either:
P2004 Intake runner control stuck open bank 1a
P2005 Intake runner control stuck open bank 2a
P2006 Intake runner control stuck closed bank 1a
P2007 Intake runner control stuck closed bank 2a
Or if you disconnect them, you'll have I think P2017 or something else. I know because I did exactly the same thing you're thinking of. It was not fun or easy to reinstall the swirl flap motor without removing the intake.
I would not recommend this if you are in an area that requires emissions checks. You are sure to fail.
Correct me if I'm wrong, but I thought the delete tune sends data to the ecu that the deleted emissions components are still present and working normally? We have an OBDII test here and I'm interested in any feedback on anyone that has gone through an inspection with delete tunes
I would not recommend this if you are in an area that requires emissions checks. You are sure to fail.
I'd like to know why you say no recommend? For diesels in my state they only do OBDII test and no tailpipe test. Is it the tailpipe test or visual inspection that you're correctly pointing out will be an issue and not the OBDII test? Or do you think even a good tune like Gazwould suggests below would still be a fail? If so why?
Originally Posted by Gazwould
A good tune does , readiness checks , it's the permameters that have been altered to accept different values .
Please chime in on which tune providers we would put in the "good" category? Doing research on all the options and ramifications and the emissions test is the "go", "no go" decider. Who is the best provider with verified folk passing their OBDII test after their delete tune?
TGcville, do you mind pointing me to who you used for the tune? I have ordered all the parts and tools following what you did. The last thing I need is a good tuner.
Last edited by Armani007; Nov 18, 2020 at 11:40 PM.
I started getting that towards the end, saw in DAS that a clogged exhaust may cause it, but still put all new orings on the intake side to be safe. Also hasn�t returned since remap.
My exhaust smell is fairly pronounced, only outside the cab, and that�s with the cat still in place. Seeing as the cat isn�t exactly helping cut down on the smell and will inevitably clog up itself, I plan on gutting it in the near future. I will say that the smell is a bit different than the diesel smell I�m used to, maybe due to the amount of oil I�m still burning? I had been running Amsoil cetane booster + injector cleaner, but not in the last two tanks. This is a junkyard motor, and when the Indy swapped it in, they didn�t program the new injectors in DAS. I did so last week and reset the adaptations. This may or may not help w the fuel dilution issue, but didn�t seem to really effect how the vehicle ran. Hopefully getting rid of the regeneration solved that. The next oil analysis will let me know. Hope to finish gathering catch can parts to install in the next week or so.
Cheers!
Before:
After:
TGcville, do you mind pointing me to who you used for the tune? I have ordered all the parts and tools following what you did. The last thing I need is a good tuner.
OK, the BDM frame arrived last night, so I removed the ECU to read my file to start the tuning process.
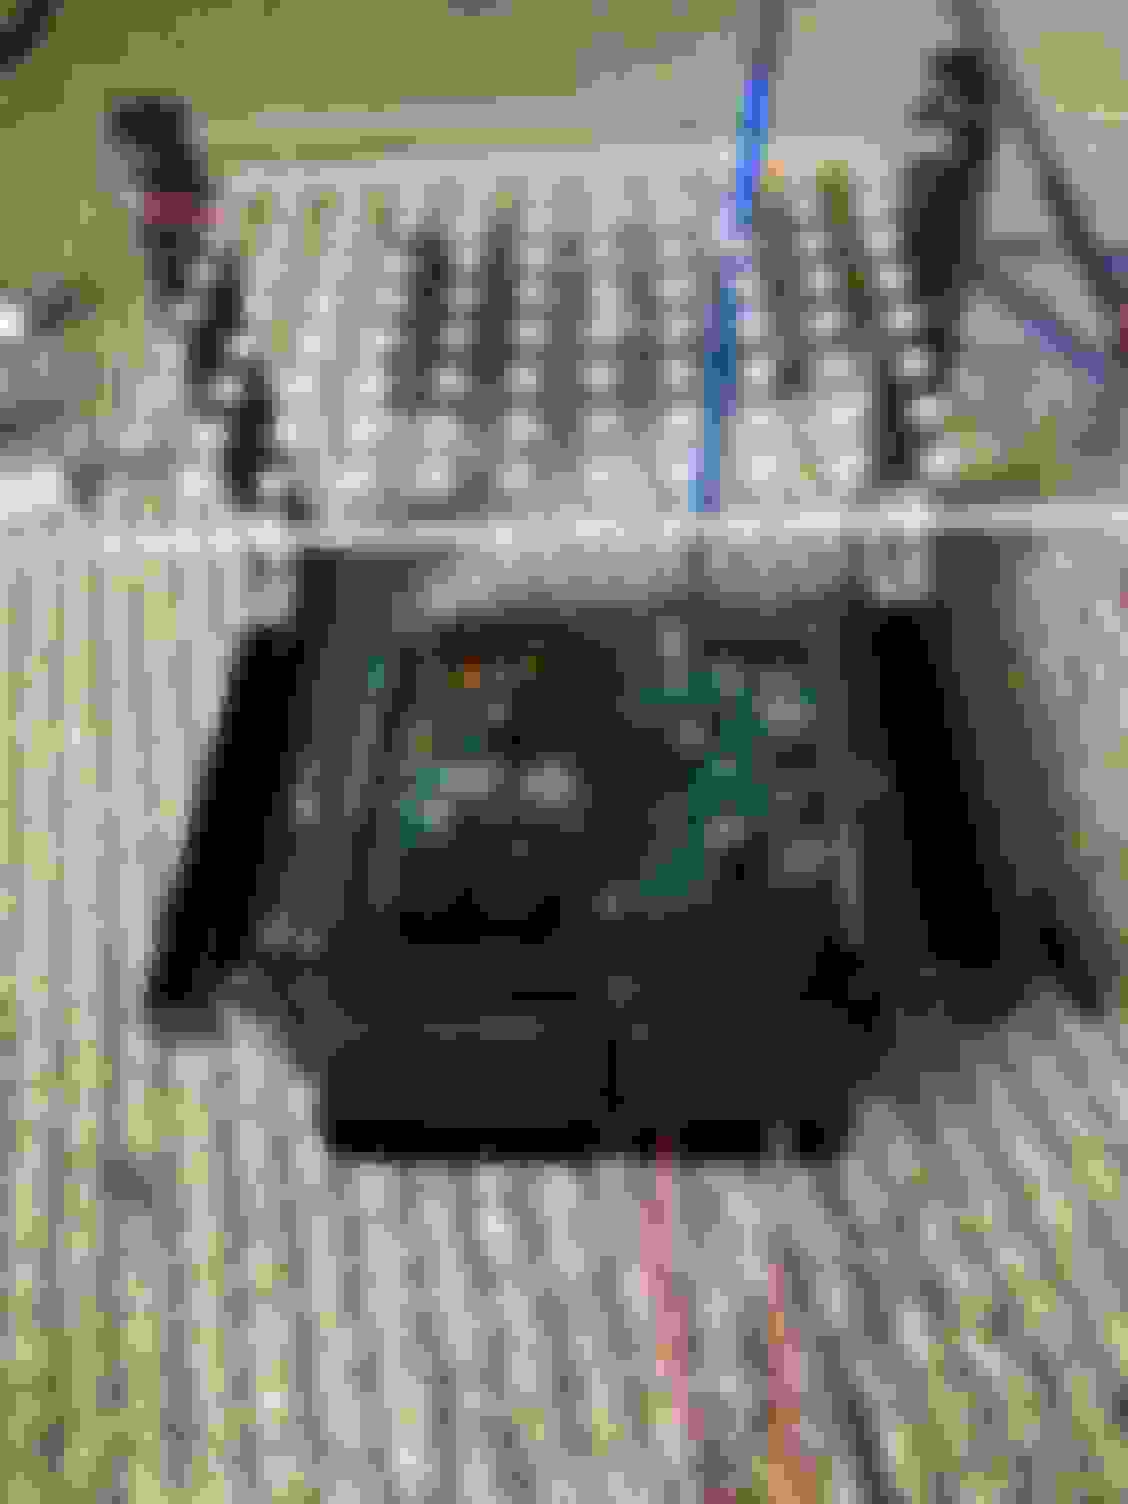
My ECU is located behind the wheel well on the passenger side. The wheel well cover is held in with several 10MM bolts, nuts, and 2 push pins. Once those were removed I was able to fold the cover down which revealed the ECU mounted on a frame. See attached photos.
It took me a little while to figure out how the ECU was secured to the frame. The frame is attached to the vehicle by 2 bolts on the right side of the ECU. I removed those and had to really maneuver the works around to get the ECU where I could access it. Once it was hanging out where I could look at it, I discovered that there is 1 screw holding the ECU to the frame. I likely could have removed that and left the frame in place (which would have made the removal much easier). I will verify this when I put the ECU back in place and update the posting.
Once removed from the vehicle, opening the ECU took about an hour. There are about 6 screws holding the cover on, but it is also sealed with a black silicone or similar adhesive. I used a heat gun to soften the adhesive, and several screwdrivers to pry the cover off. I definitely buggered up the edges a bit prying the cover off, but it should be fine when I re-seal and replace the screws. I see they sell ECU cover removal tools (which appear to be devices you just screw into the bolt holes to pry the cover off). If you have the time, order these. It will undoubtedly save you from mangling the cover as I did. I did not order these as I could not find a seller with them that did not have a month or more lead time. If you can plan ahead you should be able to order them for about $15.
Once the cover was off, reading my file was easy. The KTAG cable required about 5 leads to be connected to the pins on the ECU plug, and 1 connection was needed for the actual board inside the ECU, My BDM frame came with 4 boards and several spring loaded pins. It was designed to be soldered for use. Actually none of the boards was really proper for my ECU, but since I only needed 1 connection to the ECU board I just soldered 1 of the spring loaded pins into a board and used that to make the connection (see attached photo). It worked great. Once connected I loaded the KTAG software, selected my vehicle type, and was prompted to select a plugin. I was not sure which to use, so I guessed #155 from the list of about 6 plugins and tried to read. The software tried to read the ECU, identified it, and indicated it should be plugin #222. I backed out and started again using plugin #222 and the unit read all 3 areas of the ECU (took about 4 minutes). I saved the entire file when done, then it prompted me to also save the files individually (which saved 3 additional files - 1 for each of the 3 areas of the ECU read).
Rather than trying to modify the file myself I uploaded the readouts to a forum I joined specifically for ECU programmers. PM me for information on that. It cost $15 to join, but has been very helpful to learn about this stuff! When I woke up this morning I had already had 3 people contact me to offer the file modifications I requested. The costs ranged from $50 to $100 to modify the file for DPF/EGR/SCR/Flaps delete plus Stage 1 tuning. I went with an offer that was 80 Euros (about $90 US) based upon the users credibility on the forum. I hope to have the modified file later today to write back to the ECU.
My delete pipe is also scheduled to arrive today, so if I have time I will hopefully get that replaced tonight as well.
Perhaps tomorrow I will finally have this DPF nightmare behind me!
ECU on passenger side wheel well ECU connectors: pull on end to release clips The EDC17CP10 has 1 connection point on the board, the other connections are on the connection pins. the KTAG software shows exactly how to make the connections. My ECU sitting on the BDM frame with the KTAG connected.
ccrobin, thanks for starting this thread, it has been so helpful! I have everything on order, the last thing I need is a good tuner, do you mind pointing me to who you used?
I finally got around to doing mine, used a drop pin frame and ecu cover extractors. Went very well, used the OBD company in the UK. I wasn�t subject to the VAT as I was an �export� being in the US. Ran me $62 for the remap, included DPF, EGR, Adblue/SCR delete. Resealed it w gasket maker.
This is the SCR module that you must unplug, it�s located under the foam that holds the jack in the trunk.
So OVER my 2010 GL 350, so ovvverrrr it, and it's DPF issues. I wish I could just take it somewhere for the delete. This all sounds so complicated....to delete it that is. I think selling it would be much easier, but its just so frustrating as my GL is in very condition. My choices, sell it, pay ANOTHER $800 to repair it at the dealership (not the first trip to the dealer for DPF issues), or do a delete and hope the delete works?
So OVER my 2010 GL 350, so ovvverrrr it, and it's DPF issues. I wish I could just take it somewhere for the delete. This all sounds so complicated....to delete it that is. I think selling it would be much easier, but its just so frustrating as my GL is in very condition. My choices, sell it, pay ANOTHER $800 to repair it at the dealership (not the first trip to the dealer for DPF issues), or do a delete and hope the delete works?
Any suggestions?
I have seen several with the delete, and they work great. I had personal experience with your vintage GL after a delete. 35 MPG on the highway with no further DPF issues, ever. Just keep in mind it is still a 13 year old vehicle that will have maintenance issues, but man they are hard to beat.
Just spent some time reading through this very nice and informative thread. I also am in the same predicament. Great car and in great shape. Just over 100 000 kms. But crippled with emissions issues.
It is down again with the adblue countdown and nox sensor issues.
I am so frustrated with the overall costs of these emissions repairs.
I have a nice shop with a hoist in it. Have great car repair skills but I would say my electronics and computer skills are on the low end of the spectrum
Im afraid to start the car to move it and lower the countdown. LOL.
You can contact the guys at OBDTUNE.com to have the DEF removed.
They offer a hand-held module that works via OBD and installs the software directly into the ECU.
Installation is simple: you insert the module, a menu appears on the screen, select uninstall and wait 3-4 minutes, when the installation is complete, just pull the module out.
The only thing left is to disconnect the SCR unit in the trunk.
I didn't believe that the process would be so simple and exciting, I felt a little bit like a programmer .
The Artsiom manager answered all questions and was very polite. I recommend it to everyone!
Fewer are doing the tunes where emissions components are disabled since the US EPA is prosecuting/fining those companies.
Well , it's lucky that I am not in the US.
It would be great if someone with code/software could send me the tuned file. Or introduce a programmer who does it for a sensible price.
Thanks all
Mercedes SLR McLaren 722 S Is Extremely Rare Example Modified by McLaren
Slideshow: A one-of-one U.S.-spec Mercedes-Benz SLR McLaren Roadster became even rarer after a factory-backed transformation at McLaren's headquarters.


 .
.


