When you click on links to various merchants on this site and make a purchase, this can result in this site earning a commission. Affiliate programs and affiliations include, but are not limited to, the eBay Partner Network.
2007 GL450 found the mystical heater control valve!!!
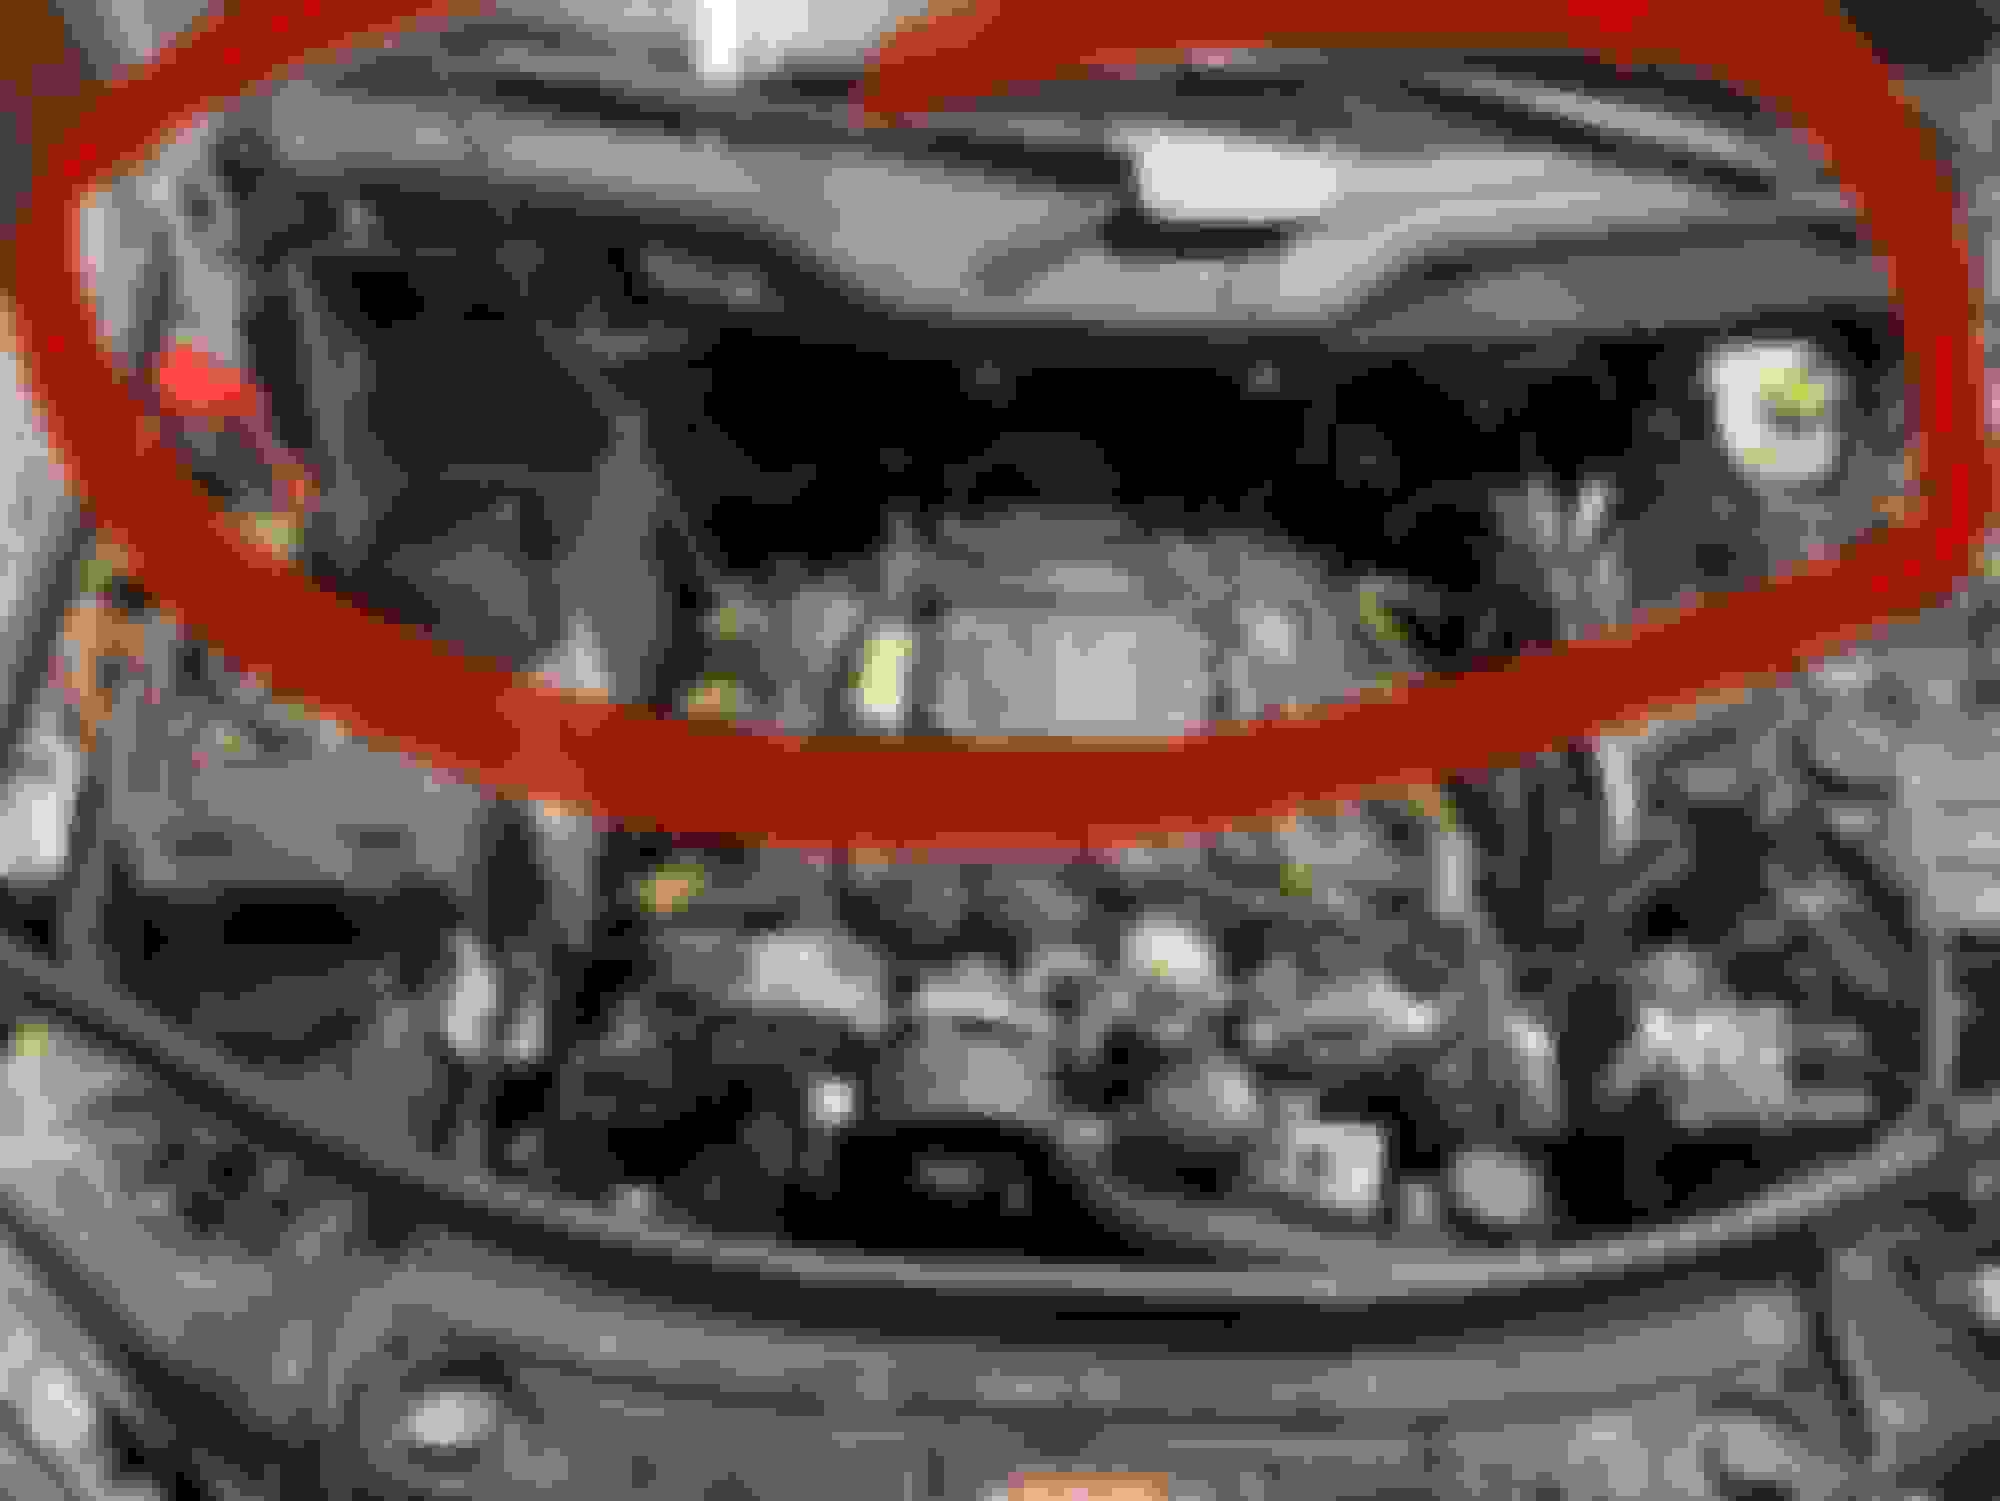
I’ve been looking the past week for the mystical location of the 2007 GL450 heater control valve, but couldn’t find it… BOOM. There is it is, in traditional Mercedes fashion, in the most complicated spot. It’s literally on the back of the motor.
Here’s the awesome part incase you wanna tackle this… you have to disassemble that entire fake wall!!! It’s outside of the little pocket under the windshield wipers. It’s below the mass airflow sensor.
I would recommend not removing the windshield wipers and that ledge. There’s metal brackets in the way, so there’s no point. It’ll just add more work disassembling it and putting it back together.
I think I’m going to rig myself up like Catherine Zeta Jones when she’s breaking in that vault. I have no flipping idea how to access that without becoming a contortionist!
Last edited by Scott Hart; Feb 15, 2022 at 11:08 PM.
That�s nothing, try changing a hcv on any aughts SAAB.
Fwiw the fake firewall comes apart pretty easy once the crossbrace and weatherstripping are out, and then you have pretty good access to everything at the back at the motor.
That fake wall is for sound, but it’s actually a lot more. It is structural. It helps hold the black plastic shelf up. It also keeps certain fittings out of the elements so they don’t corrode. Although it’s a pain, that was actually pretty damn smart. The inlet and outlet for the heater core if in there, and won’t corrode. They were really smart to put the controller valve outside in case it failed and started leaking. It helps keep any engine smells out. Just a heads up… It is a …. to reinstall. Not gonna lie. You have rubber gaskets that apparently the Keebler Elves installed.
The installation was seriously difficult. I didn’t think it would be, but 3 days later and I’m still sore. I’m 45, 5’10”, 162lbs and I’m pretty darn limber. As I’m auditioning to be a circus performer crouching and kneeling on what little hard structural surfaces of the motor I can find…
I took a picture with a Lysol can (FYI that’s the commercial can which is bigger than the can you buy at the store) so you can physically see the size. You can mentally think of the size ration in your mind, but then you see the picture and it REALLY sinks in how far back it is. Didn’t take that when it was apart, so remember all the way back to the window will be gone and that’s space you have to reach across too! There are so many wires and plugs up top that you can’t just lay across the motor. Plus the valve is nearly 1-1.5 feet down to the bottom bolt. Get a large mirror and a REALLY bright light. Also one of the magnetic things to pick up stuff you’ll drop. That’s more for putting up the wall. Trust me… You’re so exhausted at that point you’re hands may be a little tired.
I did end up having to remove the entire black shelf and the entire wiper assembly. I tried like hell, but wasn’t possible even with the hood pushed into the mechanics position.
In case you don’t know what the mechanics position is, raise your hood and look at the left strut and you’ll see a red button. Push and hold that, and push the hood further up. It’ll go into a vertical position. Just watch out for lights overhead! Lol…
(I gave you a couple of zoom in progression type photos so you get a better idea)
I’m kneeling on the beam above the radiator. Luckily I’m light, but wouldn’t recommend it.
There’s the meat and potatoes…. Now you see why I said get a large mirror and bright light. Zoom into the mirror and you’ll see a black hose with red and blue. That hose connects directly with the valve. You can see the actual connection point in the next picture.
The first picture is where that hose with the red and black goes in. Just need to use a small screw driver to lift a ring up and remove it completely. Then you have to wiggle it free. I would not recommend you remove it from the upper connector right before the fake wall. Let the upper connection support it to keep it out of your way for now. Once it’s free then disconnect it and get it out of the way. Tried just tucking it but as I tried to remove the valve from the block I would hit it and it would be back in the way. Be REALLY careful with the connector. Since it gets extremely hot back there plastic get’s brittle. Take a hook or small screwdriver and gently lift the grey button. Refer back to the photo in the mirror… That lower bolt is maybe 1” lower.
Then you see where apparently Mercedes hired the devil to engineer this! I broke the connector on the left and ended up having to dig it out. The unit comes with 2 gaskets installed. That thing is literally in the block. No connectors, just shoved directly into the block itself. You have to wiggle it out. Probable, when you are suspended from the ceiling or floating, which ever supper power you have, you are reaching around the motor through cables and hoses like you are hugging it. You have 0 leverage. I should have taken a picture, but it’s not just out in the open. Brilliantly there are actual parts of the block on either side! You have to keep wiggling and wiggling. I tried to get leverage with a screw driver, but the surface of the screw driver just turned it to one side, and didn’t do anything. Felt like I was going to break it, and truthfully didn’t know what it was connected to. Finally I had to grab a small novelty crow bar I had! I actually can’t find it. I think I might have to tear that apart and look! Like a surgeon that sows a dude up with his watch inside! Lol… It was the only thing I found that would help, but again you can’t just pry. There are a ton of cables.
It either opens or closest to flow of hot coolant to the cabin heater core based on demand for hot air. Is it weren�t there the heater core would be constantly heating the cabin.
It either opens or closest to flow of hot coolant to the cabin heater core based on demand for hot air. Is it weren�t there the heater core would be constantly heating the cabin.
Originally Posted by xrgallagher33xx
Did you do this because you didnt have heat or because it was leaking?
This was very helpful. I got yo tackle this project myself. After reading your post. I may decide not too.