When you click on links to various merchants on this site and make a purchase, this can result in this site earning a commission. Affiliate programs and affiliations include, but are not limited to, the eBay Partner Network.
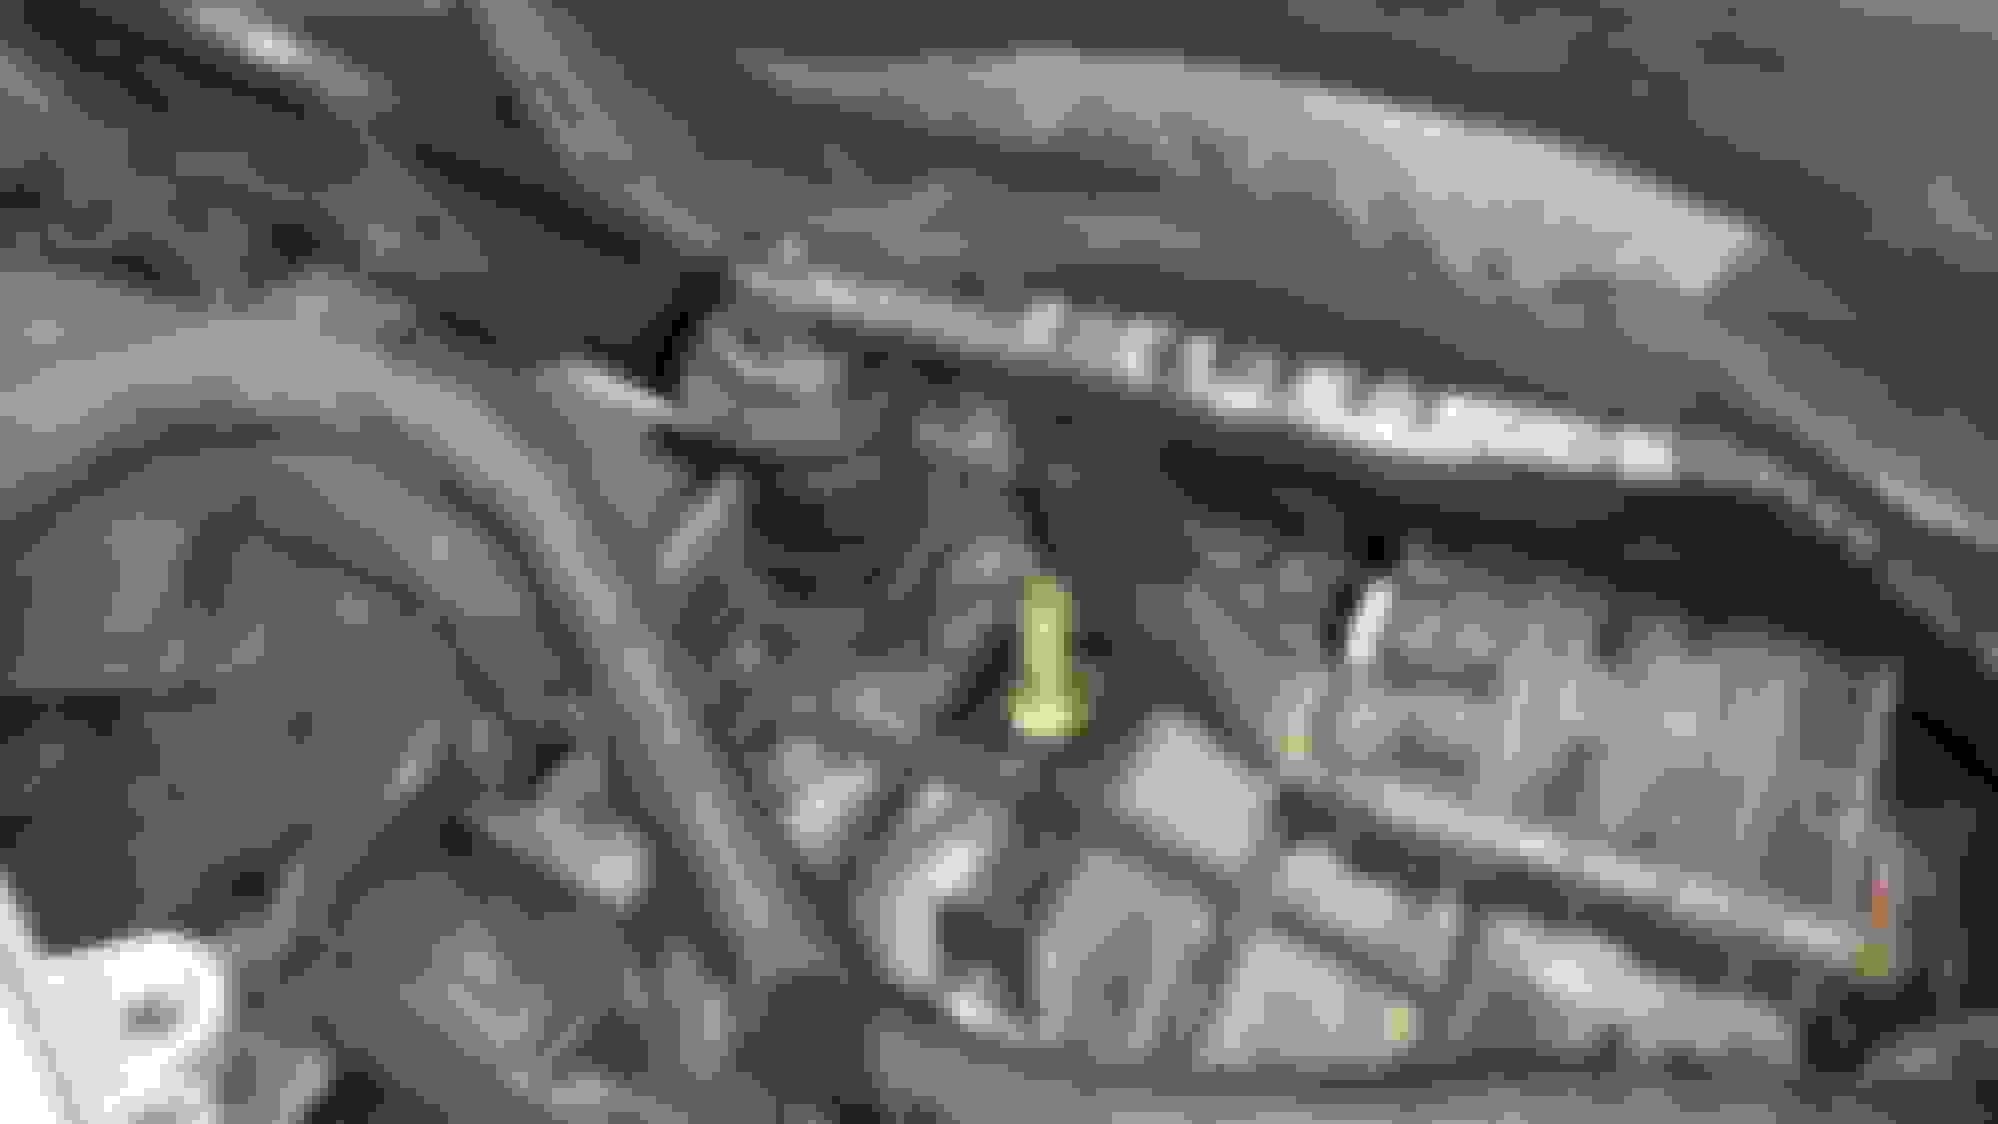
So I haven't posted much of the turbo and trans build I did a few weeks back, but will do so soon once I'm tuned. I completed the last bit of hardware mods this weekend, ending with a custom Turbosmart Race Port BOV. I decided to add a BOV to protect my new VTT turbos. I firmly believe the failures some people who have upgraded turbos have seen are due to the factory boost bleed strategy not being able to handle the additional airflow of the bigger turbos. This leads to compressor surge and stalling, stressing the shaft and bearings.
Since both turbos connect to the single intercooler feed, you really only need to vent one side as they are effectively linked. Given the cfm I expect from the VTT TURBOS, I wanted the highest flowing BOV I could get in a reasonably sized package. The 2nd Gen Turbosmart Raceport fit that bill. I was going to try and replicate the renntech diverter setup, but I found that the raceport and flange fit drivers side charge tube with enough clearance directly. I positioned it where I wanted, tacked it up and went to town with the TIG. It came out amazing if I do say so myself.
For a vacume source, I drilled the back of the intake manifold near the brake booster hoses. Then I tapped out for a 1/4" barb fitting (1/2 find thread) and screwed it in with epoxy plastic weld. Then ran some silicone vacume hose to the BOV, and worked perfect!
Now I can focus on getting it tuned, then I'll add meth later in the summer and see if we can't make some serious Jam!
Carbon intake is also my own . It's an overlay on stock pipes for cosmetic purposes only and still a work in progress. Wanted to cure them fast so put them back on the car to use engine heat to set them. Still need to sand and clear coat them. Next weekend project..lol.
KLR CLS, did you backpurge or use Solarflux to prevent carbide precipitation on the backside of the weld? There appears to be fair amount of undercutting, indicative of overheating, which causes carbide precipitation. Did you use 321 filler?
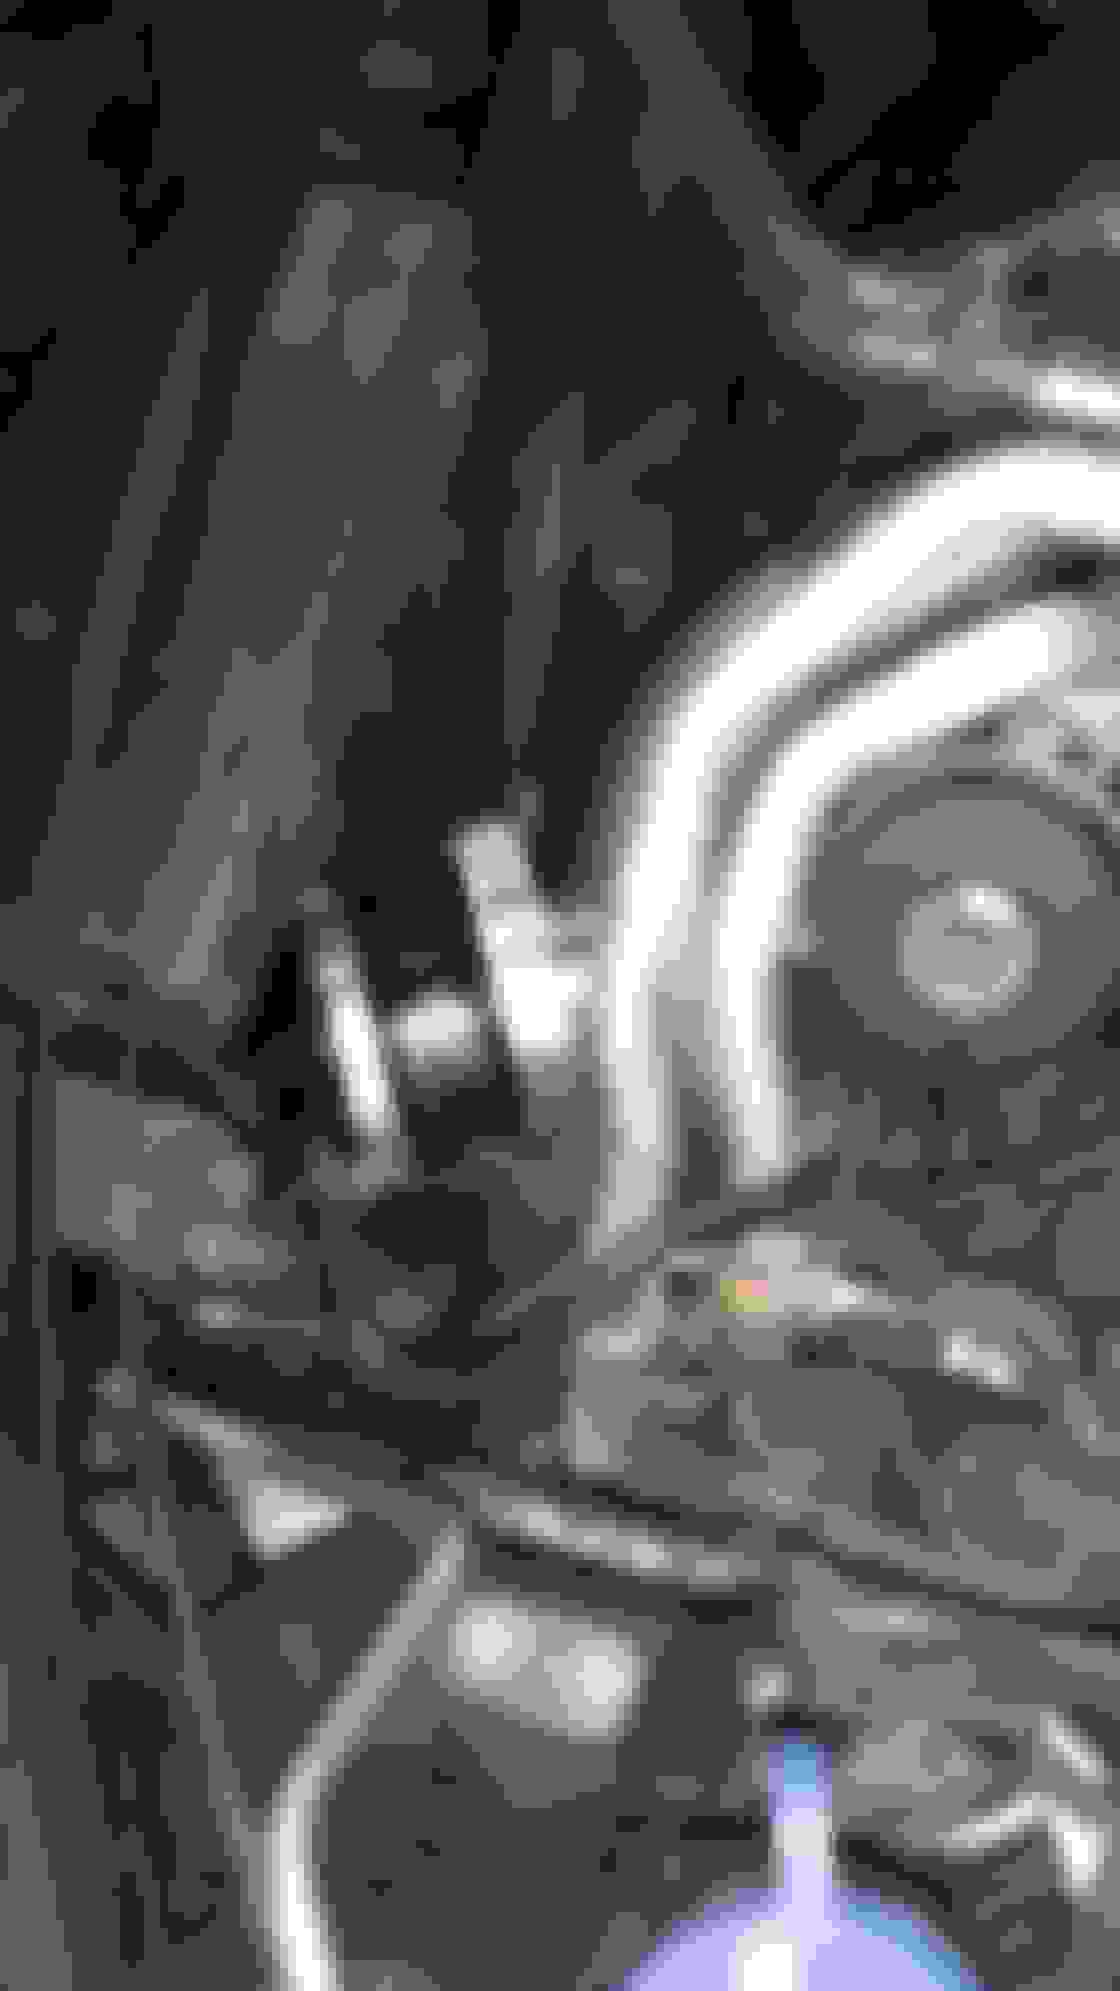
dav461, if you're going to install it yourself, I recommend you not remove the inlet tube from the turbocharger. If you remove the oil lines going into the oil filter housing, the inlet tube will have enough flex at the bottom connector to move out of the way and you can snake out the charge tube.
Sorry, but I didn't get you.
how shall I install new charge pipe without removing old from turbocharger?
i am interested in what you are saying, could you please describe it more briefly, will be very helpful.
There are four hard tubes on the engine, the outermost being the inlet tubes (the carbon-wrapped pipes in KLR CLS's photos) and the innermost being the charge tubes. The outermost are connected to the turbochargers and the innermost left (driver's side) is the one replaced by the RENNtech-modified unit. That must be completely removed, but in order to access it, you need to move the outermost enough to allow the innermost to slide past it. You can do that without removing the bottom connection of the outermost.
The clamp that connects it to the turbocharger is a bit of a pain to get to, whereas the two E10 bolts holding the oil lines to the filter housing are easily accessed.
KLR CLS, did you backpurge or use Solarflux to prevent carbide precipitation on the backside of the weld? There appears to be fair amount of undercutting, indicative of overheating, which causes carbide precipitation. Did you use 321 filler?
dav461, if you're going to install it yourself, I recommend you not remove the inlet tube from the turbocharger. If you remove the oil lines going into the oil filter housing, the inlet tube will have enough flex at the bottom connector to move out of the way and you can snake out the charge tube.
Given the thiness of the pipe, I went low on the amps and that meant having to wait a bit more for the puddle. Backpurged with argon from my mig at about 5cf/h. I think it it was 321 or 347, was some stuff I had in a tube for a while so not really sure. No surgaring on backside and its not really structural so wasn't that concerned. I am at best a layman, so think it came out alright.
There are four hard tubes on the engine, the outermost being the inlet tubes (the carbon-wrapped pipes in KLR CLS's photos) and the innermost being the charge tubes. The outermost are connected to the turbochargers and the innermost left (driver's side) is the one replaced by the RENNtech-modified unit. That must be completely removed, but in order to access it, you need to move the outermost enough to allow the innermost to slide past it. You can do that without removing the bottom connection of the outermost.
The clamp that connects it to the turbocharger is a bit of a pain to get to, whereas the two E10 bolts holding the oil lines to the filter housing are easily accessed.
I removed the inlet pipe, but only because when I had the motor out, I oriented the clamp in a way I could get it out easy. Thats probably not possible for the clamp in the factory position. I only needed to remove the closest oil feed tube as well. I am not sure you can get the charge pipe back in with inlet tube in place, but might be worth a try if you can't get the inlet tube off. Maybe pulling the fan assembly would let you at the clamp, and that only really takes 10 mins to remove.
Given the thiness of the pipe, I went low on the amps and that meant having to wait a bit more for the puddle. Backpurged with argon from my mig at about 5cf/h. I think it it was 321 or 347, was some stuff I had in a tube for a while so not really sure. No surgaring on backside and its not really structural so wasn't that concerned. I am at best a layman, so think it came out alright.
You're using straight argon in your MIG?
It seems counterintuitive, however going hotter and faster is the key to thin tubing. Lower amperage soaks the surrounding metal, increasing the heat-affected zone and creating conditions for carbide precipitation. The filler not only joins the pieces, but it cools the weldment, so traveling faster and adding filler faster achieves better results. Granted, that takes a lot of practice.
You probably know this, but I'll elaborate for the benefit of anyone reading this who doesn't weld: It's good you didn't have sugaring, but not because the piece isn't structural. The 'sugar' is chromium carbide, which is the chromium precipitating out of the metal, and without chromium, stainless no longer stains less and becomes mild steel. This means it will oxidize, and given the temperature differential between gasses in the tube and outside it, condensation will form on shutdown, accelerating oxidation. The carbide pieces will ultimately break free and be ingested by the engine.
Originally Posted by KLR CLS
I removed the inlet pipe, but only because when I had the motor out, I oriented the clamp in a way I could get it out easy.
Smart. I could see mine, but I realized that I could loosen it with some wobble extensions, but tightening it was going to be a bear.
Originally Posted by KLR CLS
I am not sure you can get the charge pipe back in with inlet tube in place, but might be worth a try if you can't get the inlet tube off. Maybe pulling the fan assembly would let you at the clamp, and that only really takes 10 mins to remove.
I hadn't thought of removing the fan assembly, mostly because I was able to get the inlet tube back in with a bit of rotation and wiggling. Countless hours of playing Tetris in my youth is really paying off.

 07-04-2017, 11:59 PM