When you click on links to various merchants on this site and make a purchase, this can result in this site earning a commission. Affiliate programs and affiliations include, but are not limited to, the eBay Partner Network.
The black strip or trim by the rear folding glass on my folding top broke near the bottom on the driver's side while raising my top. Is this hard to replace? I used double sided tape to hold it down, but every 5th or 6th time I operate the top, it breaks again. What adjustments may be needed to fix this? Thanks...
Not hard to replace, maybe a 3 on a scale of 10. First, block the roof open halfway.
You have to be gentle when beating the trim panel DOWN with a block of wood toward the trunk. May take a second set of hands to stabilize the plastic piece while tapping on it.
The trick is the little nub is on the inside (center of car) at 330mm from the top. Lift the INSIDE edge of the trim with a wedge about 3 mm to clear the nub.
Here's the WIS for it.
BTW - I tried a Vinyl wrap on these trim pieces to clear up some deterioration. There were micro fractures of the plastic, which held air, which heated up in the sun, which made bubbles appear on the wrap.
It was a good experiment in learning you can have NO air trapped under the wrap, and any surface flaws will be transferred right back to the surface.
Also - the 13 year old plastic is VERY brittle and the tabs that hold the trim in place were damaged. I need to buy new trim pieces.
Be warned if you do this yourself.
UPDATE: I did buy new trim pieces, installed them per the directions here, and all looks new again.
Last edited by kbob999; 05-29-2018 at 10:44 AM.
Reason: Update
Please forgive a slight hijacking of this thread. Until I read kbob999's response and then googled, I didn't realize that you could replace this with a new MB trim part. On mine, it looks like the top protective layer is wearing away, quite noticeably on the driver's side and just starting on the passenger side.
When working with these, make sure you work slowly, and it helps to have an assistant. There are nearly 20 plastic clips on the trim that hook into metal tabs on the frame and they are easy to break when removing, and easy to "miss one" when installing. An assistant can press inward on the panel with you push up on it to seat it so all the clips are properly engaged.
Both of mine were weathered, and the right side had cracked. I was able to use a Super Glue plastic bonding kit to fix the crack. I had to do some sanding to smooth out the surface so it would be flat and smooth. I then covered them with 3M Di-Noc fake carbon fiber film. I removed them to do this. You can cover them while in place, but it looks better if you wrap the film around the edges. On my first try, I had a lot of bubbles like kbob99 experienced. The secret is to have both parts heated. I did this on a nice hot day, leaving both the plastic trim and the 3M film in the sun for a few hours beforehand. I gently stretched the film when applying and wrapping. I am very happy with the results:
I revitalized an old DIY I did a number of years ago on trim replacement and pasted it below. The prices have likely changed and I am not sure if the website I listed below is even active. Also, if I am not mistaken, the WIS suggests opening the roof about half way or so. The way I did it was very simple. I would assume the WIS method would be better.
R230 side trim replacement DIY
Delamination of the rear window side trim covers seems to be a common problem for all R230s. The dealer will charge somewhere between $300 to $400 or more to replace the side trim. Replacing the side trim is simple and requires no special tools. This coupled with the high cost of dealer replacement makes for a perfect DIY project.
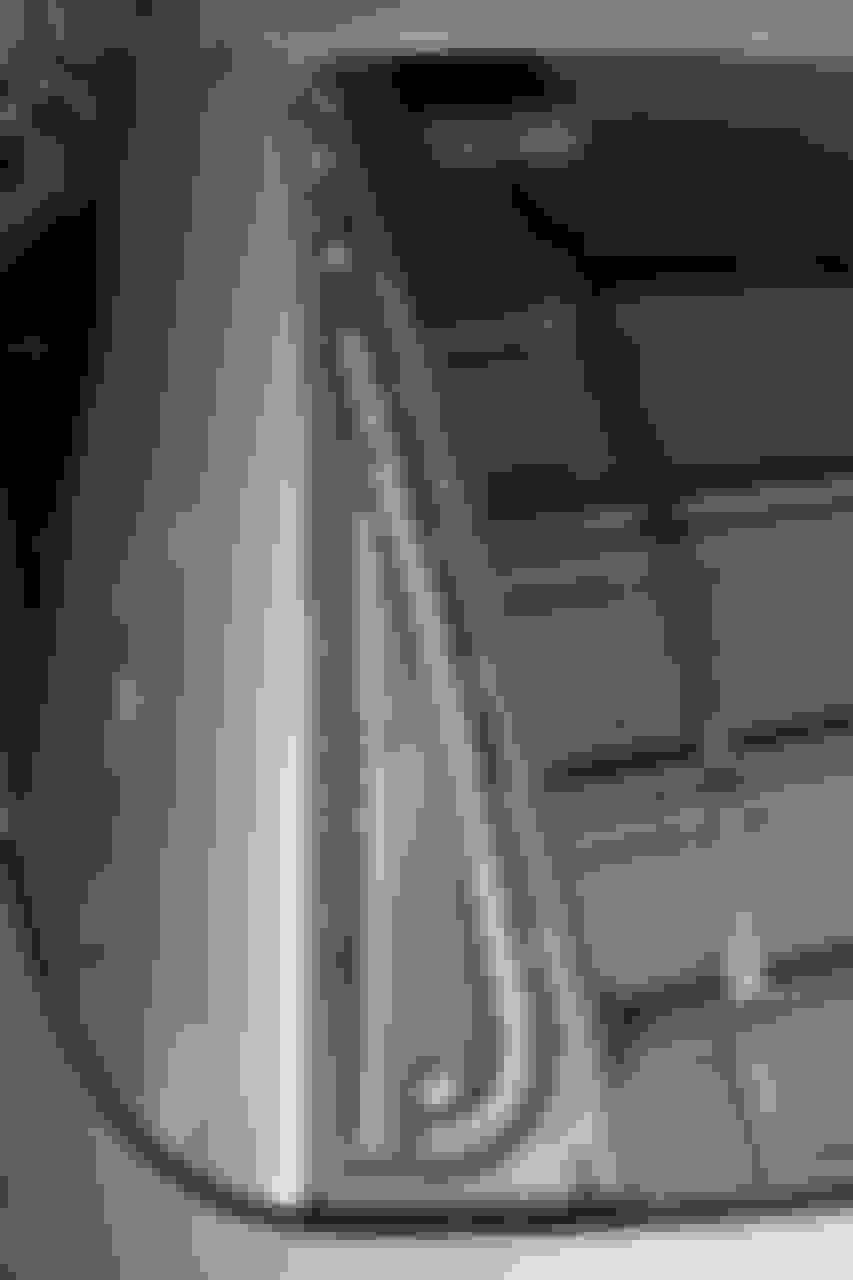
If your trim looks like the part in the foreground, this DIY is for you.
The trim pieces can be purchased from a number of online sources or your local dealer. I bought the parts through GetMercedesParts.com. Each trim piece cost $51.00. With shipping, (to Indianapolis) the total cost was $113.32. Below are the part numbers
Trim cover left: 2307920330
Trim cover right: 2307920430
I would assume the trim is the same for all R230 model years, but keying in your VIN on the parts store website will insure you get the right parts. Another way to find the trim is to click through Retractable top, Top and components, trim cover, Trim cover left (then right).
Step one is removing the old trim. The trim is held in place by a series of plastic tabs on the back which lock into metal slots that are fastened to the side window area. The trim must be moved about an inch or so down (toward the trunk) to unlock from the metal slots.
I first tried to grab the base of the trim with a pair of vise grips and pull down. It did not feel like the trim wanted to release. I then slid my fingers under the edges of the trim and gently lifted. I felt the part begin to release so carefully continued the process. I noticed that I could carefully snap a few of the tabs (break them) by doing this. This is not a problem for the old part. The trim was then loose enough to slide down and unlock.
The second trim piece came off much easier. I simply pushed in on the trim with the palms of both hands while attempting to slide down toward the trunk. I felt the part move slightly so carefully continued the process until the tabs cleared the slots and released.
It appears that removing every piece can be just a bit different. Some will come off as easily as my second piece and others might be more of a beotch to remove. You might have to tap on the top of the trim, pull from the bottom with vise grips or lift and pry from the sides. If all else fails, it looks as if you can safely lift the trim enough to snap many of the plastic tabs off. The slots are metal and quite sturdy so it is doubtful they could be damaged. My word of caution is to be careful not to inadvertently damage another part of the car while attempting to pry off the trim.
Below you can see the mounting slots for the trim piece. Notice the foam stuff. It is sticky like double sided adhesive on foam weather stripping.
Before you install the new trim, take a minute and have a look at the mounting area and specifically, the mounting slots. Make sure there is no debris or possibly broken tabs from the old trim in or around the slots that could hamper the new install. I pulled out my shop vac and cleaned the area well to make sure.
Inspect the slots carefully. I found one that was bent down. I am not sure if I did it or if it was always that way. My guess is the later. I used a flat screw driver to gently pry the slot back into proper position.
(see tab on the left)
Once everything looks good, mount the new trim. Start with the trim about an inch below its installed position. Carefully slide the trim toward the top of the roof while putting downward pressure on the trim with both hands spread across the part to insure all of the tabs lock into the slots. You just have to feel this one a bit. Take your time being certain all of the tabs are sliding into the slots. You can tell by feel. It will be obvious when the trim has locked up into the installed position.
If some of the tabs did not seat properly, carefully slide the new trim back down and try to re-seat. Patients and caution will pay off.
The results:
This is an easy straight forward DIY. You will be happy with the results. I am not sure why I did not do it a long time ago.
My trim broke already 2 X when opening the roof. Only the left one. The last one I replaced and probably opened the roof 10 x w/o issue and then boom - the trim gets caught somehow and breaks off. Anybody had any similar experience?
My trim broke already 2 X when opening the roof. Only the left one. The last one I replaced and probably opened the roof 10 x w/o issue and then boom - the trim gets caught somehow and breaks off. Anybody had any similar experience?
The WIS shows a clearance measurement required for the trim panel. It may be your clearance is incorrect, or the clips are not all engaged, causing the panel to snag. Take a look at the previous post of mine for the clearance details in the WIS. See what your looks like.
If the panel is not slid all the way up, it will definitely bind. It fits very tightly, so often times, it's necessary to use a hammer and a plastic block to gently tap it in place.
I did a vinyl wrap on Saturday, it came out great. The only problem is, it needs to be sanded down to a smooth surface, or else it�ll show on the wrap.
I did a vinyl wrap on Saturday, it came out great. The only problem is, it needs to be sanded down to a smooth surface, or else it�ll show on the wrap.
That does look nice, great job. I had the same issue a year ago and had the dealer replace it when it went in for service. About 80$ to install both sides. I don't know if anyone else is experiencing this, but the one thing in that area of the car that really irks me is the bottom lining, where the glass meets the trunk. It has a fading rubber-like lining and the OCD in me is trying to figure out a way to fix it, either by spray painting it or some other reasonable means. I will post a picture when I get back home this evening to show what I am talking about.
Last edited by Deutsche_ Amg; 03-04-2019 at 04:59 PM.
Reason: adding pictures
Thanks for posting this information very helpful ....... I’m just about to repair my leaking bottom rear window seal on my 2008 SL350 and when preparing noticed that some of the material that the c panel trim is seated on is perished / protruding ( see attached pic ) from under the trim. I had the both trims replaced before I bought the car, as they were discoloured as mentioned elsewhere on this post.
I just wanted to check and get some advice ( before I fix the seal ) that if water gets in behind the trim past this perished / protruding material can it get inside the car? ....... any advice would be greatly appreciated.
I revitalized an old DIY I did a number of years ago on trim replacement and pasted it below. The prices have likely changed and I am not sure if the website I listed below is even active. Also, if I am not mistaken, the WIS suggests opening the roof about half way or so. The way I did it was very simple. I would assume the WIS method would be better.
R230 side trim replacement DIY
Delamination of the rear window side trim covers seems to be a common problem for all R230s. The dealer will charge somewhere between $300 to $400 or more to replace the side trim. Replacing the side trim is simple and requires no special tools. This coupled with the high cost of dealer replacement makes for a perfect DIY project.
If your trim looks like the part in the foreground, this DIY is for you.
The trim pieces can be purchased from a number of online sources or your local dealer. I bought the parts through GetMercedesParts.com. Each trim piece cost $51.00. With shipping, (to Indianapolis) the total cost was $113.32. Below are the part numbers
Trim cover left: 2307920330
Trim cover right: 2307920430
I would assume the trim is the same for all R230 model years, but keying in your VIN on the parts store website will insure you get the right parts. Another way to find the trim is to click through Retractable top, Top and components, trim cover, Trim cover left (then right).
Step one is removing the old trim. The trim is held in place by a series of plastic tabs on the back which lock into metal slots that are fastened to the side window area. The trim must be moved about an inch or so down (toward the trunk) to unlock from the metal slots.
I first tried to grab the base of the trim with a pair of vise grips and pull down. It did not feel like the trim wanted to release. I then slid my fingers under the edges of the trim and gently lifted. I felt the part begin to release so carefully continued the process. I noticed that I could carefully snap a few of the tabs (break them) by doing this. This is not a problem for the old part. The trim was then loose enough to slide down and unlock.
The second trim piece came off much easier. I simply pushed in on the trim with the palms of both hands while attempting to slide down toward the trunk. I felt the part move slightly so carefully continued the process until the tabs cleared the slots and released.
It appears that removing every piece can be just a bit different. Some will come off as easily as my second piece and others might be more of a beotch to remove. You might have to tap on the top of the trim, pull from the bottom with vise grips or lift and pry from the sides. If all else fails, it looks as if you can safely lift the trim enough to snap many of the plastic tabs off. The slots are metal and quite sturdy so it is doubtful they could be damaged. My word of caution is to be careful not to inadvertently damage another part of the car while attempting to pry off the trim.
Below you can see the mounting slots for the trim piece. Notice the foam stuff. It is sticky like double sided adhesive on foam weather stripping.
Before you install the new trim, take a minute and have a look at the mounting area and specifically, the mounting slots. Make sure there is no debris or possibly broken tabs from the old trim in or around the slots that could hamper the new install. I pulled out my shop vac and cleaned the area well to make sure.
Inspect the slots carefully. I found one that was bent down. I am not sure if I did it or if it was always that way. My guess is the later. I used a flat screw driver to gently pry the slot back into proper position.
(see tab on the left)
Once everything looks good, mount the new trim. Start with the trim about an inch below its installed position. Carefully slide the trim toward the top of the roof while putting downward pressure on the trim with both hands spread across the part to insure all of the tabs lock into the slots. You just have to feel this one a bit. Take your time being certain all of the tabs are sliding into the slots. You can tell by feel. It will be obvious when the trim has locked up into the installed position.
If some of the tabs did not seat properly, carefully slide the new trim back down and try to re-seat. Patients and caution will pay off.
The results:
This is an easy straight forward DIY. You will be happy with the results. I am not sure why I did not do it a long time ago.
My left panel is broken too. Please give me an email or an online store so that I can buy this with delivery to Israel.
Great job! Thanks for the very detailed description! My left panel is broken too. Please give me an email or an online store so that I can buy this with delivery to Israel. Great job! Thanks for the very detailed description! My left panel is broken too. Please give me an email or an online store so that I can buy this with delivery to Israel.
I would check eBay. If you have no luck at all locating a source, send me a PM. In the next few days I will be looking at a parts car near my home, and it's likely to have these panels you seek.
My left panel is broken too. Please give me an email or an online store so that I can buy this with delivery to Israel.
Great job! Thanks for the very detailed description! My left panel is broken too. Please give me an email or an online store so that I can buy this with delivery to Israel.
Great job! Thanks for the very detailed description! My left panel is broken too. Please give me an email or an online store so that I can buy this with delivery to Israel.
I foolishly used a pair of pliers to yank off the old trim. This resulted in the bottom retaining clip bending and becoming misaligned. Determined to really screw this up I fitted the trim piece anyway. Of course the trim broke the first time I opened the roof.
I have new trim pieces but the metal retaining clip is strong and flexible making it hard to push back into place. It�s floating a few millimeters too high. Somebody help me before I destroy my beautiful car!
 11-10-2016, 11:23 PM


 ....... I’m just about to repair my leaking bottom rear window seal on my 2008 SL350 and when preparing noticed that some of the material that the c panel trim is seated on is perished / protruding ( see attached pic ) from under the trim. I had the both trims replaced before I bought the car, as they were discoloured as mentioned elsewhere on this post.