


DIY Quaife Install

MBWorld Fanatic!


Joined: Jan 2007
Posts: 3,342
Likes: 11
From: PA
S600, GL450, GLC 43
Here's what I've got so far. I'm still waiting on the Silkolene gear lube arrive, and when it does I'll soak the diff and gears then put it all back together. I won't go into excrutiating detail because if you undertake this project you should already have the appropriate tools, WIS, and good mechanical intuition.

Everytime some like you, BrianS, gives me just alittle bit more info, I have to open up my wallet to do more mods, THANKS MAN

GREAT INFO/PICS/DIY You the man

See yeah


Banned
Joined: May 2004
Posts: 3,797
Likes: 2
From: Richmond Hill, Ontario
2003 E55 AMG
Hey Brian... I wouldnt mind a VRP Washington location... Are you looking for work??? 

Actually, the other shop I'm sure had the ability to do it but they only had one guy to do the actual work. They had the STAR tool so I would go there for anything requiring that level of diagnosis. After reading WIS and staring at the diff and suspension for a little while, I figured, oh hell, I'll just do it myself. Much better quality control anyway.
Thread Starter
Senior Member
Joined: Apr 2007
Posts: 256
Likes: 9
From: Maryland
2004 E55 AMG
Thread Starter
Senior Member
Joined: Apr 2007
Posts: 256
Likes: 9
From: Maryland
2004 E55 AMG
Super Member
Joined: Jul 2007
Posts: 566
Likes: 0
2004 E55 AMG and 2003 C320 4Matic Miss my 993 Turbo above!!
Thread Starter
Senior Member
Joined: Apr 2007
Posts: 256
Likes: 9
From: Maryland
2004 E55 AMG
It took me a weekend since I was doing other things as well. I'm sure I could have done it in a day with miniminal interuptions, but I was also being extra **** retentive on the specs because I feel these things should be done correctly the first time. Invest a little more time up front planning and you'll spend a whole lot less time on the back end fixing if something goes wrong from rushing. My personal philosophy at least. By the way, handles great, no more TC light, and definitely worth it.
MB World Stories
The Best of Mercedes & AMG

Manual Mercedes? 6 Times Sindelfingen Let Drivers Have All The Fun
Verdad Gallardo
Mercedes SLR McLaren 722 S Is Extremely Rare Example Modified by McLaren
Verdad Gallardo
8 Classic Boxy Mercedes Designs That Have Aged Like Fine Wine
Verdad Gallardo
Flawlessly Restored Mercedes 190E Evo II Heads to Auction
Verdad Gallardo
Electric Mercedes C-Class Unveiled: 11 Things You Need to Know
Verdad Gallardo
Mercedes EQS Gets A Major Update: Everything You Need to Know
Verdad Gallardo
5 Underrated Mercedes-Benz Models That Don't Get the Love They Deserve
Verdad Gallardo
Mercedes 300D Has Pushed Well Past 1 Million Miles and It Ain't Stopping
Verdad Gallardo
10 Most Reliable Mercedes-Benz Models You Can Buy Used
Verdad Gallardo
Senior Member
Joined: Aug 2006
Posts: 340
Likes: 0
From: San Diego, CA
Great write up and job brian! you truly are amazing... I will tell you that I do not miss wrenching on the garage floor, but its projects like these that help us enjoy driving around in our own work on a daily bases.
We have a few more LSD's in stock if you anyone around you would like the installed by you.
We have a few more LSD's in stock if you anyone around you would like the installed by you.
MBWorld Fanatic!


Joined: May 2003
Posts: 4,005
Likes: 106
From: Houston, TX
2015 E250D
Great write up brian. In addition to Brian's list, I would like to mention the following:
1. Don't mix the left and right side components up.
2. Use factory MB Sealant to reseal the rear cover
3. Don't reuse the side seals. Use NEW ones always
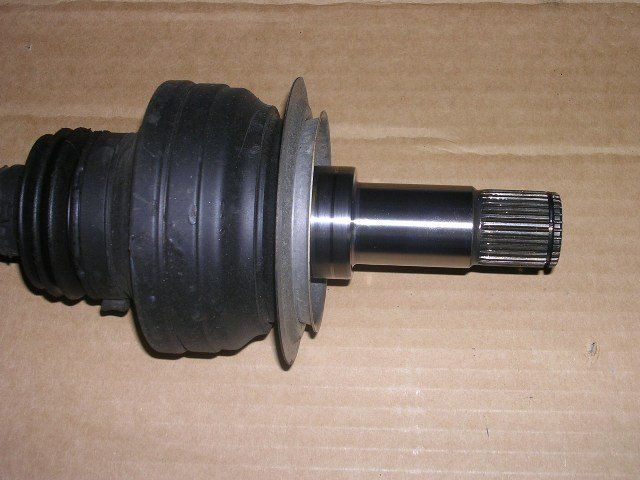
4. Be careful not to damage the ABS ring on the end of the half shaft
5. Don't use a pry bar to get the half shaft off. Give it a good pull
1. Don't mix the left and right side components up.
2. Use factory MB Sealant to reseal the rear cover
3. Don't reuse the side seals. Use NEW ones always
4. Be careful not to damage the ABS ring on the end of the half shaft
5. Don't use a pry bar to get the half shaft off. Give it a good pull
Thread Starter
Senior Member
Joined: Apr 2007
Posts: 256
Likes: 9
From: Maryland
2004 E55 AMG
Great write up brian. In addition to Brian's list, I would like to mention the following:
1. Don't mix the left and right side components up.
2. Use factory MB Sealant to reseal the rear cover
3. Don't reuse the side seals. Use NEW ones always
4. Be careful not to damage the ABS ring on the end of the half shaft
5. Don't use a pry bar to get the half shaft off. Give it a good pull
1. Don't mix the left and right side components up.
2. Use factory MB Sealant to reseal the rear cover
3. Don't reuse the side seals. Use NEW ones always
4. Be careful not to damage the ABS ring on the end of the half shaft
5. Don't use a pry bar to get the half shaft off. Give it a good pull
I agree 100%. Also, the left bearings are a few mm thicker than the right bearings so be aware like Sunil said.
MBWorld Fanatic!


Joined: Jul 2005
Posts: 3,174
Likes: 19
From: London, UK
No longer stock '06 E55, A3 3.2 Quattro, GLE 400d, R107 280SL, Golf Polo
Anyone got part numbers for the replacement parts required to do the install?
Also perhaps the part numbers for the ring gears / pinion gear + bearings should I want to go to 2.82 ratio?
Also perhaps the part numbers for the ring gears / pinion gear + bearings should I want to go to 2.82 ratio?
Last edited by stevebez; Jul 8, 2009 at 10:52 AM.
MBWorld Fanatic!
Joined: Jan 2009
Posts: 7,659
Likes: 67
From: Atlanta
2006 E55 AMG
I wish they made steeper gears for the E55? I would run with a 3.27 or there about for even more violent acceleration. We should have gearing so that 4th tops out at 150mph max, maybe even 140mph which would need a gear between 3.27 and 3.55. Imagine how hard that E55 would get out the hole with a quaiffe and those gears.


Junior Member
Joined: Sep 2010
Posts: 52
Likes: 0
E550
My MB tech cannot find the specs in the manual, and he is **** about those details. He spoke with a merc service manager who indicated that the unit comes fully assembled from Germany so specs are not available.
Super Member
Joined: May 2003
Posts: 890
Likes: 4
From: Boise, ID, USA
300D, 500E, E420
http://www.w124-zone.com/downloads/M...s/35-0550D.pdf
Page 2, bolt # 13a, torque spec is on page 17 & 18. Time to send them back to MB school for a referesher course, lol...

Thread Starter
Senior Member
Joined: Apr 2007
Posts: 256
Likes: 9
From: Maryland
2004 E55 AMG
Here's what I've got so far. I'm still waiting on the Silkolene gear lube arrive, and when it does I'll soak the diff and gears then put it all back together. I won't go into excrutiating detail because if you undertake this project you should already have the appropriate tools, WIS, and good mechanical intuition.
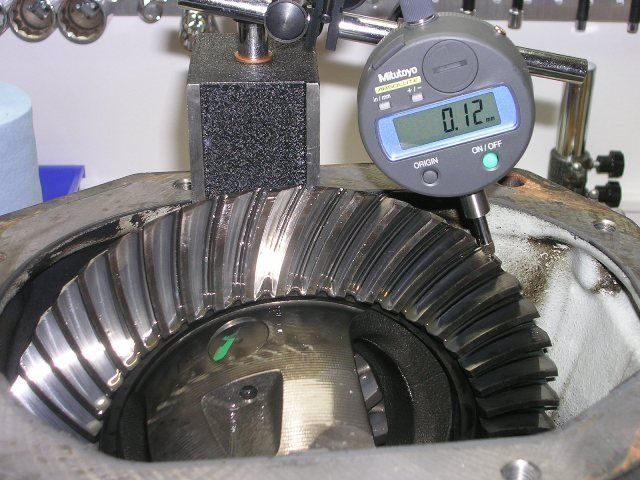
According to WIS, the factory backlash spec is .10-.16mm. The stock diff measured .12mm backlash and I was at .13mm with the Quaife....no shims needed. I used gear marking compound to check the wear pattern as well. All is good.
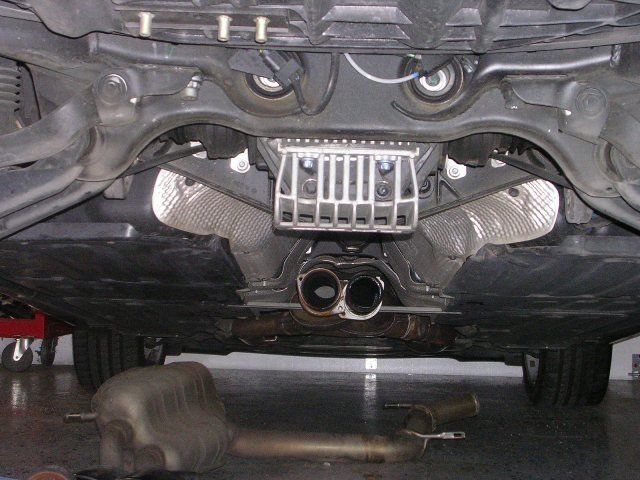
Jack up car, remove wheel, remove center cap, mount wheel back, lower, loosen axle nut (32mm socket), raise car back up, and remove back half of the exhaust. At some point disconnect the SBC harness under the hood.
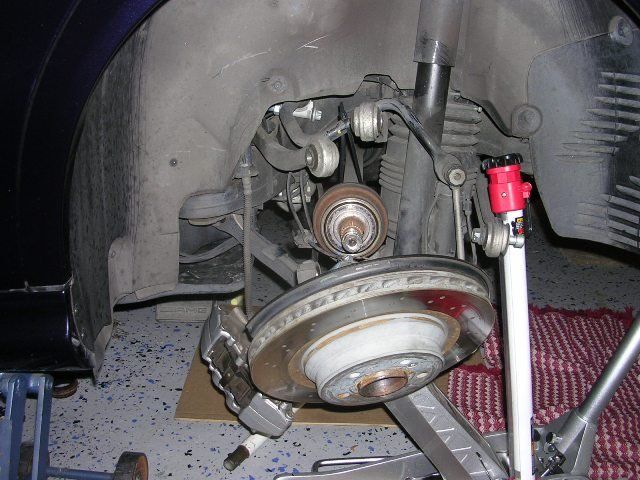
Disassemble one side of the suspension. I chose left because it was closed to my workbench but either side is fine. Slide axle out of wheel carrier.
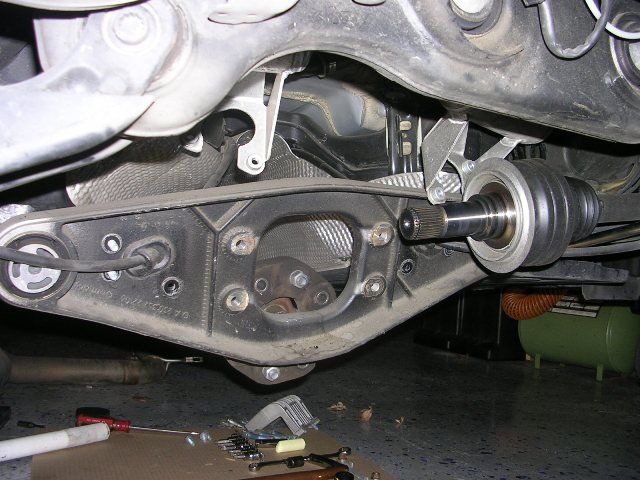
Pry axle out of differential housing.
Disconnect drive shaft, unbolt differential support housing, lower diff some and pry out the other axle.
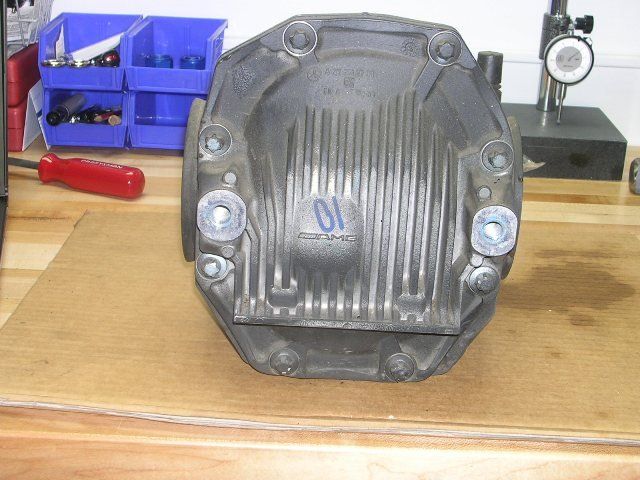
Now the patient is ready for surgery...
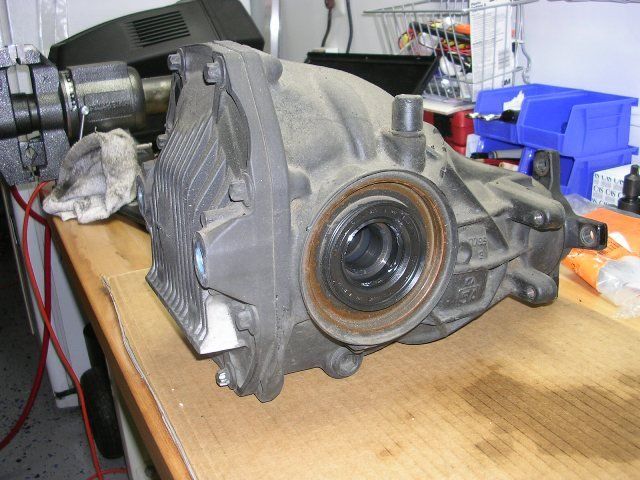
Remove both axle seals.
Remove cover and drain remaining fluid.
Backlash measured on stock differential. (I did this just to make sure)
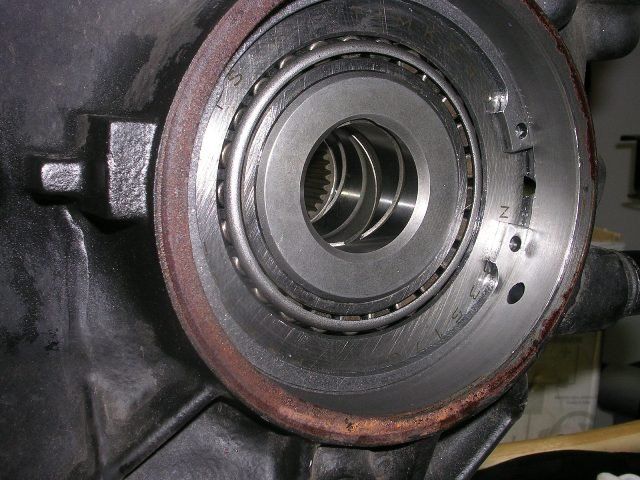
Once the seals are removed you'll see the bearing races held in with big *** circlips. Remove them.
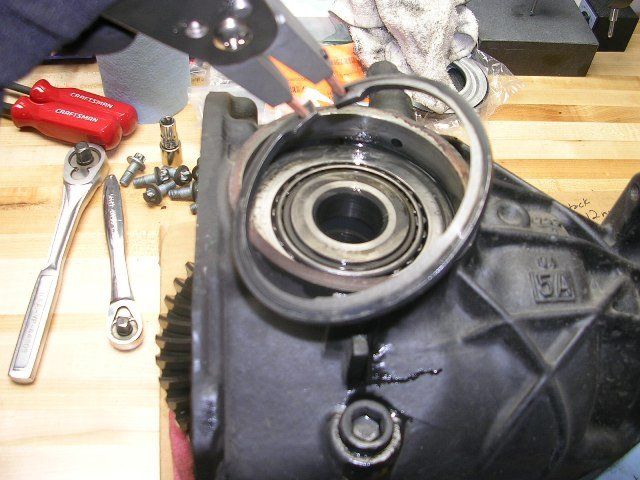
Next remove the bearing races. I used a strong magnet for this.
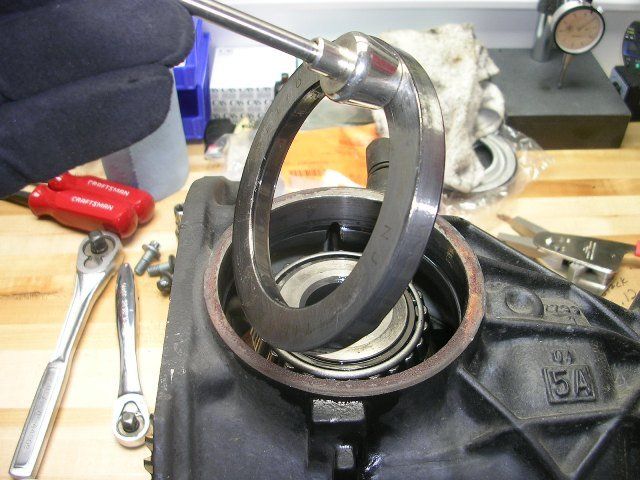
Do this on the other side as well and turn out the stock diff.
Mount stock diff in bench vise and remove ring gear.
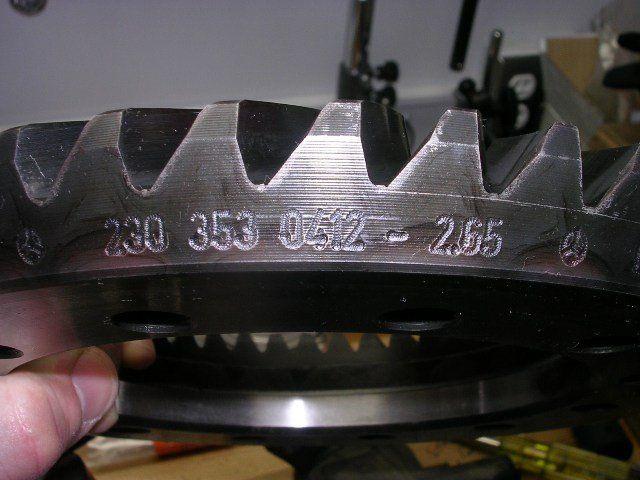
Here's the stock compared to the Quaife.
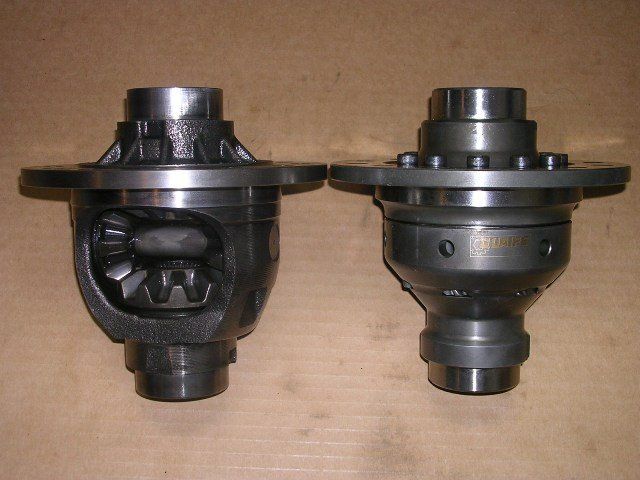
Transfer the ring gear and install new bearings.
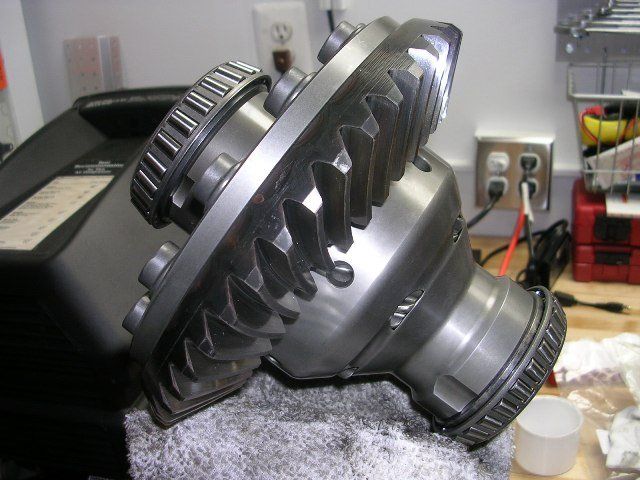
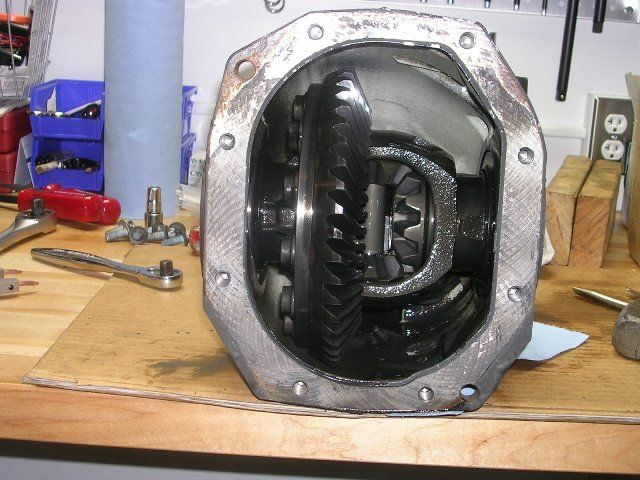
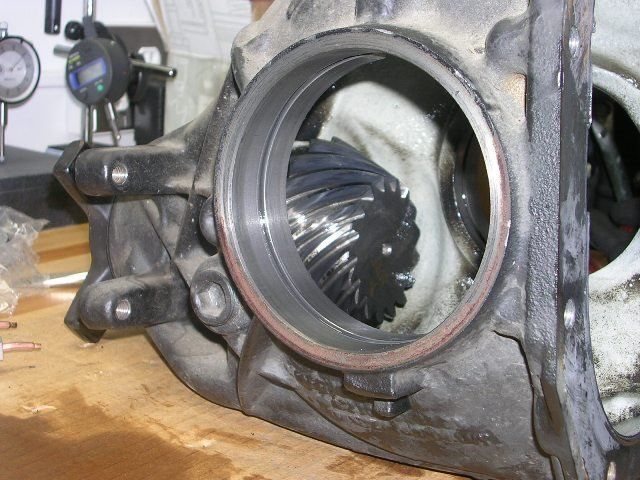
Clean the case and prep for the new unit.
Install Quaife, new bearing races, and circlips. Make sure you don't block the lube hole in the circlip groove.
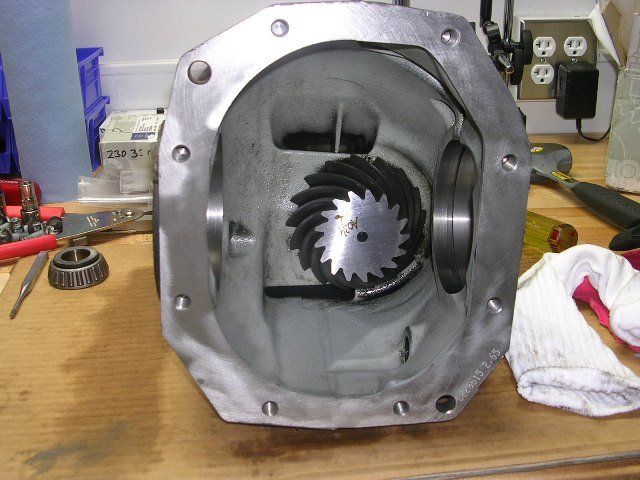
Quaife installed. Check backlash. Mine was within spec. No shims required.
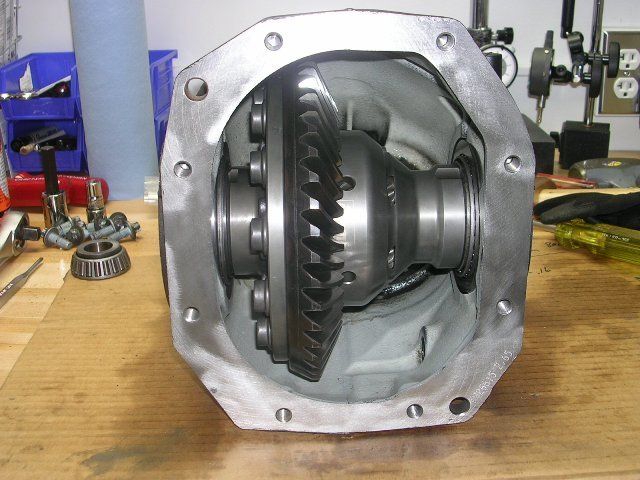
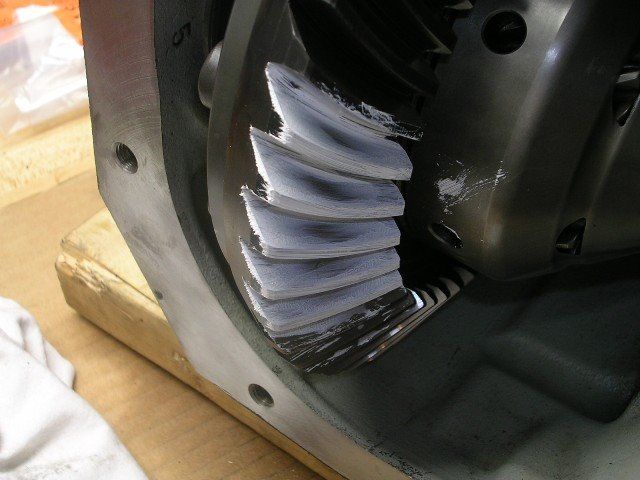
As additional check I applied gear marking compound on several areas so I could read the contact patch. Looks perfect to me.
Once my gear lube arrives I'll prelube all the moving parts, install new axle seals, and button it all up. Then it's just reversing the removal order of all the suspension parts and test drive.
According to WIS, the factory backlash spec is .10-.16mm. The stock diff measured .12mm backlash and I was at .13mm with the Quaife....no shims needed. I used gear marking compound to check the wear pattern as well. All is good.
Jack up car, remove wheel, remove center cap, mount wheel back, lower, loosen axle nut (32mm socket), raise car back up, and remove back half of the exhaust. At some point disconnect the SBC harness under the hood.
Disassemble one side of the suspension. I chose left because it was closed to my workbench but either side is fine. Slide axle out of wheel carrier.
Pry axle out of differential housing.
Disconnect drive shaft, unbolt differential support housing, lower diff some and pry out the other axle.
Now the patient is ready for surgery...
Remove both axle seals.
Remove cover and drain remaining fluid.
Backlash measured on stock differential. (I did this just to make sure)
Once the seals are removed you'll see the bearing races held in with big *** circlips. Remove them.
Next remove the bearing races. I used a strong magnet for this.
Do this on the other side as well and turn out the stock diff.
Mount stock diff in bench vise and remove ring gear.
Here's the stock compared to the Quaife.
Transfer the ring gear and install new bearings.
Clean the case and prep for the new unit.
Install Quaife, new bearing races, and circlips. Make sure you don't block the lube hole in the circlip groove.
Quaife installed. Check backlash. Mine was within spec. No shims required.
As additional check I applied gear marking compound on several areas so I could read the contact patch. Looks perfect to me.
Once my gear lube arrives I'll prelube all the moving parts, install new axle seals, and button it all up. Then it's just reversing the removal order of all the suspension parts and test drive.


