When you click on links to various merchants on this site and make a purchase, this can result in this site earning a commission. Affiliate programs and affiliations include, but are not limited to, the eBay Partner Network.
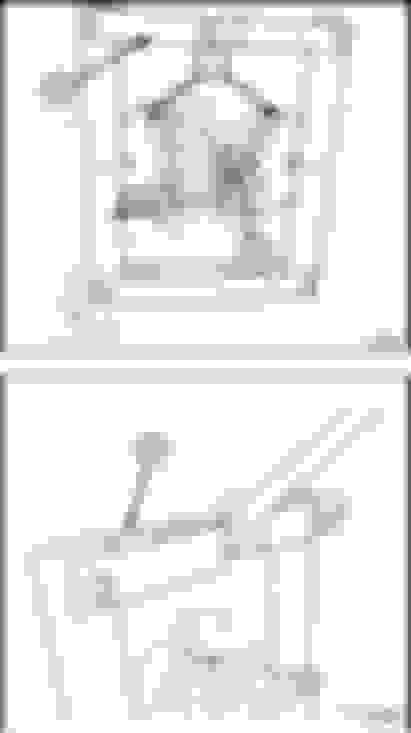
I pulled my differential out as there was a noise in it.figured i would do a LSD install also,sure enough the pinion bearings were real bad.
outer races showed some very minor pitting,but once i cut the bearing apart the real problem showed thru,the inner race was marked up real bad. New bearings should be here tomorrow,LSD came yesterday.
Ill post pics of the bearing later.
I will say one thing,these cars are WELL insulated from road noise,the day i bought the car it was obvious to me (been a mechanic for 23 years) there was a noise in hte back of the car but it was REAL faint.It could be heard at low speeds but would dissapear after about 60MPH.
If you put the windows down and drove the noise outside the car was wicked! the reason i got right to pulling it apart before any mass destruction could occur.
Should be back together monday night or tues.
Sorry to hear about the bad bearing. It sounds like it was bad from day one.
You say pinion bearings...there is typically only 1 pinion bearing. Does the E55 have two? I have never pulled the pinion shaft on one so I am curious.
I'm sure you know this but make sure you get the pinion drive depth correct as well as the backlash or you will trash the ring and pinion quickly.
Ive never seen a rear diff that did not have inner and outer pinion bearings.
I will double check the pinion depth,IT SHOULD fall into place with replacement bearings as long as the bearings are made identical,ill measure them also.
Got everything but this bearing from Benz so far,the bearings all had to come from Germany.They said it would be here tomorrow.
GOt the Quaife LSD from James@ACGSD. Gave me a real good deal on it.
Last bearing came today,thankfully my dealers parts department is open till 12 PM during the week,picked it up after worked and put the diff together and in,SO nice now that its quiet.
Thanks Brian for the write up,made the job WAY easier.
Last bearing came today,thankfully my dealers parts department is open till 12 PM during the week,picked it up after worked and put the diff together and in,SO nice now that its quiet.
Thanks Brian for the write up,made the job WAY easier.
How were you able to purchase the bearing? My mechanic said that MB only sells the complete differential and not individual bearings. I have looked around and found the same to be true.
I've got a 2007 E63 and just decided to do the 3.06 Gear swap from a 07-09 Challenger SRT8 (eBay) whose differential was also made by Mercedes vis-a-vis the "Daimler-Chrysler" merger. I also bought an M-factory LSD for 1/2 the price of a Quaife that has the added benefit of having shotpeened and cryogenically treated Helical Coils, unlike the Quaife!, and is apparently a tad lighter to boot! Well, being the M-factory was made for the C63, as referenced on its website, I e-mailed them questioning its being able to fit in my E63, to which they replied positively. I too could not find any parts info on STAR/EPC, so I searched for parts for a W210 aka E55 and guess what, all the parts were listed, so I bought em! Turned out the Bearings for the Ring Gear Carrier for the E55 are the same for the E63 and were pressed fit onto the M-factory perfectly. As for the Pinion Gears, interestingly I used the same shop to remove both Pinion gears after I had expended an inordinate amount of energy, time, angst while destroying a couple blocks of 4x4 as well as a now, not so new, defaced plastic dead-blow hammer after getting absolutely nowhere! When I went to pick up the differentials, actually I left the casing for the challenger as I have no use for it, as well as the Pinions, the guy told me that the Bearings on the 3.06 were like new as was the gear itself as he showed me it was all shiny, aka perfectly broken in! To which I replied that I already had the new parts. However, he was practically insistent stating "if it were mine, I would just leave the Bearing on the Pinion and swap over the outer Bearing too!" When I told him I bought a 12” punch to get out the outer race, he said he could do it right there if I lent him a hand! Beforehand though, he showed me the condition of the races and it as well as both Bearings were unscathed as compared to those of my E63 which were pitted! 10 minutes later we were done after he pounded out both Pinion races from the Charger Diff, installed them in mine ( at this I was a little surprised they fit perfectly!) and then he had me hold the 3.06 Pinion, which already had the Bearing on it, inside the Diff pressed into position up against the race he just swapped over by hand while he tapped into place the bearing on the outside end of the Diff onto the shaft of the Pinion extended outwards up to and against the outer race he just swapped over! There's obviously gonna be more to it than that, but at least I'm halfway there!! One thing though, the parts for the E55 Pinion included a Crush washer, but neither the Charger nor my E63 Pinion had them!!! So it's going to be very touchy feely cranking down on that Pinion Nut to get it just right!!!
I will be in awe if this works with out actually setting a pattern on the ring gear and just putting it together.
Also I believe 2010-2011 jeep Cherokee 3.06 215mm gears are the same for anyone looking for gears as the early SRT stuff are getting pricey and harder to get with low miles.
5/2/21-I finally got everything back together only to find that, in fact, simply putting it back together like the dude in Australia did NOT work! So after a marathon effort at taking it out again, this time leaving the axle of the Driver Side attached to the Hub, I brought the Diff with 3-06 Gears and M-Factory LSD back to my guy who �helped� me initially only this time, he is bringing it to his Diff Specialist! I just wish he mentioned that before! Duh! What I experienced was a vibration drone sound that was speed related on deceleration. I went no faster than 45mph as the vibration was very evident whenever taking off gas. It remained smooth whilst keeping the pedal steady at constant speed, but again, when slowing down, it would vibrate.
When I was taking it apart, I got under the drive shaft and grabbed it and pushed it up and down with both hands and could feel the Pinion was loose! Maybe there was supposed to be a crush washer all along? The E55 has one, but apparently mine (2007 E63) didn�t when my guy took it and the SRT8 Diff apart. Also, he insisted I use the and bearings and races that came off the Challenger SRT8 since they were is such good shape. I had new replacements to begin with, so this time I�ve included new bearings and races, 2 washer spacers, & Crush Washer just in case. I�m gonna make sure the guy separates the case appropriately too before adding the O�Ring Shims on each side, as per the detail below! I just wish I did it right the first time! Live and learn!
I apologize in advance for neglecting to include the info as to whom posted the very important detail below...
�The side bearing pre-load is set by using a case spreader and dial indicator set @0 and spread no more then .012". Bearings and snap rings are installed and the spreader released showing a desired retained spread of .007-.009" and remove the spreader.
This is adjusted via different thickness snap rings.
Then you move onto the back lash also adjusted with the snap rings but you have to keep the same total amount of shim thickness to maintain side bearing preload but shuffling the shims on both sides or you loose side preload. A common cause of failure because its overlooked. Some don't use a spreader and wing it and complain the Wavetrac is unreliable or noisy. Or get lucky.�
Ring and pinion are no good now and probably need to be replaced.
I have a used set of 3.06 gears if needed. They are out of a 2011 Jeep Cherokee with 79k on them.
Sorry for not getting back to this subject sooner! I ended up getting my differential about a week later, as well as all the extra parts I had previously bought (E55 Bearing Races, crush washer, etc) but the guy who rebuilt it didn’t use anything? When I asked my guy what his guy did, he just said he does what he does! Bottom line, the 3.06 diff is performing so well! I only recently, as of about 2 weeks ago, got my wheel alignment dialed in, so I really haven’t been pushing it, only driving gently on brand new Michelins to and from Alignment Shops who have all FAILED at properly addressing my alignment issue, that is, a slight pull to the right!
I know, yeah, these cars all in the US pull right and those in the UK pull left, but since I have adjustable upper Camber control arms, I had though I could “correct” this issue one way or another. I won’t go into how inept the apparent professionals have been at failing to go “outside the box” in order to actually fix the issue as compared to merely getting the Toe to align to speck. I will give a solid shout out to “Birdwell” IIrC, as his description led me to get at it myself and lo and behold, I was able to get it dialed in perfectly!
I must say that until I drove, I wasn’t expecting the final result to occur as it did, but I digress. I first set up my car level in the garage using linoleum flooring squares and used a very cool floor laser leveler to confirm and found that my previous assessment which I had arduously figured out using water in a bucket while siphoning water in a clear plastic tube measuring the difference from the highest point, which was a major PITA! Turns out I was off by only 2mm on one corner, but an error is an error, so I glad to find this out for certain!
I used thin nylon thread tied between Jack stands allowing the thread to cross the wheels midway over the Axle Caps. Taking into consideration the difference of the cars track width for and aft, my E63 is 9mm wider at the rear than the front, I measured the same distance out from the rear wheels on each side while allowing the front to measure +4.5mm (2x4.5mm=9mm) from each Axle Cap. After measuring distance from the line both from the front and rear of both front and rear tires, I went about correcting the alignment.
Being that my Upper Camber Arms were adjusted to promote a pull to the left to correct my pull to the right, I just left it where it was, offset about 0.3 of a degree (specifically, I had the passenger Camber set at about -1.3 degree while the driver was at -1 degree, no not race track ready!) I’ll also mention that after using all those different shops, none of them opted to adjust those “Crash” Bolts”! One even twisted the dame bolt while air pressure was still in the Airmatic, so when I heard a loud clank, I knew he had turned the Bolt! He responded that it ended up getting the alignment in-speck! Fortunately, the nubs weren’t destroyed in the bushing after he did this! So after all their failures I started out by installing Standard Bolts in each Arm starting from “0”
I first adjusted the the Caster on the front right (passenger) Torque Arm to pull the wheel forward 4mm using the “Crash” Bolts. One must take into account that by doing so, this also will change the Camber slightly. I measured the difference before and after and noticed about a +0.15 degree change. Afterwards, I measured distance front F&R of wheel again and tried my best to adjust toe such that there was only about 1mm of toe-in. I realized that once I got it where I wanted it, as soon as I tightened it down, I lost almost 1/2mm of toe, so I had to adjust for 1.5mm and then tighten to get about 1mm of toe!
I must admit this process was very time consuming but I’ll remind you that I actually fixed my problem after spending more than $1000 over the course of three years using 6 different shops! So, anyhow, I went for a test drive and there was till a slight pull, so back to the drawing board! I then adjusted the Driver side the opposite way, that is, by pushing the Carrier back towards the rear with my right hand while seeing just where the nubs are in the Bushing to align it with the Crash Bolt. Mind you, you must release all air from the Strut you are working beforehand! When I lowered the car, I measured the Camber only to find there was only a 0.04 degree difference ( w/both at just around -1 degree-for flat roads here in S. Florida) between the two sides after dialing the the Toe! I had the mind to adjust the Camber just slightly, but in the end, I just left alone (thank god!)
I went for a test drive expecting that there would be more adjustment but alas, It was spot on! I mean on either side of the crown it would drift appropriately and while riding on the crescent, it would track perfectly! I couldn’t be more pleased! It also dispels the notion of having to drastically adjust Camber to fix this issue as that is what I have been doing, ruining tires after 6k miles!
So now that she’s tracking perfectly, I have been able put the pedal down and I can only say that the 3.06 Ring& pinion make this beast all the more road worthy! I repeat what I’ve said on other posts by stating that in 4th gear at 3k rpm=55, 4K=76, 5K= 90mph so I don’t feel I’ve given up so much top end because I have 5th, 6th and 7th gear thereafter! Technically I have but by going to 3.06 it puts the powerband which starts at 3k right at 55mph, which I find to be perfect! Before it would be around 2.5-2.6k rpm at 55, so I’d have to downshift into 3rd at close to 4K to bust a move on the highway!
Mercedes SLR McLaren 722 S Is Extremely Rare Example Modified by McLaren
Slideshow: A one-of-one U.S.-spec Mercedes-Benz SLR McLaren Roadster became even rarer after a factory-backed transformation at McLaren's headquarters.