

***DIY*** Black housing Projectors!!!!!!

 01-31-2011, 03:05 AM
#1
MBWorld Fanatic!
Thread Starter
Join Date: Nov 2009
Location: Columbus, OH
Posts: 1,559
Likes: 0
Received 6 Likes
on
6 Posts
Evo VIII/E55 AMG
***DIY*** Black housing Projectors!!!!!!
 DIY Black housing Projector Mod.
 Time to complete: 2-4 Hours.
Materials needed:
-Patience LOTS of it.
-10mm Deep well socket Ľ and Extension
-8mm Deepwell socket and 8mm box wrench
-13mm shallow socket Ľ
-T20 and T25 torx bits
Small led flashlight
-Fine Tip flat blade screw driver
-Gasket scraper (for prying)
-Phillips head screwdriver
Scuff pad (Auto Zone,Napa,Advanced etc.)
Your choice of spray paint (I use Semi gloss black Duplicolor, It comes out with the best finish.)
1 can of filler primer
Waterproof clear silicone
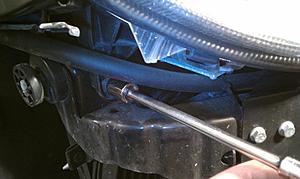
Step 1: jack the car up and remover the splash shield (8mm bolts) then begin to remove the following 8mm/10mm bolts as pictured.


Step 2: turn the wheel all the way to one side, And remove the T25 torx from the underside of the front bumper, as well as popping off the black clip with a flat blade also pictured. Repeat for the other side.

Step 2: turn the wheel all the way to one side, And remove the T25 torx from the underside of the front bumper, as well as popping off the black clip with a flat blade also pictured. Repeat for the other side.


Step 3: Pop the side markers out or the side of the bumper with a flat blade and remove the bulb wiring.
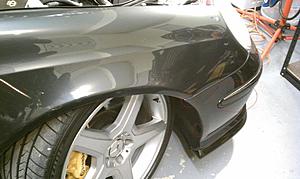
Step 4: Disconnect the fog light wiring, and the other misc sensors on the driver side inside portion of the bumper after popping it out. (you will be able to do this after you use your flat blade to pry out on the black tab holding the bumper to the fender and releasing it.
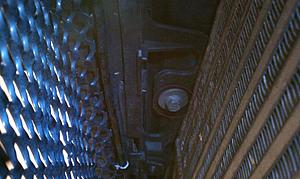
Step 5: Get under the car and take out the 2 10mm bolts holding in the front bumper directly above the H/E.
Step 6: At this point after you have verified all wiring is undone and all the bumper bolts you are clear to pull the whole front bumper off and place it somewhere safe.
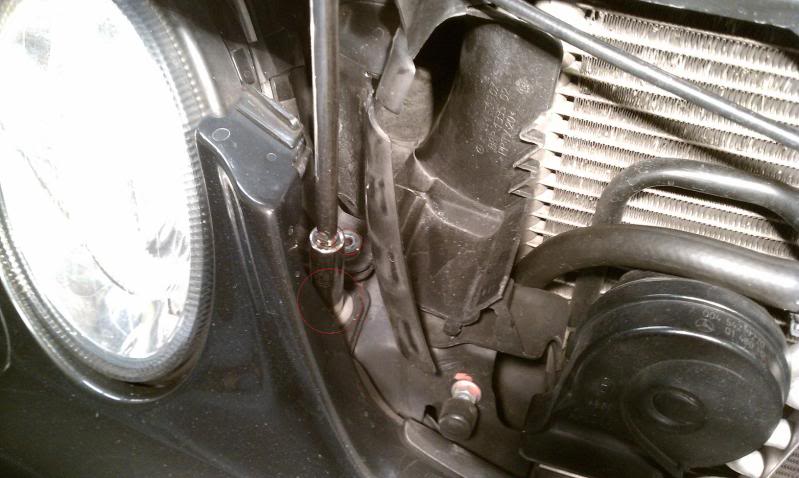
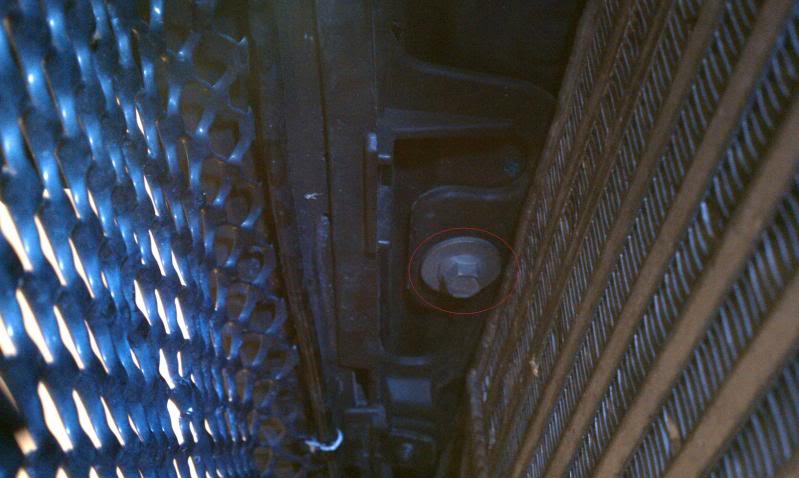
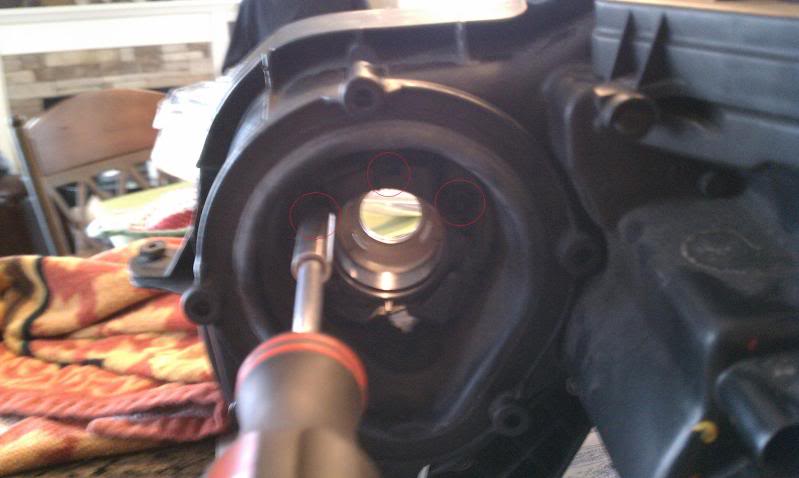
Step 7: Remove the last bolt from the headlight assembly As pictured (Circled at the bottom) use your 13mm socket on the front and directly behind it is where you will place your 8mm deep well 1.4 drive on a ratchet. Once loose remove the headlight, Repeat on the other side.
Step 8: Remove the two T20 torx screws from the bottom of the headlight and if you have the uber cool headlight washer squirters please remove the Phillips screw out front as well.
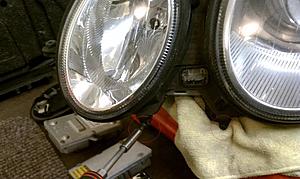
Step 9: Pull the headlight out and disconnect the 4 connectors from the back, You should be able to pull the headlamp completely out at this time.

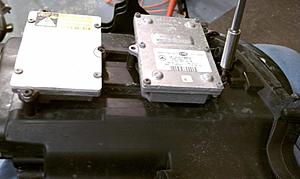
Step 10: Remove the T20 torx screws holding the ballasts in place and remove them, Also remove all running lights and the Hid bulb NOTE: Do NOT touch the HID bulb with your fingers. (It can be released by Turing the box to open and then pinching in the little safety clips on each side. And lastly the silver clips x4
Step 5: Get under the car and take out the 2 10mm bolts holding in the front bumper directly above the H/E.
Step 6: At this point after you have verified all wiring is undone and all the bumper bolts you are clear to pull the whole front bumper off and place it somewhere safe.
Step 7: Remove the last bolt from the headlight assembly As pictured (Circled at the bottom) use your 13mm socket on the front and directly behind it is where you will place your 8mm deep well 1.4 drive on a ratchet. Once loose remove the headlight, Repeat on the other side.

Step 8: Remove the two T20 torx screws from the bottom of the headlight and if you have the uber cool headlight washer squirters please remove the Phillips screw out front as well.

Step 9: Pull the headlight out and disconnect the 4 connectors from the back, You should be able to pull the headlamp completely out at this time.

Step 10: Remove the T20 torx screws holding the ballasts in place and remove them, Also remove all running lights and the Hid bulb NOTE: Do NOT touch the HID bulb with your fingers. (It can be released by Turing the box to open and then pinching in the little safety clips on each side. And lastly the silver clips x4


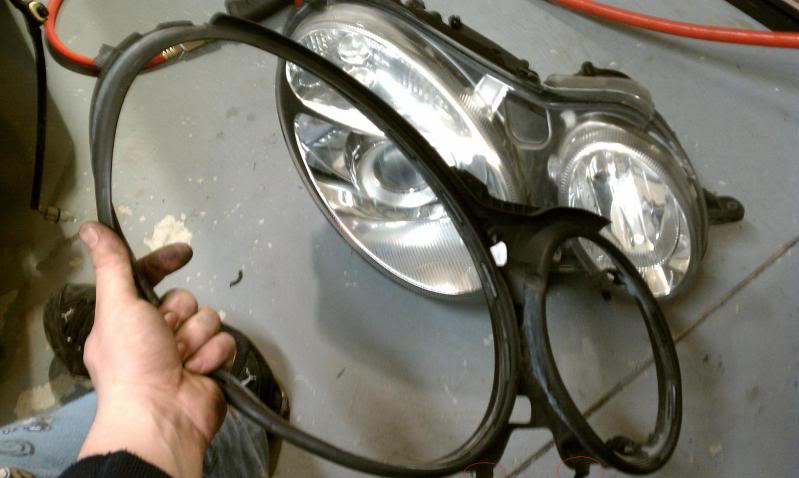
Step 11: Remove the black surround trim ring from the headlight, and repeat on the other side.

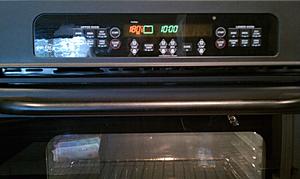
Step 12: Preheat your oven to 180 deg. (Do not let your wife catch you doing this HAHAHA) once the temp is reached and you have verified all accessories are off the light, insert it into the oven for 15-18 mins in the middle shelf. (This process loosens the glue so you can separate the headlight.
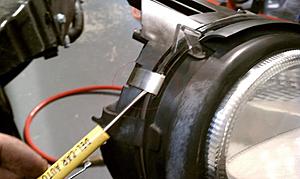
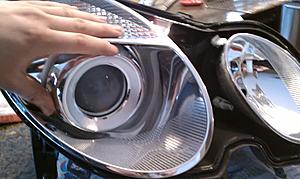
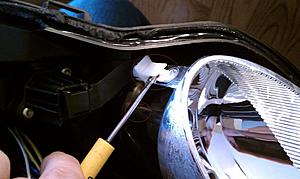
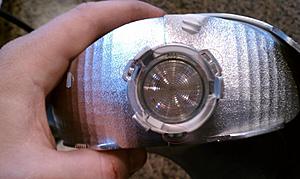
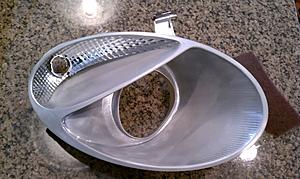
Step 13: Remove the headlamp and pry it apart revealing the inner guts. Remove the 3 T20 torx screws on the back of the city light side and pop the little turn signal cover out as well, And the 2 T20 torx screws for the inner surround ring on the lense for the city light as pictured. Also pop out the Projector surround ring. (You can choose to paint it, I left it chrome) The bottom clip for the large projector soround was a PITA, I broke the first one, If you do not to worry just apply some silicone on both sides before re-assembely.

Step 15: Scuff all parts you want to paint thoroughly and then rinse in soak and water. Let dry.
Step 16: you’re ready to shoot. Start with 2-3 LIGHT coats of the filler primer wait 3 mins in-between coats) to fill in any imperfections made with the scuff pad.

Step 12: Preheat your oven to 180 deg. (Do not let your wife catch you doing this HAHAHA) once the temp is reached and you have verified all accessories are off the light, insert it into the oven for 15-18 mins in the middle shelf. (This process loosens the glue so you can separate the headlight.

Step 13: Remove the headlamp and pry it apart revealing the inner guts. Remove the 3 T20 torx screws on the back of the city light side and pop the little turn signal cover out as well, And the 2 T20 torx screws for the inner surround ring on the lense for the city light as pictured. Also pop out the Projector surround ring. (You can choose to paint it, I left it chrome) The bottom clip for the large projector soround was a PITA, I broke the first one, If you do not to worry just apply some silicone on both sides before re-assembely.


Step 15: Scuff all parts you want to paint thoroughly and then rinse in soak and water. Let dry.

Step 16: you’re ready to shoot. Start with 2-3 LIGHT coats of the filler primer wait 3 mins in-between coats) to fill in any imperfections made with the scuff pad.

Last edited by Evolved8; 01-31-2011 at 03:12 AM.
 01-31-2011, 03:06 AM
#2
MBWorld Fanatic!
Thread Starter
Join Date: Nov 2009
Location: Columbus, OH
Posts: 1,559
Likes: 0
Received 6 Likes
on
6 Posts
Evo VIII/E55 AMG
Step 17: Apply 3 coats of your choice of paint (allow 3-5 mins in-between coats.) and always spray about 12-18 inches away.

Step 18: Your parts are ready to be re-Assembled after an hour of drying time At a Min. Turn the oven back on and heat to the same setting, while waiting apply a layer of silicone around the whole headlight housing. Then Put in the oven for 15 mins. Once its done pull it out and act quickly, Re assemble all the interior parts of the headlight assembly (your painted pieces.) and clip the turn signal cover back in. Then press firmly as you reseal the Lense to the headlight housing. (It’s good to wipe the inside down before reassembly.) Use clams if you have them to hold it.


Step 19: Apply another layer of silicone all the way around the headlamp where you sealed it back together. Repeat the same process for the other one, Then Reassemble both headlights with the black rubber surround ring, and ballasts + all necessary bulbs.
Step20: Stand back and admire your work, Then head out to the garage for the Reinstall which you will do in reverse order. After they are installed its good to buff the headlight lenses if possible.


Make sure everyting works and your DONE!! Thanks for viewing, Please leave your comments!! More to come stay tuned!!!

 01-31-2011, 03:49 AM
#7
Trending Topics
 01-31-2011, 05:27 AM
#11
MBWorld Fanatic!
Join Date: Jul 2010
Location: A Canadian in Dubai, United Arab Emirates
Posts: 4,748
Likes: 0
Received 0 Likes
on
0 Posts
'05 C200K SS, '05 Kleemann CLK500K, '08 Hummer H3 & '92 Z34 5sp (track car in Canada)
Good write up and fantastic pictures - this is a really well put together DIY!

 01-31-2011, 10:11 AM
#21
MBWorld Fanatic!
Thread Starter
Join Date: Nov 2009
Location: Columbus, OH
Posts: 1,559
Likes: 0
Received 6 Likes
on
6 Posts
Evo VIII/E55 AMG
Thanks very much man.
Thanks!! They are 8k top and bottom (Picture makes them look VERY blue)
Thanks!! Its Def. time consuming.
Thank you sir!
Again Thanks man!!
Thanks!!
I love it!! Thanks
Thanks Marcus!!


Thanks man!!
No prob, Thanks!!


