When you click on links to various merchants on this site and make a purchase, this can result in this site earning a commission. Affiliate programs and affiliations include, but are not limited to, the eBay Partner Network.
I’m sure one of you guys has run into this issue as I seem to recall hearing of somebody else with same issue.
About 1/2 the time now I can only get the car (2015 W212 AMG) to go into P if I open the door. The P button just goes dead in these instances no matter how many times I press it or how hard.
Guessing it’s the shift module? Or something else? Hoping it’s a fairly straightforward DIY?
Any confirmation on what causes this or any part number(s) necessary would be very appreciated!
Yes - it seems to be pretty common issue with the w212. I had this happen on my 16’ e63 at around 50k miles. It would only go into park about 50% of the time. Thus, I would have to open the driver door to force the override into park.
Mine was done under warranty. The dealer replaced the entire shift assembly. Unfortunately, the shifter assembly is all one part (including the electronic module that usually fails), and cannot be purchased separately. I seem to recall dealer cost was north of $900 to replace. It looks to be a pretty easy DIY.
I believe the part itself can be had for ~ $650-$700 online.
Link to the part number the dealer replaced on my car.
Yes - it seems to be pretty common issue with the w212. I had this happen on my 16’ e63 at around 50k miles. It would only go into park about 50% of the time. Thus, I would have to open the driver door to force the override into park.
Mine was done under warranty. The dealer replaced the entire shift assembly. Unfortunately, the shifter assembly is all one part (including the electronic module that usually fails), and cannot be purchased separately. I seem to recall dealer cost was north of $900 to replace. It looks to be a pretty easy DIY.
I believe the part itself can be had for ~ $650-$700 online.
Link to the part number the dealer replaced on my car.
Interesting I am at around 53k miles now. I also found that link you provided at the end of your post after I posted this thread.
I found the shift mechanism at AutoHauzaz for about $640. The video in your link is pretty clear too. I can manage this DIY totally.
i know you had yours done under warranty, I am going to look for another yourube of pulling the knob off the old mechanism. In that writeup, the guy kinda did it a bit weird. Maybe it’s the best way, but want to see alternative methods.
Many times caused by slamming on the brakes after speeding in the morning with coffee in the cupholders....or so ive heard
I use electronics spray and clean the switch every so often. '13 wagon with 66k. Ive destroyed this switch over and over with coffee and spray or alcohol always fixes it. Remember to let anything dry before energizing.
Just had the shifter trim off today and gave it a little cleaning. One torx screw and some careful trim removal (meaning proper tools) is all it takes. Always worth your twenty minutes to try.. the lazy way is to flood it from above but thats a little bit more sketchy as you have to ensure the chemical will not leave a residue AND is safe for plastic, like a real electronics cleaner.
Many times caused by slamming on the brakes after speeding in the morning with coffee in the cupholders....or so ive heard
I use electronics spray and clean the switch every so often. '13 wagon with 66k. Ive destroyed this switch over and over with coffee and spray or alcohol always fixes it. Remember to let anything dry before energizing.
Just had the shifter trim off today and gave it a little cleaning. One torx screw and some careful trim removal (meaning proper tools) is all it takes. Always worth your twenty minutes to try.. the lazy way is to flood it from above but thats a little bit more sketchy as you have to ensure the chemical will not leave a residue AND is safe for plastic, like a real electronics cleaner.
Certainly worth a try! I was thinking along these lines actually as a starting point. I have compressed air in my garage and can also use that after a bit of alcohol spray to force the alcohol through the switch contacts and speed up any drying process. But I’ll let the alcohol sit for a bit first to break any contaminants down.
So I gave it a solid try today with the electronics cleaner and a compressed air nozzle.
I took apart everything using the same method as shown in the video link above. No issues. Nothing cracked nor broke.
The switch area looked pristine with no signs of any spills. But I sprayed it well around the edges of the switch, let it soak for a few minutes, then blew it dry with the air nozzle. I repeated this process about 4 times. Seemed like it worked at first after re-assembly in my driveway. Drove around the block, went to park in driveway, and not working again. Ugh.
So I just ordered a new shift module from Autohauzaz. $673 shipped.
At least now I know how easy this swap will be when I get the new module.
Also got to perform a nice deep clean of that entire console area. Looks brand new now. Just doesn’t work. Hahaha
I’ll update again after I install the new module. Likely next weekend.
Did you spray under the switch, into the area where the actual electronic button is ensuring the pad and board got a good soak?
good to hear you tried and reported the results.
Maybe not. I did move the little 3in X 3in black plate with the “R” “D” and “N” on it out of of the way and came in from the top side around the edges of the switch.
Are you suggesting I unscrew the 4 Torx bolts and then I can get deeper to the board/electrics better? If that is the case, J will try again today.
Please let me know as soon as you can.
If that works, hopefully I can cancel my Autohauz order or at least send it back in its unopened packaging since I believe there are no returns on opened electronics.
BTW
As mentioned above, there was no signs of spillage or anything near the switch or entire shift module. It was virgin looking.
Hi again, Ive never had to go too far into it. Remove the 3x3 piece and then try and get under the actual button, I believe the black P is over/attached to a white button. I was thinking if you can ensure youre spraying under the button, thats the best shot to clean it. Think about a rubber remote switch and how there is a contact between the button (under the button we touch) and the board. That area is what needs to be cleaned. Though there was no spillage, it could just be some very light corrosion (from perhaps humidity etc) stopping the contact. If this does not work, one can assume that the contact is worn out, not completing the circuit. For how quick it is, its worth a try.
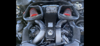
I just disassemble the gear now and below the park button there is 2 push buttons so when you press the park it push 2 buttons, the first one on the left looks fine the second one on the right with red stitching look like it does not press too far down so i thickened the park buttons where it touch this red buttons, so i will test it next week to see if it was the issue,
nothing to do with cleaning cause it looks clean.
So the clear circle is the "spring" and the square above, the led llight? and the red button the switch... interesting . I know it looks clean but spray it anyway. See if you can spray under the little boot on the red button as well. Increasing the contact sounds like a good idea but make sure its not so much that it keeps the button depressed or accidentally depresses it while driving. Dont make it thicker than original but only as thick as original was before compression. add one thickness of post it note at a time Without looking into a switch wiring diagram which im not sure is available, I wonder if its a two part switch where both areas must be depressed. Easy enough to try by putting it together and seeing if just hitting the red button with your finger puts it in park.
Great job and thanks for this. Like I said, ive avoided an issue (only failed one time a few years ago before the first cleaning) so far and have not had to dive so deep. Thanks for the pics.
Yes when you press the P button both simultaneously should be pushed down, and why i suspected that one of them is not making contact because each time you press and it will not work a fault is stored, that mean the control module knows that you pressed the park button but without working, anyway next week we will see, if not solved i will check deep in the board below.
At this point I think I am just gonna install my new module when it arrives in a couple days.
I will then tinker with a failure analysis where Robert pointed out to be able to report my visible findings and/or recommendations to repair it for others. I will keep the old module and use it if needed down the road if the new module acts up.
Just one more extra part for my W212 boneyard! Lol
Robert, are you the same Robert I met in Burlingame for EDOK TCU? Power lifter?
At this point I think I am just gonna install my new module when it arrives in a couple days.
I will then tinker with a failure analysis where Robert pointed out to be able to report my visible findings and/or recommendations to repair it for others. I will keep the old module and use it if needed down the road if the new module acts up.
Just one more extra part for my W212 boneyard! Lol
Robert, are you the same Robert I met in Burlingame for EDOK TCU? Power lifter?
Just curious.
Cheers to All on this thread. Thanks guys.
No, i am from Lebanon (Middle East), i visited USA only once in 2014 (Miami Orlando and Atlanta), wish all the best.
So installed the new shift module today. Everything working perfectly so far after a few around town trips today.
Hardest part of the install was pulling off the shift knob. I did it in the car after all trim was removed just in case. FWIW I am a longtime gym rat and still benching 315 for 6 reps legit. And it took both hands on mine with near top effort. Maybe mine was tighter than the guy in the link above that did it with one hand or he benches 315 for 10 reps!! 😂
putting it back on the new one took some pressure but only about a 1/4 of the force to pull it off.
I spent only about 20 minutes dissecting the old one for a failure analysis. I can say with certainty that my shift module failure had nothing to do with any spillage.
Robert is correct that there are 2 switches that the P button must activate. The main one that also provides illumination for the red “P” and a secondary red switch that is on the right of the button. In looking at it, it appears the red switch might be the issue. I will do a deeper dive with an ohm meter in the next few days to confirm. There might indeed be a way to save these modules without buying a new $650 module.
FYI, for those that don’t know me, I am a very seasoned Product Design Engineer. So whatever I find will have some confidence behind it. Even if that means I find replacing the module is the best solution.



 06-03-2023, 07:42 PM






 Without looking into a switch wiring diagram which im not sure is available, I wonder if its a two part switch where both areas must be depressed. Easy enough to try by putting it together and seeing if just hitting the red button with your finger puts it in park.