How-To Spotlight: Replacing M112/M113 Spark Plugs
This Is Also A Guide On How To Keep Your Cool While Stuffing Your Hands Into Impossibly Tight Spaces
Over-complication is a long-standing German tradition, and during the designing of the M112/M113 family of engines, Mercedes stopped at nothing when fussing with things that, for over 100 years of internal combustion engines, have worked perfectly fine. Valves? It needs three! Spark plugs? Two must be better than one, right? Right? You can almost imagine the engineers saying, “Do it for fun anyway, and let’s see what happens.”
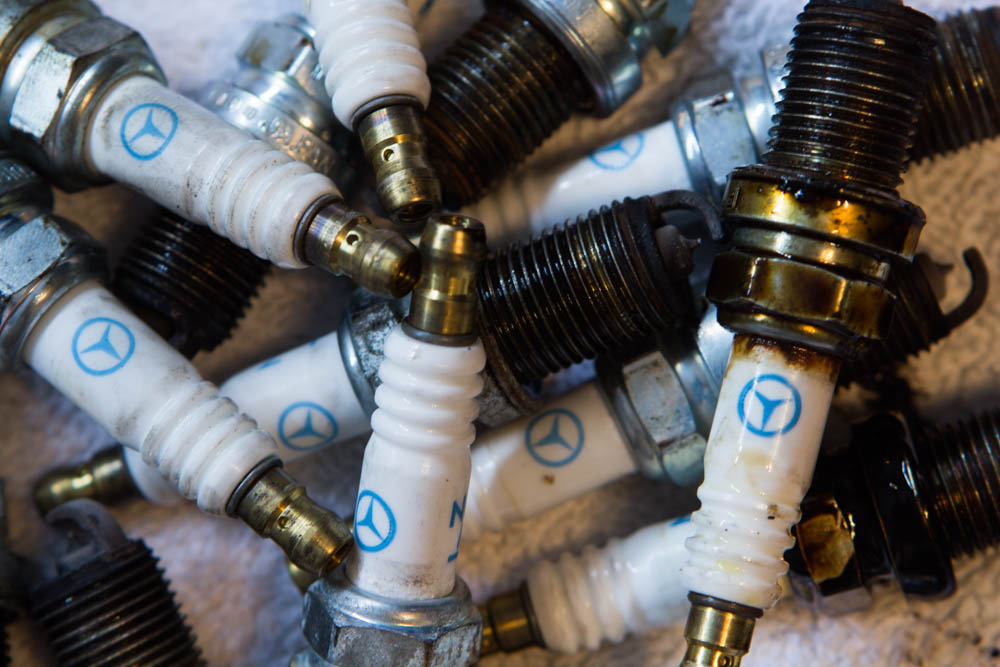
My string of woes this week came from the spark plugs — in my case 16 of them — as they aren’t exactly easy to access. They pretty much sit right at the bottom of the cylinder heads, just above the exhaust. Speaking of that, make sure you do this project while your engine is cold, unless you don’t mind your hands looking like the man from room five.
Assuming you already know how to remove the airbox from the top of the engine, let’s get started on things that you need in order to complete this project with relatively little cussing. We will start with spark plugs. For some amusement (and masochism) I went to the local MB dealer to get a quote on spark plugs. After I stopped laughing at the list price of $28.75 each, I asked a dear friend if he could check employee pricing. That came out to about 18 bucks flat. Still way too much.
CHECK OUT: What Forum Members Are Saying About This How-To Article
MB will try to sell you their branded stuff at outrageous prices, but you can just as easily reverse search the Bosch or NGK equivalent. By luck, I managed to find an OEM parts supplier by the name of ECS tuning, and their prices lopped another 9 bucks off the previous low price. I’m already ahead by $300 at this point. Win.
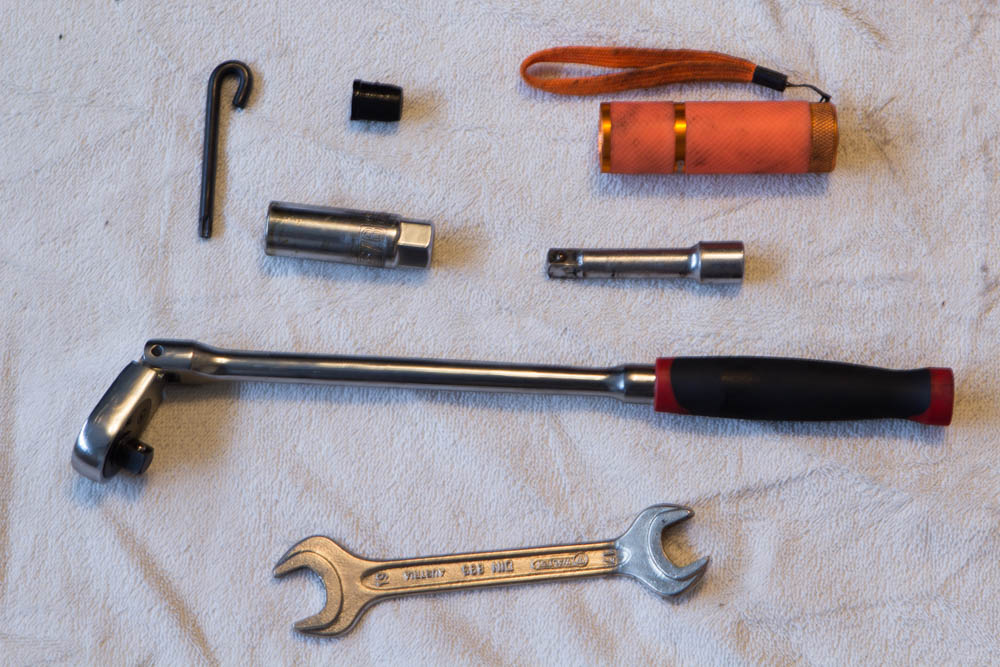
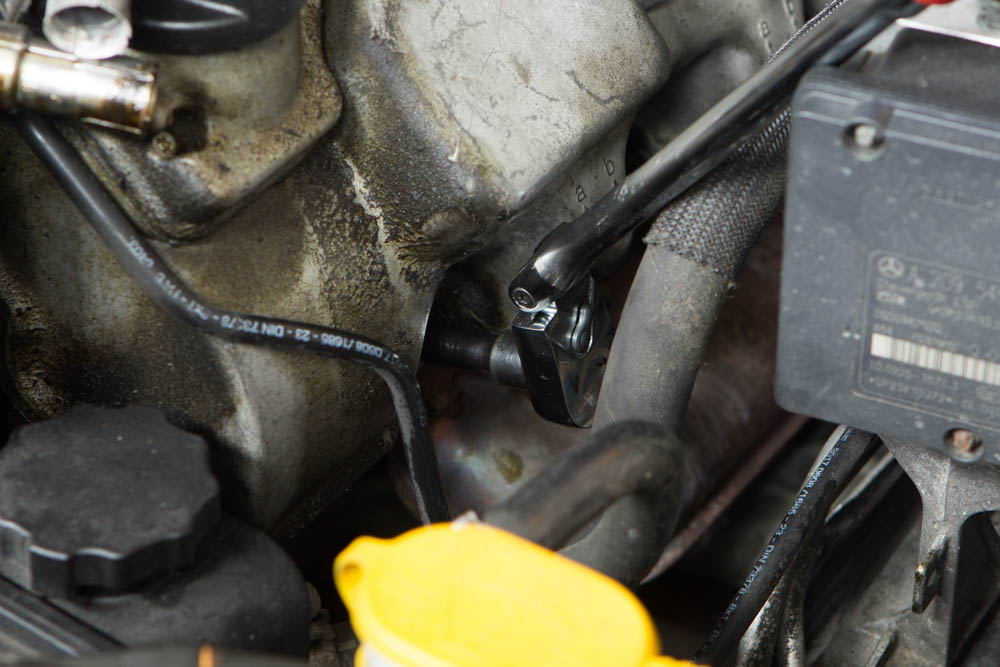
Specific tools were very helpful in working around the engine bay of my 209, so I’ve posted them above. Obviously you’ll need a 5/8ths spark plug socket, and a 3-inch extension to add on to it. Topped off by a flex-head 3/8-inch drive ratchet, and you’ll be good to use this combo on all 16. For the coil packs, you’ll need two things: a T25 torx fitting, and a spark plug boot removal tool. Mercedes makes a tool specific for this job, but I had an angled 17mm open-end wrench (pictured below) which worked just fine. A flashlight comes in handy, as well.
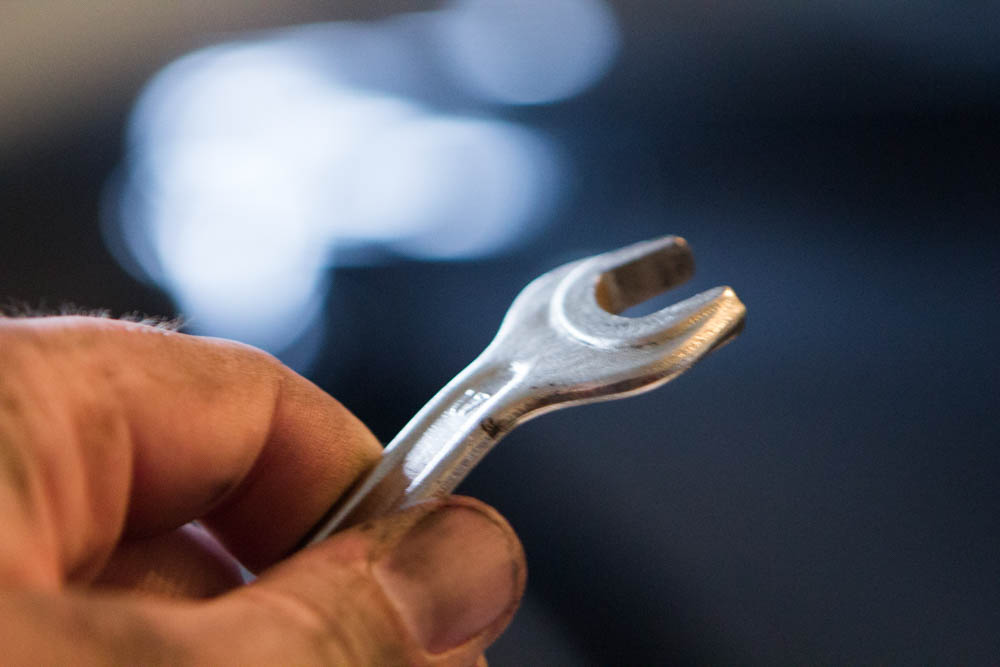
Coil packs are held on with a singular T25 Torx fitting, and to get enough room to access the spark plug boots, it’s necessary to remove them from the valve covers. Before removing them, I numbered them with a small piece of masking tape. Once those are out of the way, you’ll need to get to the spark plug boots. Those are surrounded by a metal sleeve with a small ridge that you can slip the angled 17mm wrench onto. Also keep in mind they have a seam that might only let you grab the top half of the boot. Be extra careful in that instance, and be sure to prevent pulling from the wire.
CHECK OUT: How To Change Your W124’s Cabin Air Filters
Once you have those off , it’s time to start removing the plugs. It is recommended you use some pressurized air to excavate any junk that might be sitting around the spark plugs. On each bank I decided to start closest to the firewall and work my way forward. In this order, you’ll have to slip the spark plug socket on, then the 3-inch extension, and then attach the ratchet. Once the plug is loosened, you’ll have to reverse that process. Annoying? Yes, but it works every time on every plug.
CHECK OUT: 203/209 Windshield Washer Pump Replacement
I replaced each plug as it came out, adding a dab of anti-seize to the threads of the new plugs. Moving on to the next plug was not an easy task, however. It was at this point that my vocabulary expanded quite a bit, and I probably spooked my dogs, too. Retaining pins on my ratchet and extension were only so strong, so when I tried to pull the spark plug socket off the plug, it wouldn’t come off. I couldn’t reach it by hand, either. So now I had to remove the plug again.
The best solution I found was to take the rubber grommet out of the plug socket whenever I was installing a new plug. I’d then have to put that rubber grommet back into the socket for each removal, however.
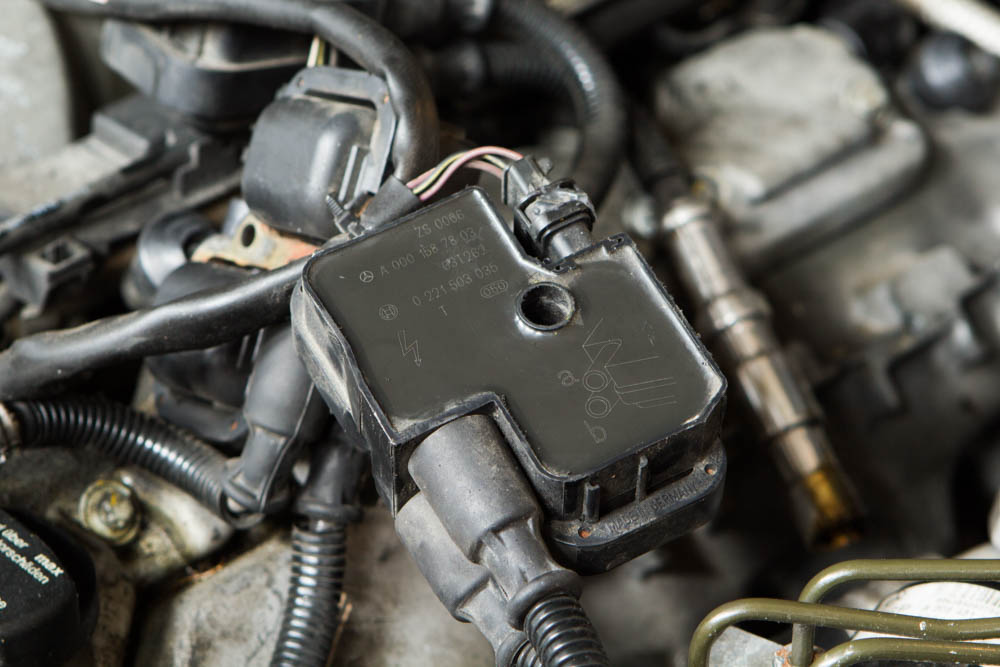
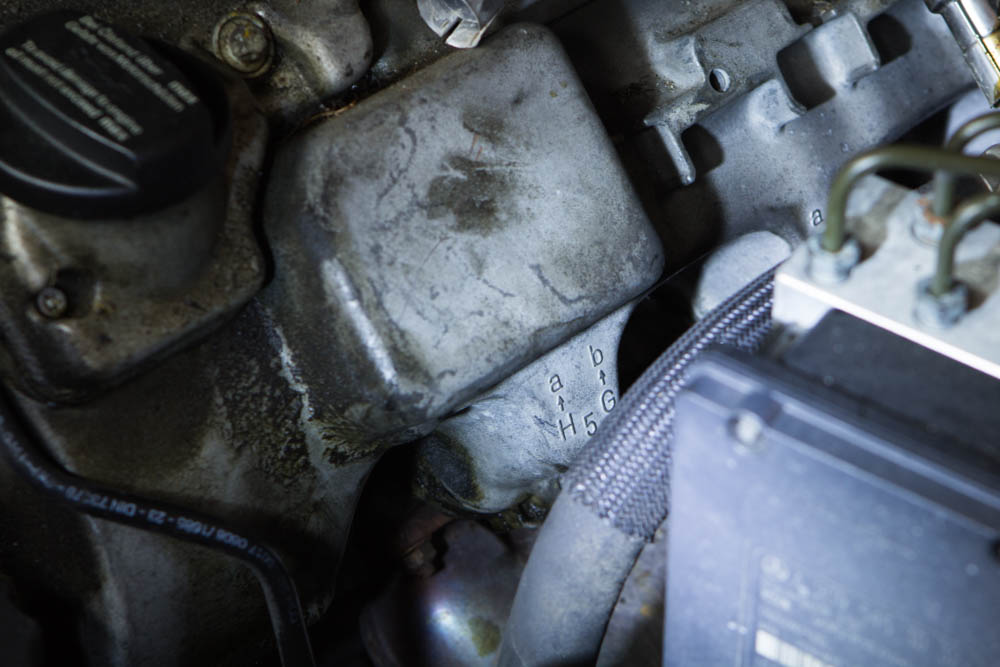
Once you get the process down, it becomes fairly straightforward to do the other seven, as the plugs get easier to remove and install as you move farther away from the firewall. When the time comes to put the coil packs back on, you’ll see “a” and “b” markings which represent where each of the wires from the coil pack is supposed to go. Take a look at the coil pack above and you’ll see the schematic. If you look at the cylinder head below, “a” and “b” are clearly marked.
Once you have everything buttoned up, take it out for a spin and enjoy your newly revitalized engine. You may or may not feel any difference, but if your plugs were older than five years or more than about 80,000 miles in age, you may see a smoother idle, and you may even see a slight bump in fuel consumption.