


Headunit Double-DIN Fabrication (Pre-Facelift)
Thread Starter
MBWorld Fanatic!
Joined: Apr 2003
Posts: 2,175
Likes: 0
From: Socal
EVE
Headunit Double-DIN Fabrication (Pre-Facelift)
Hey all - haven't posted NEARLY what I should be posting about all the mods I've either custom-fabbed, installed, produced, and what not about our Cs (but I'll take the public's request for my documentation if I get enough +1s). Anyway, just recently finished building a frame for my headunit project - finally stepping into audio!
Anyway, there was NO better deal than the one I received to get this specific headunit and I like the look and feel of it when placed in the center console to boot - so of course I went for it. I'm an extremely picky person when it comes to aesthetics, but here are some snaps of what I've come up with to make this look completely OEM:
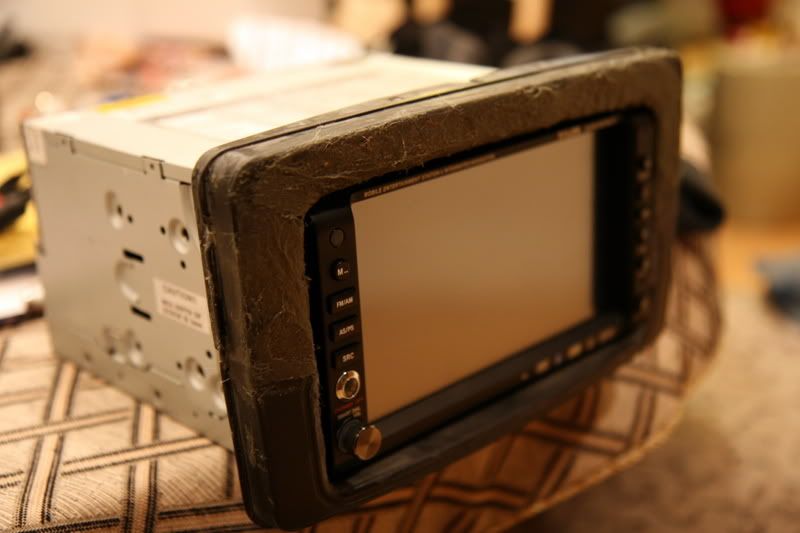

I've recently just learned how to fiberglass hence the recent spree of projects that some of you know of :p. I then plan to prime with sandable primer - paint it flatblack and do tons of prep and finishing work. I should be done with it today..depends on how long I take with "certain" installs :p.
flip
Anyway, there was NO better deal than the one I received to get this specific headunit and I like the look and feel of it when placed in the center console to boot - so of course I went for it. I'm an extremely picky person when it comes to aesthetics, but here are some snaps of what I've come up with to make this look completely OEM:
I've recently just learned how to fiberglass hence the recent spree of projects that some of you know of :p. I then plan to prime with sandable primer - paint it flatblack and do tons of prep and finishing work. I should be done with it today..depends on how long I take with "certain" installs :p.
flip

Member
Joined: Jul 2007
Posts: 194
Likes: 0
2007 C230SS
looks good.. why paint it ? cover it with leather and save yourself the hours of making it look clean.. besides leather will cover the gaps between your new frame / HU and console. can't wait to see it finished.
Super Moderator Alumni
Joined: Mar 2004
Posts: 7,684
Likes: 12
From: West Los Angeles
Midnight Blue 2004.5 C230 Kompressor Sport Sedan. 2002 w210 E320, 2009 w211 E350 Sport
Leave it "as is"! It kinda has that "rustic" look...
jus playin', dawg. I'll check it out in person tonight.
jus playin', dawg. I'll check it out in person tonight.
Trending Topics
MB World Stories
The Best of Mercedes & AMG

Manual Mercedes? 6 Times Sindelfingen Let Drivers Have All The Fun
Verdad Gallardo
Mercedes SLR McLaren 722 S Is Extremely Rare Example Modified by McLaren
Verdad Gallardo
8 Classic Boxy Mercedes Designs That Have Aged Like Fine Wine
Verdad Gallardo
Flawlessly Restored Mercedes 190E Evo II Heads to Auction
Verdad Gallardo
Electric Mercedes C-Class Unveiled: 11 Things You Need to Know
Verdad Gallardo
Mercedes EQS Gets A Major Update: Everything You Need to Know
Verdad Gallardo
5 Underrated Mercedes-Benz Models That Don't Get the Love They Deserve
Verdad Gallardo
Mercedes 300D Has Pushed Well Past 1 Million Miles and It Ain't Stopping
Verdad Gallardo
10 Most Reliable Mercedes-Benz Models You Can Buy Used
Verdad GallardoSuper Moderator Alumni
Joined: Mar 2004
Posts: 7,684
Likes: 12
From: West Los Angeles
Midnight Blue 2004.5 C230 Kompressor Sport Sedan. 2002 w210 E320, 2009 w211 E350 Sport
Super Moderator


Joined: Jul 2003
Posts: 22,060
Likes: 972
From: MBworld
bone stock E55 AMG

Thread Starter
MBWorld Fanatic!
Joined: Apr 2003
Posts: 2,175
Likes: 0
From: Socal
EVE
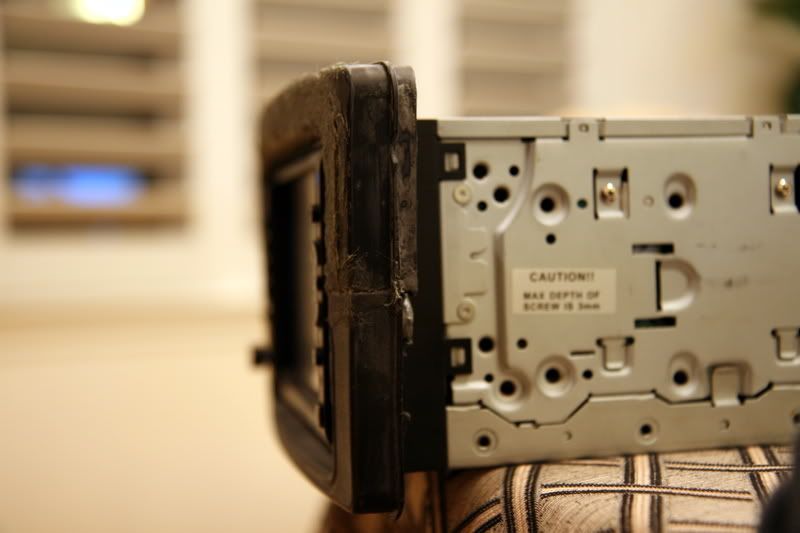
I'm also sanding it exactly to the radius of the front bezel (which comes out and swivels, so I have to be extremely careful) so it hugs it uniformly and well enough so gaps are small all around. I have yet to see how far in and out I want it to be, though.
flip
Last edited by mig888; Jul 18, 2007 at 08:05 PM.

Thread Starter
MBWorld Fanatic!
Joined: Apr 2003
Posts: 2,175
Likes: 0
From: Socal
EVE
It totally could've bro - and I probably would've glassed it too - but no dash kits protrude out like OEM buttons or fit like OEM parts... besides, spare radio was nearly the same price =D. AND the freakin dash kits were on backorder around these parts!
MBWorld Fanatic!
Joined: Jun 2006
Posts: 1,934
Likes: 1
From: Chicago
04 C32
mig, nice work so far, but I'm still confused. It is still seems like it will be very clear that there's a double DIN navi unit with an adapter ring around it to fit in the hole where the factory piece was. How is your adapter different than using one of the $14 Metra kits?


MBWorld Fanatic!
Joined: Jun 2003
Posts: 9,498
Likes: 4
From: San Diego, CA & San Jose, Costa Rica & Stuttgart, Germany
1959 220S / 1979 230 G / 2002 A210 AMG / 2003 C320 SC / 2004.5 C320 SS / 2005 ML350 SE / 2008 smart
MBWorld Fanatic!
Joined: Jun 2003
Posts: 9,498
Likes: 4
From: San Diego, CA & San Jose, Costa Rica & Stuttgart, Germany
1959 220S / 1979 230 G / 2002 A210 AMG / 2003 C320 SC / 2004.5 C320 SS / 2005 ML350 SE / 2008 smart
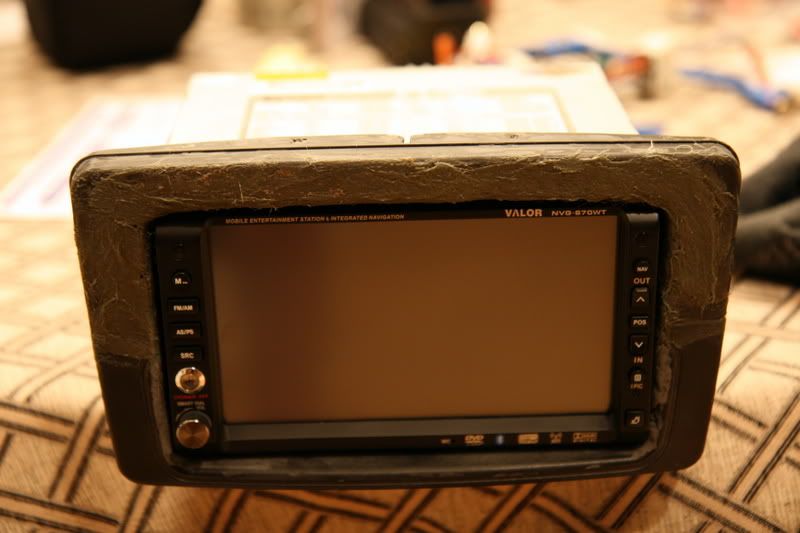
The parts I'm using are OEM parts from an OEM radio - I've seen other similar executions of aftermarket din units but I wanted something that fits into the stock trim 1:1...hence stock parts (yes, it was a spare radio fascia - not the one I'm listening to now). This way, I can decide what I want to do for the stock trim (cf maybe like yours) or black...but at least keep things separate for now. Adjustments are necessary of course - I want to keep the lines as "even" as possible, from the top row of buttons to the bottom A/C controls.
I'm also sanding it exactly to the radius of the front bezel (which comes out and swivels, so I have to be extremely careful) so it hugs it uniformly and well enough so gaps are small all around. I have yet to see how far in and out I want it to be, though.
flip
I'm also sanding it exactly to the radius of the front bezel (which comes out and swivels, so I have to be extremely careful) so it hugs it uniformly and well enough so gaps are small all around. I have yet to see how far in and out I want it to be, though.
flip

Seriously, awesome work Flip. Nice to see that 2001-2003 period OG customization & ingenuity in the W203 threads once again.
Carlos

Saprissa@aol.com
Thread Starter
MBWorld Fanatic!
Joined: Apr 2003
Posts: 2,175
Likes: 0
From: Socal
EVE
Oh don't even get me started, Carlos... you've gotta see the little intake scoop I've fabbed up for the 271s =). I have cleaner pictures of the aforementioned project when I get back form work - DAMN THOSE LONG COMMUTES!

Thread Starter
MBWorld Fanatic!
Joined: Apr 2003
Posts: 2,175
Likes: 0
From: Socal
EVE
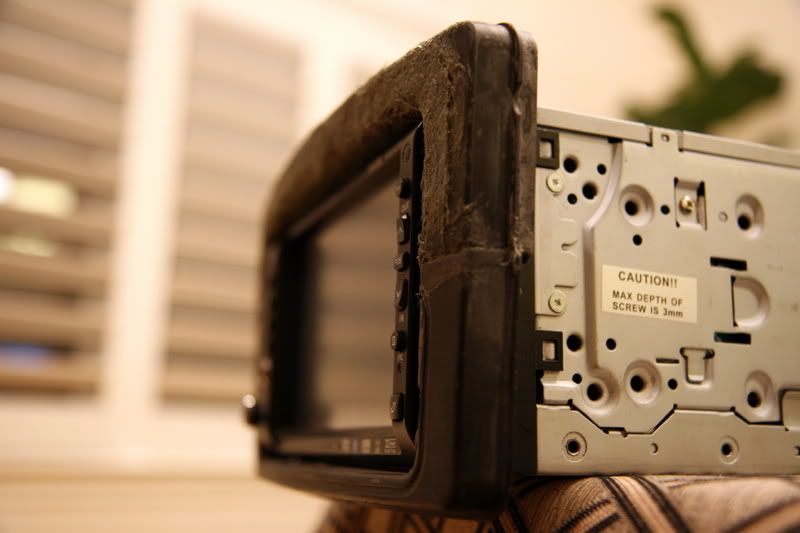
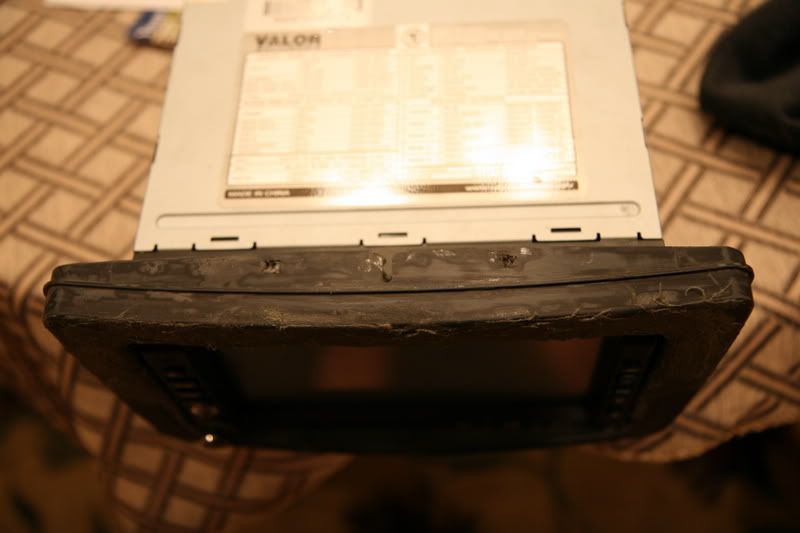
2) Realize, the face of a radio is full of button holes that need to be filled and then dremeled, cut, shaped. Solution? Used industrial foam to form inside all the little cracks and holes. The mess looked like a huge blob.
3) Cut away at the bubbles until I arrived at a semi-flat surface...then got pretty technical with the sandpaper to create an arcing "bridge" to follow the frame of what was the original OEM radio (I can always look inside my car to reference).
4) Then came the glassing to make sure the frame holds structure - got into all the little pits - I OVERDID this part on purpose to have more to sand later (this turned out for the better).
In essence two stock parts that will fit into the stock trim that's "flush" with the protruding buttons and will have a matte-sheen to it in the end - at least, that's what I envision =D.


