When you click on links to various merchants on this site and make a purchase, this can result in this site earning a commission. Affiliate programs and affiliations include, but are not limited to, the eBay Partner Network.
late 2009 CLK 350 Coupe Elegance, '65 Jaguar S Type wires
LOL - crucial info I'm just jealous - my car doesn't have one It does, however, have lights in the bottom of the doors which some don't. Nice when you step out of the car on a dark night.
Last edited by Glyn M Ruck; Feb 25, 2009 at 09:59 PM.
i have searched through the forums and have been unable to find the answer there hence, the question below;
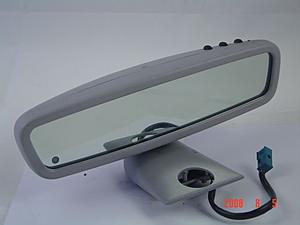
i have just picked myself up and auto-dimming w/homelink RVM for my '02 CL203 that i want to install. the issue being that the connector on the mirror is an 8-pin and the socket on the interior dome light is a 6-pin. is there any way to put the pin arrangement into the correct plug connector to get this to function?
the wiring/pin arrangement is as follows;
1 - pink w/black stripe
2 - no wire
3 - no wire
4 - grey w/aqua stripe (x2 wires)
5 - pink w/red stripe
6 - pink w/green stripe
7 - no wire
8 - brown (x2 wires)
Hi Everyone,
Just fixed this light in my mirror. I had no idea it was there until this thread. Instructions are great and couldn't have done it without this thread so Thanks!
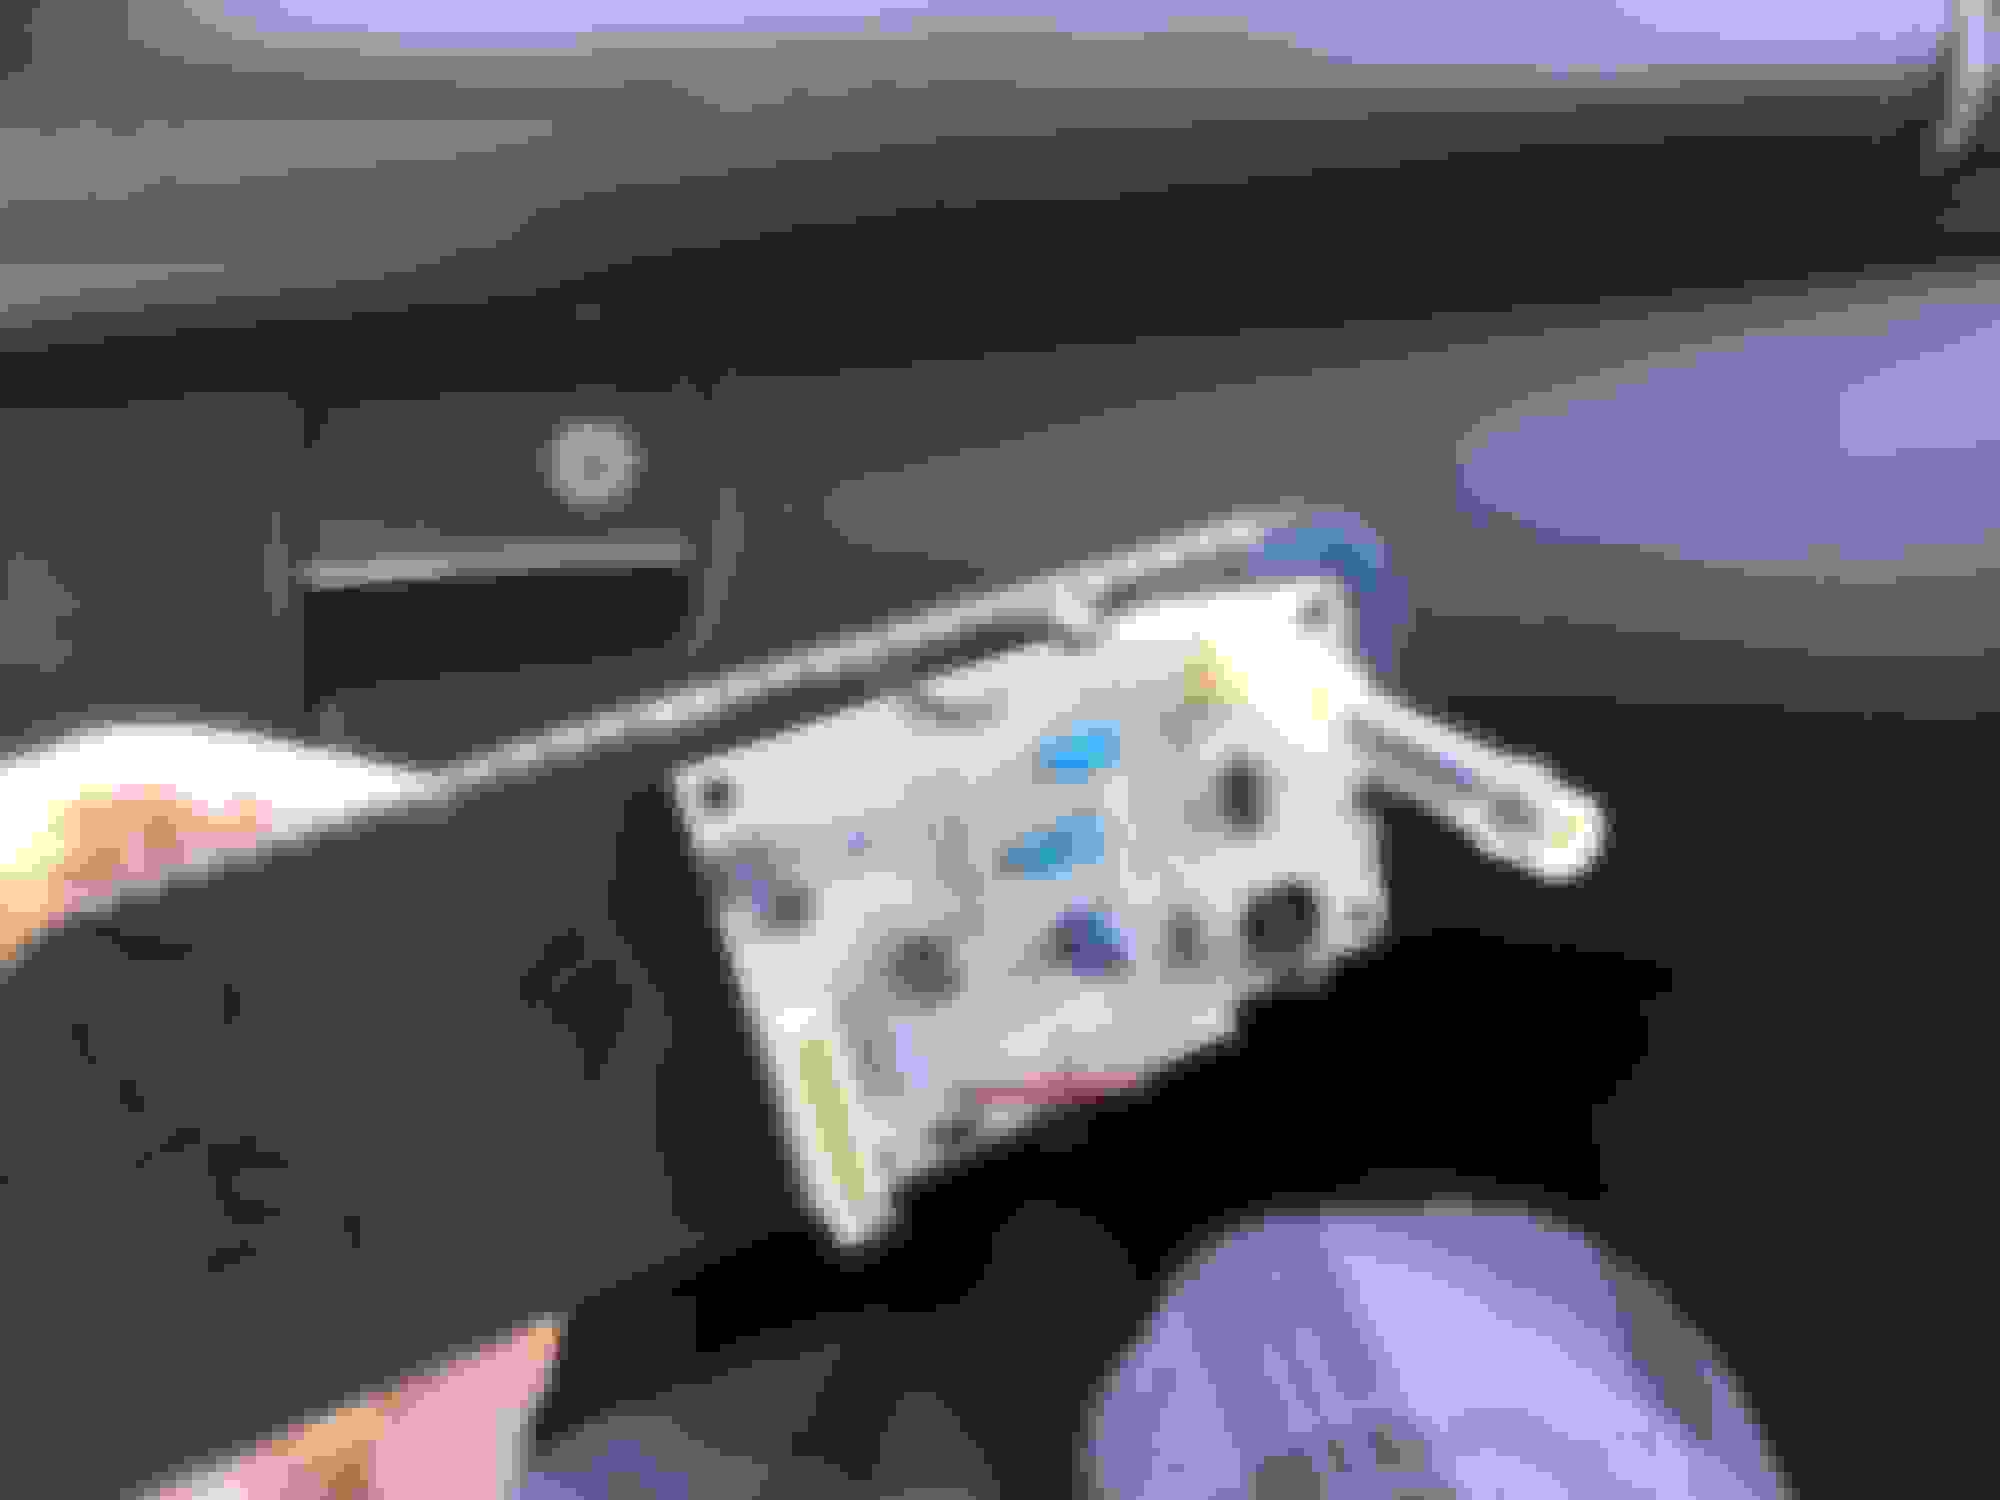
To help anyone who will try this I've posted a pic of the wiring harness for the 2 wires that attach to your new light bulb. I've marked which one is +ve and -ve so you won't have to guess like I did. I hope that helps someone.
Bought a 12V, 5000mcd amber LED from ebay (they already come pre-wired with resistor).
I sanded the tip of the LED and filed off the flange.
Took me all of 25 minutes to install. Very easy!
Bought a 12V, 5000mcd amber LED from ebay (they already come pre-wired with resistor).
I sanded the tip of the LED and filed off the flange.
Took me all of 25 minutes to install. Very easy!
I know its an old thread but....
http://www.ebay.com/itm/10-x-12-Volt-WHITE-PreWired-Leds-5mm-12v-Resistor-Installed-Same-Day-Ship-/330942826211?pt=LH_DefaultDomain_0&hash=item4d0dbac6e3
and
http://www.ebay.com/itm/4-PACK-NEW-AUDIOPIPE-LBS-400BL-BLUE-SNAKE-EYES-LEDS-LIGHTS-12V-PIPEDREAM-/131011997354?pt=US_Car_Lighting&hash=item1e80ec6eaa
i used the snake eyes in my fiance's IS300. the wires are flexible and hold the shape you bend them to. I drilled some holes under the stereo to illumintate the small storage space, a hole in the cup holder (to make the water bottles glow), and another in the storage compartment under the armrest just to make it look cool.
I also hooked them all up to one of these which i did under the armrest to control the lighting:
http://www.ebay.com/itm/Mini-12V-Control-LED-Controller-Dimmer-for-3528-5050-Sinlge-Color-Car-LED-Strip-/321156989067?pt=LH_DefaultDomain_0&hash=item4ac672c08b
but they also have one you can control with a remote:
Hi e1000 I now its and old threat but I would like to this mod to my E220 2003, when you said you would go back with the resistor what did you put, our did you keep the 560 ohm?
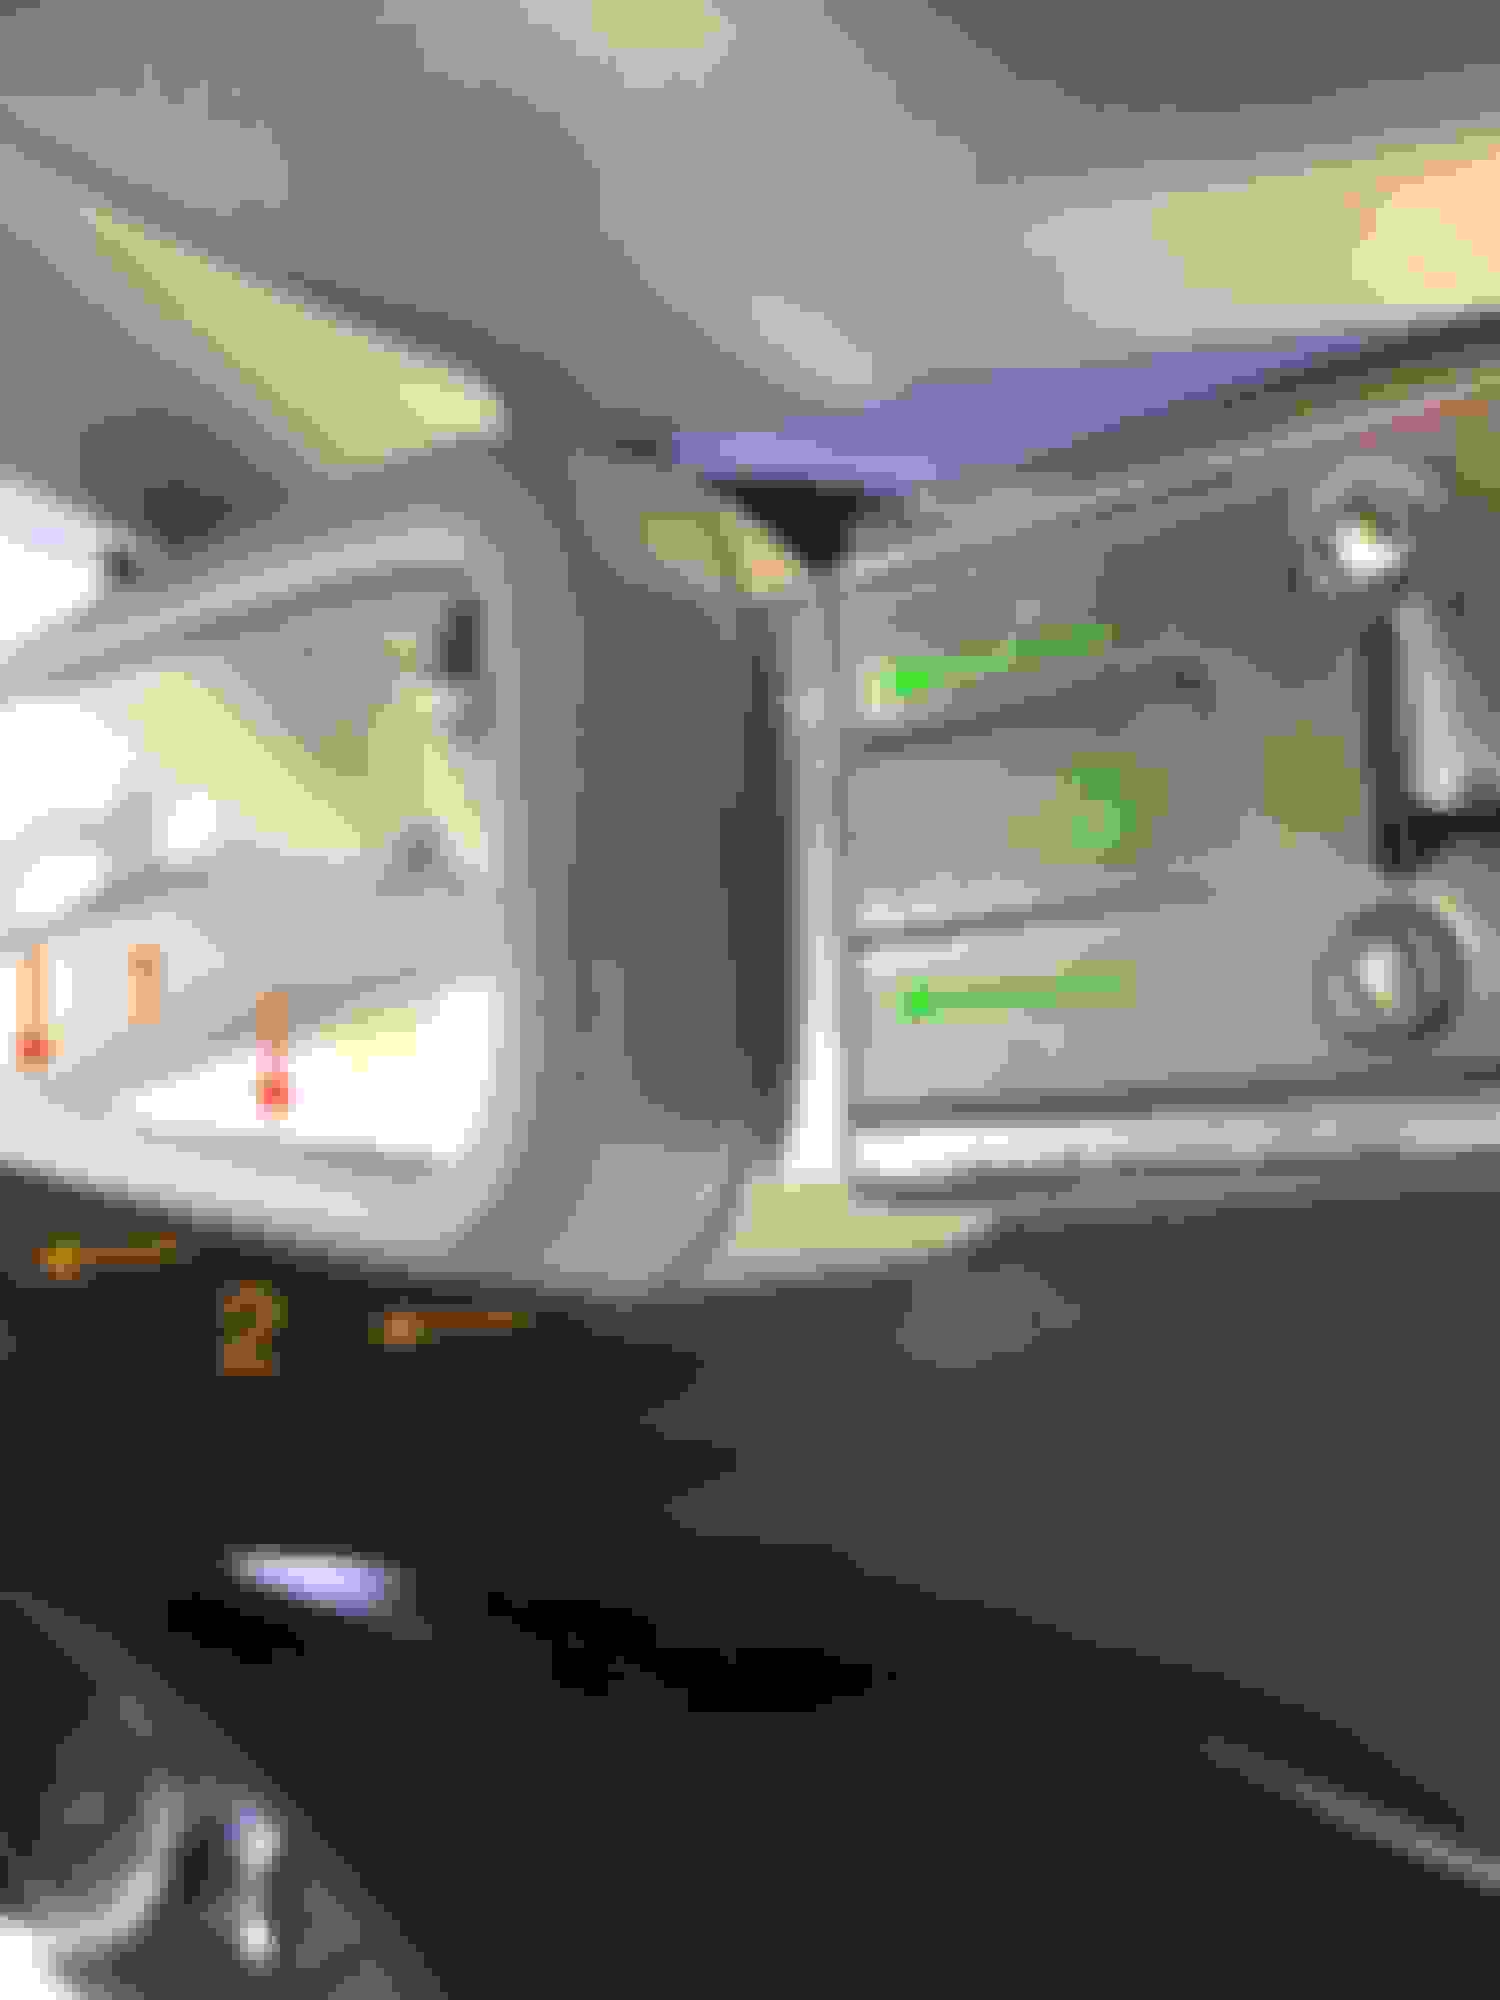
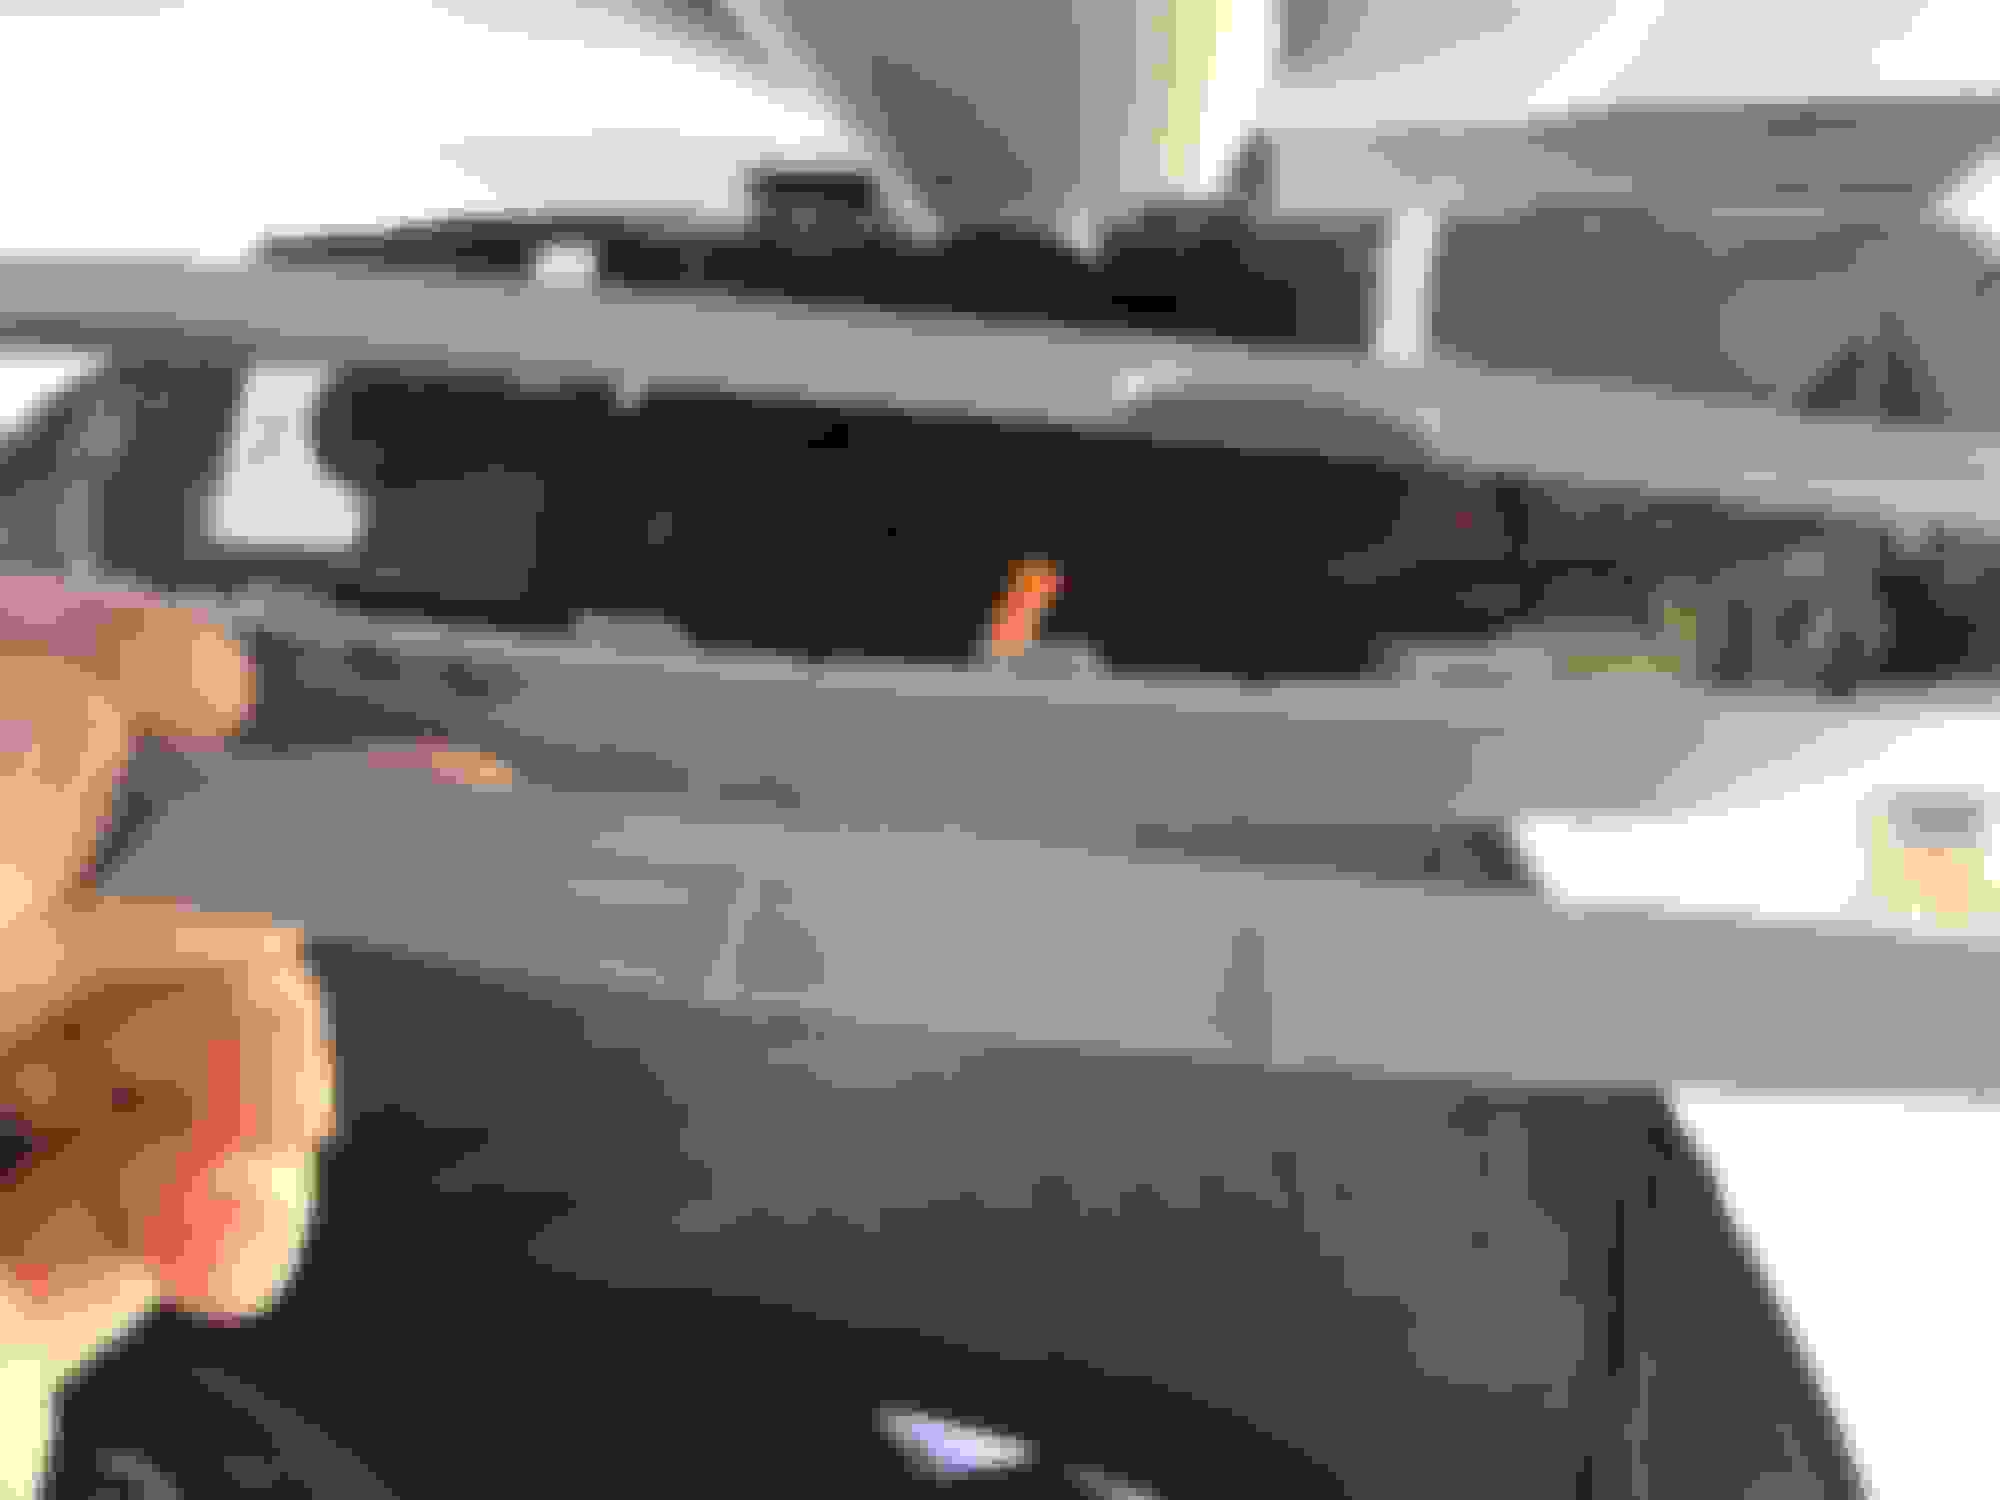
I just replaced the downlight in my rear view mirror, using a 5mm amber spot LED (had to shave off the flange) and a 600 ohm 1/2w resistor. I was able to do this leaving the mirror mounted in the car, by carefully prying off the front plastic bezel and then lifting the mirror out of the way. here are a few pics to better illustrate how the front bezel attaches:
To remove the front bezel, first (1) pull down on the bottom part of the bezel and (2) pull away from the main casing. You should be able to disengage the bottom barbs enough to separate it 1/8" or so and stick a plastic pry tool in there to keep it separated while you work on the sides. Then (3) use a razor knife to release the side barbs. Once you get the sides disengaged, a little wiggling will release the top barbs.
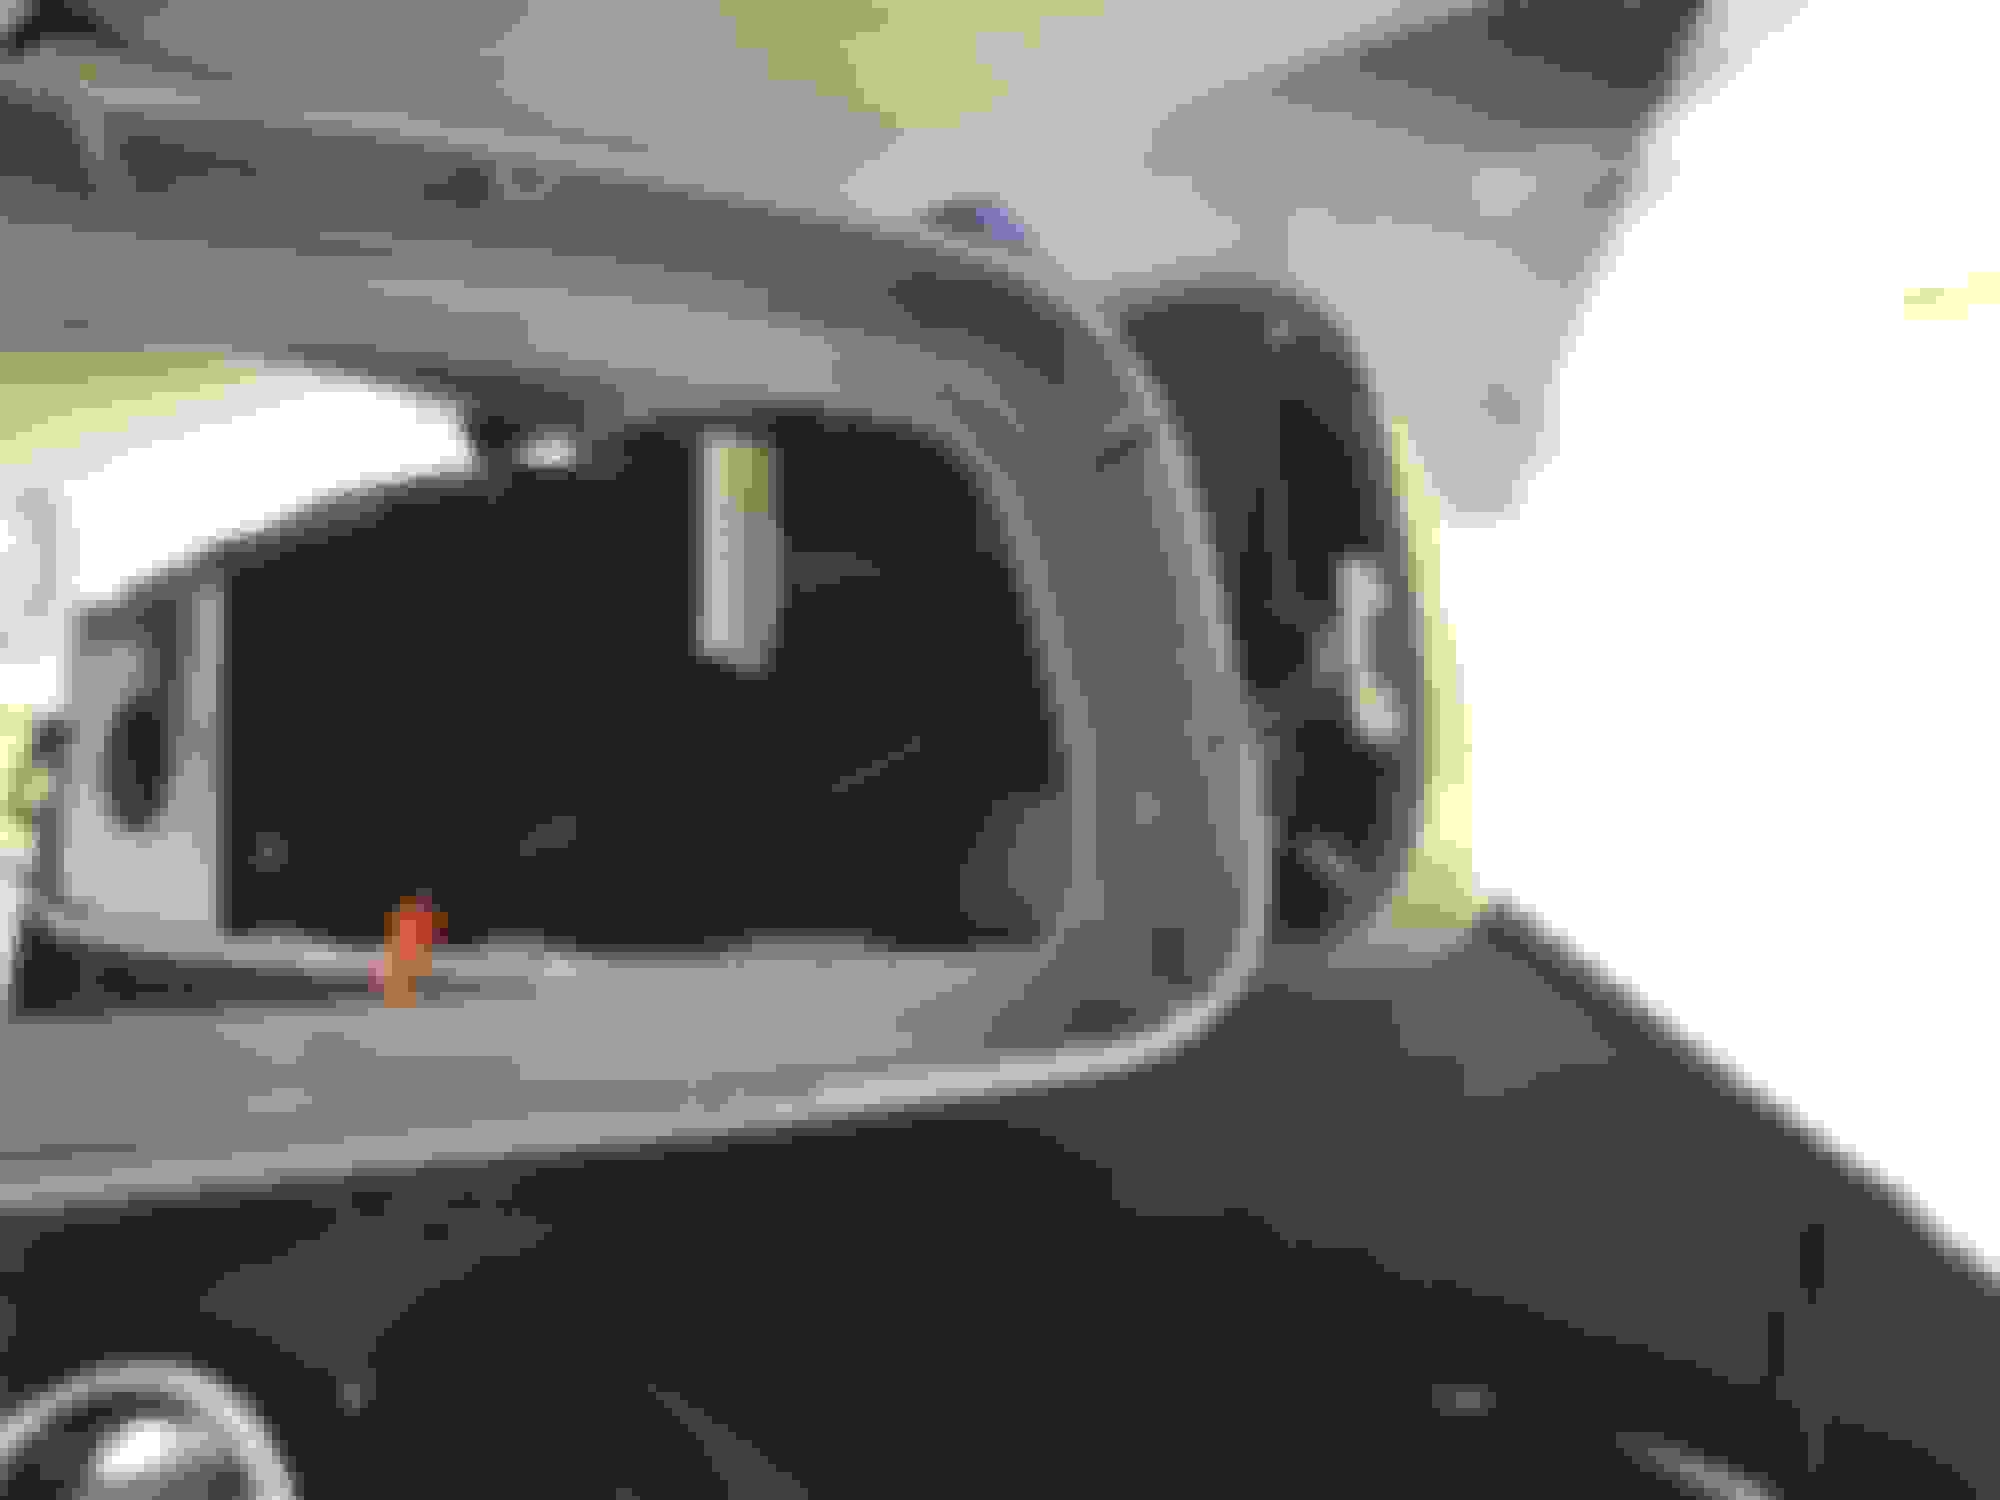
There is a barb on each side of the front bezel ... you have to push in on the side tab in order to disengage it. Use a razor knife to do this:
Inside of front bezel showing 4 bars each top and bottom, one each side:
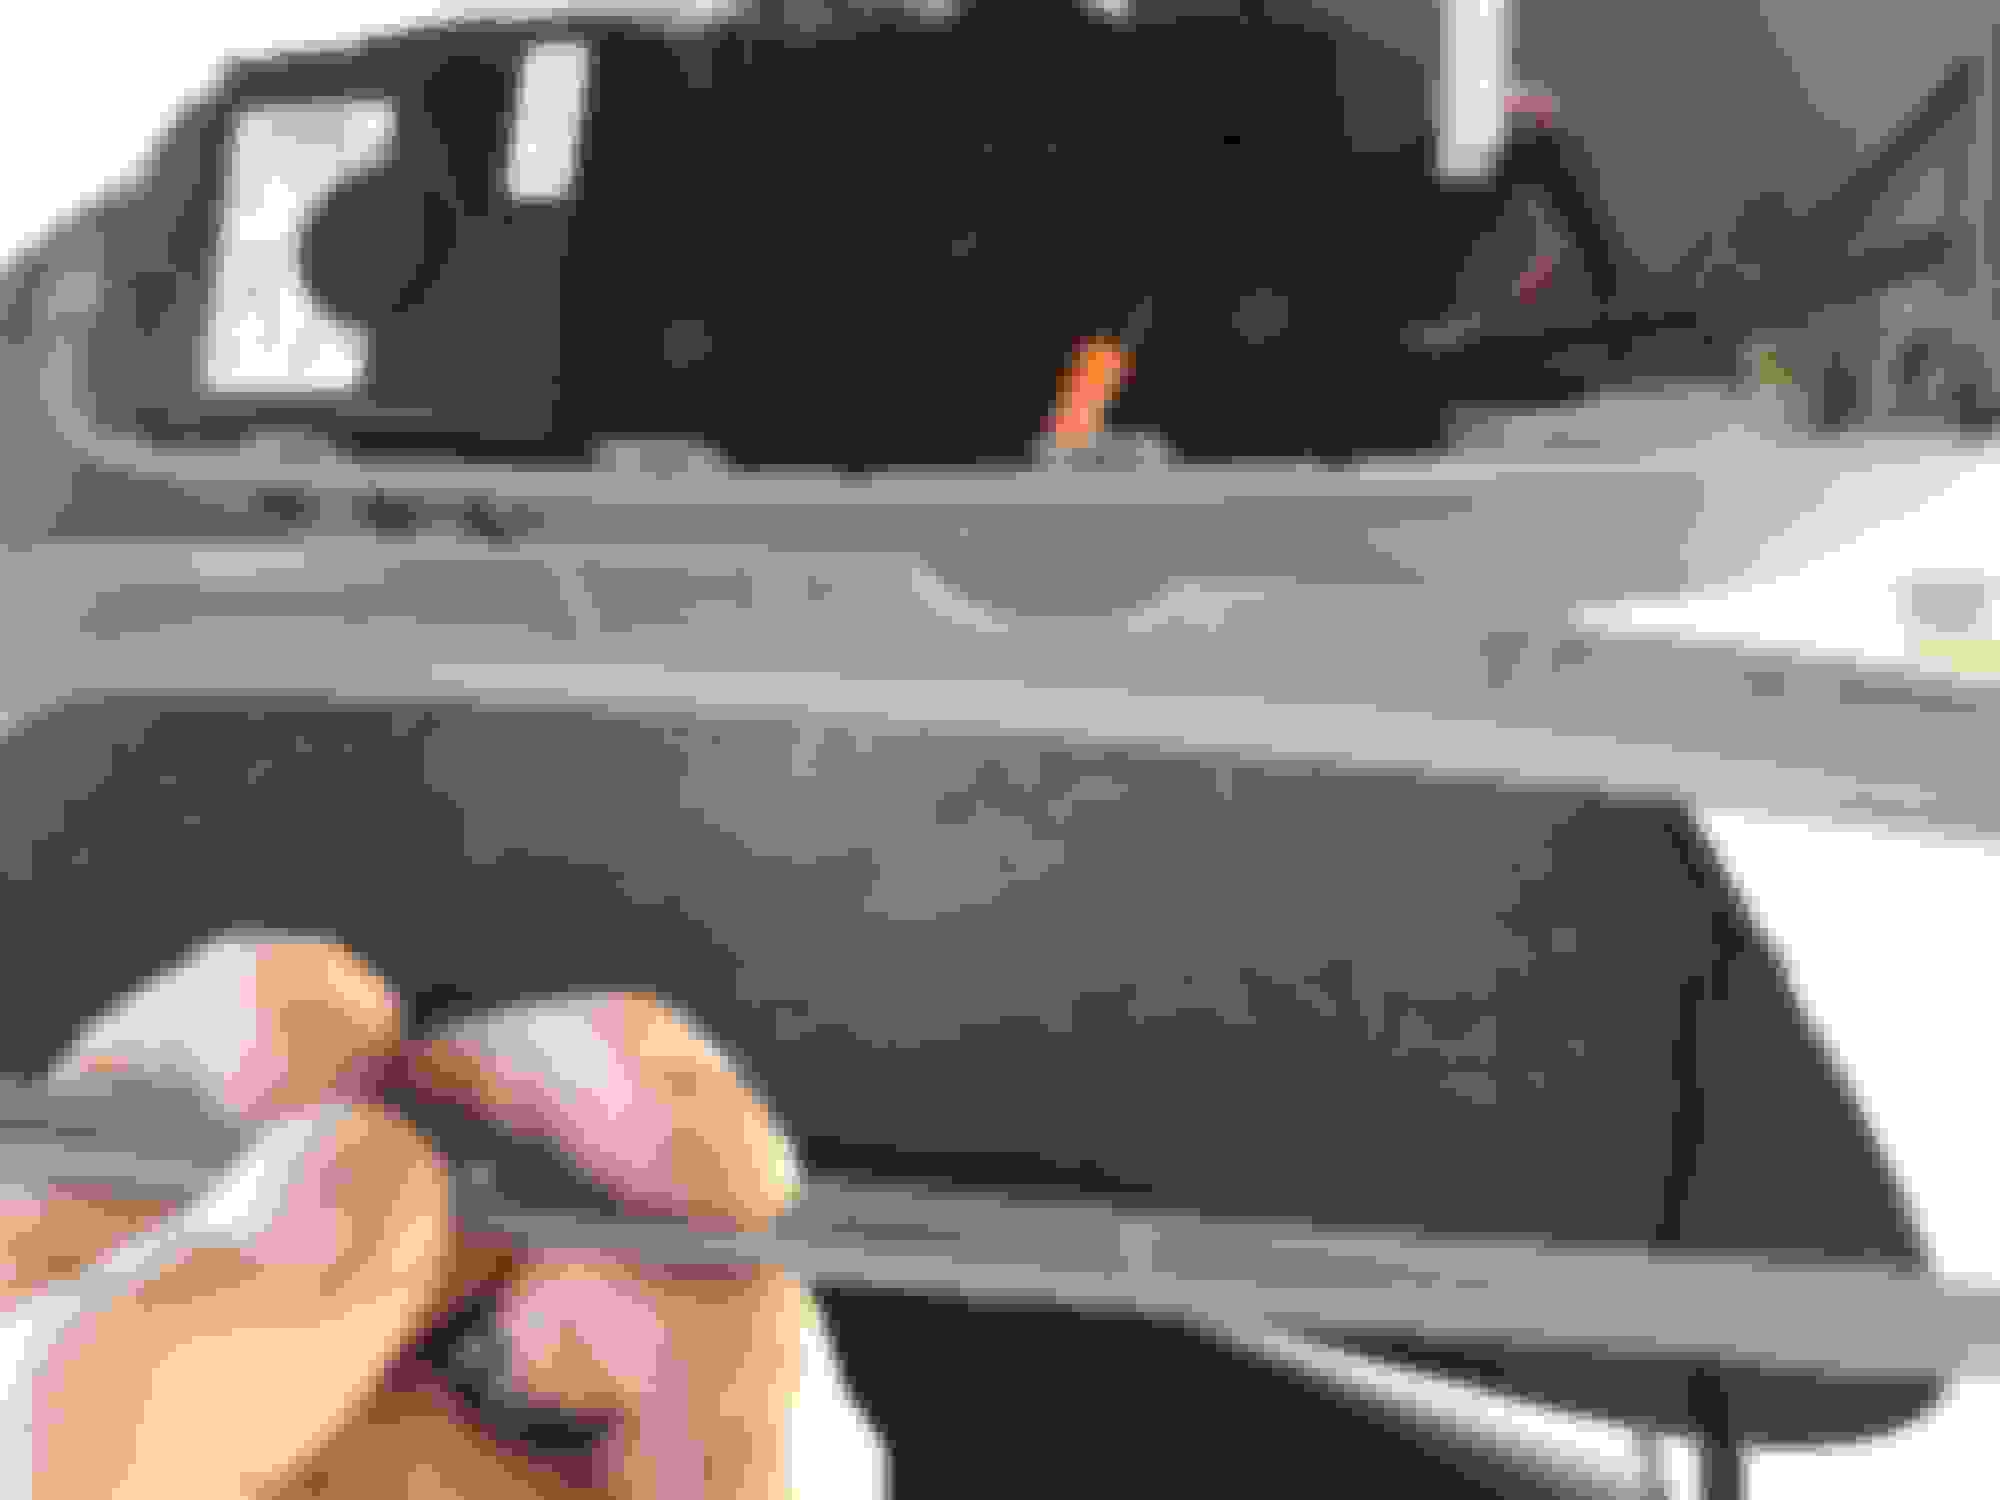
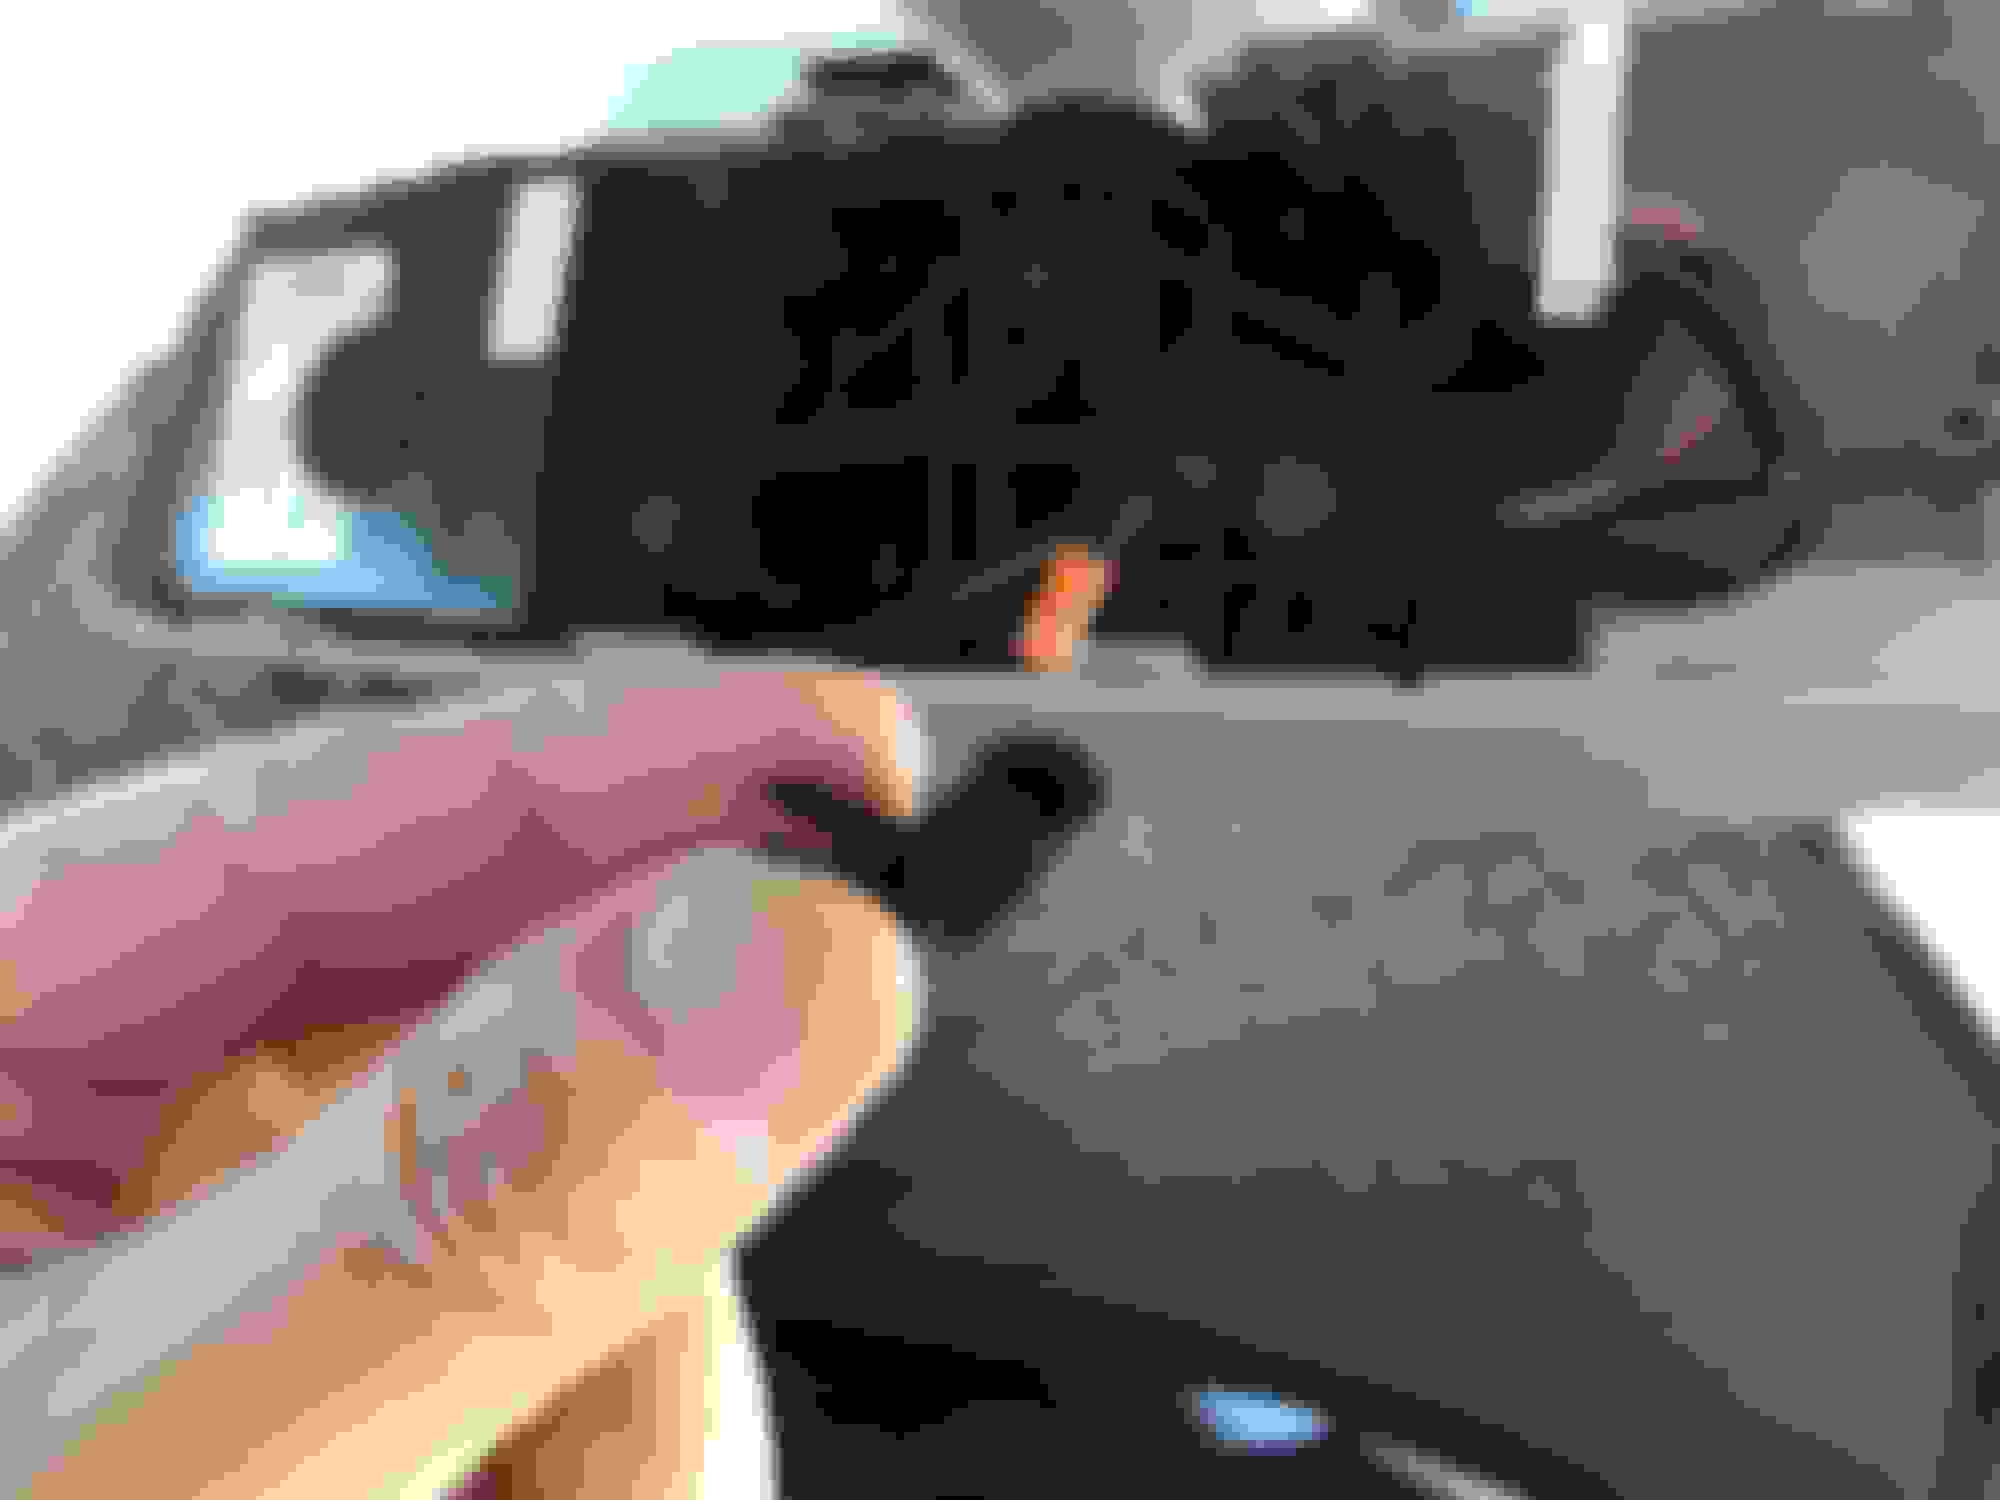
The light itself is housed in a little barrel container that opens and clicks shut. The inside diameter of this is only 4mm, the 5mm LEDs have a barrel that will fit in there as long as you shave the flange off of the LED. After taking 10 minutes to file down that flange and still having a pretty tight fit in the barrel, I'm thinking that a 3mm LED may work just as well here and not require any filing:
You can unplug the mirror and set it out of the way while you work on the wiring in the car. NOTE: the wiring won't supply power unless this plug is plugged back in! So when you are testing your replacement bulb, remember to plug this back in.
Sorry I did not take better photos here ... but the project is fresh in my mind now and I would be happy to answer any questions related to what I did.
Well, it's not quite fresh in my mind anymore ... but I did remember picking up the LEDs and Resistors from the local electronics store ... up here is it San Mateo Electronics ... they had a ton of different LED sizes and light patterns, and resistors of all different resistance ... I don't think I spent more than $4-5 for everything. -- John
Took the car out tonight and the LED is a lot brighter than the incandescant bulb it replaced. Put a NICE amber glow on my CF interior.
**EDIT** It's ALMOST too bright. So to give you an idea, you could read directions or maybe even a map if you hold it up to the air vent level. The LED I used throws at 25degrees so by the time it gets down to the shifter, the light is pretty diffused and illuminates an area a bit larger than a dinner plate. LED's can be dimmed by using different resistors. I may go back and turn it down a bit. Since the LED is amber though, the light isn't annoying at all.
Even if you were to replace the incandescant with another incandescant, there would be soldering involved.
What I COULD do is to solder up a little kit for you and once you get it, you could snip off the old light, strip 2 wires and connect them with small wire connectors. PM me if you're interested.
I know it's been quite some time since you posted this, but could you still product such a kit?
Mercedes SLR McLaren 722 S Is Extremely Rare Example Modified by McLaren
Slideshow: A one-of-one U.S.-spec Mercedes-Benz SLR McLaren Roadster became even rarer after a factory-backed transformation at McLaren's headquarters.


 I had a rearview with ambient light in my c-coupe years ago. It makes a nice difference in the interior.


 I'm just jealous - my car doesn't have one
  It does, however, have lights in the bottom of the doors which some don't. Nice when you step out of the car on a dark night.