


 I've wanted to do this for SO LONG.


Subwoofer replacement DIY

Thread Starter
Junior Member
Joined: Feb 2010
Posts: 21
Likes: 0
From: DC
C 320
Subwoofer replacement DIY
I replaced the stock 10" sub woofer with a JL Audio 10W3v3-4 and added an amp with about 250W RMS. I recommend it to everyone. Check it out:
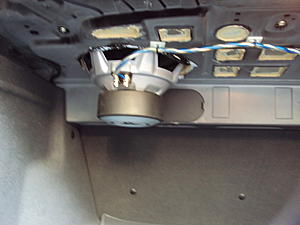
Here's the stock 10" Bose upside down after I removed it. In order to remove it, I took out the rear seats and rear deck. There's a thread here somewhere on how to do that. just remember to unbolt the rear shade from inside the trunk before pulling out the rear deck.
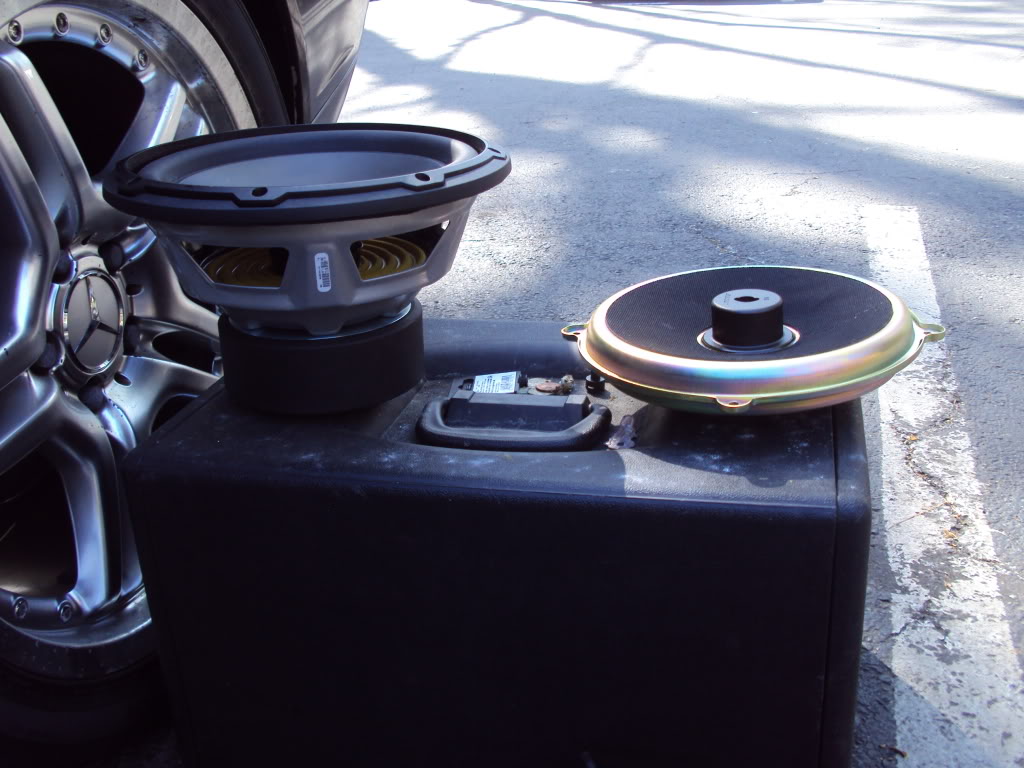
Anyway, look how small the magnet is. It was very thin and light too...
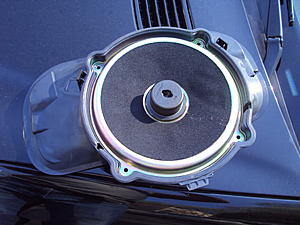
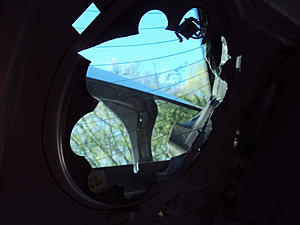
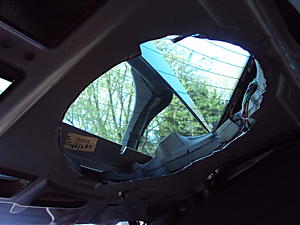
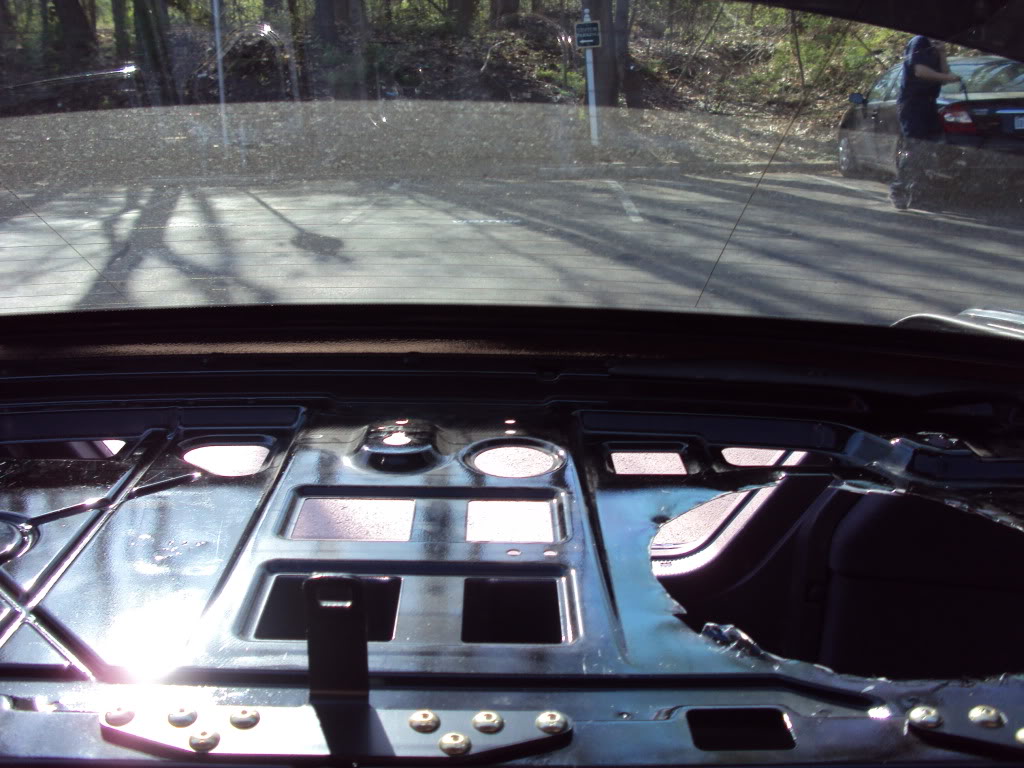
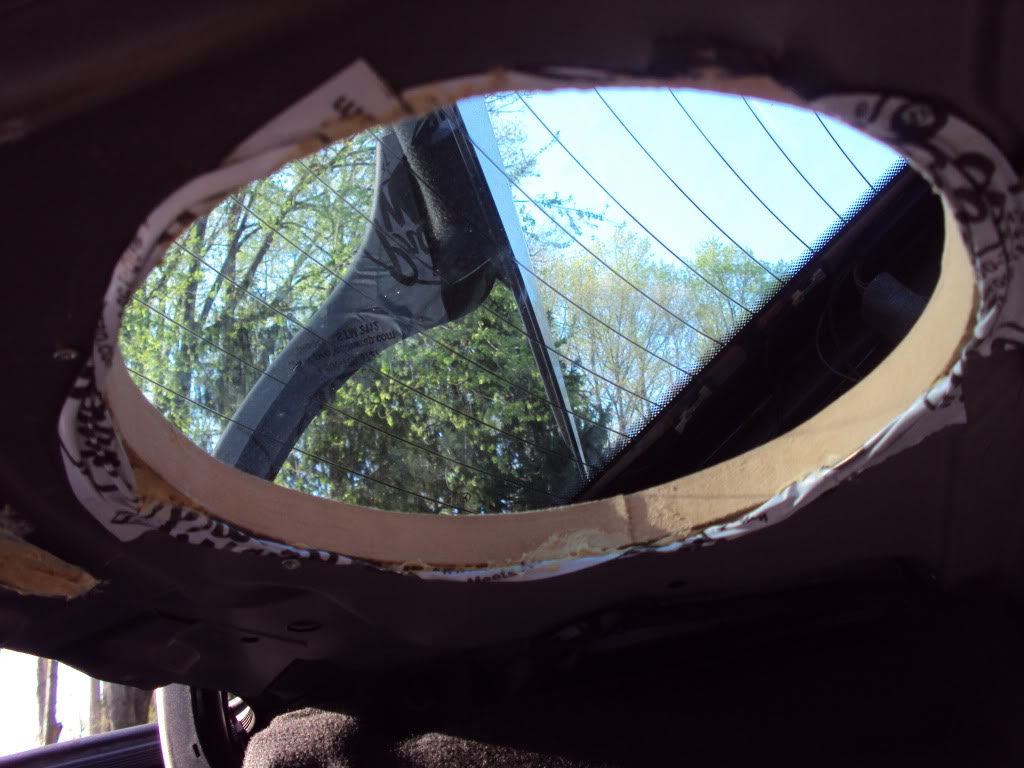
The stock sub sits here in the trunk. If you get in your trunk and look up here, you'll see the little sub and magnet. I've removed the rear deck and sub in the pic below. From inside the car, you see the oval Bose grill.

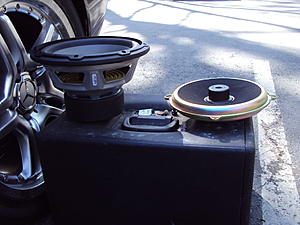
Here's a comparison of the stock vs. the replacement JL 10W3, hahaha. look at the difference in the magnets. And the weight difference was huge, haha.
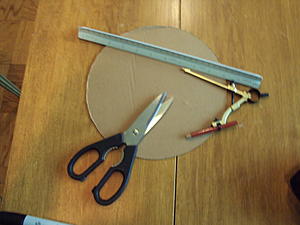
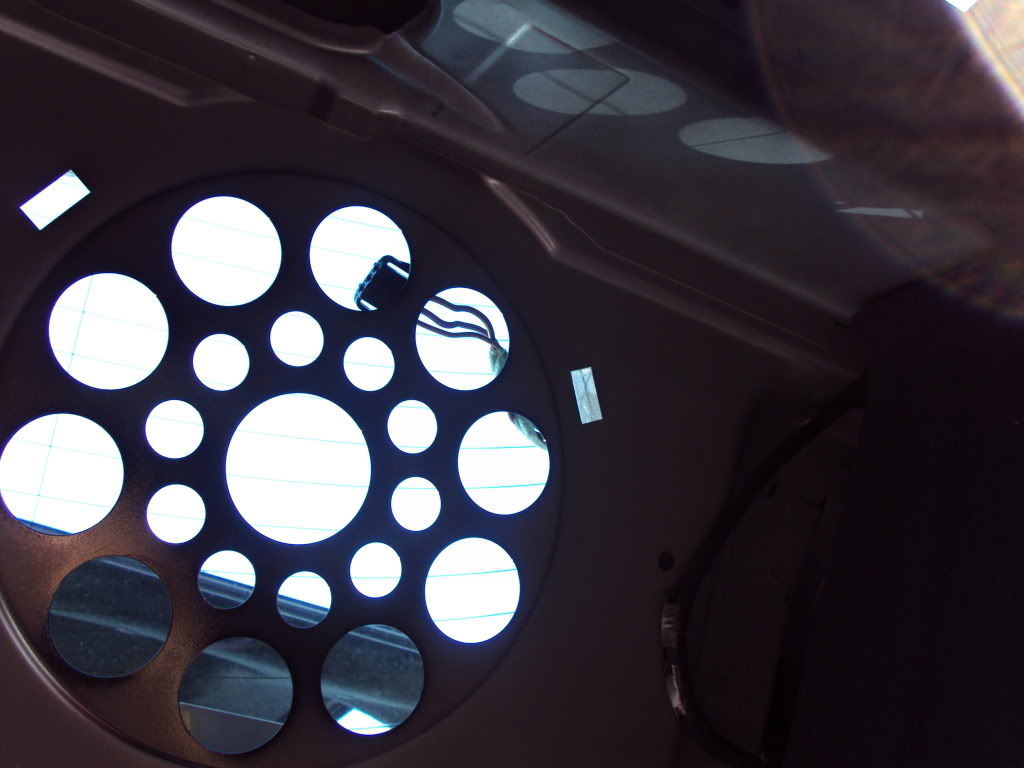
So, let the cutting begin! Measure twice, cut once! Below is the template I made off of the dimensions given by JL. I used the cardboard to draw a circle in the car to cut.
No turning back! This stuff cut like butter, by the way. It's important to use the correct tools. The cutter I'm using is a 90 degree cutter designed to cut this way. You could use a dremel, but you'll get fine iron powder spread everywhere that is impossible to clean out entirely and turns orange when wet. I turned my black BMW interior orange doing this, haha. So I bought some black interior spray paint to fix it. I digress...
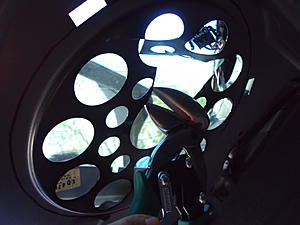
Please wear eye protection as getting metal shavings out of one's eye is likely costly, time consuming and painfull. Juss sayin.
So there it is!
There's room for two 10's, if you move the first aid kit. But you really don't need to do that, unless you want to have a stupid amounts of bass. hmmm...
I'll be back to finish up later. Peace!!!!

Here's the stock 10" Bose upside down after I removed it. In order to remove it, I took out the rear seats and rear deck. There's a thread here somewhere on how to do that. just remember to unbolt the rear shade from inside the trunk before pulling out the rear deck.
Anyway, look how small the magnet is. It was very thin and light too...

The stock sub sits here in the trunk. If you get in your trunk and look up here, you'll see the little sub and magnet. I've removed the rear deck and sub in the pic below. From inside the car, you see the oval Bose grill.
Here's a comparison of the stock vs. the replacement JL 10W3, hahaha. look at the difference in the magnets. And the weight difference was huge, haha.
So, let the cutting begin! Measure twice, cut once! Below is the template I made off of the dimensions given by JL. I used the cardboard to draw a circle in the car to cut.

No turning back! This stuff cut like butter, by the way. It's important to use the correct tools. The cutter I'm using is a 90 degree cutter designed to cut this way. You could use a dremel, but you'll get fine iron powder spread everywhere that is impossible to clean out entirely and turns orange when wet. I turned my black BMW interior orange doing this, haha. So I bought some black interior spray paint to fix it. I digress...

Please wear eye protection as getting metal shavings out of one's eye is likely costly, time consuming and painfull. Juss sayin.

So there it is!

There's room for two 10's, if you move the first aid kit. But you really don't need to do that, unless you want to have a stupid amounts of bass. hmmm...
I'll be back to finish up later. Peace!!!!
Thread Starter
Junior Member
Joined: Feb 2010
Posts: 21
Likes: 0
From: DC
C 320
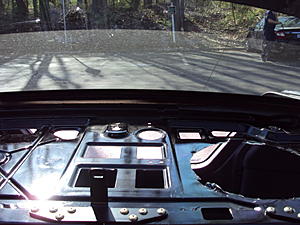
So I'm running "free air", or "infinite baffle", just like stock. But since were pushing some real bass now, I wanted to seal everything up.
Home depot is my friend. Bought some sheet metal there and some glue.
Notice the broken glass, by the way. I bought the car used. Must have been in a nice wreck or something. That explains why the car was mint. haha Everything was replaced.

I cut little shapes to fill the holes. Then glued it up.

Seemed to work for me.
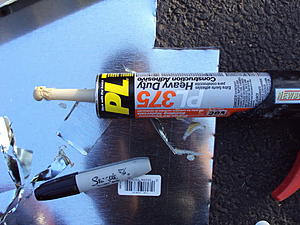
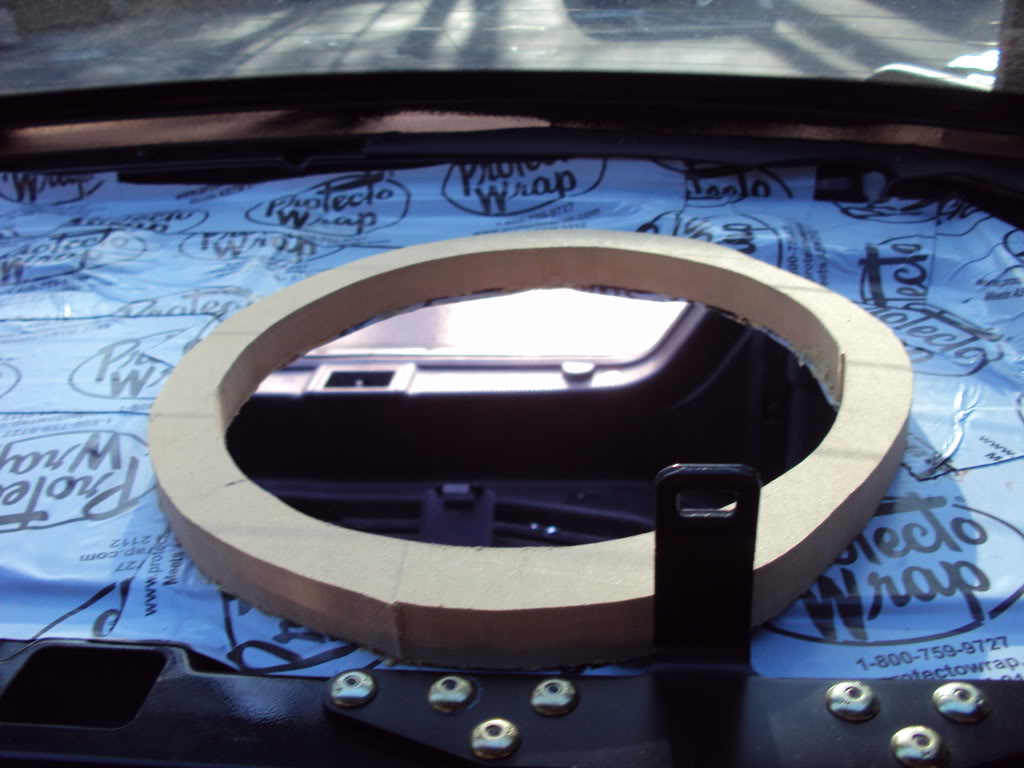
Now for my little secret. PROTECTO WRAP!!! (/superherovoice) It's butel based (similar to Dynomat Extreem) not asphault base. No oder. And it's cheap at Home Depot.

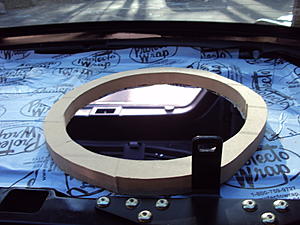
Here we are after deadening and cutting a ring out of 1" thick mdf with a jig saw. I secured the ring to the deck with the same glue, or construction adhesive, and four screws.
If I had to do it over, I would make the mdf wider (across the deck), but not deeper, due to the stuff in teh way. Reason is, when I really crank it up, the whole sheet metal deck moves significantly. hahaha
More to come!
Home depot is my friend. Bought some sheet metal there and some glue.
Notice the broken glass, by the way. I bought the car used. Must have been in a nice wreck or something. That explains why the car was mint. haha Everything was replaced.

I cut little shapes to fill the holes. Then glued it up.

Seemed to work for me.

Now for my little secret. PROTECTO WRAP!!! (/superherovoice) It's butel based (similar to Dynomat Extreem) not asphault base. No oder. And it's cheap at Home Depot.

Here we are after deadening and cutting a ring out of 1" thick mdf with a jig saw. I secured the ring to the deck with the same glue, or construction adhesive, and four screws.
If I had to do it over, I would make the mdf wider (across the deck), but not deeper, due to the stuff in teh way. Reason is, when I really crank it up, the whole sheet metal deck moves significantly. hahaha
More to come!
Thread Starter
Junior Member
Joined: Feb 2010
Posts: 21
Likes: 0
From: DC
C 320
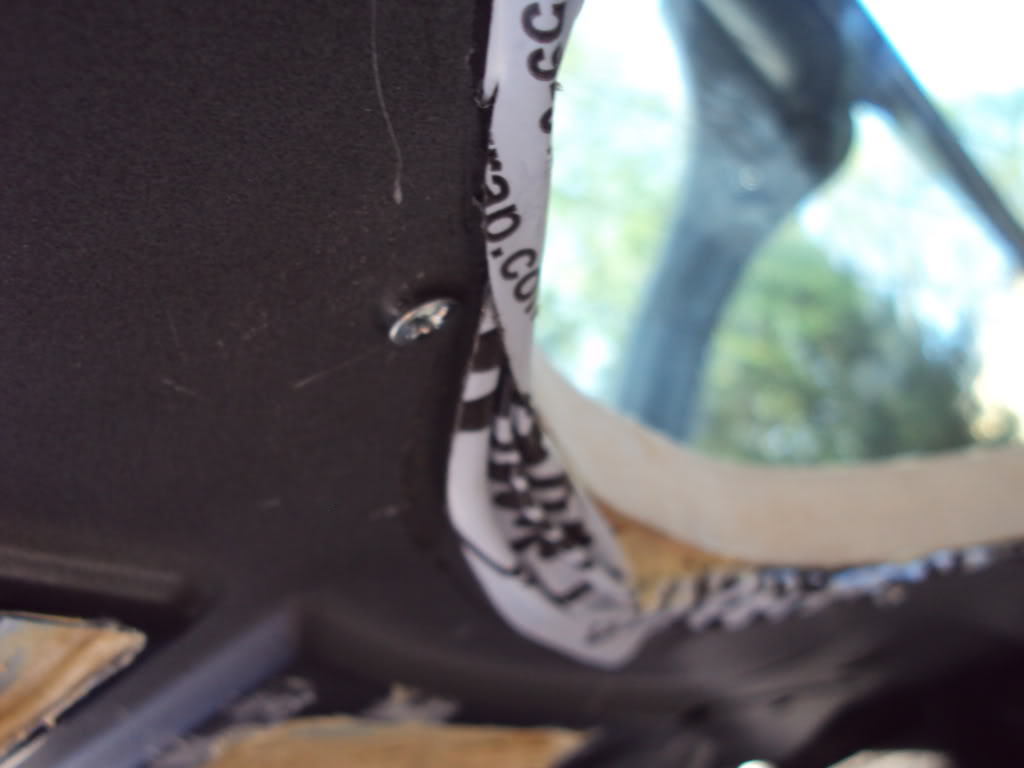
Here's one of the four screws securing the mdf ring to the sheet metal.

Glued and screwed:

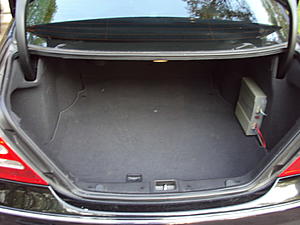
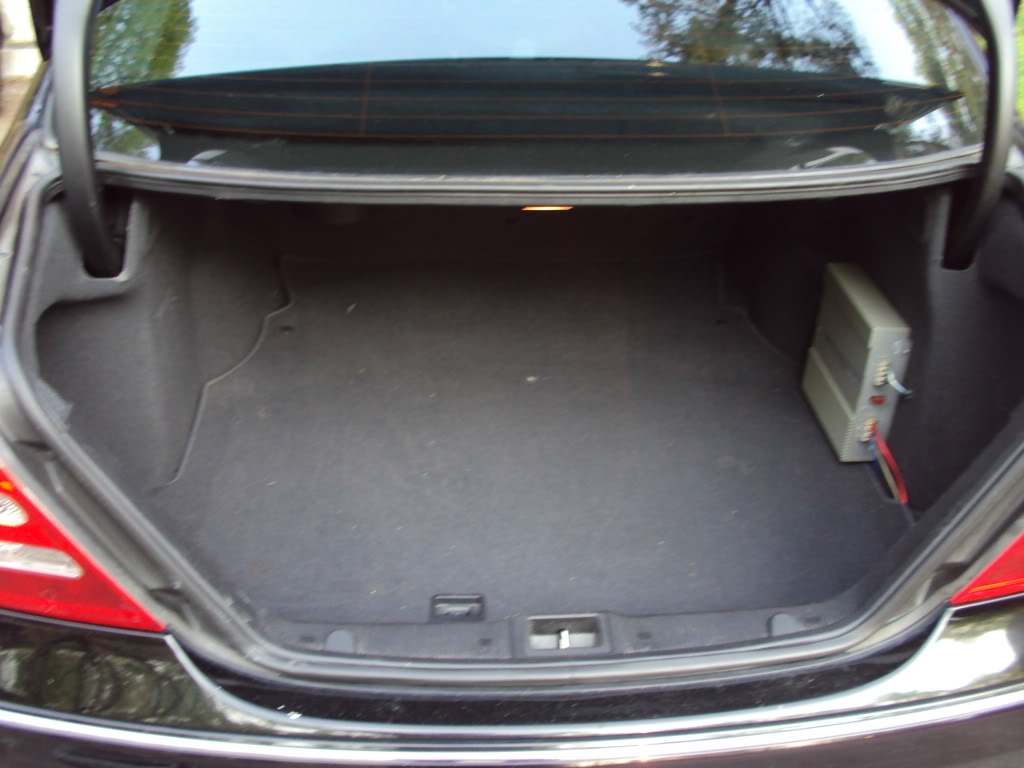
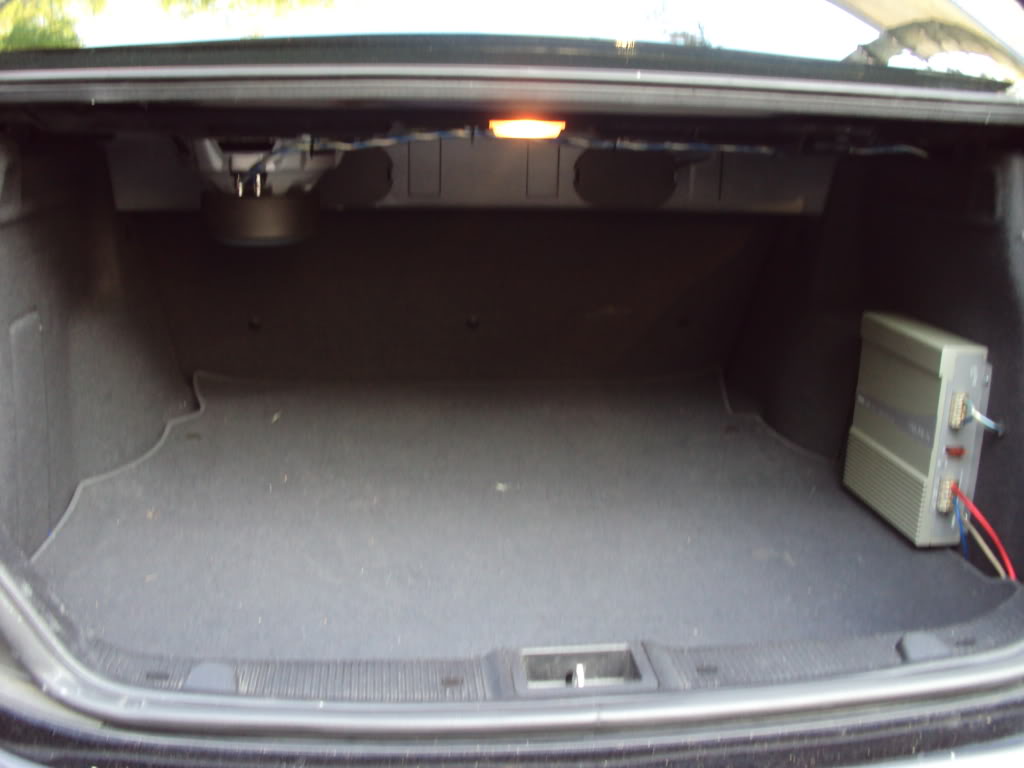
Here we are with the sub mounted. Can you see the difference compared to stock? haha
This pic was taken from eye level. You don't see the sub.
For wiring, I tapped into the line going to the factory sub and ran that to a line output converter, then to the amp using RCA's. The amp was screwed to the trunk carpet with a 1/4" board behind the carpet. The power to the amp was tapped from the power to the stock amp. And there's a stock ground point by the stock amp. Werks perfectly.


I hope that this helps and inspires some of you! Go do it!
Glued and screwed:
Here we are with the sub mounted. Can you see the difference compared to stock? haha

This pic was taken from eye level. You don't see the sub.
For wiring, I tapped into the line going to the factory sub and ran that to a line output converter, then to the amp using RCA's. The amp was screwed to the trunk carpet with a 1/4" board behind the carpet. The power to the amp was tapped from the power to the stock amp. And there's a stock ground point by the stock amp. Werks perfectly.

I hope that this helps and inspires some of you! Go do it!
MBWorld Fanatic!

Joined: Jan 2006
Posts: 3,212
Likes: 8
From: Pasadena, CA
2002 C230K, 2013 BMW 328, 2015 BMW X5
I can see the amount of effort that you put in. Good thing you did this before the heat of summer kicked in.
That JL is awfully heavy to have sagging in the rear tray. Structurally speaking, I'm wondering what the consequences will be for having that amount of weight free hanging.
Did you need to do any eq'ing to help out the sound? Free air installations move quite a bit of air, so my above point becomes all the more concerning.
If anyone is looking for an easier route, I suggest a box and sub.
Ed
Trending Topics
Senior Member
Joined: Oct 2009
Posts: 333
Likes: 2
From: NYC
2007 C280 4Matic
Thank you so much for this! Its just what I needed.
Did you have any problems putting everything back together with the new much larger sub?
What is the OD on the wood ring? I'm in the process of getting my own sub in place, and am afraid I'll have problems clearing the sunshade.
Did you have any problems putting everything back together with the new much larger sub?
What is the OD on the wood ring? I'm in the process of getting my own sub in place, and am afraid I'll have problems clearing the sunshade.
MB World Stories
The Best of Mercedes & AMG

7 Craziest Things AMG Gas Ever Built
Verdad Gallardo
New Electric Mercedes-AMG GT 4-Door Coupe Unveiled: 10 Things You Need to Know
Verdad Gallardo
6 Mercedes Models That Did NOT Age Well (But Are Somehow Still Cool)
Verdad Gallardo
Manual Mercedes? 6 Times Sindelfingen Let Drivers Have All The Fun
Verdad Gallardo
Mercedes SLR McLaren 722 S Is Extremely Rare Example Modified by McLaren
Verdad Gallardo
8 Classic Boxy Mercedes Designs That Have Aged Like Fine Wine
Verdad Gallardo
Flawlessly Restored Mercedes 190E Evo II Heads to Auction
Verdad Gallardo
Electric Mercedes C-Class Unveiled: 11 Things You Need to Know
Verdad Gallardo
Mercedes EQS Gets A Major Update: Everything You Need to Know
Verdad Gallardo
Thread Starter
Junior Member
Joined: Feb 2010
Posts: 21
Likes: 0
From: DC
C 320
No, I didn't take any pics of the amp wiring. Just buy a Line Output Converter (LOC) for $20 and connect the wires that were going to the factory sub to the LOC. Then connect RCA's between the LOC and new amp.
Then you just need power, ground, and remote to your new amp.
Ground is next to the factory amp. You'll see.
Power is the larger red wire with purple stripe (as I recall) going to the stock amp. Just tap into that power line and run that to your new amp.
Remote was found in the fuse box on the other side of the trunk. I just tried different ones until I found one that turned the amp off with the key removed. I think it was the first fuse.
Bestbuy sells an amp installation kit and LOC. That's what I used.
Thread Starter
Junior Member
Joined: Feb 2010
Posts: 21
Likes: 0
From: DC
C 320
I can see the amount of effort that you put in. Good thing you did this before the heat of summer kicked in.
That JL is awfully heavy to have sagging in the rear tray. Structurally speaking, I'm wondering what the consequences will be for having that amount of weight free hanging.
Did you need to do any eq'ing to help out the sound? Free air installations move quite a bit of air, so my above point becomes all the more concerning.
If anyone is looking for an easier route, I suggest a box and sub.
Ed
That JL is awfully heavy to have sagging in the rear tray. Structurally speaking, I'm wondering what the consequences will be for having that amount of weight free hanging.
Did you need to do any eq'ing to help out the sound? Free air installations move quite a bit of air, so my above point becomes all the more concerning.
If anyone is looking for an easier route, I suggest a box and sub.
Ed
I could install the remote gain *** for the amp, but I just don't feel the need and don't want my car appearing modified.
Also, I like subtle mods and have never installed an mdf box. I've made a nice fiberglass box for my BMW and considered doing that for the Merc. But the stock sub in the Merc makes for a perfect oportunity to go IB. It sounds great. In fact, I had the same JL sub in a fiberglass box in my BMW, and the IB set up in the Merc sounds the same.
But if you do want huge bass, get a ported box with a couple of 12's and pound away.
Thread Starter
Junior Member
Joined: Feb 2010
Posts: 21
Likes: 0
From: DC
C 320
Thank you so much for this! Its just what I needed.
Did you have any problems putting everything back together with the new much larger sub?
What is the OD on the wood ring? I'm in the process of getting my own sub in place, and am afraid I'll have problems clearing the sunshade.
Did you have any problems putting everything back together with the new much larger sub?
What is the OD on the wood ring? I'm in the process of getting my own sub in place, and am afraid I'll have problems clearing the sunshade.
You're welcome!
Putting things back together required some pushing. haha I think that's just how it is, even with everything stock. But I left everything else stock and unmodified. The foam sound absorber had to be pushed around a little, but no problem.
The ring is about 1.5 inches wide. You can see that I just eyeballed it and cut the OD with a jigsaw. The ID is important, obviously. Just take a look and give it a shot. Always remember, anything can be fixed. hahaha
MBWorld Fanatic!
Joined: Jan 2006
Posts: 3,212
Likes: 8
From: Pasadena, CA
2002 C230K, 2013 BMW 328, 2015 BMW X5
No eqing for me. I'm using stock everything else. I just adjusted the gain on the amp so that it sounds good with the bass on the middle setting on the head unit. When I turn up the bass on the head unit, it hits very well.
I could install the remote gain *** for the amp, but I just don't feel the need and don't want my car appearing modified.
Also, I like subtle mods and have never installed an mdf box. I've made a nice fiberglass box for my BMW and considered doing that for the Merc. But the stock sub in the Merc makes for a perfect oportunity to go IB. It sounds great. In fact, I had the same JL sub in a fiberglass box in my BMW, and the IB set up in the Merc sounds the same.
But if you do want huge bass, get a ported box with a couple of 12's and pound away.
I actually thought I had a nice sounding car stereo until I recently upgraded my home stereo. Now I have a new benchmark to reach.
Again, I can see the work you put into this, plus having the stock head really will cut down on the probability of theft.
What does the JL weigh? Likely 15+ lbs. I just don't know what that weight will do over time on the package tray. In addition, I wonder what resonance issues come up. I saw that you used a dampner on the tray so perhaps I'm overthinking it.
I'd add some type of brace from under the tray to the trunk floor. But that is just me.

Senior Member
Joined: Mar 2005
Posts: 309
Likes: 0
From: New Jersey, USA
Black 04 C230 Kompressor SS
No, I didn't take any pics of the amp wiring. Just buy a Line Output Converter (LOC) for $20 and connect the wires that were going to the factory sub to the LOC. Then connect RCA's between the LOC and new amp.
Then you just need power, ground, and remote to your new amp.
Ground is next to the factory amp. You'll see.
Power is the larger red wire with purple stripe (as I recall) going to the stock amp. Just tap into that power line and run that to your new amp.
Remote was found in the fuse box on the other side of the trunk. I just tried different ones until I found one that turned the amp off with the key removed. I think it was the first fuse.
Bestbuy sells an amp installation kit and LOC. That's what I used.
Senior Member
Joined: Mar 2005
Posts: 309
Likes: 0
From: New Jersey, USA
Black 04 C230 Kompressor SS

Newbie
Joined: May 2017
Posts: 9
Likes: 0
2006 C180 Kompressor
Subwoofer install with stock system
Here's one of the four screws securing the mdf ring to the sheet metal.
Attachment 408356
Glued and screwed:
Attachment 408357
Here we are with the sub mounted. Can you see the difference compared to stock? haha
Attachment 408358
This pic was taken from eye level. You don't see the sub.
Attachment 408359
For wiring, I tapped into the line going to the factory sub and ran that to a line output converter, then to the amp using RCA's. The amp was screwed to the trunk carpet with a 1/4" board behind the carpet. The power to the amp was tapped from the power to the stock amp. And there's a stock ground point by the stock amp. Werks perfectly.
Attachment 408360
Attachment 408361
I hope that this helps and inspires some of you! Go do it!
Newbie
Joined: Jan 2020
Posts: 9
Likes: 0
From: Toulouse
C220 CDI 2001
So I'm running "free air", or "infinite baffle", just like stock. But since were pushing some real bass now, I wanted to seal everything up.
Home depot is my friend. Bought some sheet metal there and some glue.
Notice the broken glass, by the way. I bought the car used. Must have been in a nice wreck or something. That explains why the car was mint. haha Everything was replaced.
Attachment 408351
I cut little shapes to fill the holes. Then glued it up.
Attachment 408352
Seemed to work for me.
Attachment 408353
Now for my little secret. PROTECTO WRAP!!! (/superherovoice) It's butel based (similar to Dynomat Extreem) not asphault base. No oder. And it's cheap at Home Depot.
Attachment 408354
Here we are after deadening and cutting a ring out of 1" thick mdf with a jig saw. I secured the ring to the deck with the same glue, or construction adhesive, and four screws.
If I had to do it over, I would make the mdf wider (across the deck), but not deeper, due to the stuff in teh way. Reason is, when I really crank it up, the whole sheet metal deck moves significantly. hahaha
Attachment 408355
More to come!
Where did you get the +12V

MBWorld Fanatic!


Joined: Jul 2017
Posts: 1,005
Likes: 148
From: Richmond, VA Metro Area
2005 C230 Sport Sedan-6 Speed Manual
Power for a subwoofer
This thread shows how to use the battery as a source for 12 volt power. You may also be able to use the rear SAM (signal acquisition module.). I don�t have any experience using the SAM as a power source. I was not sure how to do it and I didn�t want to damage anything.
This thread shows how to use the battery as a source for 12 volt power. You may also be able to use the rear SAM (signal acquisition module.). I don�t have any experience using the SAM as a power source. I was not sure how to do it and I didn�t want to damage anything.


