W203 05 C230 1.8K M271 Engine/Motor Mount DIY Tips
#1
Newbie
Thread Starter
Join Date: Feb 2017
Location: Birmingham, AL
Posts: 13
Likes: 0
Received 0 Likes
on
0 Posts
2005 C230 Sedan 1.8K
W203 05 C230 1.8K M271 Engine/Motor Mount DIY Tips
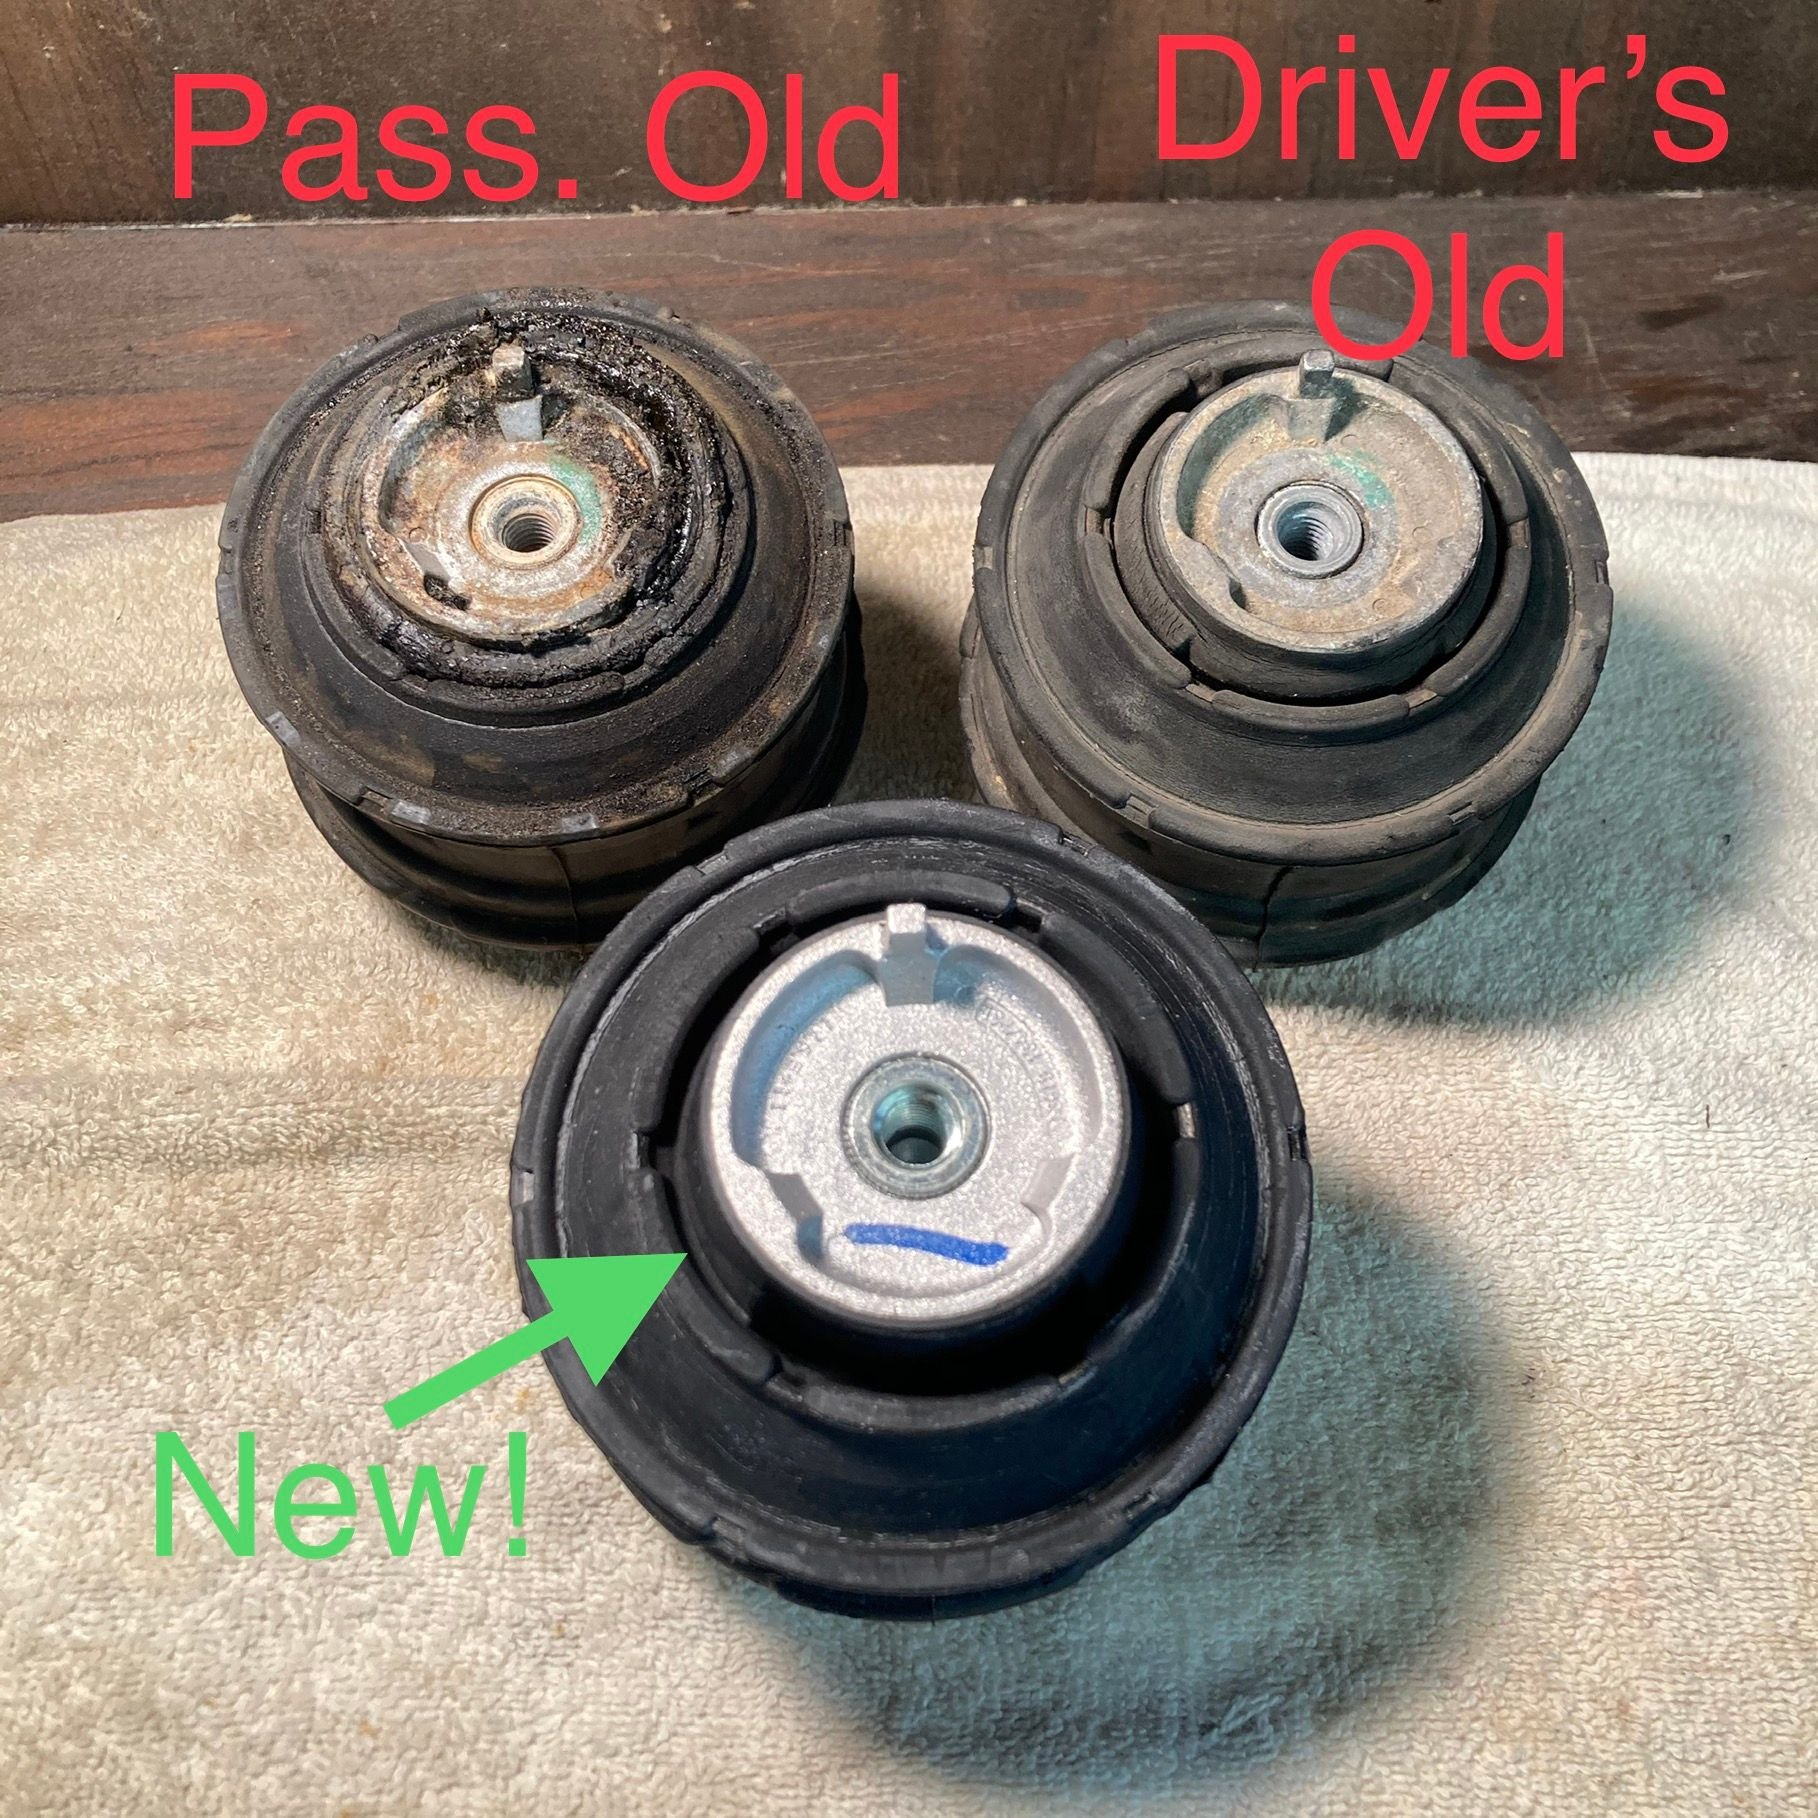
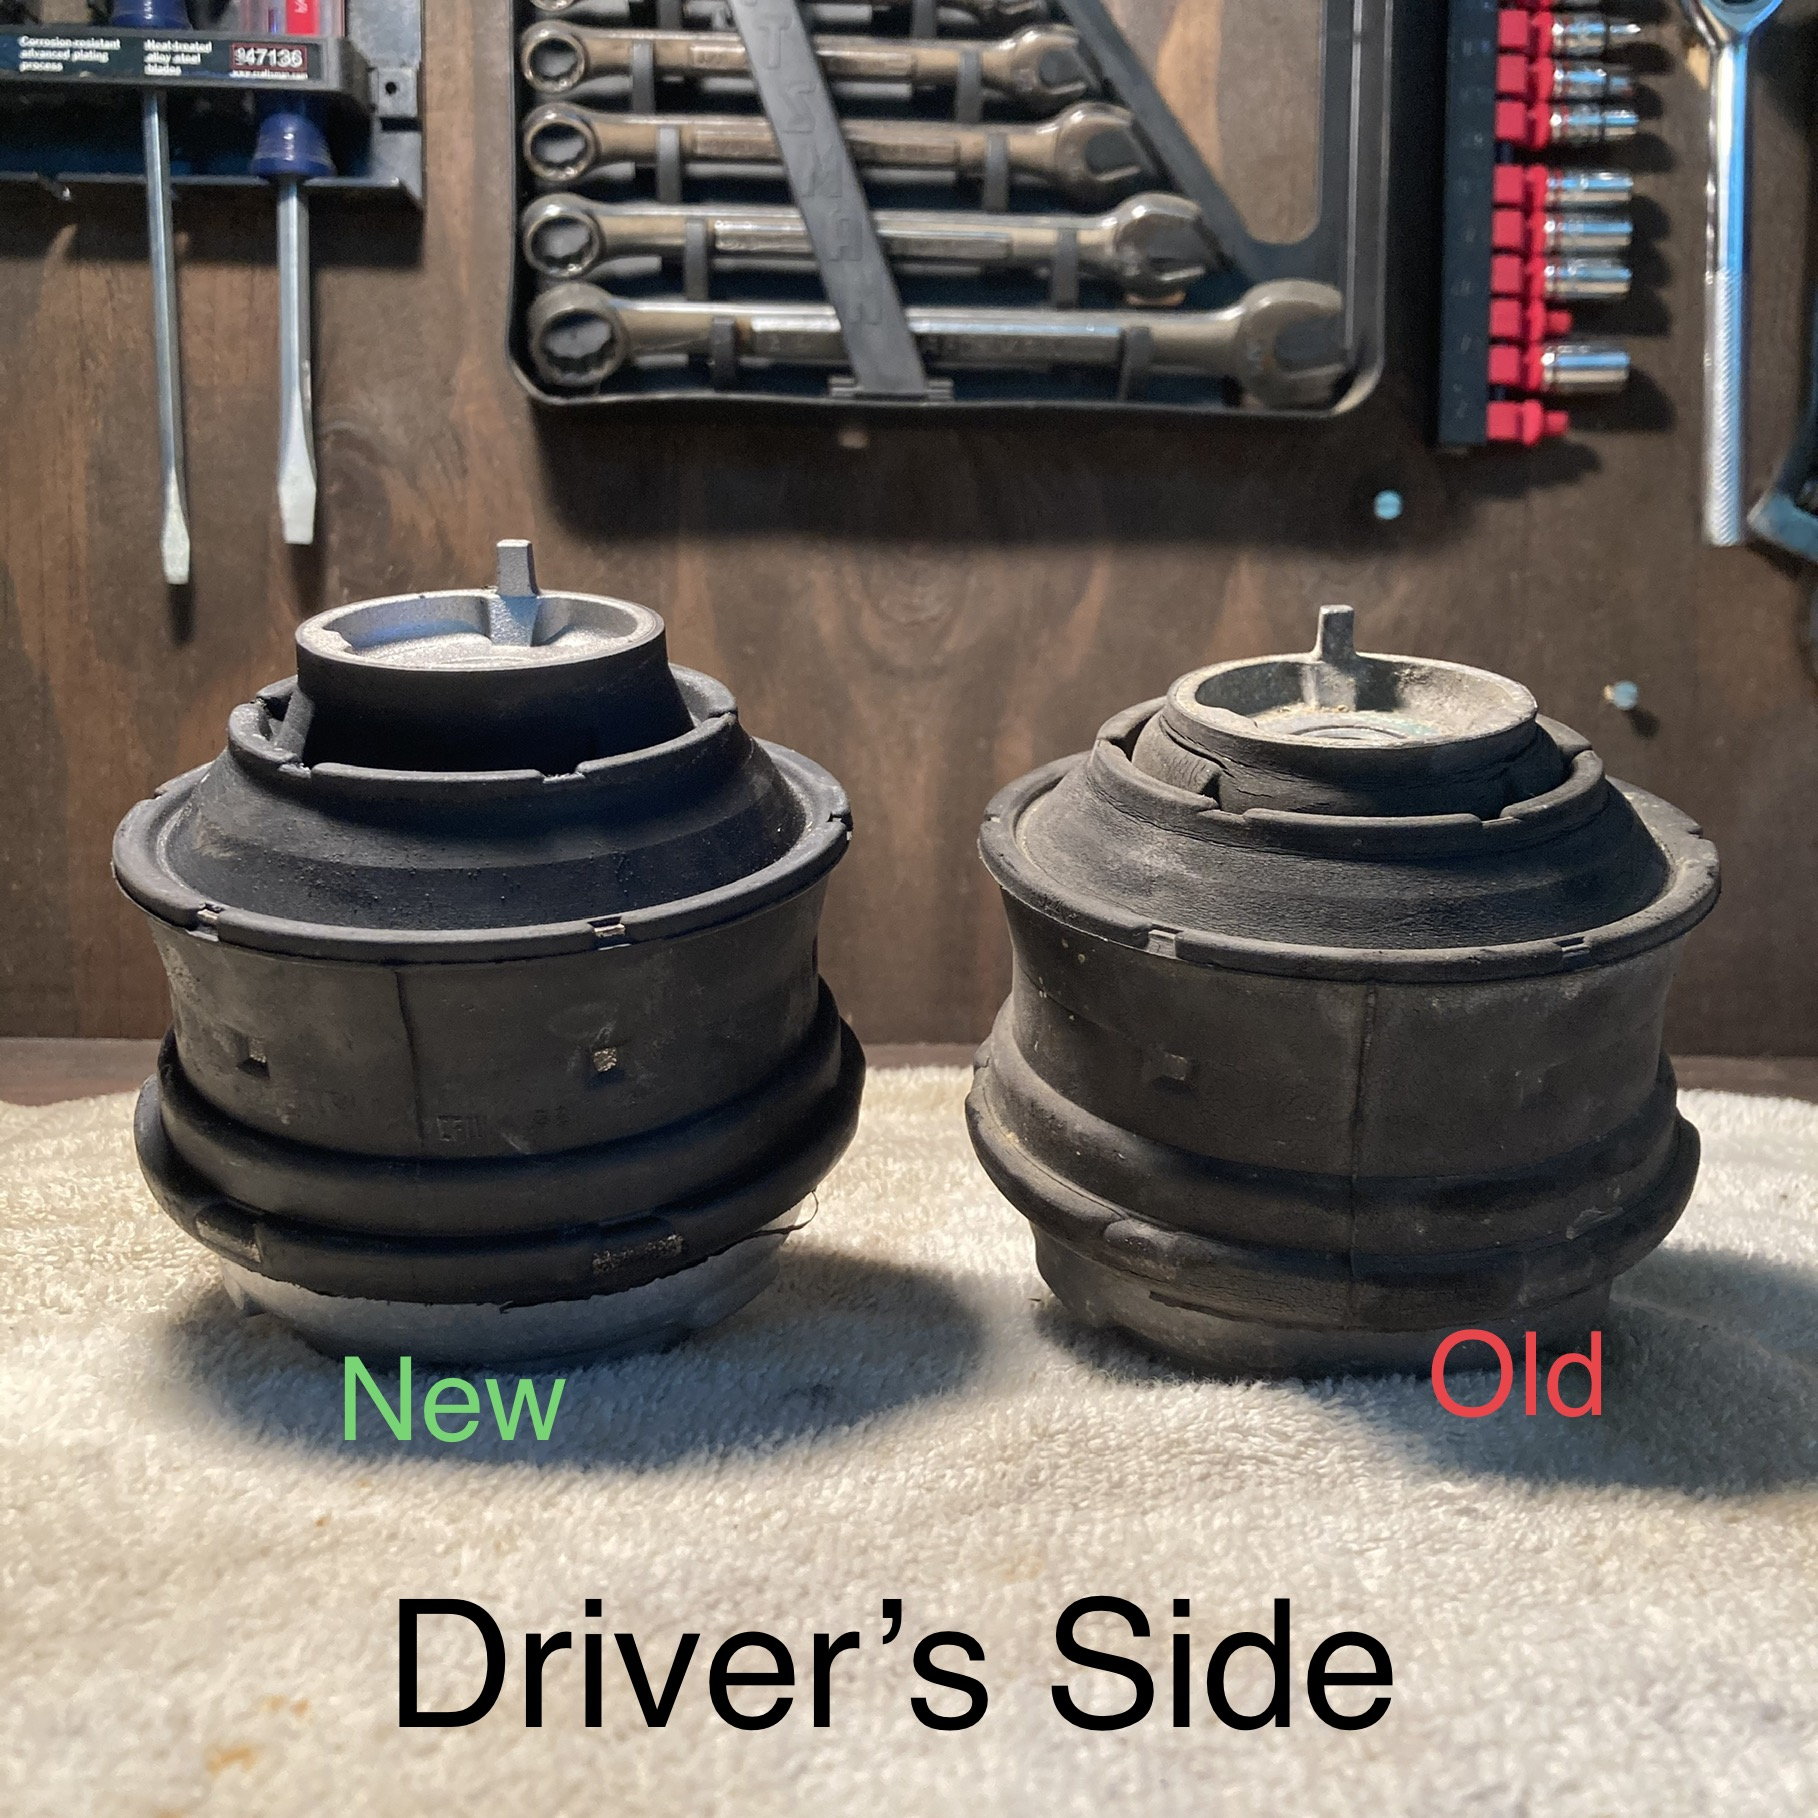
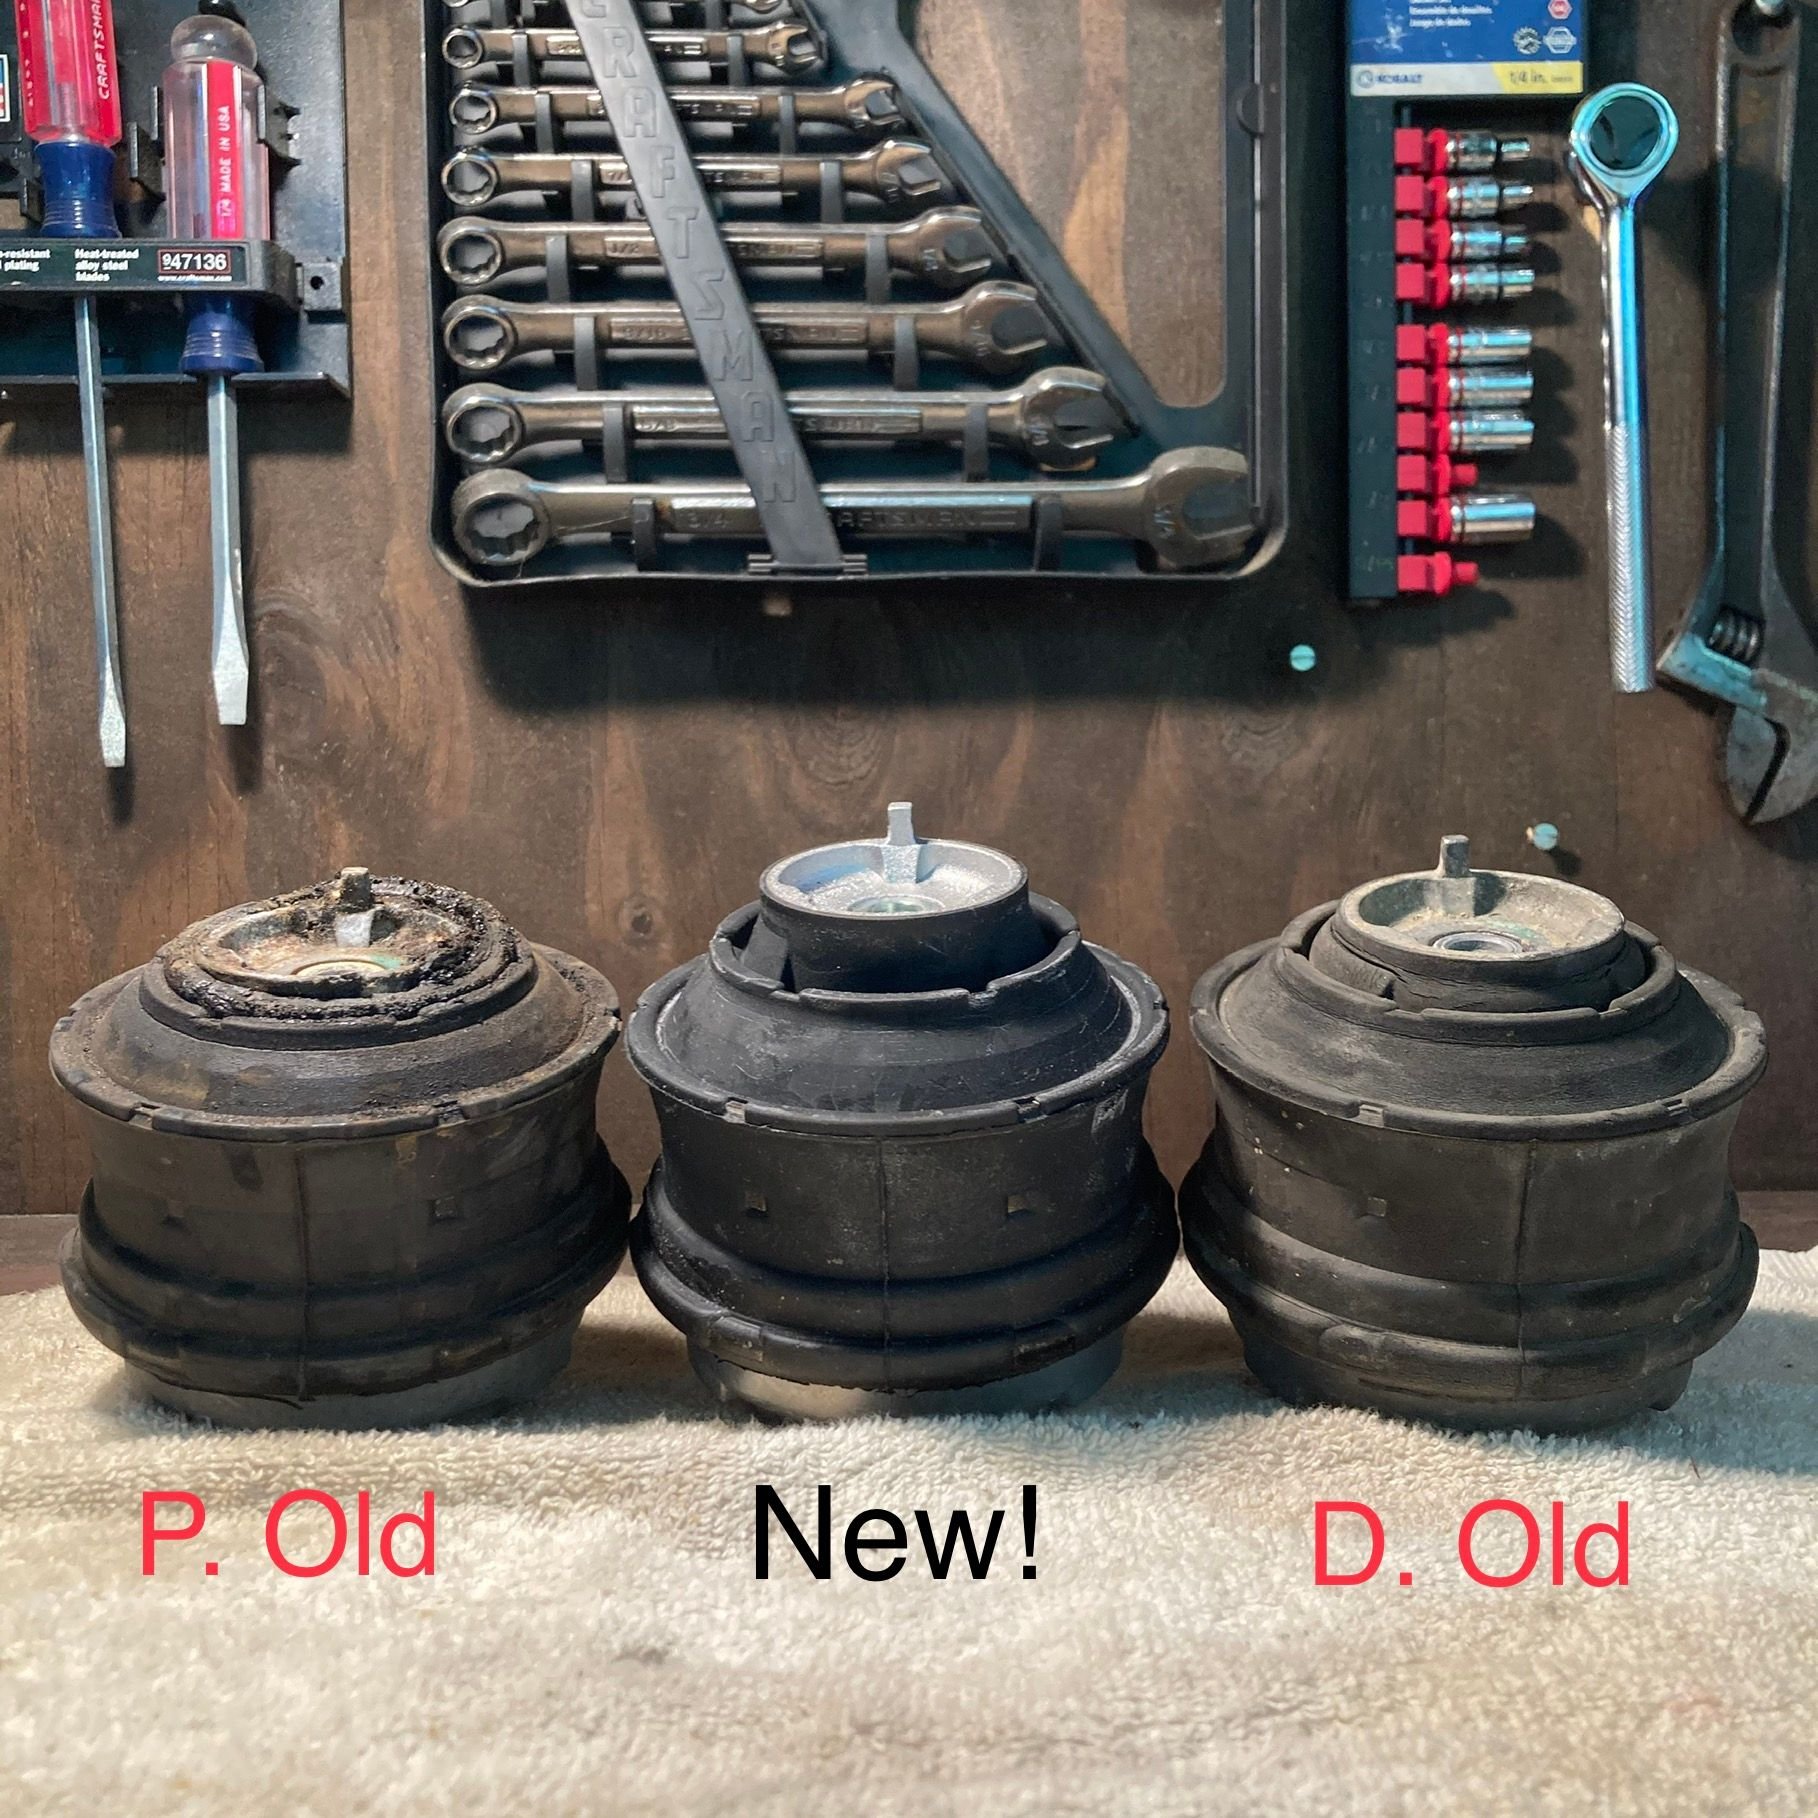
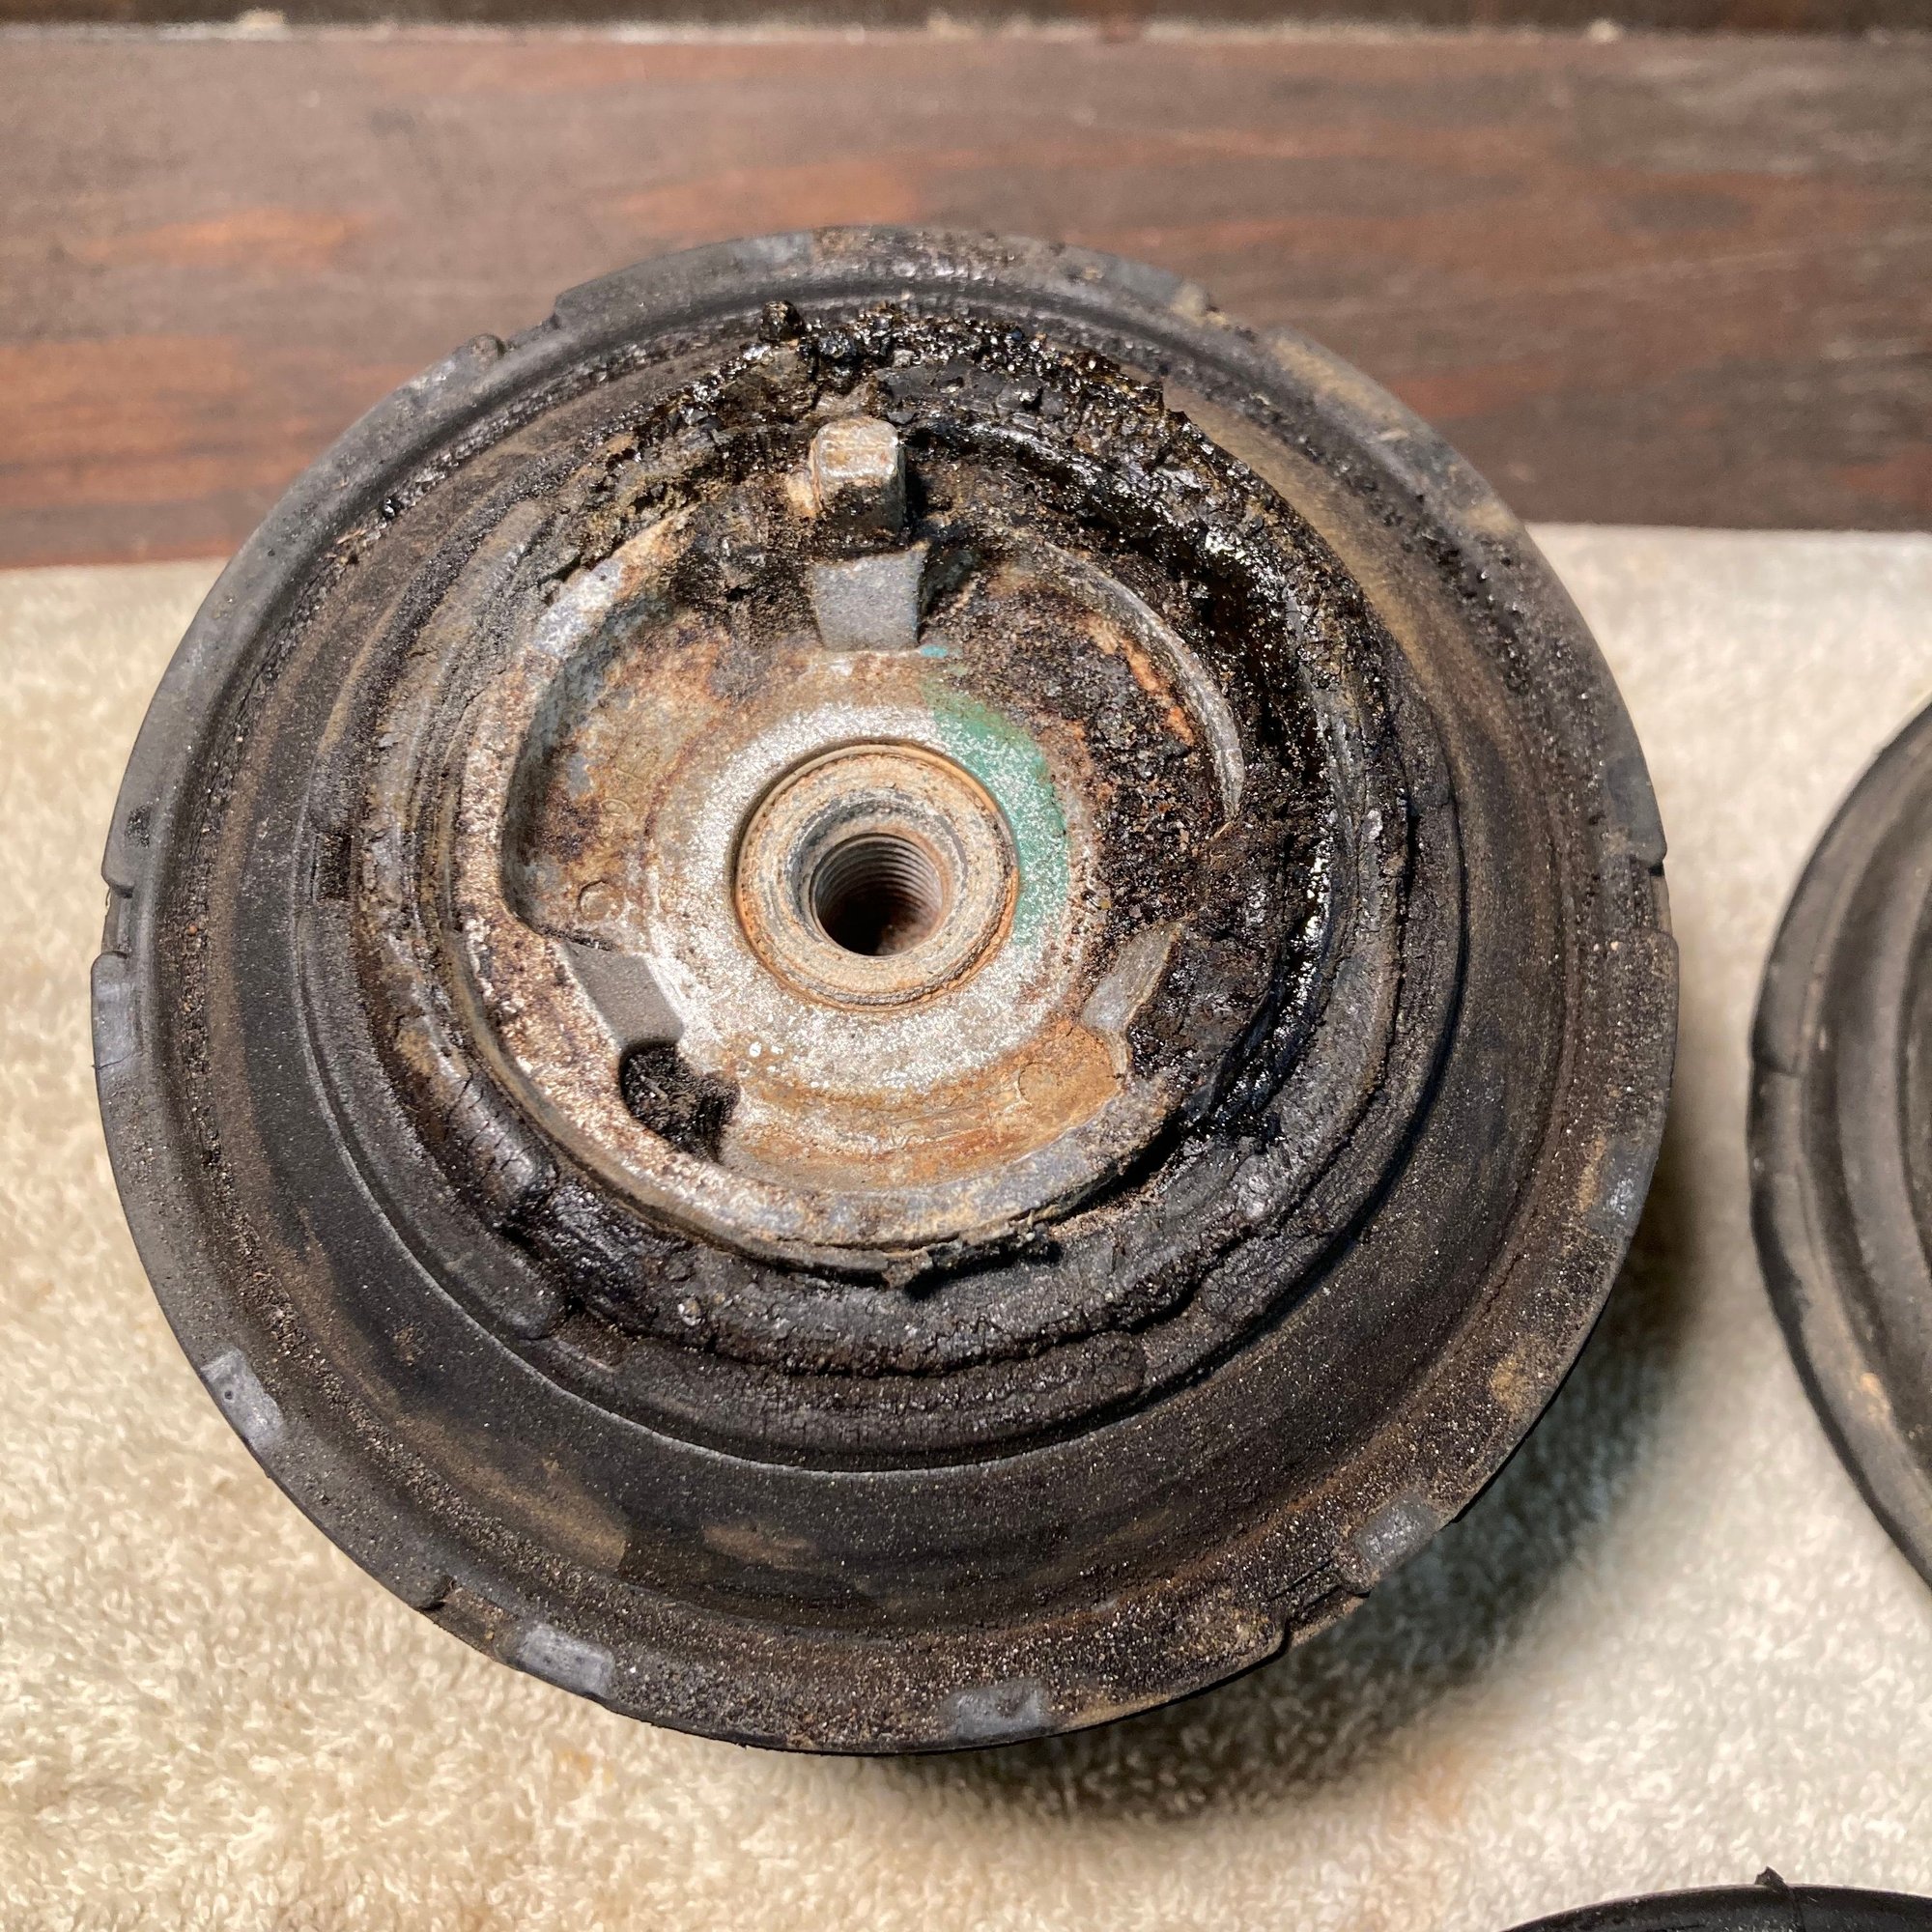
Hey guys, I would like to thank all of those that have contributed their knowledge and experience to the forum as it has enabled me to keep my wife's little Kompressor in roadworthy condition for the last few years. This is not intended to be a complete DIY write-up on doing motor & trans mounts in her 05 W203 w/ M271 sedan, but will hopefully answer some of the questions that you may have before starting the job. I was able to perform this job in the driveway with (relatively) basic handtools in just several hours for a total of $206.46, coming in well ahead of the dealership's $1800+ quote. The car and engine were experiencing a strong vibration when in Drive & Reverse while stopped. While replacing the mounts cured the vibration being felt inside the car, the engine vibration (that only occurred when in D & R while stopped, mimicking bad motor mount symptoms) ultimately ended up being from a seized alternator pulley (that is supposed to freewheel in one direction!).
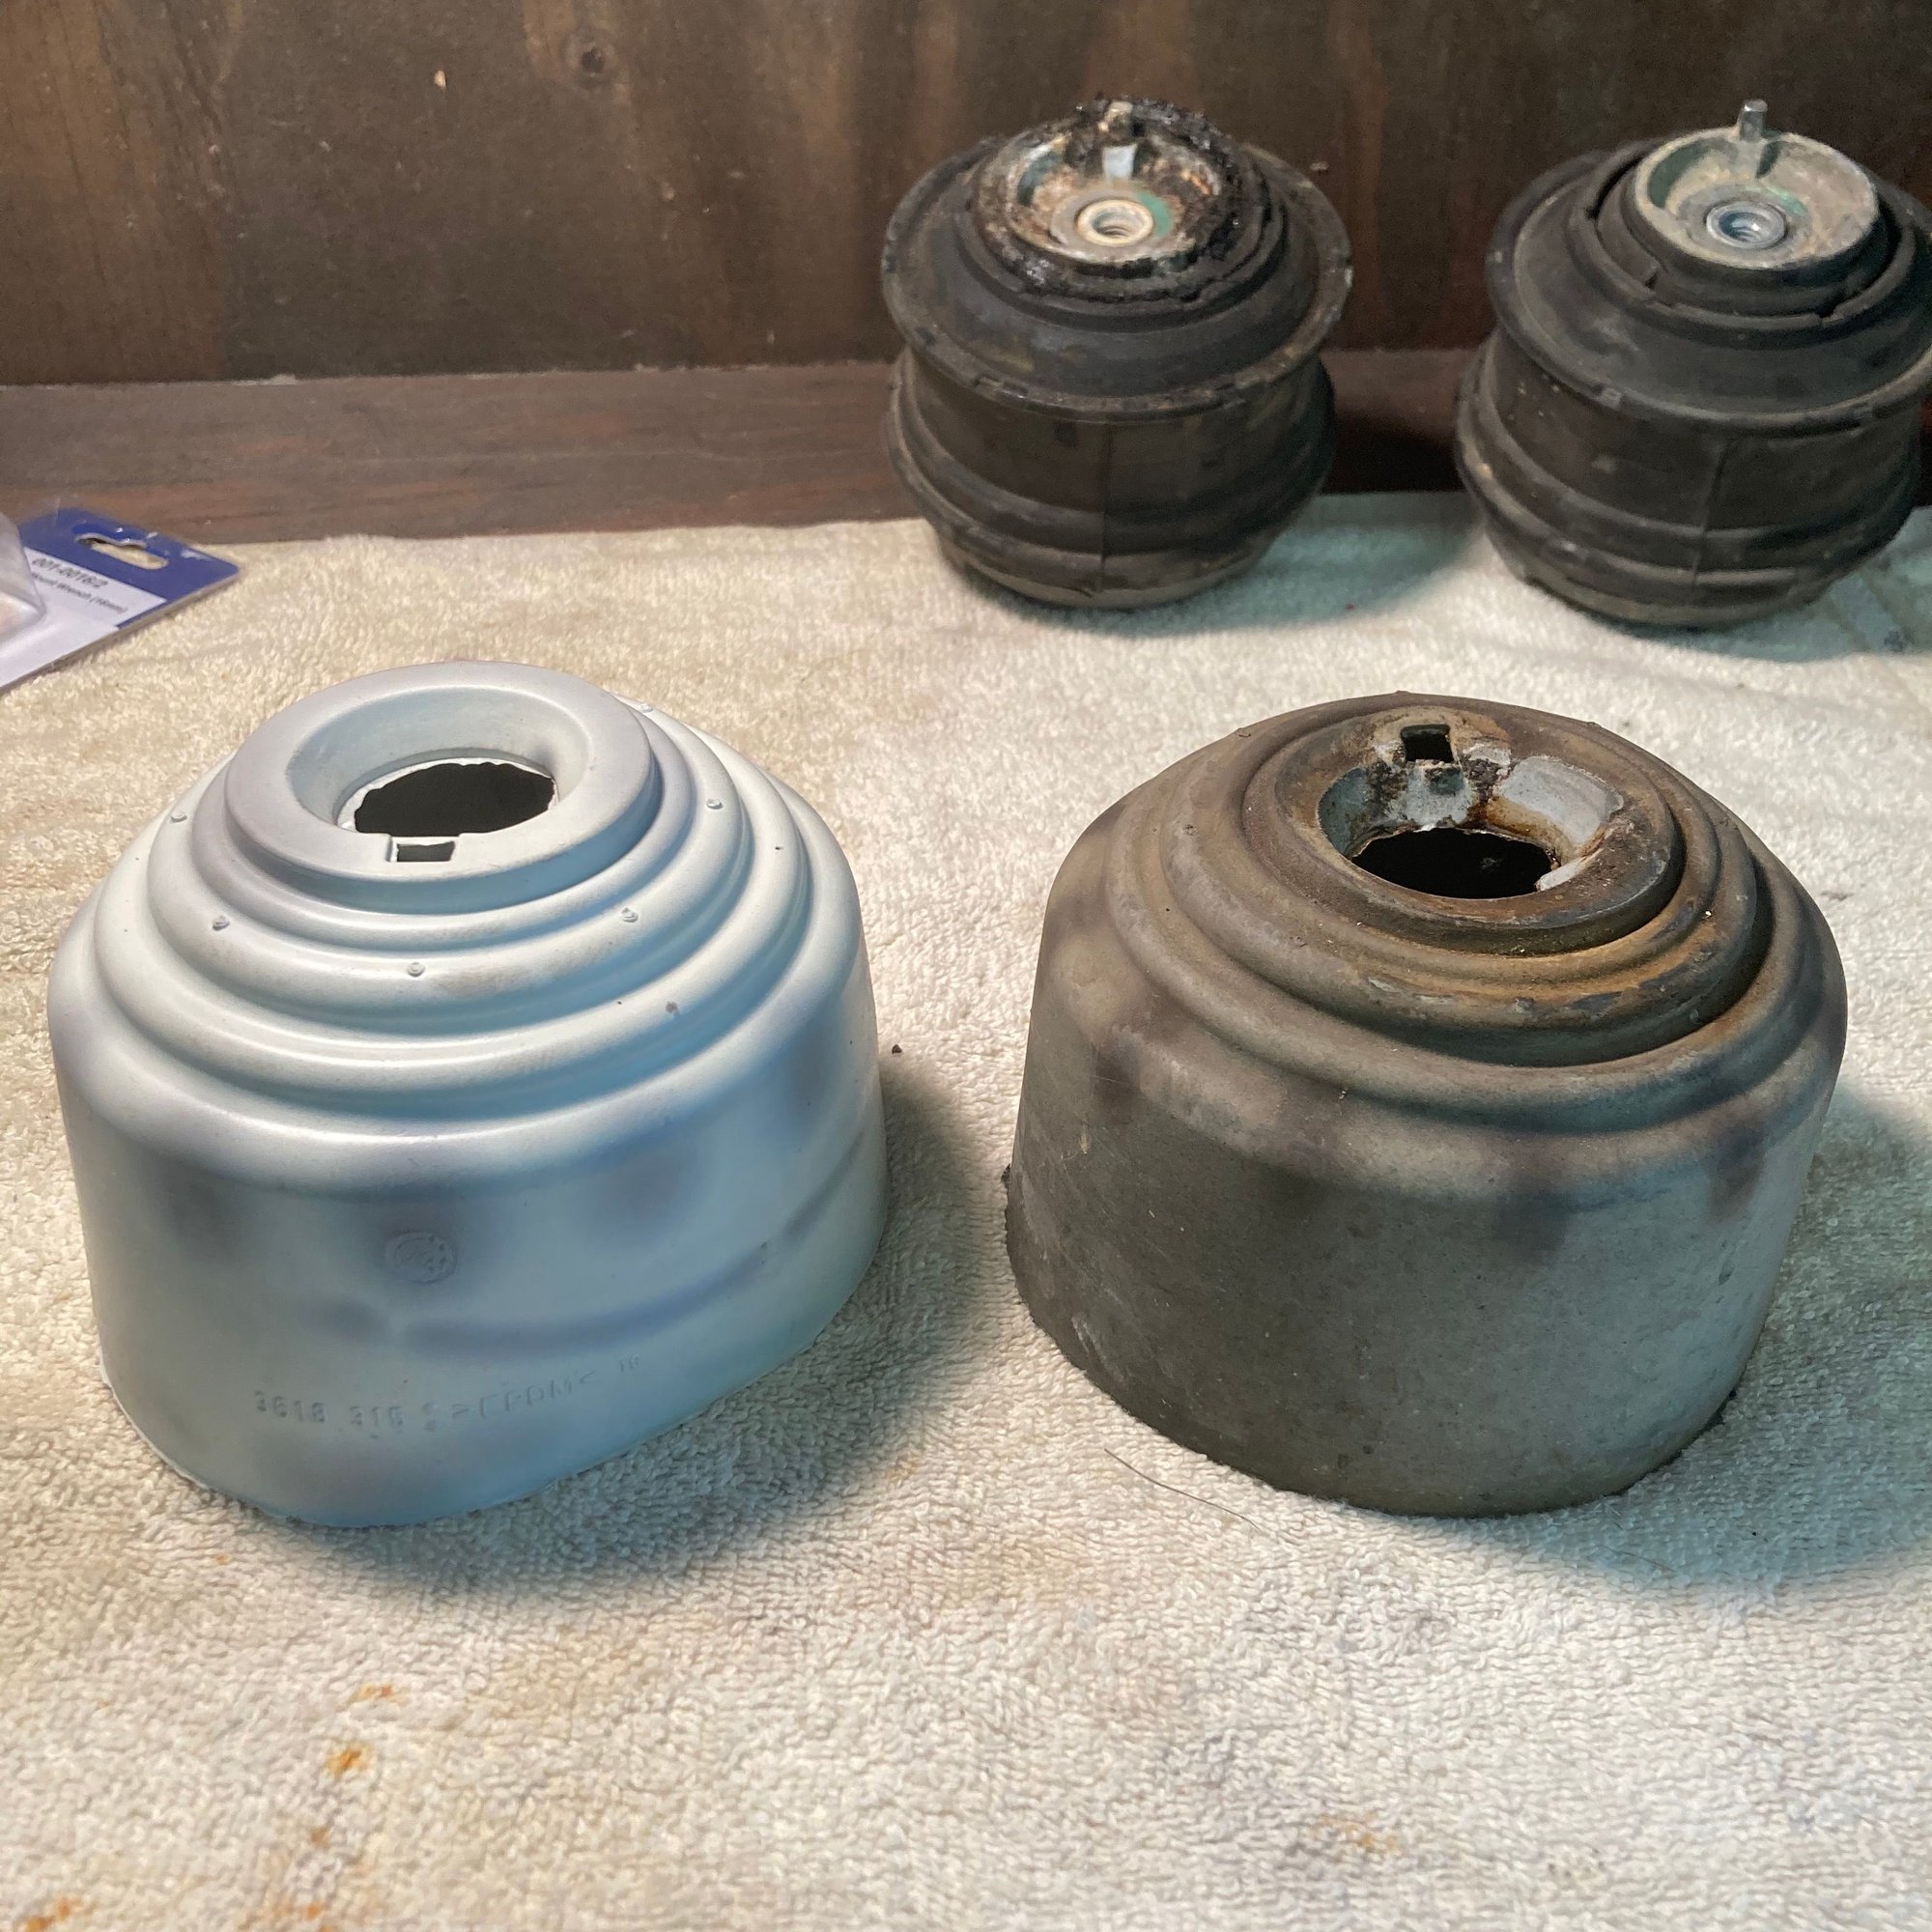
- Corteco and Lemforder seemed to be the most recommended brands for the engine and transmission mounts (possibly OE suppliers?). Some places show different part numbers for the engine mounts, but the driver's and passenger's side mounts are identical except that you will need to use the included silicone heat shield on the passenger's side. The Corteco engine mounts I ordered were the same part # ($135.98/pair - 80000393KT) and both included the silicone heat shield. The Corteco trans mount ran me $22.69 (2122400318) - it is very simple to replace (4 bolts) with NO need to remove the cross bracket.
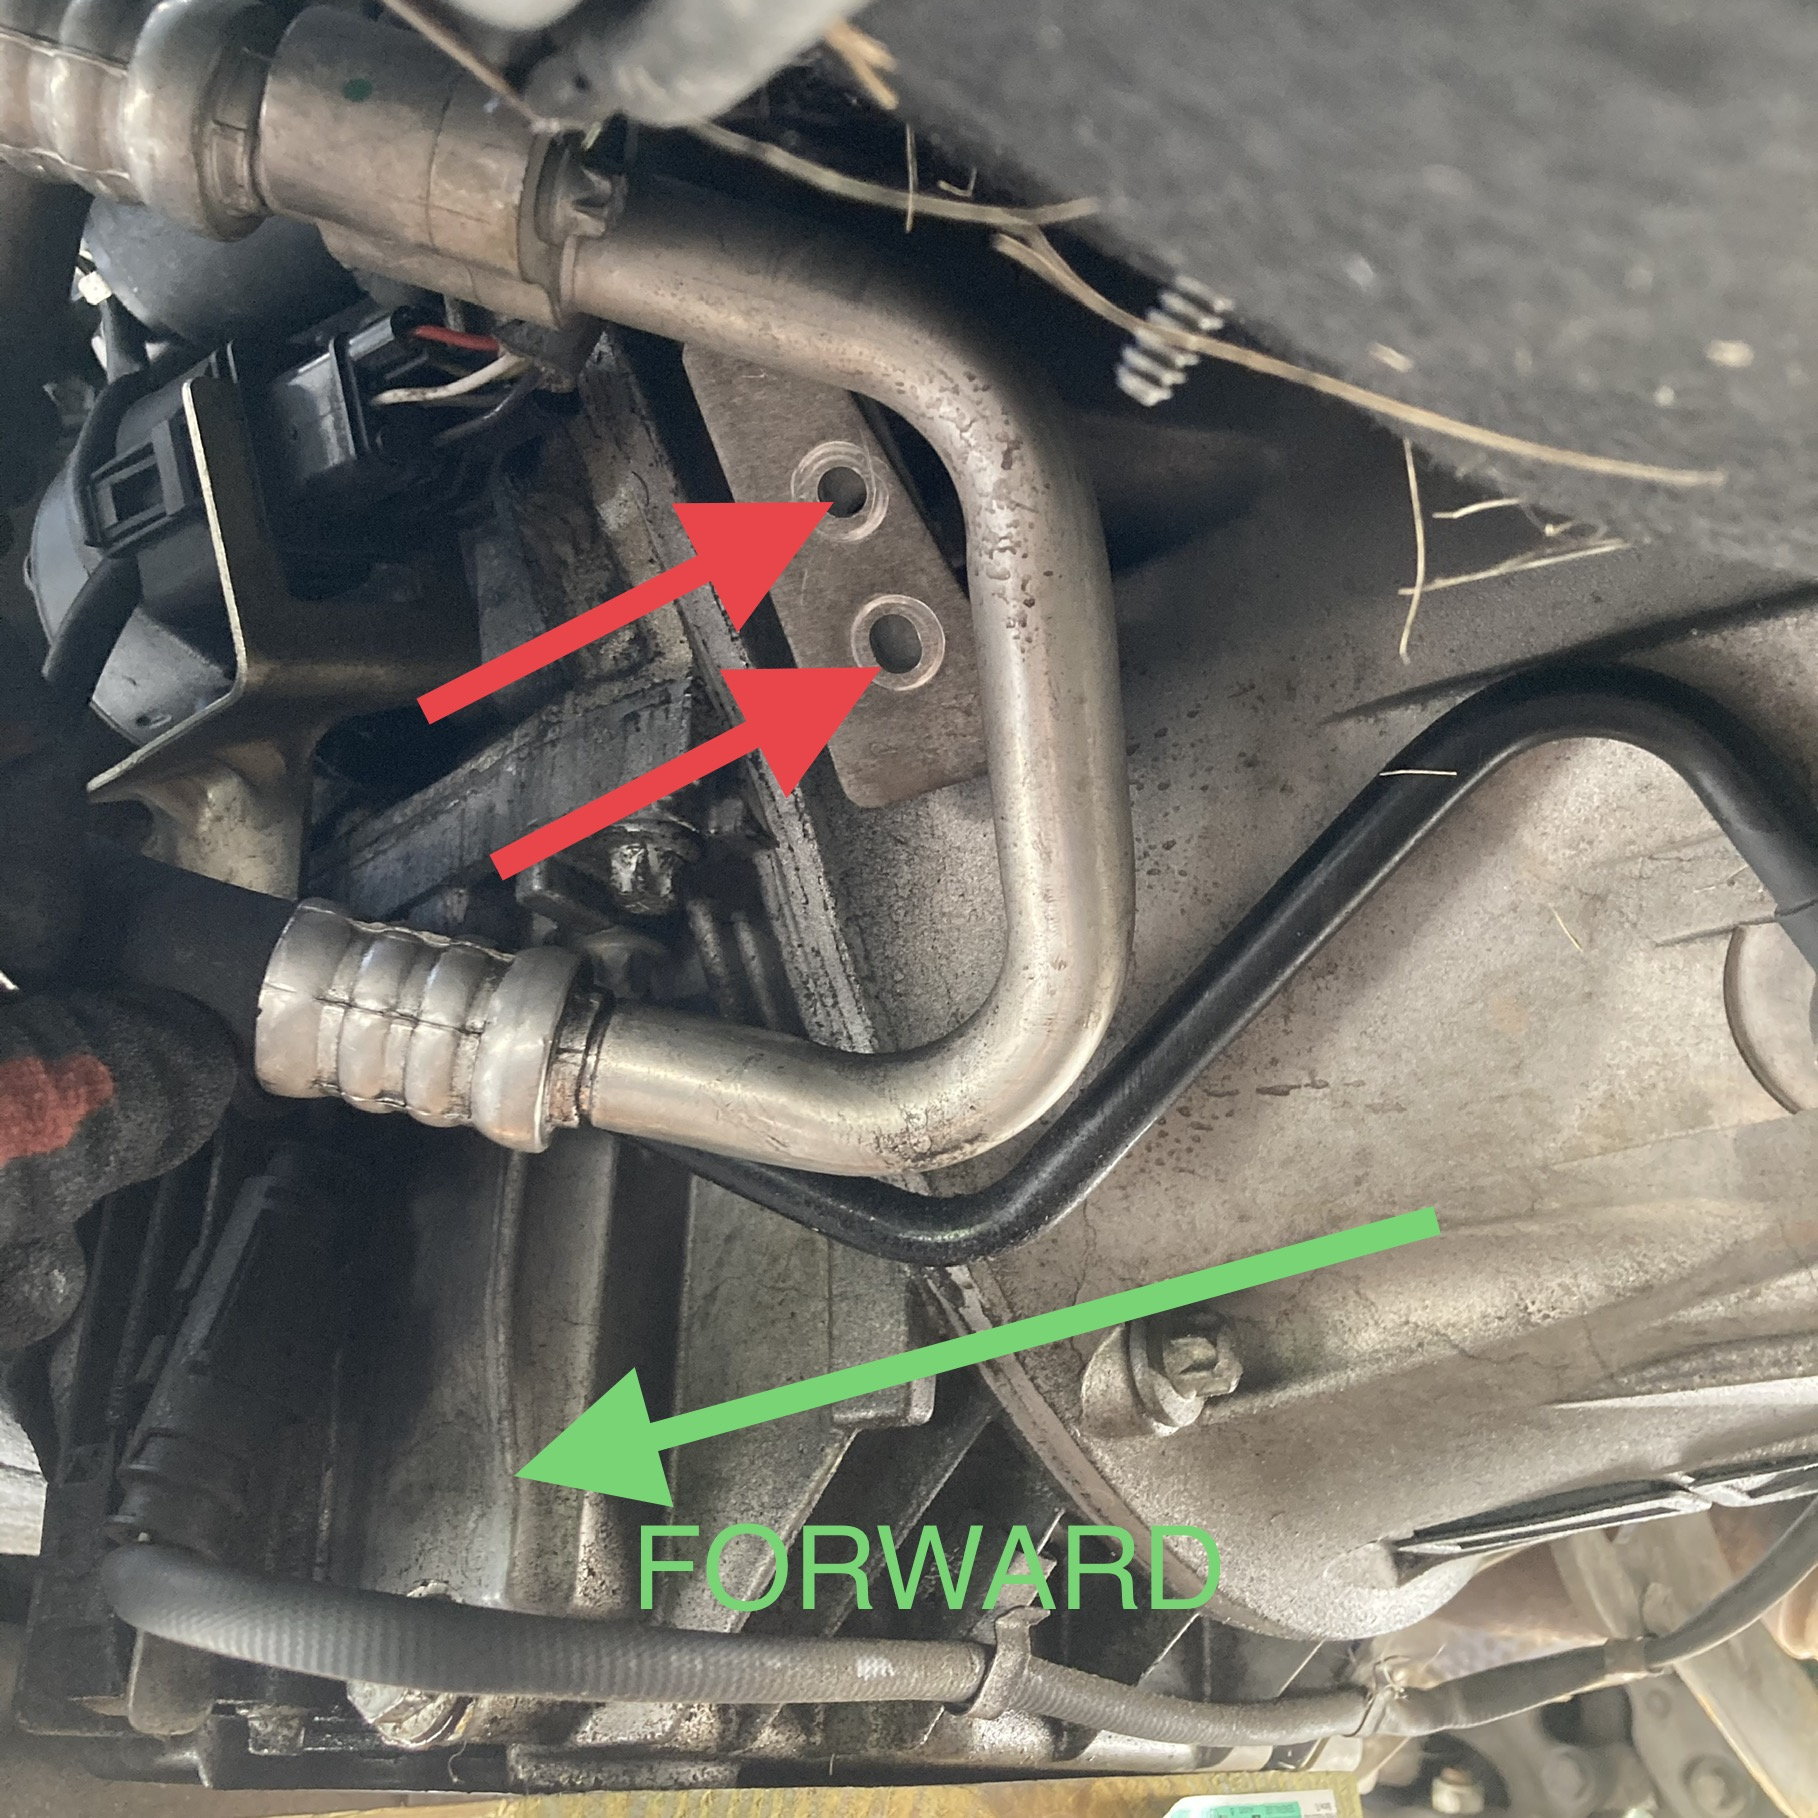
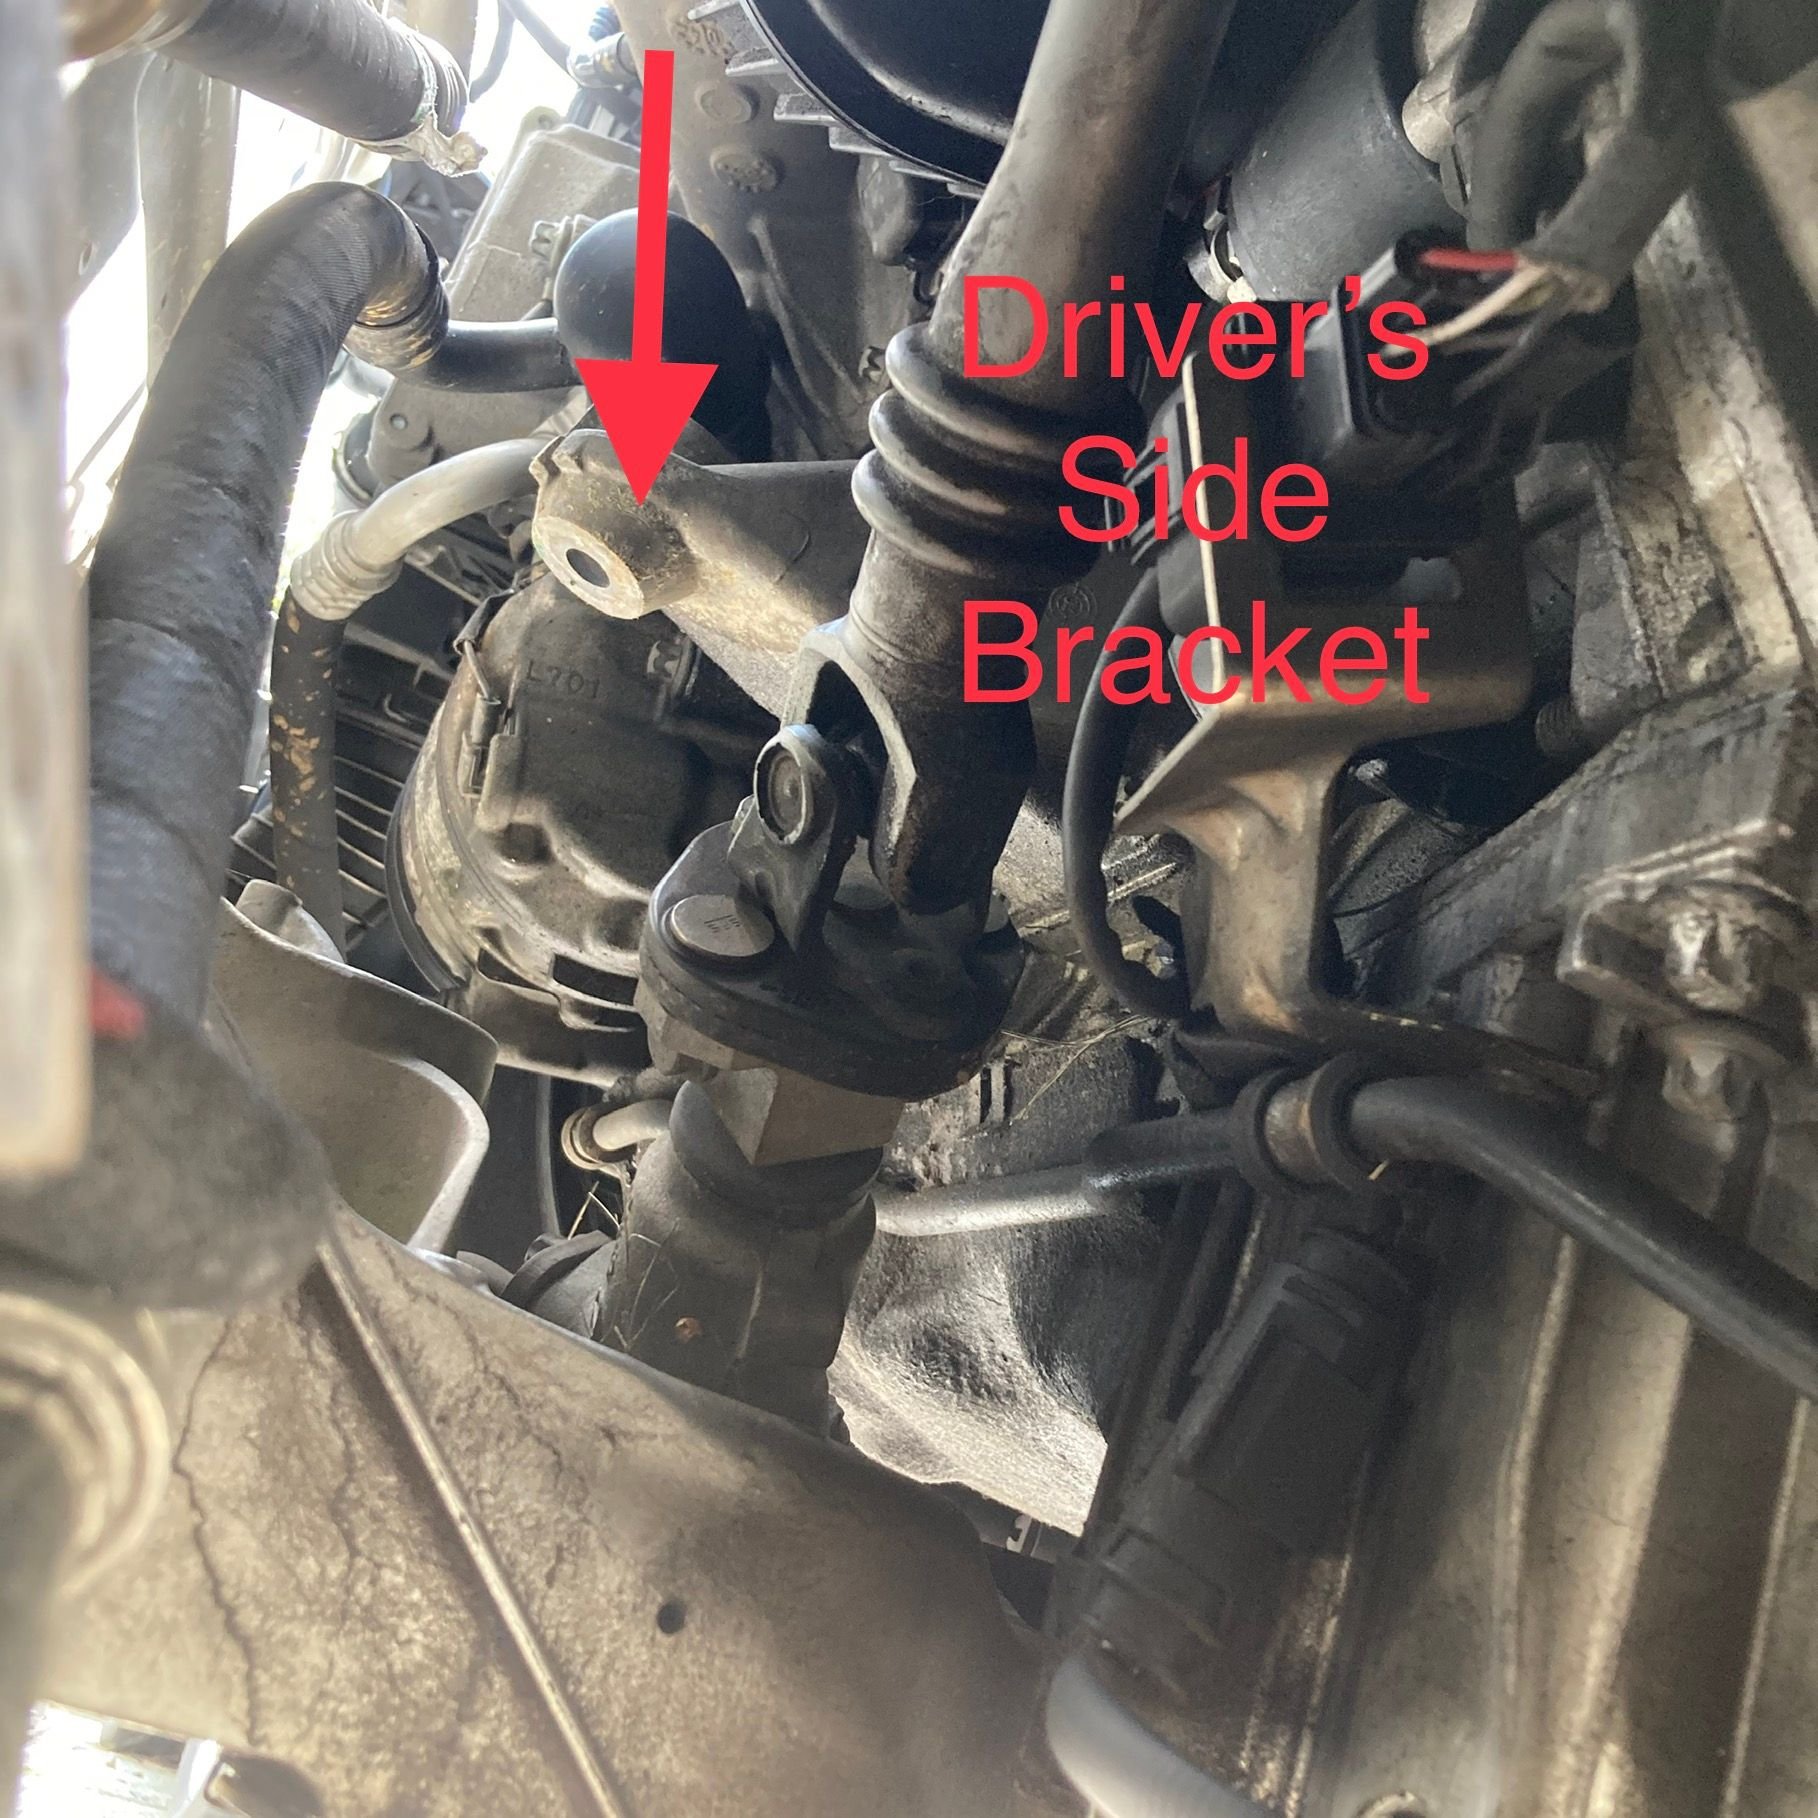
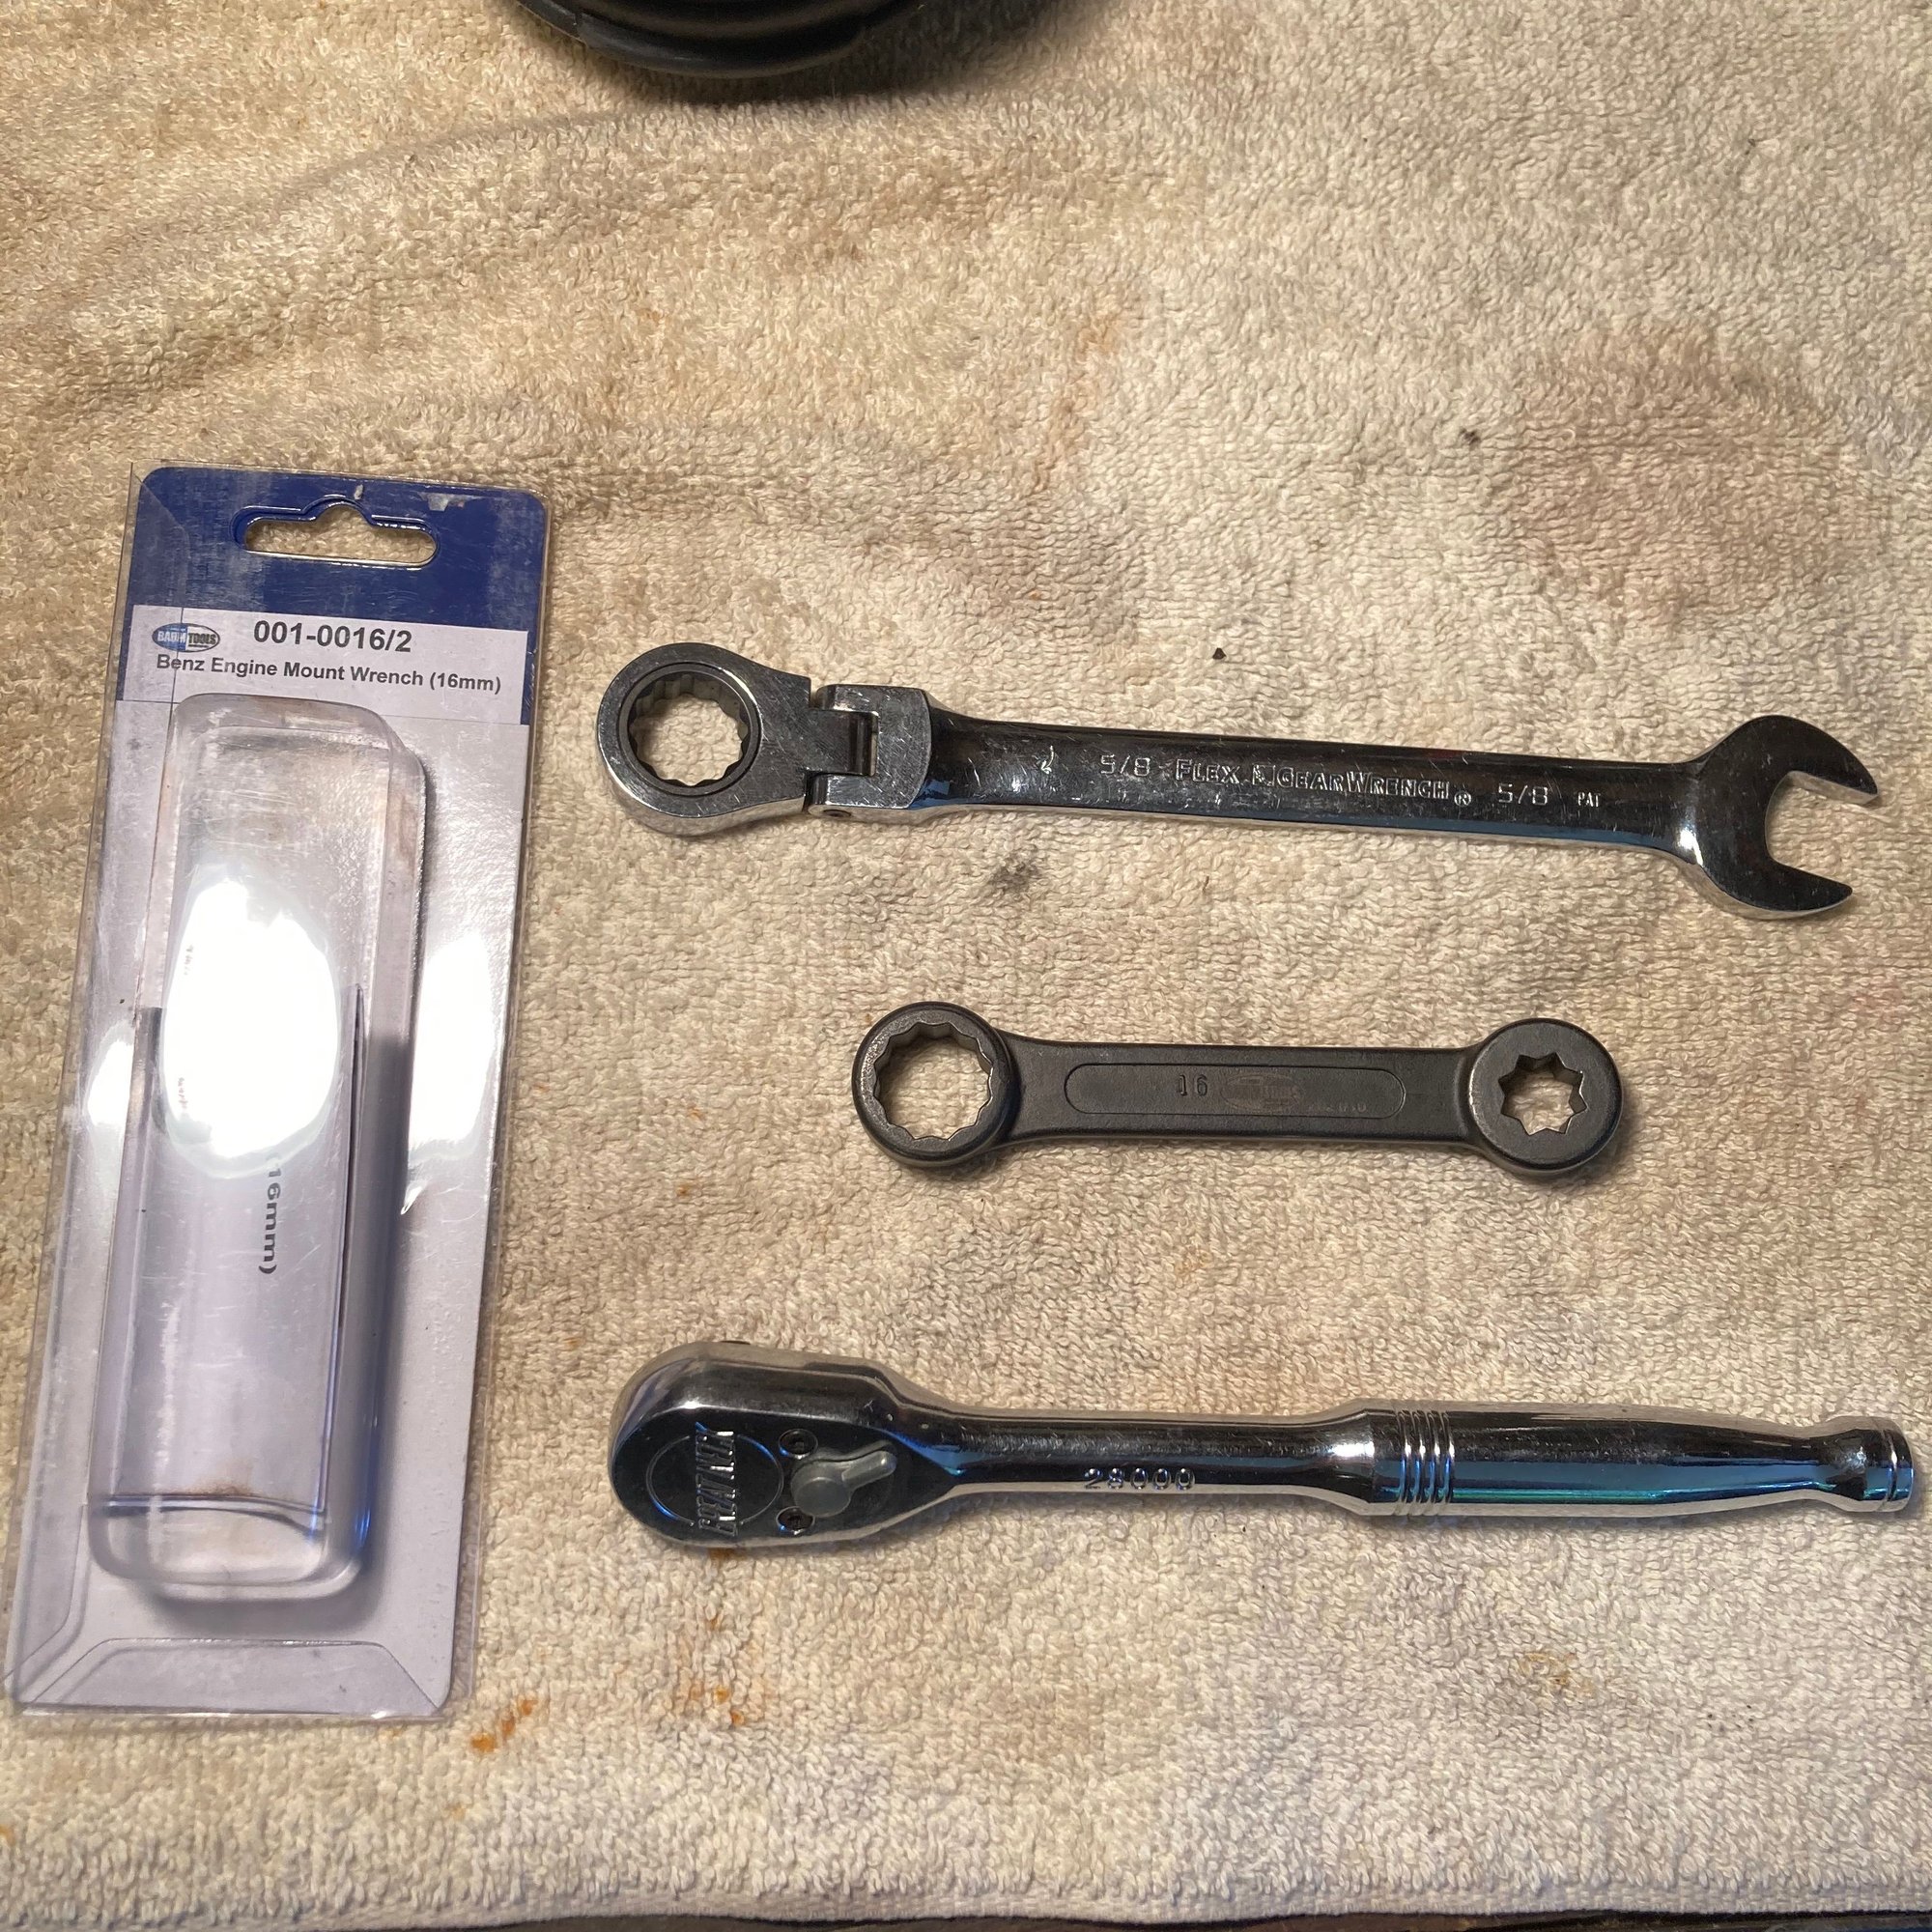
- The supercharger and intake do NOT need to be removed. Although the Mercedes manual calls for removing them in order to get to the top bolt on the driver's side mount, I was able to reach it by removing the front driver's wheel, detaching the A/C line bracket on the side of the transmission (2 E-Torx bolts - E10?), and then using a 16mm "Benz Motor Mount Wrench" attached to a regular size 3/8"-drive ratchet to break it free (had trouble getting on the bolt head using a 1/2"-drive breaker bar & adapter). I then ran the bolt out with a 5/8" flex-head ratcheting wrench with relative ease. Both engine mounts have a single bolt (13mm?) underneath as well that is not too hard to remove once located. Once the bottom bolt, top bolt & weight are removed and the engine supported, you will then have to wiggle the D-side mount out through the same way that you were reaching which takes some maneuvering but is doable. Slide the new mount in, align it correctly, get bottom bolt started, set engine down, top bolt in, and don't forget to reattach the A/C bracket like "someone I know" did. The special tool used was the Baum Tools 001-0016/2 16mm Benz Motor Mount Wrench ($32.49).
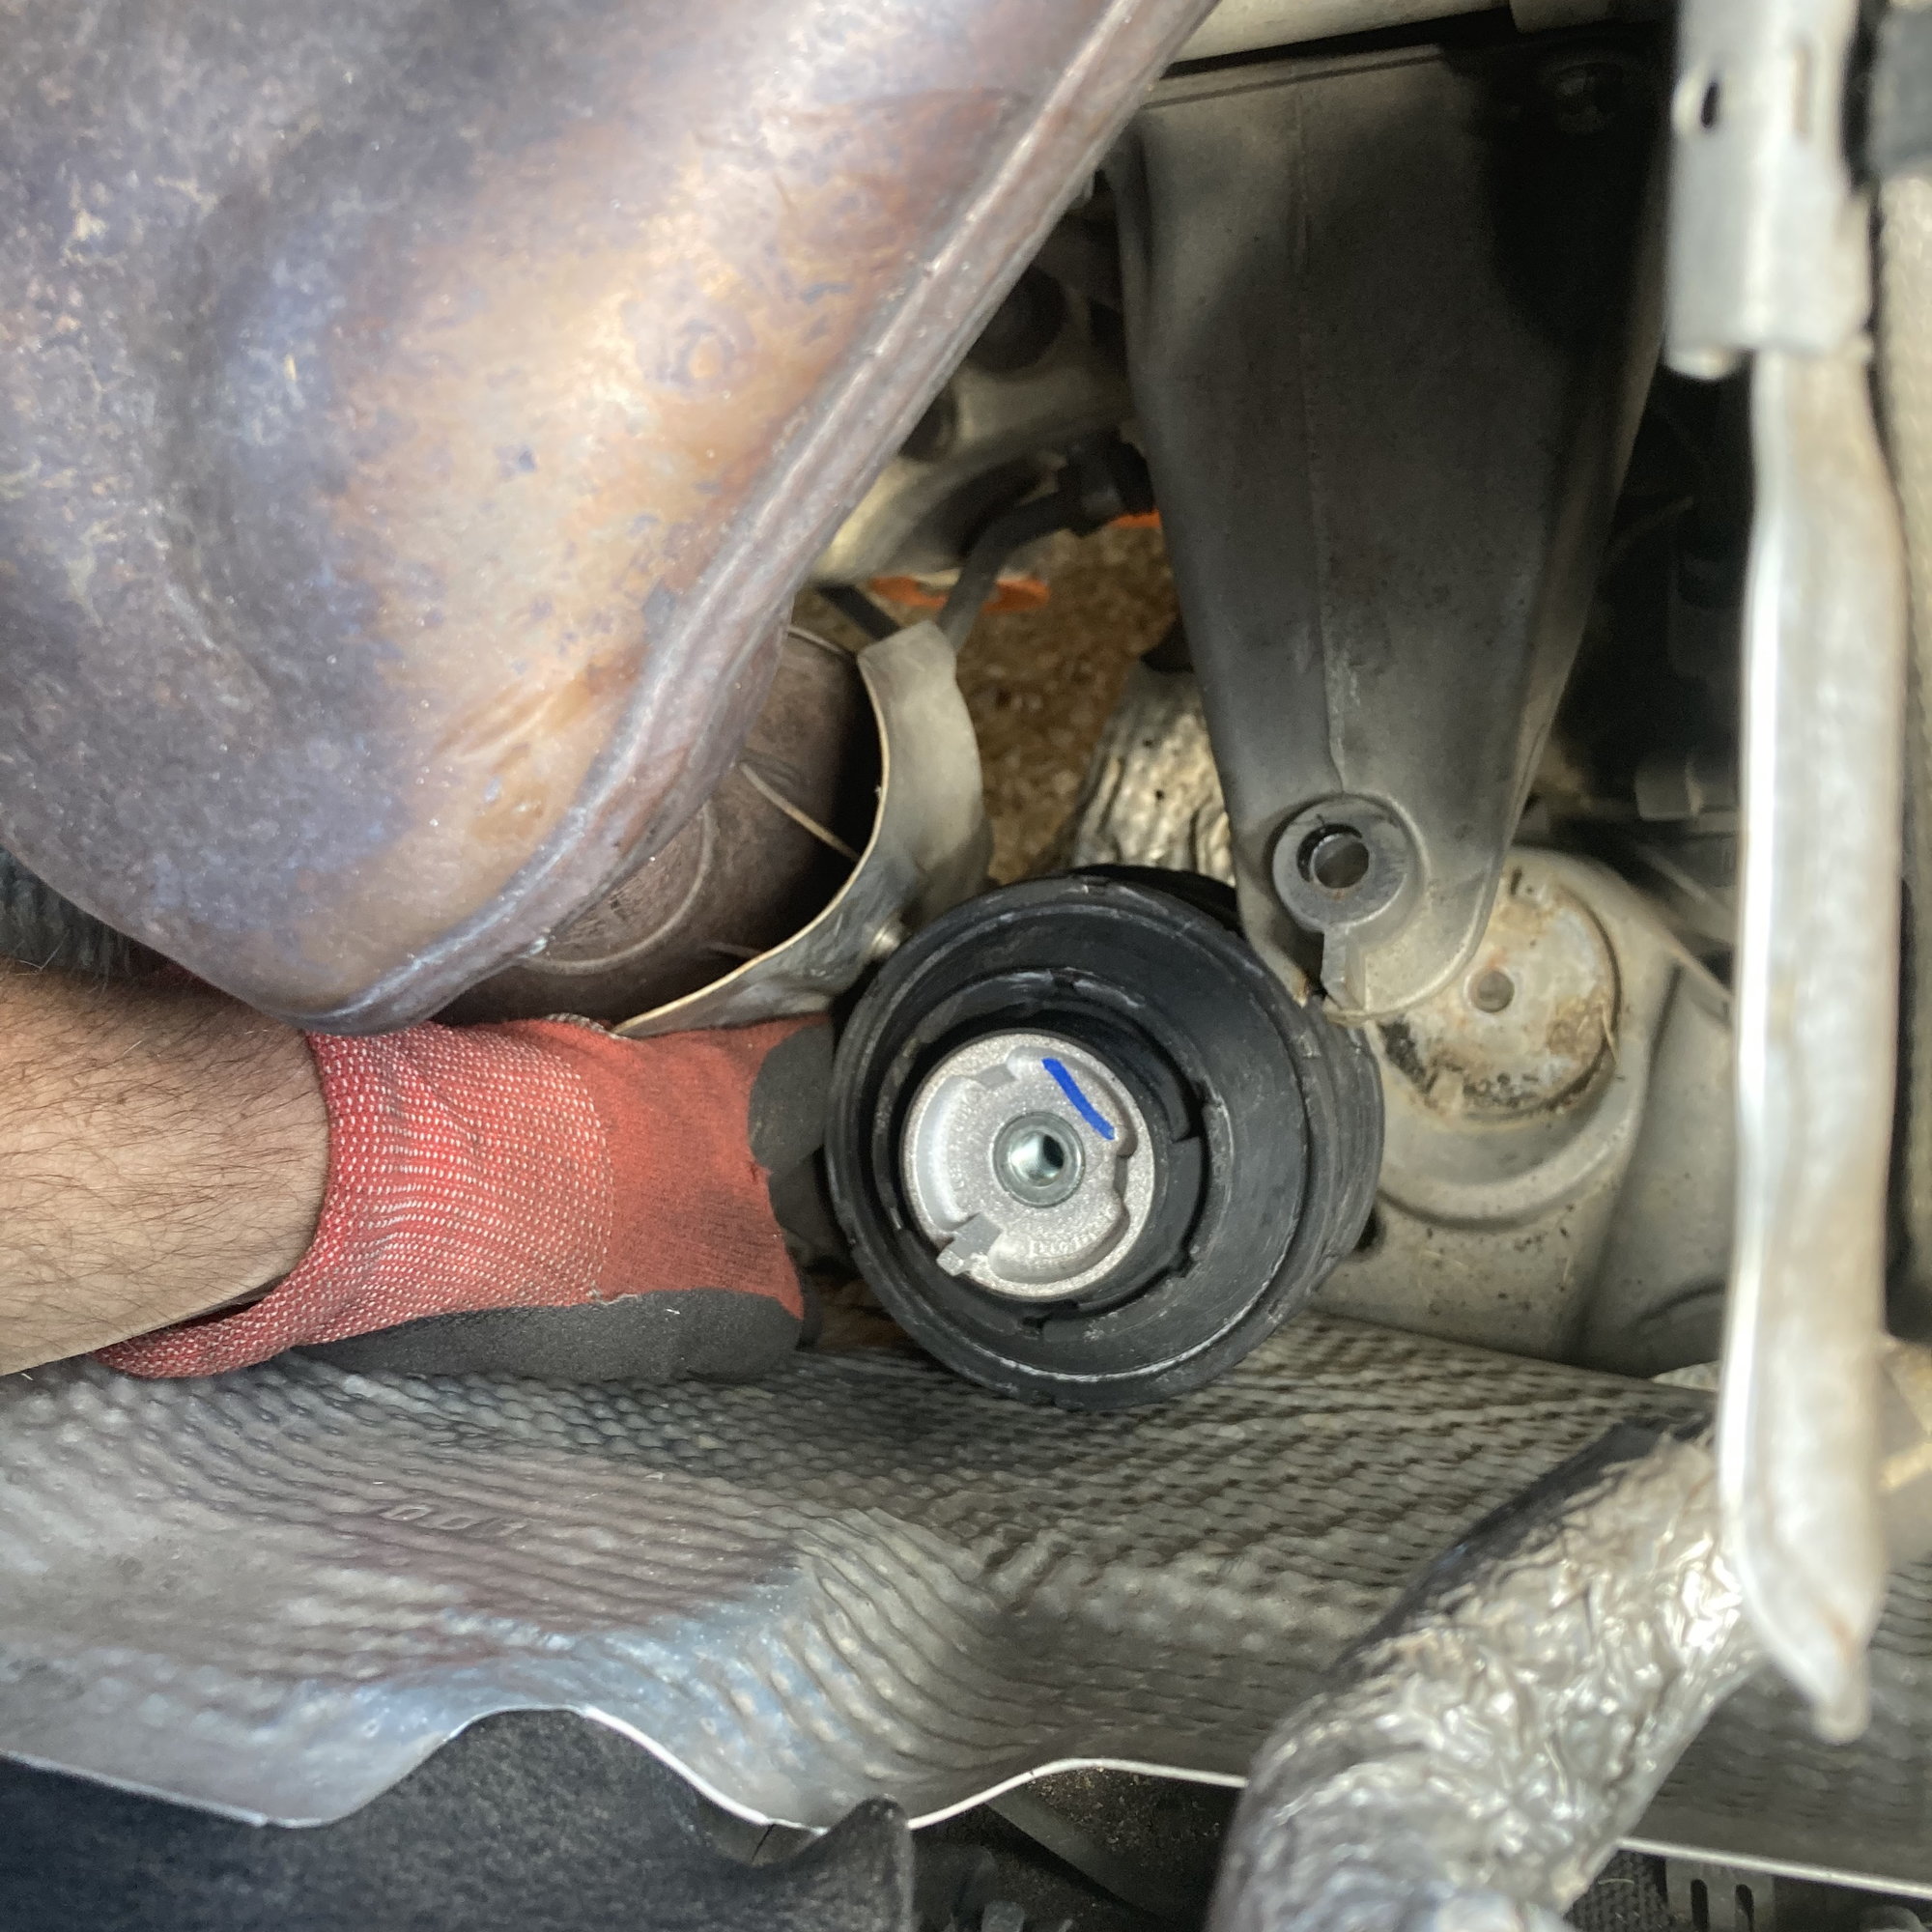
- Passenger side is much easier than driver's with no need to remove the wheel, exhaust manifold, or top mount bracket. First remove the top bolt, weight, and metal heat shield. After engine is supported and bottom bolt removed, you will need to remove the silicone heat before being able to wiggle the mount up between the manifold and top bracket. It is tight like the driver's side but can be done. Likewise, you will need to slide the new mount in before placing the silicone heat shield over it.
Be sure to use proper and safe jacking procedures if attempting this job. You will want to insulate the jack from the engine and trans pans using something like a 1"-2" thick wooden board, using extra caution on transmission pan. There are small rubber o-rings on the top bolts that may or may not be necessary but I replaced one of mine while in there. I did not measure torque when tightening but did use blue Loc-tite on all threads. The car now feels, drives, and even shifts better, and you can't even tell it's running at idle from inside the car. I will try to attach pictures to this thread as well. Feel free to reach out with any questions about this job if you think I can help. Thanks again for the years of service.
Last edited by hudsongt500; 10-06-2022 at 11:03 AM. Reason: Adding part #s
#4
MBWorld Fanatic!
Join Date: Dec 2003
Location: Vancouver, BC, Canada
Posts: 3,136
Likes: 0
Received 214 Likes
on
204 Posts
2003 C230K Coupe Orion Blue
Great writeup. 
Here is some additional information as well for those who are doing the job.
Be sure to also look into the transmission mount, which would be probably on its way out at the same mileage.
While you're down there, take a look at the flex discs (guibos, 2 in total). These things supposedly last over 300k and are often used with more torquey engines, so they probably won't need to be replaced.
Interesting how your new Cortecos look identical to the original ones. My new mounts (also Corteco) had a different design.
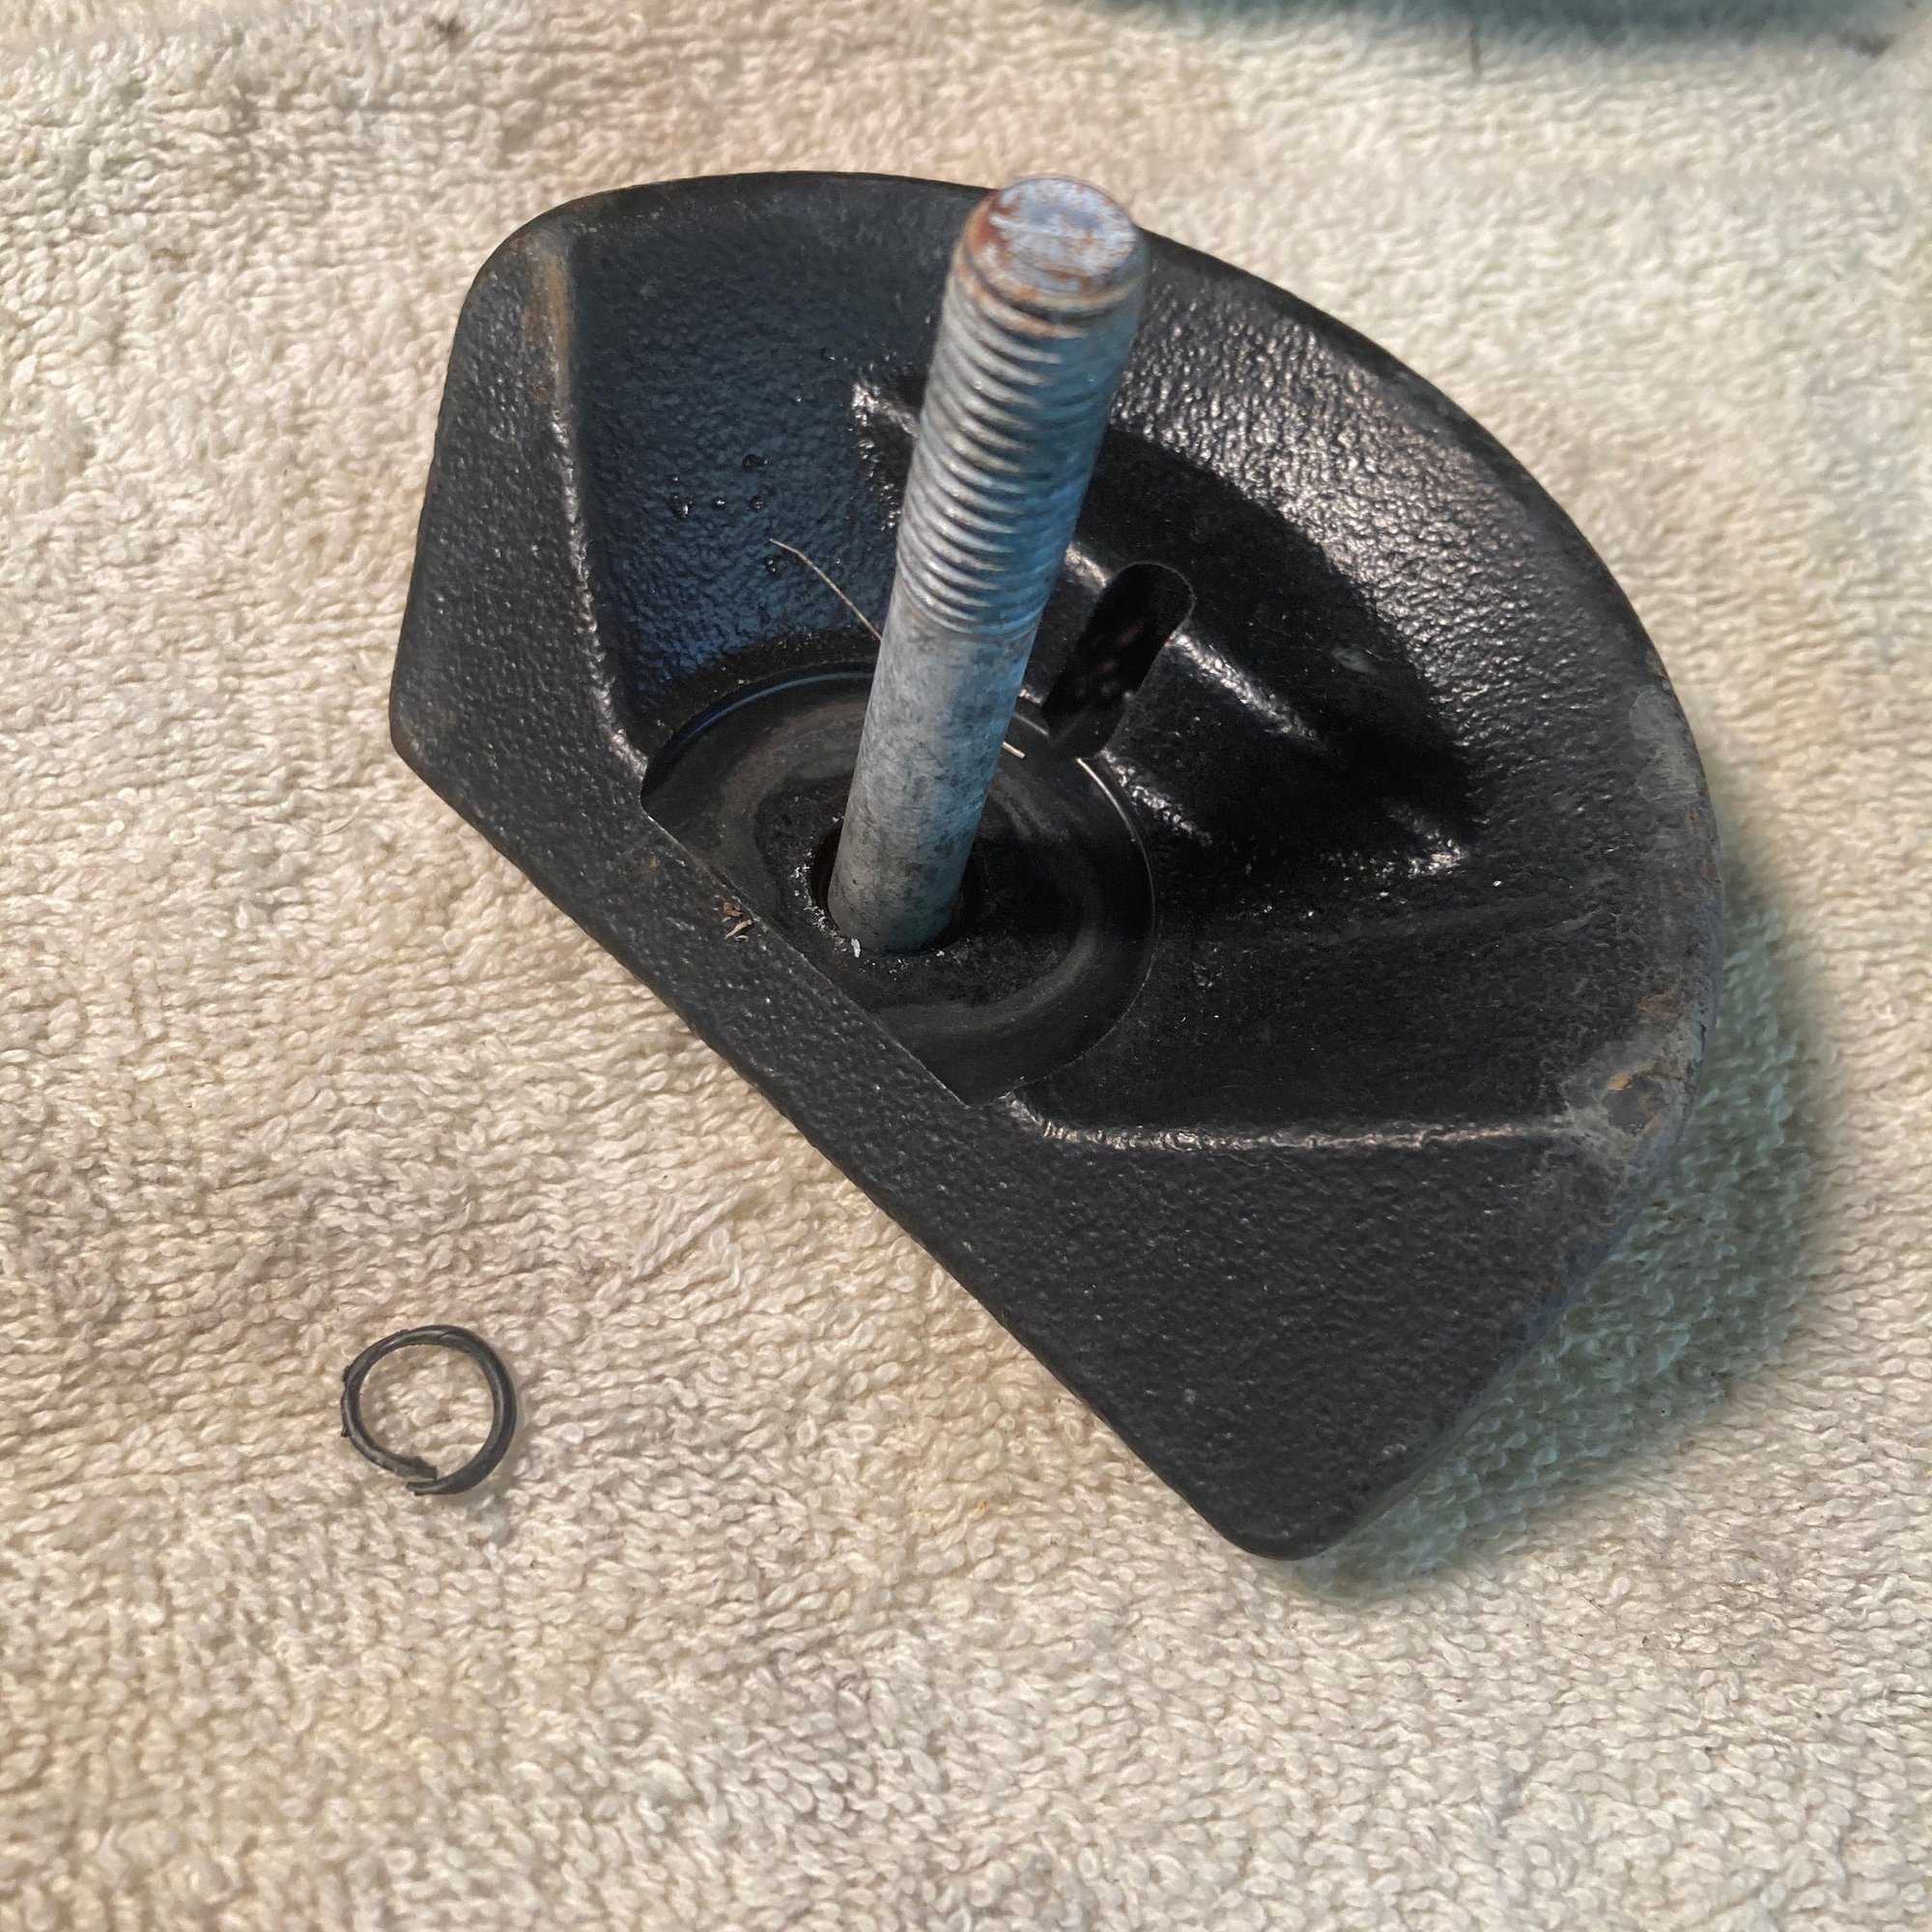
What's the o-ring looking thing next to the weight?
Last edited by slammer111; 10-06-2022 at 05:16 AM.
#5
Newbie
Thread Starter
Join Date: Feb 2017
Location: Birmingham, AL
Posts: 13
Likes: 0
Received 0 Likes
on
0 Posts
2005 C230 Sedan 1.8K
Slammer, thanks for the complement as well as reminding me that I forgot to inspect the flex discs. lol
Do the coupes and sedans use the same mounts? Or is it possible you received an updated design? These were a recent order from FCP. My old engine mounts had the Mercedes star logo and were original if I had to guess (approx. 163k mi on car).
There was that small o-ring present on each mount's top bolt inside the weight. I'm not sure if it's there to insulate the inner ring of weight from the bolt or what exactly. I can't remember if there is a lip inside that hole in the weight that the o-ring rests/catches on but do recall it seeming to help keep the bolt and weight together on removal & installation. Having a boxed assortment on hand, it seemed worthwhile to replace the bad one (pictured) while in there.
The car has been a thorough pleasure to tinker on in the last 6 years with repairs including the brake booster vacuum pump, transmission connector/o-ring, water pump, belt tensioner pulley, front & rear control arms, tie rods, alternator pulley, front wheel bearing, coolant pipe, window regulator, cracked rim, etc.. And with much thanks to this very forum, I have been able to tackle these without too much trouble while literally saving thousands. Pro-tip: get a dealership quote right before performing your DIY fixes for a good morale boost.
Last edited by hudsongt500; 10-06-2022 at 12:18 PM.
#6
MBWorld Fanatic!
Join Date: Dec 2003
Location: Vancouver, BC, Canada
Posts: 3,136
Likes: 0
Received 214 Likes
on
204 Posts
2003 C230K Coupe Orion Blue
All good. The flex discs are probably nowhere near being worn out if the car hasn't been abused. Just look the next time you're underneath. I'm still on the originals.
Interesting that we got different engine mounts. Mine were also from FCP, PN 203-240-19-17 (Corteco). Which PN did you order?
My understanding is that the sedan and coupe engines are identical. With that said, MB often like to make several variants of the same part for some reason. Many parts are completely interchangeable, despite what the dealer says. For example, I "upgraded" my brake booster vacuum pump with the newer style pump and gasket, even though the dealer told me it wouldn't fit. Then a few years later they updated the database and the PN I bought now became the correct official part.
Sounds like you're encountering many of the common C230/M271 problems as the rest of us around here. The good news is that MB often update PNs as well, so there seems to be a constant improvement.
Which part of the world are you in? Might want to put that in your signature. In Canadaland the dealership pricing is straight up insane. I always get a dealer quote before starting the job for a good laugh. Often I can do the job for 20-30% the dealership quote.
Forget saving a few thousand dollars - his forum has saved me tens of thousands in repair costs. At the rate I'm going I can almost buy a new lower end MB with the savings over the years.
With that said, there are some overpriced parts I will buy from a dealer. A good example would be o-rings. I have had reputable aftermarket ones go bad - the supplier picked the wrong material and the ring went bad after a few years. I'll also buy from the dealer for critical parts such as wheel bolts.
Often the aftermarket parts we buy are completely identical to the dealership parts (as shown by the MB PN being filed off on the aftermarket part), but sometimes the aftermarket part is clearly inferior (good example being the plastic coolant pipes which other members had fitment issues and excess material). So it is important to do one's homework on a case by case basis.
Interesting that we got different engine mounts. Mine were also from FCP, PN 203-240-19-17 (Corteco). Which PN did you order?
My understanding is that the sedan and coupe engines are identical. With that said, MB often like to make several variants of the same part for some reason. Many parts are completely interchangeable, despite what the dealer says. For example, I "upgraded" my brake booster vacuum pump with the newer style pump and gasket, even though the dealer told me it wouldn't fit. Then a few years later they updated the database and the PN I bought now became the correct official part.

Sounds like you're encountering many of the common C230/M271 problems as the rest of us around here. The good news is that MB often update PNs as well, so there seems to be a constant improvement.
Which part of the world are you in? Might want to put that in your signature.
 In Canadaland the dealership pricing is straight up insane. I always get a dealer quote before starting the job for a good laugh. Often I can do the job for 20-30% the dealership quote.
Forget saving a few thousand dollars - his forum has saved me tens of thousands in repair costs. At the rate I'm going I can almost buy a new lower end MB with the savings over the years.

With that said, there are some overpriced parts I will buy from a dealer. A good example would be o-rings. I have had reputable aftermarket ones go bad - the supplier picked the wrong material and the ring went bad after a few years. I'll also buy from the dealer for critical parts such as wheel bolts.
Often the aftermarket parts we buy are completely identical to the dealership parts (as shown by the MB PN being filed off on the aftermarket part), but sometimes the aftermarket part is clearly inferior (good example being the plastic coolant pipes which other members had fitment issues and excess material). So it is important to do one's homework on a case by case basis.
Last edited by slammer111; 10-09-2022 at 01:53 AM.
#7
Newbie
Thread Starter
Join Date: Feb 2017
Location: Birmingham, AL
Posts: 13
Likes: 0
Received 0 Likes
on
0 Posts
2005 C230 Sedan 1.8K
The engine mounts I ordered were the 80000393KT pair which also shows as OE Part # 2032401917 on their website. How strange...
Smooth move on the vacuum pump! Thankfully most of the issues I've encountered have been common enough to find info for.
I'm located in Birmingham, AL. Same issues with dealerships here. Good for small things like gaskets, etc. but not much else. It's wild that you can save almost $900 CAD for a job that shows 1.5hr book time. I don't know what's worse, the part markup or forcing diagnostics when you just want the part changed. At least there is plenty of coffee to go round. How hard of task does the alternator appear to be?
Another issue I've seen and read about in the last few years is an increase in counterfeit parts. Ordered a set of OEM Motorcraft (Ford) ignition coils for my older Expedition SUV on eBay about a year ago, and I received a decent looking knockoff that could have easily fooled many a buyer. Makes you wonder...
Trending Topics
#8
MBWorld Fanatic!
Join Date: Dec 2003
Location: Vancouver, BC, Canada
Posts: 3,136
Likes: 0
Received 214 Likes
on
204 Posts
2003 C230K Coupe Orion Blue
I'm sure many members on this forum simply got sick of getting ripped off by the dealer. I know I was. Honestly the dealer is the place of last resort for me. For parts I can simply order online, and for labour I have the option of going to a local indie which charges 30% less for labour than the dealer. The dealerships here have nice large brand new showrooms, paid for by those who can't or won't be bothered to DIY. Honestly I'd feel better if the dealership did a good job consistently, but often they simply don't care enough. I'm talking about stuff like damaged paint, broken parts (broken clips and and trim pieces), or sometimes even incorrect repairs. Meanwhile they have no problem giving me a crazy high bill with a smile.
The chance of counterfeit parts is a real issue. For this reason I stick to name brand parts, and only purchase from the dealer or from reputable sites (and even this has a small chance of fake parts). For used parts I would use places like eBay, as nobody is going to make counterfeit used parts. With that said, I wouldn't buy anything used that has moving parts. No point installing something with a shortened service life.
To be honest, the alternator is pretty accessible once you have the serpentine belt removed. The alternator is sitting in plain sight, so it'd probably be a few fasteners and electrical connections. Not sure if there's a DIY thread here, but there are plenty of videos online.
The chance of counterfeit parts is a real issue. For this reason I stick to name brand parts, and only purchase from the dealer or from reputable sites (and even this has a small chance of fake parts). For used parts I would use places like eBay, as nobody is going to make counterfeit used parts.
 With that said, I wouldn't buy anything used that has moving parts. No point installing something with a shortened service life.
To be honest, the alternator is pretty accessible once you have the serpentine belt removed. The alternator is sitting in plain sight, so it'd probably be a few fasteners and electrical connections. Not sure if there's a DIY thread here, but there are plenty of videos online.
Last edited by slammer111; 10-09-2022 at 01:57 AM.
#9
Newbie
Thread Starter
Join Date: Feb 2017
Location: Birmingham, AL
Posts: 13
Likes: 0
Received 0 Likes
on
0 Posts
2005 C230 Sedan 1.8K
I think you're right about that. The only dealer service this car has had in the last 6+ years has been for the airbag recall. When the car was picked up, the gas light was on as well as the CEL (which they tried to explain was the reason for the CEL). Who knows. The service writer couldn't even give me the breakdown of parts and labor on the $1800 motor mount quote.
Reason I asked is that when doing alternator pulley, I remember a post mentioning how difficult it was to remove the alternator. Of course the pulley can be done while it's still in the car, but the alt. looked fairly accessible while in there. Maybe just a bad personal experience. Anyways, good luck with the job!
Reason I asked is that when doing alternator pulley, I remember a post mentioning how difficult it was to remove the alternator. Of course the pulley can be done while it's still in the car, but the alt. looked fairly accessible while in there. Maybe just a bad personal experience. Anyways, good luck with the job!
#10
W203
Good day Mercedes family, l just got back from the mechanic after having him change worn out both motor mounts. The problem started a little while late after l was driving back home. I'm experiencing a clunking noise from the driver side and underneath the gearbox while turning right at low and high speeds. The sound is super annoying I don't know weather I'm damaging something while driving. On tarred roads the noise dissappear but reappear whenever I hit a rough patch on the road. I'm a novice and l thought changing just the engine mounts would cure the vibration but now lm out of sorts and thought of all of you on this forum since many of you have already gone through not too similar issues but some. I hope l articulated well enough for someone to help thanks family....
#11
Good day Mercedes family, l just got back from the mechanic after having him change worn out both motor mounts. The problem started a little while late after l was driving back home. I'm experiencing a clunking noise from the driver side and underneath the gearbox while turning right at low and high speeds. The sound is super annoying I don't know weather I'm damaging something while driving. On tarred roads the noise dissappear but reappear whenever I hit a rough patch on the road. I'm a novice and l thought changing just the engine mounts would cure the vibration but now lm out of sorts and thought of all of you on this forum since many of you have already gone through not too similar issues but some. I hope l articulated well enough for someone to help thanks family....
It is better to open a new thread, clunking is usually related to suspension parts like sway bar links.
#12
Junior Member
and while youre under there for the flex discs and transmission mounts you might as well do the diff mounts, and while youre back there for the diff mounts you might as well do the rear suspension bushings..... this is a dangerous path that I myself have found myself walking down. Itll feel way better to drive after replacing all that crusty rubber though!
#13
and while youre under there for the flex discs and transmission mounts you might as well do the diff mounts, and while youre back there for the diff mounts you might as well do the rear suspension bushings..... this is a dangerous path that I myself have found myself walking down. Itll feel way better to drive after replacing all that crusty rubber though!


