


Hey Folks. I recently replaced the rotors and pads on my C300 4Matic and thought it would be nice to share since there's no specific DIY around for this, at least not that I'm aware.
Difficulty: Easy
Time: 15min each (I'm young but have a hip prosthesis so you might be able to do that faster)
What you will need:
1. Brake Pads - PN 005 420 12 20
Note 1: as for the brake pads, I stopped using OEM's and went akebono ceramic. Why? I Hate the brake dust everyday more and the Akebonos has been very reliable to me lately.
Note 2: These pads will fit only C300 and C250 as far as my knowledge goes.
Note 3: Make sure the sensor is included, if not, find it with the PN 2115401717
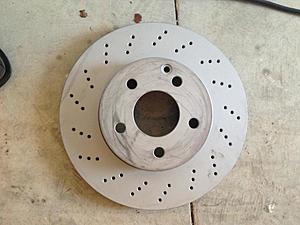
2. Brake rotors - PN 2044210912
Note 1: I used Zimmermann, bought them at autohausaz for 76$ each, I was told they are the same as OEM.
Note 2: These rotors will only fit C300 and C250 Sport models as far as I know.
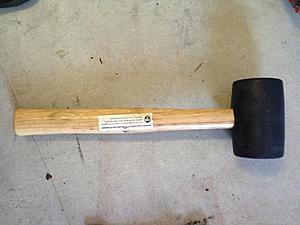
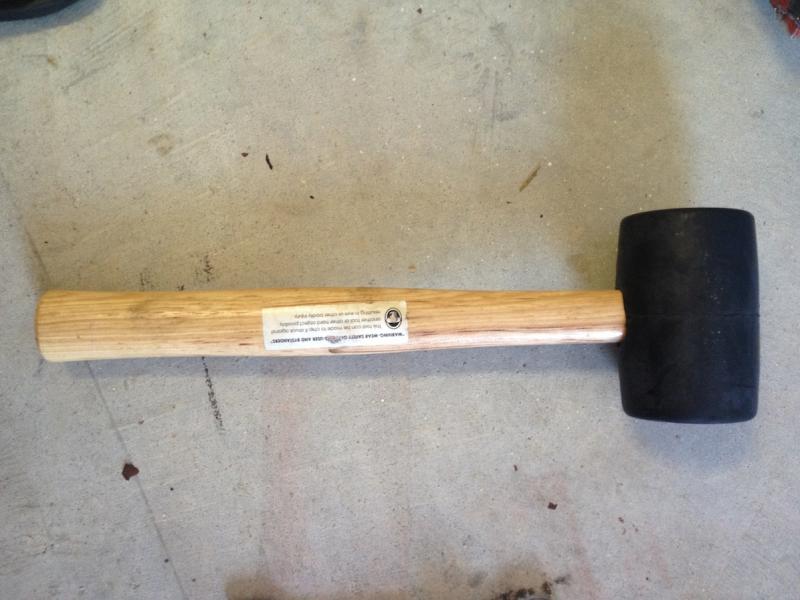
3. Hammer
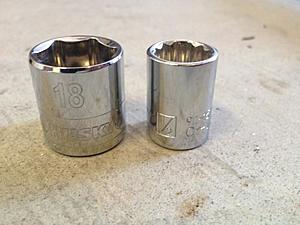
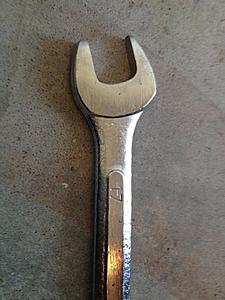
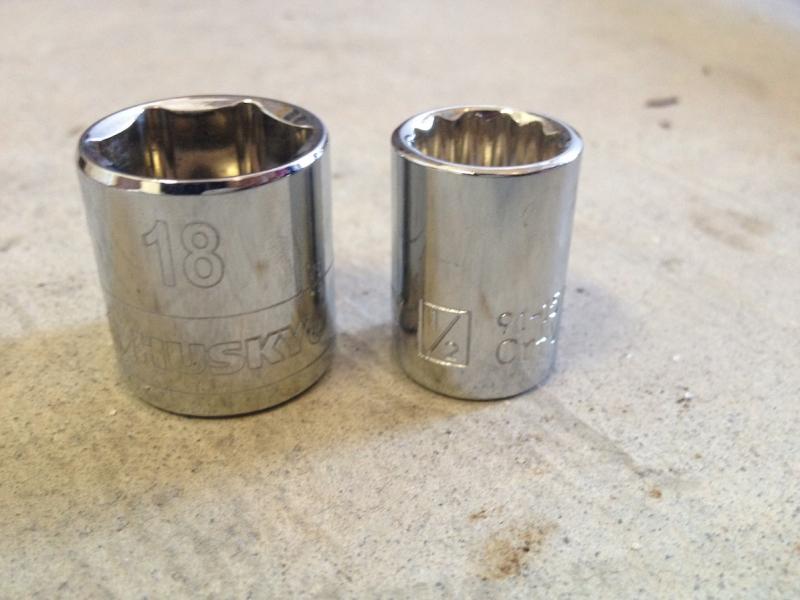
4. 17mm Wrench, 18mm and 13mm socket
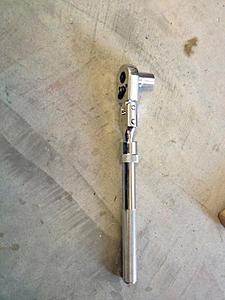
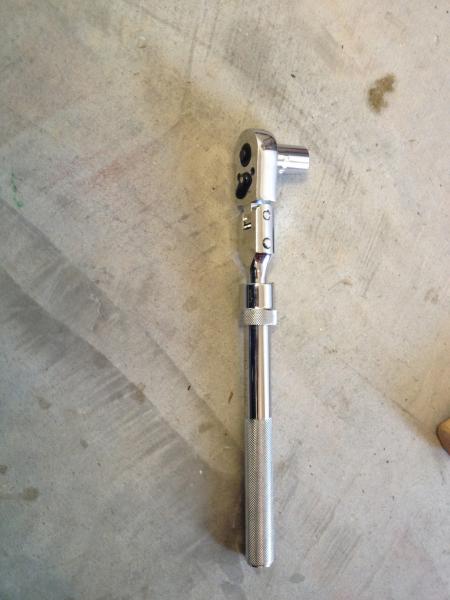
5. A ratchet, if its long or extensible it will be much better
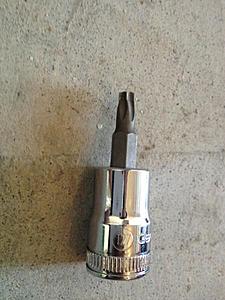
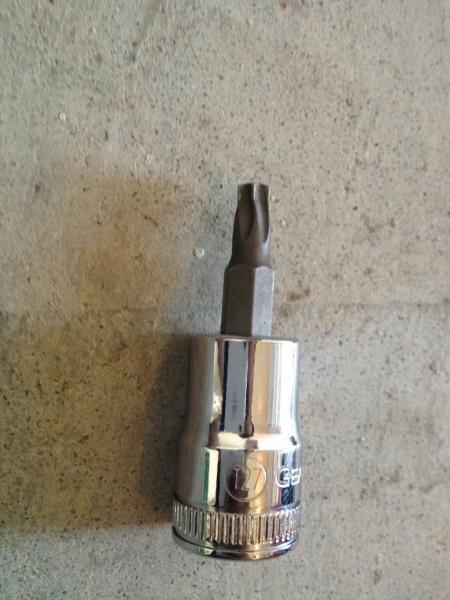
6. A T-27 socket.
7. Any kind of compression tool. Something like this:

Procedure:
Raise your car, take the wheel out and put a jack stand under your car to hold it, never ever trust in your jack to hold your car.
I will highly recommend to turn the steering wheel to the oposite side, so If you are working on the driver side, turn the steering wheel as if you will make a right. It will leave much more space to work.
1. Proceed to loose the lower 13mm bolt you will find behind the caliper.

Just loose it a little bit, then using the 17mm wrench hold the nut between the caliper and the rotor and take the bolt out using the ratchet.

2. Raise the caliper arm and take the old pads and sensor out.


3. Now loose and take out the bolts that hold the brake caliper base to the knuckle. These are 18mm bolts, really long ones.


Now that you have the complete caliper assy apart, let it rest on top of something, so you don't stretch the brake lines.

4. Using your wrench and the T-27 socket, release the only screw that holds the rotor with the knuckle.

5. Now using your hammer, hit the rotor from behing to release it from the knuckle. It might be stuck to it, if you can't remove it, use WD40 in the wheel bolt holes and let it stand for a few minutes and try again. I only needed to do this on the passenger side.

6. Now proceed and install your new rotor, put back the T-27 screw in place.

7. Now using your compression tool, figure out how to push the caliper piston back so you can fit your new and fat pads to it.

8. Install back the caliper by holding it with the 18mm bolts you removed before. Install the pads in it and it should be looking like this:

9. Now close the caliper arm, make sure you opened the piston enough so I can fit with the new pads, put the 13mm bolt back on the caliper and use the 17mm wrench to hold it as you tight the bold with the ratchet. Then replace the sensor by pulling the old one out and inserting the new one.

The brake pad has a tiny hole where the other extremity of the sensor should fit in.
10. Mount the wheel back on and you are ready. Go for a test drive.

I hope this will be useful for you guys out there, any question, comments or recommendations are welcome.
Difficulty: Easy
Time: 15min each (I'm young but have a hip prosthesis so you might be able to do that faster)
What you will need:
1. Brake Pads - PN 005 420 12 20
Note 1: as for the brake pads, I stopped using OEM's and went akebono ceramic. Why? I Hate the brake dust everyday more and the Akebonos has been very reliable to me lately.
Note 2: These pads will fit only C300 and C250 as far as my knowledge goes.
Note 3: Make sure the sensor is included, if not, find it with the PN 2115401717
2. Brake rotors - PN 2044210912
Note 1: I used Zimmermann, bought them at autohausaz for 76$ each, I was told they are the same as OEM.
Note 2: These rotors will only fit C300 and C250 Sport models as far as I know.

3. Hammer
4. 17mm Wrench, 18mm and 13mm socket

5. A ratchet, if its long or extensible it will be much better
6. A T-27 socket.
7. Any kind of compression tool. Something like this:
Procedure:
Raise your car, take the wheel out and put a jack stand under your car to hold it, never ever trust in your jack to hold your car.
I will highly recommend to turn the steering wheel to the oposite side, so If you are working on the driver side, turn the steering wheel as if you will make a right. It will leave much more space to work.
1. Proceed to loose the lower 13mm bolt you will find behind the caliper.
Just loose it a little bit, then using the 17mm wrench hold the nut between the caliper and the rotor and take the bolt out using the ratchet.
2. Raise the caliper arm and take the old pads and sensor out.
3. Now loose and take out the bolts that hold the brake caliper base to the knuckle. These are 18mm bolts, really long ones.
Now that you have the complete caliper assy apart, let it rest on top of something, so you don't stretch the brake lines.
4. Using your wrench and the T-27 socket, release the only screw that holds the rotor with the knuckle.
5. Now using your hammer, hit the rotor from behing to release it from the knuckle. It might be stuck to it, if you can't remove it, use WD40 in the wheel bolt holes and let it stand for a few minutes and try again. I only needed to do this on the passenger side.
6. Now proceed and install your new rotor, put back the T-27 screw in place.
7. Now using your compression tool, figure out how to push the caliper piston back so you can fit your new and fat pads to it.
8. Install back the caliper by holding it with the 18mm bolts you removed before. Install the pads in it and it should be looking like this:
9. Now close the caliper arm, make sure you opened the piston enough so I can fit with the new pads, put the 13mm bolt back on the caliper and use the 17mm wrench to hold it as you tight the bold with the ratchet. Then replace the sensor by pulling the old one out and inserting the new one.
The brake pad has a tiny hole where the other extremity of the sensor should fit in.
10. Mount the wheel back on and you are ready. Go for a test drive.
I hope this will be useful for you guys out there, any question, comments or recommendations are welcome.

Senior Member
Good ****. I found a video that shows how to do the rear ones and posted it on a thread I started a few days ago. I'm replacing all rotors, brake pads and painting the calipers. Im just about done with the rear wheels and your post has just complimented me so when I start on the fronts tomm. Sweet stuff.
I went akebono route as well but different rotors.
I went akebono route as well but different rotors.
Quote:
I went akebono route as well but different rotors.
Glad to hear. Post your pictures after you painted your calipers.Originally Posted by dgghostkilla
Good ****. I found a video that's shows how to do the rear ones and posted it on a thread I started a few days ago. I'm replacing all rotors, brake pads and painting the calipers. Im just about done with the rear wheels and your post has just complimented me so when I start on the fronts tomm. Sweet stuff. I went akebono route as well but different rotors.
Senior Member
Senior Member
I am also a huge DIY'er...thanks for posting this. I have one question though.What purpose the sensor serves.
Senior Member
the pads get thin to the point that eventually they will expose the sensor to the rotor. once the rotor has contact with the rotor it will activate the "check your brakes light"
Quote:
AND...Originally Posted by dgghostkilla
the pads get thin to the point that eventually they will expose the sensor to the rotor. once the rotor has contact with the rotor it will activate the "check your brakes light"
When you see the "CHECK YOUR BRAKES" light in your dash, the sensor is already dead. They live to sacrifice, when the light's on, the sensor is already dead and you need to replace it.
MBWorld Fanatic!
how many miles do you have when you changed your pads and rotors? I just did my own oil change today so my next project is the brakes
MB World Stories
The Best of Mercedes & AMG
Explore

Manual Mercedes? 6 Times Sindelfingen Let Drivers Have All The Fun
Verdad Gallardo
Mercedes SLR McLaren 722 S Is Extremely Rare Example Modified by McLaren
Verdad Gallardo
8 Classic Boxy Mercedes Designs That Have Aged Like Fine Wine
Verdad Gallardo
Flawlessly Restored Mercedes 190E Evo II Heads to Auction
Verdad Gallardo
Electric Mercedes C-Class Unveiled: 11 Things You Need to Know
Verdad Gallardo
Mercedes EQS Gets A Major Update: Everything You Need to Know
Verdad Gallardo
5 Underrated Mercedes-Benz Models That Don't Get the Love They Deserve
Verdad Gallardo
Mercedes 300D Has Pushed Well Past 1 Million Miles and It Ain't Stopping
Verdad Gallardo
10 Most Reliable Mercedes-Benz Models You Can Buy Used
Verdad GallardoMBWorld Fanatic!
Did you bleed the brake lines? I keep seeing Do-It-Yourself links to Brake Pad/Rotor replacement but no one indicates they are having their lines bled.
Senior Member
I am all done with my rear rotors, brake pads and caliper painting. its time to study up your thread and begin my fronts in a few hours  thanks
thanks
MBWorld Fanatic!
why will the akekono pads not fit a C350?
does c350 have bigger calipers?
does c350 have bigger calipers?

Member
Quote:
What kind of paint u use for the black out and how many coat u paint on it?thanksOriginally Posted by spencer3
Got mine done last week to. Makes such a difference.
Quote:
I don't see a reason to bleed the brake lines when you are just changing the pads and rotor.Originally Posted by AkaSigFreak
Did you bleed the brake lines? I keep seeing Do-It-Yourself links to Brake Pad/Rotor replacement but no one indicates they are having their lines bled.
Quote:
does c350 have bigger calipers?
Parts number are different, so I guess they should be bigger.Originally Posted by rb23lb
why will the akekono pads not fit a C350?does c350 have bigger calipers?
Senior Member
Quote:
I had plenty of time since I have two cars. I did 5 coats on each (not that you need that many maybe just 2-3)and I bought that dupliColor caliper paint. You can get it at amazon, auto zone, pep boys etc. They have many colorsOriginally Posted by dansonchan
What kind of paint u use for the black out and how many coat u paint on it?thanks
MBWorld Fanatic!
Quote:
You should actually be draining and refilling ALL of the fluid every 2 years according to MB.Originally Posted by ggms16
I don't see a reason to bleed the brake lines when you are just changing the pads and rotor.

Newbie
Hi, thanks for the great write up and pictures. This helps a lot.
I have a few questions. I have a 2010 C300 4MATIC. Since it has the sensors, how do those sensors let you know your brake pads are low? Does it flash up on the main dashboard screen?
Is there any chance my car does not have the brake pad wear sensors? I believe they do, but it's tough to have any certainty when it comes to a Mercedes.....no manuals!!
Thanks again.

Newbie
tire rack says the akebono is 3 out of 5 for stopping power? I find this disturbing. Shouldn't you want 5/5 for stopping power

MBWorld Fanatic!
Quote:
What is the basis of the scale? Is a 5 a metallic pad for the highest performance settings for a race track? What is the OE pad....a 2? I don't know. I can tell you after running several cars on Akebono EUR pads for a couple of years, their performance is excellent and I would not revert to OE pads.Originally Posted by NorcalMark
tire rack says the akebono is 3 out of 5 for stopping power? I find this disturbing. Shouldn't you want 5/5 for stopping power
Newbie
Im not sure sportstick. I would guess for normal driving(not racing) that would be fine. *shrugs*
Senior Member
Quote:
What brand and from where did you get the caliper paint? ThanksOriginally Posted by spencer3
Got mine done last week to. Makes such a difference.

MBWorld Fanatic!
I just did this job on my car, this is a good DIY - one note, the 17mm wrench you need for this job has to have a slim head, because the bolt has a captive washer that only allow a narrow thickness wrench to grab the inside caliper bolt head. The rear caliper bolt setup is much better engineered than this setup on the fronts.
Newbie
Excellent tutorial, easier to replace than a number of other cars. I wish Mercedes and others would eliminate the easy to strip Torex screws. Thanks

Newbie
I just ordered new OEM brake pads for the front and it only came with 1 sensor... Is this normal or do i need to buy another one ?


