When you click on links to various merchants on this site and make a purchase, this can result in this site earning a commission. Affiliate programs and affiliations include, but are not limited to, the eBay Partner Network.
Road TOP 10.25" Android Car Screen Basic Install Guide + Photos, Videos and more 2020
Hi All,
After a year or so watching these types of units on eBay, amazon etc, I’ve finally taken the plunge & bought it – The reason as to why I’ve now gone ahead with it, is mainly due to the recent design changes and it now being more suited to the Mercedes C class interior.
I have a Mercedes C250 2016 Model with upgraded COMMAND & Burmister sound system
DISCLAIMER: Although there’s nothing exciting about the current COMMAND system, is does what you need it to do. However, the MAPS are a complete disappointment & the traffic updates never seem to correspond with live information, such as what GOOGLE MAPS or WAZE are suggesting. So I’m constantly having the rely on using my mobile in the car. That being the case, I’m most looking forward to the opportunity to be able to rely primarily on GOOGLE MAPS; of which will now be conveniently built into the car.
I’m certainly not the first person to write an installation guide to this, as I’ve seen a few already lurking around on the internet. So no first place trophy’s here However, rather than an in-depth comprehensive installation guide; I will, in brief, describe the least steps necessary in order install a fully working retrofit; along with the typical times taken to complete each task. If you're looking for an in depth comprehensive guide see https://mbworld.org/forums/c-class-w...de-photos.html
The best thing about this upgrade is that your not replacement the COMMAND system, merely the screen. That being the case, you can jump between both systems at the click of a button.
Hopefully by providing the least amount of information you require in, you will be able to make a informed decision as to whether this upgrade is for you or not! - I am of course assuming you have a basic understanding at assembling/de-assembling car components.
� Torx T20 Screwdriver with a shaft length of at least 200mm
� Flexible shaft rod for T20 screwdriver.
� Car panel removal tool.
Preparing the car for installation
� Remove the Center speak plastic Grill. (2 Minutes)
� Detach OEM Media Screen & disconnect wires. (5 Minutes)
� Un-clip armrest storage box button (1 Minute)
� Detach center console, along with detaching all wires bar cigarette lighter. (15 Minutes)
� Remove armrest storage box. (5 Minutes)
� Detach central air vents from their latch. (2 Minutes)
� Unscrew locking mechanism and remove CD unit from tray. (2 Minutes)
� Remove Side Glove box Trim (1 Minute)
� Remove glove box (20 Minutes)
At this stage the car has now been prepped for instillation of the unit. Total time = 50 – 1 hr
Retrofit installation
� Remove the largest block harness from CD player and reconnect new harness. Ensure that the bridge is completed. (2 Minutes)
� IF you have optical wires, ensure they’ve been removed from old harness and placed into new one.
� Feed wiring behind the air vents and through the cavity where the screen will be located (5 Minutes)
� Feed GPS & Antenna wiring through the screen cavity section, through the glove box region and out of the side glove box trim (2 Minutes)
� Attach plastic Screen holder to the cavity and ensure the wires are feed through correctly. (5 Minutes)
� Feed AUX usb cable through to the armrest storage box. Plug into the USB slot. (2 Minutes)
� Return & re attach the center console (10 Minutes)
� If required, place SD & SIM into the tray behind the right hand of the screen. (2 Minutes)
� Connect the screen cables to the screen, and affix the screen to the holder (10 Minutes)
At this stage the screen has been successfully connected, but the car will not be put back together until the unit is confirmed as working. Total time = 35-45 Minutes
Pre final installation test�� Turn the Vehicle to the on position to see if the monitor powers up. (1 Minute)
� Toggle Rotary knob to check functionality. (1 Minute)
� Go to NTG setting and press & hold the general button for 10 seconds.
� Enter “CANBUS INFO” and ensure CF is visible, if not, turn off vehicle, disconnect main harness from CD player and re connect.
At this stage the screen has been successfully connected & tested. Total time = 2 Minutes
final installation
� Refit glove box (20 Minutes)
� Refit Side Glove box Trim (1 Minute)
� Return CD unit and affix with locking screws. (2 Minutes)
� Refit armrest storage box. (5 Minutes)
� Re attach central air vents to their latches. (2 Minutes)
� Refit center console, along with ensuring all wires are correctly returned (15 Minutes)
� Refit the Center speak plastic Grill. (2 Minutes)
At this stage the car cabin has been returned back to normal, with the addition of a brand new Android screen!!. Total time = 40-45 Minutes
Post installation setup
� Turn the Vehicle to the on position to see if the monitor powers up
� Go to NTG setting and press & hold the general button for 10 seconds.
� Enter “Factory Heat unit…” and follow the following:
1. Select the correct NTG type.
2. Select the correct USB position which corresponds to where you connected the USB to
3. Set the Original menu resolution to correspond with the previous Screen size.
4. Ensure that the “Factory head unit audio switching method” is set to “USB”
5. Choose the closest Vehicle type. Preference controlled.
� Set up the system for your car.
� Test OEM COMMAND Sound
� Test sample sound files on the Android screen.
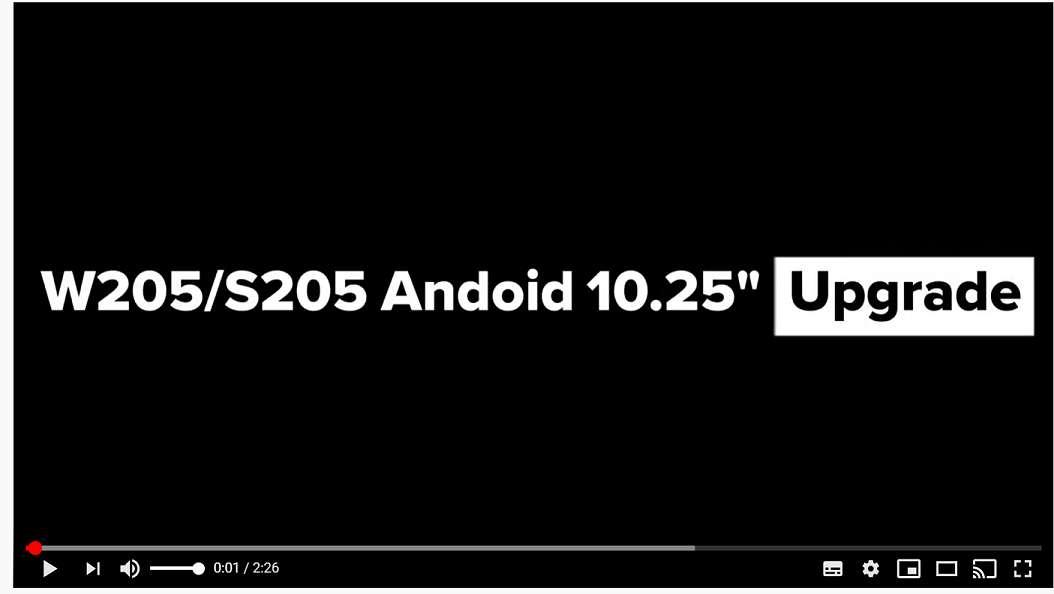
See the below video for a quick rundown on the functionality of this device
The thread subject should be Road Top DIY. I spent almost 3 hours to install my dynamic turn signal on my mirrors 😂 I installed this 10.25" screen in a professional workshop it took him roughly 4 hours so you beated him 👍
I installed my screen today - I just wanted to ask you, how did you change the NTG resolution settings. as when i switch to NTG or revers the 360 camera doesnt fit its all cut off. I cant find the setting to change the resolution.
I need serious help with the audio on my Road Top Android 10.25 install, since they don�t respond to me. I have a 2013 GLK With NGT4.5 but the Road Top Android unit looks the same as yours.
I have it installed and absolutely everything works except for audio out of the Android unit itself.
My wire harness that came with the unit has no audio outputs. Everything is labeled input. I have one Female USB end which is labeled input. There is also one 8-pin open harness which is unlabeled and has green/brown/black/black-white wires connected into it. This attached to the original screen but seems to do nothing now.
Therefore I don�t have any cables connected to my car aux jacks inside the armrest because there are no audio outputs to connect to.
Do I need another special cable or how do I get audio out?
Thanks for any help!!
I have a 2008 C300 with the HK fiber wiring which I ordered the harness and interface for. I am needing help finding out which harness, interface and antenna adapter it is I need. Every website I go to shows me different ones that fits my car 🤦🏼♀️
Mercedes SLR McLaren 722 S Is Extremely Rare Example Modified by McLaren
Slideshow: A one-of-one U.S.-spec Mercedes-Benz SLR McLaren Roadster became even rarer after a factory-backed transformation at McLaren's headquarters.


 " target="_blank">


 However, rather than an in-depth comprehensive installation guide; I will, in brief, describe the least steps necessary in order install a fully working retrofit; along with the typical times taken to complete each task. If you're looking for an in depth comprehensive guide see https://mbworld.org/forums/c-class-w...de-photos.html