


ND-Photo.nl's 2005 CLS55 Build thread

MBWorld Fanatic!


Joined: Jun 2020
Posts: 1,177
Likes: 314
2006 CLS55 AMG, 2005 SLK 350 AMG
Thread Starter
MBWorld Fanatic!


Joined: May 2022
Posts: 1,917
Likes: 499
From: The Netherlands
2005 CLS55 AMG W219 C219
Yep, aftermarket. For that price I'm willing to take a chance
https://www.aliexpress.com/item/1005003575422609.html
https://www.aliexpress.com/item/1005003228764160.html
https://www.aliexpress.com/item/1005003575422609.html
https://www.aliexpress.com/item/1005003228764160.html
MBWorld Fanatic!
Joined: Jun 2020
Posts: 1,177
Likes: 314
2006 CLS55 AMG, 2005 SLK 350 AMG
Yep, aftermarket. For that price I'm willing to take a chance
https://www.aliexpress.com/item/1005003575422609.html
https://www.aliexpress.com/item/1005003228764160.html
https://www.amazon.com/Arotom-Covers...S5K/ref=sr_1_1
https://www.aliexpress.com/item/1005003575422609.html
https://www.aliexpress.com/item/1005003228764160.html
https://www.amazon.com/Arotom-Covers...S5K/ref=sr_1_1
Thread Starter
MBWorld Fanatic!
Joined: May 2022
Posts: 1,917
Likes: 499
From: The Netherlands
2005 CLS55 AMG W219 C219
Repaired the airhose going from the compressor to the valve block. I had a Macguyver solution in place, but that didnt hold. So bought the repair kit from MB, cost about 20 euro for 1.5m of airhose. Should've done that immediately haha

The Macguyver solution with reinforced vacuumhose. The hose was strong enough, but the clamps dont give enough force.

New airline in place. Had a piece of hose which fits the airline perfectly (added protection against rubbing).

The Macguyver solution with reinforced vacuumhose. The hose was strong enough, but the clamps dont give enough force.
New airline in place. Had a piece of hose which fits the airline perfectly (added protection against rubbing).
Thread Starter
MBWorld Fanatic!
Joined: May 2022
Posts: 1,917
Likes: 499
From: The Netherlands
2005 CLS55 AMG W219 C219
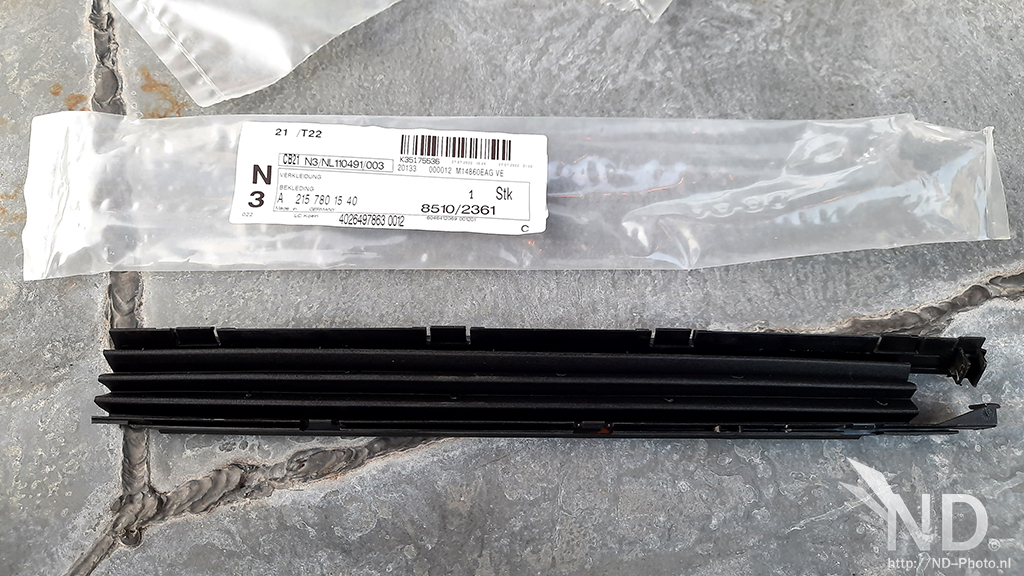
New curtains / accordeons / whatever you call them for the roof window. Looks nasty in a luxury interior if those things are ripped (both were). Small repair with maximum impact
They are quite easy to replace, start with the window open, you will see 1 tab exposed. Lift it with a flathead screwdriver and then you can continue from the inside. On the inside there is a hard plastic piece of trim (in the front of the window) which slots in the trim (on each side) with a small tab.
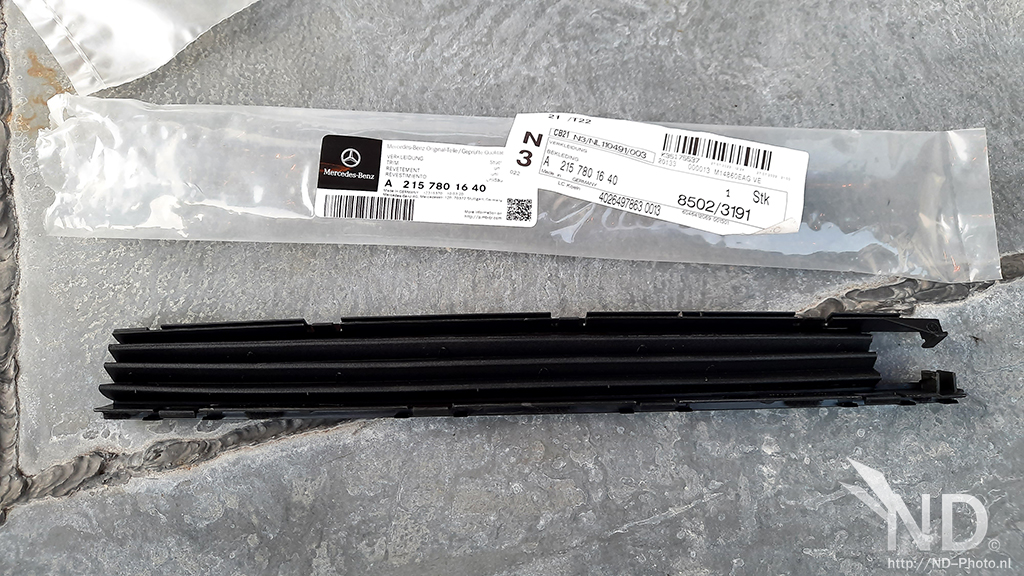
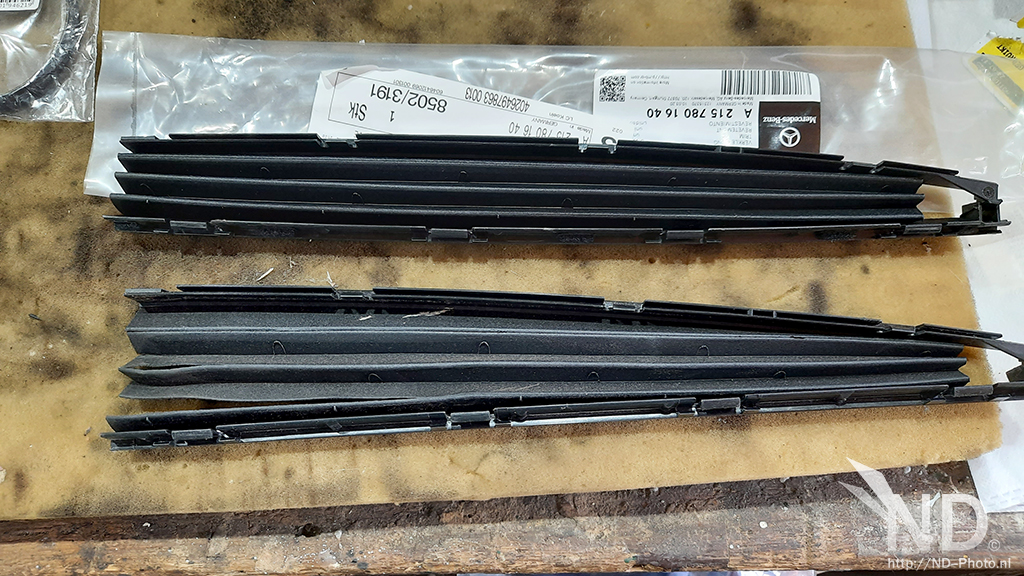
New vs old
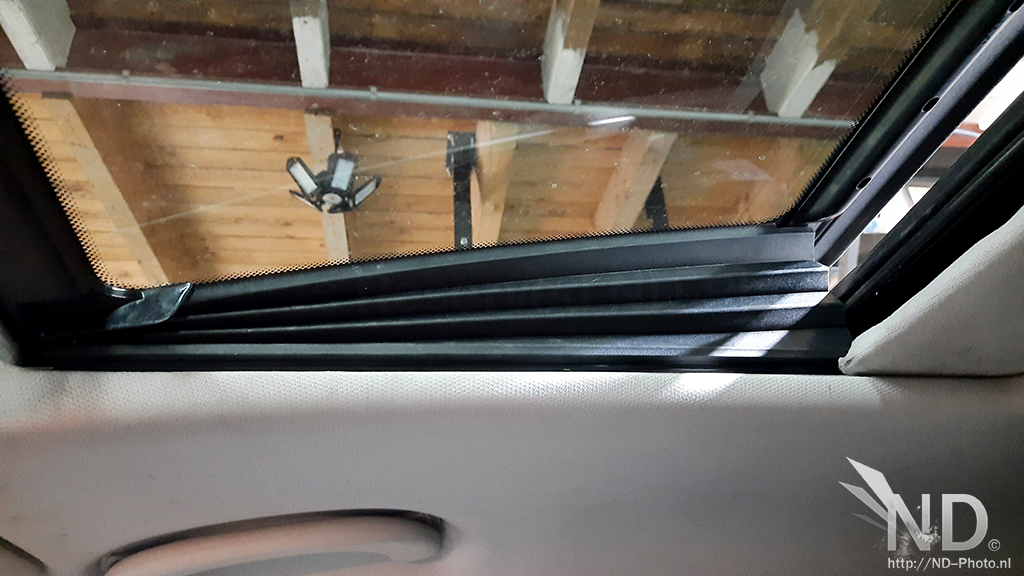
Problem solved!
They are quite easy to replace, start with the window open, you will see 1 tab exposed. Lift it with a flathead screwdriver and then you can continue from the inside. On the inside there is a hard plastic piece of trim (in the front of the window) which slots in the trim (on each side) with a small tab.
New vs old
Problem solved!
Thread Starter
MBWorld Fanatic!
Joined: May 2022
Posts: 1,917
Likes: 499
From: The Netherlands
2005 CLS55 AMG W219 C219
MB World Stories
The Best of Mercedes & AMG

Manual Mercedes? 6 Times Sindelfingen Let Drivers Have All The Fun
Verdad Gallardo
Mercedes SLR McLaren 722 S Is Extremely Rare Example Modified by McLaren
Verdad Gallardo
8 Classic Boxy Mercedes Designs That Have Aged Like Fine Wine
Verdad Gallardo
Flawlessly Restored Mercedes 190E Evo II Heads to Auction
Verdad Gallardo
Electric Mercedes C-Class Unveiled: 11 Things You Need to Know
Verdad Gallardo
Mercedes EQS Gets A Major Update: Everything You Need to Know
Verdad Gallardo
5 Underrated Mercedes-Benz Models That Don't Get the Love They Deserve
Verdad Gallardo
Mercedes 300D Has Pushed Well Past 1 Million Miles and It Ain't Stopping
Verdad Gallardo
10 Most Reliable Mercedes-Benz Models You Can Buy Used
Verdad Gallardo
Thread Starter
MBWorld Fanatic!
Joined: May 2022
Posts: 1,917
Likes: 499
From: The Netherlands
2005 CLS55 AMG W219 C219
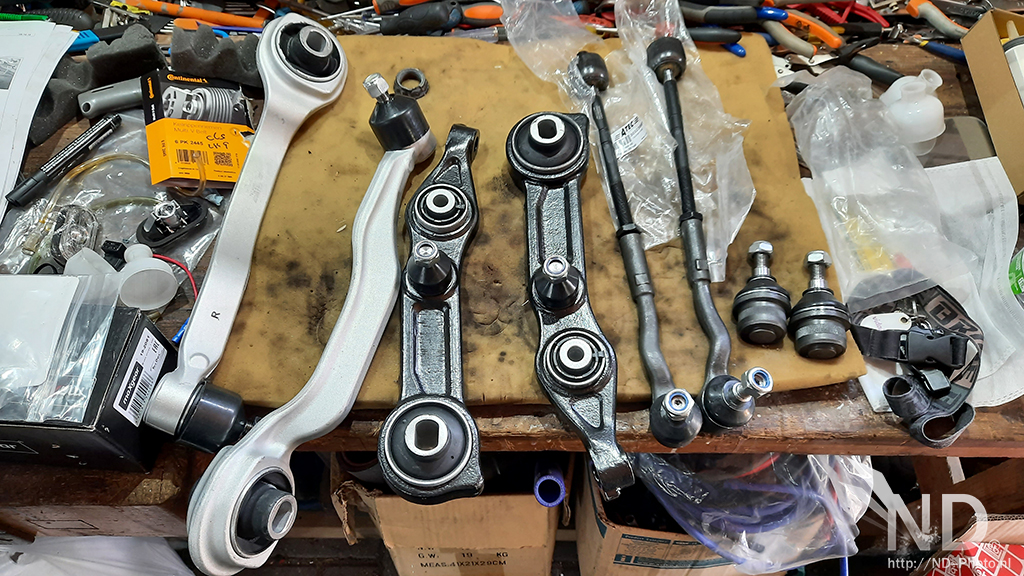
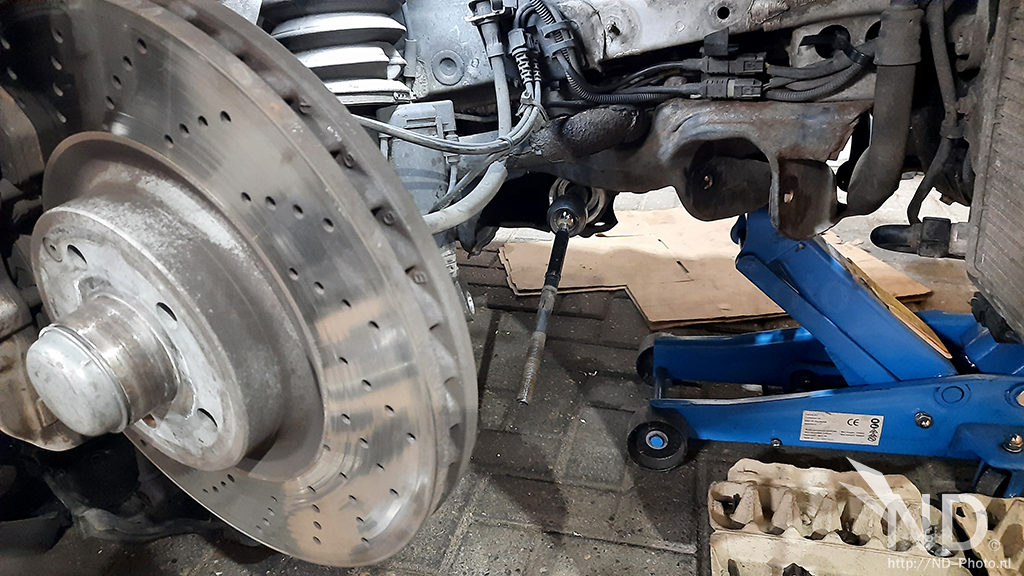
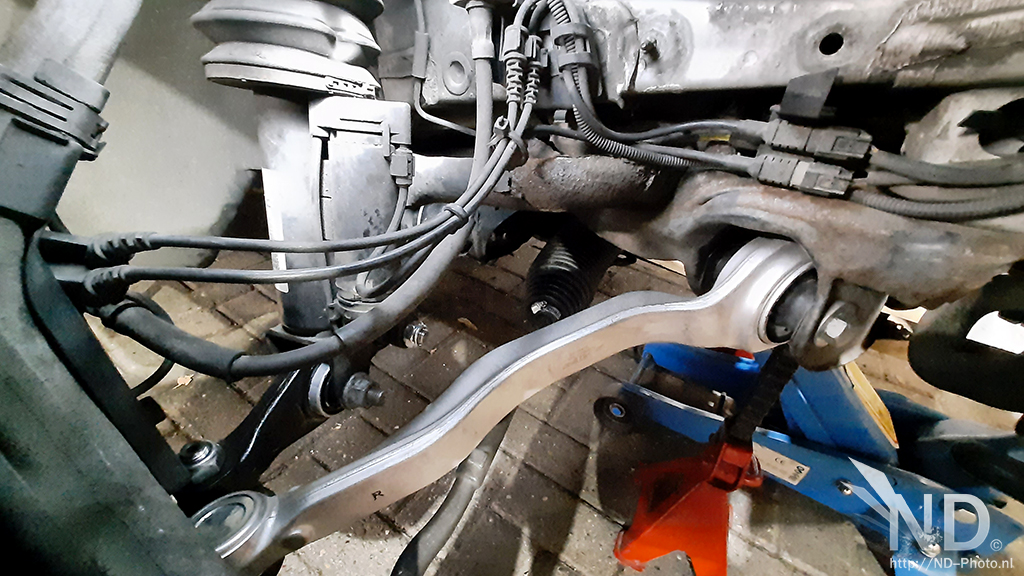
Refreshed the main parts of the front suspension. Bought the special C-clamp tool for the lower ball joints for about 40euro (which isnt bad).

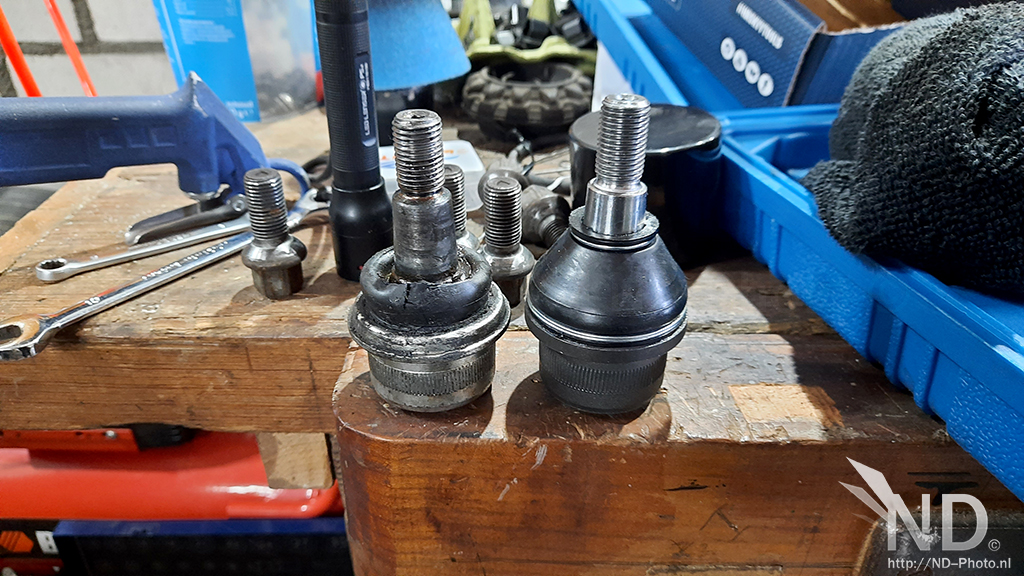
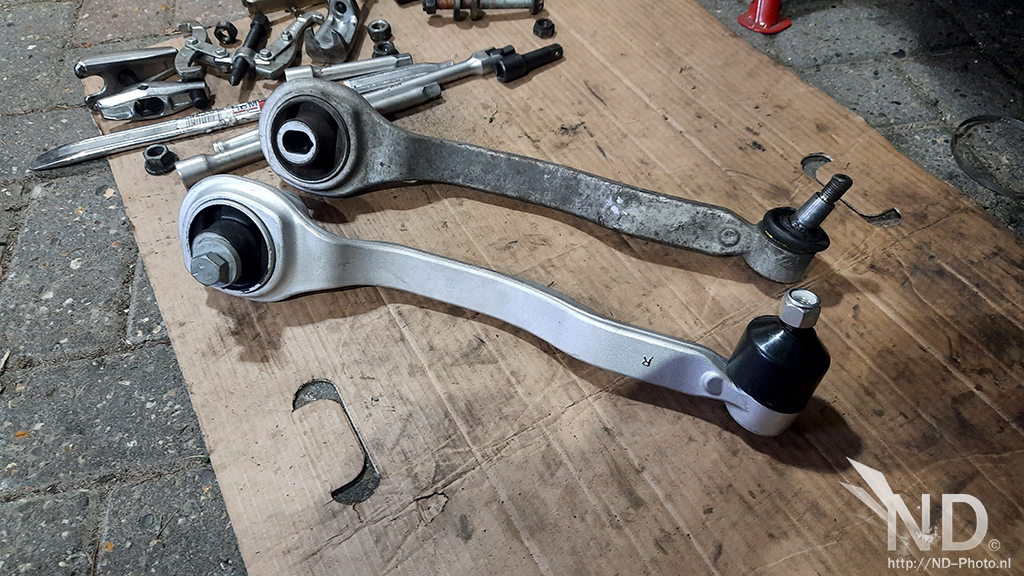
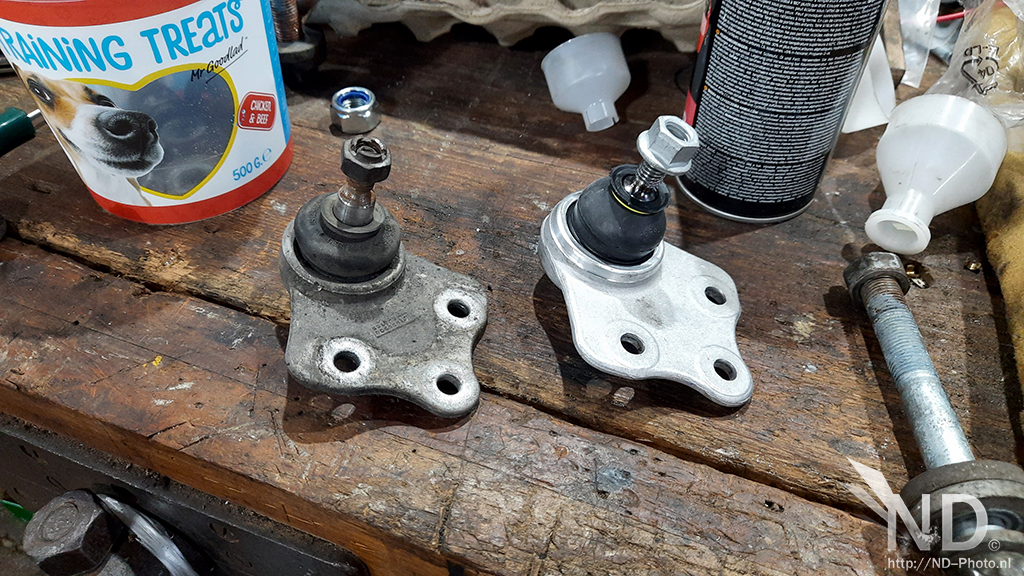
New arms, thrust arms, inner + outer tie rods and lwer ball joints
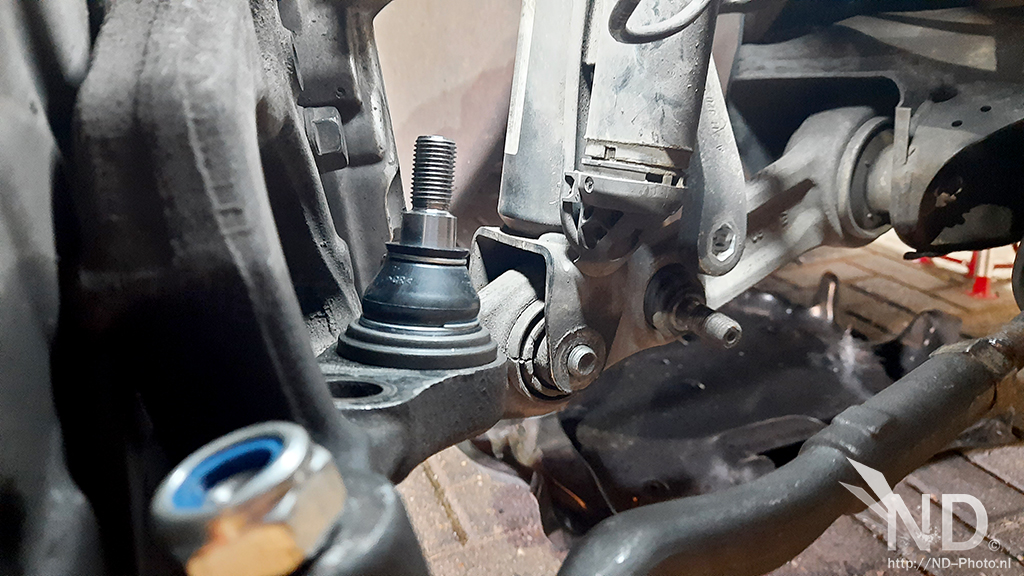
Special tool at work
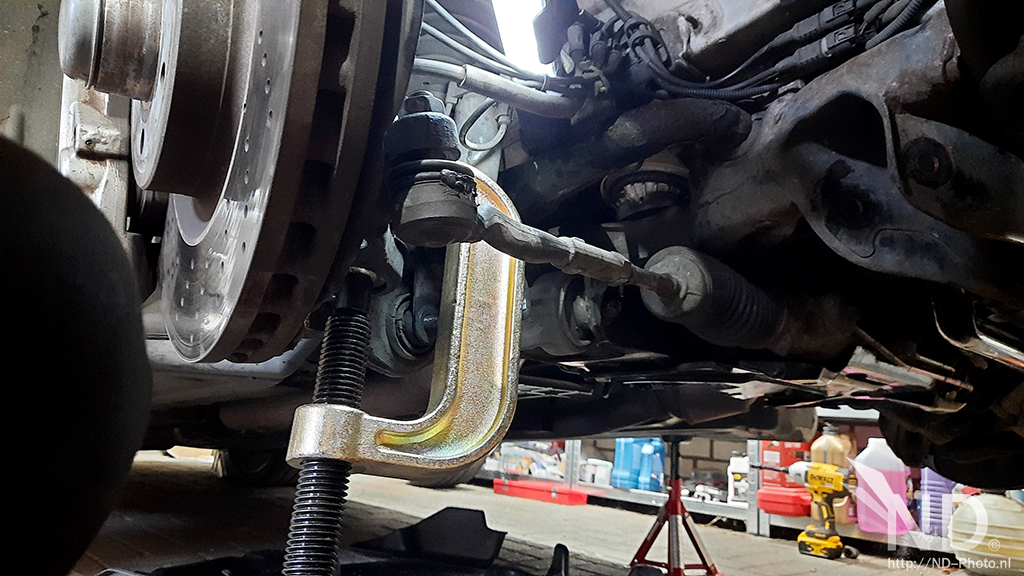
A little looksie behind the knuckle
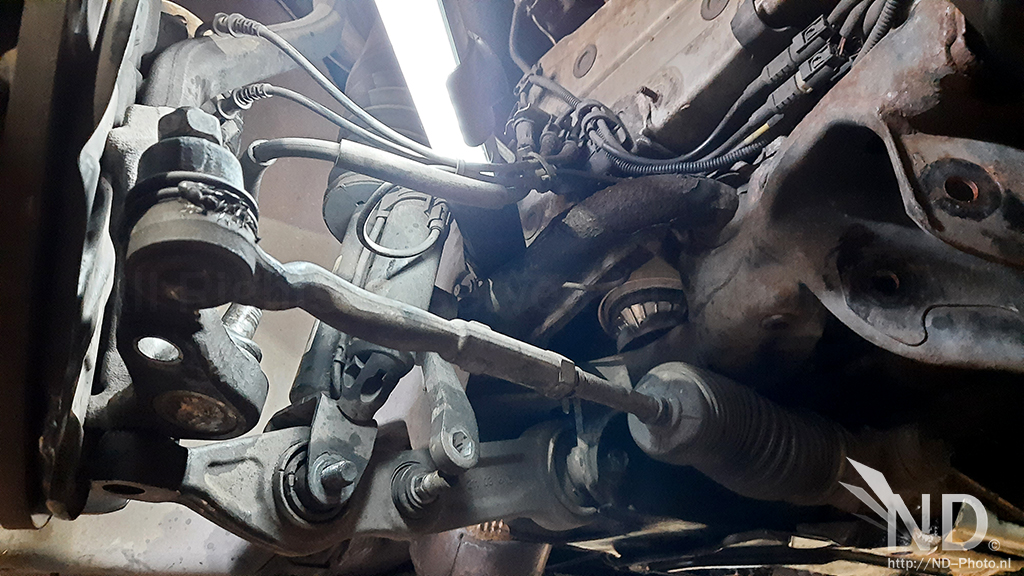
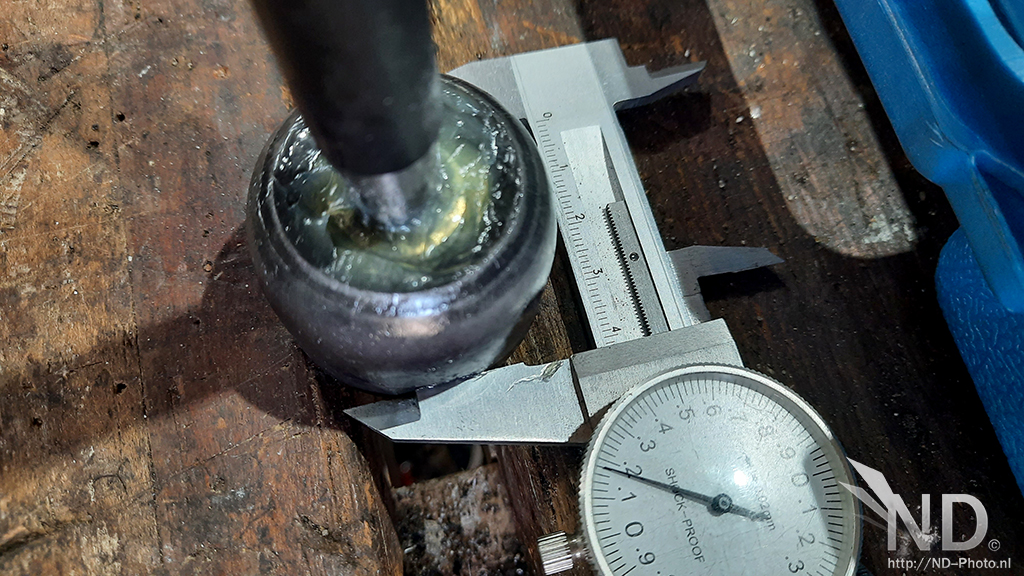
But then I found out I had the wrong ball joints delivered. So project was coming to a stop...Ball joints did not have the lip to press them in.
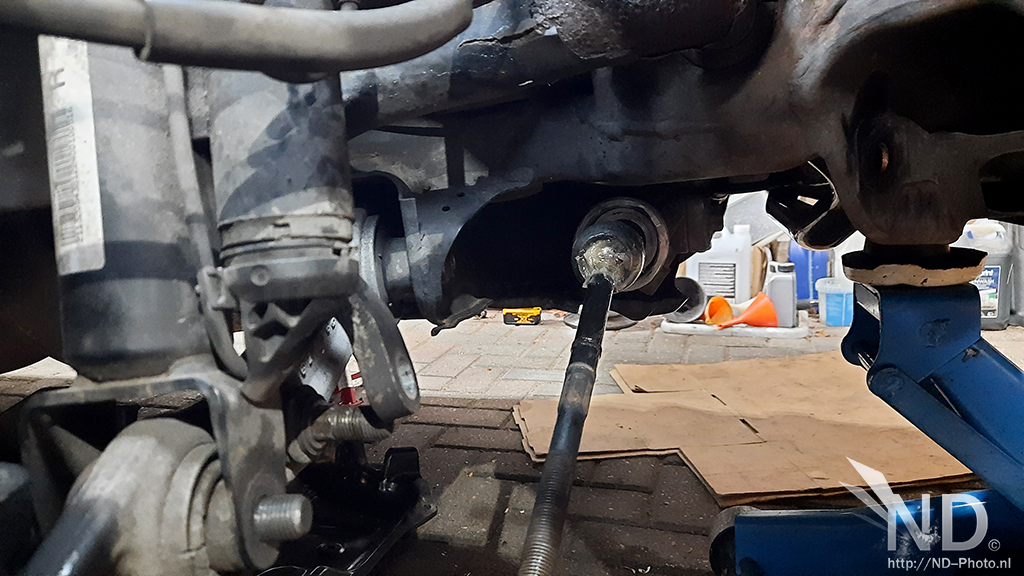
Had to use some heat (torch) to get the 21mm nut for the outer tie rood to break loose. Then I also found out my tie rod toolkit did not have the correct size (41mm). I made the decision to keep the inner tie rod for now and only replace the outer tie rods. gave it a good lube with fresh ball joint grease.
New arms, thrust arms, inner + outer tie rods and lwer ball joints
Special tool at work
A little looksie behind the knuckle
But then I found out I had the wrong ball joints delivered. So project was coming to a stop...Ball joints did not have the lip to press them in.
Had to use some heat (torch) to get the 21mm nut for the outer tie rood to break loose. Then I also found out my tie rod toolkit did not have the correct size (41mm). I made the decision to keep the inner tie rod for now and only replace the outer tie rods. gave it a good lube with fresh ball joint grease.
Thread Starter
MBWorld Fanatic!
Joined: May 2022
Posts: 1,917
Likes: 499
From: The Netherlands
2005 CLS55 AMG W219 C219
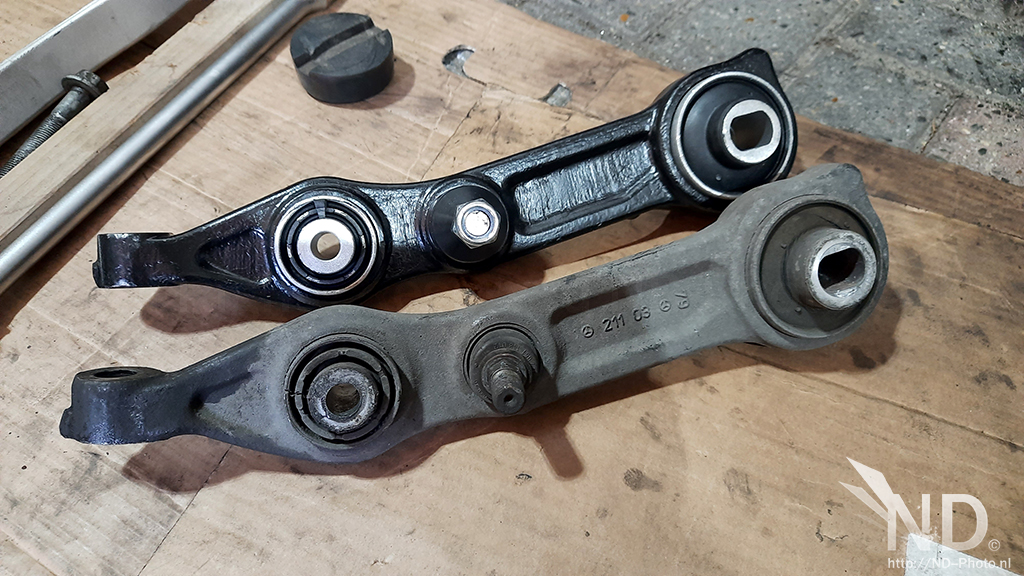
Old and new thrust arm. They were also aftermarket, so somebody replaced them already (good!)
All 4 suspension bolts looked like this. Why...
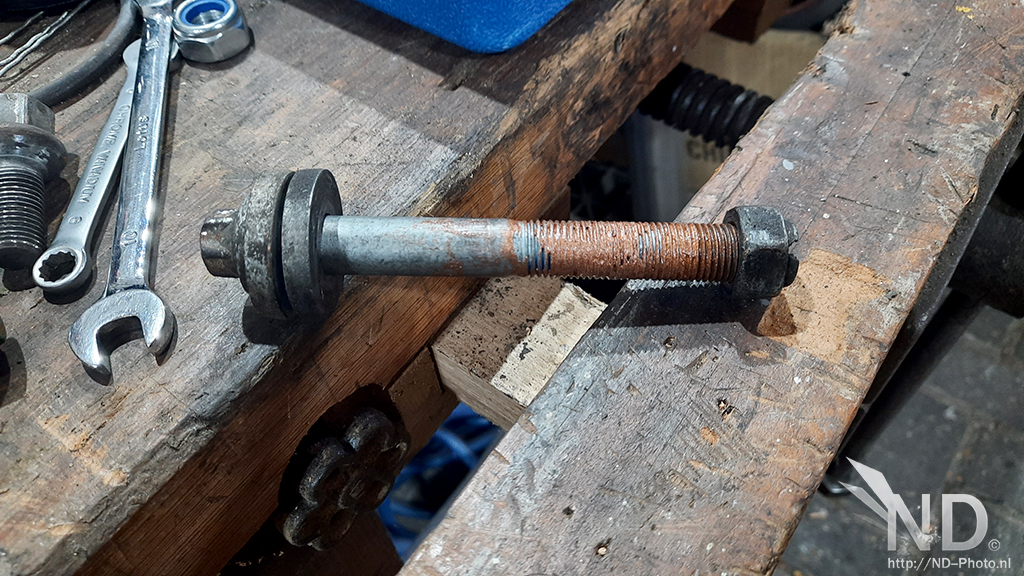
One of the outer tie rods looked like this

Couple of days later, the correct ball joints had arrived so we could continue
OE arm vs new aftermarket arm
Decided to also replace the upper ball joints (correct choice)
Everything in place! Need to do an alignment next.
All 4 suspension bolts looked like this. Why...
One of the outer tie rods looked like this
Couple of days later, the correct ball joints had arrived so we could continue
OE arm vs new aftermarket arm
Decided to also replace the upper ball joints (correct choice)
Everything in place! Need to do an alignment next.

Banned
Joined: Jul 2017
Posts: 36,799
Likes: 206
MERCEDES AMG GT, MERCEDES CLS63 AMG, MERCEDES G63 AMG, MERCEDES CL63 AMG
Thread Starter
MBWorld Fanatic!
Joined: May 2022
Posts: 1,917
Likes: 499
From: The Netherlands
2005 CLS55 AMG W219 C219
Shakedown was successful & today I passed yearly MOT in the Netherlands. I have to drain the ATF again, as I was a little bit sloppy with the oil pan of the gearbox. Seems the gasket on the corner with the heatshield was not seated correctly, so I will have to do that again 
Thread Starter
MBWorld Fanatic!
Joined: May 2022
Posts: 1,917
Likes: 499
From: The Netherlands
2005 CLS55 AMG W219 C219
Pictures from the gearbox maintenance:
10 Liters of Liquimoly gearbox oil

Servicekit

New conductor plate


Dirty valvebody (see the black residue on the valvebody)


New conductorplate in place

All back in place

10 Liters of Liquimoly gearbox oil
Servicekit
New conductor plate
Dirty valvebody (see the black residue on the valvebody)
New conductorplate in place
All back in place
Thread Starter
MBWorld Fanatic!
Joined: May 2022
Posts: 1,917
Likes: 499
From: The Netherlands
2005 CLS55 AMG W219 C219
After refitting and refilling, the car wasnt driving. With the iCarsoft I checked and noticed that the wrong gear was chosen (not corresponding with the gear lever). I tried the gearbox reset with the iCarsoft, but that didnt work and I went into mini panic mode. The day after, I drained the gearbox again and checked the seating of the valve body. I expected that the yellow lever wasnt sitting correctly, so I just wanted to make sure.
In the end, I performed a reset using the video below (method 2) and all was working again. So the 2nd drain wasnt needed at all


In the end, I performed a reset using the video below (method 2) and all was working again. So the 2nd drain wasnt needed at all
Thread Starter
MBWorld Fanatic!
Joined: May 2022
Posts: 1,917
Likes: 499
From: The Netherlands
2005 CLS55 AMG W219 C219
Bought new wheel bolts for the front. I bought bolts with loose caps, I had this type on my Volvo S80 and read back then these should center better than the normal bolt type. I thought I bought black bolts, but it seems I didnt. Nothing some black paint cant fix 
My specialist paint booth, temperature controlled and everything")

Work in progress

Here you can see the clear difference

My specialist paint booth, temperature controlled and everything
Work in progress
Here you can see the clear difference
Thread Starter
MBWorld Fanatic!
Joined: May 2022
Posts: 1,917
Likes: 499
From: The Netherlands
2005 CLS55 AMG W219 C219
And then the other valve cover started to leak hahaha That is the last time that I will be buying Febi Bilstein gaskets. I replaced them with a Viktor Reinz gasket. I also added high temp silicone sealant to seal of the oil filler neck, as oil was seeping from there as well.
Oil on the exhaust manifold

Sealant around the filler neck.

That is the last time that I will be buying Febi Bilstein gaskets. I replaced them with a Viktor Reinz gasket. I also added high temp silicone sealant to seal of the oil filler neck, as oil was seeping from there as well.Oil on the exhaust manifold
Sealant around the filler neck.
Thread Starter
MBWorld Fanatic!
Joined: May 2022
Posts: 1,917
Likes: 499
From: The Netherlands
2005 CLS55 AMG W219 C219
And I used that moment to replace the old coolant expansion reservoir. It was leaking from the cap, even though I replaced the cap with a new Febi cap. The reservoir also included a new cap and new sensor.


Thread Starter
MBWorld Fanatic!
Joined: May 2022
Posts: 1,917
Likes: 499
From: The Netherlands
2005 CLS55 AMG W219 C219
And some more on a popular dutch site, called autogespot.nl
https://www.autogespot.nl/spots?bran...country=&city=

https://www.autogespot.nl/spots?bran...country=&city=


