DIY Aluminum sports pedals
 07-11-2010, 11:24 PM
#1
MBWorld Fanatic!
Thread Starter
Join Date: Mar 2007
Location: Houston, TX
Posts: 1,948
Likes: 0
Received 3 Likes
on
2 Posts
C32/C55 AMG
DIY Aluminum sports pedals
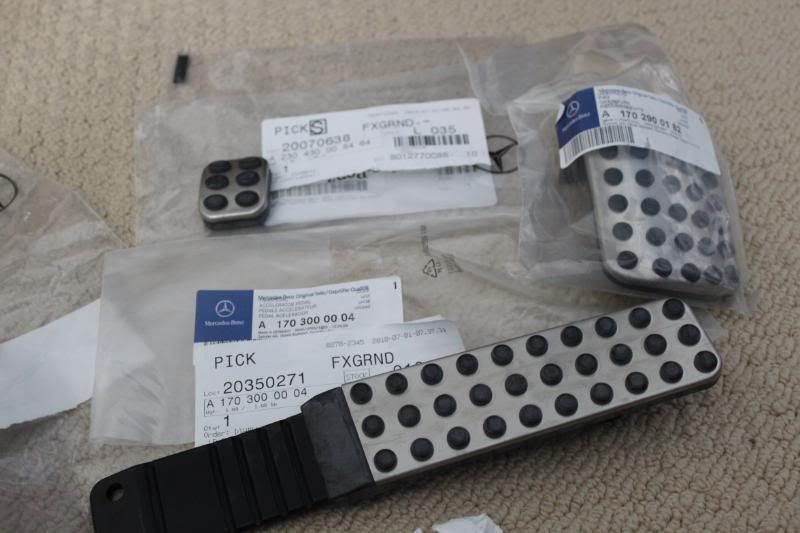
So while looking through the forum I found the MB part numbers for the aluminum sports pedals for the emergency brake, brake, and accelerator. Ordered them from parts.com and decided to do install them. The part numbers are as follows:
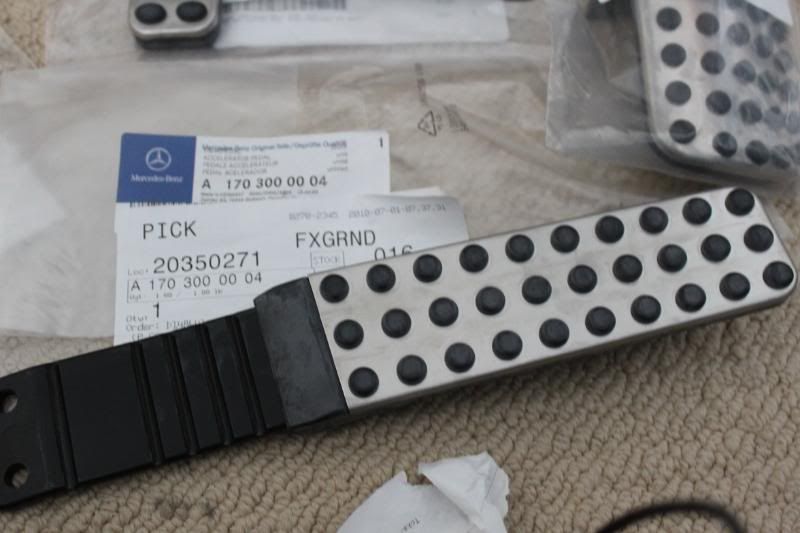
Aluminum accelerator pedal: 170 300 00 04 $18.40
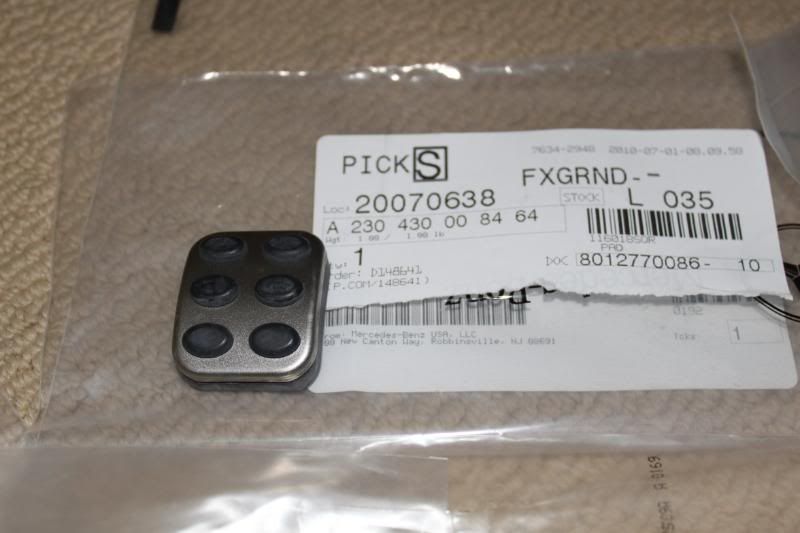
Emergency brake pad: 230 430 00 84 64 $10.06 Update: the part number should be 203 430 00 84 otherwise you will get ovals instead of circles.
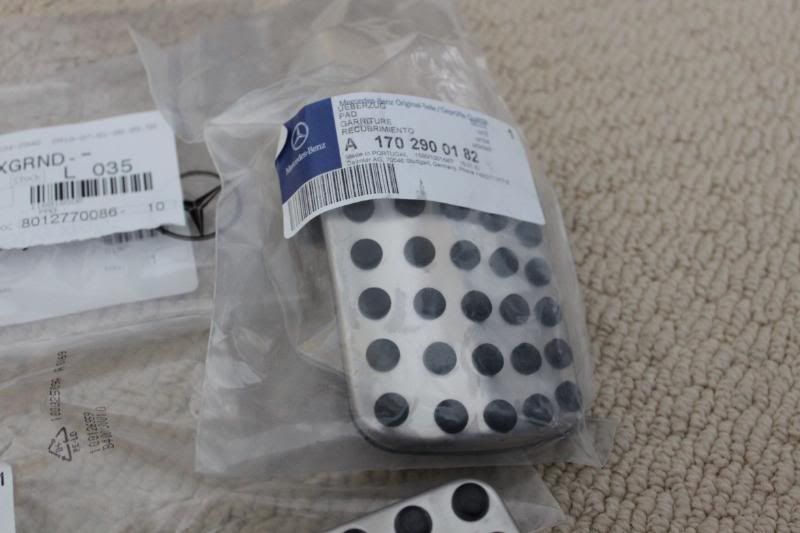
Brake pad: 170 290 01 82 $13.80
The install was pretty straight forward, but I didn't have any specific install. So I decided to make my own DIY.
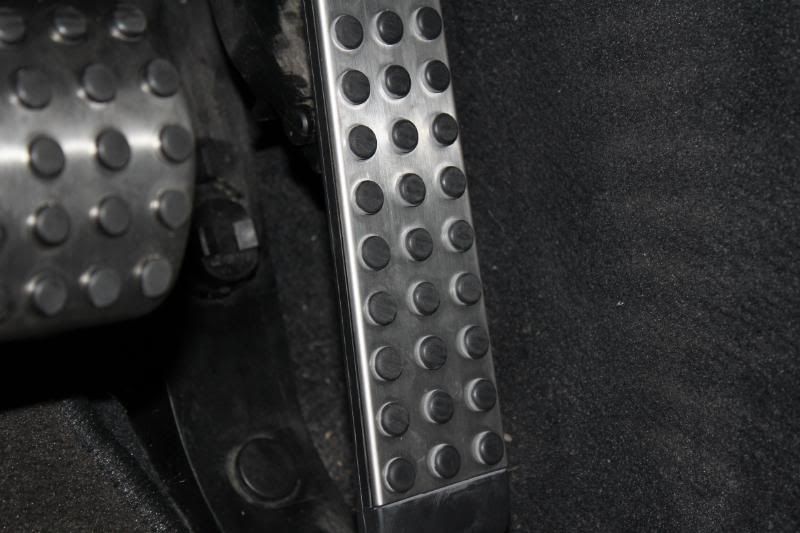
Here are some pics of the aluminum pedals:
Here is a pic with the pedals installed. I wish I could have taken some pictures with the pedals disassembled:
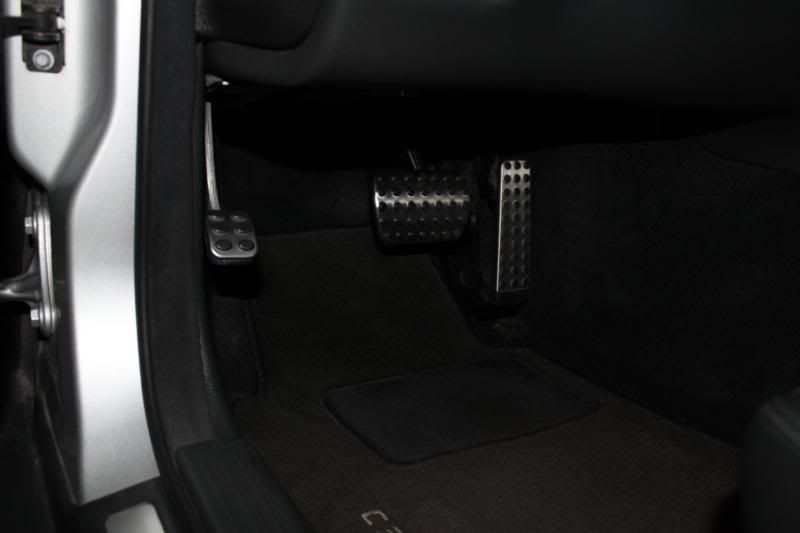
The pedal pads for the emergency brake pad was the simplest and then the accelerator pad was the next easiest. The most difficult pad was the brake pedal.
Taking off the old pedal pads was easy. They just slipped off of the metal pedal assembly. The accelerator was a bit more steps, but almost as easy as the installation of the pad for the emergency brake pedal.
The emergency brake pedal just slips on and just requires a bit of working with.
The brake pedal was a pain in the *** to install. You are at an odd angle and you have to make sure that you get the cover on just right. A screw driver might help, but my wife's small hands did the trick.
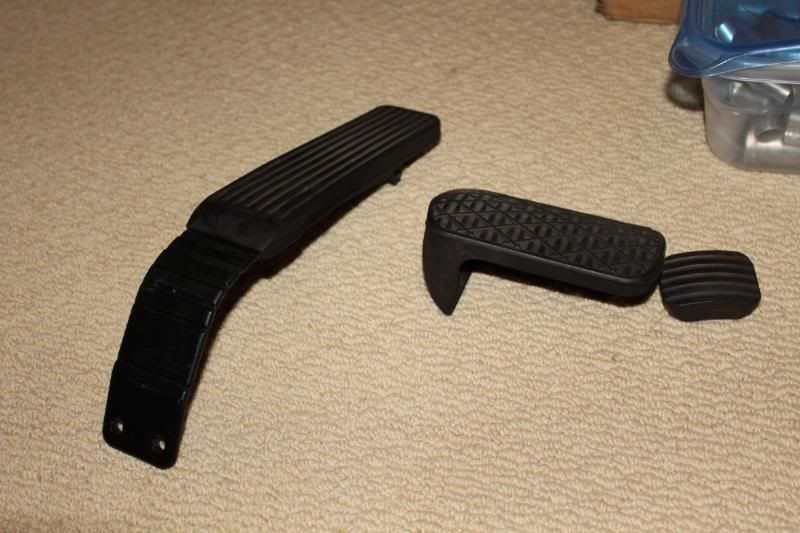
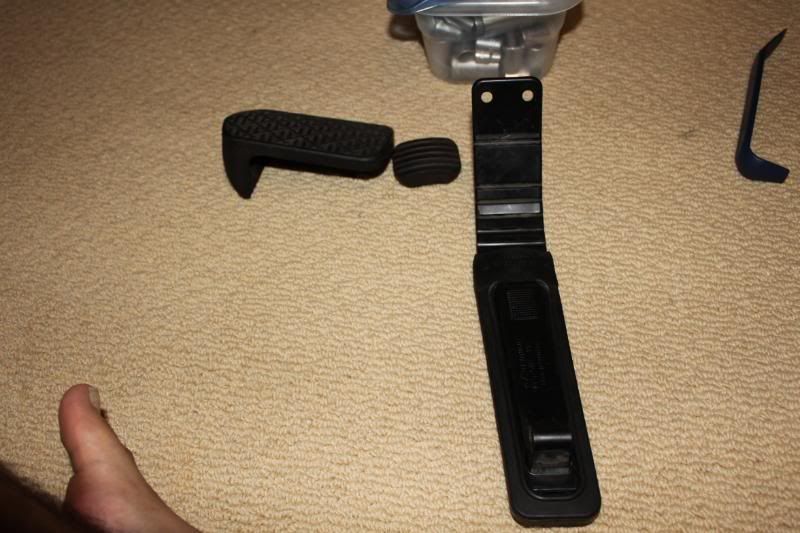
Here are some pics of the old pads:
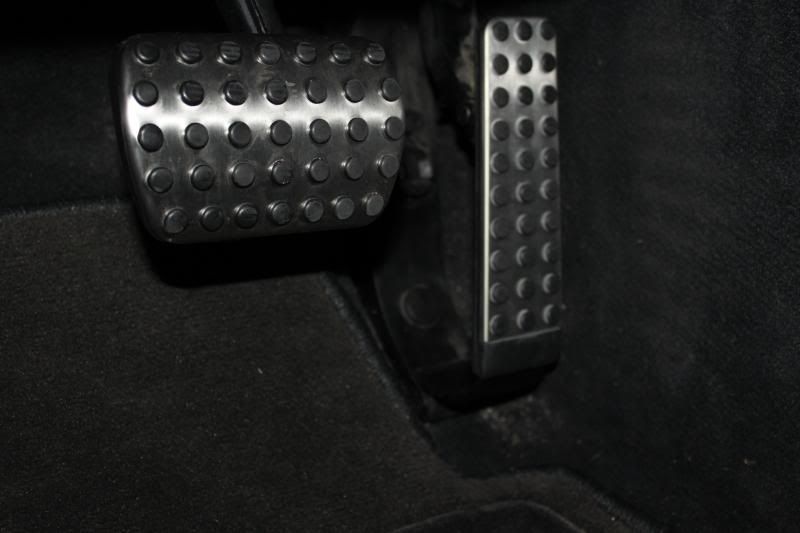
In order to install the accelerator pedal you have to take the pedal off of the assembly. At first it will seem difficult, but it's very easy. Take a look at the side profile of the new accelerator pedal installed:
Near the top of the pedal you will notice a small plastic round pin that holds the top portion of the pedal to the assembly. All you need to do is pry it out. It will feel like it won't come out, but it will just pop right out. Once you have that portion off you can bend the pedal forward and you can access the plastic cap at the base of the pedal that covers a 10mm bolt. The plastic cap just pries off. You will find a groove where you can slip a flat head screw driver to pry it off.
Unscrew the 10mm bolt with a ratchet and the whole assembly will move down attached to the pedal. What you will need to do is get under the assembly to pry off an oval plastic cap that holds the pedal on to the assembly. The assembly will just slide out and then you just install in reverse. Unfortunately I failed to get a pic of this portion, but it's pretty straight forward.
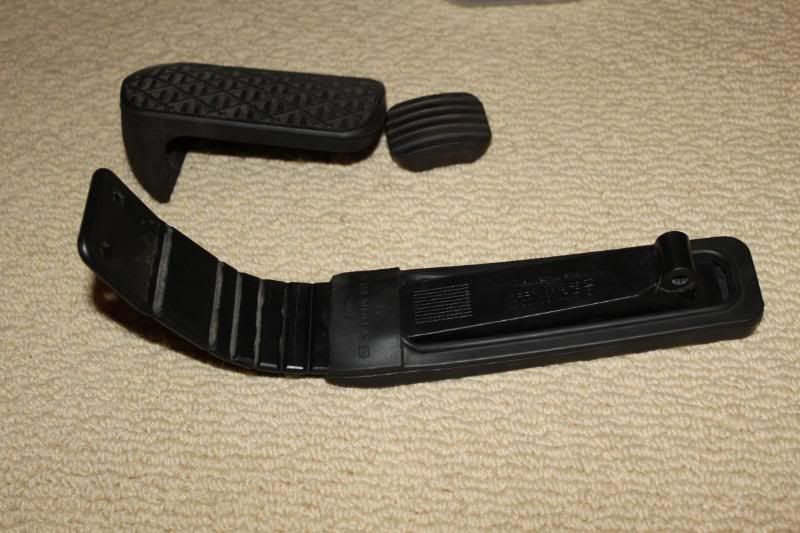
What I notice is the original accelerator pedal was slightly different than the original but fit in with out a hitch. Some people will tell you that you should just swap the pads, but that's more difficult then installing the whole pedal. Here's another view of the original accelerator pedal. You will notice the two holes, that what the plastic cap sits in to to hold the pedal into the whole assembly.
The accelerator pedal feels firmer and much better, maybe I was just due for a change.
Aluminum accelerator pedal: 170 300 00 04 $18.40
Emergency brake pad: 230 430 00 84 64 $10.06 Update: the part number should be 203 430 00 84 otherwise you will get ovals instead of circles.
Brake pad: 170 290 01 82 $13.80
The install was pretty straight forward, but I didn't have any specific install. So I decided to make my own DIY.
Here are some pics of the aluminum pedals:
Here is a pic with the pedals installed. I wish I could have taken some pictures with the pedals disassembled:
The pedal pads for the emergency brake pad was the simplest and then the accelerator pad was the next easiest. The most difficult pad was the brake pedal.
Taking off the old pedal pads was easy. They just slipped off of the metal pedal assembly. The accelerator was a bit more steps, but almost as easy as the installation of the pad for the emergency brake pedal.
The emergency brake pedal just slips on and just requires a bit of working with.
The brake pedal was a pain in the *** to install. You are at an odd angle and you have to make sure that you get the cover on just right. A screw driver might help, but my wife's small hands did the trick.
Here are some pics of the old pads:
In order to install the accelerator pedal you have to take the pedal off of the assembly. At first it will seem difficult, but it's very easy. Take a look at the side profile of the new accelerator pedal installed:
Near the top of the pedal you will notice a small plastic round pin that holds the top portion of the pedal to the assembly. All you need to do is pry it out. It will feel like it won't come out, but it will just pop right out. Once you have that portion off you can bend the pedal forward and you can access the plastic cap at the base of the pedal that covers a 10mm bolt. The plastic cap just pries off. You will find a groove where you can slip a flat head screw driver to pry it off.
Unscrew the 10mm bolt with a ratchet and the whole assembly will move down attached to the pedal. What you will need to do is get under the assembly to pry off an oval plastic cap that holds the pedal on to the assembly. The assembly will just slide out and then you just install in reverse. Unfortunately I failed to get a pic of this portion, but it's pretty straight forward.
What I notice is the original accelerator pedal was slightly different than the original but fit in with out a hitch. Some people will tell you that you should just swap the pads, but that's more difficult then installing the whole pedal. Here's another view of the original accelerator pedal. You will notice the two holes, that what the plastic cap sits in to to hold the pedal into the whole assembly.
The accelerator pedal feels firmer and much better, maybe I was just due for a change.
Last edited by loudandheard; 07-13-2010 at 08:59 PM.


 07-12-2010, 03:08 AM
#7
MBWorld Fanatic!

Trending Topics

 07-13-2010, 02:39 PM
#11
MBWorld Fanatic!
Thread Starter
Join Date: Mar 2007
Location: Houston, TX
Posts: 1,948
Likes: 0
Received 3 Likes
on
2 Posts
C32/C55 AMG
Look at your pedals and check out if they look the same as the ones I posted above. I'm sure they are all the same, but compare with my pics.
07-13-2010, 03:38 PM
#12
Out Of Control!!
Join Date: Apr 2008
Location: Jerzy
Posts: 10,275
Likes: 0
Received 9 Likes
on
9 Posts
04 CLK 320 > CLK32K
It looks good, but there is a problem with your ebrake. If you take a look at your other two pedals you will see the rubber are circles and on your ebrake they are oval. Looks like you inverted some numbers. The part # you ordered is 230 430 00 84 when the correct # is 203 430 00 84. I have included some pics, sorry for the bad pics
07-13-2010, 08:58 PM
#14
MBWorld Fanatic!
Thread Starter
Join Date: Mar 2007
Location: Houston, TX
Posts: 1,948
Likes: 0
Received 3 Likes
on
2 Posts
C32/C55 AMG
It looks good, but there is a problem with your ebrake. If you take a look at your other two pedals you will see the rubber are circles and on your ebrake they are oval. Looks like you inverted some numbers. The part # you ordered is 230 430 00 84 when the correct # is 203 430 00 84. I have included some pics, sorry for the bad pics
06-03-2014, 09:41 AM
#17
Member
Join Date: May 2014
Location: MELBOURNE VICTORIA AUSTRALIA
Posts: 77
Likes: 0
Received 3 Likes
on
3 Posts
w2010 w204 c300 amg sports package
CANT GET PEDALS OFF HELP PLS!!
So while looking through the forum I found the MB part numbers for the aluminum sports pedals for the emergency brake, brake, and accelerator. Ordered them from parts.com and decided to do install them. The part numbers are as follows:
Aluminum accelerator pedal: 170 300 00 04 $18.40
Emergency brake pad: 230 430 00 84 64 $10.06 Update: the part number should be 203 430 00 84 otherwise you will get ovals instead of circles.
Brake pad: 170 290 01 82 $13.80
The install was pretty straight forward, but I didn't have any specific install. So I decided to make my own DIY.
Here are some pics of the aluminum pedals:
Here is a pic with the pedals installed. I wish I could have taken some pictures with the pedals disassembled:
The pedal pads for the emergency brake pad was the simplest and then the accelerator pad was the next easiest. The most difficult pad was the brake pedal.
Taking off the old pedal pads was easy. They just slipped off of the metal pedal assembly. The accelerator was a bit more steps, but almost as easy as the installation of the pad for the emergency brake pedal.
The emergency brake pedal just slips on and just requires a bit of working with.
The brake pedal was a pain in the *** to install. You are at an odd angle and you have to make sure that you get the cover on just right. A screw driver might help, but my wife's small hands did the trick.
Here are some pics of the old pads:
In order to install the accelerator pedal you have to take the pedal off of the assembly. At first it will seem difficult, but it's very easy. Take a look at the side profile of the new accelerator pedal installed:
Near the top of the pedal you will notice a small plastic round pin that holds the top portion of the pedal to the assembly. All you need to do is pry it out. It will feel like it won't come out, but it will just pop right out. Once you have that portion off you can bend the pedal forward and you can access the plastic cap at the base of the pedal that covers a 10mm bolt. The plastic cap just pries off. You will find a groove where you can slip a flat head screw driver to pry it off.
Unscrew the 10mm bolt with a ratchet and the whole assembly will move down attached to the pedal. What you will need to do is get under the assembly to pry off an oval plastic cap that holds the pedal on to the assembly. The assembly will just slide out and then you just install in reverse. Unfortunately I failed to get a pic of this portion, but it's pretty straight forward.
What I notice is the original accelerator pedal was slightly different than the original but fit in with out a hitch. Some people will tell you that you should just swap the pads, but that's more difficult then installing the whole pedal. Here's another view of the original accelerator pedal. You will notice the two holes, that what the plastic cap sits in to to hold the pedal into the whole assembly.
The accelerator pedal feels firmer and much better, maybe I was just due for a change.
06-29-2014, 02:47 AM
#18
Newbie
Join Date: Jun 2014
Location: Scottsdale, AZ
Posts: 3
Likes: 0
Received 0 Likes
on
0 Posts
'03 C32 AMG/'99 F-150 4x4/'69 Mach 1 428CJ-R
This worked great! My �03 C32 AMG did not have these pedals, so I went to the junk yard today and found a wrecked �05 C230 Sport, and removed the pedals. I washed them up, and the install went fairly simple. I also found the pedals on-line at ecklersmbzparts.com for $72.97 (24.99 brake, 30.99 Acc, and 16.99 eBrake), but did not buy them. I did not remove the bolts holding the bottom of the accelerator pedal to the floor, only the small plastic round pin in the top of the pedal. A flathead screw driver on one side, and fingernails on the other, and it came right out. I then just had to pull the pad over that pin hole. It was a little tight, but the rubber is pretty flexible. A C32 needs these sportier looking pedals!


