
DIY Headers Installation?
 04-25-2011, 12:51 AM
#1
MBWorld Fanatic!
Thread Starter
Join Date: Mar 2007
Location: Houston, TX
Posts: 1,948
Likes: 0
Received 3 Likes
on
2 Posts
C32/C55 AMG
DIY Headers Installation?
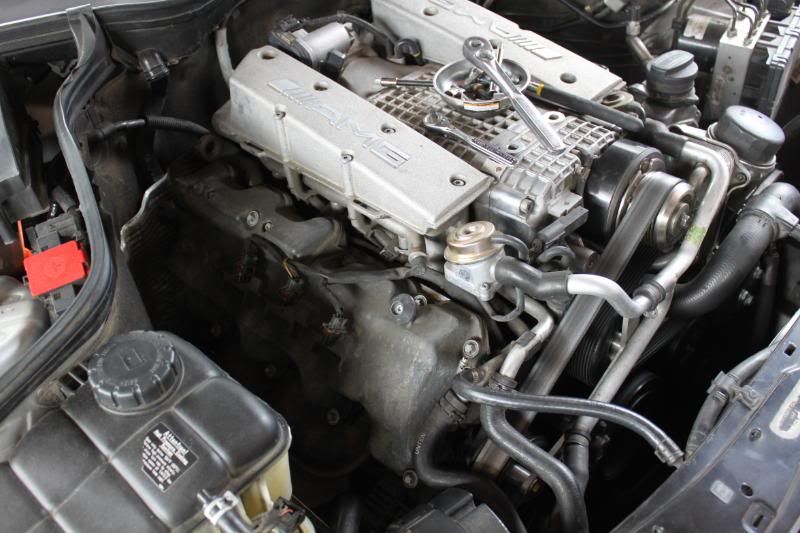
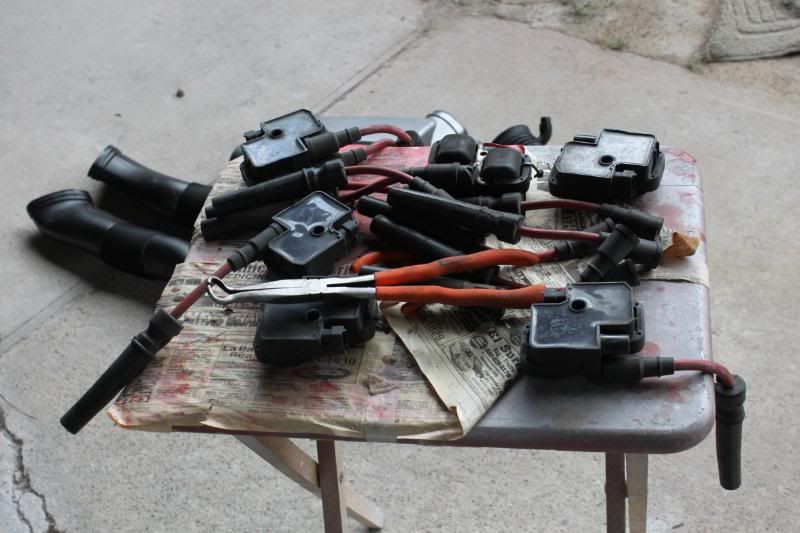
I attempted to install my equal length headers, but did not realize Easter was this Sunday. So I remove all the coil packs, spark plug wires, and the exhaust. I was able to get out the top three bolts on the manifolds on the driver side, but the passenger side top bolts gave me trouble. The first bolt I finally was able to get out, but it required the use of a pipe as a breaker bar to break the bolt free. The second bolt did not fair so well, I just stripped it. I was able to get the third out, but by that time I had to go to a party. So that was the end of Saturday.
So I realize at the party that Sunday was Easter and I was not going to be able to do a lot to the car. So I have brunch with my wife and we watch a movie. I finally get to work on the car again, but this time I had to put it all back together. Started around 7 and finished around 11. I think I might have an exhaust leak, but won't know till I drive it tomorrow. Does anyone know what the signs of an exhaust leak are?
I will get in to detail in what's required to do the job, but I need some advice from people that have done headers or have taken off their manifolds. I decided to quit rather than proceed because I was worried that I was going to have a hard time removing the bottom bolts. If I had to use a breaker bar up top, I may have to use one in an area where there isn't any space. I also felt like I could not get a socket on some of the bolts because there wasn't enough room around the bolt for it to fit. Hopefully next time I'll be prepared.
 04-25-2011, 01:03 AM
#2
MBworld Guru
Join Date: Apr 2002
Location: Diamond Bar, CA
Posts: 22,007
Likes: 0
Received 6 Likes
on
6 Posts
white and whiter
you need to get those joint thing and you will need to get to it from under the car. it's a pain in the *** process. i watched shops take off and put on mine. it's something i wouldn't want to do myself.
04-25-2011, 02:21 PM
#3
One thing that helps is to remove the bolts that hold the bottom of the motor mounts on. then you can jack up the engine 3-4 inches and move it side to side a few inches to make getting the manifolds off easier.
04-26-2011, 01:25 PM
#4
MBWorld Fanatic!
Thread Starter
Join Date: Mar 2007
Location: Houston, TX
Posts: 1,948
Likes: 0
Received 3 Likes
on
2 Posts
C32/C55 AMG
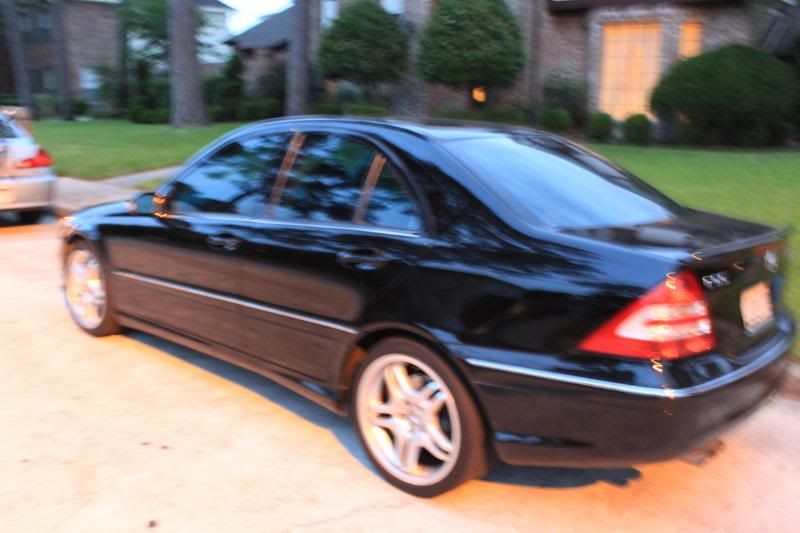
I forgot to mention the new addition, the wife's car. She also took the bad pics, lol.:

 04-26-2011, 01:52 PM
#6
Senior Member

Join Date: Jun 2009
Location: Los Angeles, CA
Posts: 263
Likes: 0
Received 1 Like
on
1 Post
03 C32 AMG
 Good luck!
 04-26-2011, 07:00 PM
#7
MBworld Guru
Join Date: Apr 2002
Location: Diamond Bar, CA
Posts: 22,007
Likes: 0
Received 6 Likes
on
6 Posts
white and whiter
so you bought it from the other guy? nice...don't forget to get some heat insulation sleeve for the ignition wires in the back because those will get in contact of the header pretty close.
i have the shorty header now. my old header definitely has more top end power.
another thing is on the driver side you will need to unhook the steering column to get to the last bolt.
i have the shorty header now. my old header definitely has more top end power.
another thing is on the driver side you will need to unhook the steering column to get to the last bolt.
Trending Topics
04-26-2011, 07:38 PM
#8
Member
04-26-2011, 08:08 PM
#10
Member
04-26-2011, 09:30 PM
#12
MBWorld Fanatic!
Thread Starter
Join Date: Mar 2007
Location: Houston, TX
Posts: 1,948
Likes: 0
Received 3 Likes
on
2 Posts
C32/C55 AMG
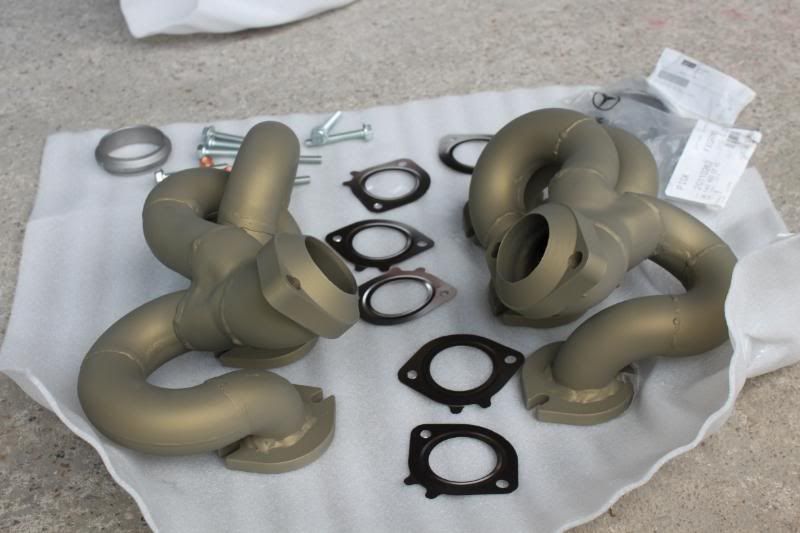
I was wondering how am I going to attach the headers to the exhaust down pipe. I noticed that the factory manifolds have a threaded nut attached to them. I bought parts from a thread on here a while ago and I have all sorts of bolts and a few other things that don't make sense.
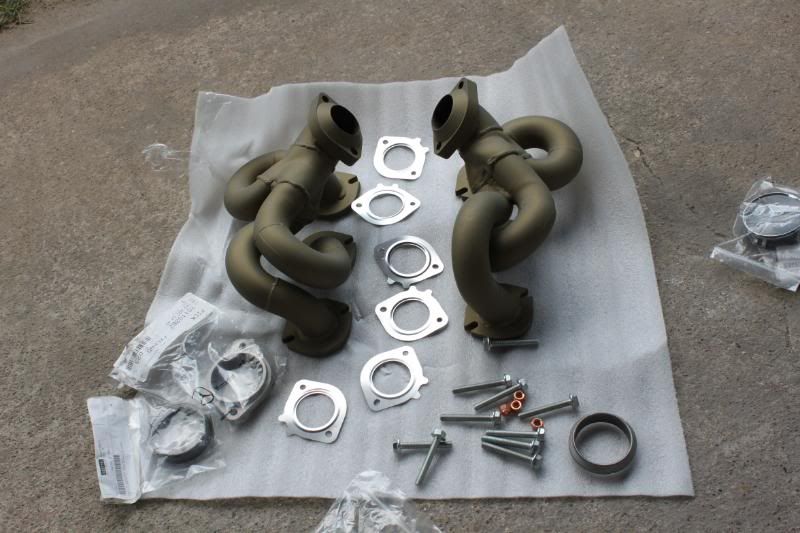
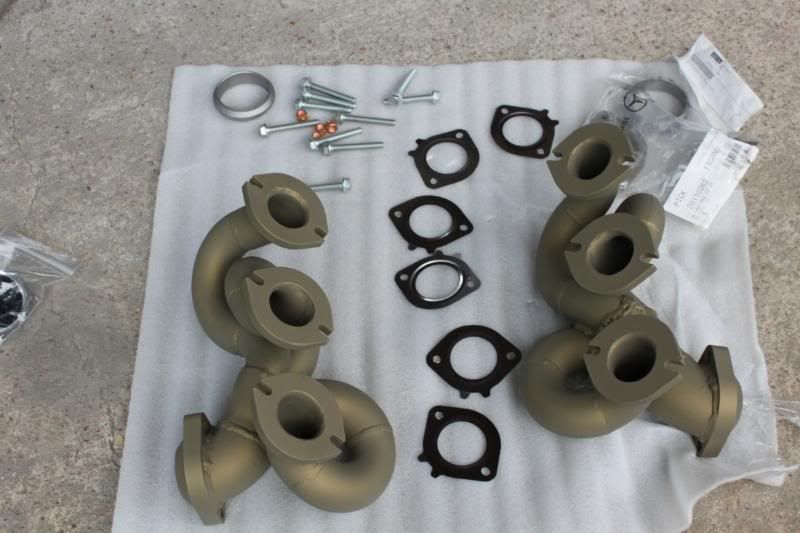
Here are the parts I purchased:
https://mbworld.org/forums/c32-amg-c...ader-swap.html
I did realize that a lot of the bolts are the same size as the bolts that attach the manifolds to the down pipe. I also purchased 4 nuts that fit on those bolts, so I'm assuming that's the way I'm going to attach the headers to the down pipes. I can see it being a pain to line up the down pipe to the headers and then putting a bolt through and screwing on the nut.
Here are the parts I purchased:
Here is what I got from the website. Its way cheaper than the Benz dealer who wanted $117.12 and the website $77.00 w/ shipping. Thats $40.00 savings! Its no surprise that the stealership....SUCKS.
Part Number: 1121420180
Exhaust system - Exhaust manifold - Manifold gasket Manifold gasket, cl500 2000 - 2006
$1.87 x 6
Part Number: 2024920181
Exhaust system - Exhaust components - Flange - Seal Seal Left - 600 1993 - 2002
$5.95 x 1
Part Number: 0009903250
NUT
$1.62 x 4
Part Number: 1299900310
SCREW
$2.13 x 2
Part Number: 1404920281
SEAL RING
$7.86 x 1
Part Number: 1404920245
Exhaust system - Exhaust components - Flange Flange - 600 1993 - 2002
$11.05 x 1
Part Number: 1299900410
SCREW
$2.13 x 4
Part Number: 1709900010
Exhaust system - Exhaust components - Mount bolt Mount bolt - 5.0 liter & 5.5 liter-v8 2000 - 2006
$1.28 x 6
I did realize that a lot of the bolts are the same size as the bolts that attach the manifolds to the down pipe. I also purchased 4 nuts that fit on those bolts, so I'm assuming that's the way I'm going to attach the headers to the down pipes. I can see it being a pain to line up the down pipe to the headers and then putting a bolt through and screwing on the nut.
04-27-2011, 12:08 PM
#13
Member

Join Date: Aug 2008
Location: Roseville, CA
Posts: 81
Likes: 0
Received 0 Likes
on
0 Posts
2002 c32 amg
Glad to see these headers are being installed. I am the one who bought them from Frankw and sold them to loudandheard. I'm not going to lie, they were a pain to install. I unbolted the steering shaft and the motor mounts so I could raise and shift the engine. I had to use a sawzall on the passenger side to cut off one stud that I stripped the nut on.
Once they were installed they were great. The top end power was amazing, and they fit in nicely with no exhaust leaks. Overall it took me two full days to do the install. Good luck, feel free to ask me any questions.
Once they were installed they were great. The top end power was amazing, and they fit in nicely with no exhaust leaks. Overall it took me two full days to do the install. Good luck, feel free to ask me any questions.
04-27-2011, 10:01 PM
#15
MBWorld Fanatic!
Thread Starter
Join Date: Mar 2007
Location: Houston, TX
Posts: 1,948
Likes: 0
Received 3 Likes
on
2 Posts
C32/C55 AMG
I went in some what blind and the timing was horrible. I found a few threads and I checked out the wis instructions, but there were no tips or tricks on how to do it. Basically the instructions just said what to take off.
The job is very basic, there are just a few things that I did not account for. If you can spray all the bolts on the manifolds and the exhaust with liquid wrench you may make your life easier. Something I didn't do, but will do next time.
1. Put the car on a lift, ramps, or jack stands. I had it on jack stands and I did not have a lot of room, but I could get completely underneath the car.
2. Remove the intake
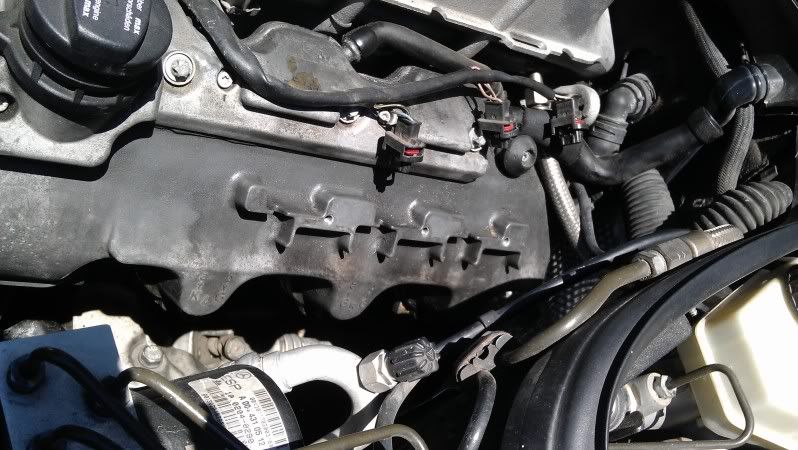
3. Remove the coil packs and wires - wis recommends disconnecting the battery, but I didn't and I had no problems. The coil packs are attached with a single torx bolt. I can't remember the size, but you can find it in a common torx socket set.
4. Remove the paneling underneath the engine and tranny
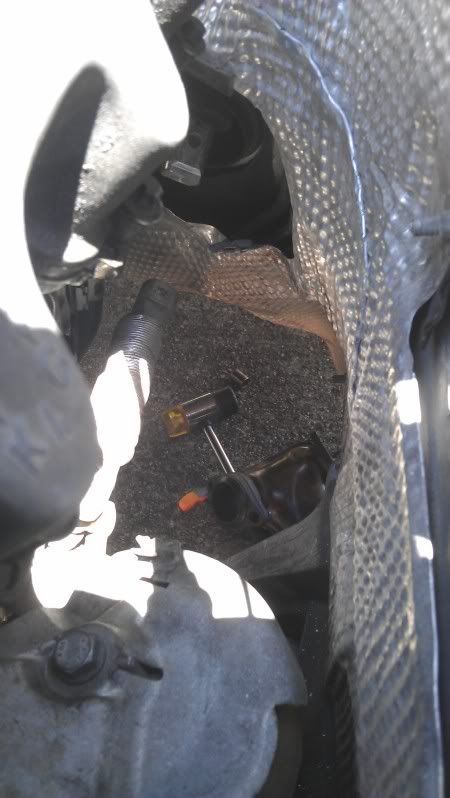
5. Remove the heat shielding right underneath the area where the manifolds and the exhaust down pipe connect. There are two bolts (8mm) and it's a very small piece of heat shielding that you can wiggle out. This will give you access to the bolts that connect the manifolds to the exhaust down pipes. I thought it was going to be impossible to get access to those bolts, but this allows you to get a long extension to reach those bolts.
6. Remove the bolts that attach the manifold to the exhaust down pipes. You will need a long extension along with a 13mm socket to get to the bolts. I used a deep 13mm socket along with an extension I happened to have to reach the bolt. There are two bolts on each side and they screw in to a nut that is set in the manifold. If you are underneath the car on your back with your feet towards the engine you will see two bolts, the one towards your right is a bit difficult to grab, but you should be able to get the socket on to the bolt. The left side bolt is easy to get once you have the heat shielding off, which took me thirty minutes to figure out. There is an area that appears to have something that looks like a bushing and an opening. I used that opening to get to the bolt on the left with my extension. Surprisingly, the bolts broke free even thought they looked rusted solid.
7. You can remove the O2 sensors, but I decided to leave them on because I was having trouble disconnecting them.
8. You can then remove the bolts that attach the pipes to the body. There are two 13mm or 12mm bolts on each side.
9. To completely remove the down pipe with the cats, you can remove the bolts to the couplers that attach the rear exhaust to the down pipe. There are two couplers with two bolts. The couplers attach by the use of a 13mm bolt and a 12mm nut. I used a 13mm socket with a 12 mm wrench. Once you have removed the bottom bolt you can move the coupler to better reach the other bolt. You should now be able to move the exhaust down pipe to give you more room and space to get to the manifolds.
10. Now you can get to removing the manifolds. The manifolds are attached to the engine block with 6 threaded studs which are suppose to be hardened steel and 6 10mm copper nuts per side, 3 up top and 3 down low. The copper nuts are very easy to strip and a few of the nuts do not have the proper space to get a socket on them correctly. It was almost as if the manifolds expanded a tad and the space to get a socket on the nut was gone. Another issue was that the copper nuts were not coming off the stud, they were coming off with the stud. Based on what I read, the copper nuts should come off by themselves, but all of the ones I removed came off with the threaded stud. I used a small 1/4" ratchet, a 10mm socket, and a small extension. The driver side manifold studs and copper nuts came off easily, but the drive side required the use of a large pipe that I used as a breaker bar to get the bolts free. The middle copper nut did not have a good angle to get the socket on properly and felt welded to the manifold, which I ended up stripping. I bought a special 10mm socket which I hope to try to get off the stripped nut. I think if I had soaked the bolts with liquid wrench or some thing similar, it may have been easier.
That's where I stopped and the next day I had to put every thing back together. The tough part was reattaching the manifolds to the exhaust down pipes. The driver side went in with out a problem, but the passenger side one took me forever. I think the works part of the whole job was reinstalling the under engine panels. I hate those things.Hopefully, I should be able to complete the writeup and give a good diy for headers.
The job is very basic, there are just a few things that I did not account for. If you can spray all the bolts on the manifolds and the exhaust with liquid wrench you may make your life easier. Something I didn't do, but will do next time.
1. Put the car on a lift, ramps, or jack stands. I had it on jack stands and I did not have a lot of room, but I could get completely underneath the car.
2. Remove the intake
3. Remove the coil packs and wires - wis recommends disconnecting the battery, but I didn't and I had no problems. The coil packs are attached with a single torx bolt. I can't remember the size, but you can find it in a common torx socket set.
4. Remove the paneling underneath the engine and tranny
5. Remove the heat shielding right underneath the area where the manifolds and the exhaust down pipe connect. There are two bolts (8mm) and it's a very small piece of heat shielding that you can wiggle out. This will give you access to the bolts that connect the manifolds to the exhaust down pipes. I thought it was going to be impossible to get access to those bolts, but this allows you to get a long extension to reach those bolts.
6. Remove the bolts that attach the manifold to the exhaust down pipes. You will need a long extension along with a 13mm socket to get to the bolts. I used a deep 13mm socket along with an extension I happened to have to reach the bolt. There are two bolts on each side and they screw in to a nut that is set in the manifold. If you are underneath the car on your back with your feet towards the engine you will see two bolts, the one towards your right is a bit difficult to grab, but you should be able to get the socket on to the bolt. The left side bolt is easy to get once you have the heat shielding off, which took me thirty minutes to figure out. There is an area that appears to have something that looks like a bushing and an opening. I used that opening to get to the bolt on the left with my extension. Surprisingly, the bolts broke free even thought they looked rusted solid.
7. You can remove the O2 sensors, but I decided to leave them on because I was having trouble disconnecting them.
8. You can then remove the bolts that attach the pipes to the body. There are two 13mm or 12mm bolts on each side.
9. To completely remove the down pipe with the cats, you can remove the bolts to the couplers that attach the rear exhaust to the down pipe. There are two couplers with two bolts. The couplers attach by the use of a 13mm bolt and a 12mm nut. I used a 13mm socket with a 12 mm wrench. Once you have removed the bottom bolt you can move the coupler to better reach the other bolt. You should now be able to move the exhaust down pipe to give you more room and space to get to the manifolds.
10. Now you can get to removing the manifolds. The manifolds are attached to the engine block with 6 threaded studs which are suppose to be hardened steel and 6 10mm copper nuts per side, 3 up top and 3 down low. The copper nuts are very easy to strip and a few of the nuts do not have the proper space to get a socket on them correctly. It was almost as if the manifolds expanded a tad and the space to get a socket on the nut was gone. Another issue was that the copper nuts were not coming off the stud, they were coming off with the stud. Based on what I read, the copper nuts should come off by themselves, but all of the ones I removed came off with the threaded stud. I used a small 1/4" ratchet, a 10mm socket, and a small extension. The driver side manifold studs and copper nuts came off easily, but the drive side required the use of a large pipe that I used as a breaker bar to get the bolts free. The middle copper nut did not have a good angle to get the socket on properly and felt welded to the manifold, which I ended up stripping. I bought a special 10mm socket which I hope to try to get off the stripped nut. I think if I had soaked the bolts with liquid wrench or some thing similar, it may have been easier.
That's where I stopped and the next day I had to put every thing back together. The tough part was reattaching the manifolds to the exhaust down pipes. The driver side went in with out a problem, but the passenger side one took me forever. I think the works part of the whole job was reinstalling the under engine panels. I hate those things.Hopefully, I should be able to complete the writeup and give a good diy for headers.
Last edited by loudandheard; 04-27-2011 at 10:07 PM.
04-23-2012, 07:50 PM
#16
MBWorld Fanatic!
Thread Starter
Join Date: Mar 2007
Location: Houston, TX
Posts: 1,948
Likes: 0
Received 3 Likes
on
2 Posts
C32/C55 AMG
So I decided to tackle this job again. I figured I'd do motor mounts and tranny mount while I'm at it. I removed the cats and mid-pipe, driver's side manifold, and I almost got the passenger side manifold out. I'm on day two and I'm stuck. I stripped a copper nut last time I tried to do this and now I'm trying to dremel it out, but it's being stubborn. I have one copper nut on the bottom that is also being impossible. Anyone have any suggestions on how to tackle those problems?
 04-23-2012, 08:39 PM
#18
MBWorld Fanatic!
Thread Starter
Join Date: Mar 2007
Location: Houston, TX
Posts: 1,948
Likes: 0
Received 3 Likes
on
2 Posts
C32/C55 AMG
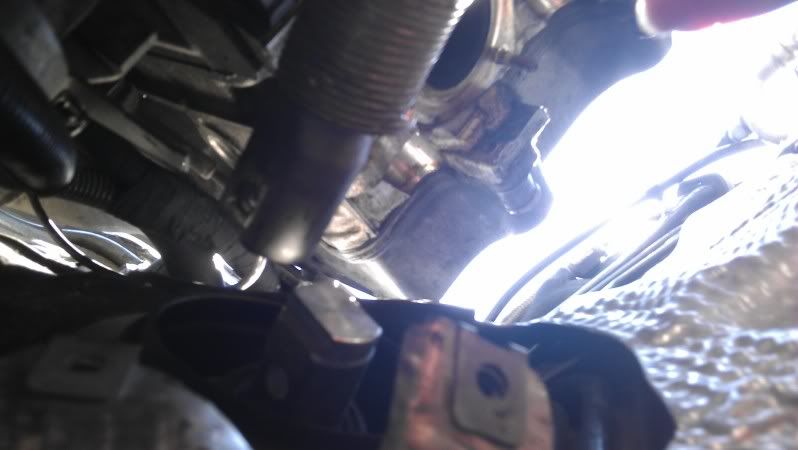
Any tips on lifting the engine? I took out the bolt on both motor mounts and tried to lift from the oil pan close to the drain plug and the whole car was lifting.

 04-24-2012, 12:21 AM
#22
MBWorld Fanatic!
I have done this before on other cars, its always lots of fun no matter how careful you are. I am not looking forward to installing mine when they arrive.
I am no expert but the following might help. If the nut is turning but wont loosen the you can use a device which cleaves it in two if there is enough room. Broken studs usually have to be drilled out unless they are big enough for a reverse thread removing tool. If they need to be drilled then you have to helicoil the hole to create new threads in the same size. Use lots of PB blaster first as already mentioned. If the stud comes out instead of the nut coming off then throw them both away and use new ones of both or you can break them free and re-use them but this is risky especially for such a cheap part.
I am no expert but the following might help. If the nut is turning but wont loosen the you can use a device which cleaves it in two if there is enough room. Broken studs usually have to be drilled out unless they are big enough for a reverse thread removing tool. If they need to be drilled then you have to helicoil the hole to create new threads in the same size. Use lots of PB blaster first as already mentioned. If the stud comes out instead of the nut coming off then throw them both away and use new ones of both or you can break them free and re-use them but this is risky especially for such a cheap part.
04-24-2012, 09:06 AM
#24
MBWorld Fanatic!

Looks like you're missing two bolts from the pictures unless you're reusing the original and those are for something else LOL. I see 10 when you should have 12. Good luck with finishing the headers, and nice job tackling it yourself. Know how cramped the engine bay is. Not fun at all... 
04-24-2012, 11:21 AM
#25
MBWorld Fanatic!
Thread Starter
Join Date: Mar 2007
Location: Houston, TX
Posts: 1,948
Likes: 0
Received 3 Likes
on
2 Posts
C32/C55 AMG
Here are the part number for the copper nuts, studs, and gaskets. I notice that the studs were a bit larger than the original ones that came off the car.
Gasket 112 142 01 80 (6 req.)
Stud 272 990 00 05 (12 req.)
Nut (M6) 112 142 00 72 (12 req.)
I recommend doing engine mounts, tranny mount, and plugs and wires while your at it. Everything is out of the way and should be a piece of cake to do. You are going to need various 10 mm sockets, wrenches, extensions, swivels, and flex extensions to get to the copper nuts. Make sure to use a quality socket or you could strip the copper nut. Of course you need to remove the paneling to get access to the bottom, which I think uses 8mm sockets/10mm sockets. You will need an 8mm socket to remove two heat shields, on on each side of the exhaust in the front, held in by two bolts. A majority of the exhaust bolts should be 13mm. I used ramps to lift the front end, but you can use jack stands. Also a good jack will help if you need to lift the engine. Don't forget to disconnect the battery, because you will come in contact with the starter and possibly the alternator.
The first thing you want to do before you even try to remove any of the bolts is to soak the manifold bolts and the exhaust bolts with pb blaster, this will make your life easier. If you can try to do it over night. I stripped the copper hex nut becuase, I used a crappy socket, I couldn't get a good angle, and the nut was so tight it wouldn't come out with a breaker bar. Remember the exhaust and manifolds warm up very quicjly and you need to give it a couple of hours to cool down. I just turned on the car to put it on ramps and I could't touch the manifolds or the cats for a couple of hours.
I had to remove the cats and down pipes to get to the bottom bolts. This is fairly easy, but you need to remove a few heat shields in the front the car to get access to the bolts that connect the exhaust to the manifolds. There is 1 small heat shield on each side that prevents you from getting to the bolts that connect the exhaust to the manifold. There are just two 8mm bolts that hold it in place and then it just comes out. You should be able to get an extension through a gap to the bolt that connects the exhaust and the manifold with an extension and a 13mm socket. To make more room on the driver's side you can remove the steering shaft. There is a small round looking heat shield held in place with two 8mm bolts, once you remove it you will get access to the bolt holding the drive shaft in place. I think it was a 13mm as well, should be fairly easy to get out. Once it's out, just lift the top portion that is attached to the body of the car up and it will move into the body of the car and now you can move the steering shaft out of the way for more room.
The top manifold copper nuts can be removed from the top of the car using a small extension and a 10mm socket. You need to make sure you get the socket on well or you will strip the copper nut. The space is super tight, but it can be done. The driver's side seemed to be easiest of the two sides. The passenger side in the middle, where I stripped the nut, barely has enough room to put a socket or anything else on it. So maybe finding a way to tap a socket on to the nut will help you.
The bottom copper nuts can be got from the top and the bottom. The ones closest to the firewall you will have to get from the bottom, but the ones closest to the front of the car can be got from the top. You will need to use a small extension and a small ratchet. The copper nuts may seem impossible to get to, but you can get them out with patience and determination. I used a small 10mm wrench to get the nuts out once I broke it free with the ratchet and socket. Do the driver's side first because it seems to be the hardest, the passenger side seemed to be the hardest for me.
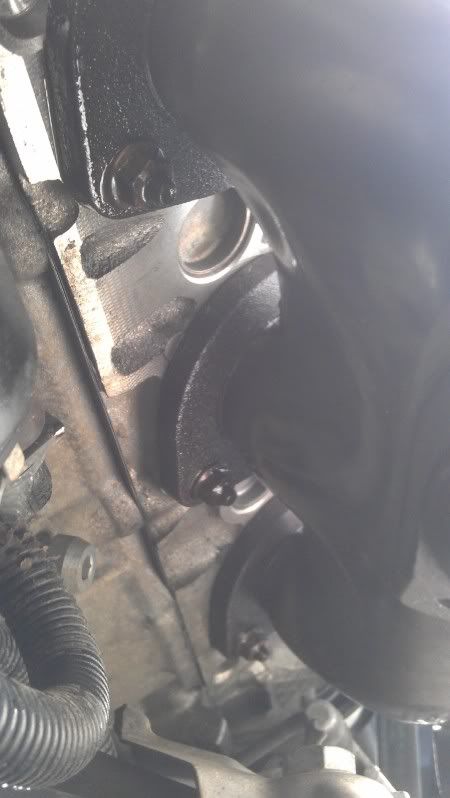
The one nut I'm still having trouble with is on the biottom of the manifold on the passenger side closest to the firewall. This nut seems to be the most accessible, but it is difficult to get a socket on because the manifold barely gives you any room. The portion the manifold connects to the exhaust gets in the way and so does the starter. I can get to it with a swivel, but I can't turn the ratchet. I can get a wrench on it, but I can't get enough leverage to turn the socket.
I'll post more once I get that stubborn manifold out.
Anybody have tips on where to lift the engine from below?
Gasket 112 142 01 80 (6 req.)
Stud 272 990 00 05 (12 req.)
Nut (M6) 112 142 00 72 (12 req.)
I recommend doing engine mounts, tranny mount, and plugs and wires while your at it. Everything is out of the way and should be a piece of cake to do. You are going to need various 10 mm sockets, wrenches, extensions, swivels, and flex extensions to get to the copper nuts. Make sure to use a quality socket or you could strip the copper nut. Of course you need to remove the paneling to get access to the bottom, which I think uses 8mm sockets/10mm sockets. You will need an 8mm socket to remove two heat shields, on on each side of the exhaust in the front, held in by two bolts. A majority of the exhaust bolts should be 13mm. I used ramps to lift the front end, but you can use jack stands. Also a good jack will help if you need to lift the engine. Don't forget to disconnect the battery, because you will come in contact with the starter and possibly the alternator.
The first thing you want to do before you even try to remove any of the bolts is to soak the manifold bolts and the exhaust bolts with pb blaster, this will make your life easier. If you can try to do it over night. I stripped the copper hex nut becuase, I used a crappy socket, I couldn't get a good angle, and the nut was so tight it wouldn't come out with a breaker bar. Remember the exhaust and manifolds warm up very quicjly and you need to give it a couple of hours to cool down. I just turned on the car to put it on ramps and I could't touch the manifolds or the cats for a couple of hours.
I had to remove the cats and down pipes to get to the bottom bolts. This is fairly easy, but you need to remove a few heat shields in the front the car to get access to the bolts that connect the exhaust to the manifolds. There is 1 small heat shield on each side that prevents you from getting to the bolts that connect the exhaust to the manifold. There are just two 8mm bolts that hold it in place and then it just comes out. You should be able to get an extension through a gap to the bolt that connects the exhaust and the manifold with an extension and a 13mm socket. To make more room on the driver's side you can remove the steering shaft. There is a small round looking heat shield held in place with two 8mm bolts, once you remove it you will get access to the bolt holding the drive shaft in place. I think it was a 13mm as well, should be fairly easy to get out. Once it's out, just lift the top portion that is attached to the body of the car up and it will move into the body of the car and now you can move the steering shaft out of the way for more room.
The top manifold copper nuts can be removed from the top of the car using a small extension and a 10mm socket. You need to make sure you get the socket on well or you will strip the copper nut. The space is super tight, but it can be done. The driver's side seemed to be easiest of the two sides. The passenger side in the middle, where I stripped the nut, barely has enough room to put a socket or anything else on it. So maybe finding a way to tap a socket on to the nut will help you.
The bottom copper nuts can be got from the top and the bottom. The ones closest to the firewall you will have to get from the bottom, but the ones closest to the front of the car can be got from the top. You will need to use a small extension and a small ratchet. The copper nuts may seem impossible to get to, but you can get them out with patience and determination. I used a small 10mm wrench to get the nuts out once I broke it free with the ratchet and socket. Do the driver's side first because it seems to be the hardest, the passenger side seemed to be the hardest for me.
The one nut I'm still having trouble with is on the biottom of the manifold on the passenger side closest to the firewall. This nut seems to be the most accessible, but it is difficult to get a socket on because the manifold barely gives you any room. The portion the manifold connects to the exhaust gets in the way and so does the starter. I can get to it with a swivel, but I can't turn the ratchet. I can get a wrench on it, but I can't get enough leverage to turn the socket.
I'll post more once I get that stubborn manifold out.
Anybody have tips on where to lift the engine from below?


