


HOW TO: Replace c55 spotlight the easy way

Thread Starter
Junior Member


Joined: Oct 2016
Posts: 64
Likes: 14
C55 AMG
HOW TO: Replace c55 spotlight the easy way
Righto, once again there is a major lack of how to fix your own basic stuff on the c55 online, so here is another one.
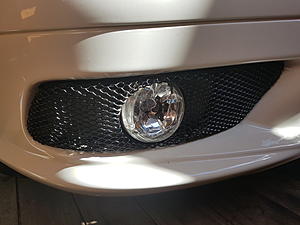
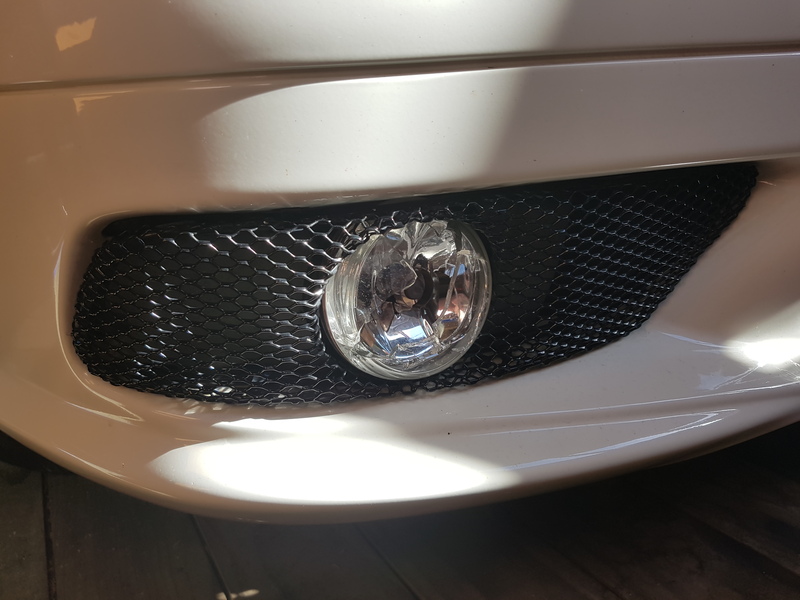
The driving lights are quite low and are very vulnerable to getting smashed, like mine did.
The consensus seems to be you need to take it all apart from behind and underneath, taking off various underpanels and other things, that is a load of bollocks, this is easy to do with basic tools and took me about a half hour figuring it out as i went.
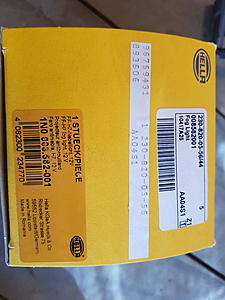
First step is to get yourself a replacement Hella unit, use the internet as price varies alot, i got mine form Ebay US.
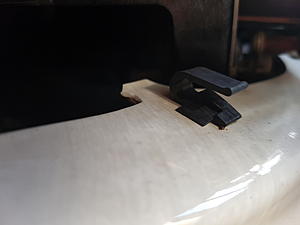
Next you need to get the grille piece out, its held in by four clips that release by pushing a holder leg up (at the top) or down (on the bottom) with a screwdriver and pulling the grille towards you, the easiest place to start is the top outside edge.
This is a clip here.
Once you work the grille out just let it hang on the wiring for whatever sensor that is, dont yank it any further than needed.
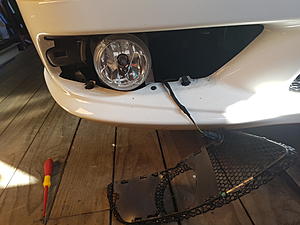
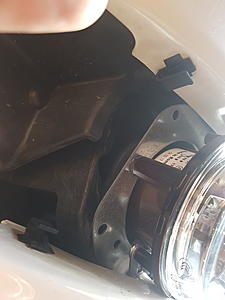
Now you can see the four torx screws that hold it in place, undo those screws obviously. The bottom inside screw will be to a metal plate that is clipped to the bumper, just turn it out of the way, it turns freely.
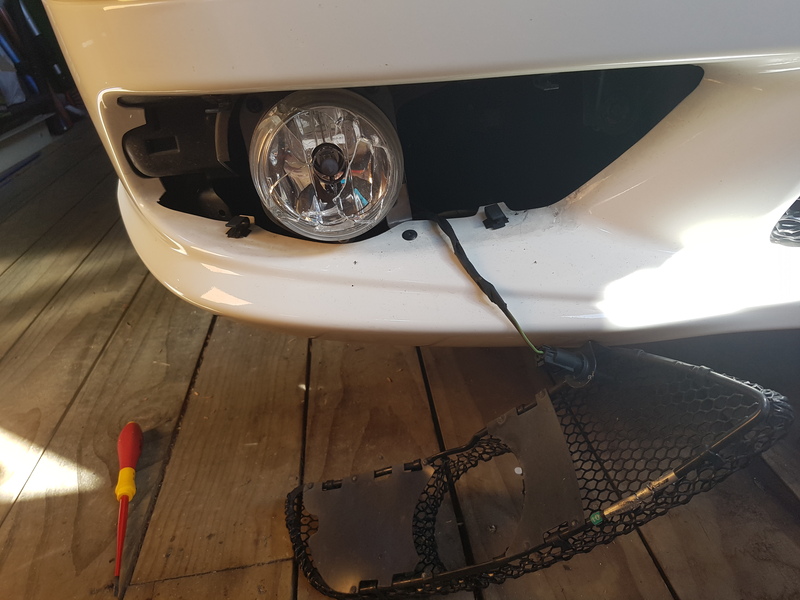
You will then be left with the light just hanging around like this
You need to make sure the adjuster screw at the bottom is tucked down behind the front bumper plastic, then push the upper plastic up with your hand as you pull the top edge out first, i highly recommend using a cloth or rag to avoid damaging paint as the spotlight bracket scrapes along the top edge a bit. I didnt on the way out but did on the way in with the new one, i marked it a little but not in a noticeable spot and only if you are too close not to be getting run over.

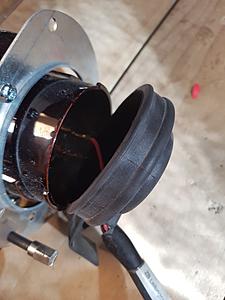
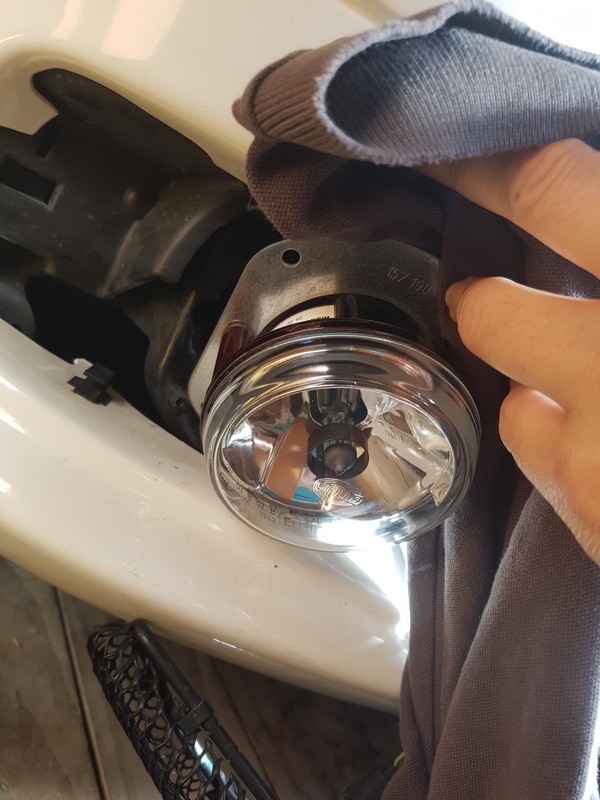
Now the whole unit should be hanging out on its wiring, there is a rubber seal on the back that needs working off (mine was cable tied on???), then you can unplug the lamp and the whole assembly falls away.
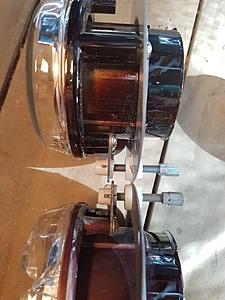
Next adjust the new unit to be on the same angle as the unit you just removed via the adjustment screw.
Mine out of the box was a bit different.
Now it is just plugging in the lamp, reinstalling the rubber seal and getting the light back in place, definitely use a rag for this otherwise it will murder your bumper paint.
Screw the light back in with the four screws, test the light works then clip the grille back in and admire the few hundred dollars you just saved.
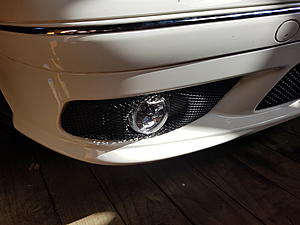
Too easy.
The driving lights are quite low and are very vulnerable to getting smashed, like mine did.
The consensus seems to be you need to take it all apart from behind and underneath, taking off various underpanels and other things, that is a load of bollocks, this is easy to do with basic tools and took me about a half hour figuring it out as i went.
First step is to get yourself a replacement Hella unit, use the internet as price varies alot, i got mine form Ebay US.

Next you need to get the grille piece out, its held in by four clips that release by pushing a holder leg up (at the top) or down (on the bottom) with a screwdriver and pulling the grille towards you, the easiest place to start is the top outside edge.
This is a clip here.

Once you work the grille out just let it hang on the wiring for whatever sensor that is, dont yank it any further than needed.
Now you can see the four torx screws that hold it in place, undo those screws obviously. The bottom inside screw will be to a metal plate that is clipped to the bumper, just turn it out of the way, it turns freely.
You will then be left with the light just hanging around like this

You need to make sure the adjuster screw at the bottom is tucked down behind the front bumper plastic, then push the upper plastic up with your hand as you pull the top edge out first, i highly recommend using a cloth or rag to avoid damaging paint as the spotlight bracket scrapes along the top edge a bit. I didnt on the way out but did on the way in with the new one, i marked it a little but not in a noticeable spot and only if you are too close not to be getting run over.
Now the whole unit should be hanging out on its wiring, there is a rubber seal on the back that needs working off (mine was cable tied on???), then you can unplug the lamp and the whole assembly falls away.

Next adjust the new unit to be on the same angle as the unit you just removed via the adjustment screw.
Mine out of the box was a bit different.

Now it is just plugging in the lamp, reinstalling the rubber seal and getting the light back in place, definitely use a rag for this otherwise it will murder your bumper paint.
Screw the light back in with the four screws, test the light works then clip the grille back in and admire the few hundred dollars you just saved.

Too easy.
Member
Joined: Sep 2013
Posts: 78
Likes: 7
From: Lithuania
'04 C55 AMG
MBWorld Fanatic!


Joined: Sep 2007
Posts: 4,566
Likes: 421
05 c55 silver, 98 Imperial Red C43

Trending Topics

Member
Joined: Apr 2018
Posts: 223
Likes: 16
From: Bloomington IL
2006 C55, 2004 ML350
Hope someone can help here. I bought a C55 a few months back that was missing the foglights and mounting brackers. Ordered them both (brackers from dealer and fogs from FCP euro) and installed them but for some reason the connectors at the bulb aren't the same. I assume just buy new bulbs rather than re-do the wiring harness. Anyone else run into this problem?
MB World Stories
The Best of Mercedes & AMG

6 Mercedes Models That Did NOT Age Well (But Are Somehow Still Cool)
Verdad Gallardo
Manual Mercedes? 6 Times Sindelfingen Let Drivers Have All The Fun
Verdad Gallardo
Mercedes SLR McLaren 722 S Is Extremely Rare Example Modified by McLaren
Verdad Gallardo
8 Classic Boxy Mercedes Designs That Have Aged Like Fine Wine
Verdad Gallardo
Flawlessly Restored Mercedes 190E Evo II Heads to Auction
Verdad Gallardo
Electric Mercedes C-Class Unveiled: 11 Things You Need to Know
Verdad Gallardo
Mercedes EQS Gets A Major Update: Everything You Need to Know
Verdad Gallardo
5 Underrated Mercedes-Benz Models That Don't Get the Love They Deserve
Verdad Gallardo


