
upper intake removal m113?

Thread Starter
MBWorld Fanatic!
Joined: Dec 2007
Posts: 1,100
Likes: 0
From: Rochester, MN
sounds like airplane
yeah, I would only coat the top piece then for only cosmetic purposes-
it would be as simple as digging out all the gasket stuff and resealing? (similar to the gasket I made at the back of the intake when the TB was replaced with the HPS piece)
-Drew
it would be as simple as digging out all the gasket stuff and resealing? (similar to the gasket I made at the back of the intake when the TB was replaced with the HPS piece)
-Drew
Thread Starter
MBWorld Fanatic!
Joined: Dec 2007
Posts: 1,100
Likes: 0
From: Rochester, MN
sounds like airplane
so- can I remove that brake booster plug without taking apart the whole inside of the upper piece?
how do I take apart that upper piece- removing the 4 screws didn't seem to release the "inside" bit at all?
I'm starting to get frustrated
how do I take apart that upper piece- removing the 4 screws didn't seem to release the "inside" bit at all?
I'm starting to get frustrated
MBWorld Fanatic!

Joined: Oct 2005
Posts: 1,083
Likes: 11
From: PNW
2001 E430
I'll go dig mine out later tonight and take a closer look at the plastic brake fitting. I never had a need to remove that piece so I'm not sure. As for the inside runner parts I'm pretty sure all you have to do is remove the 4 screws. On my mani the runners were glued in pretty tight. It took a lot of gentle persuasion and some heat to get it to finally release from the outer housing without breaking anything. Unlike Nitro or mbenzman's mani mine was relatively oil free and the glue was very much intact still. I'm thinking the excess oil breaks down the glues bond. IIRC Nitro said his mani almost fell apart after removing the screws.
Thread Starter
MBWorld Fanatic!
Joined: Dec 2007
Posts: 1,100
Likes: 0
From: Rochester, MN
sounds like airplane
very good information-
it all comes out in once piece right?
any hints at where to pry? heat gun type heat do the trick?
mine is dirty inside (the runers have build-up) but I wouldn't say it is any more or less full of gunk than I would have expected.
it all comes out in once piece right?
any hints at where to pry? heat gun type heat do the trick?
mine is dirty inside (the runers have build-up) but I wouldn't say it is any more or less full of gunk than I would have expected.
MBWorld Fanatic!
Joined: Oct 2005
Posts: 1,083
Likes: 11
From: PNW
2001 E430
First and foremost apologies to mbenzman for stealing his picture.
On my manifold there was a lot of glue on the edges of the intake runners. In the picture I have pointed them out with the yellow arrows. They fit into a small groove that is also full of glue. The blue arrows show some of the residual glue (brown in color) that remained after mbenzman disassembled his manifold.

I simply used a heat gun on the outside of the manifold concentrating on the areas where these glue spots should be. If you gently tap it with a plastic mallet or the wood handle of a hammer you should be able to hear where it is still glued solid and where you need to work on it. I gently pried up where ever I could find leverage and tapped on the outside listening for the glue to crack and the more hollow sound once a runner had broke free of the glue. I spent about 2 hours doing this because I was going slow and being careful. Much like you I wasn't sure it was ever going to come apart but eventually it starts to loosen up.
On my manifold there was a lot of glue on the edges of the intake runners. In the picture I have pointed them out with the yellow arrows. They fit into a small groove that is also full of glue. The blue arrows show some of the residual glue (brown in color) that remained after mbenzman disassembled his manifold.
I simply used a heat gun on the outside of the manifold concentrating on the areas where these glue spots should be. If you gently tap it with a plastic mallet or the wood handle of a hammer you should be able to hear where it is still glued solid and where you need to work on it. I gently pried up where ever I could find leverage and tapped on the outside listening for the glue to crack and the more hollow sound once a runner had broke free of the glue. I spent about 2 hours doing this because I was going slow and being careful. Much like you I wasn't sure it was ever going to come apart but eventually it starts to loosen up.
MBWorld Fanatic!
Joined: Oct 2005
Posts: 1,083
Likes: 11
From: PNW
2001 E430
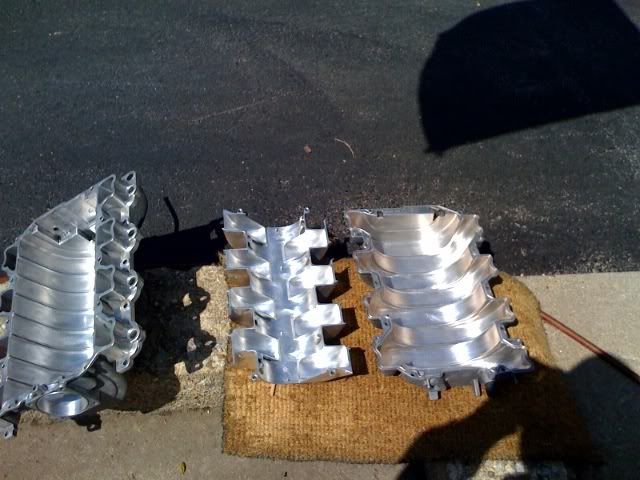
There are actually 3 inner parts to the top half of the manifold. That big piece in the picture I posted and two smaller parts where the venturis or velocity stacks or what ever you want to call the openings where the air goes in. Those parts are just glued to that big main piece and shouldn't be in your way but their glue might break free while you are working on it.
Thread Starter
MBWorld Fanatic!
Joined: Dec 2007
Posts: 1,100
Likes: 0
From: Rochester, MN
sounds like airplane
btw- i read through all 3 of the mbenzman threads relating and can't believe that no where in there these questions got answered. Am I the only one who "missed" this info?

MBWorld Fanatic!
Joined: Feb 2004
Posts: 1,559
Likes: 0
From: Portsmouth, NH
none
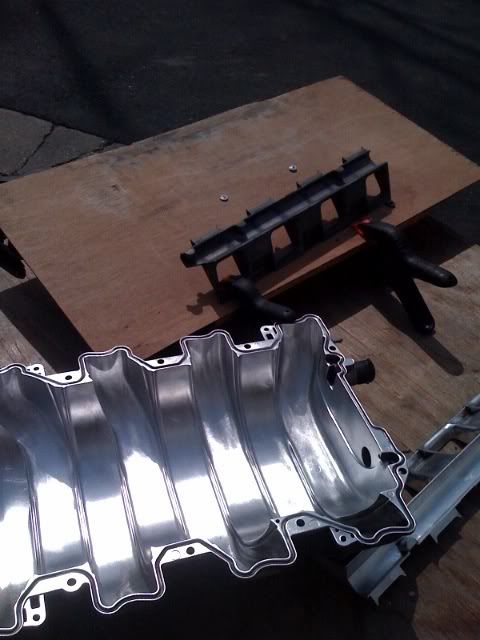
Found some pics that I had posted up a while ago. Haven't made any more progress on my end, but very much want to finish this.
The bottom section of runners was the only one that was really stuck for me. the other pieces came out with me removing the screws and pulling as hard as I could using my hands. The bottom section is the one with the 8 butterflys. I ended up covering a long screwdriver with a rag and sliding down the runners front to back carefully prying at the piece and it poped out. I do think things could get broke this way so I was pretty careful.
If you look at the pictures there are two small sections that mate the runners that is also glued to the bottom of the top inner piece. They pop off easy but show that they use a good amount of adhesive along the flat mounting areas. You'll see what I mean when you take the top inner part out, and its three pieces. I think I will end up using both VHT for the channels and a high temp adhesive for the parts that require it.
I would at least heavily clean and maybe lightly buff the runners with a rag and a moderate compound to smooth things out in there. Then see a way to lower or prevent the intake contamination and gunk. Catch can system etc..
Thread Starter
MBWorld Fanatic!
Joined: Dec 2007
Posts: 1,100
Likes: 0
From: Rochester, MN
sounds like airplane
yeah- how far should i try to go here?
just lots of buffing/polishing?
how much more than that has anyone done? I"m not real clear on where I could really take material away and get any gains.
just lots of buffing/polishing?
how much more than that has anyone done? I"m not real clear on where I could really take material away and get any gains.
MBWorld Fanatic!


Joined: Feb 2005
Posts: 5,761
Likes: 4
From: North Carolina
98 Black C43 , 12� ML 350 Blutec
Found some pics that I had posted up a while ago. Haven't made any more progress on my end, but very much want to finish this.
The bottom section of runners was the only one that was really stuck for me. the other pieces came out with me removing the screws and pulling as hard as I could using my hands. The bottom section is the one with the 8 butterflys. I ended up covering a long screwdriver with a rag and sliding down the runners front to back carefully prying at the piece and it poped out. I do think things could get broke this way so I was pretty careful.
If you look at the pictures there are two small sections that mate the runners that is also glued to the bottom of the top inner piece. They pop off easy but show that they use a good amount of adhesive along the flat mounting areas. You'll see what I mean when you take the top inner part out, and its three pieces. I think I will end up using both VHT for the channels and a high temp adhesive for the parts that require it.
I would at least heavily clean and maybe lightly buff the runners with a rag and a moderate compound to smooth things out in there. Then see a way to lower or prevent the intake contamination and gunk. Catch can system etc..
MBWorld Fanatic!
Joined: Feb 2004
Posts: 1,559
Likes: 0
From: Portsmouth, NH
none
Rich took alot of meat out of his, he also understands and has alot more experience removing material with regards to air flow. Ex. I funneled the openings to the butterflys to a gradual rounded corner compared to rich who openend them up with a nice open funnel shape, which I wasn't ready to do with my experience. Its soft metal. Getting this thing bench flowed like they do with a cyl.head would be cool, but I think the manifolds design with the butterflys and such would prevent this.
I used a wide varity of light grit sanding sponges, papers, sanding bits, and some wire brush dremels that worked awesome at getting into the passages they form to when spinnging. I found the carbon and build up to be about .25-.5mm in the smooth sections and I went about another .25mm beyond that which basically took the magnesium-ish alloy from dull to shiny and not much farther than that. I took a light approach and more so smoothed the runners rather than alter the flow. You'll see some sections were it looks as if there are casting marks/imperfections left over from manufacturing. I focused on these most and perfecting the OEM design, which I feel was alot of change and should really help. I also spent about 3 hours with the interior pieces assembled smoothing the runner connections between each piece. They didn't line up 100% and a credit card thickness was found between some. So in to sum up my rant, just lightly smooth and polish the current design and improve any lips and rough areas. Once the pieces is 100% clean you'll see the areas although subtle. I only final polished one small piece and after the 100000000000 grit I used a polishing wheel and a stick of polishing compound/rouge stuff.
I used a wide varity of light grit sanding sponges, papers, sanding bits, and some wire brush dremels that worked awesome at getting into the passages they form to when spinnging. I found the carbon and build up to be about .25-.5mm in the smooth sections and I went about another .25mm beyond that which basically took the magnesium-ish alloy from dull to shiny and not much farther than that. I took a light approach and more so smoothed the runners rather than alter the flow. You'll see some sections were it looks as if there are casting marks/imperfections left over from manufacturing. I focused on these most and perfecting the OEM design, which I feel was alot of change and should really help. I also spent about 3 hours with the interior pieces assembled smoothing the runner connections between each piece. They didn't line up 100% and a credit card thickness was found between some. So in to sum up my rant, just lightly smooth and polish the current design and improve any lips and rough areas. Once the pieces is 100% clean you'll see the areas although subtle. I only final polished one small piece and after the 100000000000
grit I used a polishing wheel and a stick of polishing compound/rouge stuff.
MBWorld Fanatic!
Joined: Feb 2004
Posts: 1,559
Likes: 0
From: Portsmouth, NH
none
If you look at some posts above you'll see what the manifold build up looks like, and that was partly cleanded. Its a shietload of gunk and I don't see how it can't hurt performance. However, the gunk is already there so the catch can will only prevent further, and the carbon stuff really sticks on so maybe if you installed a can and clean the mani with some seafoam a few times it would help. Otherwise you would have to yank it and clean it as mbenzman and myself have. The catch can is a filtered can about the size of a beer that is plumbed to the PCV lines to catch the oil/carbon gunk before it is pulled through the manifold and mixed with the A/F mix.
I'm in the midst of moving again so I hope in a few weeks I can have my life back to normal and start playing with things again. It must go on this spring/summer though. MBenzman saw 20whp or more on his N/A CLK55 with this modification. AMG employees witnessed this I believe. So I'm very optimistic.
What is TVT doing? I contacted LET for a custome dyno tune and they recomended TVT...maybe I'll have to plan a road trip.
Last edited by NitrogenBalance; Feb 4, 2009 at 09:56 AM.
MBWorld Fanatic!
Joined: Apr 2007
Posts: 6,171
Likes: 16
300E a couple 1994 w124wagon E320 Wagon/,1971MGB Track/Rally, MG Midget Autocross ,2000 E320 wagon.
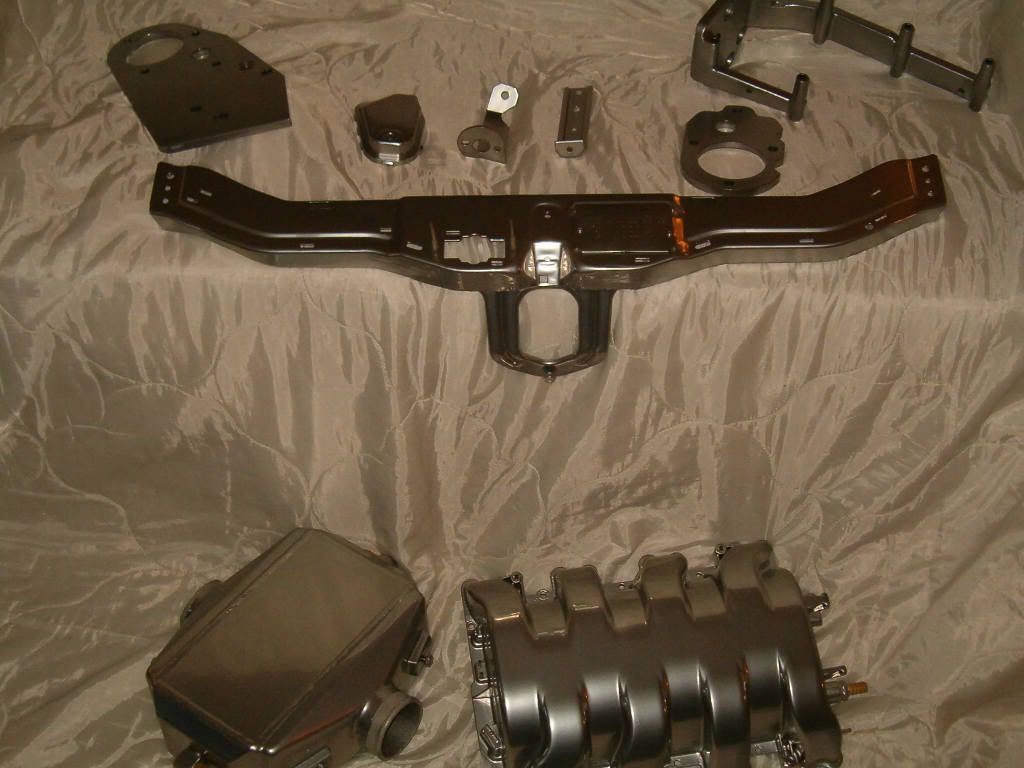
If you
ever do get the top powder coated,track before and after temps with a Ir gun.
I would be interested seeing how much heat Gets held in,and if that affects the gains from the SC.
PC sure holds a lot of heat in coated headers,maybe jet hot could give you some thermo transfer specs.
Lots of work.Call the guy who signed the engine and ask him what he would do
I would be interested seeing how much heat Gets held in,and if that affects the gains from the SC.
PC sure holds a lot of heat in coated headers,maybe jet hot could give you some thermo transfer specs.
Lots of work.Call the guy who signed the engine and ask him what he would do
Thread Starter
MBWorld Fanatic!
Joined: Dec 2007
Posts: 1,100
Likes: 0
From: Rochester, MN
sounds like airplane
I have an IR gun that I keep in the car actually...
You may be right that I will hold in some heat- I'm obviously doing it for cosmetic reasons (which, I know, is sort of lame). Hopefully the spacers, meth, intercooler improvements etc. etc. more than counteracts the heat from the blower and any heat this holds in.
You may be right that I will hold in some heat- I'm obviously doing it for cosmetic reasons (which, I know, is sort of lame). Hopefully the spacers, meth, intercooler improvements etc. etc. more than counteracts the heat from the blower and any heat this holds in.

Thread Starter
MBWorld Fanatic!
Joined: Dec 2007
Posts: 1,100
Likes: 0
From: Rochester, MN
sounds like airplane
be on asap if I canfigure out how to change my crank position sensor!
I'm going to try some more tools on it today when I get time- see me other thread
I'm going to try some more tools on it today when I get time- see me other thread
MBWorld Fanatic!
Joined: Feb 2004
Posts: 1,559
Likes: 0
From: Portsmouth, NH
none
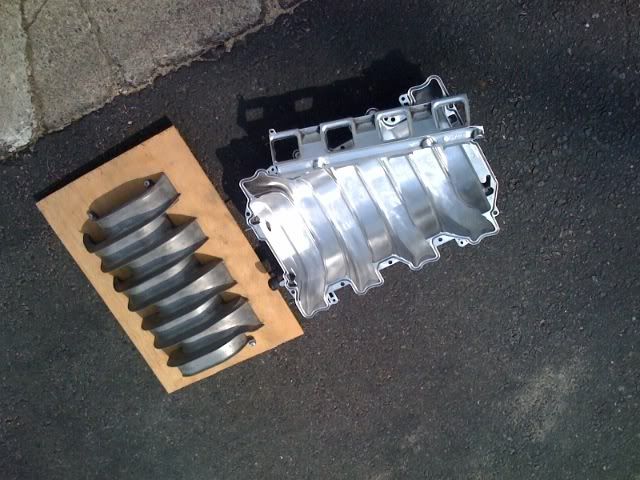
Hey Drew,
Just had mine done the same, decided that polishing the outside was a little too much work considering it will tarnish in no time due to the magnesium or such. I went bright silver and it looks clean like yours. Can't wait till you get it on, its gonna be weeks for me.
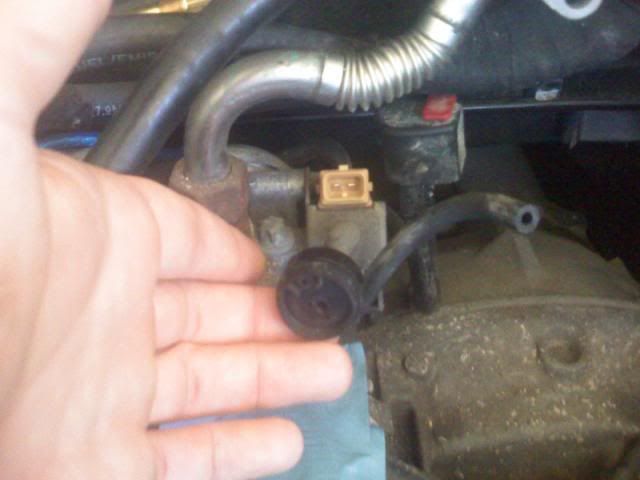
lastly, did you break that brake booster line connection off? The one thats pressed in? it looks as if you installed a regular 1/2in barb fitting.
Nice work
Just had mine done the same, decided that polishing the outside was a little too much work considering it will tarnish in no time due to the magnesium or such. I went bright silver and it looks clean like yours. Can't wait till you get it on, its gonna be weeks for me.
lastly, did you break that brake booster line connection off? The one thats pressed in? it looks as if you installed a regular 1/2in barb fitting.
Nice work
MBWorld Fanatic!


Joined: Jan 2007
Posts: 1,986
Likes: 9
From: Toronto
V12TT


