


45 hr Detail by me

Thread Starter
MBWorld Fanatic!


Joined: Nov 2012
Posts: 2,768
Likes: 419
'10 C63
45 hr Detail by me
This winter, my project was to do a full correction on my paint and then apply Optimum Gloss Coat. I've watched all the Ammo NYC videos and whatnot, and my buddy is a professional detailer. I took my time and made sure things were done to my liking. I figured I would just make a little writeup of what I did. I am by no means a professional detailer.
Tools used:
-Griot's 6 inch DA
-Rupes 15 w/5 inch backing plate
-Griot's 3 inch DA
-Home Depot Halogen work lights
-2 6 inch Meguiar's Microfiber Cutting Pads
-4 3 inch Meguiar's Microfiber Cutting Pads
-1 Hex Logic yellow foam cutting pad
-2 5.5 inch Meguiar's Microfiber Cutting Pads
-2 4 inch Lake Country orange foam polishing pads
-1 4 inch Lake Country black foam finishing pad
-1 6 inch Lake Country orange foam polishing pad
-1 6 inch Lake Country black foam polishing pad
-about 20 16x16 Griot's MF towels (available at Advance Auto Parts)
-Bottle of 15% IPA solution
-1 32 oz Bottle of CarPro Eraser (WOULD NOT RECOMMEND!)
-3 grey foam OptiCoat applicators
-1 10mL tube of Optimum Gloss Coat (5ml used)
-1 Mother's Clay bar kit (Next time I will try Nanoskin AutoScrub or a finer clay)
-Menzerna FG400
-Menzerna SI1500
-Menzerna SF4000
-automotive painter's tape
Things I wish I had:
-Flex 3401 w/pads to support it.
-Climate controlled garage.
-15 sets of arms.
I started with my normal wash. Nothing too special, although I have since bought a foam cannon and Chemical Guys Snow Foam. I won't go into the wash details. I then clayed the car which I think marred the paint considerably. I don't remember the Meguiar's clay marring the paint, but I feel like the Mother's Clay Bar, even with significant amounts of the provided detail spray, left considerable marring.
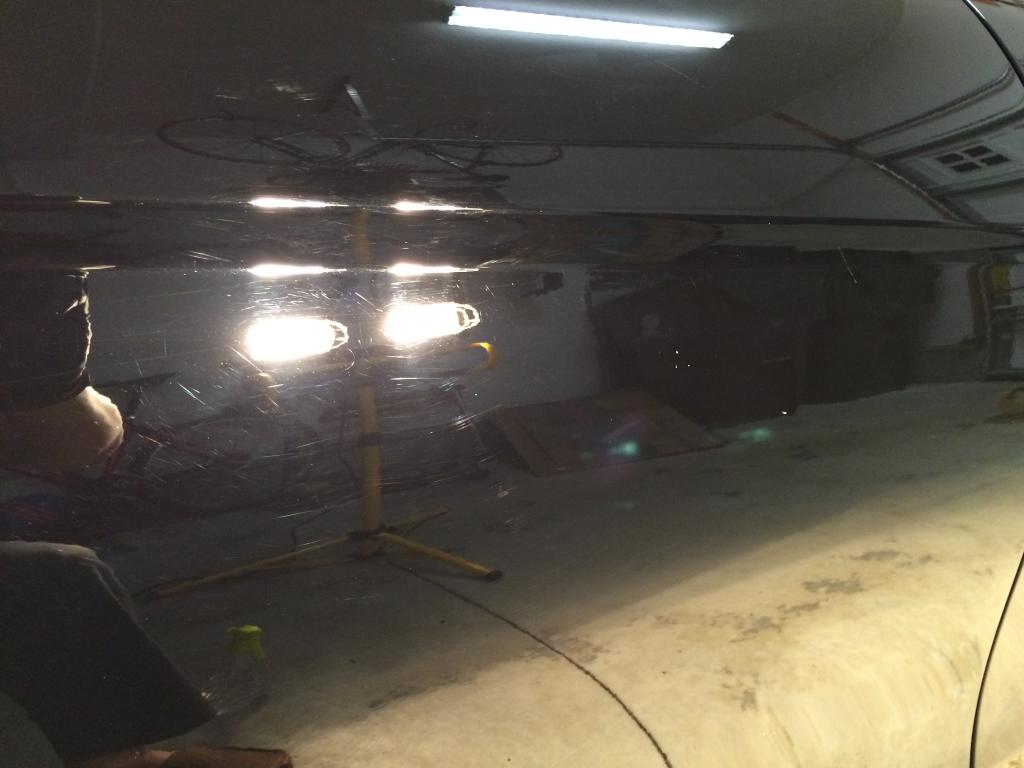
Next step was an IPA wipedown and then tape off the rubber trim. Then it was off to the races with the compound. I started with my Griot's 6 inch with a MF Cutting pad and the FG400 on speed 6. It worked fine, and I did almost half of the car like that. The problem was, it took FOREVER! I made sure to clean out the pad periodically to get rid of any buildup or dried compound. Once the FG400 started to break down or dust, I'd wipe the panel down with IPA and inspect. It worked well but left a haze as expected.
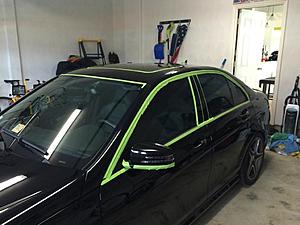
Taped off. I think I would not tape the sides of the B-pillars. The tape adhesive started to just make things a pain.
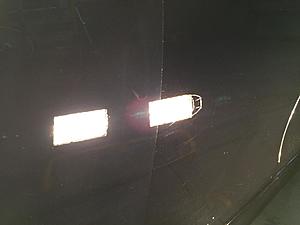
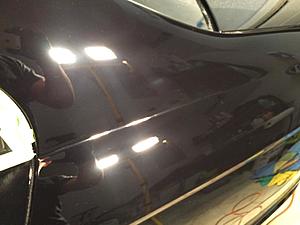
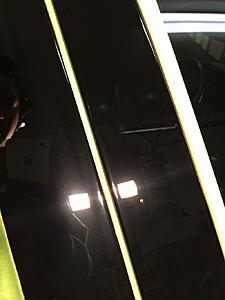
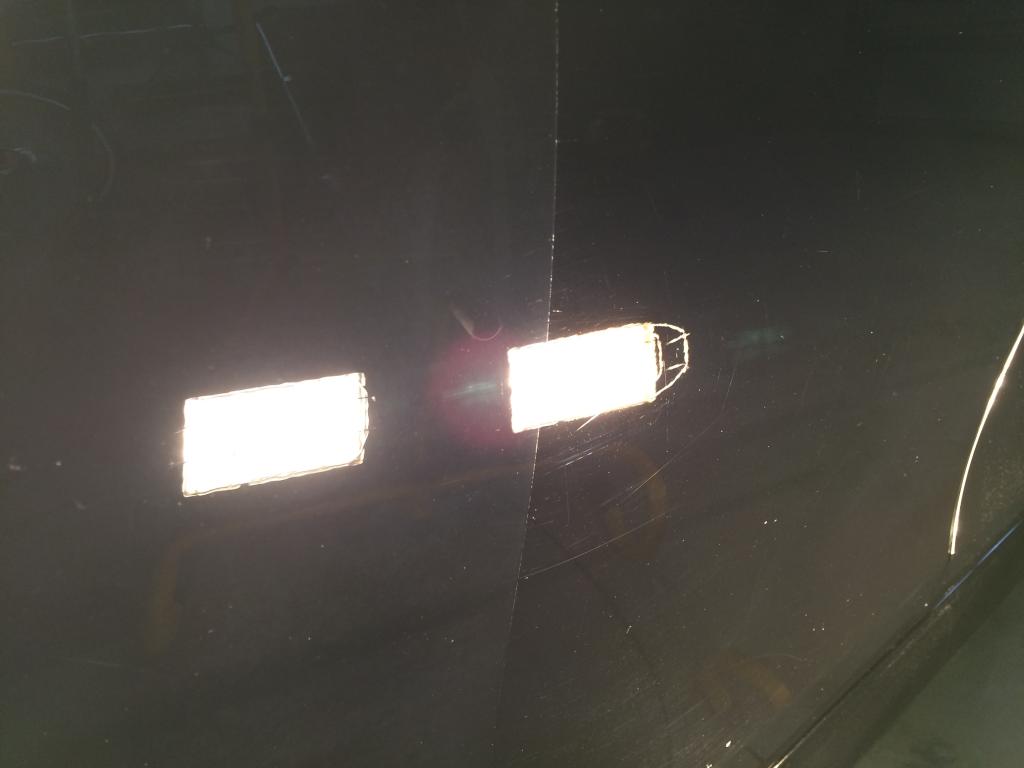
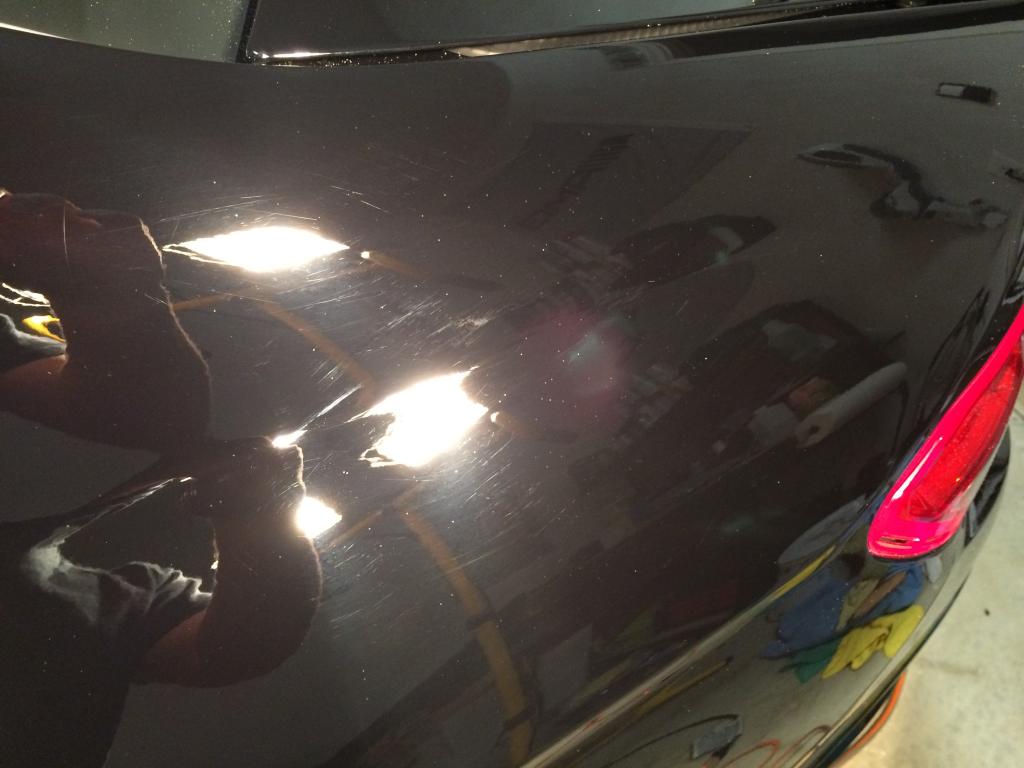
Here's a 50/50 shot showing the haze left, but the marring is removed.
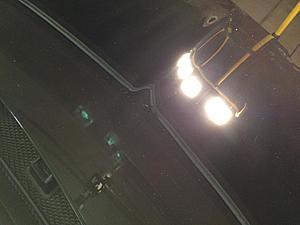
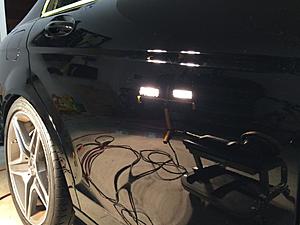
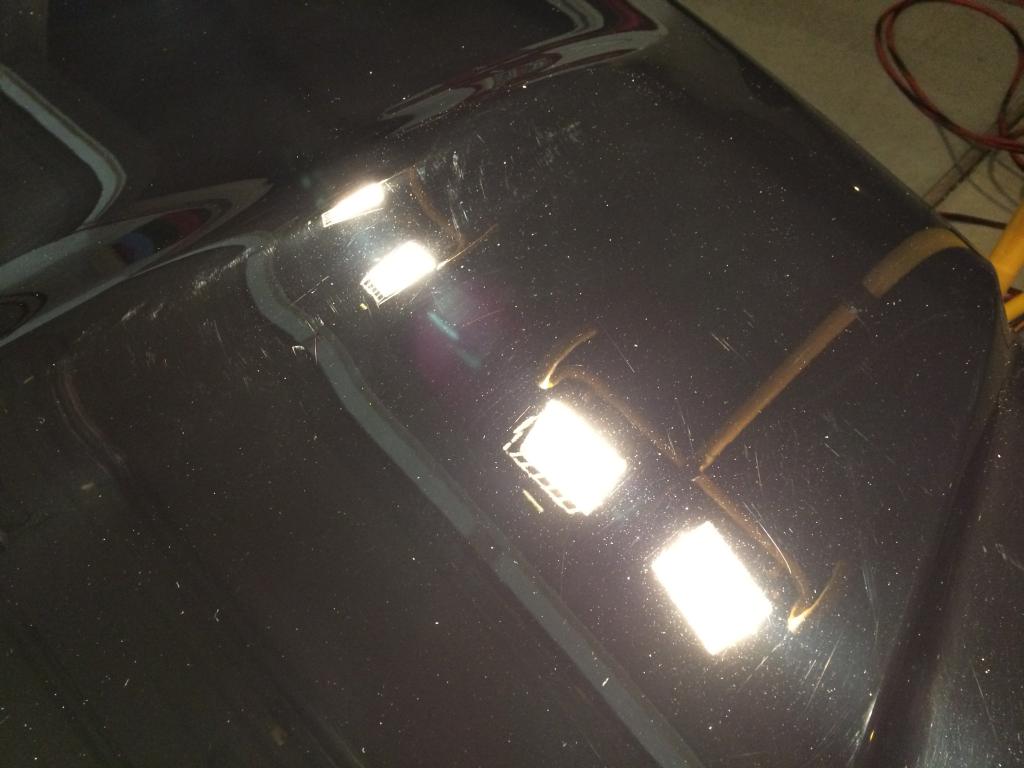
After getting tired of the slow progress with my Griot's DA, I called my buddy and begged him to loan me his Rupes 15 which he gladly did. He also gave me some MF cutting pads and a Hex Logic Yellow cutting pad to go with it. I initially used the yellow pad which was nice as it followed contours better and didn't clog as easily as the MF pads. Unfortunately as I had read about, the Hex Logic pad started to disintegrate. So I switched back to MF cutting pads for the rest of the car. The Rupes was easily 3 times as fast and provided an equal or better result. That being said, even with the "washer mod," the pad is still fairly easy to stop. I would have preferred a Flex 3401 to cut through the hard paint. Here are a couple more before and after shots.


Some little tips maybe specific to this car:
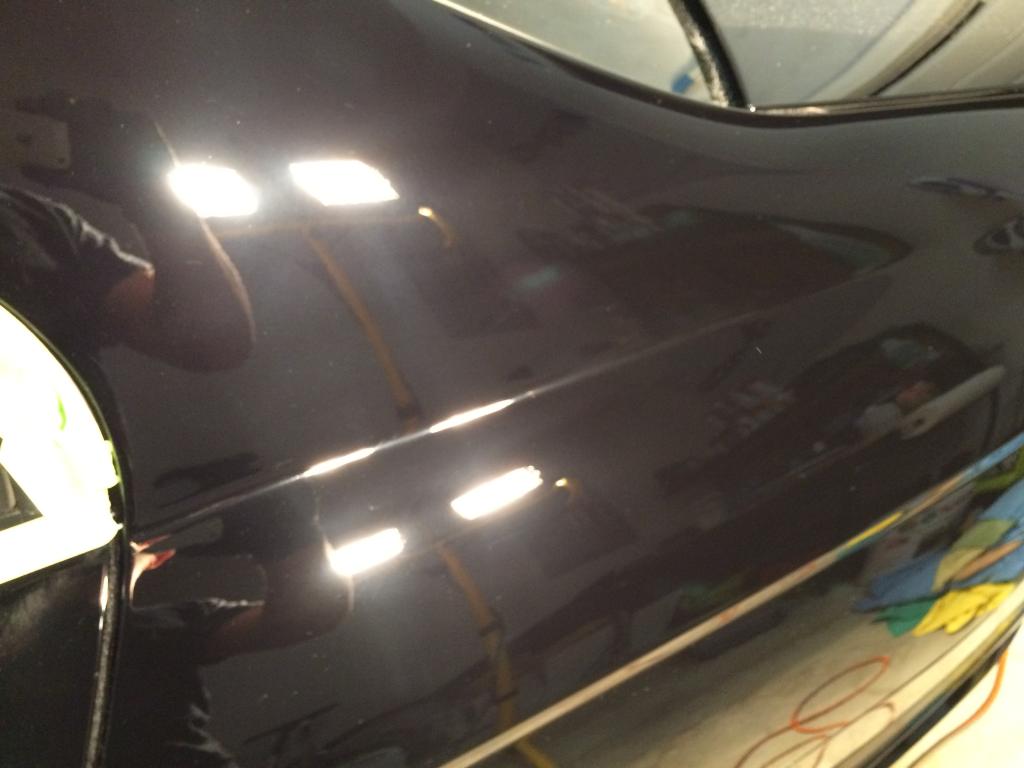
The creases that run the length of the car easily stop the pads from rotating. I found that I couldn't get the bigger buffers to correct near the creases. In order to fix that paint, I ended using the Griot's 3 inch with a MF cutting pad to cut all that paint. That little buffer was crucial in taking care of the front bumper, the creases on the sides, the strakes on the hood, and the B-pillars.
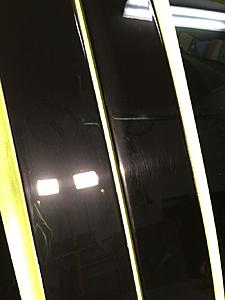
For the B-pillars, I used the 3 inch buffer with an orange pad and the FG400. I think that paint is single stage as I was getting some paint transfer. Here are some progress shots.
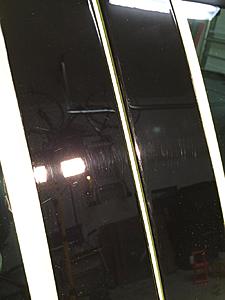
left one done:
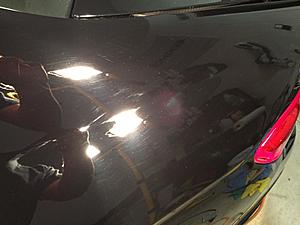
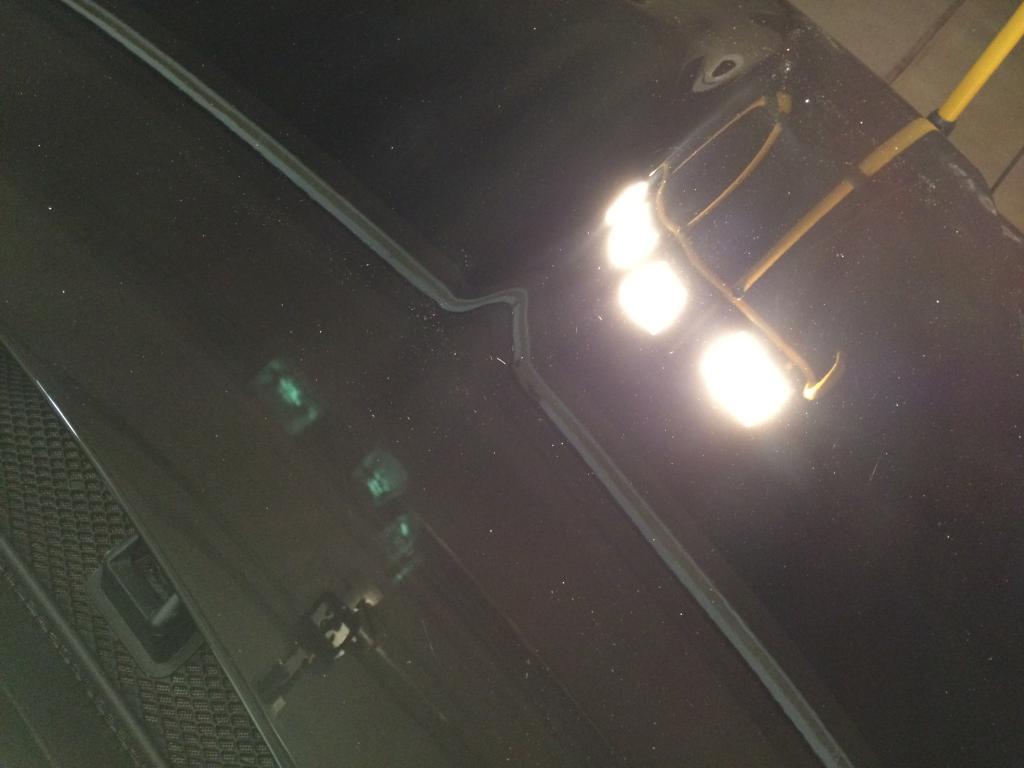
After all the big marring was taken care of (approx. 30 hrs later), I went over the car with an orange pad and SI1500. This got all of the hazing out but under direct spotlight, you could see some very fine scratches. In addition to the paint, I corrected any scratches on the headlights and tail lights with 1500 and an orange pad on the 3 inch. I don't really have any progress shots of that as the iphone wasn't really capturing it. Last step was SF4000 on a black pad to jewel the car on speed 4.
Once the paint was all done, it was too cold to OptiCoat! Even with some small space heaters, I couldn't get my garage warm enough and didn't want to try the heat lamp method to try and make it cure. I patiently waited 3 weeks to coat the car. There was a slightly layer of dust on the car I had to carefully remove prior to putting the coating on. My detailing buddy told me to use CarPro Eraser as there is supposedly less chance of marring the paint, but it's still supposed to remove any polishing oils and residues. We sprayed it on and immediately began to "scoop" the dirty off the paint gently. We did not let it sit at all. We started to notice whitish spots that looked like acid rain etching on the paint. After having stared at the paint for literally days, I knew I hadn't seen this before. I stopped using it, corrected the paint again with a light polish, did 3 IPA wipe downs and everything seemed fine.
Optimum Gloss Coat was actually pretty easy to use. There are some videos on youtube of how to apply it. I would definitely recommend using the black/grey applicators. Once the temp was in the 60s and 70s, OC went on smoothly and flashed very easily. I applied in the standard cross pattern, let it flash and sit for a few minutes and then knocked down (basically lightly go over, lighter than buffing off the haze from a sealant) any high spots that were left. I applied it to all painted surfaces, the lights, rear windshield, sunroof, and the outside mirrors. I elected to not put it on the wheels since the car is getting new tires this week and I will have to remove the old wheel weight residue anyway. I'll do it then. One thing I noticed with the semi-low temps that kind of scared me was some hazing from the OC. They didn't look like high spots that I had seen on forums, but maybe more like spots where the paint had some type of contamination under the OC, not allowing it to adhere to the paint. This was still there a day after coating the car. I decided to park the car in the sun when it was about 65F outside and just let it sit for a couple hours. I came back out, and the haze was gone. I am pretty sure the OC just needed a little more heat to cure.
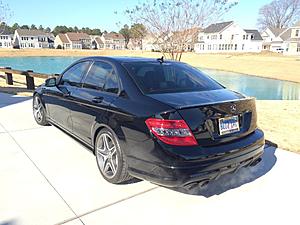
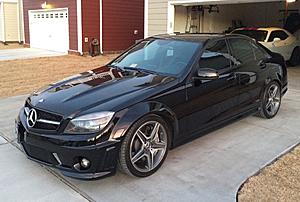
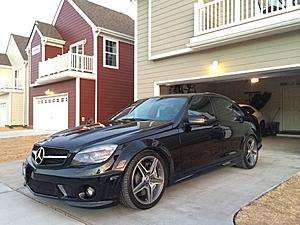
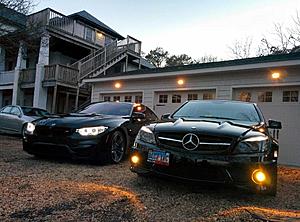
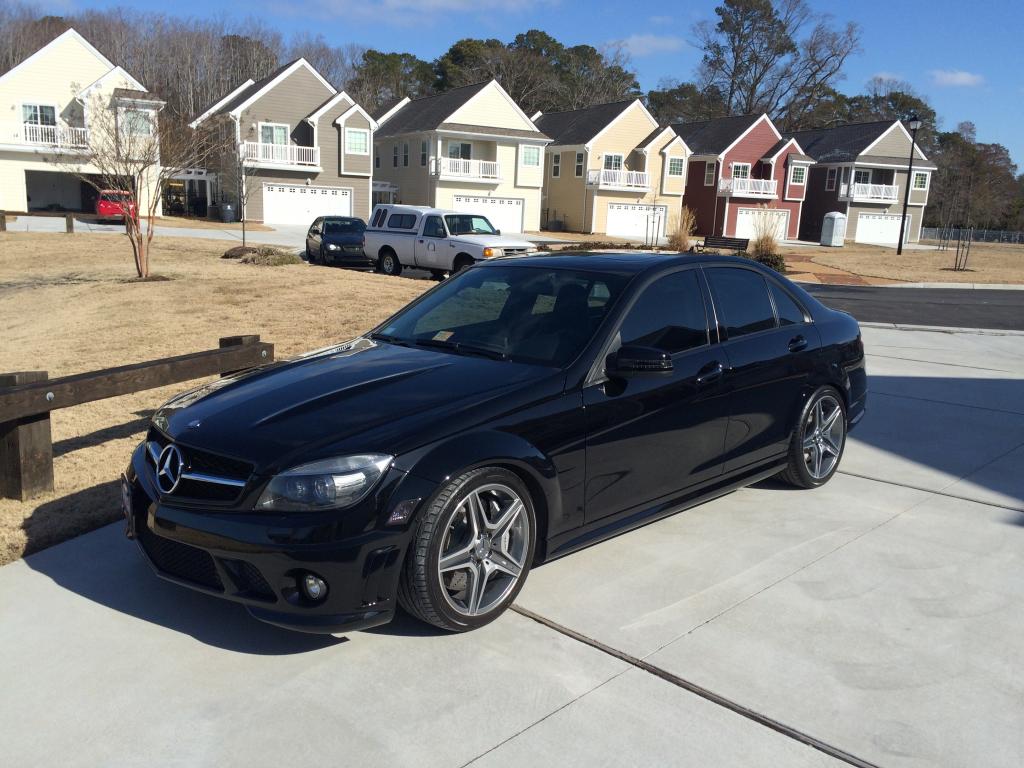
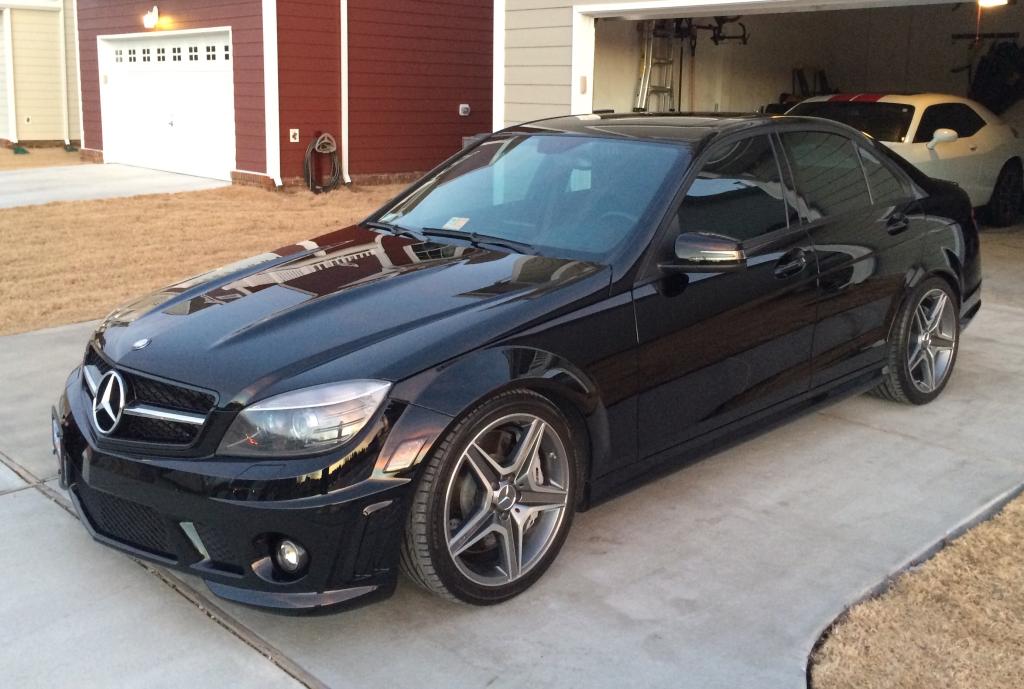
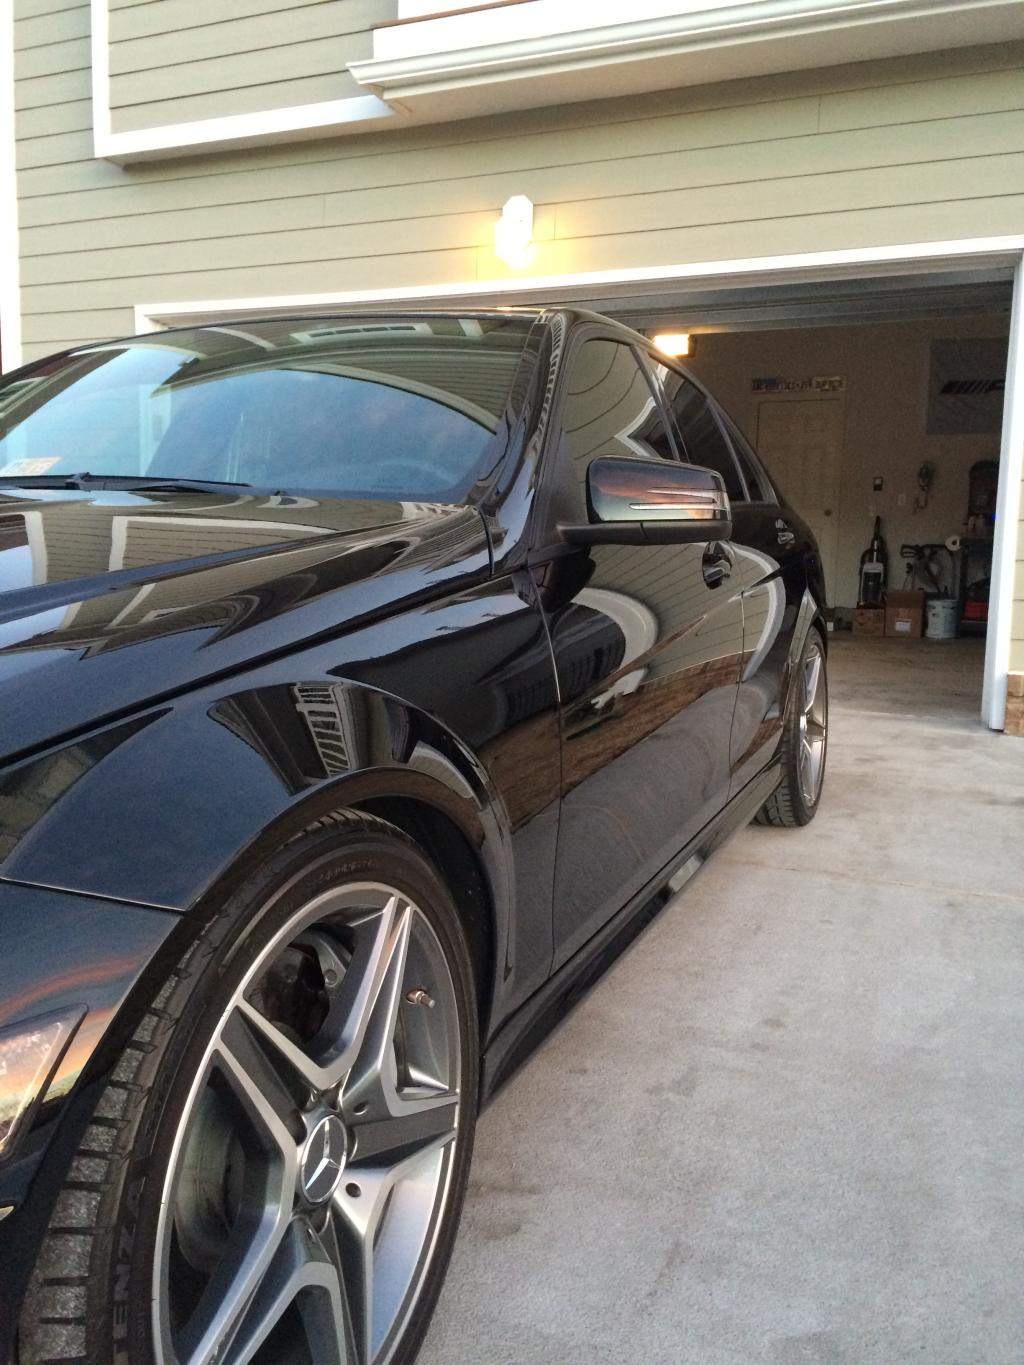
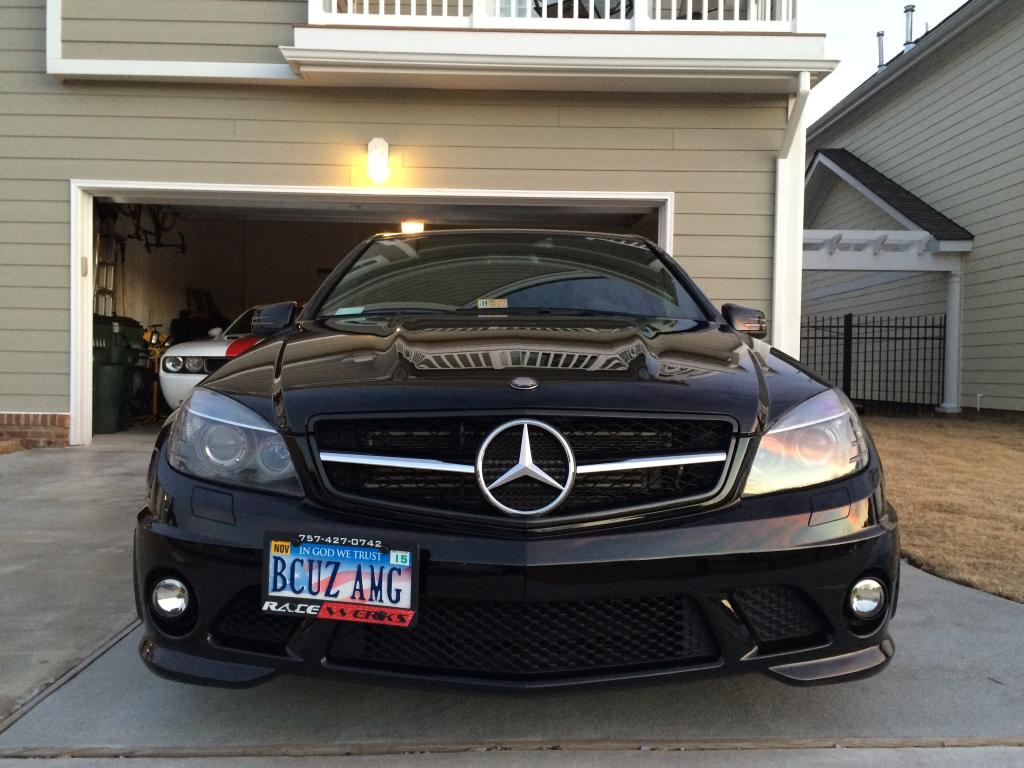
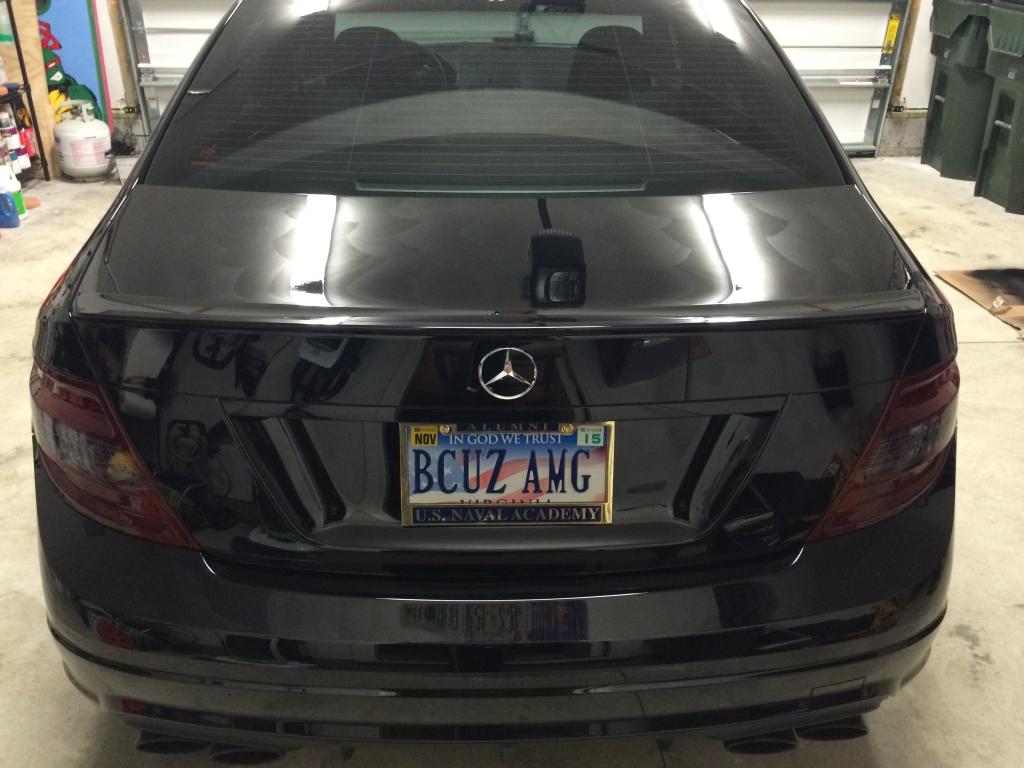
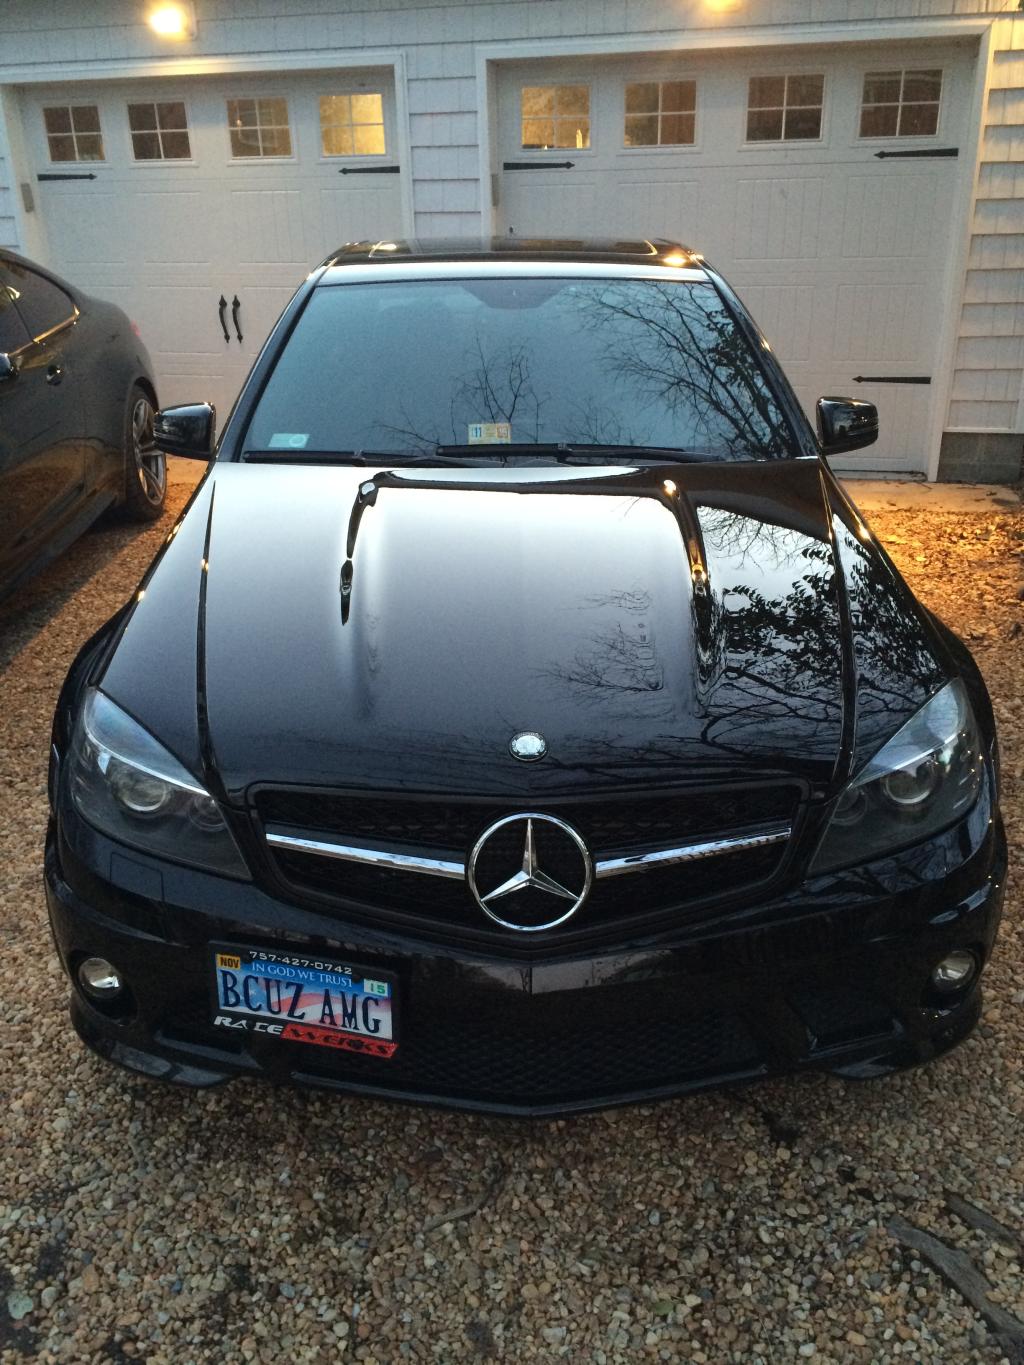
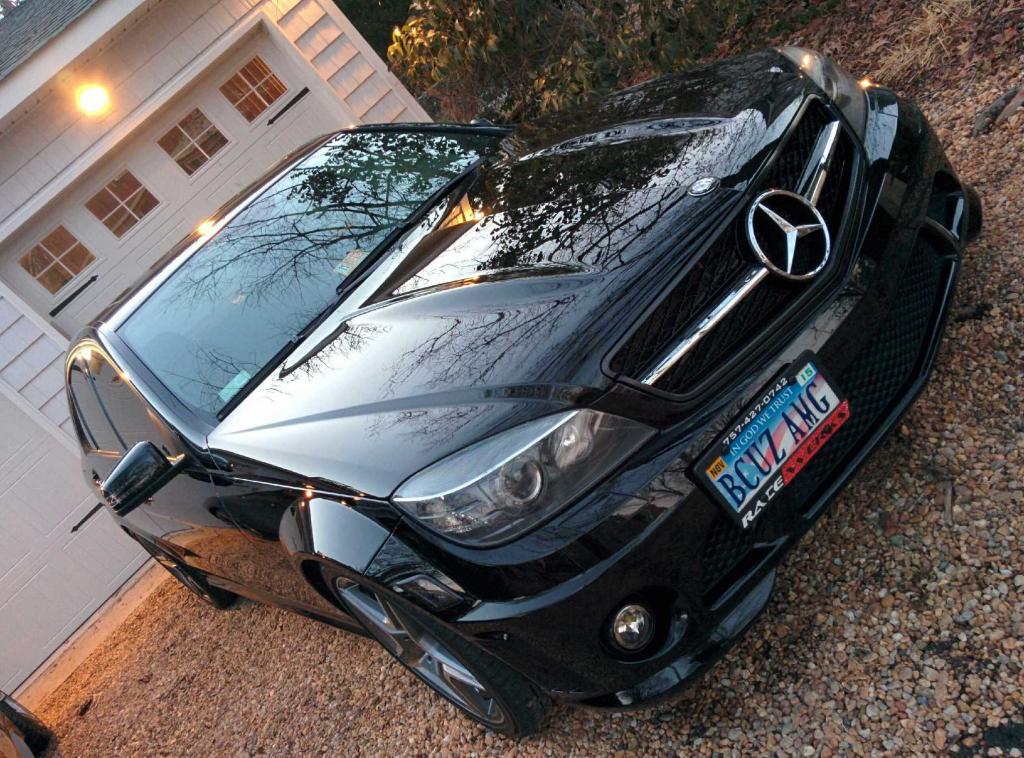
Now on to the Final pics (grille was changed too ):
):


Dat reflction!
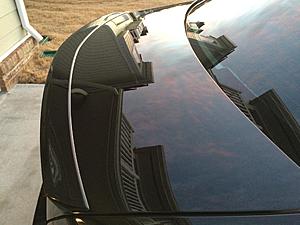

You can see the ceiling's texture!

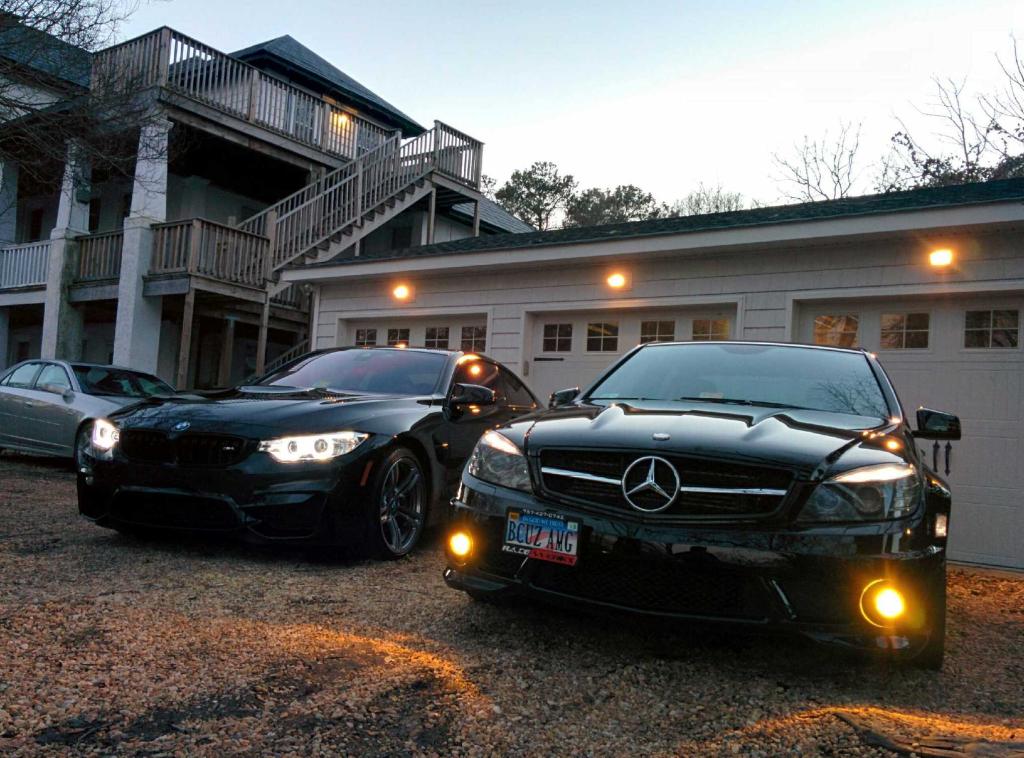
With a 6speed M4 my buddy just finished. It sounded like a diesel


Comments and questions are welcome! Thanks for looking!
Tools used:
-Griot's 6 inch DA
-Rupes 15 w/5 inch backing plate
-Griot's 3 inch DA
-Home Depot Halogen work lights
-2 6 inch Meguiar's Microfiber Cutting Pads
-4 3 inch Meguiar's Microfiber Cutting Pads
-1 Hex Logic yellow foam cutting pad
-2 5.5 inch Meguiar's Microfiber Cutting Pads
-2 4 inch Lake Country orange foam polishing pads
-1 4 inch Lake Country black foam finishing pad
-1 6 inch Lake Country orange foam polishing pad
-1 6 inch Lake Country black foam polishing pad
-about 20 16x16 Griot's MF towels (available at Advance Auto Parts)
-Bottle of 15% IPA solution
-1 32 oz Bottle of CarPro Eraser (WOULD NOT RECOMMEND!)
-3 grey foam OptiCoat applicators
-1 10mL tube of Optimum Gloss Coat (5ml used)
-1 Mother's Clay bar kit (Next time I will try Nanoskin AutoScrub or a finer clay)
-Menzerna FG400
-Menzerna SI1500
-Menzerna SF4000
-automotive painter's tape
Things I wish I had:
-Flex 3401 w/pads to support it.
-Climate controlled garage.
-15 sets of arms.
I started with my normal wash. Nothing too special, although I have since bought a foam cannon and Chemical Guys Snow Foam. I won't go into the wash details. I then clayed the car which I think marred the paint considerably. I don't remember the Meguiar's clay marring the paint, but I feel like the Mother's Clay Bar, even with significant amounts of the provided detail spray, left considerable marring.
Next step was an IPA wipedown and then tape off the rubber trim. Then it was off to the races with the compound. I started with my Griot's 6 inch with a MF Cutting pad and the FG400 on speed 6. It worked fine, and I did almost half of the car like that. The problem was, it took FOREVER! I made sure to clean out the pad periodically to get rid of any buildup or dried compound. Once the FG400 started to break down or dust, I'd wipe the panel down with IPA and inspect. It worked well but left a haze as expected.
Taped off. I think I would not tape the sides of the B-pillars. The tape adhesive started to just make things a pain.

Here's a 50/50 shot showing the haze left, but the marring is removed.
After getting tired of the slow progress with my Griot's DA, I called my buddy and begged him to loan me his Rupes 15 which he gladly did. He also gave me some MF cutting pads and a Hex Logic Yellow cutting pad to go with it. I initially used the yellow pad which was nice as it followed contours better and didn't clog as easily as the MF pads. Unfortunately as I had read about, the Hex Logic pad started to disintegrate. So I switched back to MF cutting pads for the rest of the car. The Rupes was easily 3 times as fast and provided an equal or better result. That being said, even with the "washer mod," the pad is still fairly easy to stop. I would have preferred a Flex 3401 to cut through the hard paint. Here are a couple more before and after shots.

Some little tips maybe specific to this car:
The creases that run the length of the car easily stop the pads from rotating. I found that I couldn't get the bigger buffers to correct near the creases. In order to fix that paint, I ended using the Griot's 3 inch with a MF cutting pad to cut all that paint. That little buffer was crucial in taking care of the front bumper, the creases on the sides, the strakes on the hood, and the B-pillars.
For the B-pillars, I used the 3 inch buffer with an orange pad and the FG400. I think that paint is single stage as I was getting some paint transfer. Here are some progress shots.

left one done:


After all the big marring was taken care of (approx. 30 hrs later), I went over the car with an orange pad and SI1500. This got all of the hazing out but under direct spotlight, you could see some very fine scratches. In addition to the paint, I corrected any scratches on the headlights and tail lights with 1500 and an orange pad on the 3 inch. I don't really have any progress shots of that as the iphone wasn't really capturing it. Last step was SF4000 on a black pad to jewel the car on speed 4.
Once the paint was all done, it was too cold to OptiCoat! Even with some small space heaters, I couldn't get my garage warm enough and didn't want to try the heat lamp method to try and make it cure. I patiently waited 3 weeks to coat the car. There was a slightly layer of dust on the car I had to carefully remove prior to putting the coating on. My detailing buddy told me to use CarPro Eraser as there is supposedly less chance of marring the paint, but it's still supposed to remove any polishing oils and residues. We sprayed it on and immediately began to "scoop" the dirty off the paint gently. We did not let it sit at all. We started to notice whitish spots that looked like acid rain etching on the paint. After having stared at the paint for literally days, I knew I hadn't seen this before. I stopped using it, corrected the paint again with a light polish, did 3 IPA wipe downs and everything seemed fine.
Optimum Gloss Coat was actually pretty easy to use. There are some videos on youtube of how to apply it. I would definitely recommend using the black/grey applicators. Once the temp was in the 60s and 70s, OC went on smoothly and flashed very easily. I applied in the standard cross pattern, let it flash and sit for a few minutes and then knocked down (basically lightly go over, lighter than buffing off the haze from a sealant) any high spots that were left. I applied it to all painted surfaces, the lights, rear windshield, sunroof, and the outside mirrors. I elected to not put it on the wheels since the car is getting new tires this week and I will have to remove the old wheel weight residue anyway. I'll do it then. One thing I noticed with the semi-low temps that kind of scared me was some hazing from the OC. They didn't look like high spots that I had seen on forums, but maybe more like spots where the paint had some type of contamination under the OC, not allowing it to adhere to the paint. This was still there a day after coating the car. I decided to park the car in the sun when it was about 65F outside and just let it sit for a couple hours. I came back out, and the haze was gone. I am pretty sure the OC just needed a little more heat to cure.
Now on to the Final pics (grille was changed too
):


Dat reflction!

You can see the ceiling's texture!
With a 6speed M4 my buddy just finished. It sounded like a diesel
Comments and questions are welcome! Thanks for looking!
Last edited by chrisridebike8; Mar 10, 2015 at 04:41 PM.
Thread Starter
MBWorld Fanatic!
Joined: Nov 2012
Posts: 2,768
Likes: 419
'10 C63
Thread Starter
MBWorld Fanatic!
Joined: Nov 2012
Posts: 2,768
Likes: 419
'10 C63
Thanks. I asked someone how much it would be and they told me around $2500-3000 for inside and out. Now if I could just tell my wife that I saved $3000 and should use that towards headers...
Trending Topics
Thread Starter
MBWorld Fanatic!
Joined: Nov 2012
Posts: 2,768
Likes: 419
'10 C63
Some of it might be the hazing I was talking about. A lot of those pics are after only the compounding was complete. 1500 and the orange pad smoothed that all out. And the 4000 and the black pad made it look wet
MB World Stories
The Best of Mercedes & AMG

Manual Mercedes? 6 Times Sindelfingen Let Drivers Have All The Fun
Verdad Gallardo
Mercedes SLR McLaren 722 S Is Extremely Rare Example Modified by McLaren
Verdad Gallardo
8 Classic Boxy Mercedes Designs That Have Aged Like Fine Wine
Verdad Gallardo
Flawlessly Restored Mercedes 190E Evo II Heads to Auction
Verdad Gallardo
Electric Mercedes C-Class Unveiled: 11 Things You Need to Know
Verdad Gallardo
Mercedes EQS Gets A Major Update: Everything You Need to Know
Verdad Gallardo
5 Underrated Mercedes-Benz Models That Don't Get the Love They Deserve
Verdad Gallardo
Mercedes 300D Has Pushed Well Past 1 Million Miles and It Ain't Stopping
Verdad Gallardo
10 Most Reliable Mercedes-Benz Models You Can Buy Used
Verdad Gallardo
MBWorld Fanatic!
Joined: Dec 2012
Posts: 6,775
Likes: 1,152
From: NY
E63S | X5
Even at a cheap $75/hr, a 30hr detail is $2250. People who don't understand detailing lose their chit when they call a shop for a "full" inside out job and get quoted $2k.
Out Of Control!!
Joined: Jun 2004
Posts: 13,799
Likes: 3,228
2014 E63S; AMS 100 octane ECU dyno tune; EDOK TCU tune; BB intakes; sprintbooster
Swirls?! Where?! Are you looking at the trunk shot while it's in the garage? Those aren't swirls...at least not on the paint. They are swirls on the ceiling of the garage!
Some of it might be the hazing I was talking about. A lot of those pics are after only the compounding was complete. 1500 and the orange pad smoothed that all out. And the 4000 and the black pad made it look wet
Some of it might be the hazing I was talking about. A lot of those pics are after only the compounding was complete. 1500 and the orange pad smoothed that all out. And the 4000 and the black pad made it look wet
Again, NICE JOB!!
By the way that grill is how it should be from the factory on the w204...
Thread Starter
MBWorld Fanatic!
Joined: Nov 2012
Posts: 2,768
Likes: 419
'10 C63
Yeah. Those are swirls. Those are the before shots. The after are right next to them. To get them out you have to do a lot as stated above.
And i didnt mean to come off as mad. More as excited about the reflection/gloss. Thanks for the compliments.
And i didnt mean to come off as mad. More as excited about the reflection/gloss. Thanks for the compliments.
MBWorld Fanatic!
Joined: Dec 2012
Posts: 6,775
Likes: 1,152
From: NY
E63S | X5
Swirls?! Where?! Are you looking at the trunk shot while it's in the garage? Those aren't swirls...at least not on the paint. They are swirls on the ceiling of the garage!
Some of it might be the hazing I was talking about. A lot of those pics are after only the compounding was complete. 1500 and the orange pad smoothed that all out. And the 4000 and the black pad made it look wet
Some of it might be the hazing I was talking about. A lot of those pics are after only the compounding was complete. 1500 and the orange pad smoothed that all out. And the 4000 and the black pad made it look wet
Out Of Control!!
Joined: Jun 2004
Posts: 13,799
Likes: 3,228
2014 E63S; AMS 100 octane ECU dyno tune; EDOK TCU tune; BB intakes; sprintbooster
Thread Starter
MBWorld Fanatic!
Joined: Nov 2012
Posts: 2,768
Likes: 419
'10 C63
Peter, i think a video will explain better. Larry has tons and os definitely someone to watch on youtube, even just to see the cool cars he does. Heres a good example of how to remove imperfections. Hope that helps and is a better answer you were looking for.
MBWorld Fanatic!
Joined: Dec 2012
Posts: 6,775
Likes: 1,152
From: NY
E63S | X5
^ Going off of that, you could probably watch YouTube videos from now until the day you die 24/7 on detailing. Tons and tons of videos out there. Find someone with a lot of views, comments, and seems professional and just go off of that. I learn much better by watching the process as well.
Thread Starter
MBWorld Fanatic!
Joined: Nov 2012
Posts: 2,768
Likes: 419
'10 C63
Honestly, unless you have a rotary buffer, if you watch youtube and read forums like me, you can end up with the same result. The paint on this car is so hard that it makes it, I wouldn't say difficult or impossible, but less easy to mess up while cutting the paint. A Flex or a rotary could probably get you in trouble with possible burn through but a Griot's DA and some free time to experiment shouldn't do too much harm. Just see how Larry does it and read some stuff on autogeek. Try some out. Maybe see if someone has a beater you can try things on first. And then crank things to 11 when doing the C63 because the paint is so hard.
MBWorld Fanatic!
Joined: Dec 2012
Posts: 6,775
Likes: 1,152
From: NY
E63S | X5
If you're friendly with a body shop just ask them for a body panel that came off of whatever in an accident and was dumpster bound. Scratch that up with whatever and just practice on a small piece.

MBWorld Fanatic!
Joined: Jul 2014
Posts: 1,142
Likes: 3
2010 C63 P30
Honestly, unless you have a rotary buffer, if you watch youtube and read forums like me, you can end up with the same result. The paint on this car is so hard that it makes it, I wouldn't say difficult or impossible, but less easy to mess up while cutting the paint. A Flex or a rotary could probably get you in trouble with possible burn through but a Griot's DA and some free time to experiment shouldn't do too much harm. Just see how Larry does it and read some stuff on autogeek. Try some out. Maybe see if someone has a beater you can try things on first. And then crank things to 11 when doing the C63 because the paint is so hard.
I suppose paint this hard is where the really pricey da's like rupes and flex come in handy
Thread Starter
MBWorld Fanatic!
Joined: Nov 2012
Posts: 2,768
Likes: 419
'10 C63
Thanks for all the comments! I hope some of this was helpful.
Yeah. I need to do my Lexus. That amount of marring on the Lexus is only like 6 hours total work because it's so soft. And I can't use MF pads and FG400 on there without risking burn through.
Yeah it is. I bought it off a member here and then I used plastidip and glossifier on the edge to make it look like a 507 grille. Like a couple other members on here, it made a whistling sound around 70 mph. This is due to the fact that the stock top piece has a small rubber gasket and the 55tech one doesn't. You can use the stock top piece or find some type of insulation to use.
Yeah it is. I bought it off a member here and then I used plastidip and glossifier on the edge to make it look like a 507 grille. Like a couple other members on here, it made a whistling sound around 70 mph. This is due to the fact that the stock top piece has a small rubber gasket and the 55tech one doesn't. You can use the stock top piece or find some type of insulation to use.
MBWorld Fanatic!

Joined: Oct 2009
Posts: 2,286
Likes: 62
From: eNyCe
Steel Grey Metallic C63!!
Excellent detailed write up Chris! I'm definitely going to hit you up when I attempt something like this for my ride.
I guess you'll be getting a set of headers soon...
I guess you'll be getting a set of headers soon...
MBWorld Fanatic!
Joined: Jul 2014
Posts: 1,142
Likes: 3
2010 C63 P30
Thanks for all the comments! I hope some of this was helpful.
Yeah. I need to do my Lexus. That amount of marring on the Lexus is only like 6 hours total work because it's so soft. And I can't use MF pads and FG400 on there without risking burn through.
Yeah it is. I bought it off a member here and then I used plastidip and glossifier on the edge to make it look like a 507 grille. Like a couple other members on here, it made a whistling sound around 70 mph. This is due to the fact that the stock top piece has a small rubber gasket and the 55tech one doesn't. You can use the stock top piece or find some type of insulation to use.
Did the same to a oem fl grille on mine and it was such a pita getting just the trim black, I need to rip it off and try again it's not as smooth as I'd like


