When you click on links to various merchants on this site and make a purchase, this can result in this site earning a commission. Affiliate programs and affiliations include, but are not limited to, the eBay Partner Network.
I'm looking for a guide to install a reversing camera on a 2013 C204 Coupe, but all I seem to trawl up in the search is aftermarket stuff. I realise that aftermarket is very cheap, but I really want to go the OEM route.
I think I'm right in saying that I need:
- New chrome strip that has camera hole
- Camera
- Some kind of junction box to protect other equipment
- Video lead
Is there anything else? Or a part number for the kit from MB?
Sorry for the 100th thread concerning these cameras, I'm just here for some help/info.
I just completed this a while ago.
You need the wiring harness, camera and control module.
You can use your existing plastic piece and drill and deemed the hole which is already marked on it.
If you use this solution, your field of view is going to be stock. The stock field of view does not allow you to see hundreds of yards behind the car, a quarter is taken by the rear bumper. But seeing the bumper allows you to back really close to a wall, without hitting it.
If you use the oem camera, you would use technology from back on the day and there will be no guiding lines.
If you use the aftermarket camera, you will have lines and subjectively better resolution.
I have a leftover wiring harness that I'm looking to sell, pm me if interested.
I'll try to post steps here.
The harness has both sections covered.
The installation I wanted to be just like the factory one. So ran cables where the factory ran them. Not the easiest.
The module has the advantage of turning on the camera at the correct time, not having it on all the time, like the generic installation all do.
In my case this installation was additionally more complicated because I have the universal media connector in the glovebox and this takes the only FAKRA connector available in the PFL Command 4.
There is a factory option installation sheet, in German. there is one on this forum and one I googled around and found it. The one in German turns out to be for the W204.
The module for the camera has to be installed in the trunk, on the driver's side, on the rear of the strut tower.
There you will find a hole where the mounting bracket for the module goes and a tunnel, to pass through to the front side.
(Picture provided courtesy of member Opala)
Now, (and this is not the first time I see this), the factory installation of an aftermarket factory option can be different than the assembly line installation.
In this case, the instructions want you to run from the passenger side (where the camera cable comes out of the trunk lid), to the driver's side (where the module is), up top, by the speakers. This can be done at the very outer edge, almost underneath the trunk rubber gasket. the sheet metal has a lot of pressing cut-outs and you can snake the cable there.
I didn't like this, because when the speakers vibrate, the cable may vibrate too.
There are pictures of the factory outfitted option on this forum and the cables cross from passenger side of the trunk to the driver's side in a black plastic through, at the bottom of the trunk. Very elegant, but the through has several stacked compartments. The bottom has a module in it and I decided to cross in the compartment above it.
You're crossing with 3 components of the harness:
(picture provided courtesy of member Opala)
-The power component, terminated with a green fuse holder, which then climbs up and behind the trunk fuse block. Once you're in place behind the fuseblock, you may find that there is a position taken and the green connector is already in place, No problem, take the pin out of the harness by opening the harness connector and pop it into the "required" port number. It's not really required, as you will energize correctly from whichever port of this connector, but it's nice to know that you're in the factory port number and the legend of fuse numbers applies to your camera.
-The signal component, which goes to the passenger side reverse light (comes with pins, but I soldered it in and applied heatshrink ). The German instructions called for one of those electrical compression tacks (very amateur, but hey the instructions are for an aftermarket factory option installation), and I could not see how the provided factory harness pin could be pressed into the reverse bulb socket.
-The video component, which comes from by the passenger trunk hinge (the camera connector is all the way in the trunk , the camera pigtail is only 6 inches long or so)
Here, I chose to solder the connector for the aftermarket camera without cutting the factory camera connector from the factory camera harness, then heatshrink and tuck.
There's an easy ground cable that you take to an easily available ground pin, by the trunk fuse holder.
Here are the tricky parts:
so you have all the cables by the module and you feed them into the tunnel, there all cables have to somehow go down to the black plastic through. There is a connection between this plastic tunnel that takes you into the back seat area and the transversal black layered through that crosses (as mentioned above ) from the driver's to the passenger's side. If you snake the cable for 5 minutes, you'll find it.
Now for the video cable that originates from the camera module and ends at the Command unit. The car has luxurious troughs/cable trays for cables to go anywhere. The installers (or design of the robotic installers) made dumb use of the trays.
Meaning:
You take out the bottom cushion of the back seat and the camera cable emerging from the tunnel in the trunk easily feeds in the cable tray to take it to the front side.
However, the wire harnesses here are bundled and the bundling straps are then clipped to the inside of the tray. When you want to feed this additional cable, it should be a breeze, but whatever you use to push the cable through gets stuck in these bundling straps.
I'm sure there's a trick to do this, but I couldn't figure it out, so I had to open all the cable through covers and physically lay the cable through.
I could have just tucked the cable over everything and under the carpet, but I wanted the factory install, so spent a few hours here. There is no reason for this, but I'm an engineer and became stubborn on using the engineered cable features, had to do it.
Once you're underneath the dash it's easy, you snake the cable to the back of the command.
A few notes:
1. The Mercedes camera must be a 6 volt camera, because this is what the module puts out. The Taiwan camera that I picked on ebay was a 10 volt minimum or so camera. At least this is what they wrote in the description. To my surprise, it works flawlessly on 6 volts. They must copy-paste the description without having a clue of what they're selling. But hey, works great.
2. There are two types of factory harnesses for cameras for the W204. PFL and FL. You know the FL one, because it has some sort of pass through FAKRA connector and a real one in one unit. Of course the PFL has only one FAKRA, this is all that's there with the Command 4, vs 4.5 in FL (has 2).
3. With this installation there is no noticeable lag in the camera powering up, this module must be powering the camera up fast. You shift into reverse, the screen blacks out almost at the same time and by the time you let go of the shifter, the video is there.
4. I saw numerous videos for the basic installation and in one of them, the installer claimed that even with the command off, once you put it into reverse, the command turns on and the video comes up. In my PFL, this of course would mean that the screen has to flip up. Mine doesn't do this, but I also have not seen video evidence that this happens. the video was only talk in reference to this.
5. On ebay there will be two camera module part numbers. On this forum and on ebay there is a bit of controversy as far as which to buy for the W204. I can dig out which I bought, but I don't remember this minute if the module was the same PFL and FL. I think it is cause the person that posted pictures of the factory install on this forum had the part number I bought in an FL, from what I remember.
Also, if you have the Universal media interface and want that to work, in a PFL as well as the reverse camera, PM me, I might just make some more FAKRA spliters.
besides the harnesses, control box (and camera) do not you need to code the car and the control box itself?
As per an MB manual, you need to VeDoc, SCN code, then calibrate with the Star Diag.
Can you get on without any of these?
First, this thread is all about an OEM installation.
Second, the OEM control module does have a relay.
The relay is controlled by the signal from the reverse light.
Even without a relay, powering the camera from the reverse lights, feedback indicates the camera is slow to turn on.
With the control module it turns on fast, as designed. Also no bulb errors.
No coding is necessary, you can use the engineering menu.
The advantage is that the camera is only powered when needed.
Sounds great. Do you mean to source the harness, (a used) control box and the camera, connect them (as per the manual), adjust the headunit and good to go? So no Xentry is needed at all? Do I need to source the control box from the very same type of car (s/w212 yr 2014) or any device used to work with the NTG 4.5 - 4.7 would do?
Sounds great. Do you mean to source the harness, (a used) control box and the camera, connect them (as per the manual), adjust the headunit and good to go? So no Xentry is needed at all? Do I need to source the control box from the very same type of car (s/w212 yr 2014) or any device used to work with the NTG 4.5 - 4.7 would do?
There were two control box part numbers. The information on one of the threads was for the W204 and the other was for an E class, maybe W211/w212.
You should probably get the proper part number for your application, I think the NTG model number matters.
Mine was NTG4.
As I was posting, once I got around to measure the voltage that this control box puts out to the camera, there was a surprise there.
But then the camera operated just fine with this voltage.
I preferred an aftermarket camera, because the technology has progressed a lot since 2010 and there's no point in installing an inferior, more expensive camera that the factory sourced back in the day from Panasonic or whoever.
Once that is done, you should only use the engineering menu, then you will be fine. In my application, additional things happen too:
With the head unit display off and display folded shut, when putting it in reverse, the head unit starts and the display flips up. With this aftermarket camera, the first generation fixed lines are also available.
The position I chose for my aftermarket camera is the OEM position.
The OEM position is off center and you see in the field of view a portion of the rear bumper. When you look at a w204 picture of the reverse camera feature, you know if it's oem if you see in the field of view a portion of the bumper.
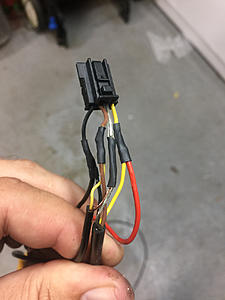
This is the fl factory harness that I have available. Attachment 415384
Hi, first of all, thanks for you explanation. I am trying to find part numbers for w205 and figuring out how to make it works. Harness and video cable have same part number? do you have video cable still available? I guess it will be compatible.
Originally Posted by Todwick
Did I miss the part number for the wire harness? I cannot seem to find it anywhere.
NM, I found part numbers Α2044404908, Α2044404808 and module A1645430062.
Didnt find Α2044404908, Α2044404808 at EPC. Did you bought them and installed? two part numbers for two wires?
There is a bag of cables that comes with the part number. The cables are merged into a harness and I think one separate cable.
At this point, my video screen has quit working and I decided to upgrade to the 10.25 inch unit.
This unit can accommodate a factory reverse camera, through the NTG head unit.
Unfortunately, the image I get is black and white.
Even if I manage to sort this out, from a combination of 6 choices in the Android and 3 choices in the NTG engineering menu, the result will be the image from the camera being restricted to the resolution of the NTG.
The aftermarket camera can do a lot better than the NTG allows it to.
So now I will try a combo:
The powering up of the camera will be with the factory module, but the video will go directly to the Android, hopefully giving me the full benefit of the camera resolution.
Problems of black/white could be relationed to PAL/NTSC?
Yo project sounds very good.
BTW, I am tryint to retrofit backup camera in my S205, I would like to make OEM installation but I cant find Retrofit file at WIS, if I loof for *retrofit* a lot of files are found but not relationed to camera,
Yes, the retrofit information I collected from misc sources.
Interestingly, the kit of cables in the part number was almost designed to be a retrofit.
The routing of the cables, which I wanted to be the genuine routing, and the placement of the module, which I wanted in the correct location, I did with photos that some people posted of the genuine option.
To go in a bit of details, the Android has NTSC, PAL and another 6 options, that I don't understand the coding, but it's another bundle of acronyms and for some reason sound similar with the options in the engineering menu SVRC and DVRC and DVRC-C or so.
So NTSC and PAL did it get color to come up.
Then there is another small menu in the Android with OEM, aftermarket and a third option.
Basically the permutations of these options are probably good 25 possibilities.
I'm getting a small creak from the mount of the new display, so I may go back in there anyway to add I'm thinking some electrical tape.
Didnt find Α2044404908, Α2044404808 at EPC. Did you bought them and installed? two part numbers for two wires?
goy0, I have not had a chance to work on this project so I haven't purchased the cables yet. My guess is that one cable is needed to go from the module to the head unit and the other is needed to go from the module to the camera.
So I connected the video signal to the android and powering up of the camera is still OEM.
Now I have a good resolution image and I have steering responsive guiding lines.
OEM wiring and module still powers the reverse camera.
So I connected the video signal to the android and powering up of the camera is still OEM.
Now I have a good resolution image and I have steering responsive guiding lines.
OEM wiring and module still powers the reverse camera.


 01-12-2018, 08:14 AM