When you click on links to various merchants on this site and make a purchase, this can result in this site earning a commission. Affiliate programs and affiliations include, but are not limited to, the eBay Partner Network.
So, in case you guys were wondering, my CLK still gets plenty of use and love . However, the headliner is slowly on its way out, as well as the rear lower side panel trim. In that respect, I bought some suede headliner material and will be taking care of this as soon as the rest of the parts come in. I decided to switch the color to black...or charcoal if the black is too dark, so I have to get dark trim pieces/buttons/etc. I never realized the CLK had handles for the back seats as well. Who even sits in the back? I will be documenting the swap here...for future reference.
Anyone have headliner experiences they would like to share?
I have no experience in replacing the headliner but mine is in need of repair. I removed the sunroof screen out of necessity, as the adhesive had dried and flaked causing the loose headliner to jam. The rest of the headliner is fluttering in the wind when the windows are down (most of the time). I was planning to to remove and re-adhere it sometime over the winter. I had also started to loosely look for an upholsterer, just in case I was too lazy or things got to be too much of a PITA.
I would be very interested in how it goes for you.... and good luck.
Yeah, I considered going to an upholstery place as well, but I think they charge too much for the type of labor involved. Sticking a piece of fabric to a panel is not rocket science if you have the right tools/consumables and...talent . There are also fabrics readily available with foam backing, so you don't have to do the foam and then the fabric separately.
My interior is anthracite, officially. I had Colorbond 349 (Mercedes anthracite) on hand, and the colors do not match. The Spray can is a slightly dark/brownish color. My interior is more of black/gray shade. So I decided to just go with black parts for the trim and the headliner. For anyone looking to get black trim (roof grab handles, etc) - the Mercedes color code is 9051. Some parts have other codes for black, but the majority share this code. You can also get parts from Germany, seeing how dealers here list them as "discontinued", and some of the ebay used parts, are 3x-4x the price of new parts. Thanks ebay.
Speaking of Colorbond (ASIN B00G6IQC0C), works pretty good in my experience on car interior parts.
Ok, finally had a chance to start taking everything apart and ready for new material. Disassembly is pretty straight forward. Remove everything attached to the headliner and remove the headliner.
The color change complicates things a little but what the hell. Here are some details.
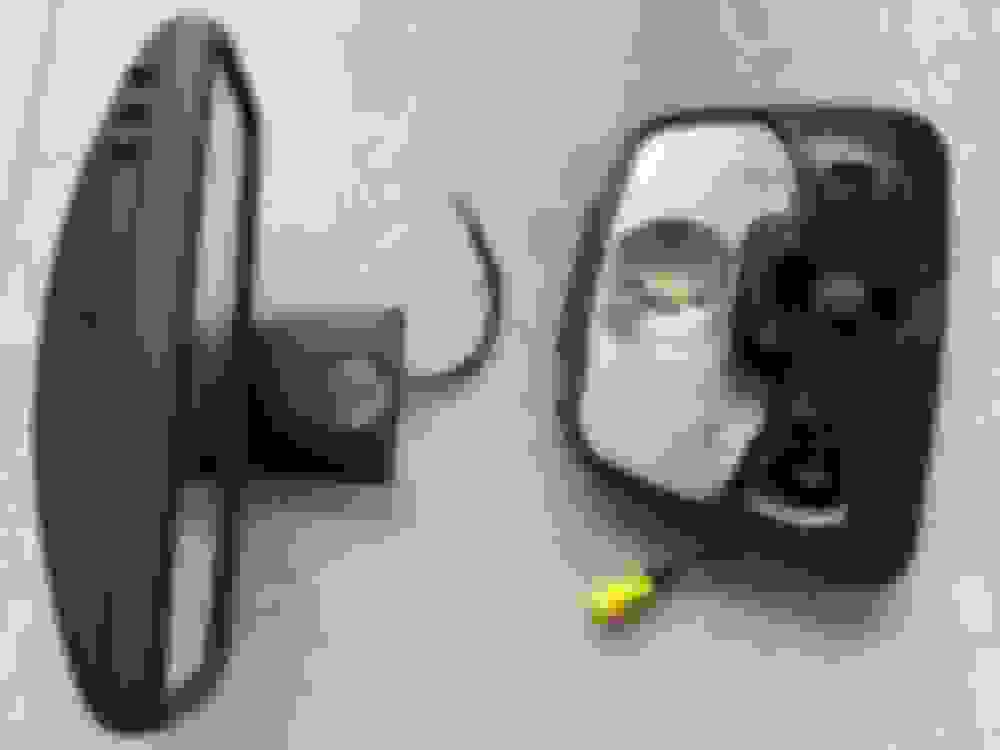
- Rear view mirror - many different versions over the years, hard to source a black one on eBay. Cost of a new one not really worth it. Repainted with Colorbond 349 and finished with a semi gloss clear.
- Upper/dome controls - same situation here, disassembled everything and repainted with Colorbond 349 and finished with a semi gloss clear.
- Grab handles - having a hard time sourcing them from Germany, will dye them instead. Will have details later
- Rear quarter panel cover seat belt plastic trim was removed from the panel and painted as well.
- Sunroof cover grille - easily sourced on eBay, in black.
- Sunroof cover handle - will be painted.
Started removing existing material from pillar covers. It's messy but not too bad. First, remove the fabric. Second, use a drill with a wire brush attachment to remove the glue/fabric backing. Before/after pics below. Use existing fabric pieces to trim new fabric, giving yourself extra material to work with. Will have pics of that shortly.
Starting to remove the glue.
Glue....gone.
Painted trim pieces.
Last edited by megacrazy; Aug 26, 2021 at 02:20 PM.
Quick update. I started wrapping the pieces in the new fabric. I'm using 3M 38808 glue, which works great. Make sure your fabric pieces are perfectly flat before spraying them. The glue has a tendency to spray around corners somehow.
Lay the old material on top of the new fabric. Don't use the glue side, as that will leave behind a lot of crap.
Mark a questionable looking outline and cut it out.
Spray both the trim piece and the back of the fabric extensively. Wait 1-2 minutes for the glue to get tacky and stick away. If you have wrapped stuff in vinyl before, this is very similar, and easier in a lot of ways. Use a soldering iron to make some of the smaller holes. Make sure all edges are stuck properly, so stuff doesn't start peeling. The glue dries fairly quickly and has no issues holding the material down.
Thanks, yeah the new material looks much better than the stock crap. More updates. Next up is the actual headliner, whenever more material comes in.
Removing the headliner was pretty straight forward. The only issue I had was with a power cable, that according to the instructions is supposed to unplug....However there was no plug in sight. It most likely went straight to the rear SAM. I decided to cut it and I will install a connector on it, instead of removing the entire harness from the headliner (glued in place).
Well, there's your problem right there. Can't drive a Mercedes looking like that. Yes, I decided to do the rear panels as well.
A lot of these plastic welds need to be removed, to get everything apart, ready for wrapping.
Fabric removed.
Glue removed.
Wrapped piece. Magically finished.
The sunroof shade foam with the fabric removed.
Foam gone. This actually came off easily. I think it was a stick on piece, not spray glue.
The 2 vents are hard to get out and even harder to get back in.
I decided to redo the outside as well, which is unfinished stock.
First some pics of the back side of the headliner...in case you're wondering. I haven't seen many posted.
If you're getting weird rattles from the back, one of the velcro pads may have broken, just like mine, below.
First step is to remove the metal trim around all dome lights. Tabs should bend back without issues, at least a couple times, before they break.
Headliner with fabric removed. The foam is the issue. It degrades into a rubbery mess. You can easily rub it off with a metal brush, or even your fingers. I used a drill with a wire brush attachment as before. Word of advice, be careful with the drill. The headliner is fairly fragile and is very thin fiberglass on one side and cardboard on the other. Do not use the wire brush on the cardboard site. Stick to something made out of plastic.
Everything cleaned. Took about 2 hours, in case you're wondering.
This stuff is really messy, gets everywhere and is sticky. I got it all in one large pile with a broom and then vacuumed it. Next up wrapping it in new fabric.
Last edited by megacrazy; Sep 13, 2021 at 10:58 AM.
I have only done headliners twice in my life. Both occasions left the kind of memories you don't want.
You're doing great.
BTW, thanks for the photos.
DF
The CLK honestly wasn't too bad. The only negative aspect is re-assembling the interior. It's a real pain in the *** how it was designed and it always manages to annoy me. Anyway, final set of pics. Turned out good and it was well worth the effort. Overall it gives the CLK interior a much classier feel and blocks a lot of light, which I like.
A couple of tips from the experience:
- Taking out the headliner is simple. Follow all the steps in SDS, then slide the whole thing forward. It has 1 lip around the rear of the sunroof opening and 1 metal clip in the middle back (close to the rear window). Putting it back in requires that both the lip and the rear clip are aligned at the same time. Have 1 person hold the headliner up while a second person aligns and slides the whole thing back. 2 minutes max. Push on the velcro pads on the left and right side of the rear metal clip and you're done.
- If you used alcantara/fake suede/whatever, it won't be stretchy. Some curves around the sunroof won't be doable, at least without wrinkles.
- I was unable to source black grabhandles. I used "HI-TECH Industries VP&C DYE - Black (HIT-HT-470)" to spray them. Seems to work well.
- Use loads of glue, make sure you have 100 percent coverage on both sides (headliner and fabric).
- Use a good quality glue, like 3M.
- Doing the rear pillar covers or other panels, requires drilling out of plastic welds. Re-glue with a strong flexible glue, like Plastic Weld from JB. Dries slowly but remains slightly flexible and is strong.
- Give yourself loads of extra material on all sides.
- Work in sections, do not spray the whole thing at once (this one is a no-brainer)
- Do not attempt if you're terrible wrapping things in vinyl. Same principles apply here.
Last edited by megacrazy; Sep 28, 2021 at 11:05 AM.
Looks fantastic! I wish my CLK55 had sued headliner. Might have to add it to the build list as the Renntech build is done.
I always found the sunshade a pain in the a$$.
Looks fantastic! I wish my CLK55 had sued headliner. Might have to add it to the build list as the Renntech build is done.
I always found the sunshade a pain in the a$$.
Yup definitely spruces up the interior. When you do it, seeing how clks are only getting older, go with a darker color than stock. Looks much better in my opinion.
Yup definitely spruces up the interior. When you do it, seeing how clks are only getting older, go with a darker color than stock. Looks much better in my opinion.
I have black headliner in both CLK�s. I just wish it was sued and black to give that extra feel.
Mercedes SLR McLaren 722 S Is Extremely Rare Example Modified by McLaren
Slideshow: A one-of-one U.S.-spec Mercedes-Benz SLR McLaren Roadster became even rarer after a factory-backed transformation at McLaren's headquarters.


 . However, the headliner is slowly on its way out, as well as the rear lower side panel trim. In that respect, I bought some suede headliner material and will be taking care of this as soon as the rest of the parts come in. I decided to switch the color to black...or charcoal if the black is too dark, so I have to get dark trim pieces/buttons/etc. I never realized the CLK had handles for the back seats as well. Who even sits in the back? I will be documenting the swap here...for future reference.