


MB E55 Detail Black, WOW

Thread Starter
Almost a Member!
Joined: Sep 2002
Posts: 39
Likes: 0
From: New Jersey
2003 Audi RS6/2002 996TT
MB E55 Detail Black, WOW
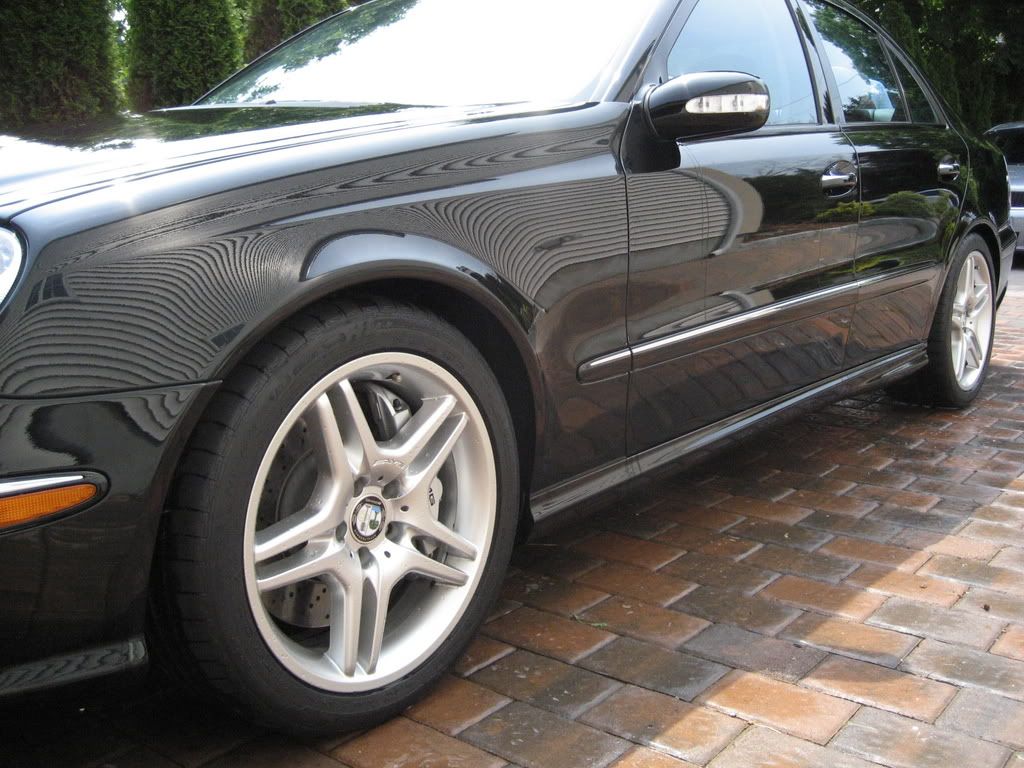
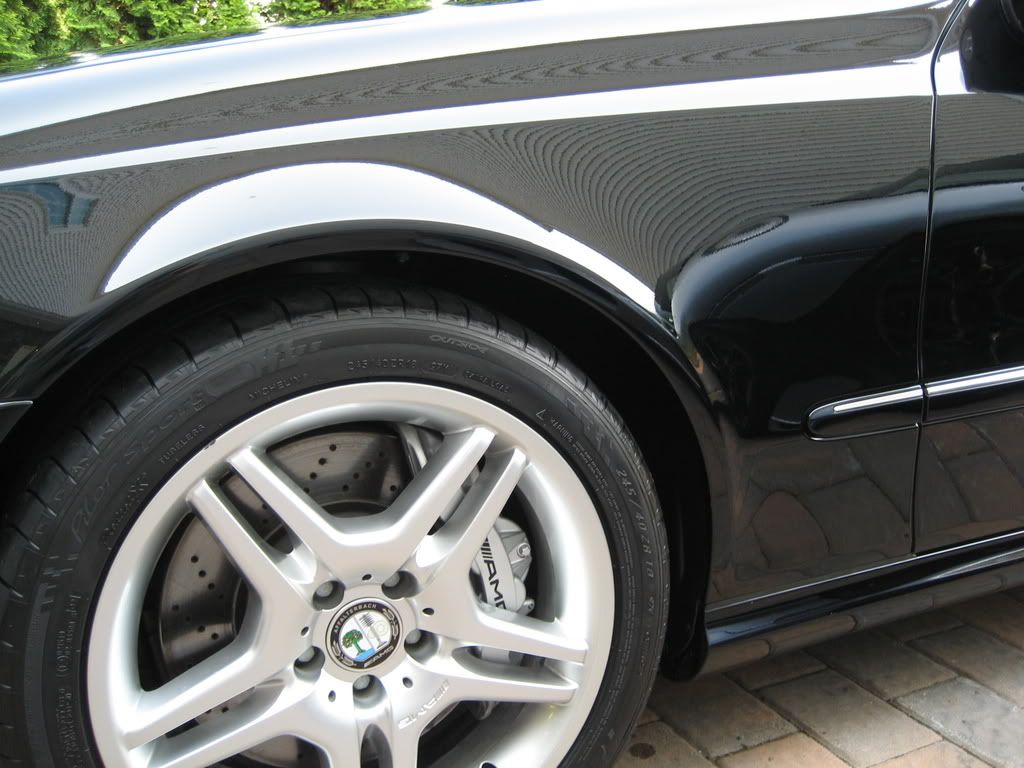
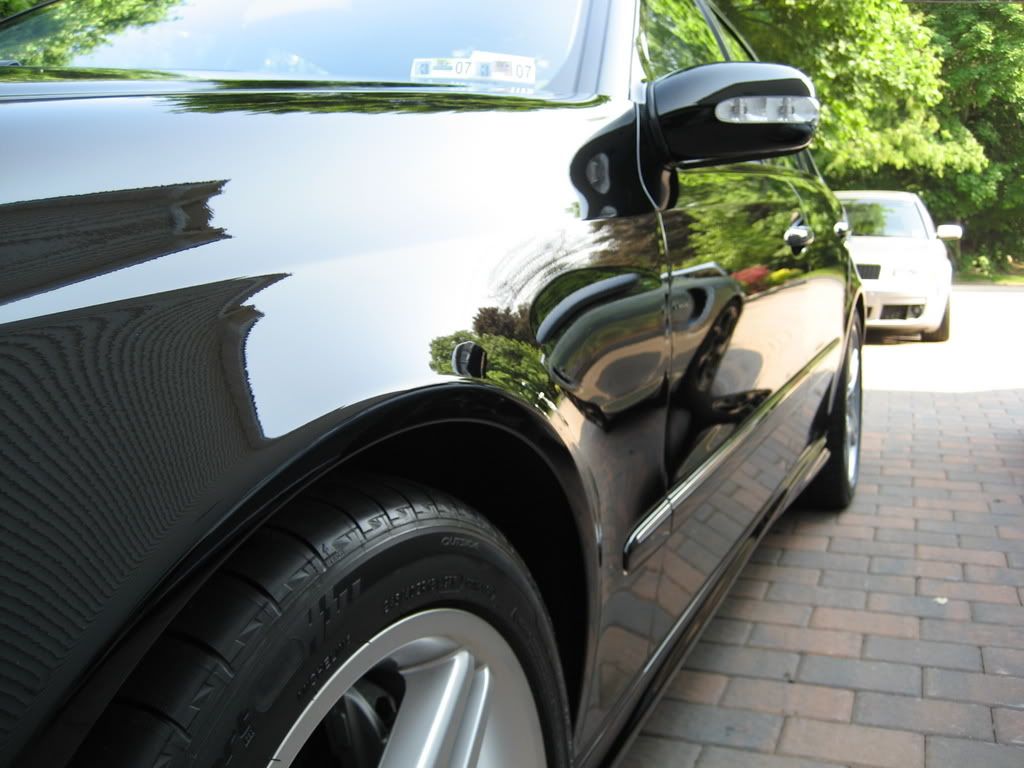
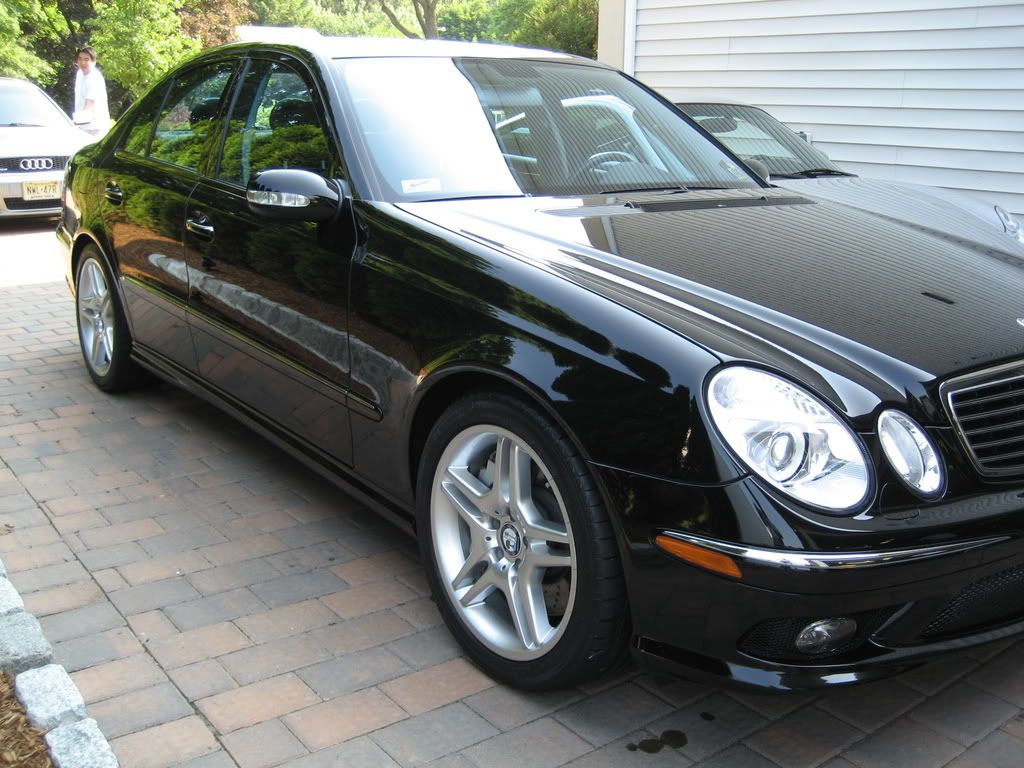
This MB E55 is a beast! Car has 13k a needed some major work, swirls, light scratches, ribbons from the last person that put a machine too it. Pictures are not the best but I'm getting there.
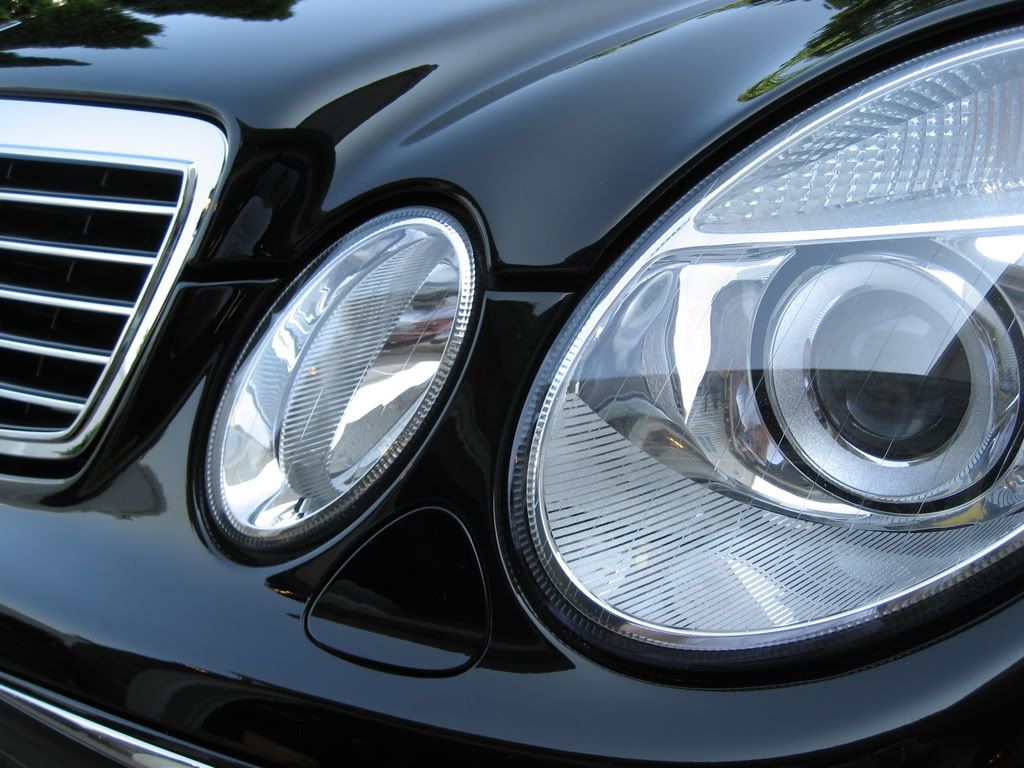
This car came out great!!!!
Enjoy!
Total time 4 hours 30 minutes (2 people on it)
Products used:
Pamolive Dish washing detergent (to remove any and all wax on the car)
Shmitt Wash mitt and Shmitt Wheel mitt
1 Bucket with grit guard
Jumbo Waffle Weave Drying Towel
Microfiber Buffing Towels (about 20-30 used)
Boar's Hair Brush
Spoke brush for the inner wheels
Adam's VRT
Adam's Glass Cleaner
Adam's Detail Spray
Adam's Clay Bar
Menzerna Super Intensive Polish
Menzerna 85rd
Swissol Concorso
Swissol Pre-Cleaner
P21S Wheel Cleaner Gel
P21S Autowash
Metabo (hi speed rotary)
PC
Firehose Nozzle
Edge pad blue, green, yellow 6 inch
1Z Einszett Leather conditioner/cleaner
1Z Einszett Cockpit
1Z Einszett Detail Spray
Procedure:
1. Rinsed down the wheels (they were cool enough to touch)
2. Sprayed down the wheels with some P21S Wheel Cleaner Gel
3. Brush and cleaned the wheels with a Boar's Hair Brush
4. Rinsed down the wheels
5. Filled the bucket with water and soap
6. Used the Shmitt to wash the car, from top to hood to sides to rear.
cleaning the Shmitt after each panel was soaped up by dunking it in the bucket with the grit guard at the bottom, rinse and clean the pad and continue on to the next panel repeat till you finish washing each panel.
7. After you wash the car rinse car off throughly
8. Dried the car with a Waffle Weave Drying Towel
9. Used 3M adhesive remover to remove the leftover adhesive from customer debadging his car.
10. Used Adam's Detail Spray and Adam's Clay bar to clay the entire car
11. Used the Metabo with the Menzerna SIP and the E2K green and yellow pads to polish out all the imperfections.
12. Used the Metabo with Menzerna 85RD with the E2K blue pad to polish out the car to a mirror finish.
13. Applied the Swissol Pre Cleaner (needed for the Swissol wax to bond to the car)
14. Removed Pre Cleaner
15. Applied and removed Swissol Concorso (applied with bare hands) (WOW amazing a super wet/deep/shine....)
16. Cleaned up the windows with Adam's Glass Cleaner (interior/exterior)
17. Dressed the tires with Adam's VRT (did one pass on the applicator and did a pass using the dry side as the customer prefers a matte finish)
18. Used 1Z Detail Spray to do a final wipe down on the wheels.
19. Used the 1Z Detail Spray for a final wipe down on the car.
Interior: (sorry no pics)
1. Wiped down the door jambs with 1Z detail spray
2. Vacuumed the mats, carpet, etc.
3. Wiped down the interior and used 1Z Leather Cleaner/Conditioner (applied with a MF Applicator pad 1 pass to apply the next pass on the dry side to wipe to a matte finish, no shine for this customer)
4. Wiped down the dash with 1Z Cockpit
5. Cleaned the glass
6. Wiped down the jambs with 1Z einszett detail spray.
7. Applied Swissvax to the jambs.
Engine: (sorry no pics)
Engine cleaning was done after the wheels, as the engine was still warm
1. Rinsed down the engine
2. Sprayed some P21S Autowash on the engine
3. Brushed the dirt and grime off the engine with a boar's hair brush
4. Sprayed down engine to rinse the P21S off
5. Closed the rear hatch and let it dry
6. Wiped down the jambs and the metal parts with 1Z einszett detail spray.
Before:

After Wash:
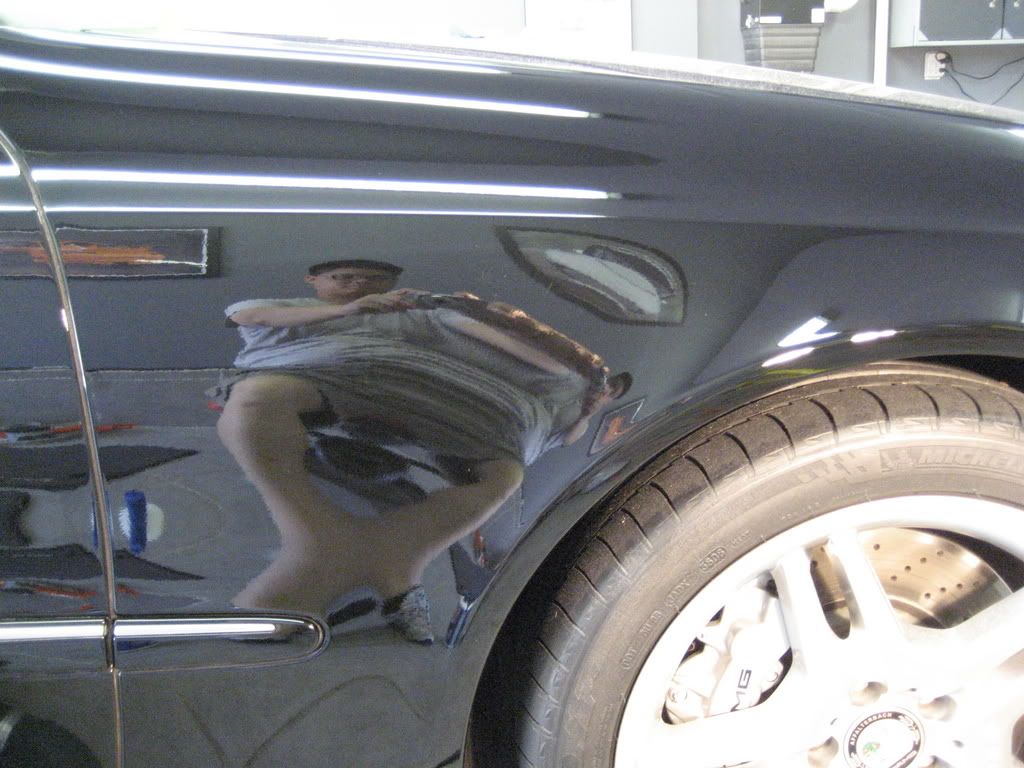
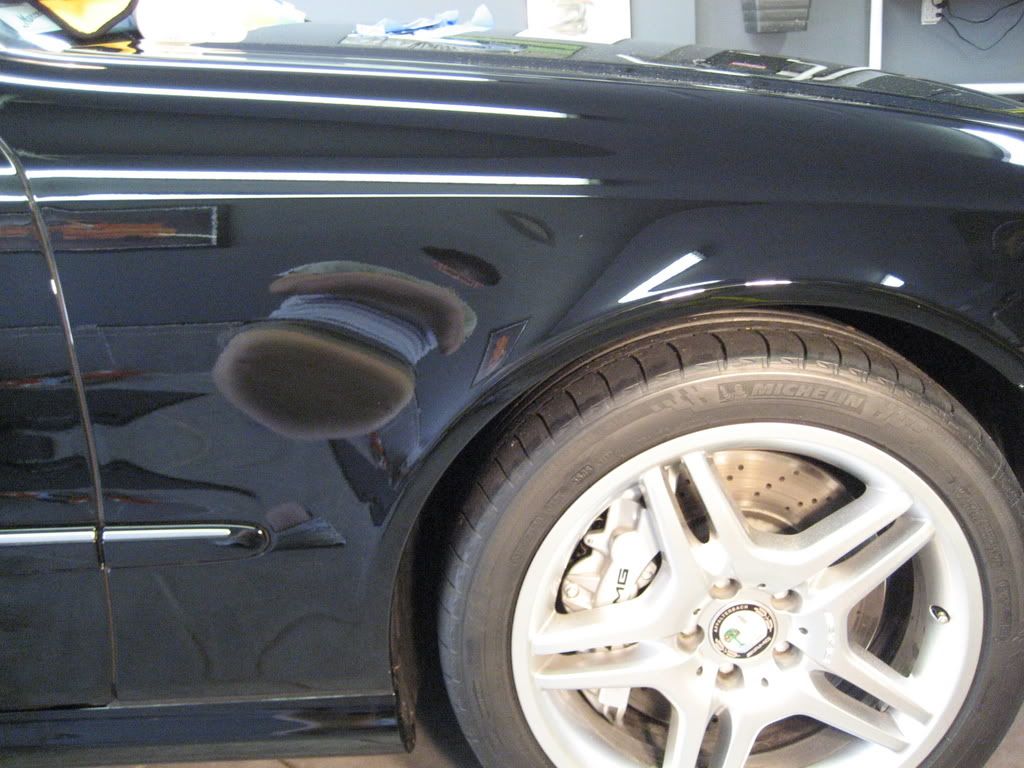
Before right fender: (notice the leftover adhesive from the debadging)
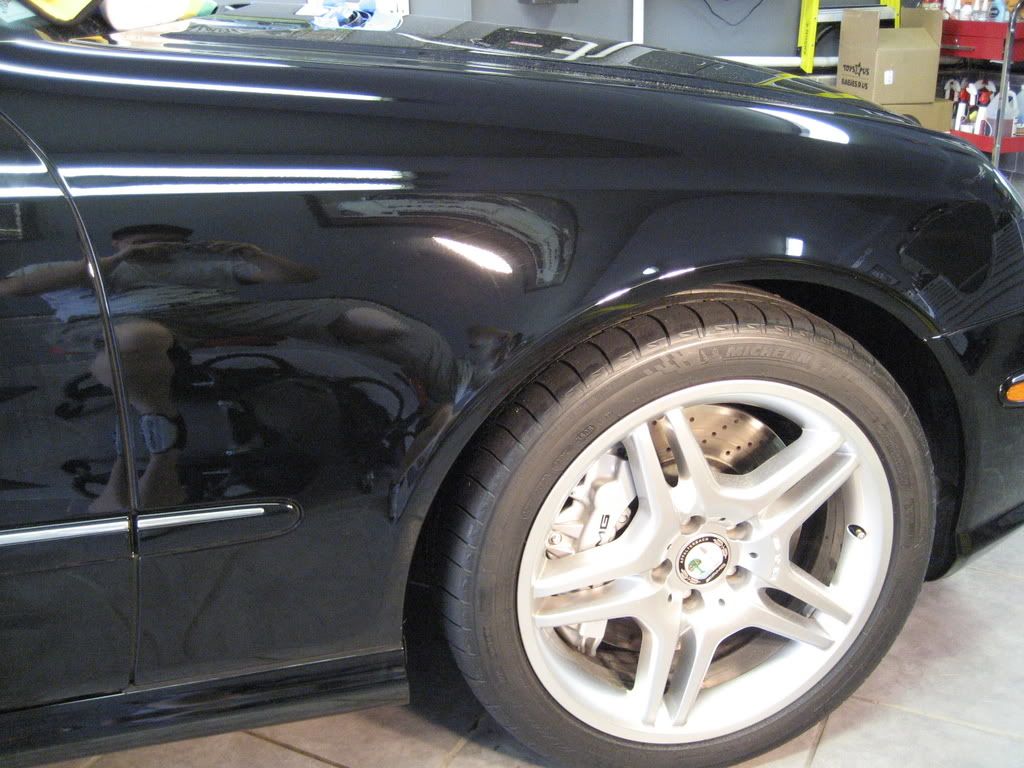
Right fender after wash after clay:
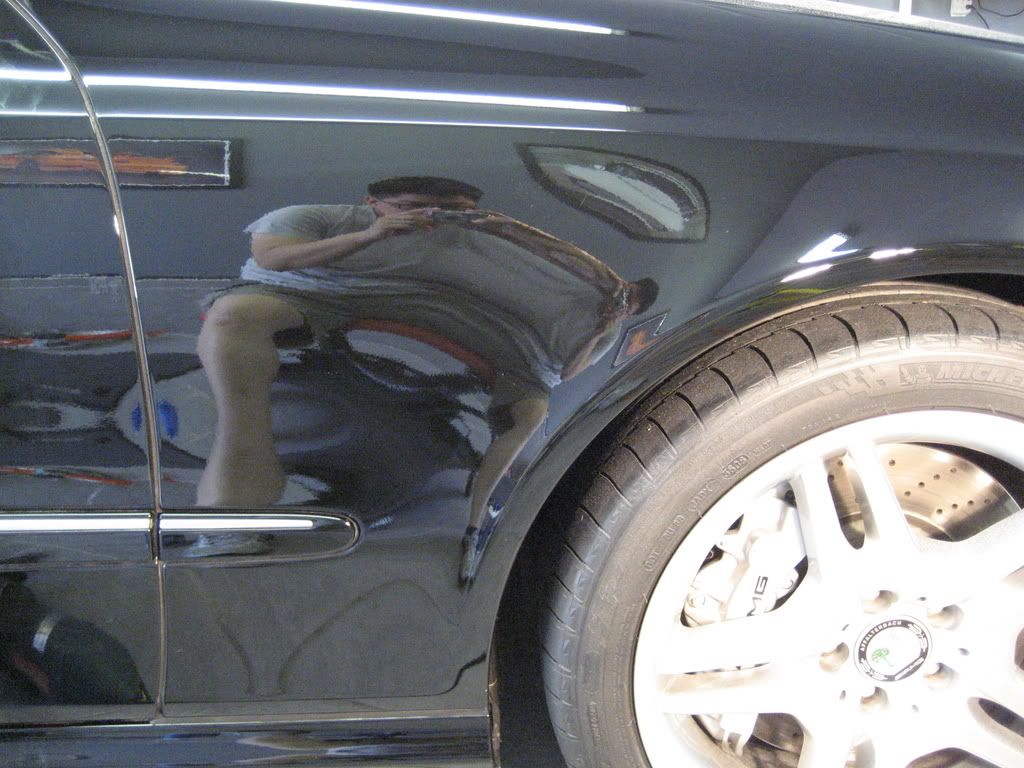
Right fender after a pass or 2 with Menzerna SIP using yellow E2K pad:
Right fender after a couple passes with Menzerna SIP using green E2K pad:
Right fender after a couple passes with Menzerna 85rd using blue E2K pad:
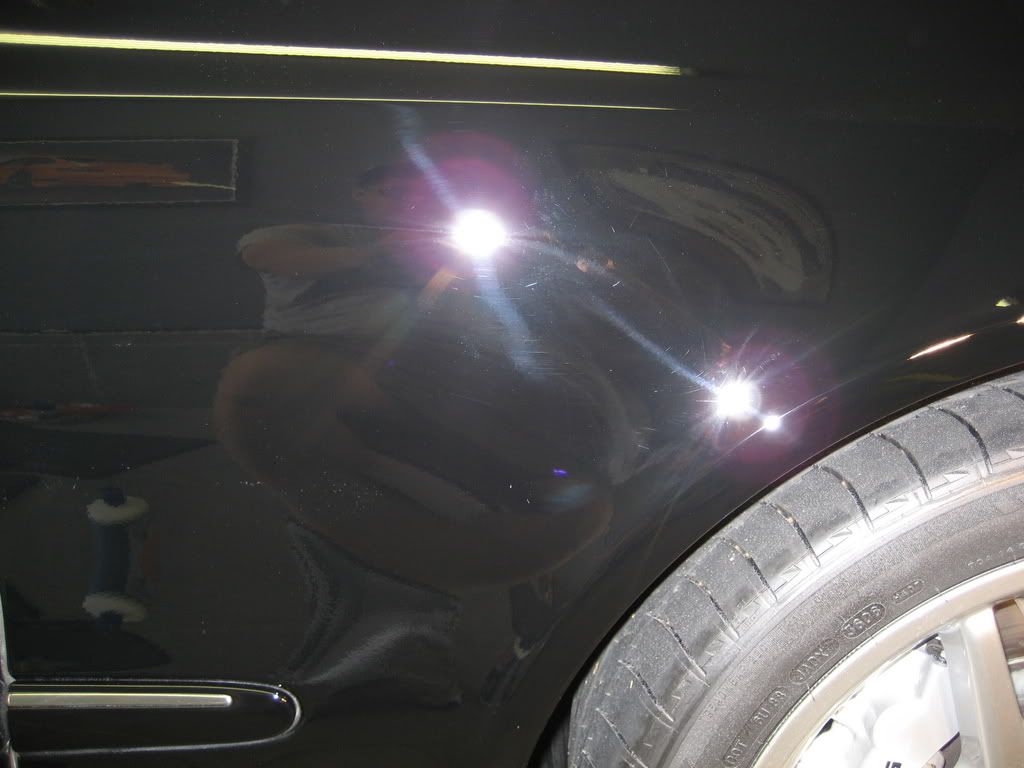
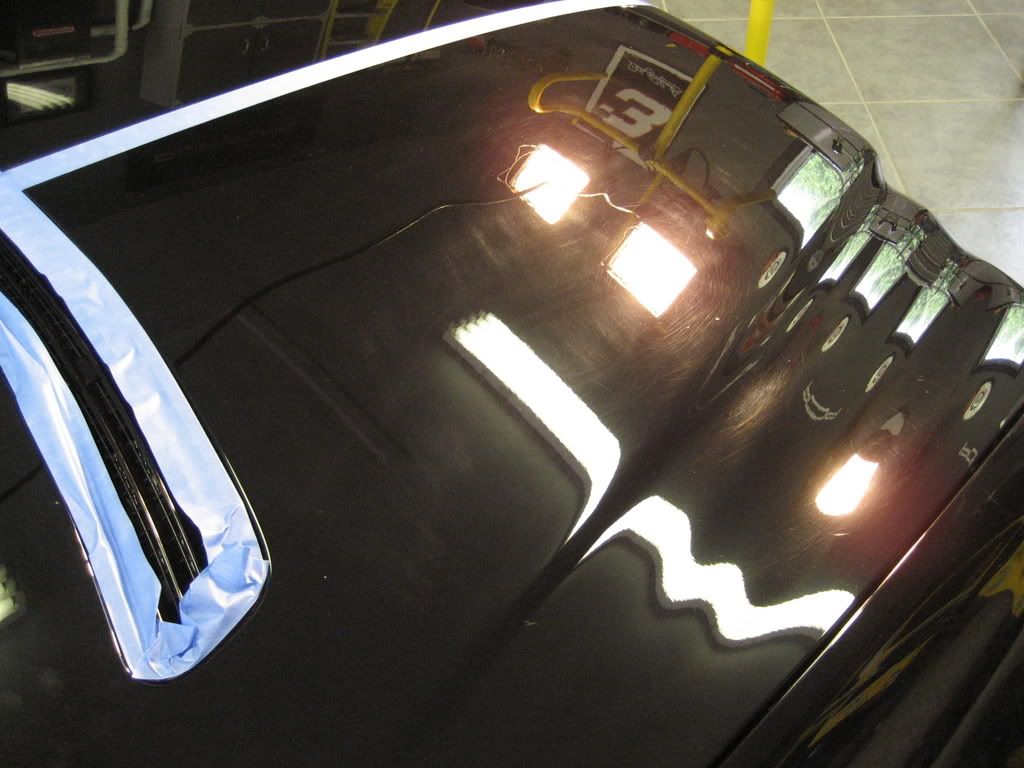
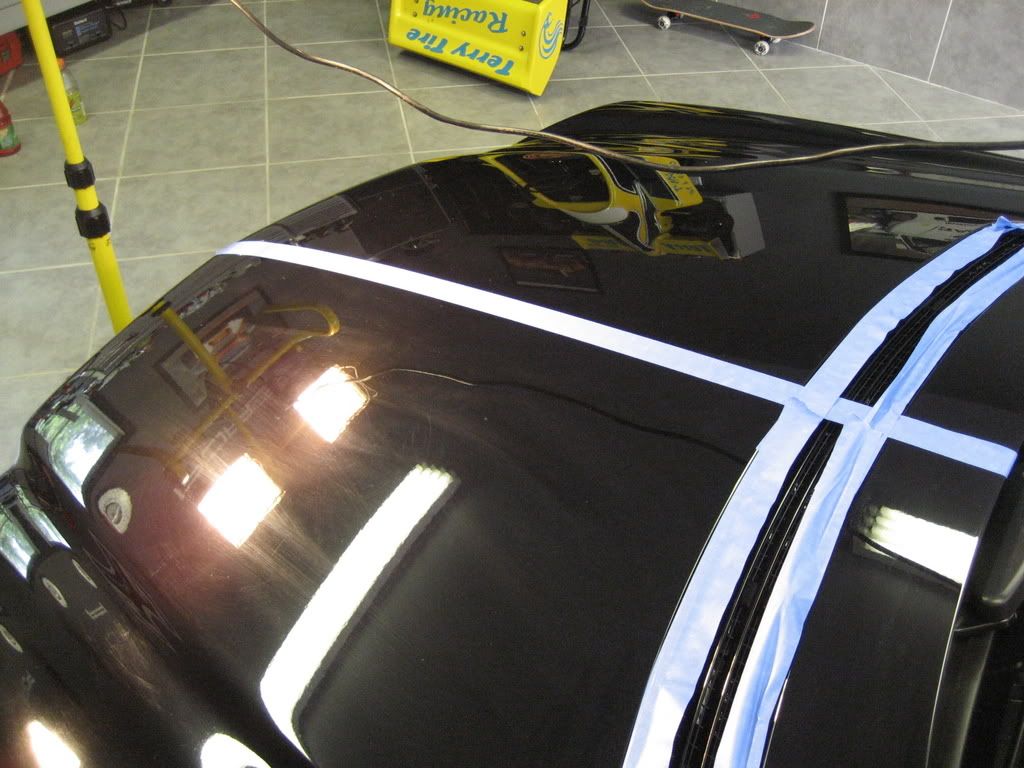
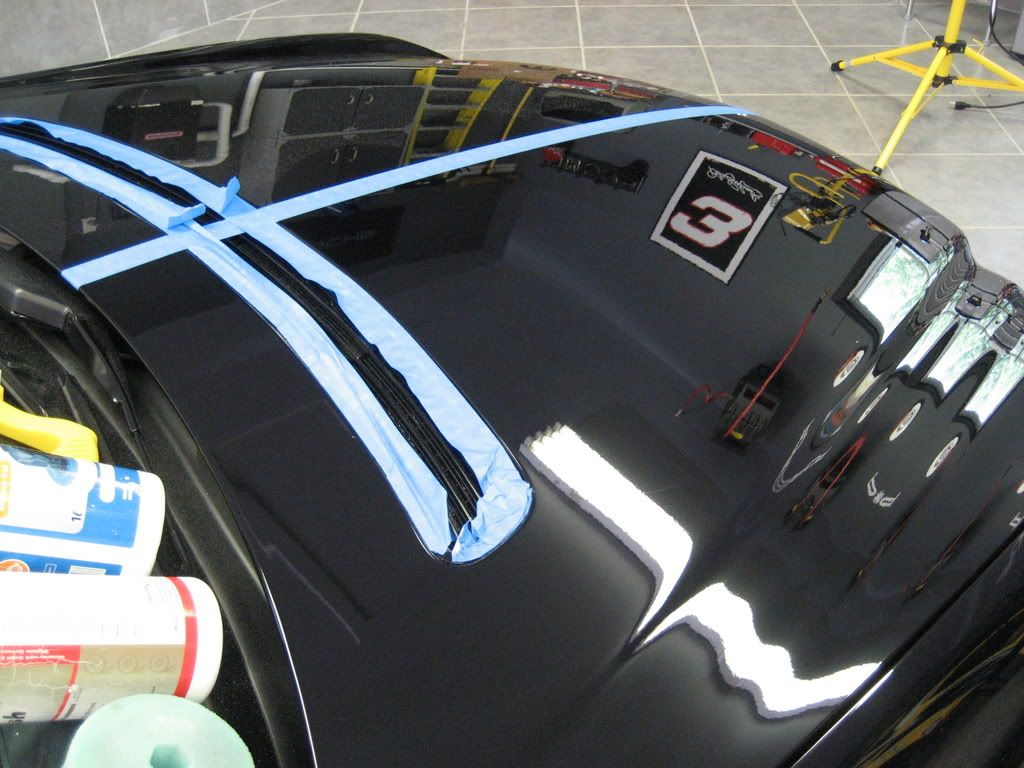
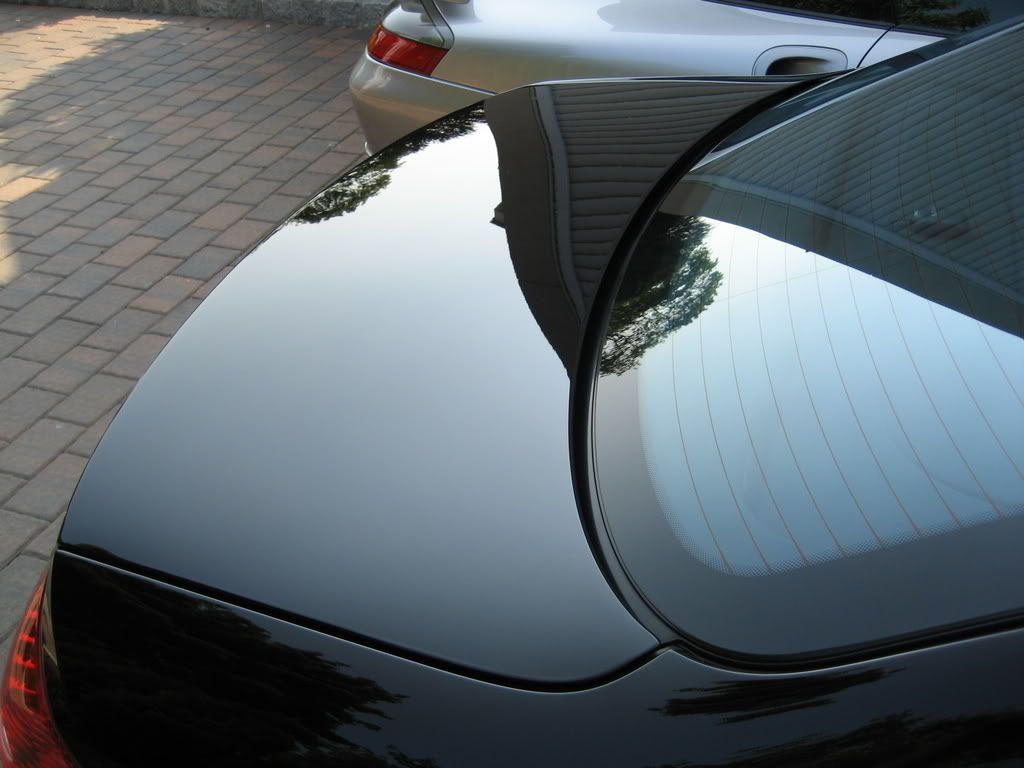
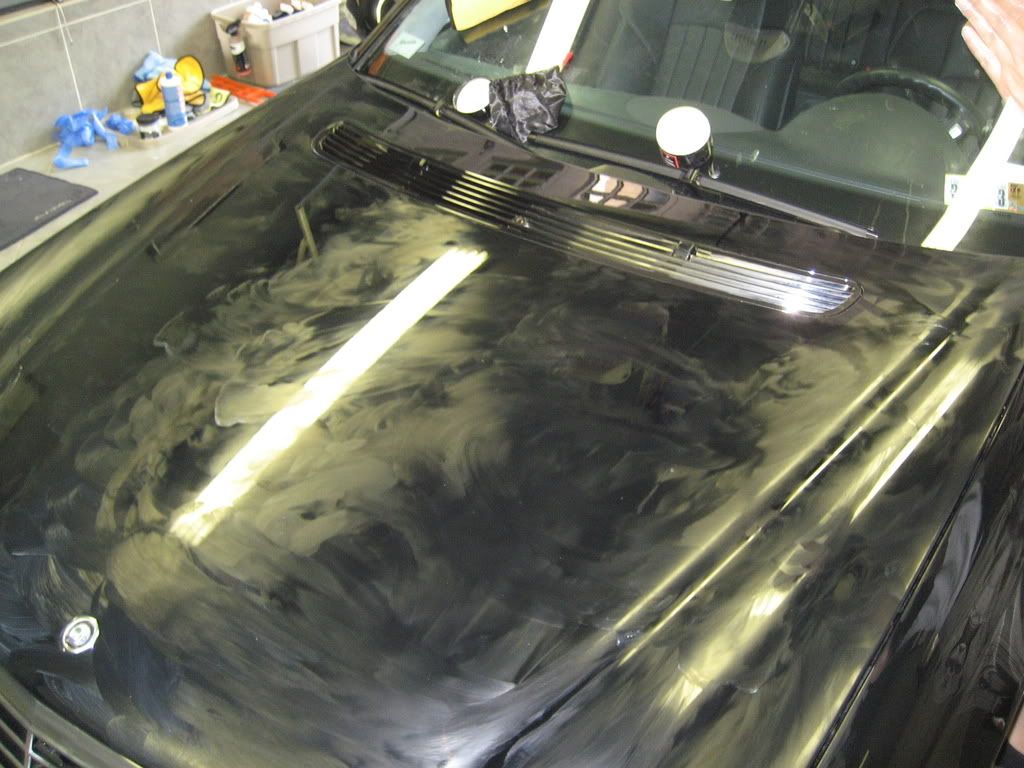
Hood shots before wash:

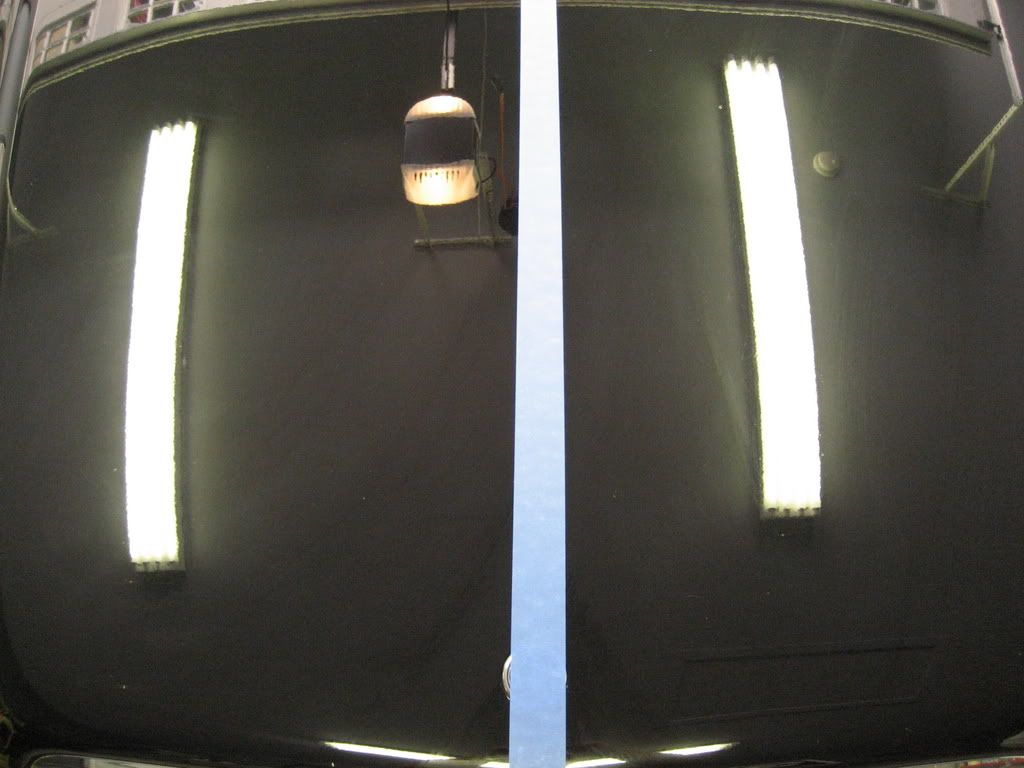
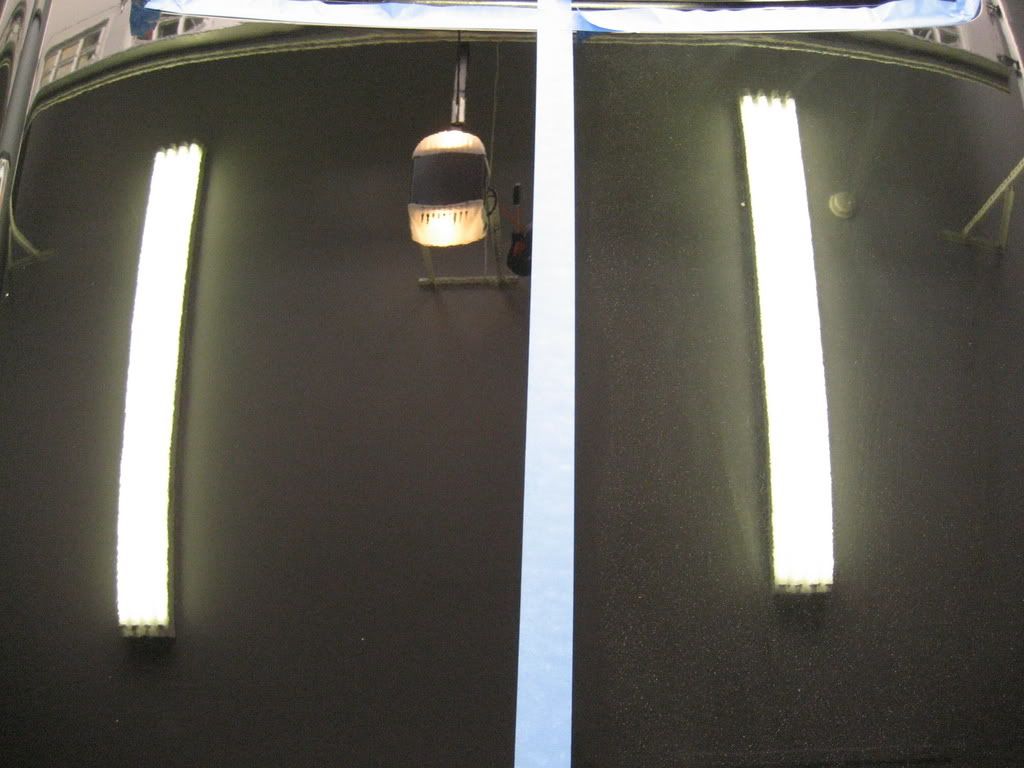
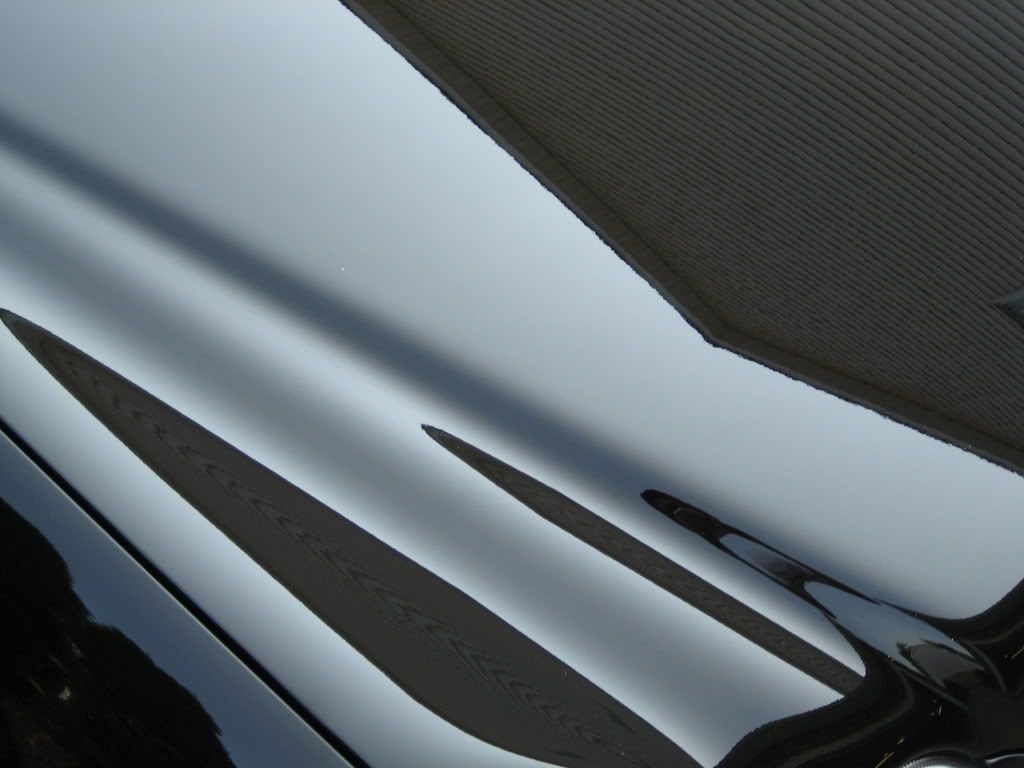
Split shot of hood:
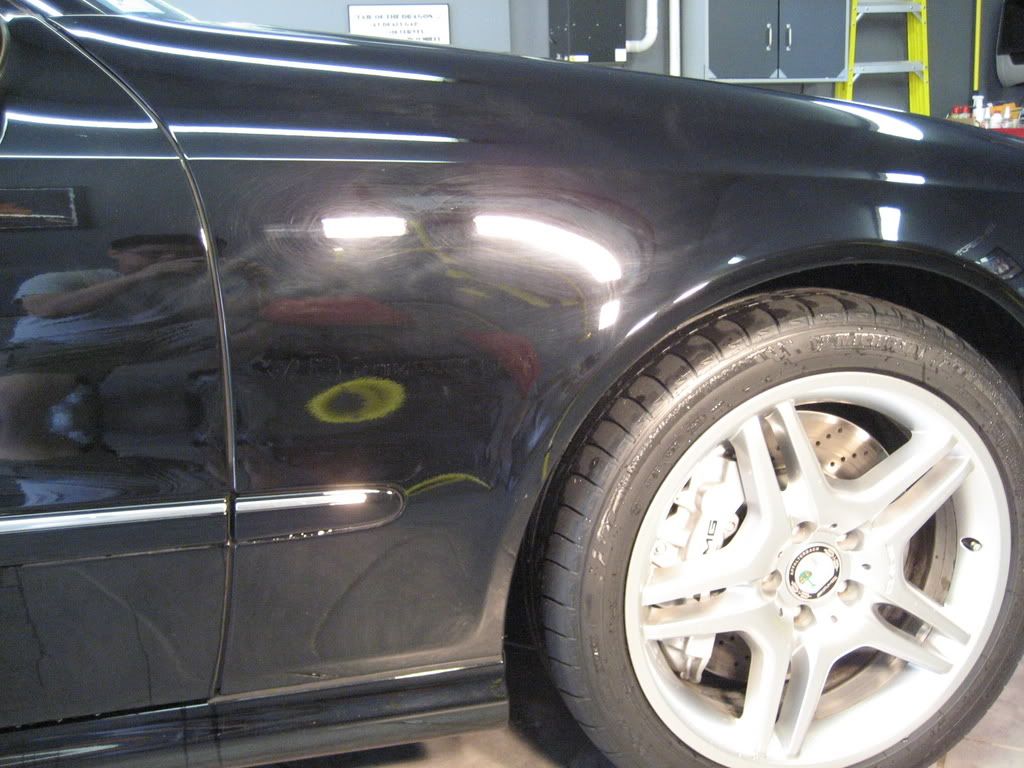
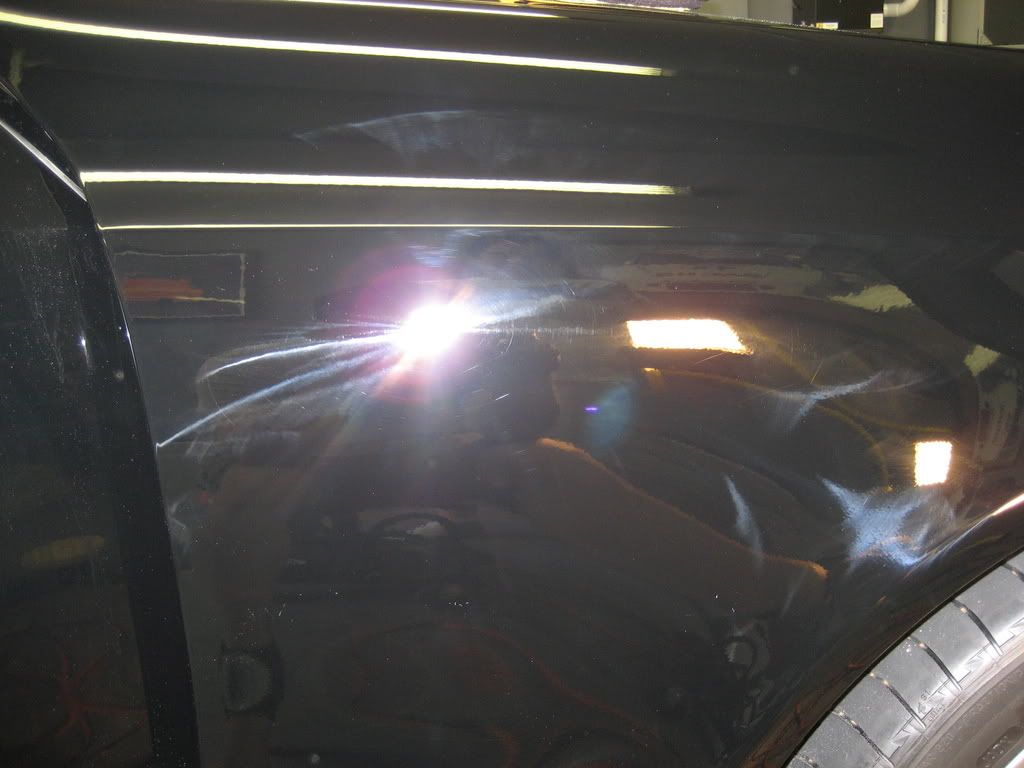
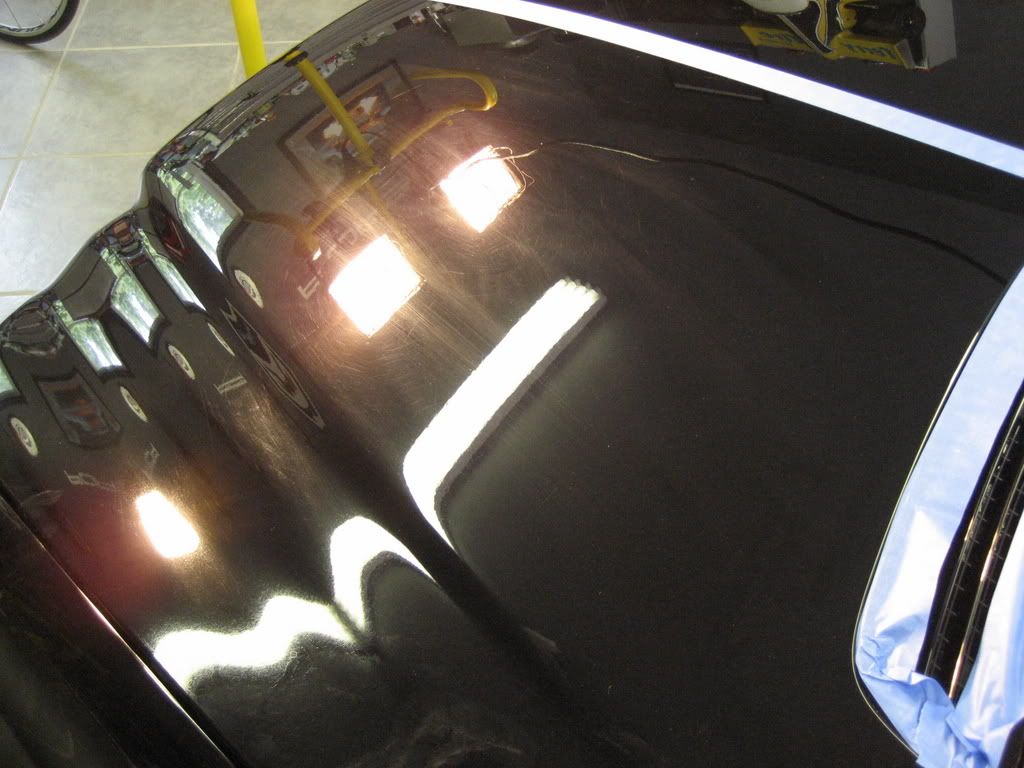
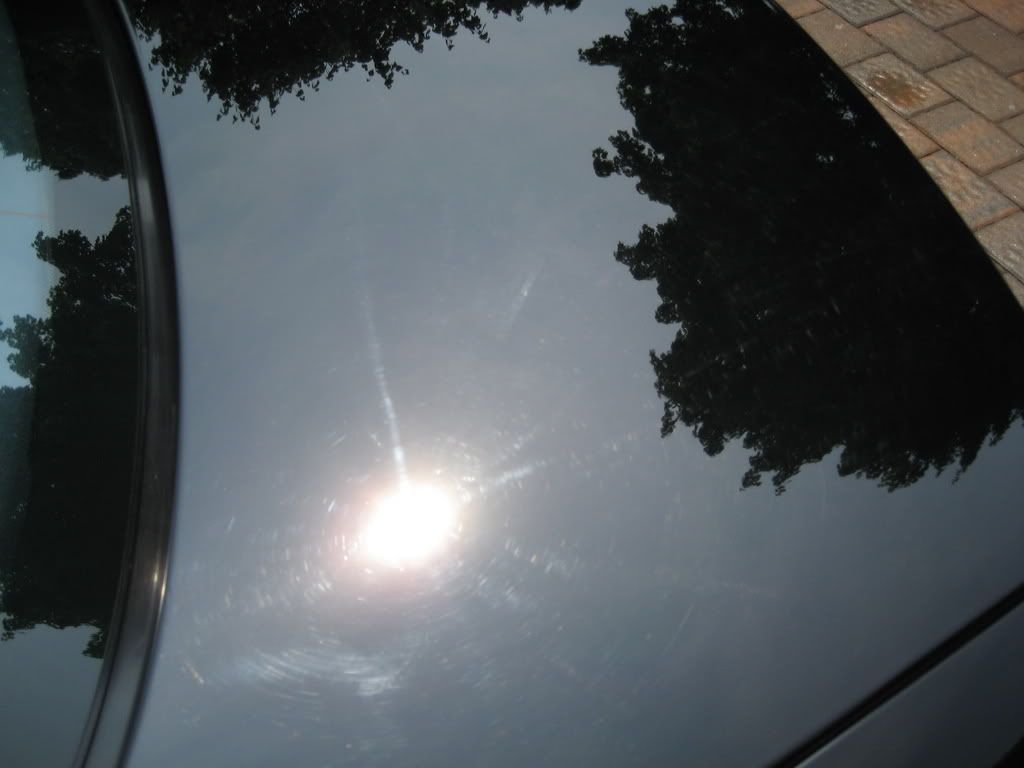
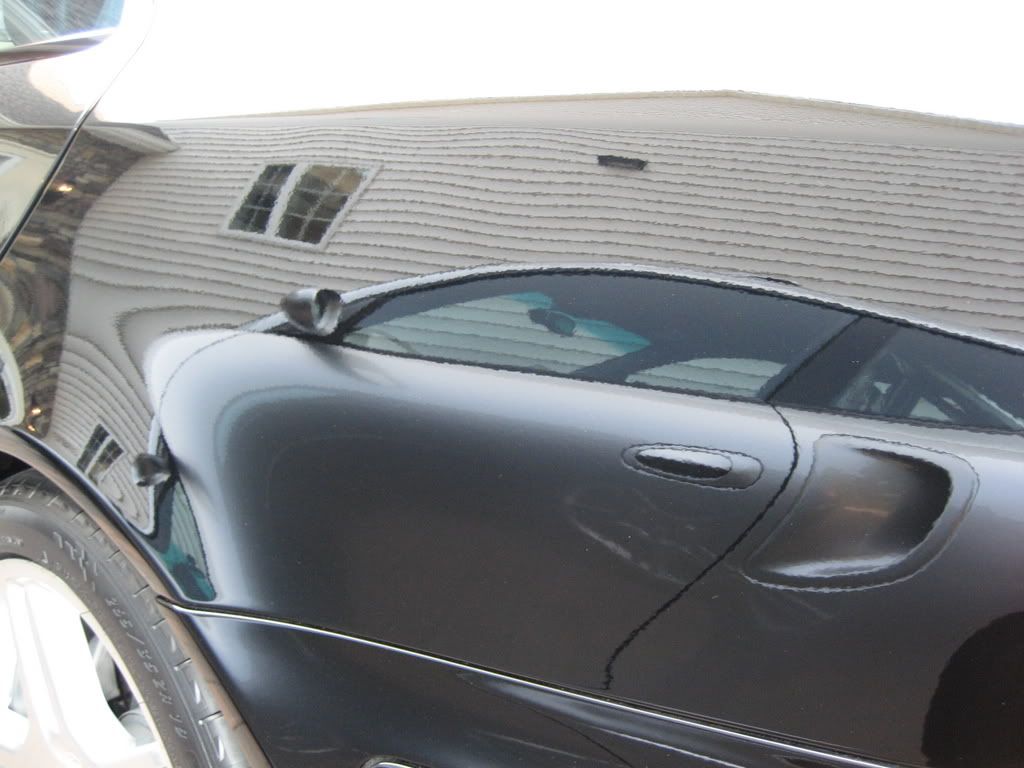
Better shots of what needed to be corrected:
This car came out great!!!!
Enjoy!
Total time 4 hours 30 minutes (2 people on it)
Products used:
Pamolive Dish washing detergent (to remove any and all wax on the car)
Shmitt Wash mitt and Shmitt Wheel mitt
1 Bucket with grit guard
Jumbo Waffle Weave Drying Towel
Microfiber Buffing Towels (about 20-30 used)
Boar's Hair Brush
Spoke brush for the inner wheels
Adam's VRT
Adam's Glass Cleaner
Adam's Detail Spray
Adam's Clay Bar
Menzerna Super Intensive Polish
Menzerna 85rd
Swissol Concorso
Swissol Pre-Cleaner
P21S Wheel Cleaner Gel
P21S Autowash
Metabo (hi speed rotary)
PC
Firehose Nozzle
Edge pad blue, green, yellow 6 inch
1Z Einszett Leather conditioner/cleaner
1Z Einszett Cockpit
1Z Einszett Detail Spray
Procedure:
1. Rinsed down the wheels (they were cool enough to touch)
2. Sprayed down the wheels with some P21S Wheel Cleaner Gel
3. Brush and cleaned the wheels with a Boar's Hair Brush
4. Rinsed down the wheels
5. Filled the bucket with water and soap
6. Used the Shmitt to wash the car, from top to hood to sides to rear.
cleaning the Shmitt after each panel was soaped up by dunking it in the bucket with the grit guard at the bottom, rinse and clean the pad and continue on to the next panel repeat till you finish washing each panel.
7. After you wash the car rinse car off throughly
8. Dried the car with a Waffle Weave Drying Towel
9. Used 3M adhesive remover to remove the leftover adhesive from customer debadging his car.
10. Used Adam's Detail Spray and Adam's Clay bar to clay the entire car
11. Used the Metabo with the Menzerna SIP and the E2K green and yellow pads to polish out all the imperfections.
12. Used the Metabo with Menzerna 85RD with the E2K blue pad to polish out the car to a mirror finish.
13. Applied the Swissol Pre Cleaner (needed for the Swissol wax to bond to the car)
14. Removed Pre Cleaner
15. Applied and removed Swissol Concorso (applied with bare hands) (WOW amazing a super wet/deep/shine....)
16. Cleaned up the windows with Adam's Glass Cleaner (interior/exterior)
17. Dressed the tires with Adam's VRT (did one pass on the applicator and did a pass using the dry side as the customer prefers a matte finish)
18. Used 1Z Detail Spray to do a final wipe down on the wheels.
19. Used the 1Z Detail Spray for a final wipe down on the car.
Interior: (sorry no pics)
1. Wiped down the door jambs with 1Z detail spray
2. Vacuumed the mats, carpet, etc.
3. Wiped down the interior and used 1Z Leather Cleaner/Conditioner (applied with a MF Applicator pad 1 pass to apply the next pass on the dry side to wipe to a matte finish, no shine for this customer)
4. Wiped down the dash with 1Z Cockpit
5. Cleaned the glass
6. Wiped down the jambs with 1Z einszett detail spray.
7. Applied Swissvax to the jambs.
Engine: (sorry no pics)
Engine cleaning was done after the wheels, as the engine was still warm
1. Rinsed down the engine
2. Sprayed some P21S Autowash on the engine
3. Brushed the dirt and grime off the engine with a boar's hair brush
4. Sprayed down engine to rinse the P21S off
5. Closed the rear hatch and let it dry
6. Wiped down the jambs and the metal parts with 1Z einszett detail spray.
Before:
After Wash:
Before right fender: (notice the leftover adhesive from the debadging)
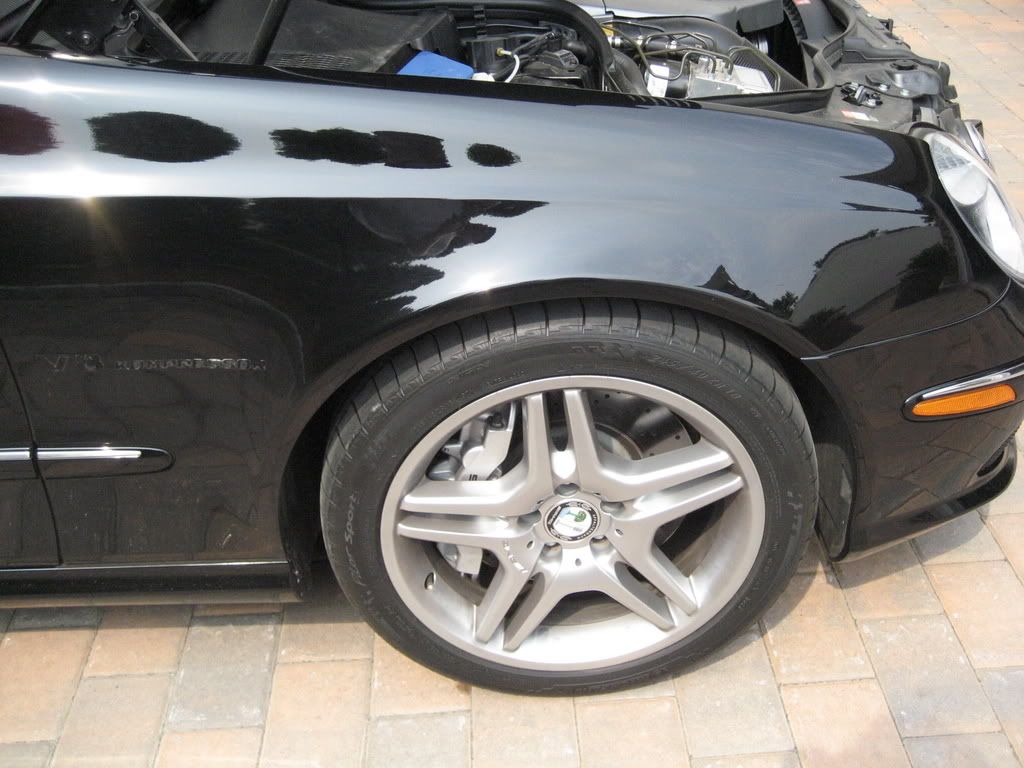
Right fender after wash after clay:
Right fender after a pass or 2 with Menzerna SIP using yellow E2K pad:
Right fender after a couple passes with Menzerna SIP using green E2K pad:
Right fender after a couple passes with Menzerna 85rd using blue E2K pad:
Hood shots before wash:
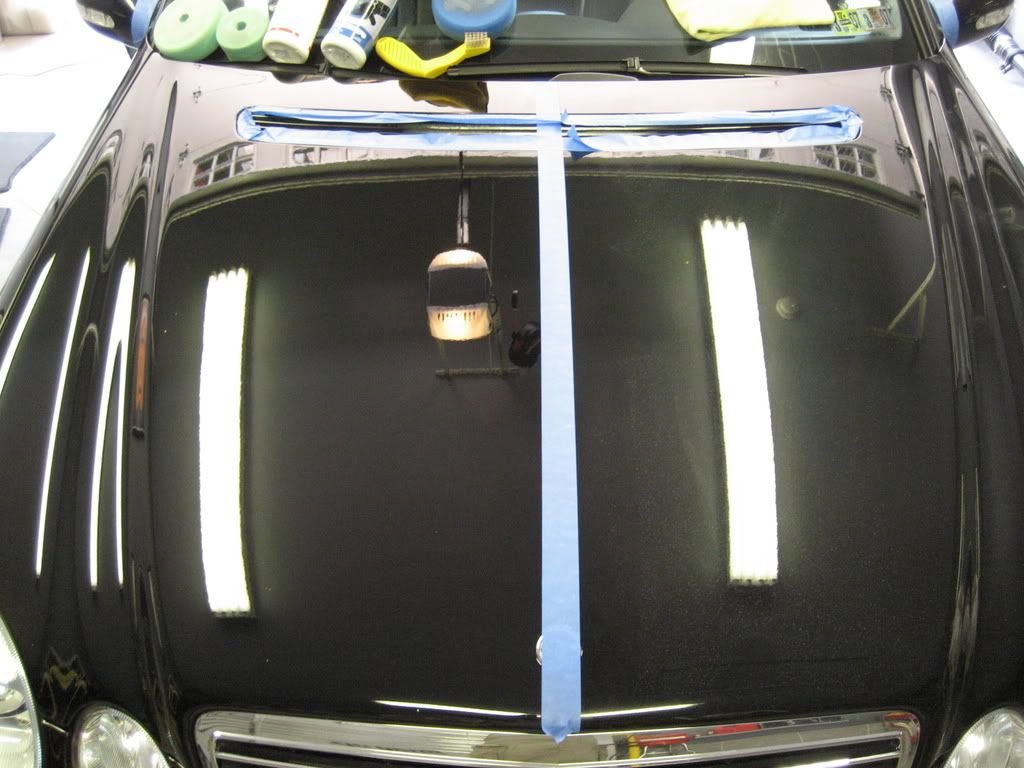
Split shot of hood:
Better shots of what needed to be corrected:
Thread Starter
Almost a Member!
Joined: Sep 2002
Posts: 39
Likes: 0
From: New Jersey
2003 Audi RS6/2002 996TT
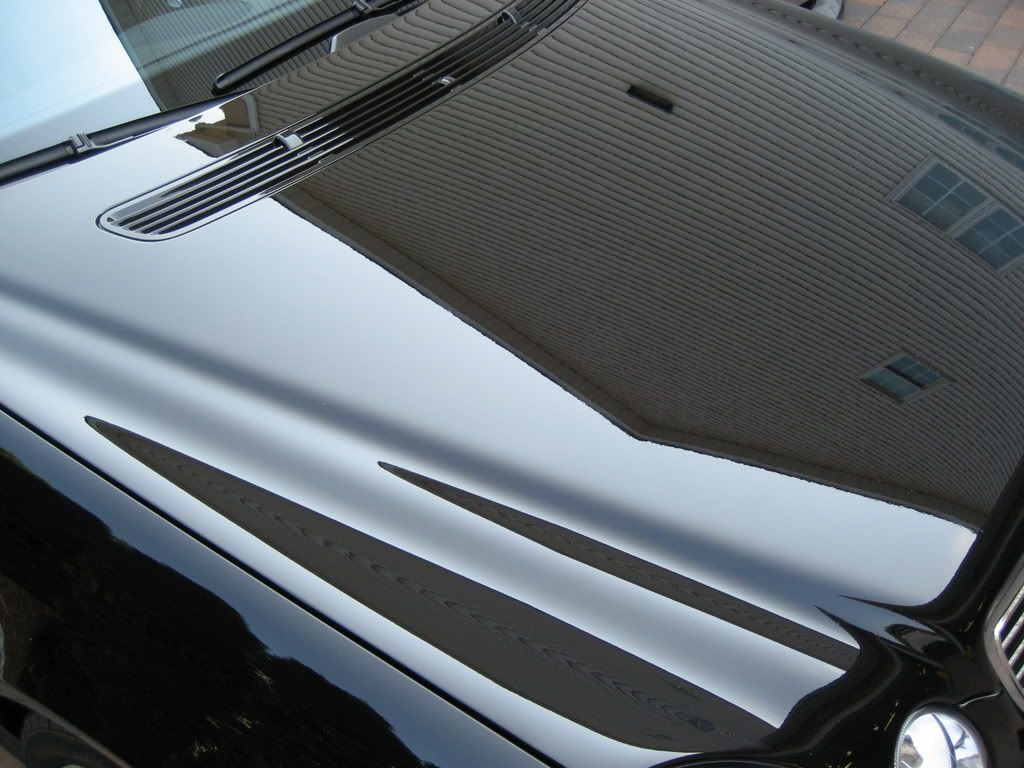
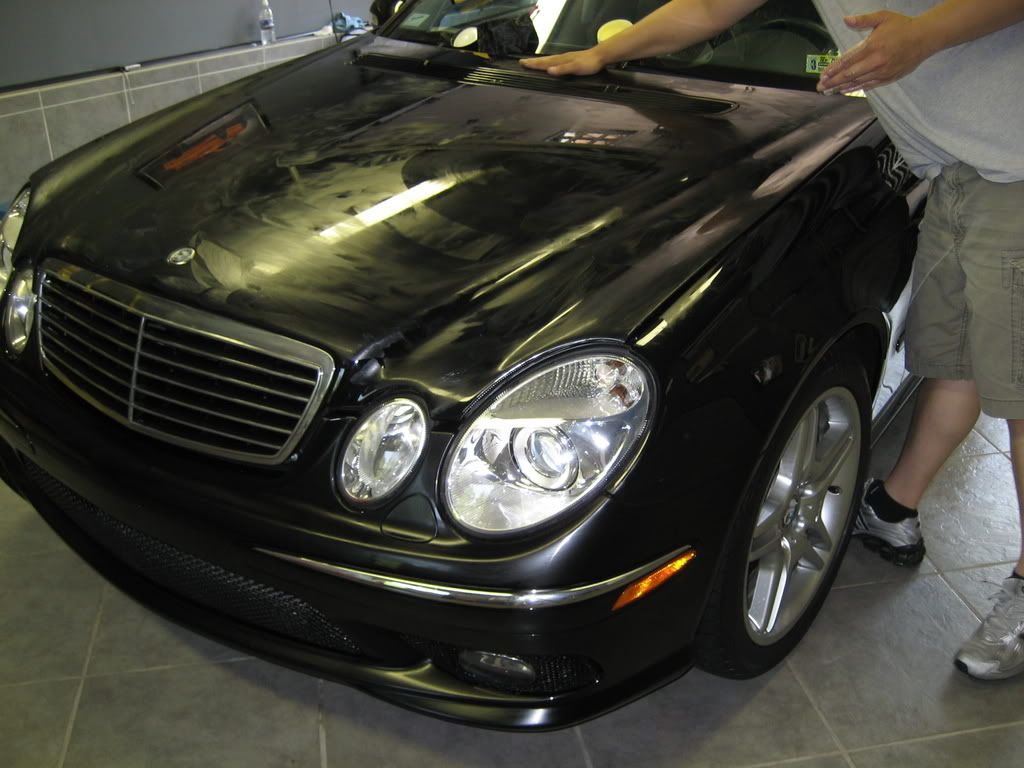
Passenger side of hood corrected:
After hood outside:
Trunk shot before:
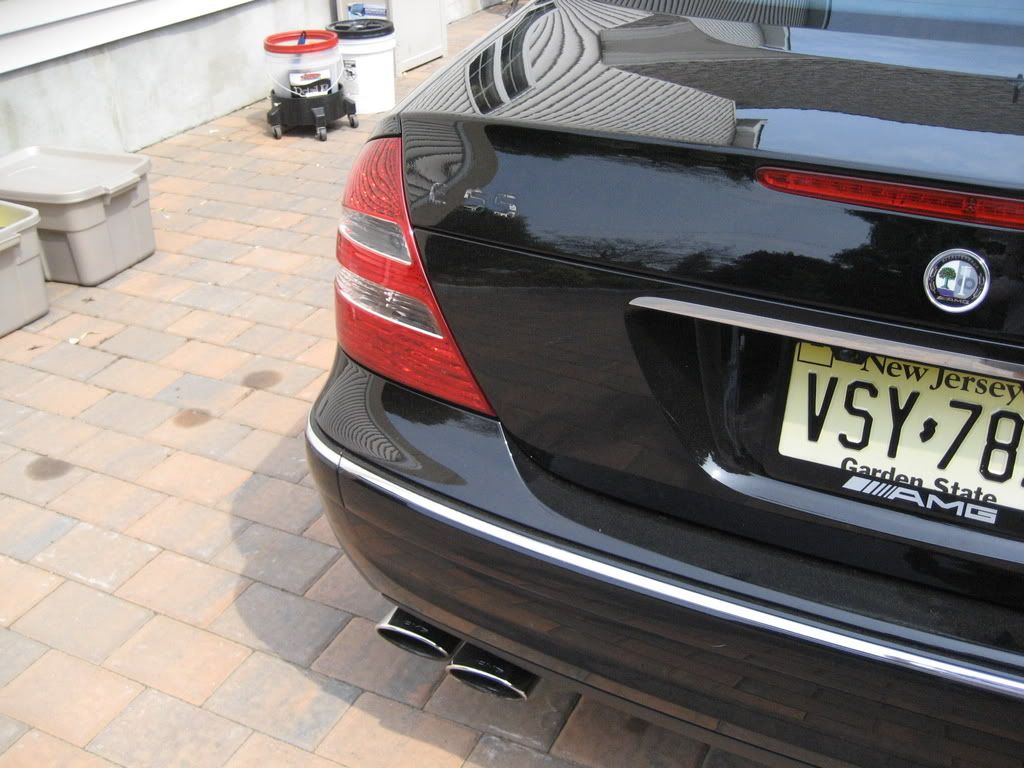
Trunk shot after:

Trunk shot after outside:

Debadging before:
Debadged area after:
After hood outside:
Trunk shot before:
Trunk shot after:
Trunk shot after outside:
Debadging before:
Debadged area after:
Thread Starter
Almost a Member!
Joined: Sep 2002
Posts: 39
Likes: 0
From: New Jersey
2003 Audi RS6/2002 996TT
Swissvax Concorso being applied (prior to this we used Swissvax Cleaner Fluid to set up the paint for the wax)
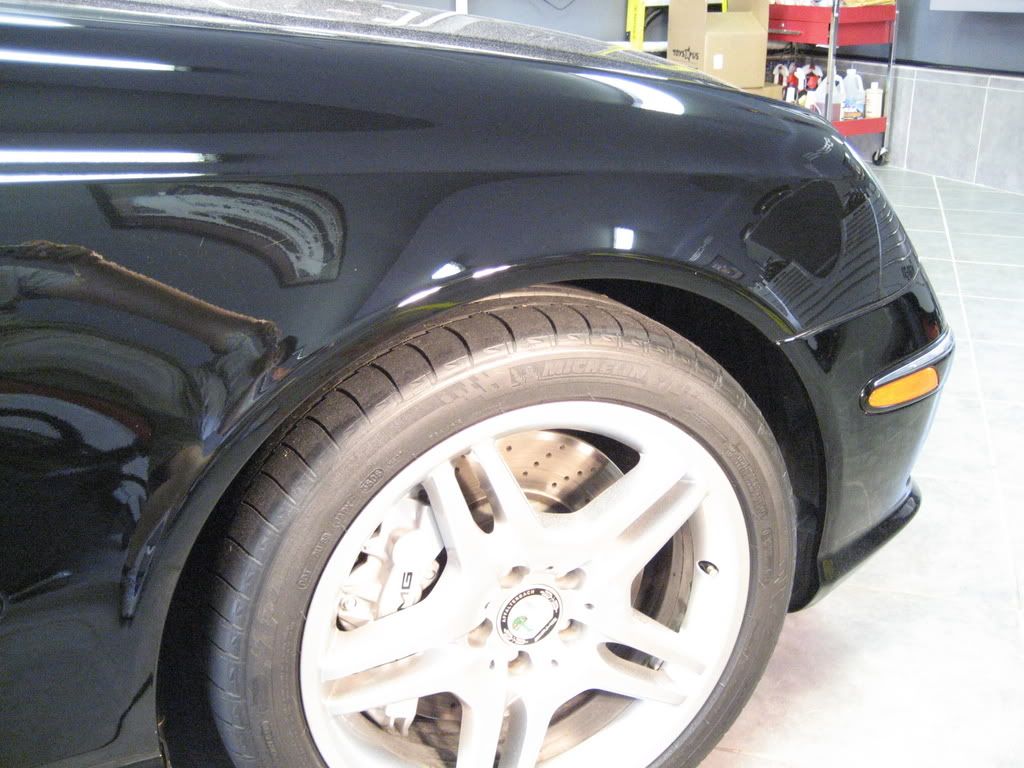
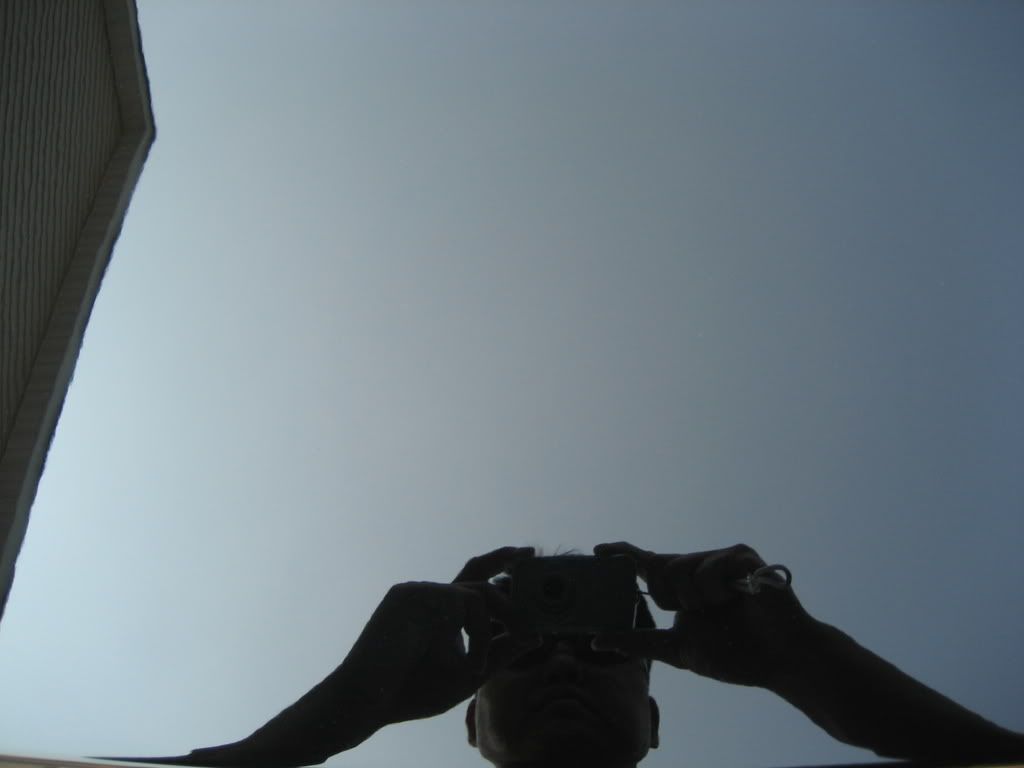
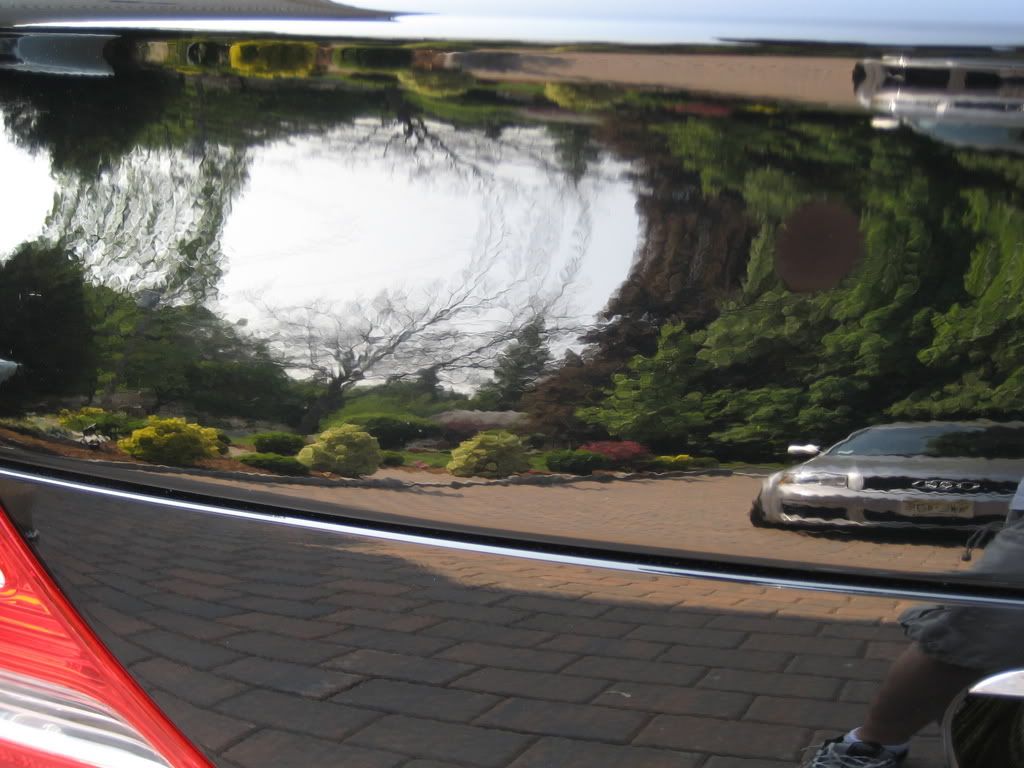
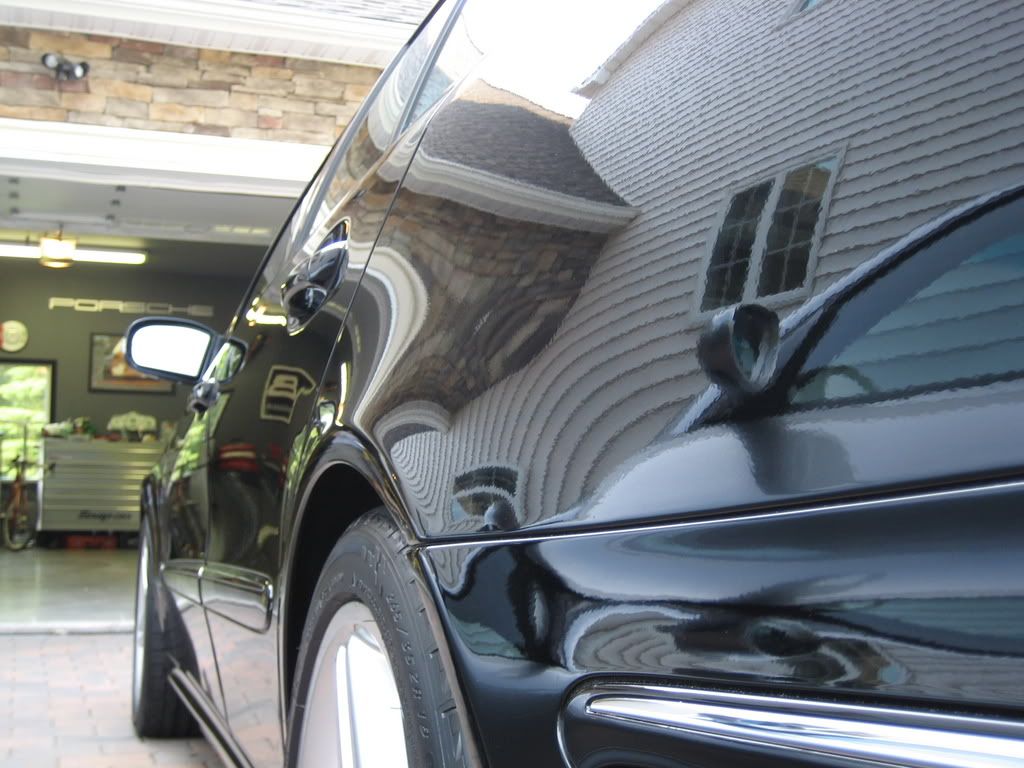
Hood after the Swissvax Concorso:
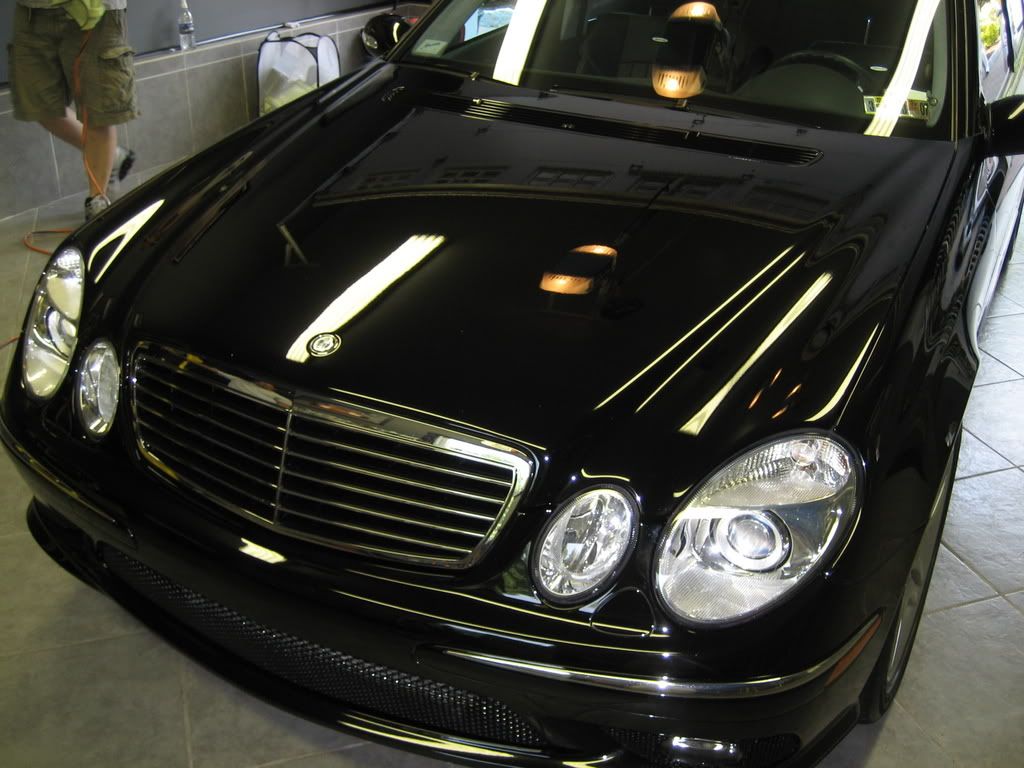
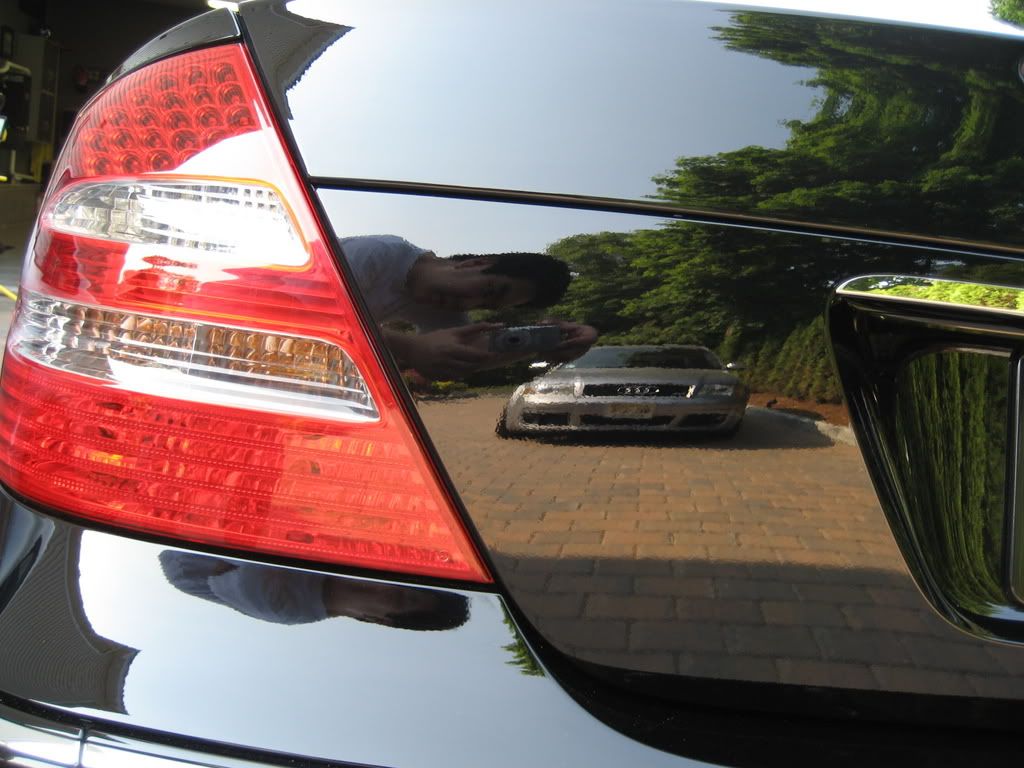
The rest of the after shots:
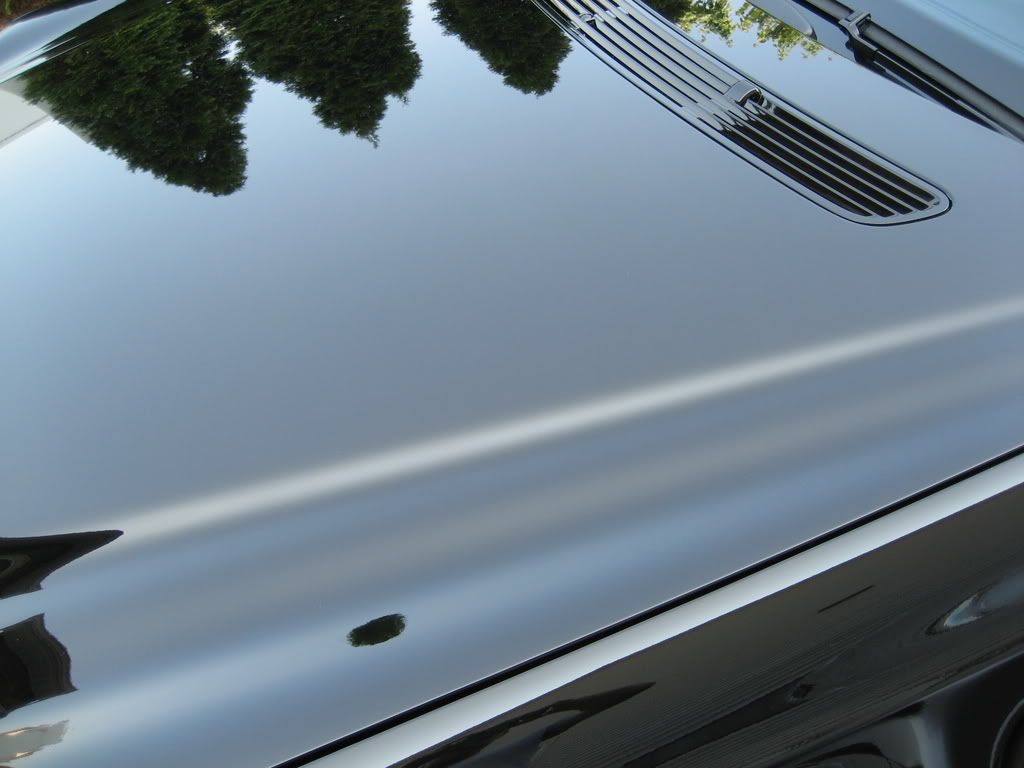
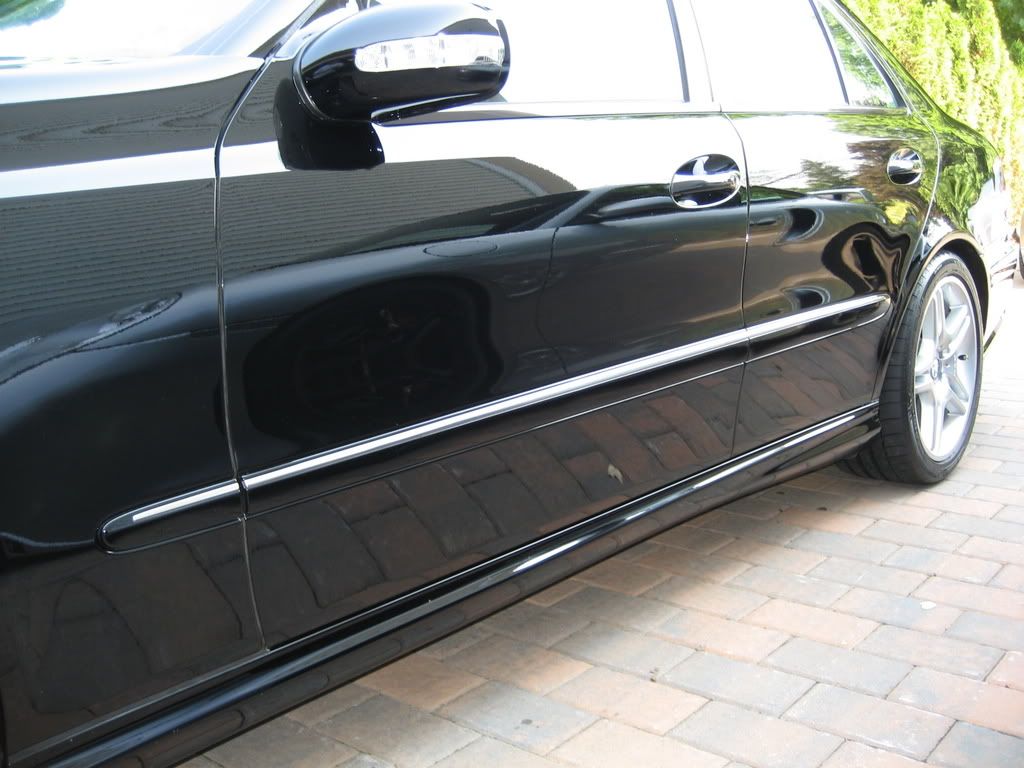
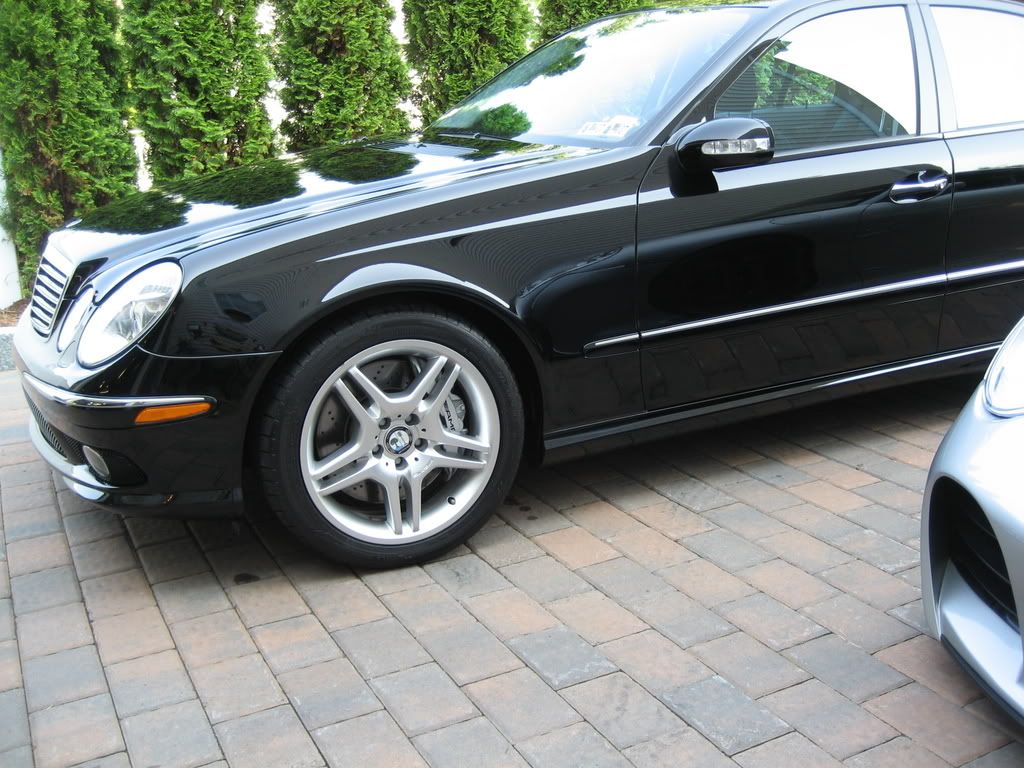
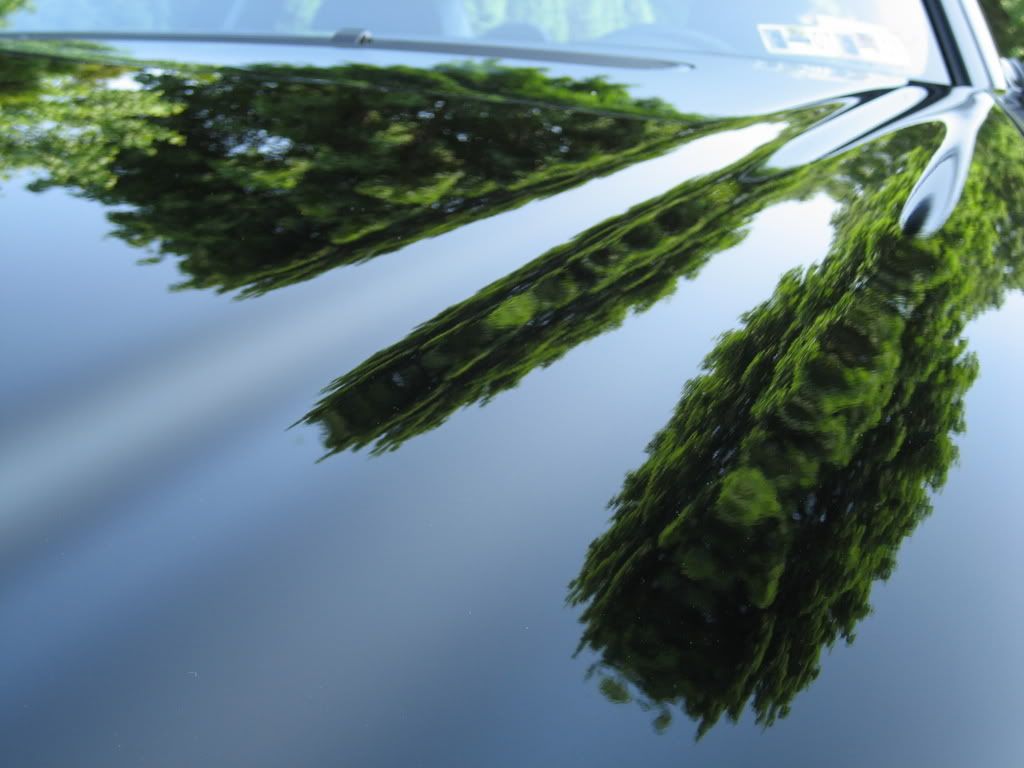
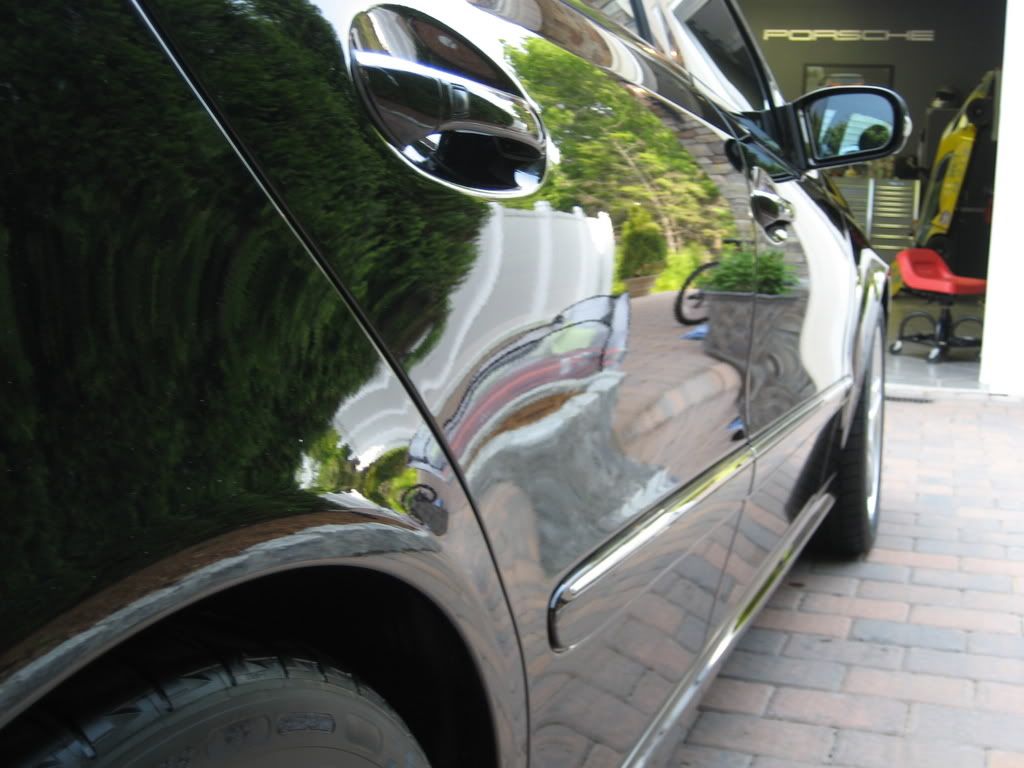
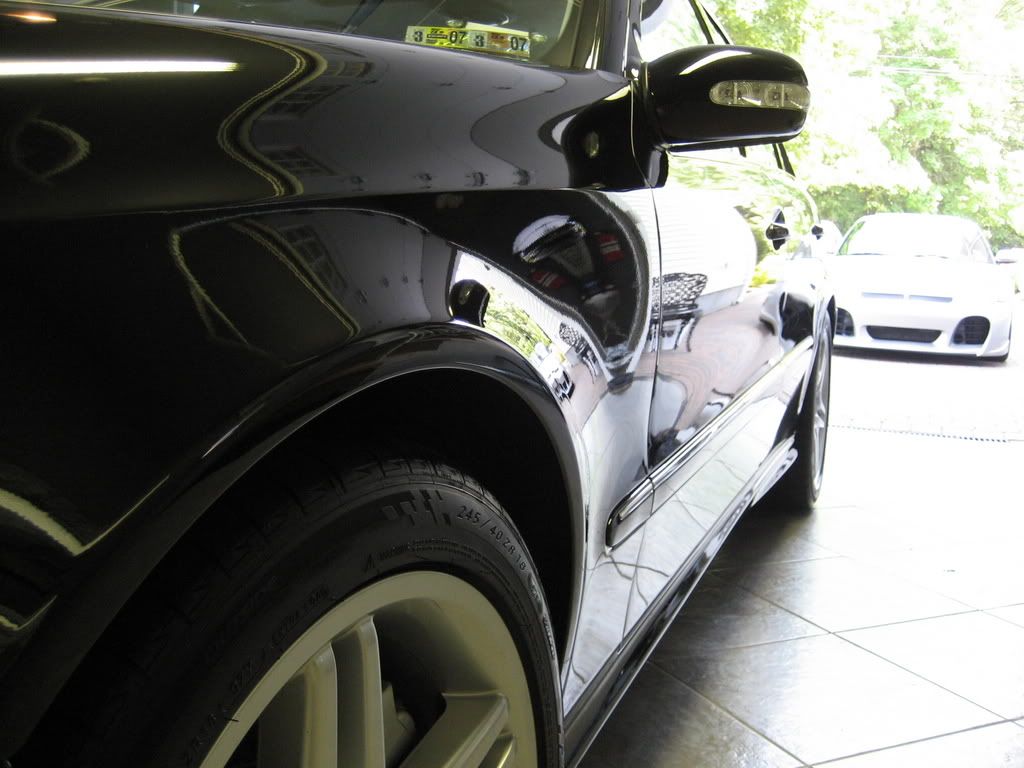
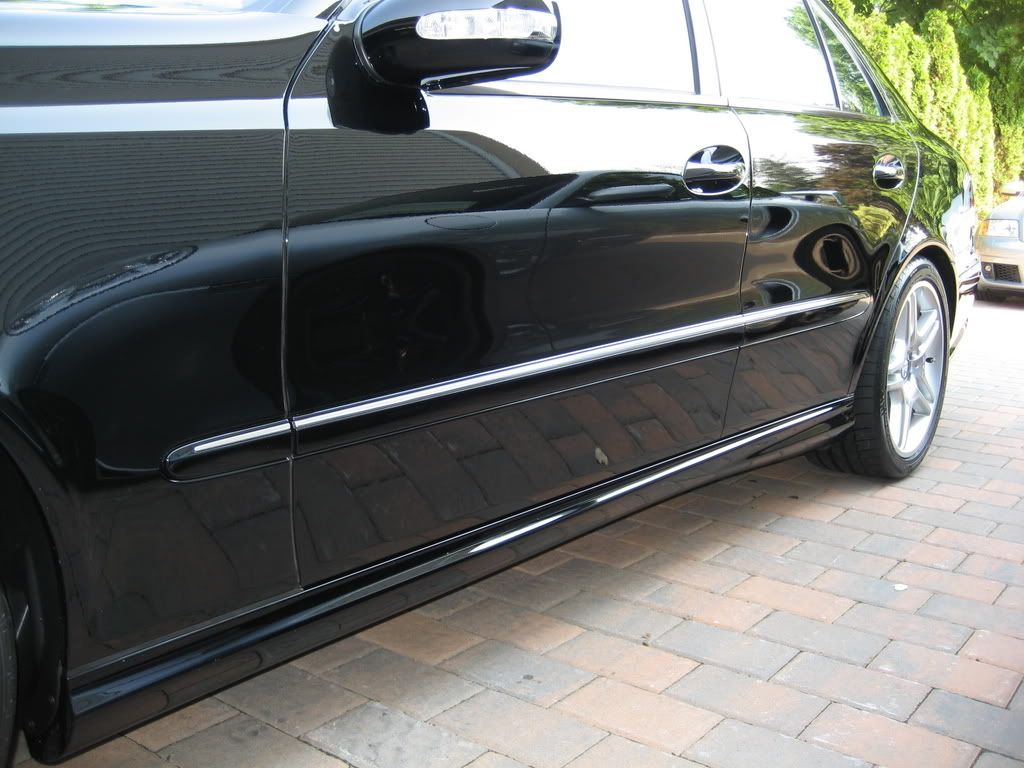
Last shot:
Hood after the Swissvax Concorso:
The rest of the after shots:
Last shot:
MBWorld Fanatic!
Joined: Nov 2001
Posts: 5,640
Likes: 11
From: GMT -8 hours
Mercedes-Benz
looks great. What year E55? The after shots weren't comparable to the before... but I know that is hard to do as the sun goes down later in the day.
PS. I wish you kept the OEM centercaps or the laurel star.
PS. I wish you kept the OEM centercaps or the laurel star.
Trending Topics
Almost a Member!
Joined: Mar 2007
Posts: 33
Likes: 0
From: Northern NJ
2006 E55
As far as the badges, I'm really looking for the car to be as unique as possible without body kits, or anything like that.
In an ideal world, someone will look at the car and say, "What the hell is that?"

MB World Stories
The Best of Mercedes & AMG

Manual Mercedes? 6 Times Sindelfingen Let Drivers Have All The Fun
Verdad Gallardo
Mercedes SLR McLaren 722 S Is Extremely Rare Example Modified by McLaren
Verdad Gallardo
8 Classic Boxy Mercedes Designs That Have Aged Like Fine Wine
Verdad Gallardo
Flawlessly Restored Mercedes 190E Evo II Heads to Auction
Verdad Gallardo
Electric Mercedes C-Class Unveiled: 11 Things You Need to Know
Verdad Gallardo
Mercedes EQS Gets A Major Update: Everything You Need to Know
Verdad Gallardo
5 Underrated Mercedes-Benz Models That Don't Get the Love They Deserve
Verdad Gallardo
Mercedes 300D Has Pushed Well Past 1 Million Miles and It Ain't Stopping
Verdad Gallardo
10 Most Reliable Mercedes-Benz Models You Can Buy Used
Verdad GallardoMBWorld Fanatic!


Joined: Oct 2005
Posts: 1,346
Likes: 14
From: North/Central NJ
GLC 63 S AMG / Corvette C8 / Jaguar SVR
Do you do detailing in the NJ/NY area? I am in Morris County, possibly interested...PM me pricing and everything for a complete detail if you do.


Super Member
Joined: Nov 2003
Posts: 880
Likes: 4
From: Ponte Vedra Beach FL/ Hampstead, London, England
'84 380 SL/ '02 XK8
Menzerna + Rotary (plus a skilled detailer) are the answer to M-B Cermiclear
Nice job
https://mbworld.org/forums/detailing-automotive-care/198197-professional-detailer-s-directory.html
Nice job
https://mbworld.org/forums/detailing-automotive-care/198197-professional-detailer-s-directory.html

MBWorld Fanatic!
Joined: Nov 2001
Posts: 1,697
Likes: 4
From: Santa Ana, CA
E320CDI, CLK55, and a Smart
Mike Phillips from Meguiars charges $450 per day for his services.


