When you click on links to various merchants on this site and make a purchase, this can result in this site earning a commission. Affiliate programs and affiliations include, but are not limited to, the eBay Partner Network.
I had it installed for 13.5 years and it worked flawlessly as of the time I sold that car to get my new 2019 E450 4Matic Cabriolet last month.
I've been going nuts with all of the hassle required to open and close the top both in the car and from they key, so once again I've turned to SmartTOP as the solution.
Please note that I'm in no way affiliated with Mods4Cars or SmartTOP - I'm just a 2nd time customer doing a post to help others as installing these things scares the heck out of me.
Here's the exact car I'm working on and the total installation time took roughly 20 minutes - including going slow and taking photos.
2019 E450 4Matic Cabriolet AMG Line
SmartTOP STHFMZ4 Step 1
Open the trunk pass-through to make sure you can get back in the trunk if something goes wrong
SmartTOP STHFMZ4 Step 1 - Open pass-through in case something goes wrong later
SmartTOP STHFMZ4 Step 2
Physically pull them open to make sure they are really open on both sides SmartTOP STHFMZ4 Step 2 - Lay flat
SmartTOP STHFMZ4 Step 3
Lift the trunk carpet to reveal the area where you will be working
SmartTOP STHFMZ4 Step 3 - Lift trunk floor
SmartTOP STHFMZ4 Step 4
Notice on the right side of the trunk there's a pull hole that you'll be using to get to where you'll be working
SmartTOP STHFMZ4 Step 4 - On right side locate pull hole
SmartTOP STHFMZ4 Step 5
Give it a good tug straight up. It's a bit scary, but this stuff is meant to be handled like this so it's more durable than it seems. You'll have to pull around the edges and keep wedging it out. I was cautious and used the minimal amount of effort to remove to avoid damaging anything and had no problems.
SmartTOP STHFMZ4 Step 5 - Pull straight up - don't worry it's more durable than it looks
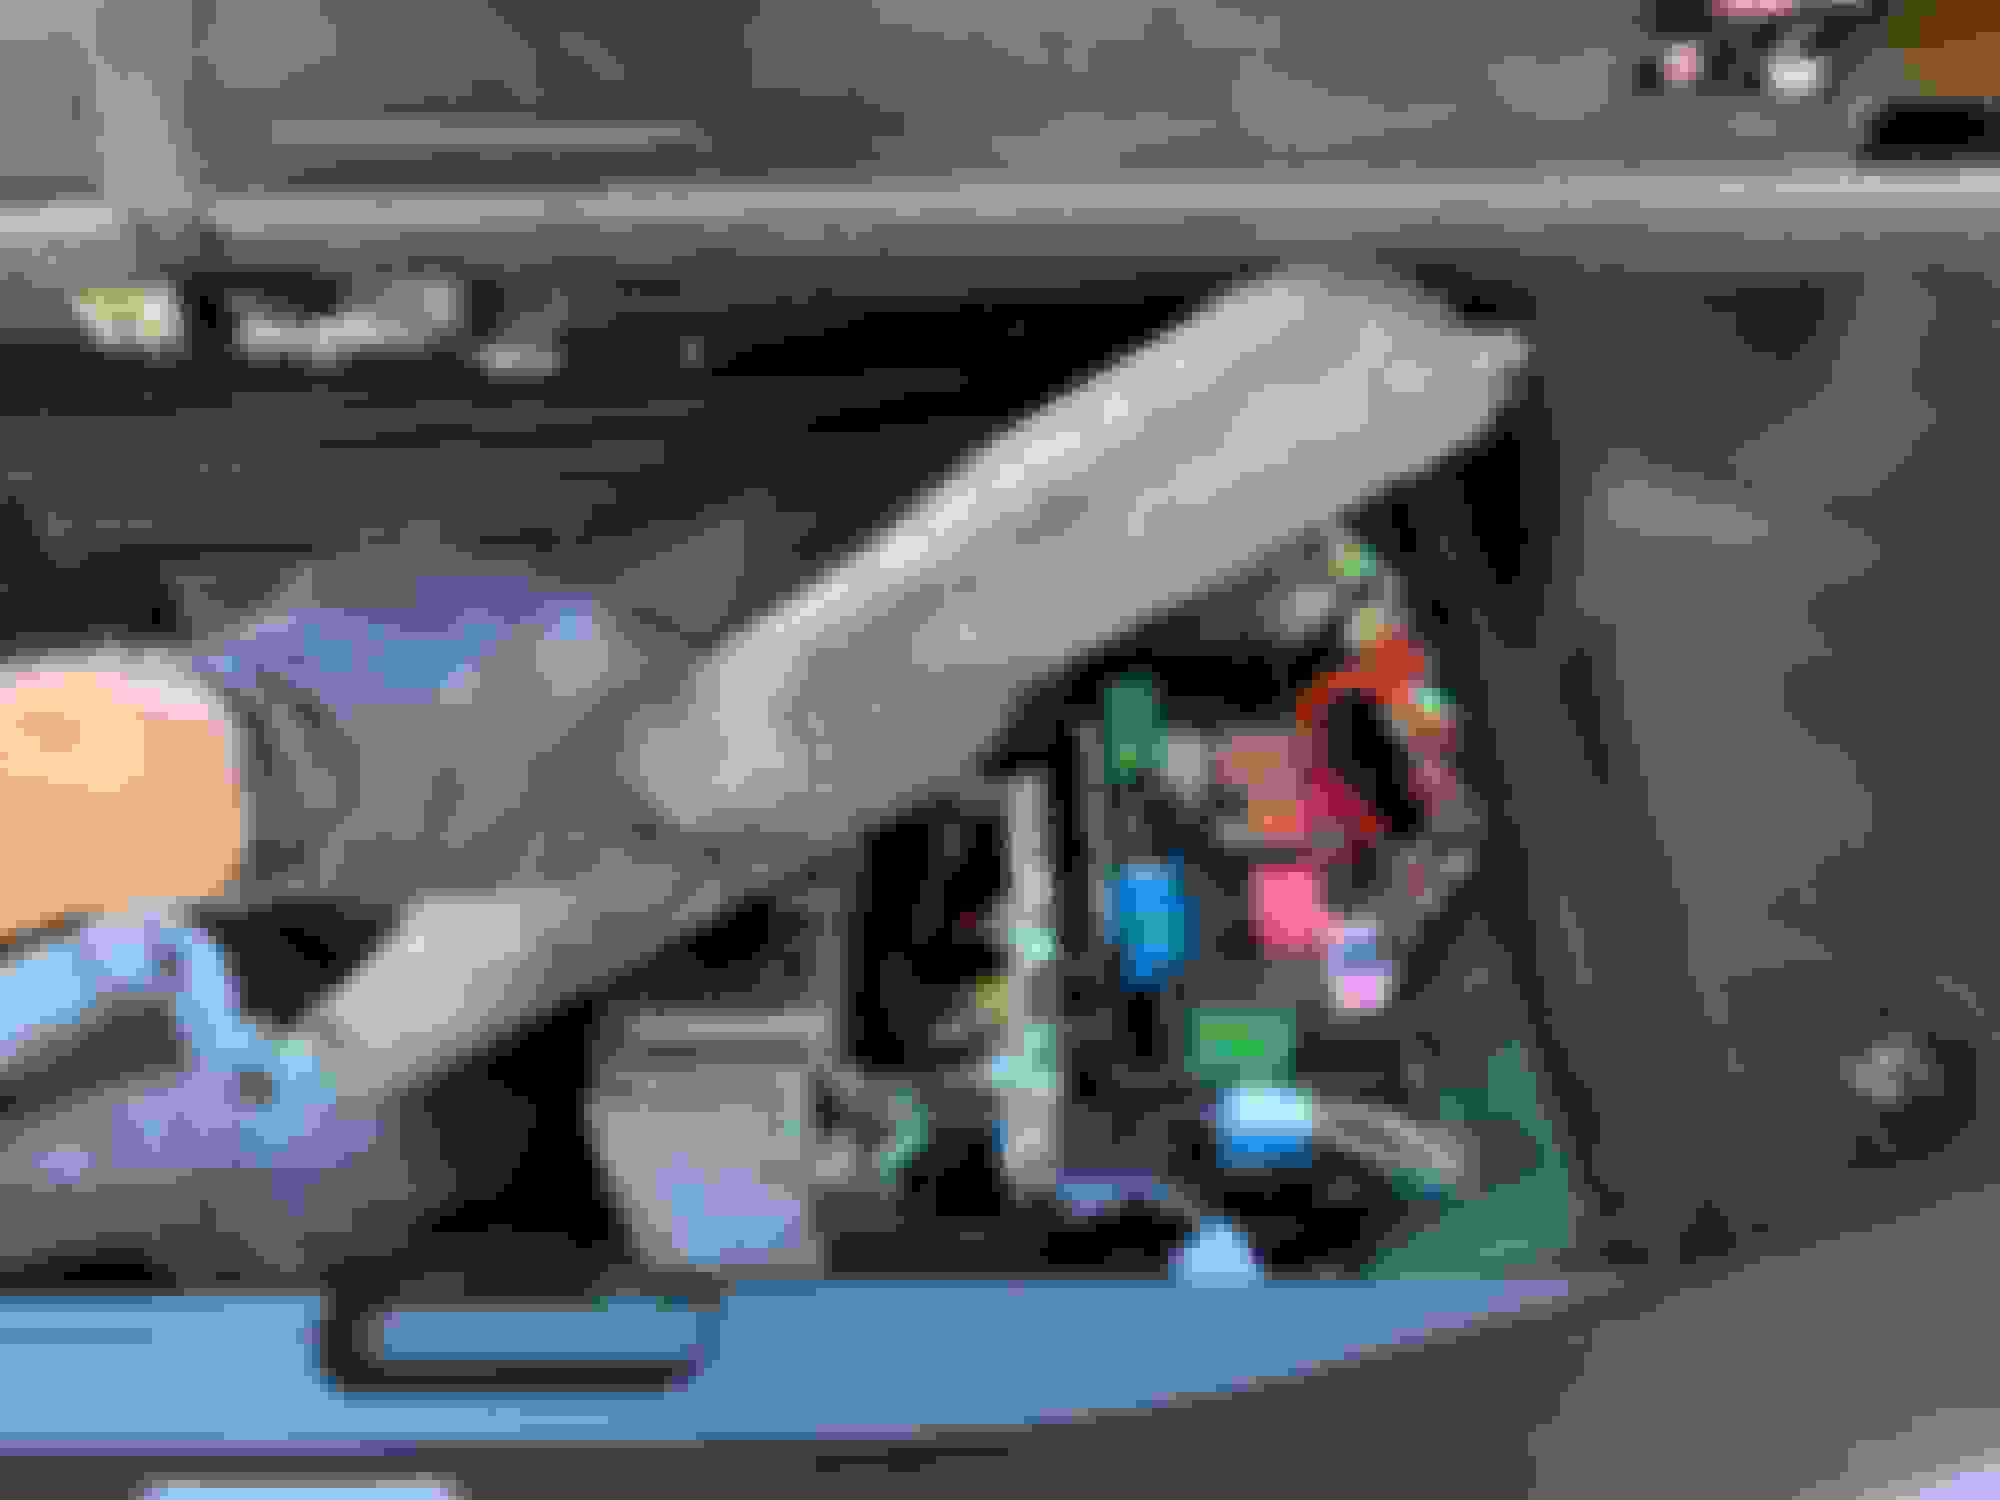
SmartTOP STHFMZ4 Step 6
Underneath is where you'll be working and I only removed enough to do my job rather than removing it all as shown in the instructions.
SmartTOP STHFMZ4 Step 6 - Underneath lies what you'll need to work with so only pull open as much as you need to work comfortably
SmartTOP STHFMZ4 Step 7
Here's the three switches from the instructions with my finger pointing at #1, yellow is #2 and the one on the far right is #3.
SmartTOP STHFMZ4 Step 7 - These are the three things you'll need to remove
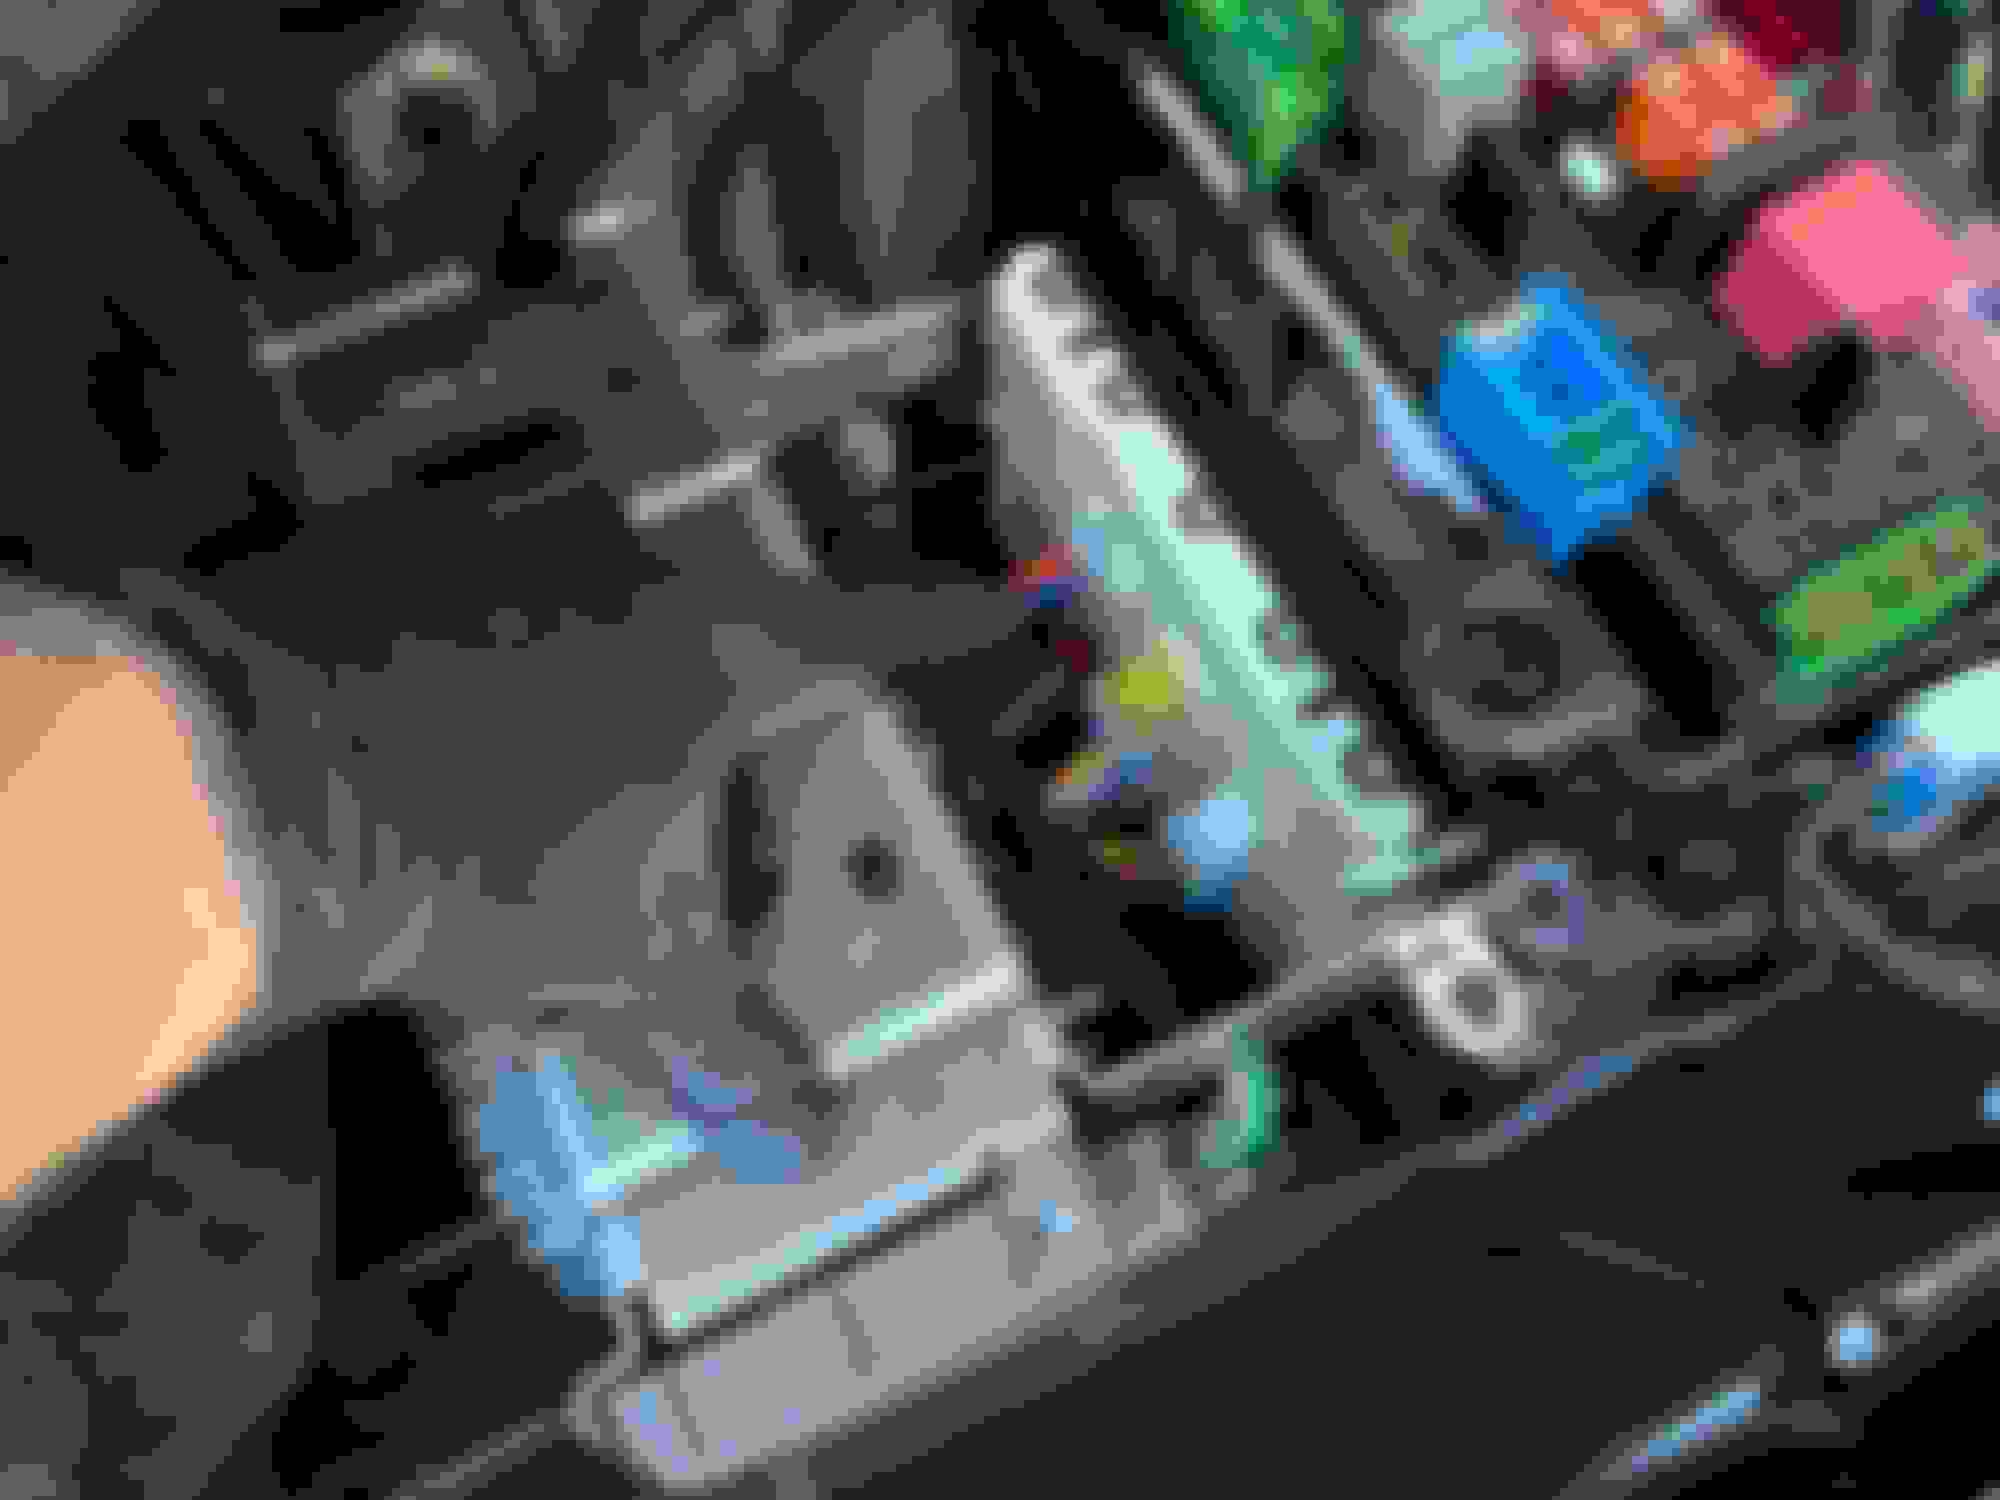
Here I've removed #1 and I've lifted the gray lever on yellow #2 so it can be easily removed. No force is required to remove it.
SmartTOP STHFMZ4 Step 7a - you can see the tiny tabs that need to be depressed on BOTH sides to remove and lift the levers up on the others as shown here for #2 yellow
My thumb is by the tab on the right side of #1 and there's another on the other side. Both need to be depressed simultaneously and it comes out with a little wiggling. SmartTOP STHFMZ4 Step 7b - you can see the tiny tabs that need to be depressed on BOTH sides to remove
***** NOTE *****
When trying to plug #1 into the new harness I was very concerned that this brown wire didn't match with the hardware provided by SmartTOP. The good news is that it doesn't seem to matter and you can only plug in one way. I did find this one to be the hardest one to secure back in without it coming detached, so this is really the hardest part of the installation.
SmartTOP STHFMZ4 Note - This brown wire made me nervous because it doesn't match up to the brown wire in the new harness, but it seems that's OK. You can only plug in one way.
SmartTOP STHFMZ4 Step 8
This is what all 3 new plugs look like after they've been plugged in again. I just stuffed the wires back down in the gap so things looked clean.
SmartTOP STHFMZ4 Step 8 - This is what they should look like after being plugged in - both sides should be secure and not come unplugged when pulled on. #1 seems to be the hardest to secure into the new foam plug.
SmartTOP STHFMZ4 Step 9
After plugging in my module on the last step the green data light flashed and everything just worked. I didn't remove any power to the battery to do this installation, so this was the final step before testing and closing things back up.
SmartTOP STHFMZ4 Step 9 - Lastly connect the SmartTOP and it should flash green after being plugged in.
I've got a really bad video showing it working on my first test try -
Thanks. So this product makes it so you don't have to hold the button/pull the lever the entire top down/up process? Meaning, you press the button once/twice and after that it just does its thing?
Also, is the knocking sound in the video coming from your car, or is there construction in your neighborhood?
Yes, usc96 - that's exactly what it does. For fear of irritating people I won't post a link but if you google "mod4cars STHFMZ4 " you'll see the product page for the one I ordered and you can watch a video that shows how it works. They also have a list of the 16 features.
Even though I'm leasing this car, I can't live without this.
Yes, that knocking is my neighbor installing a new deck cover - not the car.
Thanks. I need to look into getting one. 99 times out of 100 I want the top either up or down. I guess there could be that 1 time out of 100 where I might want to clean the storage area??? where I might want it to stop at the midway point. MB not having a push and release feature already does seem like a design flaw.
Thanks again.
BTW, I noticed the other night that the E53 cab has an easily removable plastic cover instead of the felt cover on the E450 over the trunk fuse box.
Finally, beautiful car!!!!
Thanks! I wish that it was easier, but it wasn't too bad - putting it back was actually the harder part, but still not a problem.
Exactly and the default configuration for the SmartTOP is that you have to click three times to auto open and three times to auto close with the key. In the car it's just one press. This means you can still operate the key the way it comes from the factory to do as you suggest to clean the rear window or something.
I had one on my 911 for 13.5 years so I just took for granted that's the way cars work. I actually had forgotten I installed a SmartTOP until I got this car and immediately thought - WTF - why is it so hard to open and close the top and windows?!!!
A238 E Class Cab E220 Premium Plus 2018, X253 GLC E220 Premium Plus 2018
Great post and like you I am a second time customer, I had the first one in my A207 E350 for 6 years and not one issue, just installed it in my new cab and still well happy.
Just installed the module https://smarttop.uk/product/smarttop...l-for-s-class/ on my 2018 E400 this week. I like the all windows up or down 1 click function from the factory all window switch. The fact I don't have to hold the remote button down the whole time I'm operating the top is nice too. I can use the top without stepping on the brake or holding the switch the entire operation. I changed 1 default function for the key fob buttons. The job is easier if you remove the big flap you hook to the trunk opening. Just remove 2 push in black plastic retainers at the back of flap on floor pan. It took about 15 minutes to install and about 1/2 hour to learn and go through the module default settings on the PC. Overall I would recommend this device.
Mercedes SLR McLaren 722 S Is Extremely Rare Example Modified by McLaren
Slideshow: A one-of-one U.S.-spec Mercedes-Benz SLR McLaren Roadster became even rarer after a factory-backed transformation at McLaren's headquarters.