


Conversion- Digital Ac Control Unit
Senior Member
Joined: May 2014
Posts: 485
Likes: 31
From: Concord, CA
'13 E350 . M276
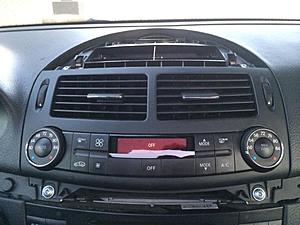
Well, I got the A/C to work. I placed fob in ignition and turned it to II position. I pushed Auto (driver side) + A/C simultaneously for 5 seconds, and that did it. All controls are working as designated.
Last edited by Stuttgarten; Jul 22, 2014 at 02:06 PM.

Banned
Joined: Feb 2008
Posts: 0
Likes: 118
Here are the pictures.
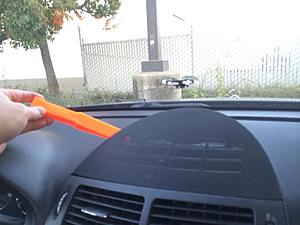
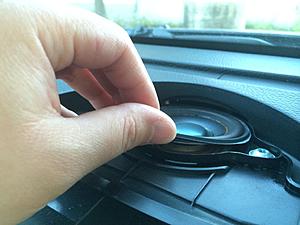
Notes to picture 1:
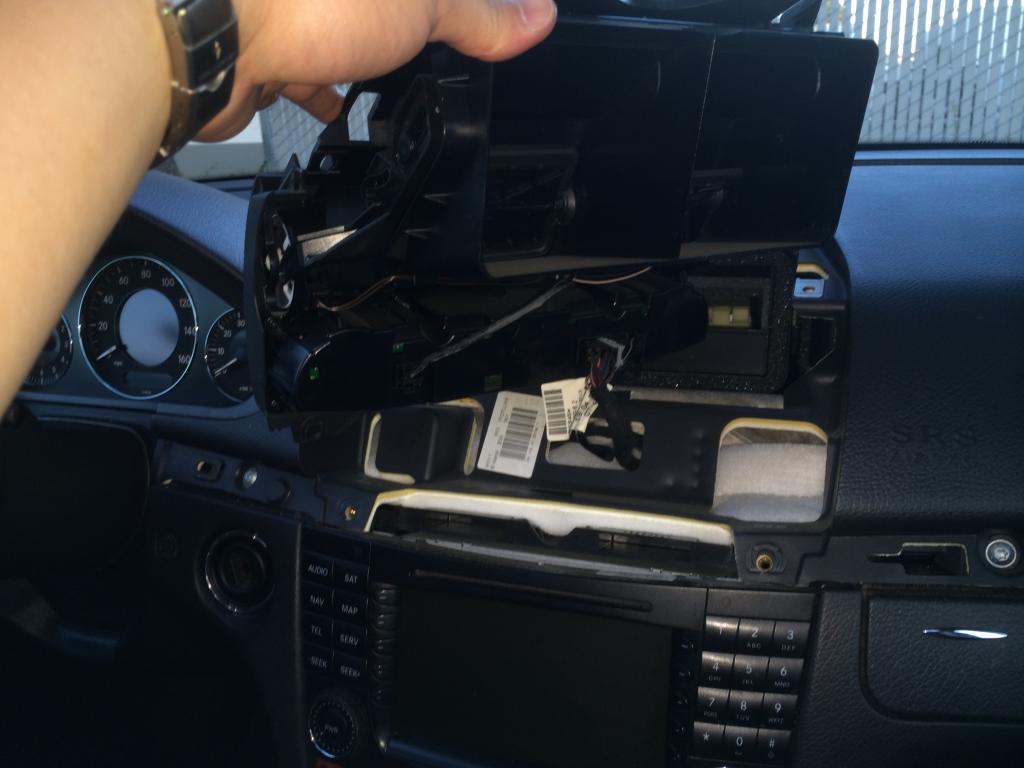
Use a small flat head screw driver and pry the trim out at the spot indicated by my arrow.
Make sure you open the passenger side door when you slide the trim out or you will damage it from when the trim hits your door panel. It can easily crack!
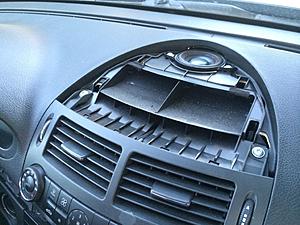
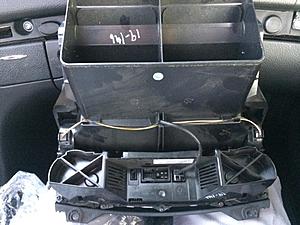
Notes to picture 2:
Use 2 small flat head screw drivers and go inside the opening indicated by the arrows I drew and press down the latches. Then remove the center speaker grill.
Once that is done, remove the 2 screws holding the center speaker in place. Then remove the 2 screws holding the entire air vent/center speaker console in place which were hidden underneath the trim that you removed in step one.
Now the whole assembly can come out, remove the connectors, take all miniature hex screws out and remove the AC unit. Assembling in reverse order.
Happy modding!!!
Notes to picture 1:
Use a small flat head screw driver and pry the trim out at the spot indicated by my arrow.
Make sure you open the passenger side door when you slide the trim out or you will damage it from when the trim hits your door panel. It can easily crack!
Notes to picture 2:
Use 2 small flat head screw drivers and go inside the opening indicated by the arrows I drew and press down the latches. Then remove the center speaker grill.
Once that is done, remove the 2 screws holding the center speaker in place. Then remove the 2 screws holding the entire air vent/center speaker console in place which were hidden underneath the trim that you removed in step one.
Now the whole assembly can come out, remove the connectors, take all miniature hex screws out and remove the AC unit. Assembling in reverse order.
Happy modding!!!
Senior Member
Joined: May 2014
Posts: 485
Likes: 31
From: Concord, CA
'13 E350 . M276
I'm wondering if it possible to do rear vents with a digital unit. I'm wondering if MY '07-'09 are digital units. I found a unit with separate controls & hot/cold for each side, which means in a dual zone like mine, this will not work. I'm wondering what unit would show on the LCD? Has anyone tried this?
Banned
Joined: Feb 2008
Posts: 0
Likes: 118
I'm wondering if it possible to do rear vents with a digital unit. I'm wondering if MY '07-'09 are digital units. I found a unit with separate controls & hot/cold for each side, which means in a dual zone like mine, this will not work. I'm wondering what unit would show on the LCD? Has anyone tried this?
Member
Joined: Jun 2013
Posts: 222
Likes: 1
2006 E350


Last edited by Drag0na5h; Jul 25, 2014 at 07:35 AM.
Member
Joined: Jun 2013
Posts: 222
Likes: 1
2006 E350
Senior Member
Joined: May 2014
Posts: 485
Likes: 31
From: Concord, CA
'13 E350 . M276
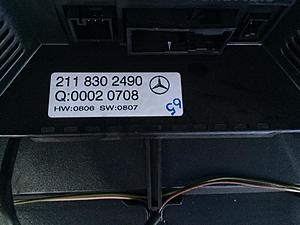
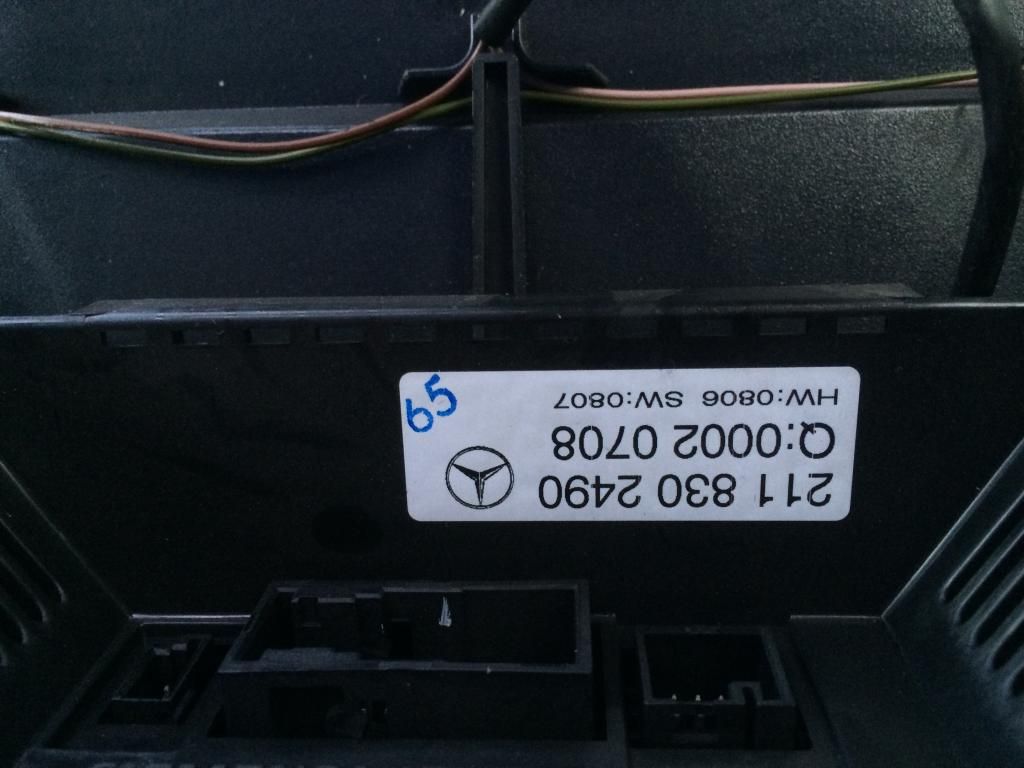
Well Plutoe, the part # I installed in mine is the same as Drag...'s which is 2118302490. Mine worked after actuating the system. I'm not sure why resetting Drag....'s system is not responding. You may want to disconnect all the cables and reattach. I would also try resetting by pushing AUTO by itself for 5-10 seconds. I also read somewhere recently that pushing AUTO + Recirculate could be done, but this was on other units.
Hey Mackhack, any suggestions!
Hey Mackhack, any suggestions!
Last edited by Stuttgarten; Jul 25, 2014 at 12:23 PM.
MB World Stories
The Best of Mercedes & AMG

Manual Mercedes? 6 Times Sindelfingen Let Drivers Have All The Fun
Verdad Gallardo
Mercedes SLR McLaren 722 S Is Extremely Rare Example Modified by McLaren
Verdad Gallardo
8 Classic Boxy Mercedes Designs That Have Aged Like Fine Wine
Verdad Gallardo
Flawlessly Restored Mercedes 190E Evo II Heads to Auction
Verdad Gallardo
Electric Mercedes C-Class Unveiled: 11 Things You Need to Know
Verdad Gallardo
Mercedes EQS Gets A Major Update: Everything You Need to Know
Verdad Gallardo
5 Underrated Mercedes-Benz Models That Don't Get the Love They Deserve
Verdad Gallardo
Mercedes 300D Has Pushed Well Past 1 Million Miles and It Ain't Stopping
Verdad Gallardo
10 Most Reliable Mercedes-Benz Models You Can Buy Used
Verdad GallardoMember
Joined: Jun 2013
Posts: 222
Likes: 1
2006 E350
Well Plutoe, the part # I installed in mine is the same as Drag...'s which is 2118302490. Mine worked after actuating the system. I'm not sure why resetting Drag....'s system is not responding. You may want to disconnect all the cables and reattach. I would also try resetting by pushing AUTO by itself for 5-10 seconds. I also read somewhere recently that pushing AUTO + Recirculate could be done, but this was on other units.
Hey Mackhack, any suggestions!
Hey Mackhack, any suggestions!
Banned
Joined: Feb 2008
Posts: 0
Likes: 118
580 is the general AC system vs. 581 ClimaTronic. 955 is elegance package, 494 is USA spec vehicle and 805 is MY04. I would say the differently wired system is indeed the problem. You might wanna try a ClimaTronic unit from an early E500/E55 as I have said it last week already.
Member
Joined: Jun 2013
Posts: 222
Likes: 1
2006 E350
Thanks for the info on my VIN and such guys! Appreciate the time taken!
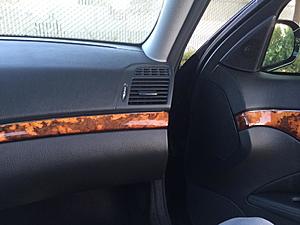
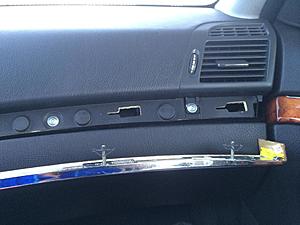
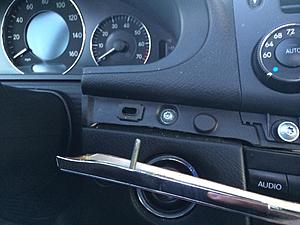
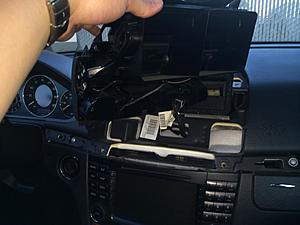
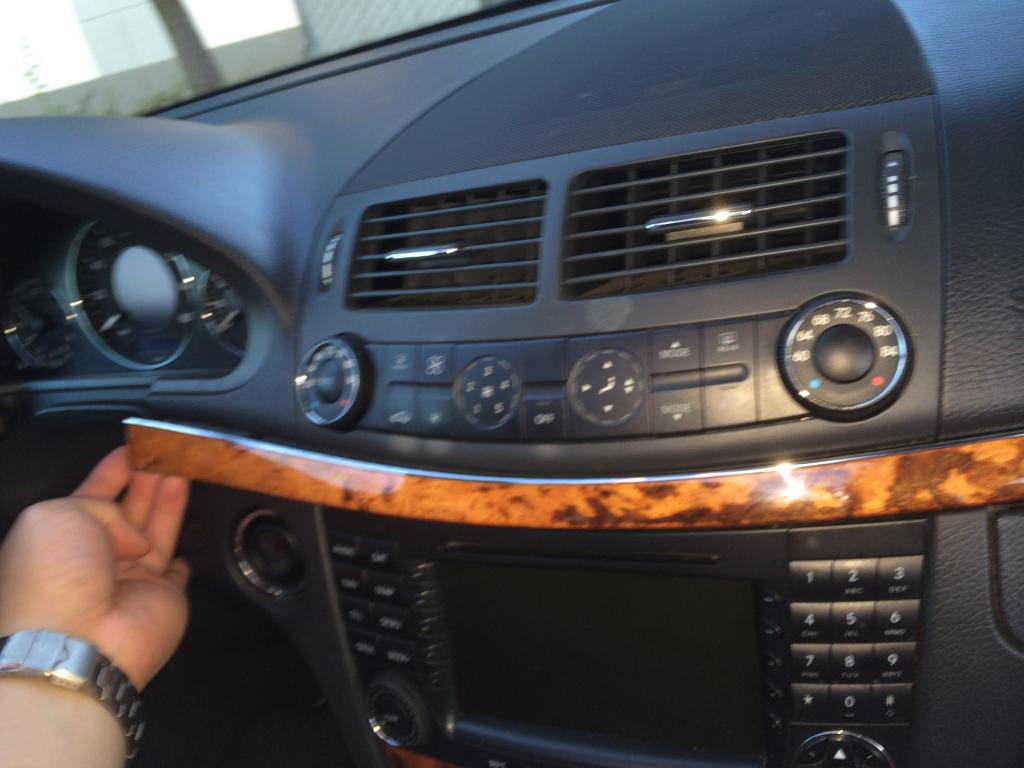
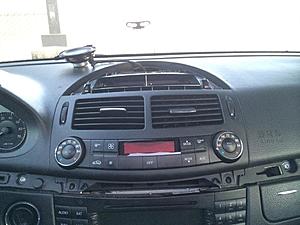
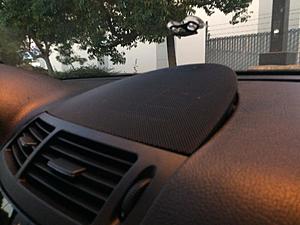
Alright as promised, here is a pictoral DIY of how to remove the HVAC controls on a 2006 and up dash. These are the ones with a mesh center panel. If you have the fin type, there are special tabs you need to access through the fins to unlock the center panel. Anywho lets get started. First off you want to open your passenger door to the point it won't close on itself (esp. on a windy day or incline).
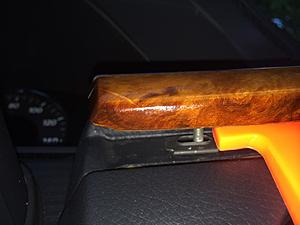
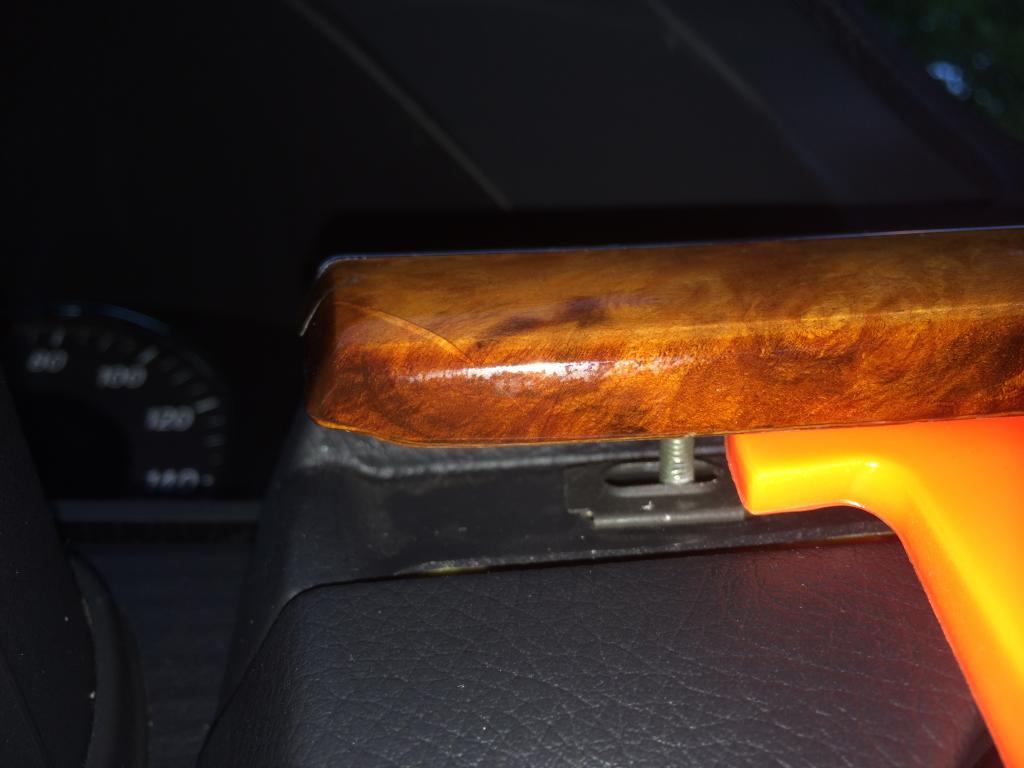
Next use plastic panel removing tools to pry the far left side of the wood trim just above the ignition.
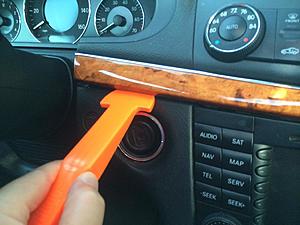
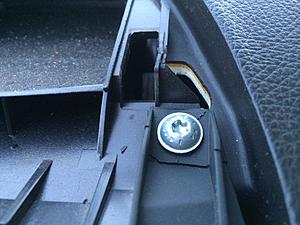
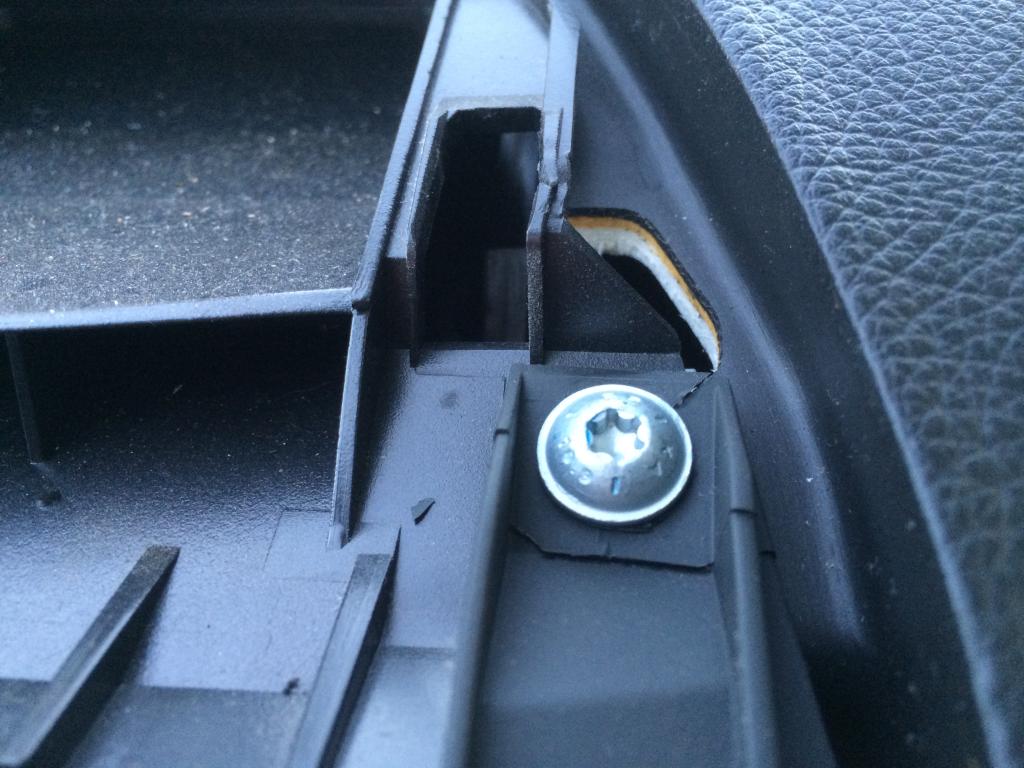
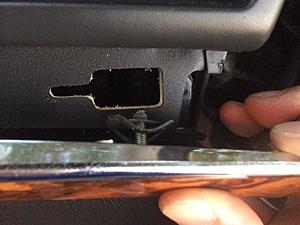
You should hear it pop (possibly more than once) and this is why. Take a look at the threaded end and the black clip it slides into. It is held in place rather well, but easily pulled out with the right tools and angle of lift.
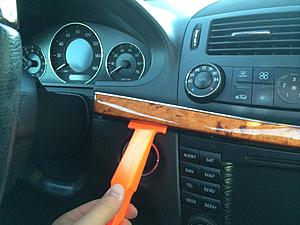
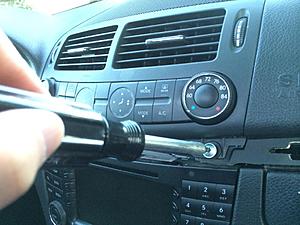
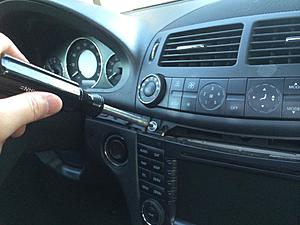
Next while you pull on this end slighty away from the dash, you want to pull the whole trim towards the passenger side. The remaining clips are designed to slide lock into place. Pulling them towards the passenger door unlocks them and allows for removal.

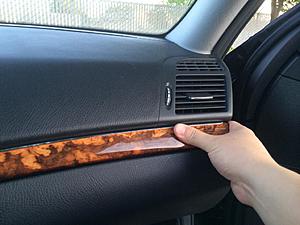
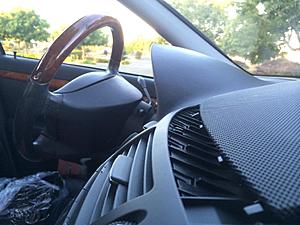
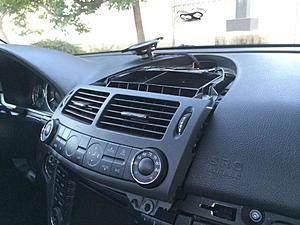
This is how far it should have been pulled out.
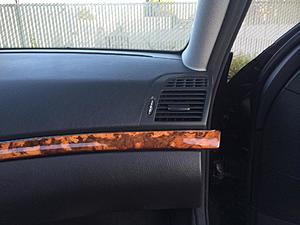
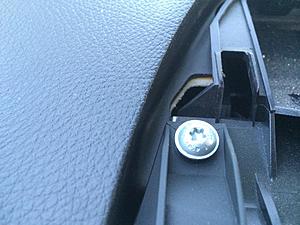
Here's a close up of one of the slide locking clips.
Here they are as a whole.
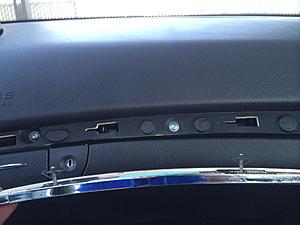
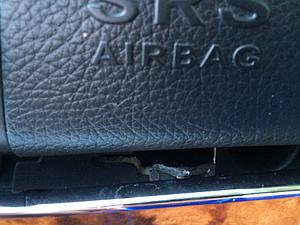
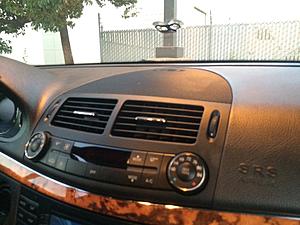
Now store the wood trim somewhere safe where it won't get damaged. Next using a T25 screw driver remove the two torx screws on the front end of the assembly.
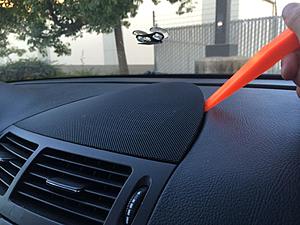
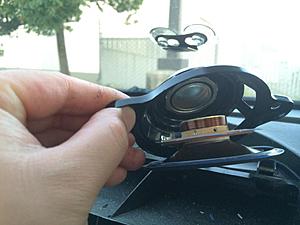
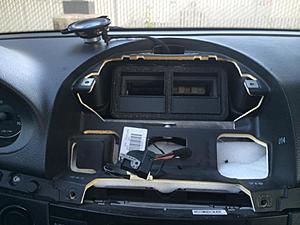
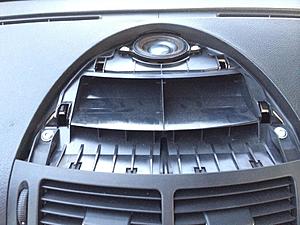
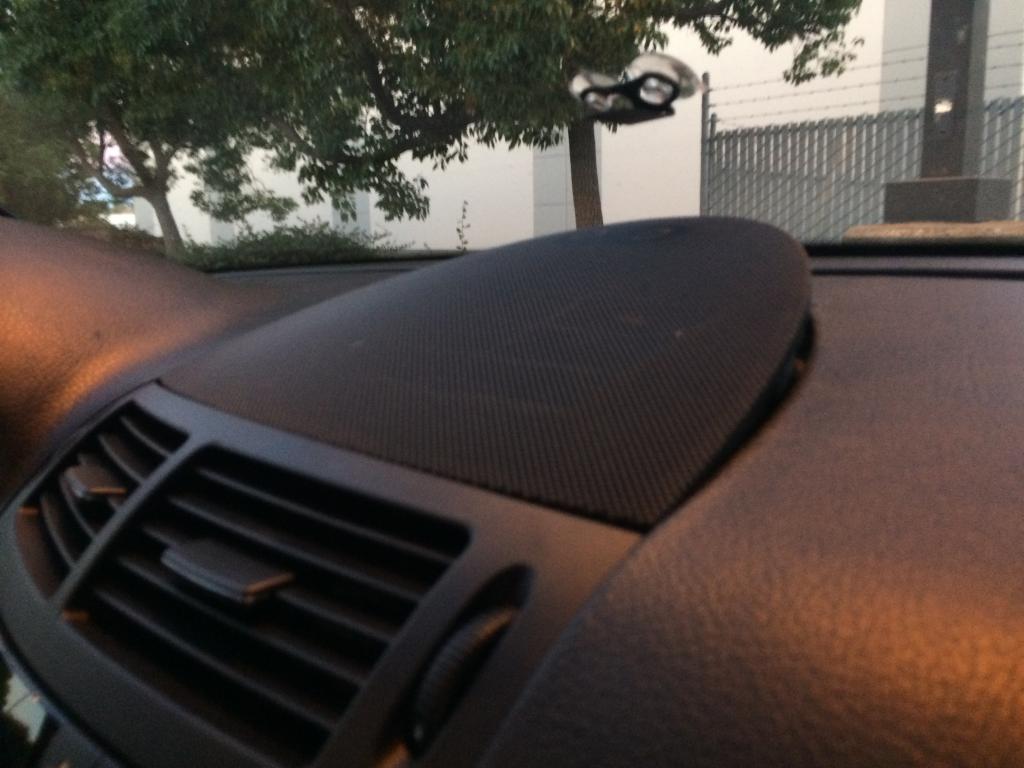
Next using a pry tool, you want to pry from the back right corners of the rounded mesh panel. Absolutely do not pry from the front end where it meets the vent. From the pictures you will see that the mesh panel actually slips underneath that mating line prior to snapping down into place.

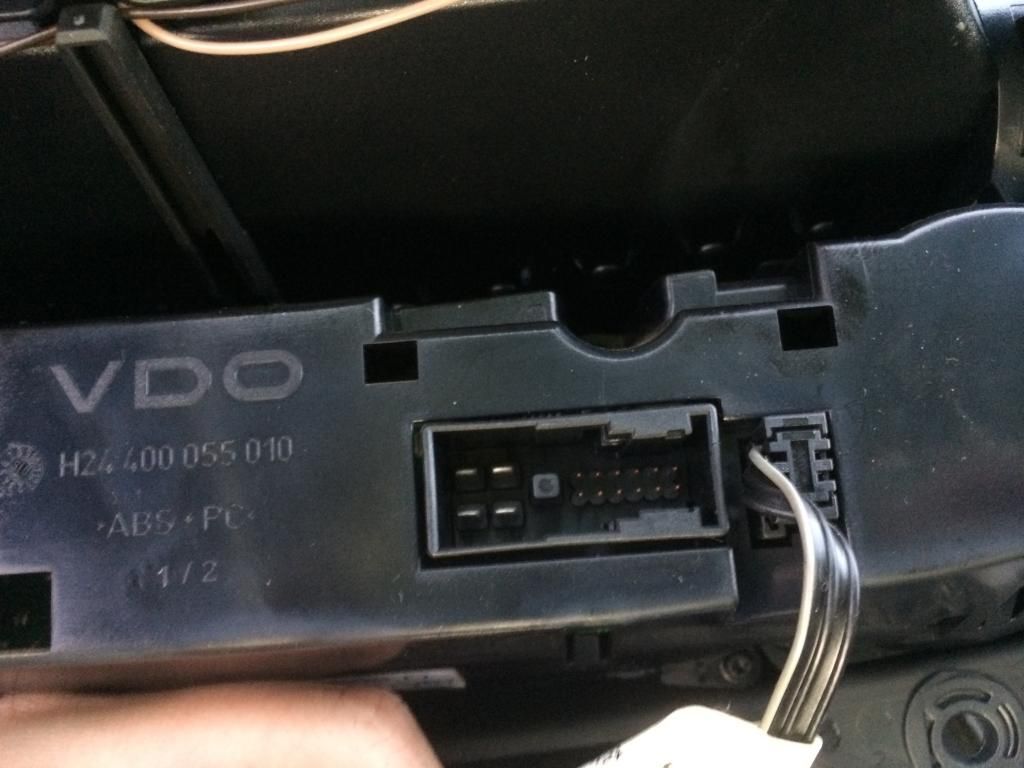
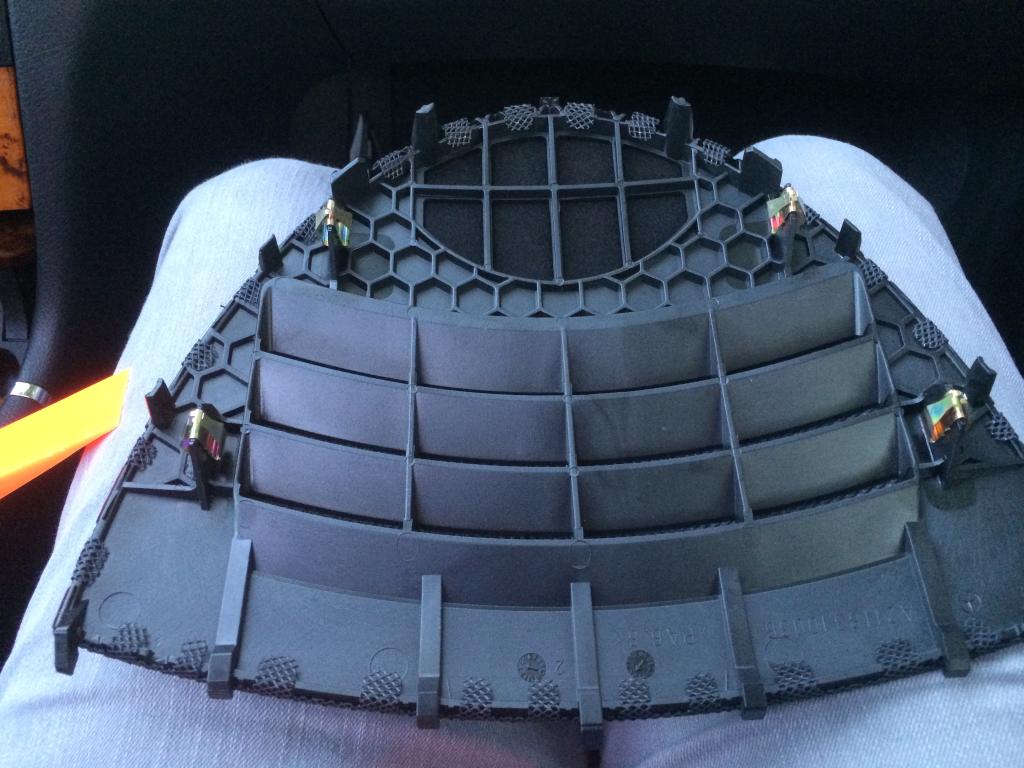
Here is the underside of the mesh panel so you can understand how it's held into place via 4 press lock pins and a series of tabs that slip underneath the vent panel.

And now we see the dreaded center speaker that always makes listening to music annoying...
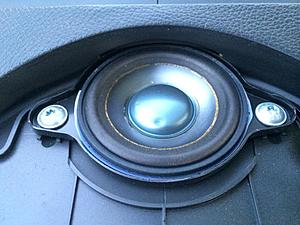
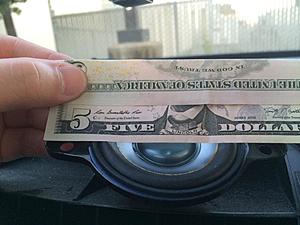
Dried and falling apart...
Sorry, didn't have a scale so I used a $5 bill to show you the size of the speaker incase you wanted to find a replacement...
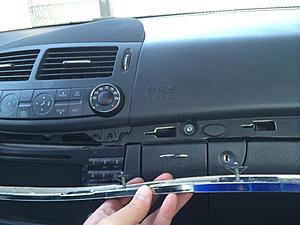
Going back to the original shot, you want to remove the 4 T25 screws on the top. Two holding the speaker down and the other two that probably have cracked ends...
Alright now you can pull the center assembly out.
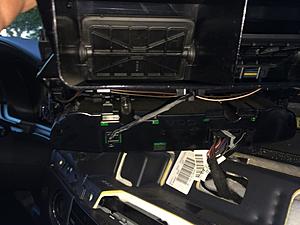
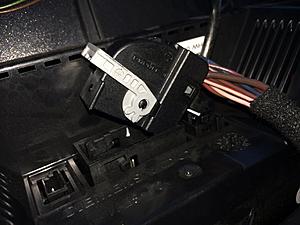
Mine had two plugs leading into the dash. Remove those before yanking the thing outta there!
ENHANCE..........!!!!
Here's one of them
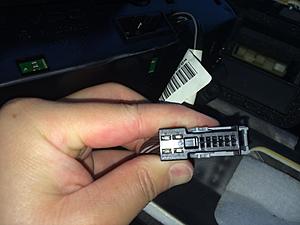
Theres the other adjacent to it.
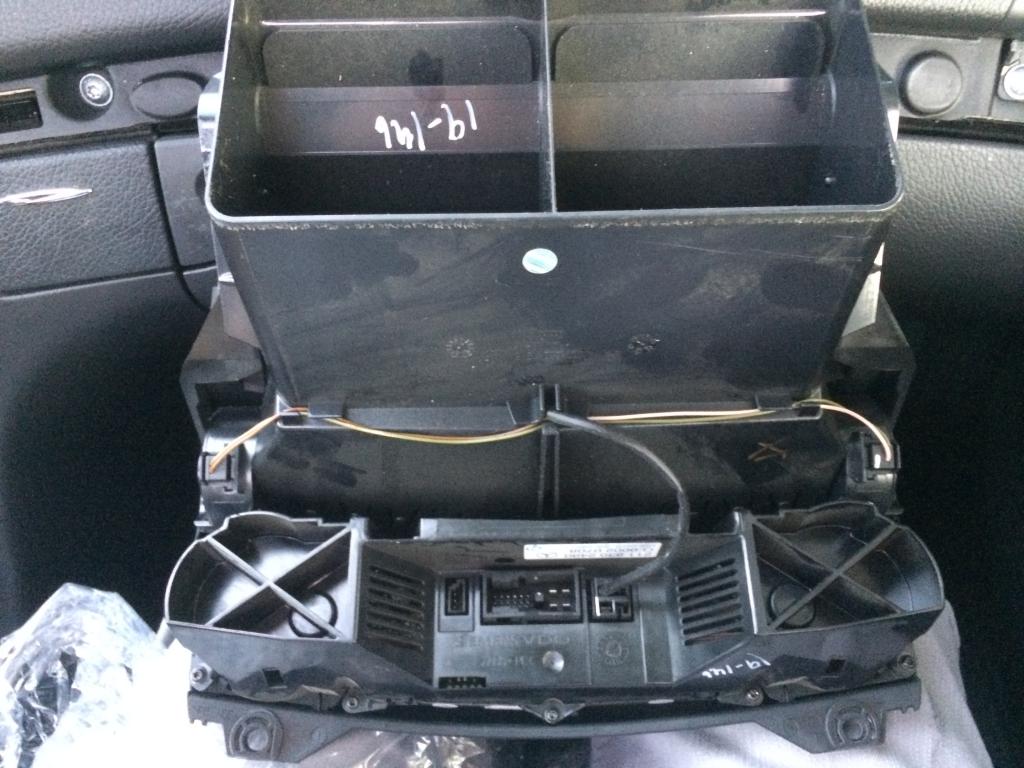
Both plugs removed, now my stock part rest on my lap for one last photo op.
The guts...
TBC...
Alright as promised, here is a pictoral DIY of how to remove the HVAC controls on a 2006 and up dash. These are the ones with a mesh center panel. If you have the fin type, there are special tabs you need to access through the fins to unlock the center panel. Anywho lets get started. First off you want to open your passenger door to the point it won't close on itself (esp. on a windy day or incline).

Next use plastic panel removing tools to pry the far left side of the wood trim just above the ignition.


You should hear it pop (possibly more than once) and this is why. Take a look at the threaded end and the black clip it slides into. It is held in place rather well, but easily pulled out with the right tools and angle of lift.
Next while you pull on this end slighty away from the dash, you want to pull the whole trim towards the passenger side. The remaining clips are designed to slide lock into place. Pulling them towards the passenger door unlocks them and allows for removal.

This is how far it should have been pulled out.

Here's a close up of one of the slide locking clips.

Here they are as a whole.


Now store the wood trim somewhere safe where it won't get damaged. Next using a T25 screw driver remove the two torx screws on the front end of the assembly.


Next using a pry tool, you want to pry from the back right corners of the rounded mesh panel. Absolutely do not pry from the front end where it meets the vent. From the pictures you will see that the mesh panel actually slips underneath that mating line prior to snapping down into place.


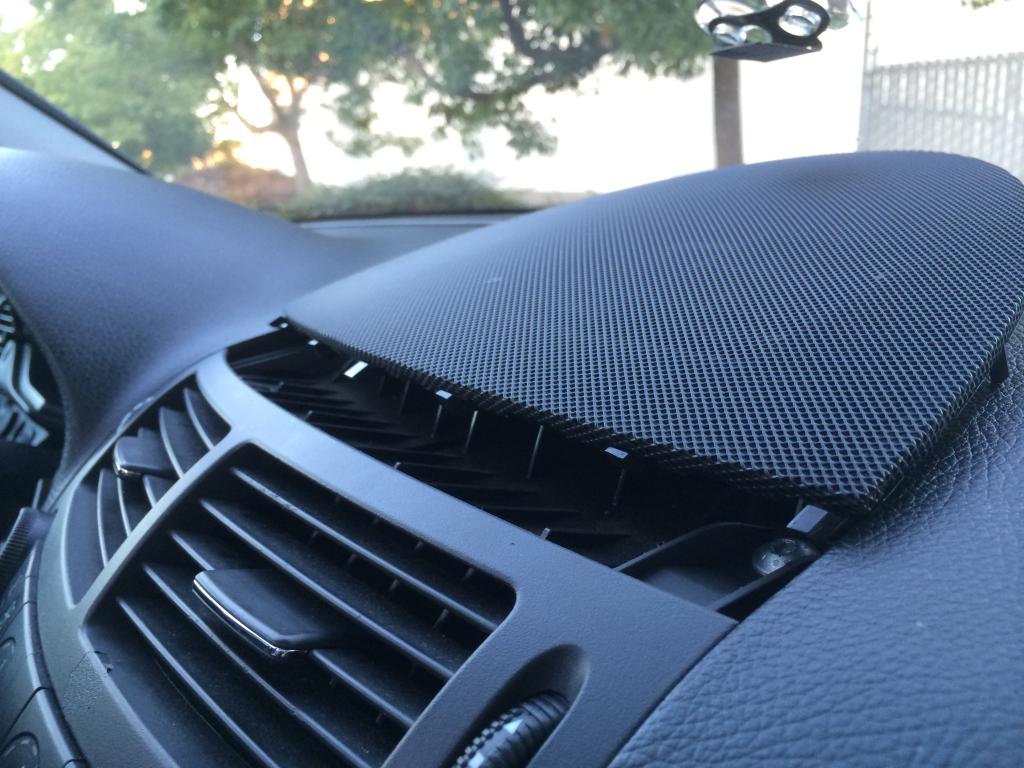

Here is the underside of the mesh panel so you can understand how it's held into place via 4 press lock pins and a series of tabs that slip underneath the vent panel.
And now we see the dreaded center speaker that always makes listening to music annoying...


Dried and falling apart...

Sorry, didn't have a scale so I used a $5 bill to show you the size of the speaker incase you wanted to find a replacement...

Going back to the original shot, you want to remove the 4 T25 screws on the top. Two holding the speaker down and the other two that probably have cracked ends...

Alright now you can pull the center assembly out.

Mine had two plugs leading into the dash. Remove those before yanking the thing outta there!

ENHANCE..........!!!!

Here's one of them

Theres the other adjacent to it.

Both plugs removed, now my stock part rest on my lap for one last photo op.


The guts...

TBC...
Last edited by Drag0na5h; Aug 5, 2014 at 08:15 PM.
Member
Joined: Jun 2013
Posts: 222
Likes: 1
2006 E350
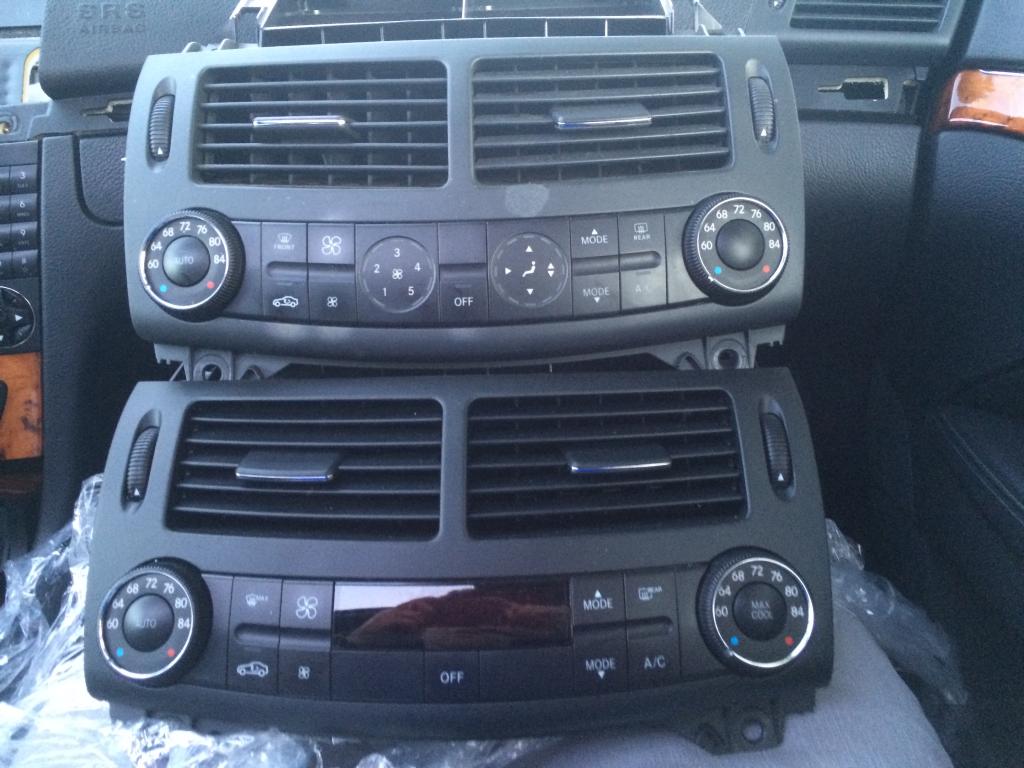
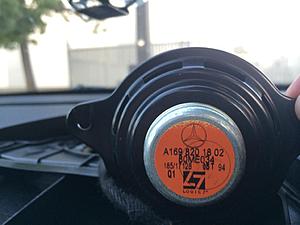
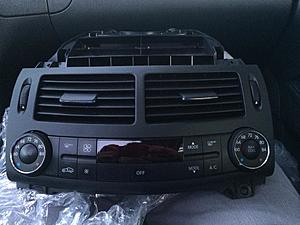
Heres my new unit ready for transplant.
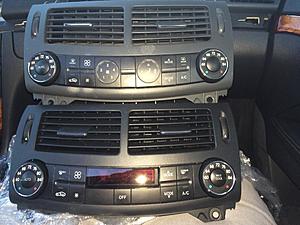
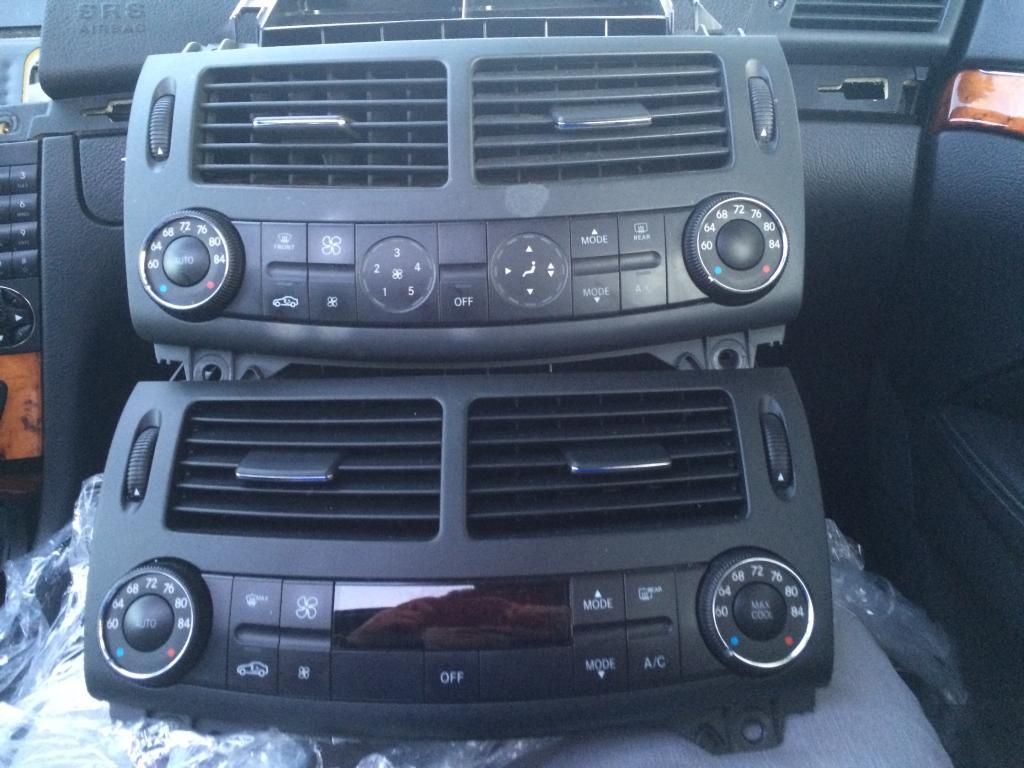
Comparison shot...
BE SURE TO TEST OUT THE UNIT BEFORE PUTTING THE REST BACK IN PLACE!!!
Now reverse the steps to reinstall the new unit.


Carefully line up all of the slide lock clips.
When sliding the wood trim back towards the driverside be sure that the threaded end on the far left doesn't get hung up on the mating clip attached to the dash. Once the slide lock clips are snug press down on the far left to lock the threaded end in place.
When reinstalling the mesh panel slide the vent side tabs in place first.
Then press down on the places where the lock pins were.
All done!


Comparison shot...

BE SURE TO TEST OUT THE UNIT BEFORE PUTTING THE REST BACK IN PLACE!!!
Now reverse the steps to reinstall the new unit.


Carefully line up all of the slide lock clips.

When sliding the wood trim back towards the driverside be sure that the threaded end on the far left doesn't get hung up on the mating clip attached to the dash. Once the slide lock clips are snug press down on the far left to lock the threaded end in place.

When reinstalling the mesh panel slide the vent side tabs in place first.
Then press down on the places where the lock pins were.

All done!
Last edited by Drag0na5h; Jul 25, 2014 at 10:43 PM.
MBWorld Fanatic!
Joined: Jul 2013
Posts: 3,133
Likes: 134
From: Down Unda
W204 C63 AMG, W212 E250 CGI, C207 E250 CGI
As always, very detailed write up! This will help a lot when i do mine as soon as i receive the one i ordered. I hope i dont run into the same A/C problem as you did though.
Member
Joined: Jun 2013
Posts: 222
Likes: 1
2006 E350
 Please list the part number you end up with when it arrives. Thanks.
Super Member
Joined: Apr 2011
Posts: 902
Likes: 3
From: Arizona
W211
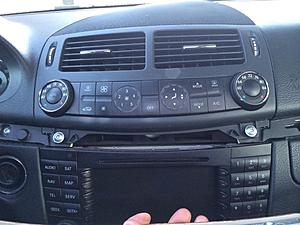
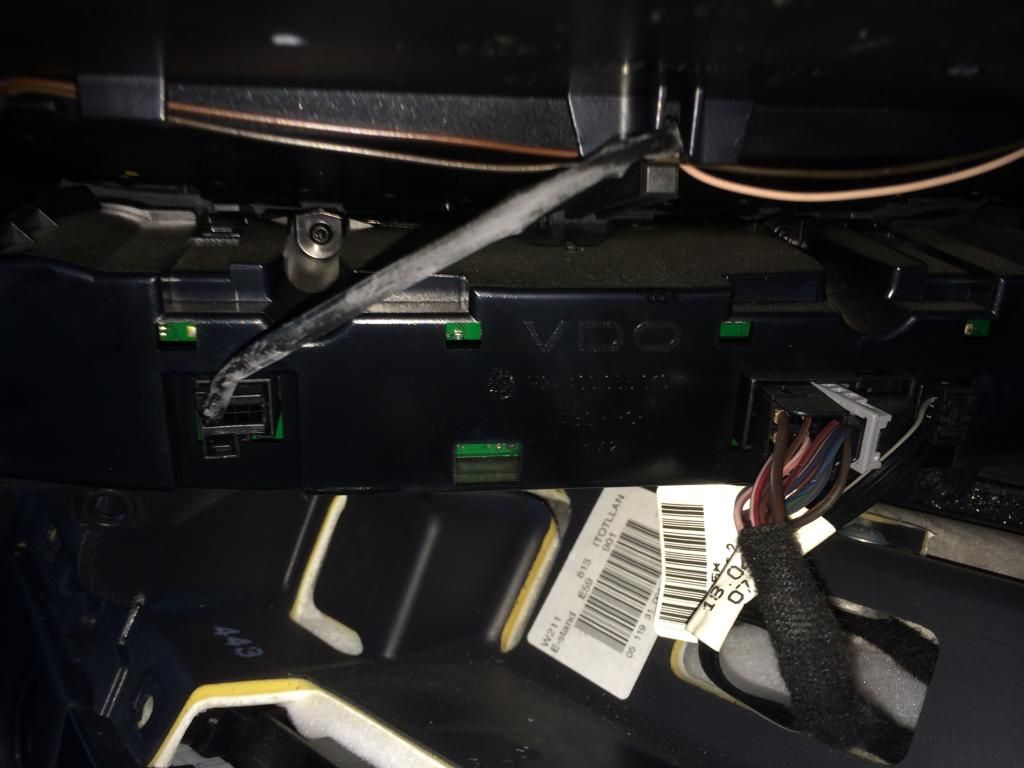
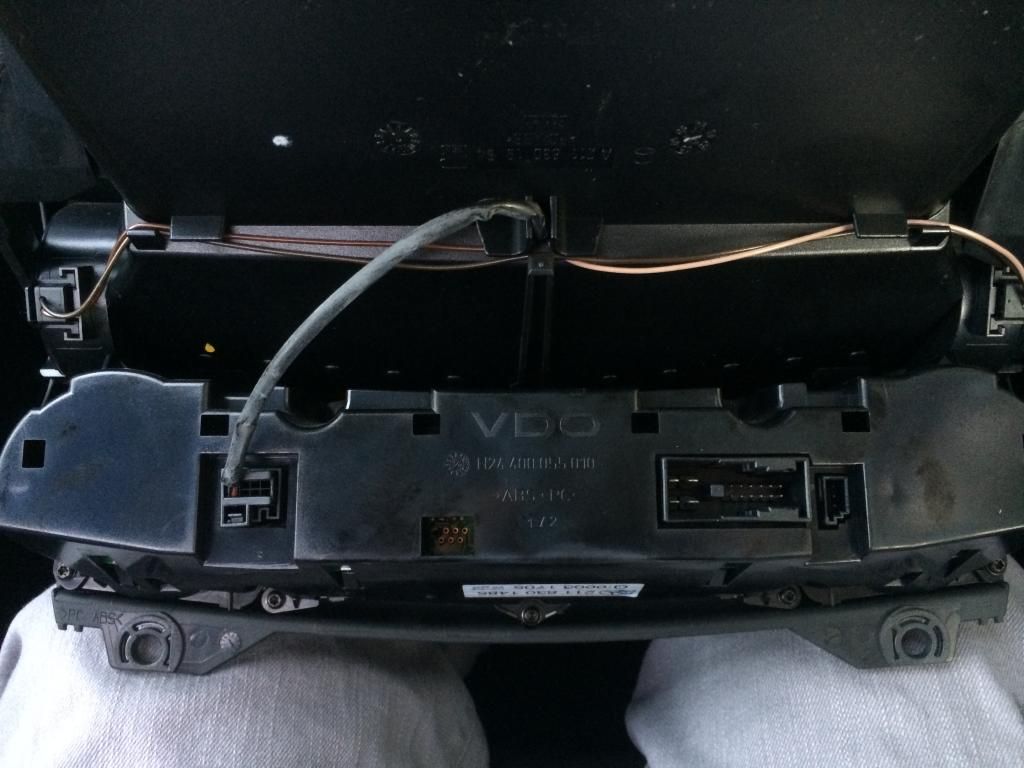
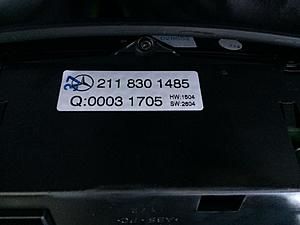
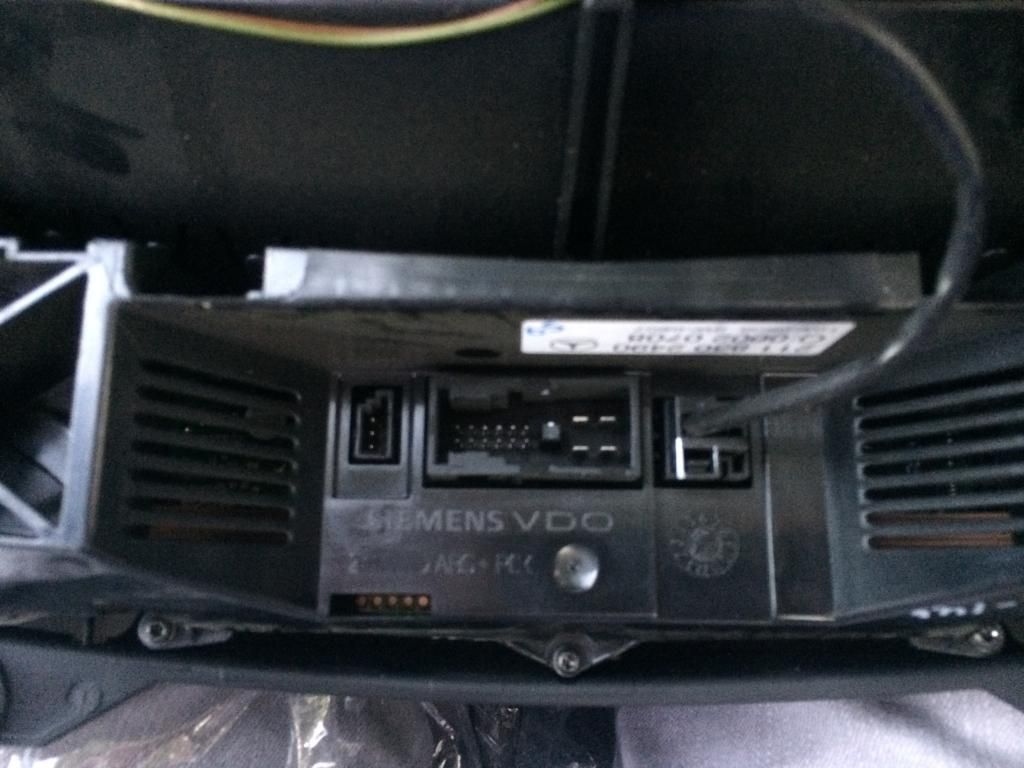
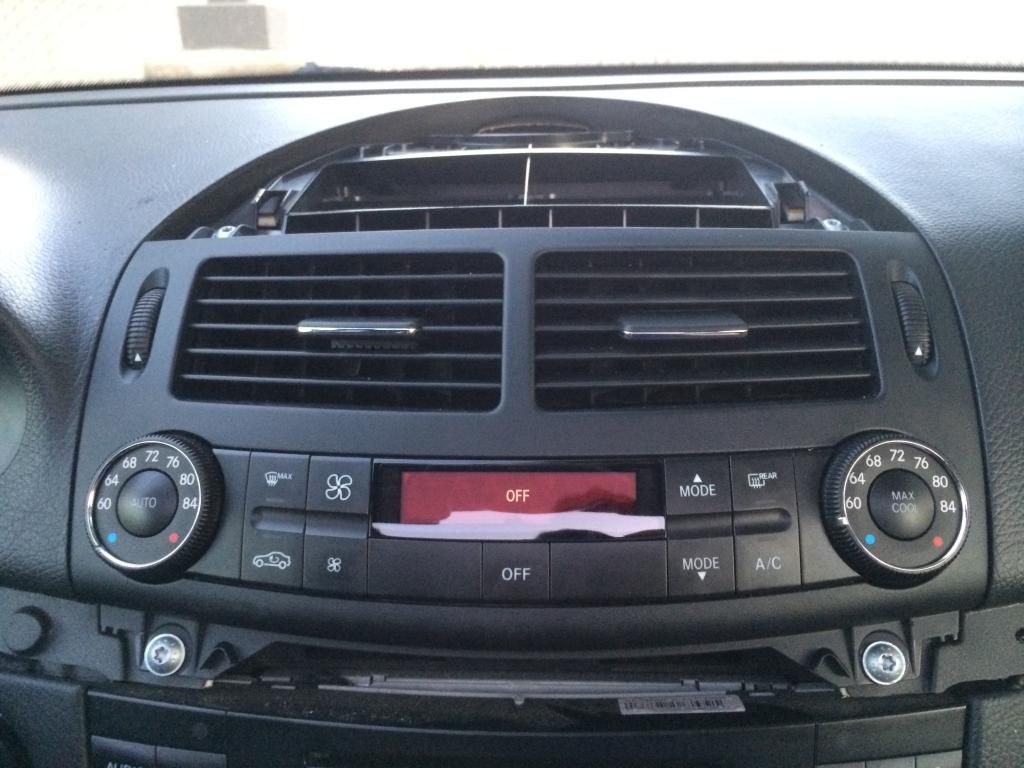
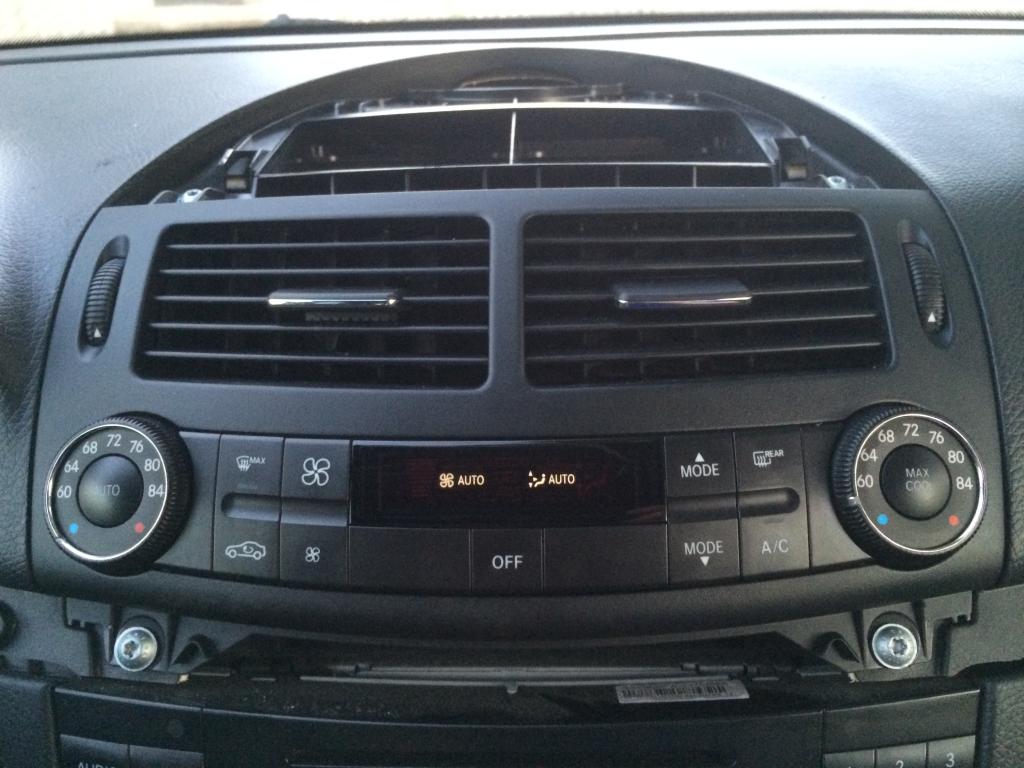
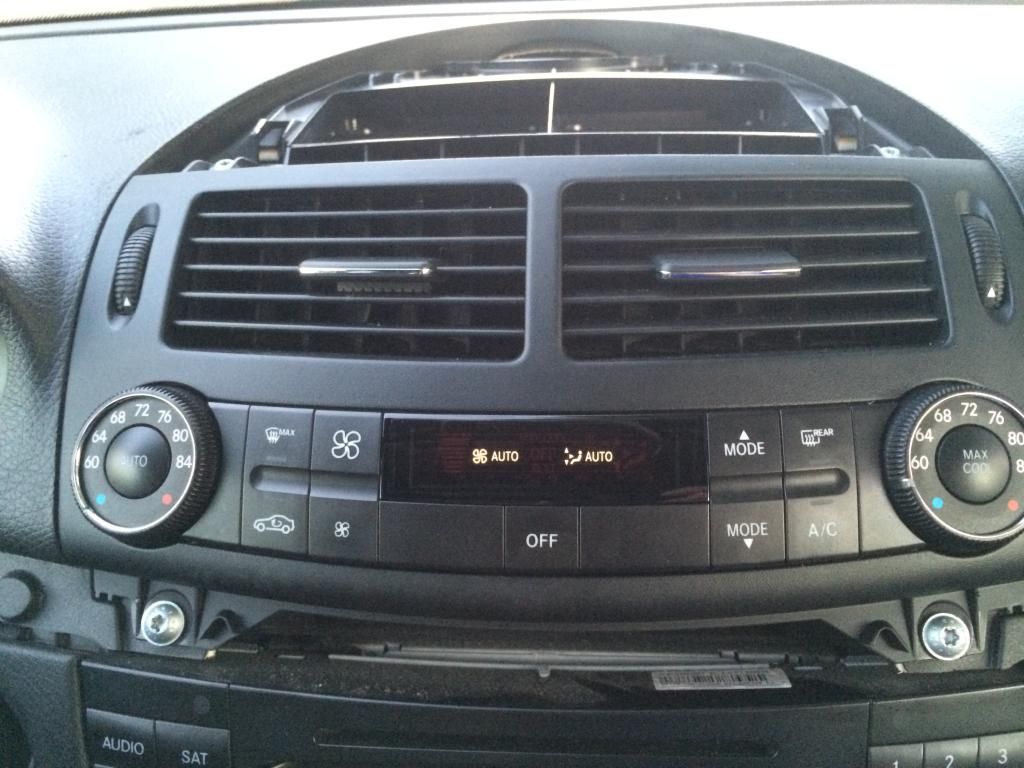
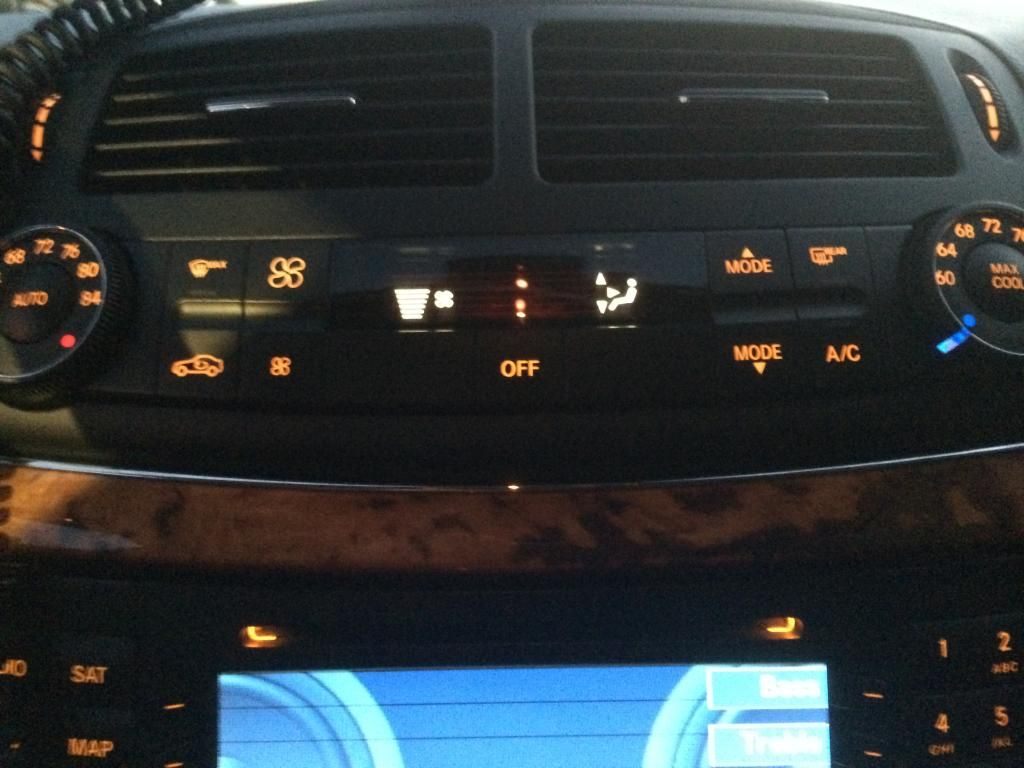
Just wondering if I'm missing a step here. I finished swapping my old MY06 unit out with what I believe is a MY07&08 control part # 211 830 2490 and I'm having the AC / Max Cool symptoms you previously had. AC light won't stay on just blinks 5 times when pressed and then stays off. Max Cool light blinks twice then stays off. I tried turning the fob to the II position then holding down (driver side) AUTO + AC buttons for 5 seconds heck even 10 seconds and still no luck. Here are a few pics of the units.


Member
Joined: Jun 2013
Posts: 222
Likes: 1
2006 E350
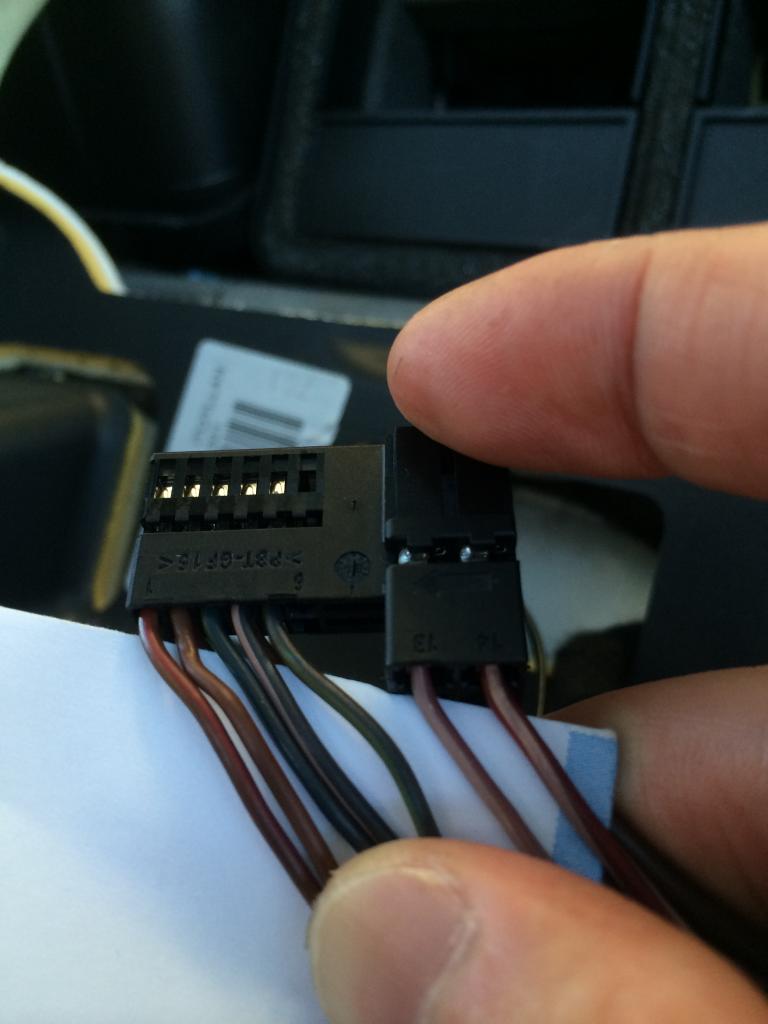
Took a few photos of the main wiring harness, total 16 pin slots with 4 slots unused (6, 9, 11 & 12)
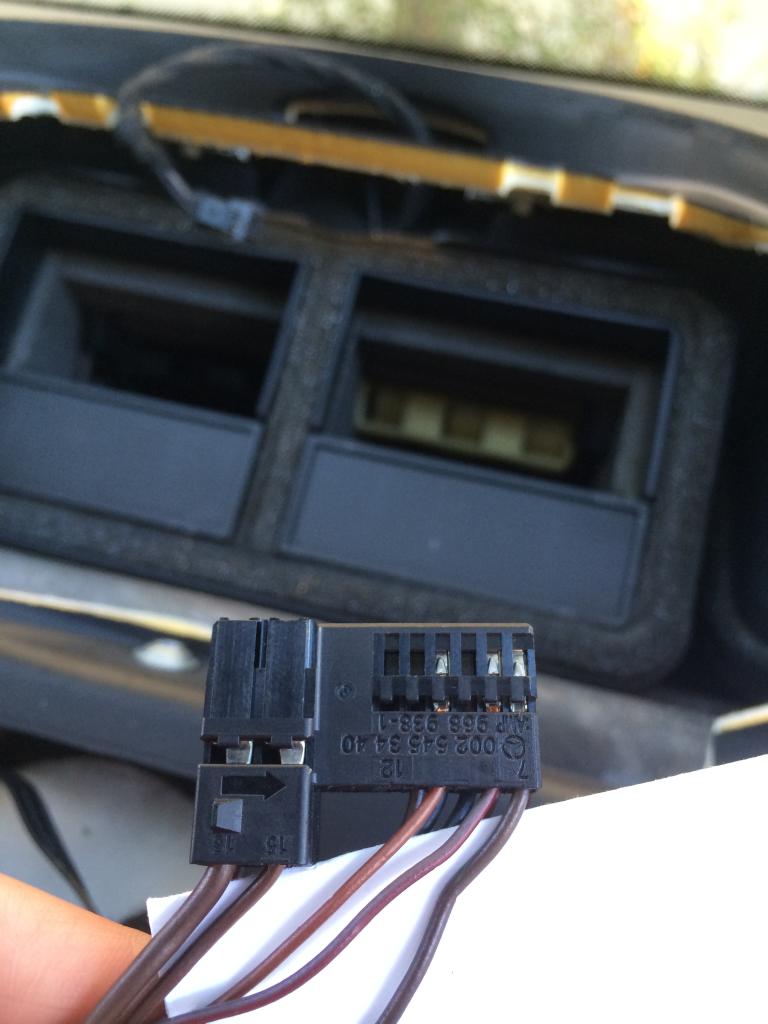
And the mini harness, 3 pin slots all used.

Last edited by Drag0na5h; Jul 26, 2014 at 12:34 PM.
Member
Joined: Jun 2013
Posts: 222
Likes: 1
2006 E350
Well if you're asking me specifically, I don't just want an LCD to replace the 1950s LED display. I also want to retain the knob style temperature controls because I personally dislike using buttons for that function. Agree to disagree?
Banned
Joined: Feb 2008
Posts: 0
Likes: 118
Neither! Just trying to help. If it's not needed, let me know and I'll focus on more important **** in my life. You have to understand that certain things just can't get accomplished on these cars as much as we'd like to though. I'm playing around for more than a year to build a can bus module to do something for me that MB never intended to be on board but would be a neat feature for these cars. So far no luck, but not bc I' unable to build the herd and software but rather bc MB messed up when they developed the W211. Same thing with what we're doing here. Some MY just seem like they don't like a certain AC control unit with LCD which some of you like to have, and at the same time another one would work plug and palsy but doesn't have dial knobs for temp control.
MBWorld Fanatic!
Joined: Jul 2013
Posts: 3,133
Likes: 134
From: Down Unda
W204 C63 AMG, W212 E250 CGI, C207 E250 CGI
I do. The later version looooooks way better for sure but id rather have buttons and knobs that actually do something when i push/turn it. But, its just me.
Member
Joined: Jun 2013
Posts: 222
Likes: 1
2006 E350
Neither! Just trying to help. If it's not needed, let me know and I'll focus on more important **** in my life. You have to understand that certain things just can't get accomplished on these cars as much as we'd like to though. I'm playing around for more than a year to build a can bus module to do something for me that MB never intended to be on board but would be a neat feature for these cars. So far no luck, but not bc I' unable to build the herd and software but rather bc MB messed up when they developed the W211. Same thing with what we're doing here. Some MY just seem like they don't like a certain AC control unit with LCD which some of you like to have, and at the same time another one would work plug and palsy but doesn't have dial knobs for temp control.
Senior Member
Joined: May 2014
Posts: 485
Likes: 31
From: Concord, CA
'13 E350 . M276
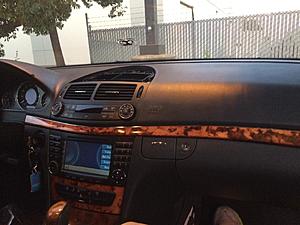
One big drawback to the LCD unit, is that in direct sunlight, the screen gets drained and you can't see much. This does not happen with analog stock unit.


