When you click on links to various merchants on this site and make a purchase, this can result in this site earning a commission. Affiliate programs and affiliations include, but are not limited to, the eBay Partner Network.
W211/W219 Rear Subframe Bushing: Determining whether it is DIY
Hi All;
I have a bad rear subframe bushing on my w219 2006 cls500 (same chassis as the w211). A worn rear subframe mount causes movement in the suspension and metallic sounds.
1.0 Purpose.
The purpose of this thread is to determine whether this is DIY, benefit other users, and solicit questions and feedback.
2.0 Background.
Lately I have been experiencing suspension sounds on my drivers side rear. I took it to several mechanics and they all could not diagnose and said nothing was wrong with my car. But then I had an idea to get my car on my lift and have a friend rev the engine while I look at suspension under the car. Once I did this, it was very clear the source of the problem: the rear subrame bushing.
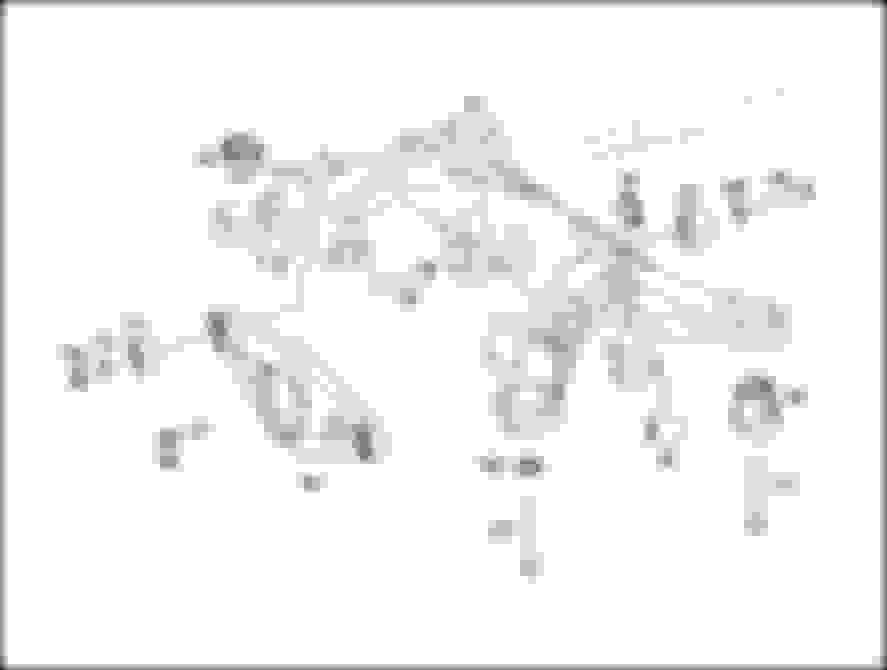
Here is the video of the play in the suspension, as well as a pic and diagram. The part number for the bushing is w211-351-14-42, and the bolt and nut are A0019903003 and A2303520246, respectively
Here is the bushing that is showing excessive play. It is on the drivers side rear. There are 4 bushings that attach to the car. This is the drivers side front rearward.
3.0 YouTube Videos and Threads.
The purpose of this section is to document all available information on changing this bushing. I cannot seem to find a good resource for the w219/w211, but there are a couple good youtube videos on the w210. Since the w211 is the older sibling to the w210, my hope is that these procedures will be mostly applicable.
Before we dive in, I'd like to note the two key challenges and hurdles with this DIY:
Accessing the bushing and removing the big bolt. On our car the bushing appears to be accessible, but I will confirm this later.
Getting this monster off the vehicle. Some have suggested that the entire rear axle needs to be dropped, and I am not even going to consider doing this. But then others in the videos and threads simply jack up the car and use the weight of the vehicle to press out the bushing. There are also other tools available to press out the busing, but I did not notice the DIYers using this tool.
1. W210 Subframe Busing Video DIY (complete job start to finish).
Looks like the author is supporting the subframe with a simple floorjack by the subframe
It appears he just lowers the jack and the subframe and entire bushing is exposed and just about ready to be removed, aside from some clearance issues.
Seems conclusive that the entire subframe and axle does not have to be removed to change this bushing.
Note the orientation of the bushing for installation.
There is a mounting plate on top of the bushing that needs to be removed.
He uses a jack, socket, and extension to push out the bushing from the bottom.
Using a power air hammer tool, there is some metal that he grinds away and then cleans up the area.
He uses a new bolt.
A special tool is not used to get out the bushing; I wonder if it would be best just to buy the tool and avoid the mess?
To remove the bushing, he uses a cup attachment on the top of the bushing and a socket extension on the bottom and used the jack to force it out.
To press in the bushing, he used the jacket and pressed against the vehicle
This w214 owner replaced his subframe bushings in his home garage, and it seemed quite doable
His suggested torque spec for the big bolt is 70 ft/lbs
He assessed the bushing by removing the bolts of subframe on one side of the car and supported with a jack
3.0 Hurdles
With the preceding information it seems DIY is possible. As mentioned, two technical hurdles exist. I need to be able to access the bushings, and lower the subframe enough so that I can remove the bushings. I'll report back when I determine if I can get the the bushing, although I am reasonable sure this is possible but who knows without digging in and see what crap is in the way.
Wish me luck and feel free to comment!!!
Update 1:
I spent the entire weekend on this job. It took a dozen hours to access the bushing and dig it out:
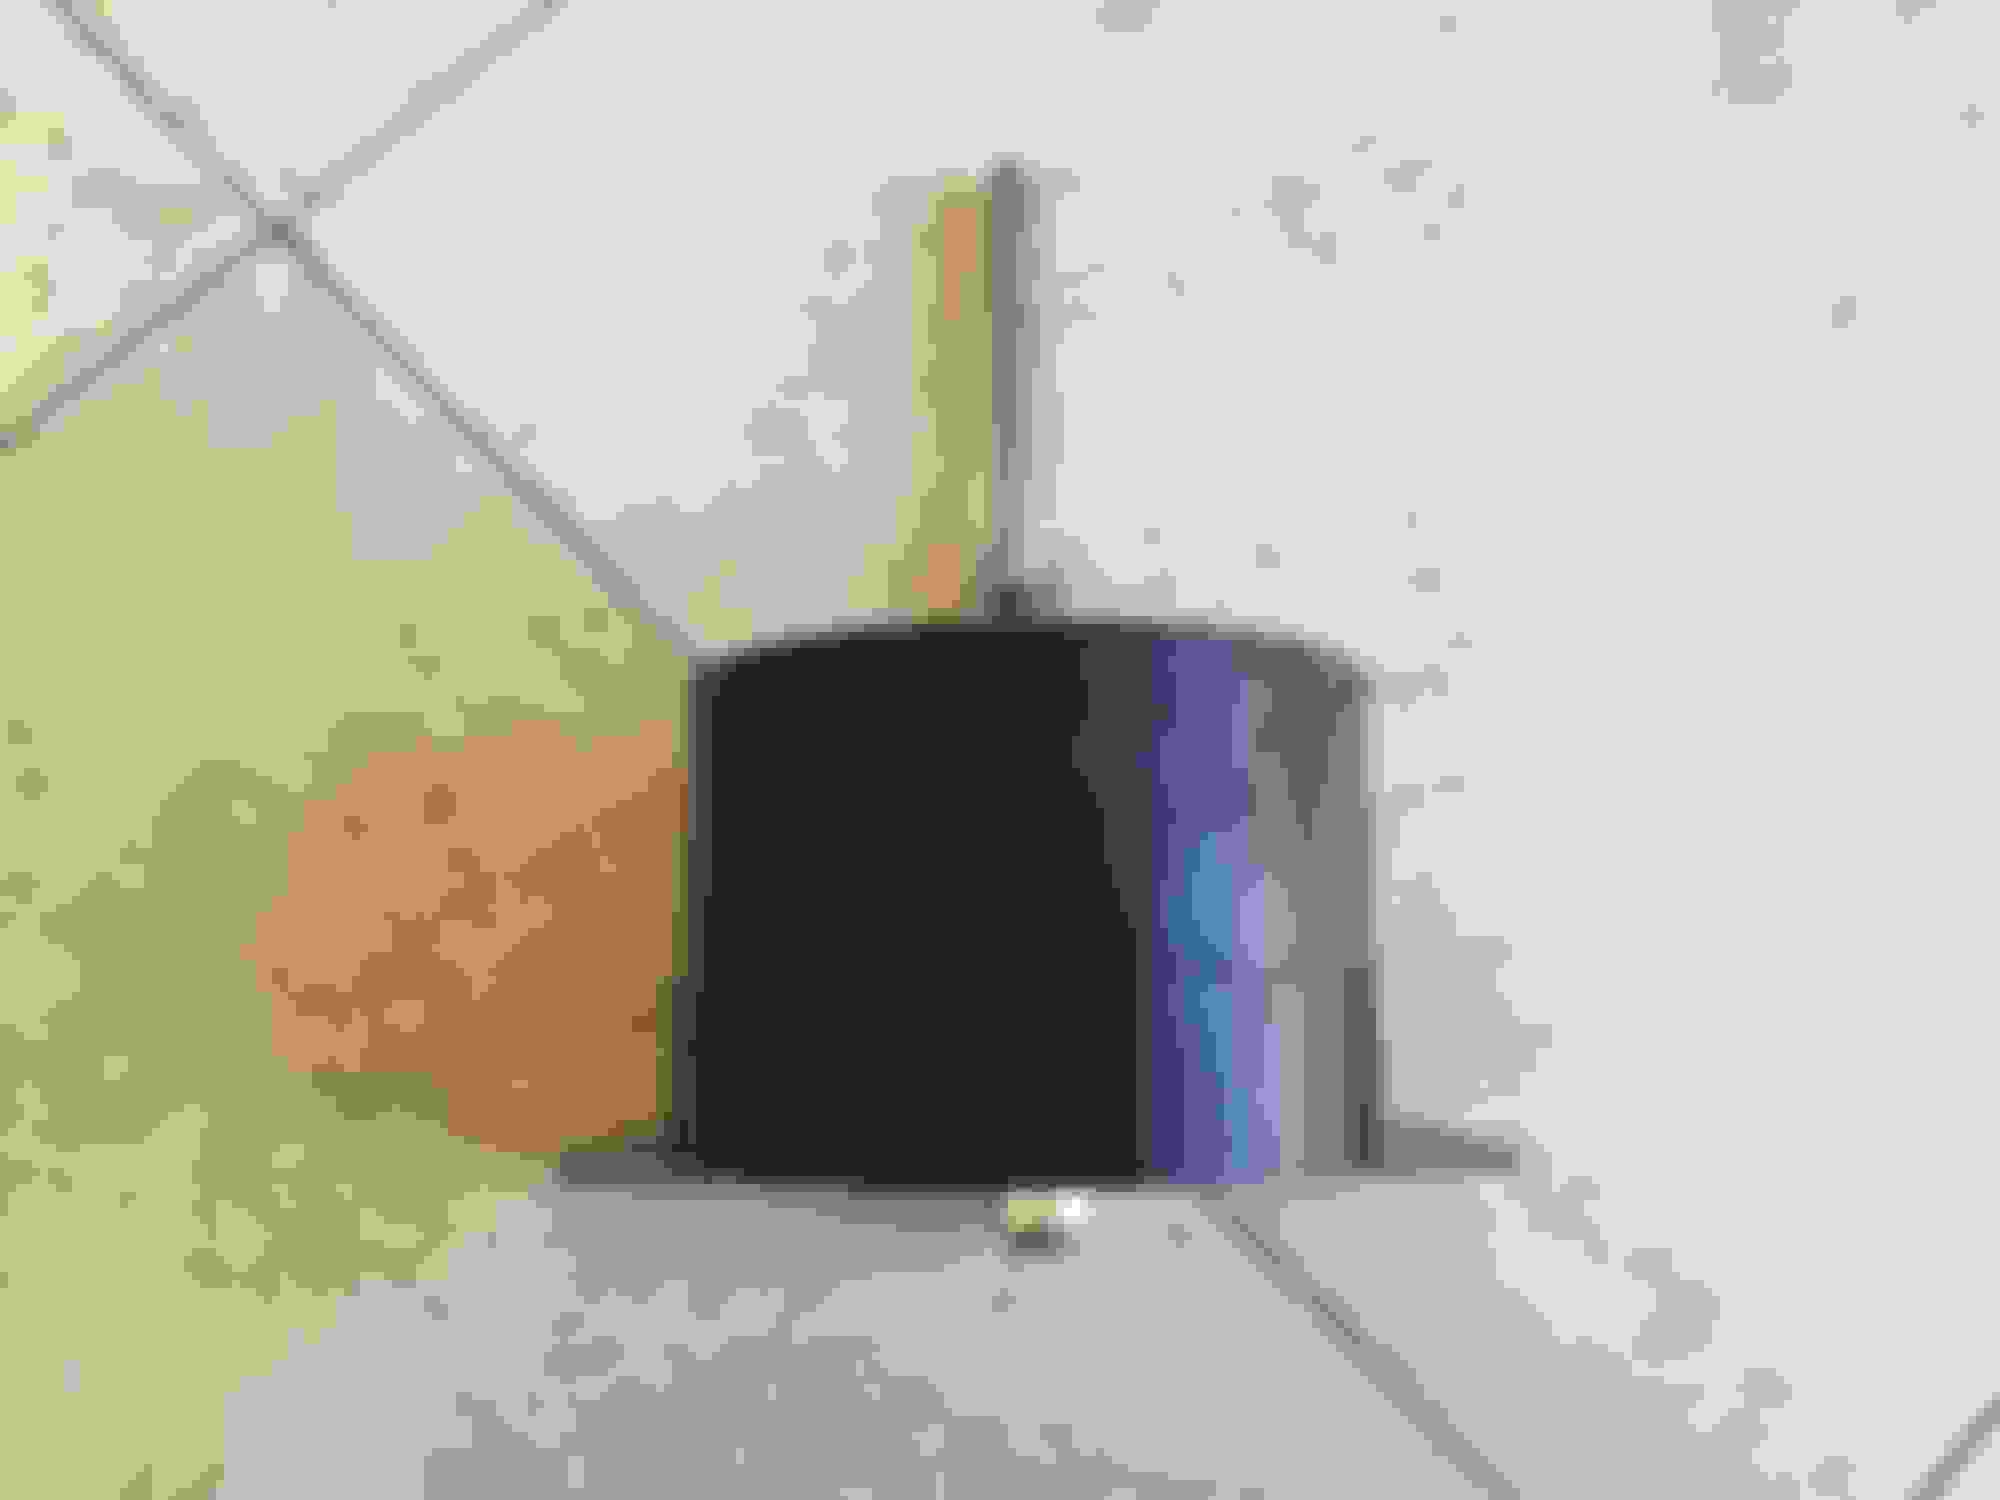
Here is the monster. I had to unbolt a couple suspension items. It took over 10 hours to dig it out. I'm stuck now because I cannot press it back in, but I bought the special tool and *pray* it work to install. Waiting for the tool to arrive in mail, so car is in garage in pieces which sucks. It was extremely difficult to dig out the bushing, and it was really hard to tell what was the subframe and what was the bushing. As a result, some of the subframe is mangled from my drill and I have had to smooth out the metal with my dremel tool so the bushing slides back in with obstruction from frayed metal. Also I am building up the mangled areas with bondo, smoothing it out, and reforming the surface and painting silver. I'm sure everyone will marvel at my beautiful subframe bushing when I am driving down the street upon completion of this tedious project!
Update 2:
As I have been waiting for the special install tool to arrive in the mail, I watched the w210 video above several more times. THEN it occurred to me that maybe after all I did not completely dig out the bushing after all. In the w210 video, he digs out the bushing but a very strong metal ring remained in the subframe. It looks like the subframe but is actually part of the bushing. Upon this revaluation I used giant pliers and ripped out the metal and now the bushing fits flush on the subframe and should easily go in. My problem was not that I needed the tool. The problem was that the old bushing was not completely removed. I will post pics of the SOB metal bushing (that looked like the subframe) as well as the giant pliers that I used to remove.. Update #3:
Well I finally finished this horrific job about 3am last night. It turns out that the special tool I bought online was absolutely necessary to press in the bushing. I tried putting the entire weight of the car to press it in, like others have suggested, but that didn't work. With the special tool I pressed it in in minutes.
Putting the car back together was harder than I expected. I had to disconnect the lower control arm and the sway bar to get clearance to get to the bushing. Rebolting the control arm wasn't too bad, but the sway bar took at least five hours. There must be a trick to doing this. Bolting in the subframe bushings to the vehicle was not too bad but still required extreme caution and precision.
Upon initial test drive I did not hear the terrible sound from the bushing. But something didn't feel right. Turns out that I punctured the air spring and my rear end sank to the ground and now I need to replace that as well. I almost cried when I realized my mistake, but at least anything i do now compared to this project will be *easy*. I bought a Sunco airpring at advanced auto for $230 to replace the punctured strut.
Once I have a chance will post some pics of the bushing, tools, etc.
And to answer the question "is changing the rear subframe budhing on a w211/w219 DIY?:
Well, yes and no.
It is a doable job but very, very extensive.
Something is bound to go wrong that is not well documented online.
In my case, I did not have the special tool initially, but even if I did there were about a dozen or more hours I was just banging my head and didn't know what to do.
If you decide to do this job make sure to get the tool and have another means of transportation. Unless you are a master tech or something this is not a weekend job. In my case rode the subway to work and used my wife's car.
Please feel free to comment.
Once I have the air strut installed I will do another update.
Have a great day and I hope my write up will help someone someday.
Update #4:
Here are various pics with explanations in captions.
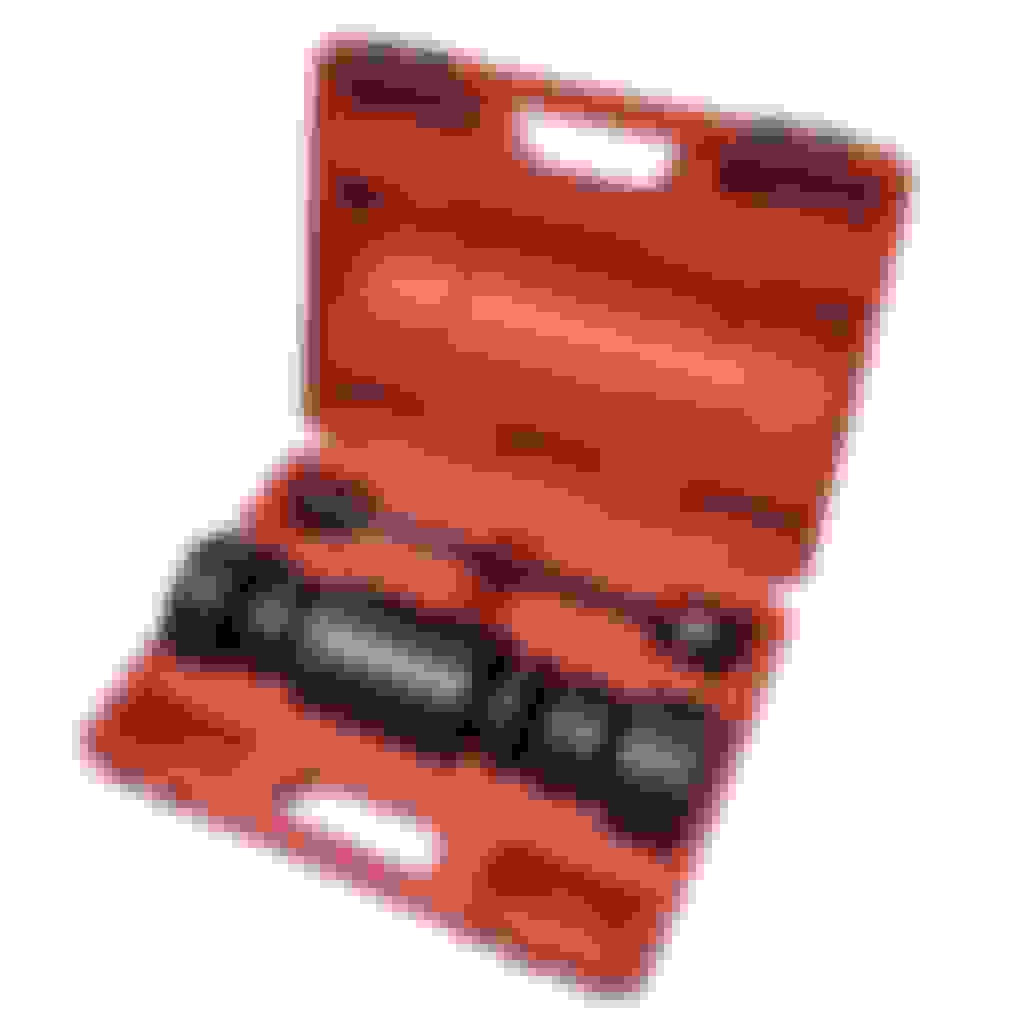
is the link to the special tool. It is a bit clunky but it gets the job done fast pressing in the bushing.
The magic tool, a must have unless you want to ruin your weekend. I tried to press in the bushing with the entire weight of the car and it did not work. With this tool the bushing went in within minutes. I'm still not sure if the tool has clearance to remove the bushing, but you can always do the caveman style to remove and dig it out with a drill, pliers, hammer, and hunting knife (not kidding).
Another w210 suggested building a special tool yourself. Don't do it. Sure, it may be possible but I could not figure it out. Spent an entire Saturday running from one hardware store to the next and wasted time and money. Now I have to return a pile of random crap.
Last edited by LexBrett2; Sep 17, 2018 at 03:50 PM.
Hello, I know this is an older thread, but I just did the bushing replacement on my 07 e550 passenger side. I bought the special tool set which made removing and installing the bushings very simple and removed them in 1 piece. I wanted to share that I only removed the caliper, lower shock bolt and the rubber hose between the fuel filler and the gas tank. It was necessary to lower the subframe enough to use the tool. I'll finish the driver side tomorrow and post and update to the improvement. I previously replaced rear shocks, but felt no improvement. Here's pics halfway through and the cracks around the center boss on the front bushing.
2006 CLS55 IWC, 2003 Black E55 designo interior, 2005 White designo E55
W211 subframe
Hey
yes please update us
I am very interested as I need to do this on my w219 cls55.
The driver front bushing has partially come away from the main bushing.
Please PM if you are willing to rent me your special tool!
Thanks
Sam
Hi, do any of you have the special tool you'd be willing to lend out for a fee? I'm in desperate need of it, and would rather not spend the $500 asking price. I'm in the US and nowhere seems to rent it. Thank you!
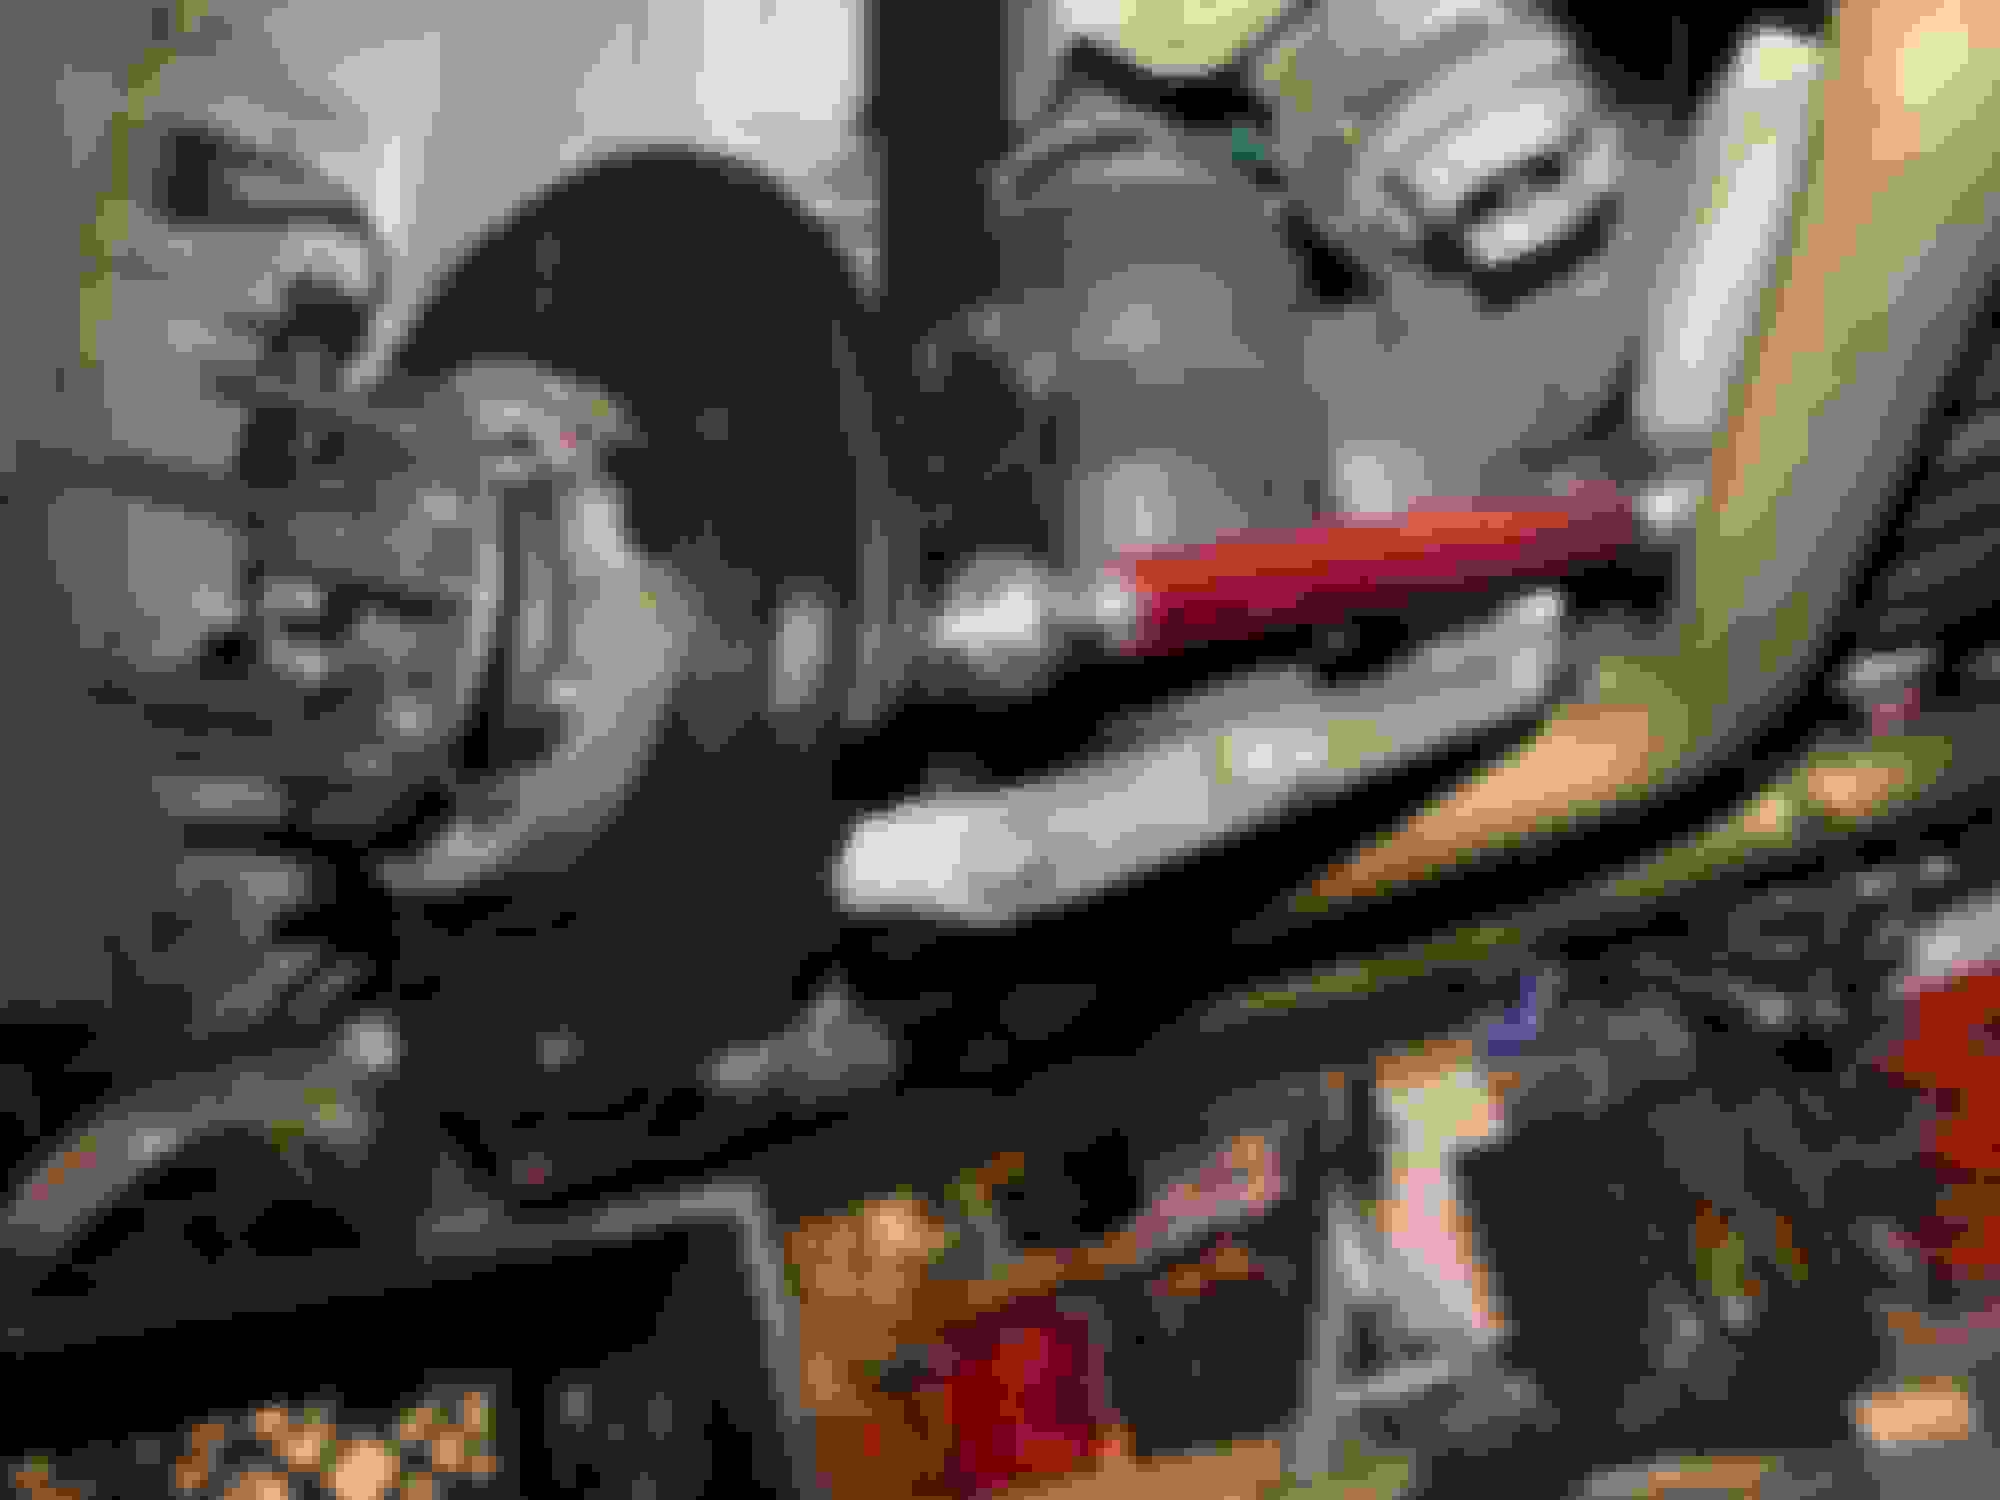
I just completed renewing all my Subframe Bushings, as well as most everything from the Rear Main Seal back, including a 3.06 Rear Diff Gear and LSD! Those front Bushings are the toughest to remove because of exactly what you talk about, they have a metal cup that is filled with oil within the rubber Bushing material. When you “pull” it out, in my case, it exploded and left that cup in the subframe. I’d really like to see what Pliers you used to get that mother out? I ended up using a Router and blew through a whole bit grinding a slot into each cup which enabled me to then easily fish it out. I made my own extraction tool:
And here you can see me using it to Install the Rear Subframe Bushing. I used it to also replace every bushing in each Arm and renewed them w/K-Mac’s, as well as the OEM Rubber Bushings in the Carrier. The K-Macs come with their own perfectly sized tube to extract those Upper Control Arm Bushes. My DIY Tool in action Shiny new K-Mac Bushings up close! The installed end result with new UPD Toe Arms and New OEM Torque Arms.
purchased a tool similar to the one you shared but the $350 version in a blue box that looks like an OEM supplier...didn't work. completely wrong kit. planning on renting from Creative Steel as $499 for a tool i plan to use once is crazy. didn't rent the tool upfront because its been over 2 years and now i'm getting around to installing these bushings.
Creative Steel offers a tool rental to customers who purchase our polyurethane subframe bushings. To order the tool you must call the shop. We will then discuss the terms of the tool rental which involves placing a $500 authorization to your credit card. This charge is placed for potential damages, missing parts, and/or if the tool is not returned to us. The TOTAL DEPOSIT AMOUNT will be REFUNDED if the tool is returned in the same condition as received. Rental fee is $75 for 7 days and then $25 per day following that initial 7 days. We also offer instructions on how to use the tool to remove your old bushings and install the new ones.
Below is a link to the tool and our subframe bushings in addition to a video showing the before and after performance of our bushings. Please let us know if you have any questions!
Mercedes SLR McLaren 722 S Is Extremely Rare Example Modified by McLaren
Slideshow: A one-of-one U.S.-spec Mercedes-Benz SLR McLaren Roadster became even rarer after a factory-backed transformation at McLaren's headquarters.