


 Jun 4, 2015, 07:58 PM
Last edit by: IB Advertising
See related guides and technical advice from our community experts:
- Mercedes Benz E Class How to Install Interior LED Lights
Step by step instructions for do-it-yourself repairs

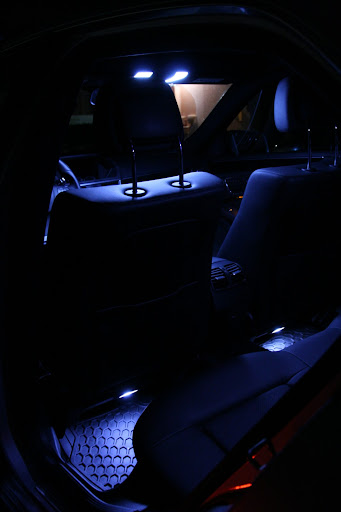
Did it...LED interior, LED trunk, and LED rear License plate lights.
Thread Starter
Super Member

Joined: Mar 2006
Posts: 771
Likes: 7
From: Waikele, Oahu, Hawaii
2011 GLK350 P1, Multi-media & AMG Pkg; 2010 E350 w/ prem 2; 2018 4Runner SR5 Prem. 4x4
Did it...LED interior, LED trunk, and LED rear License plate lights.
Started at midnight...finished around 1:30 am...

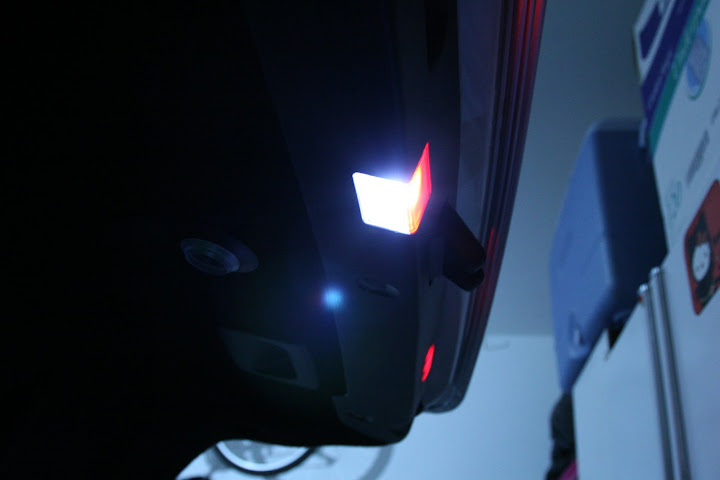
Did all 4 lower door panels, glove box, all 4 footwells, 2 front dome, rear dome, 2 rear reading lights, 2 rear trunk ,1 rear trunk lid, and both license plates.
Need to figure out the side mirror puddles.
Pics in subsequent posts....keep on scrolling down.
Pete
Did all 4 lower door panels, glove box, all 4 footwells, 2 front dome, rear dome, 2 rear reading lights, 2 rear trunk ,1 rear trunk lid, and both license plates.
Need to figure out the side mirror puddles.
Pics in subsequent posts....keep on scrolling down.
Pete
Last edited by PHML; Jan 28, 2012 at 03:53 AM.
Thread Starter
Super Member
Joined: Mar 2006
Posts: 771
Likes: 7
From: Waikele, Oahu, Hawaii
2011 GLK350 P1, Multi-media & AMG Pkg; 2010 E350 w/ prem 2; 2018 4Runner SR5 Prem. 4x4
oh...forgot to say that since I have P2, I didn't swap out any inner city lights, or fog lights.
Thread Starter
Super Member
Joined: Mar 2006
Posts: 771
Likes: 7
From: Waikele, Oahu, Hawaii
2011 GLK350 P1, Multi-media & AMG Pkg; 2010 E350 w/ prem 2; 2018 4Runner SR5 Prem. 4x4
DIY
I need to take more pics of the final product tonight. I took only a few pics during the install...kinda hard to trying to mod as quietly as possible not to wake up the neighbors past midnight...LOL!!
I'd have to say this though...the door panels, glove, trunk, and footwells were the easiest. Removing the bulb housing required a flat head screwdriver and prying one side out...then popping them back in...
Door Panels....

I used directional SMD LEDs....the socket flips down and the LEDs will face outward...

Removing Footwell housing (the glove box unit and trunk is similar to this).....
The more difficult ones were the front dome, rear dome, and the license plate bulbs.
Front Dome....you need to remove the white housing like so...

Put in the SMD LEDs...I used these for now...it has a small heatsink...but I may swap them out later...

The rear dome unit is more difficult than the front dome...
You need to remove the entire rear dome unit with a flat head screwdriver...

then disconnect the wire....

Once disconnected....you have to pry apart the unit just to get to the festoon bulb....I tried to tenderly pry the sections apart, but realized I aint going to get it done if I baby it....the tabs are delicate...I broke a small tab, but nothing to worry about...still works....btw, the reading lights are easy to swap out...


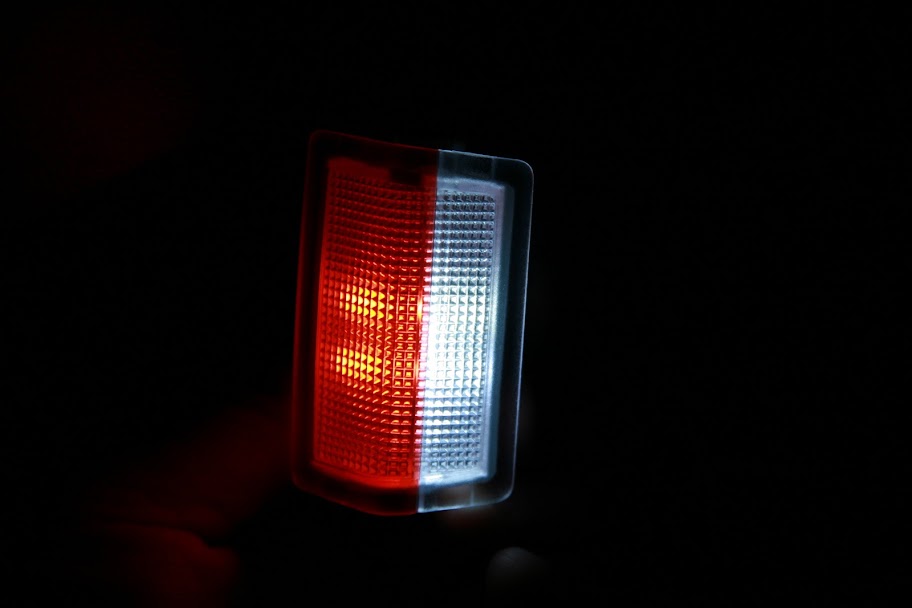
Festoon bulb in place....either 39mm to 42mm can be used...stock size is supposedly 41mm.

Put it back together and you're in business.
As far as the rear trunk lid LED and the license plate bulbs...it is easy if you have skinny arms. I think swapping out the bulbs is easy...its just getting your arms in there is the hardest part. I think its just the access to them is what everyone wants to know. I didn't take pics of this part, as I was in a zone to finish quickly...so maybe tonight, I'll take some pics on how to remove the liner to access these bulbs.
Best of all...no error codes!! Cheeeeee Hoooooo!!!
Overall pics of how they look will be taken tonight.
Pete
I'd have to say this though...the door panels, glove, trunk, and footwells were the easiest. Removing the bulb housing required a flat head screwdriver and prying one side out...then popping them back in...
Door Panels....
I used directional SMD LEDs....the socket flips down and the LEDs will face outward...
Removing Footwell housing (the glove box unit and trunk is similar to this).....
The more difficult ones were the front dome, rear dome, and the license plate bulbs.
Front Dome....you need to remove the white housing like so...
Put in the SMD LEDs...I used these for now...it has a small heatsink...but I may swap them out later...
The rear dome unit is more difficult than the front dome...
You need to remove the entire rear dome unit with a flat head screwdriver...
then disconnect the wire....
Once disconnected....you have to pry apart the unit just to get to the festoon bulb....I tried to tenderly pry the sections apart, but realized I aint going to get it done if I baby it....the tabs are delicate...I broke a small tab, but nothing to worry about...still works....btw, the reading lights are easy to swap out...
Festoon bulb in place....either 39mm to 42mm can be used...stock size is supposedly 41mm.
Put it back together and you're in business.
As far as the rear trunk lid LED and the license plate bulbs...it is easy if you have skinny arms. I think swapping out the bulbs is easy...its just getting your arms in there is the hardest part. I think its just the access to them is what everyone wants to know. I didn't take pics of this part, as I was in a zone to finish quickly...so maybe tonight, I'll take some pics on how to remove the liner to access these bulbs.
Best of all...no error codes!! Cheeeeee Hoooooo!!!
Overall pics of how they look will be taken tonight.
Pete
Last edited by PHML; Jan 27, 2012 at 06:41 PM.
Trending Topics
MB World Stories
The Best of Mercedes & AMG

Manual Mercedes? 6 Times Sindelfingen Let Drivers Have All The Fun
Verdad Gallardo
Mercedes SLR McLaren 722 S Is Extremely Rare Example Modified by McLaren
Verdad Gallardo
8 Classic Boxy Mercedes Designs That Have Aged Like Fine Wine
Verdad Gallardo
Flawlessly Restored Mercedes 190E Evo II Heads to Auction
Verdad Gallardo
Electric Mercedes C-Class Unveiled: 11 Things You Need to Know
Verdad Gallardo
Mercedes EQS Gets A Major Update: Everything You Need to Know
Verdad Gallardo
5 Underrated Mercedes-Benz Models That Don't Get the Love They Deserve
Verdad Gallardo
Mercedes 300D Has Pushed Well Past 1 Million Miles and It Ain't Stopping
Verdad Gallardo
10 Most Reliable Mercedes-Benz Models You Can Buy Used
Verdad Gallardo
Junior Member
Joined: Mar 2009
Posts: 41
Likes: 0
From: San Diego
C280,ML 320, 2010 E350
I need to take more pics of the final product tonight. I took only a few pics during the install...kinda hard to trying to mod as quietly as possible not to wake up the neighbors past midnight...LOL!!
I'd have to say this though...the door panels, glove, trunk, and footwells were the easiest. Removing the bulb housing required a flat head screwdriver and prying one side out...then popping them back in...
Door Panels....
I used directional SMD LEDs....the socket flips down and the LEDs will face outward...
Removing Footwell housing (the glove box unit and trunk is similar to this).....
The more difficult ones were the front dome, rear dome, and the license plate bulbs.
Front Dome....you need to remove the white housing like so...
Put in the SMD LEDs...I used these for now...it has a small heatsink...but I may swap them out later...
The rear dome unit is more difficult than the front dome...
You need to remove the entire rear dome unit with a flat head screwdriver...
then disconnect the wire....
Once disconnected....you have to pry apart the unit just to get to the festoon bulb....I tried to tenderly pry the sections apart, but realized I aint going to get it done if I baby it....the tabs are delicate...I broke a small tab, but nothing to worry about...still works....btw, the reading lights are easy to swap out...
Festoon bulb in place....either 39mm to 42mm can be used...stock size is supposedly 41mm.
Put it back together and you're in business.
As far as the rear trunk lid LED and the license plate bulbs...it is easy if you have skinny arms. I think swapping out the bulbs is easy...its just getting your arms in there is the hardest part. I think its just the access to them is what everyone wants to know. I didn't take pics of this part, as I was in a zone to finish quickly...so maybe tonight, I'll take some pics on how to remove the liner to access these bulbs.
Best of all...no error codes!! Cheeeeee Hoooooo!!!
Overall pics of how they look will be taken tonight.
Pete
Can u post where did u order your led light? Thanks in advance!
MBWorld God!


Joined: Jul 2010
Posts: 31,273
Likes: 3,916
From: on my way
2012 CLS63
wow, thats great man....I'll bet it's so bright in there!!
thanx for putting all the effort in sharing your work: a job in itself
sorry you broke one of the tabs.....hopefully you won't get a rattle anywhere's....
and seriously, how much noise could you have been making?? lol
..I'll bet it's so bright in there!!thanx for putting all the effort in sharing your work: a job in itself
sorry you broke one of the tabs.....hopefully you won't get a rattle anywhere's....
and seriously, how much noise could you have been making?? lol
Thread Starter
Super Member
Joined: Mar 2006
Posts: 771
Likes: 7
From: Waikele, Oahu, Hawaii
2011 GLK350 P1, Multi-media & AMG Pkg; 2010 E350 w/ prem 2; 2018 4Runner SR5 Prem. 4x4
ebay....everything is regular 194 size LEDs...the only exceptions are the license plate LEDs which need to be canbus to prevent an error code on the dash, and the rear dome LED is festoon...41mm/42mm is best.
Was a small plastic tab joining the 2 of the 3 sections of the rear dome together...no rattle at all.
As for noise, I had to pull the car out of the garage to work on it with the doors swung wide open on both sides....and I live in a private culdesac so its pretty quiet...except for me.
wow, thats great man....I'll bet it's so bright in there!!
thanx for putting all the effort in sharing your work: a job in itself
sorry you broke one of the tabs.....hopefully you won't get a rattle anywhere's....
and seriously, how much noise could you have been making?? lol
..I'll bet it's so bright in there!!thanx for putting all the effort in sharing your work: a job in itself
sorry you broke one of the tabs.....hopefully you won't get a rattle anywhere's....
and seriously, how much noise could you have been making?? lol
As for noise, I had to pull the car out of the garage to work on it with the doors swung wide open on both sides....and I live in a private culdesac so its pretty quiet...except for me.


 ! you did a wonderful job
Thread Starter
Super Member
Joined: Mar 2006
Posts: 771
Likes: 7
From: Waikele, Oahu, Hawaii
2011 GLK350 P1, Multi-media & AMG Pkg; 2010 E350 w/ prem 2; 2018 4Runner SR5 Prem. 4x4

 ! i'm still counting how many bulbs i need in total
  .
.
Thread Starter
Super Member
Joined: Mar 2006
Posts: 771
Likes: 7
From: Waikele, Oahu, Hawaii
2011 GLK350 P1, Multi-media & AMG Pkg; 2010 E350 w/ prem 2; 2018 4Runner SR5 Prem. 4x4

MBWorld Fanatic!
Joined: Dec 2011
Posts: 2,056
Likes: 5
From: Paradise
w212 E550
ok, please let me know if my math is ok. 4 lower door panels (courtesy lights), 1 glove box, 4 footwells, 2 front dome, 2 rear reading lights, 2 rear trunk , 1 rear trunk lid, 2 side mirror and they are all 194. 2 error free license plate bulbs and 1 festoon for rear dome. am i correct? i really like the brightness of yours, not too bright. how many smd? thanks again!

Member
Joined: Oct 2004
Posts: 174
Likes: 7
From: 626
w212 & s212
got mine changed a while back and saw how it was done...
the mirror is pretty much held in with 3 clips that can be popped off by prying with a plastic knife type of item. it'll end up dangling from the side mirror. the bulb will not be accessible right away. There is a small light module that is held in place by 1 small screw. Remove the screw to remove the light module to access the small bulb.
i hope my attempt of explaining what I saw works....
Thread Starter
Super Member
Joined: Mar 2006
Posts: 771
Likes: 7
From: Waikele, Oahu, Hawaii
2011 GLK350 P1, Multi-media & AMG Pkg; 2010 E350 w/ prem 2; 2018 4Runner SR5 Prem. 4x4
got mine changed a while back and saw how it was done...
the mirror is pretty much held in with 3 clips that can be popped off by prying with a plastic knife type of item. it'll end up dangling from the side mirror. the bulb will not be accessible right away. There is a small light module that is held in place by 1 small screw. Remove the screw to remove the light module to access the small bulb.
i hope my attempt of explaining what I saw works....
the mirror is pretty much held in with 3 clips that can be popped off by prying with a plastic knife type of item. it'll end up dangling from the side mirror. the bulb will not be accessible right away. There is a small light module that is held in place by 1 small screw. Remove the screw to remove the light module to access the small bulb.
i hope my attempt of explaining what I saw works....
Anyways...like my Lexus' side mirror, our side mirror is held onto the motor by clips. Angle the mirror down and away as far as possible....this should give a small gap between the mirror and the housing. If you can get a finger in there, pull the mirror down away...a quick jerk may do the trick, and the mirror should pop off from the motor. Remove the mirror from the motor and let it hang by the wires. You need to remove 3 screws to dismount the motor....then unplug the socket plug to the motor and place the motor somewhere safe. At this point, removing the puddle light housing is difficult, but can be done. The problem is that the bracket that holds the motor to the inside housing shell is large. It's the full height and length of the inside shell housing....and sits above the puddle light housing with about only 2mm gap between them, and the housing is held in place with a rail guide on one side, and a plastic tab on the other side.....so even removing ALL the screws (3) that i could find and thinking it would free up that bracket to make it easy to access the puddle light housing....I was sadly mistaken!
 With all the screws out, that bracket didn't budge at all.
I was forced to muscle the puddle light housing out at an angle....I was thinking for sure I was going to break a tab...but luckily I didn't break any. Swapped out the puddle bulb for the driver side...took me an hour...done at 2 am....lol. I will do the pass side later...it's time for bed.
Btw, this is by far the most difficult to do...makes the rear dome seem easy!
Pete
Last edited by PHML; Jan 29, 2012 at 04:30 AM.
Thread Starter
Super Member
Joined: Mar 2006
Posts: 771
Likes: 7
From: Waikele, Oahu, Hawaii
2011 GLK350 P1, Multi-media & AMG Pkg; 2010 E350 w/ prem 2; 2018 4Runner SR5 Prem. 4x4
MBWorld God!
Joined: Jul 2010
Posts: 31,273
Likes: 3,916
From: on my way
2012 CLS63
I would consider a few places to put the led's....the floorboards are a yes....
the trunk too, and the doors.....not sure about the actual compartment lights.....
I have them set to stay off when the doors open anyway......helps the ambient lighting and the door sills stand out even more......
I'm sure the led's would accentuate that nice look.......
those night time pix are savory man, nice high quality looking....
 .
.
Thread Starter
Super Member
Joined: Mar 2006
Posts: 771
Likes: 7
From: Waikele, Oahu, Hawaii
2011 GLK350 P1, Multi-media & AMG Pkg; 2010 E350 w/ prem 2; 2018 4Runner SR5 Prem. 4x4
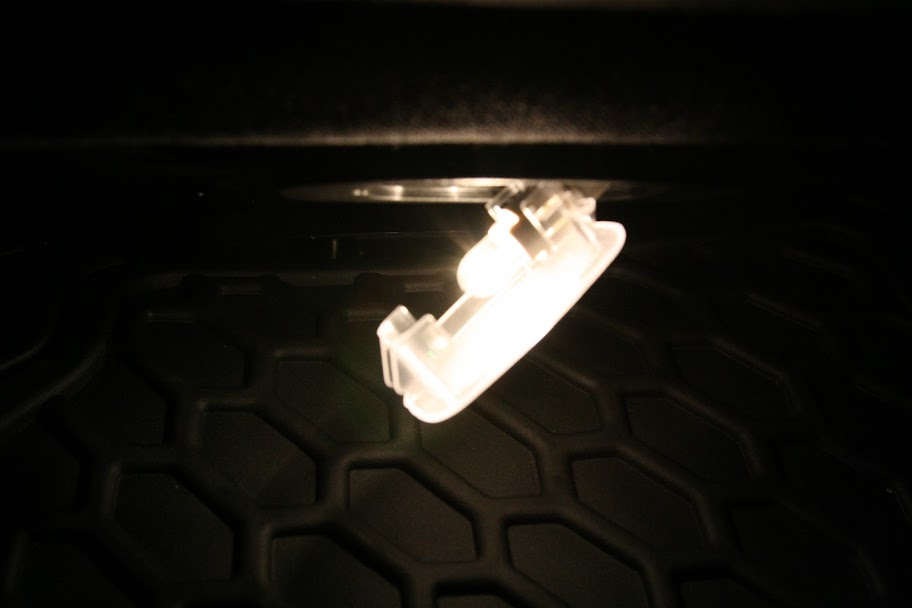
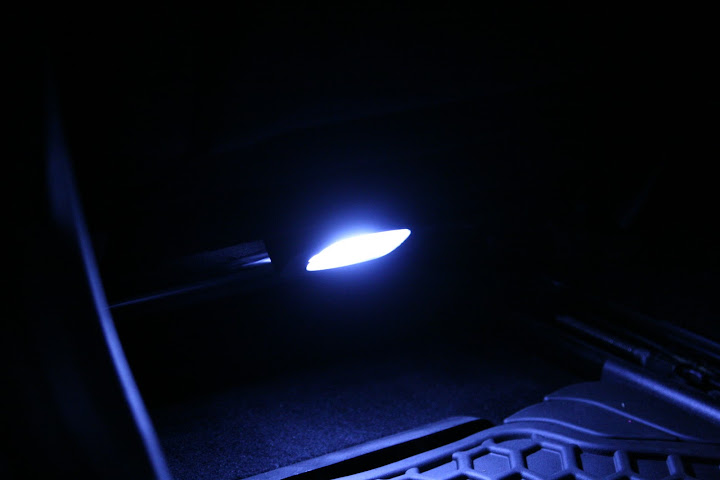
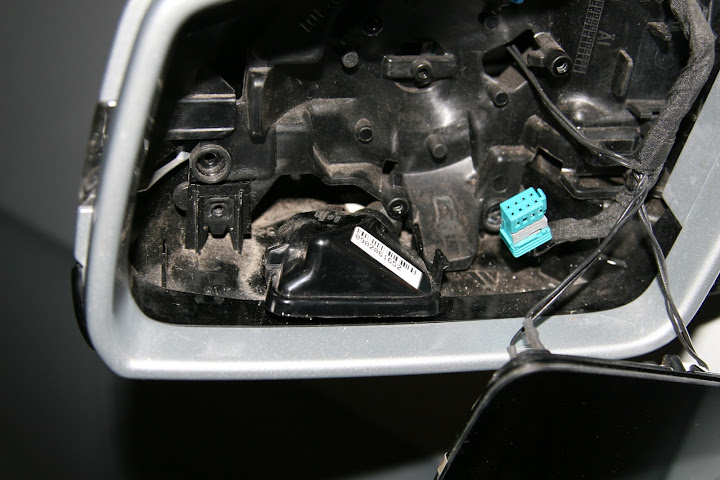
Side mirror pics...mirror and motor removal to gain access to puddle light bulb housing...

Remove 3 silver screws to dismount the motor...

Removed 3 black screws to remove the backside bracket...but it didn't budge at all....so I put some muscle and luckily didn't break anything to remove the puddle light housing...as you can see below...the housing is now loose.
Remove 3 silver screws to dismount the motor...
Removed 3 black screws to remove the backside bracket...but it didn't budge at all....so I put some muscle and luckily didn't break anything to remove the puddle light housing...as you can see below...the housing is now loose.
Last edited by PHML; Jan 29, 2012 at 04:30 AM.


