


2010 E350 (W212) command control knob
Thread Starter
Newbie

Joined: Aug 2013
Posts: 5
Likes: 0
From: Houston, TX
E350
2010 E350 (W212) command control knob
I've the dreaded command control knob malfunction where the rotate doesn't work. I seen a very good video on removal and repair for the C-class (
) doesn't look awfully hard! My issue is I can�t find a guide on how to remove the command control knob from the W212 so that it can be repaired. Can anyone point me in the right direction of a good disassembly guide for the W212. Thanks in advance.

Senior Member
Joined: May 2013
Posts: 325
Likes: 3
From: Boston
2010 E550
[QUOTE=drsaab;5844068]I think these are what you need. Let me know how it goes, I need to do the same.[/QUOTE
THIS is why I joined MBWorld! Great help from the community. Good luck with the swap guys.
THIS is why I joined MBWorld! Great help from the community. Good luck with the swap guys.
Senior Member
Joined: Mar 2005
Posts: 409
Likes: 1
From: Vienna, VA
Well I did end up doing this today and just like the video says, it is a piece that is engineered to break in 4 years. So I think we will see alot of ppl bringing this topic up in the future. You will need a torx 10 and a 15 as well as a 8. The screw that holds the command knob in is smaller than T10. In the youtube video his is a T10 but mine was smaller. Fixing the broken shaft was not hard, just follow the video. Getting the controller out was the hard part. There is a front tab and you have to take out the front console that covers the cup holder etc. Getting that front console piece back in was real tough. I had to eventually loosen the back armrest area to push back that section so the front section could slide back into its place. This front console install/removal was the only hard part of this task.
But now i can zoom in on my navi again. There is no other way to do that once the scroll part of the knob goes bad.
But now i can zoom in on my navi again. There is no other way to do that once the scroll part of the knob goes bad.
Newbie
Joined: Apr 2014
Posts: 2
Likes: 0
2011 E350 4MATIC
Separating Control Halves
Anyone have issues separating the control halves after taking out the four torx screws on bottom? I've removed the screws and something is still holding the halves together. I've checked the vid several times to ensure the four torx 10 screws were the only screws holding them, but still no luck.
Trending Topics
Senior Member
Joined: Mar 2005
Posts: 409
Likes: 1
From: Vienna, VA
Anyone have issues separating the control halves after taking out the four torx screws on bottom? I've removed the screws and something is still holding the halves together. I've checked the vid several times to ensure the four torx 10 screws were the only screws holding them, but still no luck.
Last edited by drsaab; Apr 15, 2014 at 02:52 PM.
MB World Stories
The Best of Mercedes & AMG

Dubai Tuner Gives the Mercedes G-Class An Entirely New Look
Verdad Gallardo
Six Gift Ideas Your AMG Loving Dad or Grad Will Cherish

7 Craziest Things AMG Gas Ever Built
Verdad Gallardo
New Electric Mercedes-AMG GT 4-Door Coupe Unveiled: 10 Things You Need to Know
Verdad Gallardo
6 Mercedes Models That Did NOT Age Well (But Are Somehow Still Cool)
Verdad Gallardo
Manual Mercedes? 6 Times Sindelfingen Let Drivers Have All The Fun
Verdad Gallardo
Mercedes SLR McLaren 722 S Is Extremely Rare Example Modified by McLaren
Verdad Gallardo
8 Classic Boxy Mercedes Designs That Have Aged Like Fine Wine
Verdad Gallardo
Flawlessly Restored Mercedes 190E Evo II Heads to Auction
Verdad GallardoNewbie
Joined: Apr 2014
Posts: 2
Likes: 0
2011 E350 4MATIC
drsaab- Thanks for the ashtray housing and control panel diagrams. I needed them.

Newbie
Joined: Jun 2014
Posts: 4
Likes: 0
From: Jacksonville FL
2015 S550 current - 2010 E550 (retired)- 2018 Jaguar F Pace - 2006 Harley Davidson FLTTPI
It Worked
I just completed this fix, with one issue on my part. The first attempt I think my mix of JB Weld was to weak and it failed just after I had it all reinstalled. So I pulled it out again and tried again. This time it worked like a champ. I did not have any matches, so I cut down some toothpicks to increase the surface area and coated the entire "X" pattern with it. I also extended my JB Weld coating about 3-4mm onto the main barrel. It did leave a few slight bumps but JB Weld is very easy to file down when completely set. I also used Dry Lube because I did not have any Lithium Spray handy. Now I am searching for a used unit to have a spare just in case it happens again.
Only thing I would do different in leave top knob off until after installed, all the moldings went in so much easier.
Wanted to say thanks to all in this thread, after reading every post, I felt confident I could get through it.
Also a big thanks to drsaab for the prints.
And to Scott for making the video

Newbie
Joined: Jul 2014
Posts: 3
Likes: 0
E350
Hi everyone ,I have a W212 , E350 2010 .I removed most of the area around the rotary knob , but can't remove it without removing the side bezel . I don't know how to remove the side bezel. The pdf file of the ashtray housing and control panel was not of much help. I watched the video for the W204 .But to reach the rotary switch is 
Last edited by carsmb; Jul 2, 2014 at 11:40 PM.
Newbie
Joined: Jun 2014
Posts: 4
Likes: 0
From: Jacksonville FL
2015 S550 current - 2010 E550 (retired)- 2018 Jaguar F Pace - 2006 Harley Davidson FLTTPI
Pull Outward Side Bezel
Hi everyone ,I have a W212 , E350 2010 .I removed most of the area around the rotary knob , but can't remove it without removing the side bezel . I don't know how to remove the side bezel. The pdf file of the ashtray housing and control panel was not of much help. I watched the video for the W204 .But to reach the rotary switch is
Newbie
Joined: Jul 2014
Posts: 3
Likes: 0
E350
I use the Harbor Freight Nylon Molding removal tools (Not to nick molding) Or a small screwdriver will also work, but I would wrap it in a rag (Not to nick molding) The molding (Side Bezel) is fairly straight forward. Get the wedge tool underneath on one of the edges and pull outward. The clips are tough buy will come loose from console.
ps. do you have a pic of the wedge tool that you used ?
Last edited by carsmb; Jul 3, 2014 at 08:41 PM.
Newbie
Joined: Jun 2014
Posts: 4
Likes: 0
From: Jacksonville FL
2015 S550 current - 2010 E550 (retired)- 2018 Jaguar F Pace - 2006 Harley Davidson FLTTPI
[QUOTE=carsmb;6091420]Thanks Billg67, will try it on saturday
ps. do you have a pic of the wedge tool that you
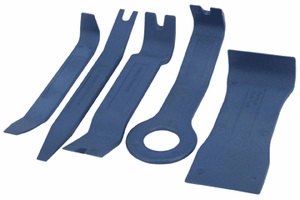
Second one from right in this pic. Got photo from harbor freight tool web site. If you want to see better pic google this: Harbor Freight Tool - Trim And Molding Tool Set 5 Pc
ps. do you have a pic of the wedge tool that you
Second one from right in this pic. Got photo from harbor freight tool web site. If you want to see better pic google this: Harbor Freight Tool - Trim And Molding Tool Set 5 Pc
Out Of Control!!
Joined: Jul 2003
Posts: 15,901
Likes: 4,634
From: North Scottsdale, AZ
'71 Pinto

Member
Joined: Mar 2012
Posts: 115
Likes: 0
From: Brisbane Australia
C220CDI 2009
I have a C220CDI 2009 model with a 130k and my centre control knob stopped working about 2 months ago, and I'v been on M/B customer service, and I have just had a phone call from the dealer telling me they are arranging to have a new one fitted, FREE of charge.
This is what I would expect M/B to do however, in saying that, I do appreciate them fixing it free of charge.
They really should take this up with the manufacture or give them the boot and source the control from another suppler.
This is what I would expect M/B to do however, in saying that, I do appreciate them fixing it free of charge.
They really should take this up with the manufacture or give them the boot and source the control from another suppler.


Member
Joined: Mar 2012
Posts: 115
Likes: 0
From: Brisbane Australia
C220CDI 2009
I bought the car from another dealer just out side of Brisbane.
This part is not cheap here in (Australia) I was quoted just over a $1000.00 with out fitting.
I'm as happy as a pig in mud,
 it was just a couple of phone calls & emails and that was it just waiting on a call when they have the part in stock to have it replaced.
PS. The part that breaks in these units is the shaft this part should never break, unless the cogs at the base are all seized up and then you try and force it, even then I'd expect to strip the cogs not break the shaft.
As I said above M/B should either tell the manufacture to fix the problem or source the unit some place else, it's not as if this is a bloody cheap part, well it's not here in (Australia)
Last edited by silkynitro; Jul 30, 2014 at 07:27 AM.
Super Member


Joined: Sep 2013
Posts: 971
Likes: 182
From: DFW, TX
2014 E350 Wagon, 2025 GLC 350e, 2026 E53 Wagon
The actual part that breaks is a cheap part. The issue is that it's a non-replaceable part and it does not have its own part number, you have to get the entire assembly replaced which is the expensive one. And this is why people resort to fixes at home with epoxy.
Member
Joined: Mar 2012
Posts: 115
Likes: 0
From: Brisbane Australia
C220CDI 2009
Yes I know that, that's my point, as I said, M/B should either get the manufacture up to speed and fix this problem or change supplier.
Last edited by silkynitro; Jul 30, 2014 at 05:36 PM.

Newbie
Joined: Aug 2014
Posts: 3
Likes: 0
C220 CDi sport. W204 / 2008
Part number
Hi All,
1st post - be gentle with me.
Does anyone have the part number for this rotary switch module for my 2008 / W204 C220 cdi. I intend trying to repair it but was just wondering how much a new one was anyway.
1st post - be gentle with me.
Does anyone have the part number for this rotary switch module for my 2008 / W204 C220 cdi. I intend trying to repair it but was just wondering how much a new one was anyway.
Member
Joined: Mar 2012
Posts: 115
Likes: 0
From: Brisbane Australia
C220CDI 2009
I am lucky they are replacing mine for nothing when the part arrives
Cheers
Phil
Newbie
Joined: Aug 2014
Posts: 3
Likes: 0
C220 CDi sport. W204 / 2008
Thanks to konigstiger who sent me my data card and the part number :-
A2048700779
Mercedes in the UK want �190 inc 20% tax / VAT


