


How to Install Front Mud Flaps on GLC (2016+) (without Running Board)

Thread Starter
Junior Member
Joined: Jul 2011
Posts: 35
Likes: 18
From: Colorado Springs, CO
2019 C43
How to Install Front Mud Flaps on GLC (2016+) (without Running Board)
Hi All. I recently took delivery of a 2017 GLC300 4Matic last Friday. I wanted to get some mud flaps for the car so I went ahead and purchased the OEM ones on ebay. Since there are no how-to videos or instructions included with the product or posted online, I decided to put together one today for those of you that are interested in this simple DIY. Please note that this is only for the front set as I realized, after purchasing both front and rear sets, that the rear mud flaps are not compatible with cars that have the AMG/Sport package (Opt 772).
Parts / Tools Required:
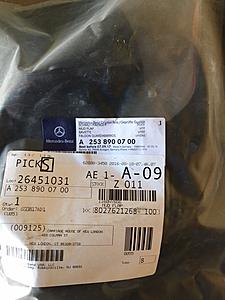
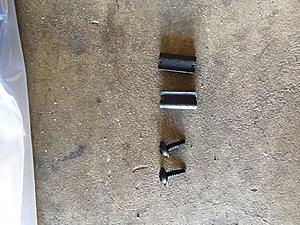
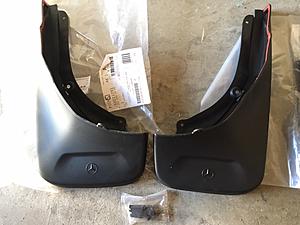
Front Mud Flaps (w/o Running Board options);includes two screws and a metal bracket; Part no. A253 890 0700
Small Flat Head Screw Driver
Drill with Torx Screw Bit
Clorox Wipes
Paper Towels
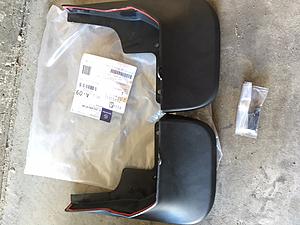
Step 1: Gather your parts.
Step 2: Turn your wheel towards the side you'd like to work on. This will make it easier to remove the rivets. For this example, I'll be working on the left side (Driver Side).
Step 3: Locate the 3 plastic rivets on the wheel well where the mud flap will be mounted to.
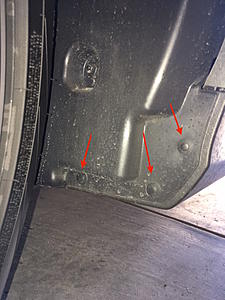
Step 4: Remove these rivets by gently pulling the middle piece (pin) first, followed by the rivet head and body.
Step 5: Clean the area with clorox wipes then air dry or wipe down with paper towel. Ensure that the area is free if debris as the mud flap includes a 3M double sided tape to secure it to the body of the car.
Step 6: Before removing the paper backing to expose the tape, perform a test fit to the car so you'll know exactly where to attach it.
Step 7: Remove the sticker backing and attach to the car. Hold for at least 30 seconds to a minute.
Step 8: Reattach the rivets and install the metal bracket.
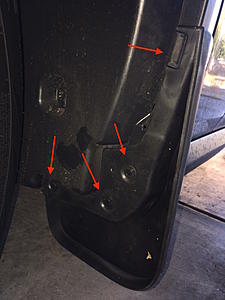
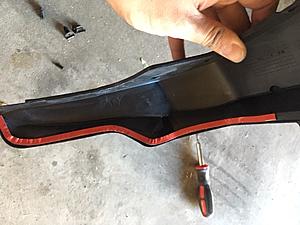
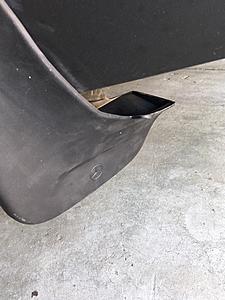
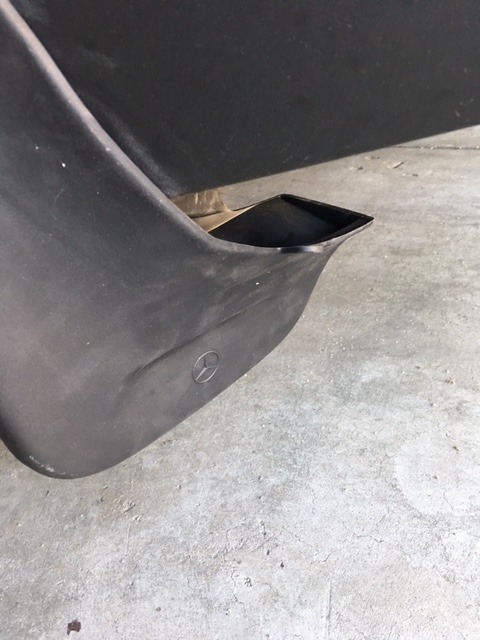
Step 9: You'll notice that on the opposite side, towards the bottom of the mud flap, has a little flap to secure it further to the body of the car. Note that there is no pre-existing hole here. I just simply marked it on the picture.

Step 10: Find the self tapping torx screw (includes two, one for each side) that came with the packaging.

Step 11: Using a drill, drive the screw through the hole to attach the mud flap securely.
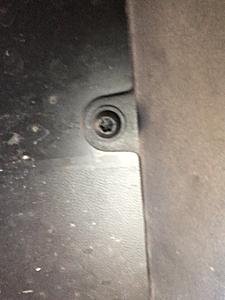
Step 12: Work on the next side, and you're done!
After installation:
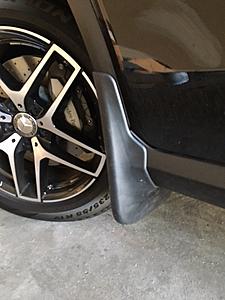
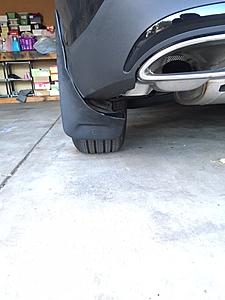
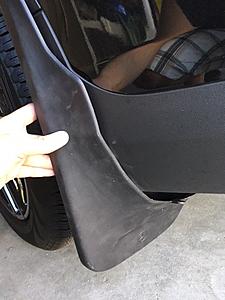
As I mentioned earlier, I bought the rear set mud flaps without knowing that they were incompatible with my car because of the Sport/Night Package. Here are the photos of the mud flap and the test fitment I did when I realized that it didn't fit well.
Part no.: A253 890 0800
Please let me know if you have any further questions.
In case you are curious, here are the specs of my car:
2017 GLC300 4Matic
Black
Black MBTex
Black Ash Wood Trim
LED Headlights
Night Package
P02 Premium 2 Package
Burmester Surround Sound

Parts / Tools Required:
Front Mud Flaps (w/o Running Board options);includes two screws and a metal bracket; Part no. A253 890 0700
Small Flat Head Screw Driver
Drill with Torx Screw Bit
Clorox Wipes
Paper Towels
Step 1: Gather your parts.


Step 2: Turn your wheel towards the side you'd like to work on. This will make it easier to remove the rivets. For this example, I'll be working on the left side (Driver Side).
Step 3: Locate the 3 plastic rivets on the wheel well where the mud flap will be mounted to.
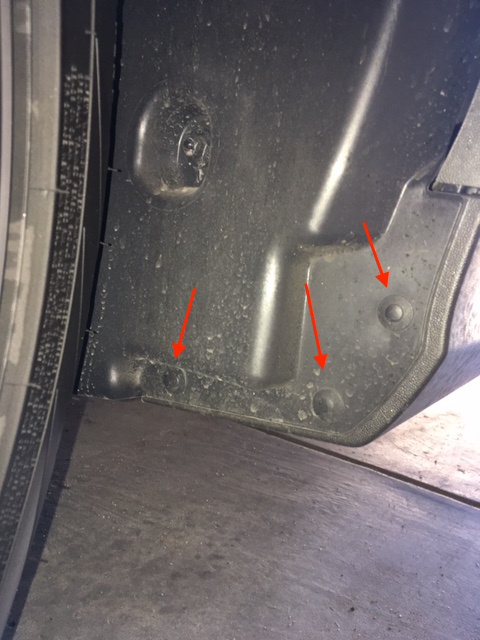
Step 4: Remove these rivets by gently pulling the middle piece (pin) first, followed by the rivet head and body.
Step 5: Clean the area with clorox wipes then air dry or wipe down with paper towel. Ensure that the area is free if debris as the mud flap includes a 3M double sided tape to secure it to the body of the car.
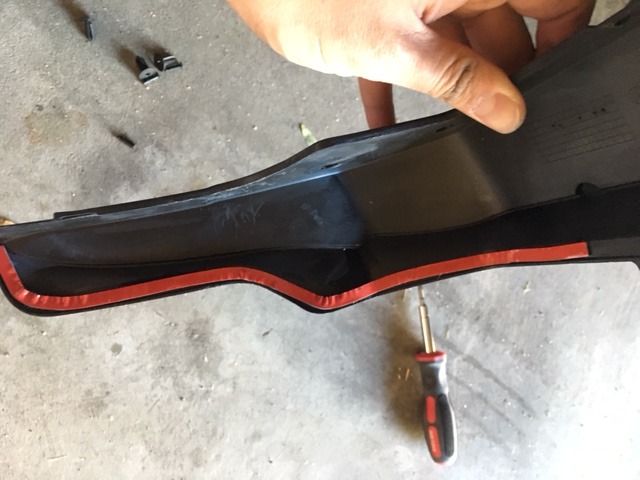
Step 6: Before removing the paper backing to expose the tape, perform a test fit to the car so you'll know exactly where to attach it.
Step 7: Remove the sticker backing and attach to the car. Hold for at least 30 seconds to a minute.
Step 8: Reattach the rivets and install the metal bracket.

Step 9: You'll notice that on the opposite side, towards the bottom of the mud flap, has a little flap to secure it further to the body of the car. Note that there is no pre-existing hole here. I just simply marked it on the picture.

Step 10: Find the self tapping torx screw (includes two, one for each side) that came with the packaging.


Step 11: Using a drill, drive the screw through the hole to attach the mud flap securely.

Step 12: Work on the next side, and you're done!
After installation:

As I mentioned earlier, I bought the rear set mud flaps without knowing that they were incompatible with my car because of the Sport/Night Package. Here are the photos of the mud flap and the test fitment I did when I realized that it didn't fit well.
Part no.: A253 890 0800


Please let me know if you have any further questions.
In case you are curious, here are the specs of my car:
2017 GLC300 4Matic
Black
Black MBTex
Black Ash Wood Trim
LED Headlights
Night Package
P02 Premium 2 Package
Burmester Surround Sound


Super Member

Joined: Dec 2015
Posts: 812
Likes: 86
From: Springboro, OH
16 GLC 19 Volvo XC40 06Corvette Z06
When I took delivery on my GLC in Feb. I ordered front and rear mudflaps from my M-B dealer parts department. The next day they called and said the M-B flaps were not compatible with my vehicle because it had AMG style lower body cladding.
Week before last I revisited the parts department to ask if compatible flaps were yet available. The answer was no.
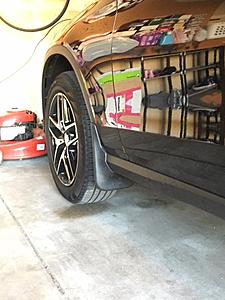
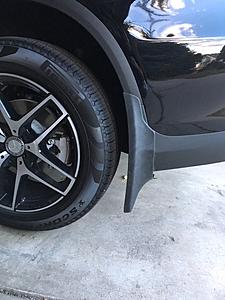
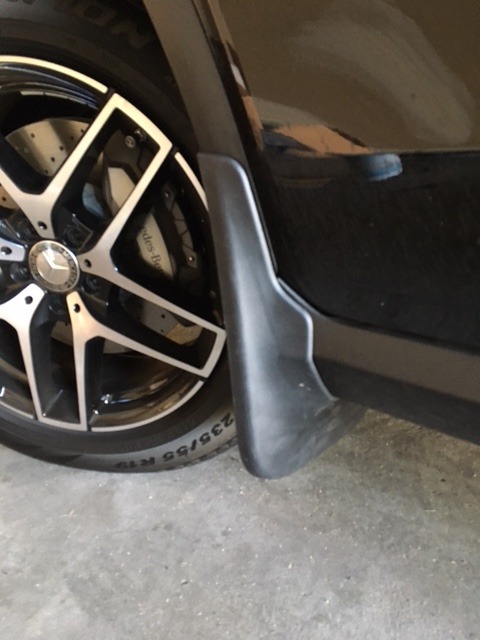
The above said, the front flaps on aaron's GLC appear to fit perfectly.
Week before last I revisited the parts department to ask if compatible flaps were yet available. The answer was no.
The above said, the front flaps on aaron's GLC appear to fit perfectly.
Last edited by larrypmyers; Sep 24, 2016 at 09:49 AM.
Thread Starter
Junior Member
Joined: Jul 2011
Posts: 35
Likes: 18
From: Colorado Springs, CO
2019 C43
@mb4mb, here's a slightly higher res photo. The texture is slightly different and the color is just a touch lighter, but it could be caused by the trim cleaner/solution that was applied to the car when the dealership detailed it during delivery. It's not noticeable unless you're within a foot away from it.
Trending Topics

Member
Joined: Jan 2014
Posts: 142
Likes: 31
From: Orlando, FL
E300, C63
if/when you have time, can you post a couple photos of the truck from a couple different angles? I'm curious to see what it looks like with only front mud flaps.
This will be my wife's vehicle, so I'm not able to clean it as often as I clean my vehicles (I generally clean them at work in my spare time.) Also Diamond White is incredibly hard to color match so the less chips the better.
This will be my wife's vehicle, so I'm not able to clean it as often as I clean my vehicles (I generally clean them at work in my spare time.) Also Diamond White is incredibly hard to color match so the less chips the better.
MB World Stories
The Best of Mercedes & AMG

Manual Mercedes? 6 Times Sindelfingen Let Drivers Have All The Fun
Verdad Gallardo
Mercedes SLR McLaren 722 S Is Extremely Rare Example Modified by McLaren
Verdad Gallardo
8 Classic Boxy Mercedes Designs That Have Aged Like Fine Wine
Verdad Gallardo
Flawlessly Restored Mercedes 190E Evo II Heads to Auction
Verdad Gallardo
Electric Mercedes C-Class Unveiled: 11 Things You Need to Know
Verdad Gallardo
Mercedes EQS Gets A Major Update: Everything You Need to Know
Verdad Gallardo
5 Underrated Mercedes-Benz Models That Don't Get the Love They Deserve
Verdad Gallardo
Mercedes 300D Has Pushed Well Past 1 Million Miles and It Ain't Stopping
Verdad Gallardo
10 Most Reliable Mercedes-Benz Models You Can Buy Used
Verdad Gallardo


Member


Joined: Jan 2017
Posts: 104
Likes: 13
2017 GLC300, 2017 Corvette Z06
Just put them on our new 2017.
Have several pics below for the rear install.
You have to pull the wheel to add the 2 screws.
They are held on by one existing rivet, 2 new screws and a new clip inside the wheel well. It also has a new screw below like the front flaps.
Very simple install. Just clean and prep (isopropyl alcohol in my case) the area so the VHB (very high bond) tape adheres properly.
I did the fronts the other day and then it rained. It is obvious that this plastic is going to be hard to keep clean. The dirt really gets down in the fine texture in the plastic.
Anyhow, I like them and it will help keep the wife's car cleaner. : ) I can't say anything however as my car in the background is dirty.
I also just purchased a jacking puck and bolt extenders from ReverseLogic. They work great.
Last edited by ArcticWhiteZ51; Jan 21, 2017 at 03:39 PM.
Newbie
Joined: Jul 2020
Posts: 9
Likes: 2
From: Nor Cal
MB GLC 300 4Matic
I bought he OEM rear only flaps for my 2019 GLC 300. I set them aside and a few months down the line I saw the bag only had the mud flaps, now screws or plastic parts. Since I didn't know if you could could use the existing pegs to lock it in place, I wentr looking and saw this. You said you had the wrong rear flaps, did you try to screw them in or use the existings pegs. I didn't get the front flaps since I also bought running boards..
Thanks,
Thanks,


