


DIY: front Headrest removal, TV/DVD installation instruction
Thread Starter
MBWorld Fanatic!
Joined: Jun 2007
Posts: 1,856
Likes: 7
From: Socal
07E63, 12E350, 08997TT, 16SiennaSE
DIY: front Headrest removal, TV/DVD installation instruction
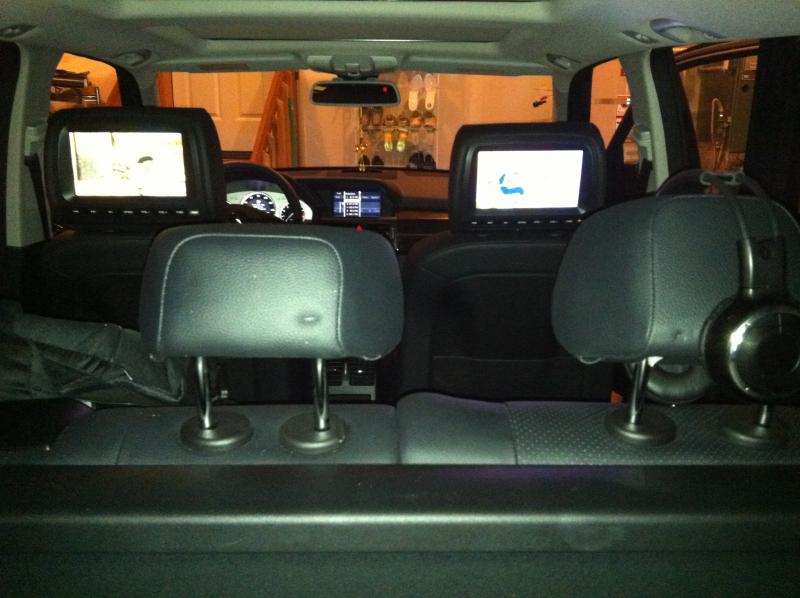
I just installed the rear entertainment center in the headrests and I took some pictures and wrote down some instruction for future reference just incase anyone want to know how to remove the front headrests or install the LCDs headrest.
Note: You will get two warning message that the left and right side SRS head restraint systems malfunction blah balh blah.. I'm trying to find out if it can be turn off by STAR, if not I will remove the mechanism from the headrests and plug it back in and tuck it inside the seats to get rid of this messages.
Tools needed: flat head screw driver, 10mm socket & wrench, wire striper/cutter, electrical tape, 2 butt connectors, crimper, soldering gun.
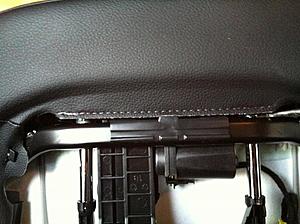
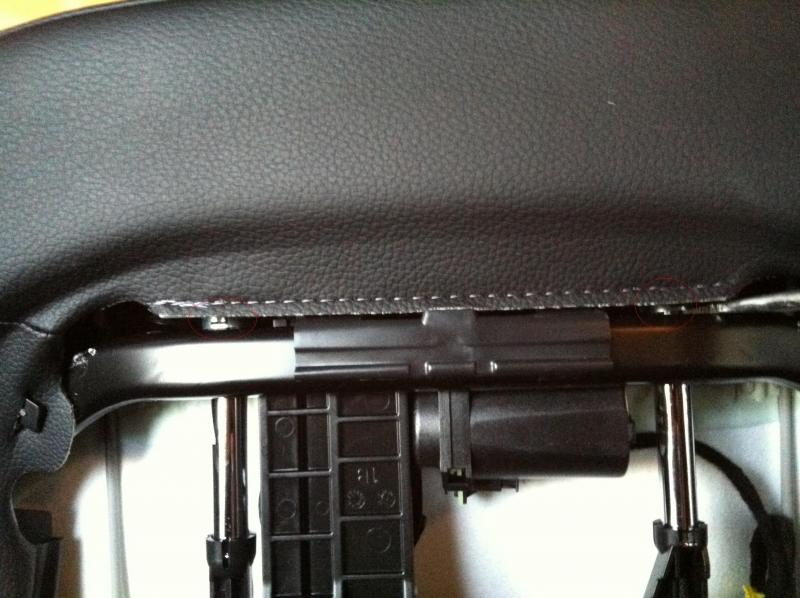
Removing the back seats cover: Move the seats all the way forward and upward as far as it will go to gain more working room. Pull the the bottom part of the back cover out gently..if it does not pop out than you need to use a flat head screw driver and stick it up and compress the plastic clips (see picture). Once the bottom pop out pull the cover down and out toward you, very easy. Disconnect the connector for the SRS head restraint. On the driver side you might want to move the headrest all the way down and disconnect the motor. You will not be able to use the motorized headrest function if you going to install the new headrest with LCD/DVD built in like the one I got, the LCD headrest post is to short.
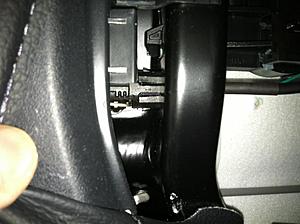
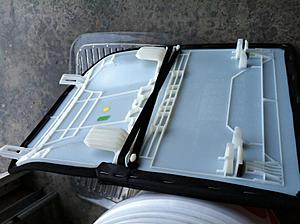
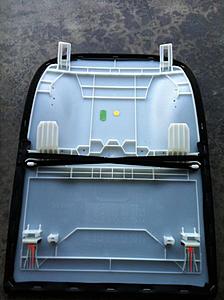
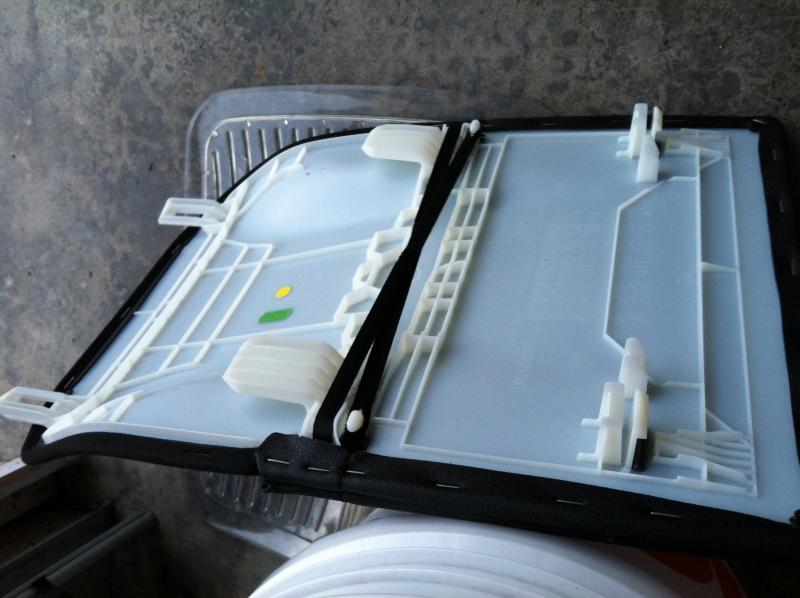
To remove the headrest: There are two "C" clips on each seat that you need to remove. it's located on top not at the bottom like I thought (see pictures)
take a flat head and pop it out. once you remove the clips slide your headrest out. If your headrest does not slide right out..there is another clip on the left post that is spring load (see picture) take a flat head and gently pride it out while pull up on the headrest. On the driver side use a flat head to pop out the posts from the plastic sockets that motorized up and down. Lean the seats back and slide the headrest off. You won't have enough room to slide it upward.
And that is how you remove the headrest. Take me less than 30 minutes to remove both side.
If you want to add the DVD/LCD pillows than read on. If you can install a car stereo than this will take you less than 2 1/2 hrs to complete this project.
I bought a set of 9" DVD/LCD on EBay for less than $220. They will sell it to you for $220 if you make an offer. Its work great! My kids love it. Keep them out of my hair on long trip.
http://www.ebay.com/itm/160713245368...84.m1423.l2649
First, install the new TV headrests in place of the stock one..run all the cables and wires down the holes. You will need to use the big chrome tubes provided, this is the easy part.
12 volt power source: I used the rear 12v supply in the ashtray below the rear vent. this 12 volt source is turn on by the ignition position 1 or 2 and it the closest power source without running long wire to fuse box.
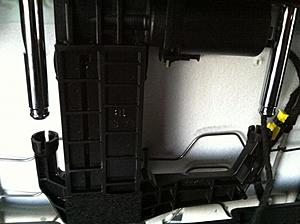
Removing the Vent and ashtray: Just grip on the back side and pull gently and it will pop out..pull it up and it will come right off. Pull on the ashtray straight out and it will pop out, no screws just held on by two clips on each side. once the ashtray is off you will see the wires going to the 12v socket (-Brown and +red) and 2 nuts that hold the rear part of the center console down, remove the two nuts so you can tilt the rear console up so you have more room to run the wires and cable under the console to the back seats. If you don't remove these two nuts you will not be able to slide the wires under the console.
From here on it all depend on how you want to run your wires. I ran the driver seat TV cable to the the back of the passenger seat, less craps behind there. Both TV come with inline fuses..reason I ran everything in one location is to trouble shoot later on if one of them don't work. I ran all the wires and cable to the back side of the passenger seat and up inside. Make sure you leave some slack so when you move the seats it does not pull on the wires, run all the wires under the seat track so it won't get caught in the track. If you do it right you will not noticed any wires. If you look really close and try to find the wires on my installation you will only see 2 black cable the side of a straw coming out from each side of the center console to the seats, the cable blend in with my black interior making it hard to see. Good luck and if you have any questions just let me know.
Post Clips
Tension clip
Note: You will get two warning message that the left and right side SRS head restraint systems malfunction blah balh blah.. I'm trying to find out if it can be turn off by STAR, if not I will remove the mechanism from the headrests and plug it back in and tuck it inside the seats to get rid of this messages.
Tools needed: flat head screw driver, 10mm socket & wrench, wire striper/cutter, electrical tape, 2 butt connectors, crimper, soldering gun.
Removing the back seats cover: Move the seats all the way forward and upward as far as it will go to gain more working room. Pull the the bottom part of the back cover out gently..if it does not pop out than you need to use a flat head screw driver and stick it up and compress the plastic clips (see picture). Once the bottom pop out pull the cover down and out toward you, very easy. Disconnect the connector for the SRS head restraint. On the driver side you might want to move the headrest all the way down and disconnect the motor. You will not be able to use the motorized headrest function if you going to install the new headrest with LCD/DVD built in like the one I got, the LCD headrest post is to short.
To remove the headrest: There are two "C" clips on each seat that you need to remove. it's located on top not at the bottom like I thought (see pictures)
take a flat head and pop it out. once you remove the clips slide your headrest out. If your headrest does not slide right out..there is another clip on the left post that is spring load (see picture) take a flat head and gently pride it out while pull up on the headrest. On the driver side use a flat head to pop out the posts from the plastic sockets that motorized up and down. Lean the seats back and slide the headrest off. You won't have enough room to slide it upward.
And that is how you remove the headrest. Take me less than 30 minutes to remove both side.
If you want to add the DVD/LCD pillows than read on. If you can install a car stereo than this will take you less than 2 1/2 hrs to complete this project.
I bought a set of 9" DVD/LCD on EBay for less than $220. They will sell it to you for $220 if you make an offer. Its work great! My kids love it. Keep them out of my hair on long trip.
http://www.ebay.com/itm/160713245368...84.m1423.l2649
First, install the new TV headrests in place of the stock one..run all the cables and wires down the holes. You will need to use the big chrome tubes provided, this is the easy part.
12 volt power source: I used the rear 12v supply in the ashtray below the rear vent. this 12 volt source is turn on by the ignition position 1 or 2 and it the closest power source without running long wire to fuse box.
Removing the Vent and ashtray: Just grip on the back side and pull gently and it will pop out..pull it up and it will come right off. Pull on the ashtray straight out and it will pop out, no screws just held on by two clips on each side. once the ashtray is off you will see the wires going to the 12v socket (-Brown and +red) and 2 nuts that hold the rear part of the center console down, remove the two nuts so you can tilt the rear console up so you have more room to run the wires and cable under the console to the back seats. If you don't remove these two nuts you will not be able to slide the wires under the console.
From here on it all depend on how you want to run your wires. I ran the driver seat TV cable to the the back of the passenger seat, less craps behind there. Both TV come with inline fuses..reason I ran everything in one location is to trouble shoot later on if one of them don't work. I ran all the wires and cable to the back side of the passenger seat and up inside. Make sure you leave some slack so when you move the seats it does not pull on the wires, run all the wires under the seat track so it won't get caught in the track. If you do it right you will not noticed any wires. If you look really close and try to find the wires on my installation you will only see 2 black cable the side of a straw coming out from each side of the center console to the seats, the cable blend in with my black interior making it hard to see. Good luck and if you have any questions just let me know.
Post Clips
Tension clip


Last edited by Peter_02AMG; Feb 7, 2012 at 03:41 PM.

Newbie
Joined: Oct 2012
Posts: 1
Likes: 0
daihatsu charade
Back seats without cover.
Passenger
Attachment 228068
Driver
Attachment 228069
Post clips
Attachment 228074
Final production
Attachment 228070
Attachment 228073
Passenger
Attachment 228068
Driver
Attachment 228069
Post clips
Attachment 228074
Final production
Attachment 228070
Attachment 228073

Newbie
Joined: Jun 2015
Posts: 1
Likes: 0
mercedes E350
[QUOTE=Peter_02AMG;5041726]
Note: You will get two warning message that the left and right side SRS head restraint systems malfunction blah balh blah.. I'm trying to find out if it can be turn off by STAR, if not I will remove the mechanism from the headrests and plug it back in and tuck it inside the seats to get rid of this messages.
Thank you for this awesome instruction, and I be able to follows the instruction accordingly.
I am wondering if you have already solved the problem with two warning messages that the left and right side SRS system malfunction, etc....
Can you be able to turn off the message? or did you remove the mechanism from the headrest? If you did, are you willing to share with me? Thanks in advance
Trending Topics
MB World Stories
The Best of Mercedes & AMG

Manual Mercedes? 6 Times Sindelfingen Let Drivers Have All The Fun
Verdad Gallardo
Mercedes SLR McLaren 722 S Is Extremely Rare Example Modified by McLaren
Verdad Gallardo
8 Classic Boxy Mercedes Designs That Have Aged Like Fine Wine
Verdad Gallardo
Flawlessly Restored Mercedes 190E Evo II Heads to Auction
Verdad Gallardo
Electric Mercedes C-Class Unveiled: 11 Things You Need to Know
Verdad Gallardo
Mercedes EQS Gets A Major Update: Everything You Need to Know
Verdad Gallardo
5 Underrated Mercedes-Benz Models That Don't Get the Love They Deserve
Verdad Gallardo
Mercedes 300D Has Pushed Well Past 1 Million Miles and It Ain't Stopping
Verdad Gallardo


