When you click on links to various merchants on this site and make a purchase, this can result in this site earning a commission. Affiliate programs and affiliations include, but are not limited to, the eBay Partner Network.
Rear lowering links not lowering enough, reverse the L-bracket?
For those who have adjustableairride lowering links in the rear, have you found maximum adjustment to lower not enough?
My link is pretty much maxed out (on shortest setting, which gives the car the lowest height) on one side and maybe a turn left on the other, but I would like to go lower.
In the thread below, Rodneyc77 reversed the L-bracket that the link attaches to (see picture about 3/4 down the page) to get around this problem. The bracket normally points up.
what happens when you flip the height sensor link's lower l-bracket is you move the whole thing so far down, that you will actually now need to extend the link to the max (and then some) to make up that difference. in the case of that rodney guy, you can see that he had to not only max the length of his link, but also lift the lower bracket up with washers.
My personal suggestion would be to flip your lower bracket, and then use a single spacer along with a longer bolt to reattach it...and that way you can also move the bracket up further than with the few washers in that pic above, which will allow you to run the link in its middle range of adjustability...thus giving you the ability to fine tune the height up and down as needed.
one thing to remember, though, is that the concern isn't necessarily how to get the rear of the car lower, but more how to maintain a decent ride at that height. i'd say starting around rodney's height in his thread, the rear bags will have very little air pressure in them (and he mentions this very problem also), so that rear end will want to bottom out over everything. The solution is to adapt a set of aftermarket air bags with custom brackets designed to keep those bags at their optimum ride height, with the car at your preferred ride height.
Thanks vanable! This makes a lot of sense, I appreciate the input. Think I will leave it alone for the time being, and give the spacers idea more thought.
Also, the car is so low now... that parking is actually an issue. The front bumper would get destroyed if I park forward. So I park backwards most of the time and even the rear barely clears most concrete bars, curbs etc..
Do you have some pictures of your car at its current ride height?
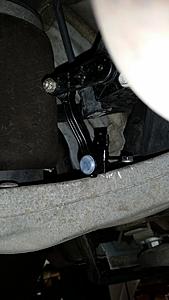
So on this topic of flipping L-brackets, I just confirmed something while looking under my car the other day... you will definitely want to space up the L-bracket if you do decide to flip it, as it would otherwise interfere with the lower control arm. In rodney's pic posted above, you will see the L-bracket is flipped and sitting on an extruded part that's elevated above the control arm... the problem is, I don't think most W251s came with a control arm like that. You can see in this pic from tailwagon:
that the lower L-bracket is laying flush on the control arm, and its bent surface overlaps part of the control arm...so that if you flip it, you wouldn't be able to just simply bolt it back into the same hole. You *might* be able to rotate the bracket slightly to match the curve in that control arm, but I didn't get a chance to take precise measurements to determine if that's possible or not....and anyways, it would be easier/better to space it up and clear the whole control arm and not worry about any potential interference, or forcing the link into an even more extreme angle.
Ultimately, the best solution might just be to use different links that can go shorter from the get-go without having to swap or flip or change anything else, and I'm going to try that out soon... will post results in a few...
The problem with most aftermarket lowering links for our cars is that they are made from components made to fit a wide variety of other applications... so that gives us kits that are full of compromises. I ended up making my own links to get my car down about 1.5" in front, and 2" in back. I feel that that amount of lowering is probably the most you'd want to go while still maintaining some semblance of comfort and ridability.
Attached is a picture of my car from a couple months back... I actually lowered the driver's side rear corner another 1/4" after these pictures were taken, in order to match it to the amount of lowering on the right rear corner. So it now sits a tad bit lower than seen in the pic. I'm also back on the OEM 20" wheels with slightly-larger-overall-diameter-than-OEM 275/45/20s, so there's a lot less wheel gap than with the Volk Racing wheels in the picture, which have 245/40/20s that are 1.8" smaller in OD than stock.
Like all you guys that popped into this thread, I ultimately would like to go lower in the back also...but the only way to do that safely is to replace the rear air springs with shorter units that can ride low with a higher amount of air pressure in them.
One potential problem that may also arise when you lower an airmatic car a lot in the rear is the external reservoir on the rear shocks sit precariously close to the body. I'm pretty sure that it *shouldn't* be an issue, even in a bottoming out situation, but I will double check that the next chance I get to go under the car again.
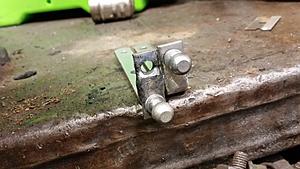
I lowered mine without using adjustable links, I modified the brackets instead. at first I did the flip-the-bracket method but I found that to be very insecure and not symmetrical since this method gives up the positive angle holding that the locating pin provides. since there is only one bolt, once it is raised it can then pivot slightly left and right, meaning inconsistencies left to right. I found that the position could shift slightly from some massive potholes and wasn't as secure as originally mounted by using one bolt and a locating pin. when it's spaced up you loose the locating pin and it can then pivot left to right with only one bolt mounting it. what I did was modify the bracket instead so it can remain bolted in place as originally intended. this keeps the locating pin locked so they both maintain the same exact angle, position and orientation, and it can then remain positively located with no way for them to ever shift, even slightly.
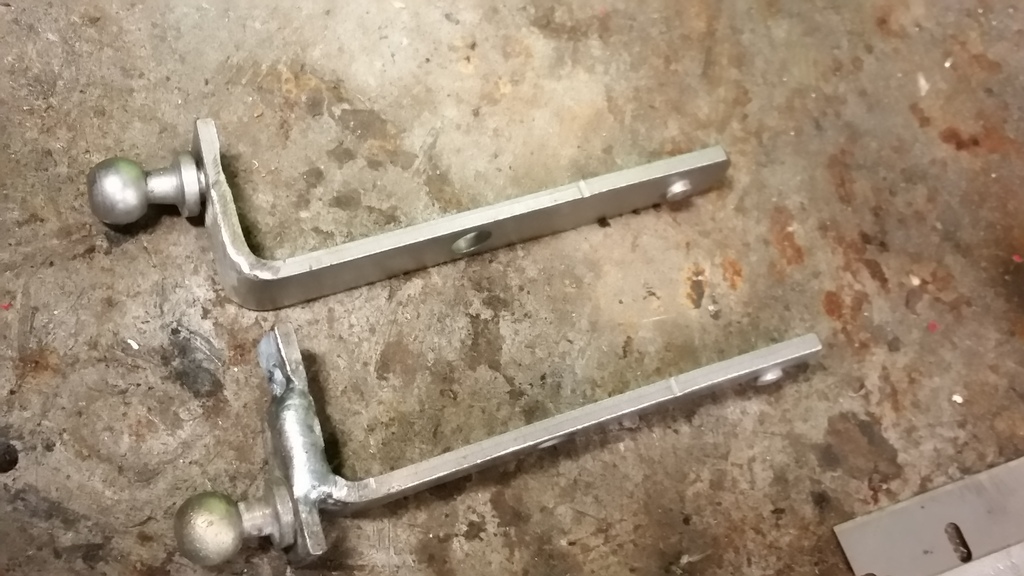
here are a few pictures to illustrate how I did it. I bought a few extra brackets, then cut part from one and welded it to the other to make these lower mounting points:
upper pic is stock ball location, lower is modified
I did both sides exactly the same to maintain symmetry
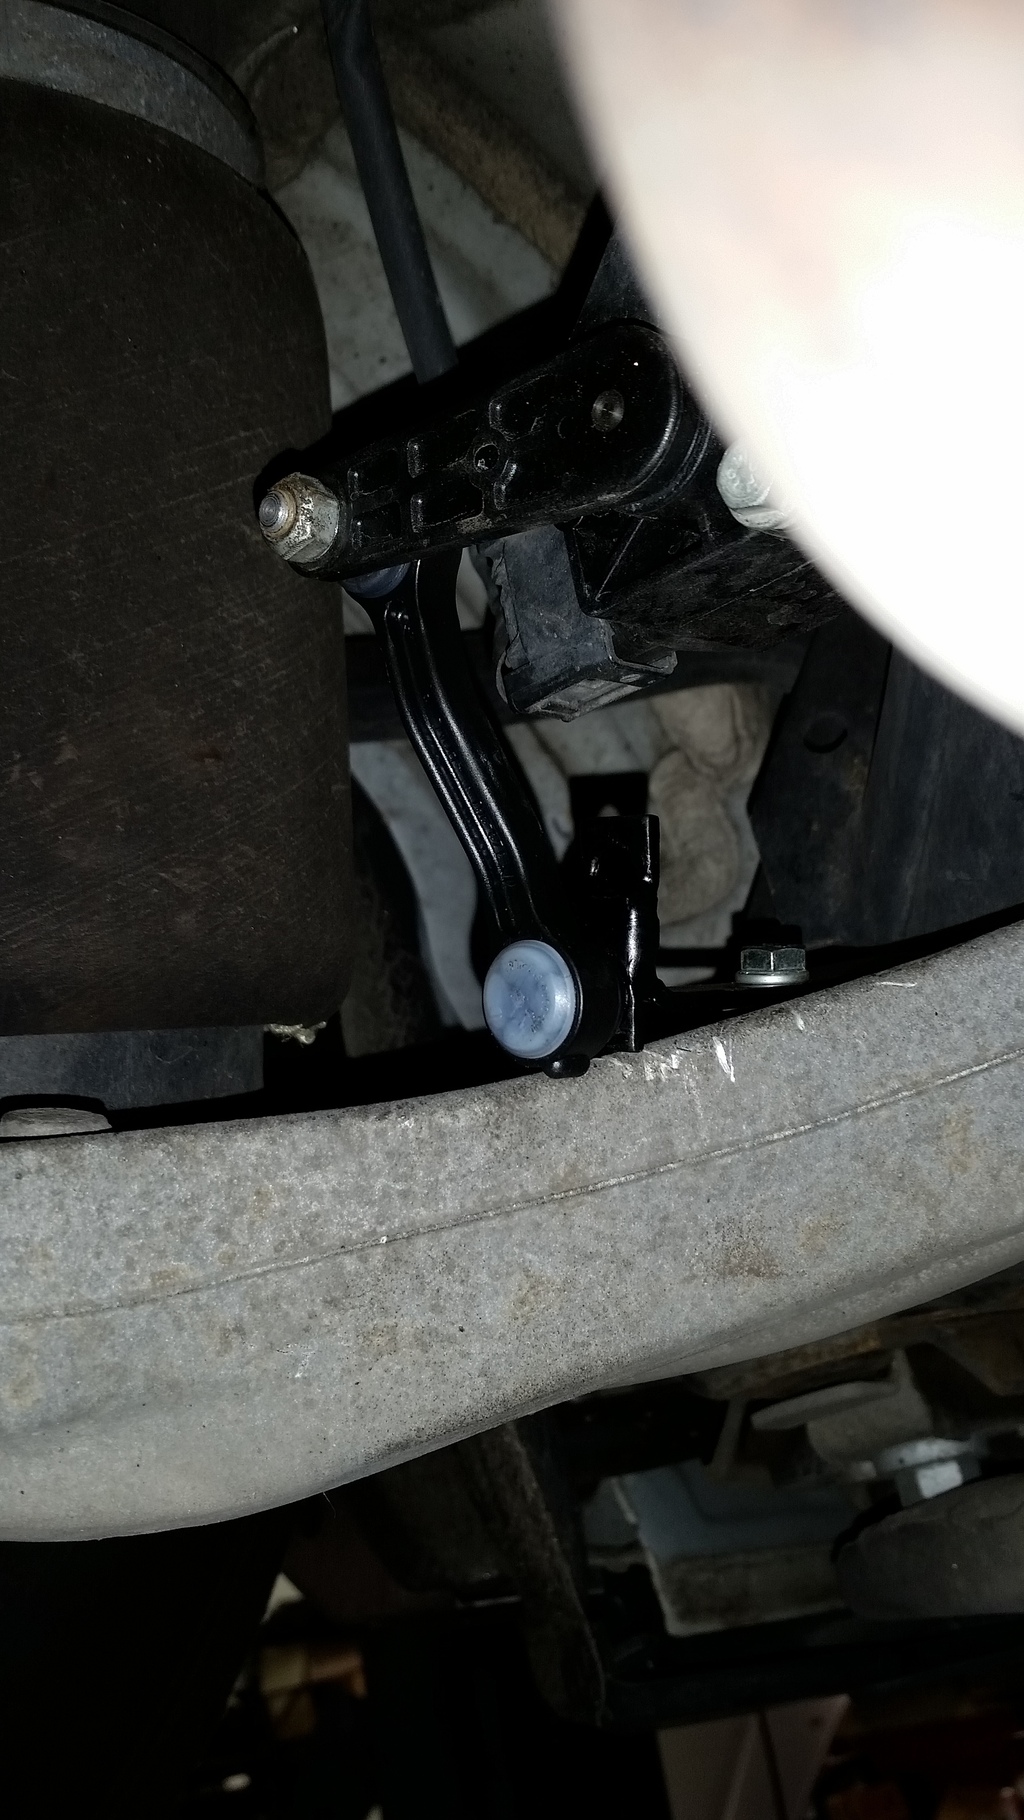
here they are after paint and mounted in place
this brings the ball as low as it can possibly go while still keeping it in line with the original geometry, the ball now sits right above the control arm. at this height it brings the R as low in the back as you'd ever want to go with stock airbags, it's right at the edge of being slightly too choppy in ride and I intend on raising it a fraction of a mm to fine tune it. to raise it all I'd need to do is place a shim below where this new bracket touches the control arm, when tightened down this bracket deflects a bit which causes a slight bend in the mounting arm, a shim will just bend it slightly more but will still maintain the same exact positive positioning left to right. of course I could always use adjustable links to fine tune it from this point too but personally I like using the stock links
Last edited by turbocad6; Dec 9, 2015 at 12:29 PM.
I love the idea of replacing the rear link's control arm mount completely. I actually was making a replacement mount also...another machined part I was thinking of just making as a one-off for myself, but maybe will work up a couple extras for those few (growing number of) people who want to go lower in the rear. The benefit of changing the control arm mount as such is, as you mentioned, you don't have to run a super short adjustable link that ends up sitting at an obtuse angle...thereby reducing the risk of the link breaking/failing/popping out.
Mercedes SLR McLaren 722 S Is Extremely Rare Example Modified by McLaren
Slideshow: A one-of-one U.S.-spec Mercedes-Benz SLR McLaren Roadster became even rarer after a factory-backed transformation at McLaren's headquarters.