


Major Service done today on my 2006 S65

Thread Starter
Member


Joined: Sep 2012
Posts: 190
Likes: 47
From: Las Vegas
2016 S65 AMG coupe, 2010 E63, 2015 Z06/z07 m7 vert 735rwhp, 2000 f-350 crewcab w/ 16" kelderman kit
Major Service done today on my 2006 S65
For the last few days i have been working on a B+ Service on my S65.
This included:
-Radiator replacement
-oil change with filter
-transmission service including filter, conductor plate, and connector
-engine air filters
-cabin filters
-hood struts
-trunk struts
from easy to hard
Hood and trunk Struts-
-Hold the hood/trunk up with some vice grips or a broom handle
-use a small screwdriver to pop off the metal clips on the ends and just push the new ones on. done
Engine Air Filters
-Remove engine covers
-use a T25 torx to unscrew the filter covers
-remove old filters, vacuum out filter box, install new filter
-retighten torx and reinstall the engine covers
Cabin Filters
-open glove box
-using small screwdriver, pop out and unhood the light
-remove 2 top and 2 bottom phillips screws
-pull out glove box
-lift white handle on filter box and open filter door
-pull out old filters and install new ones
-reinstall glove box
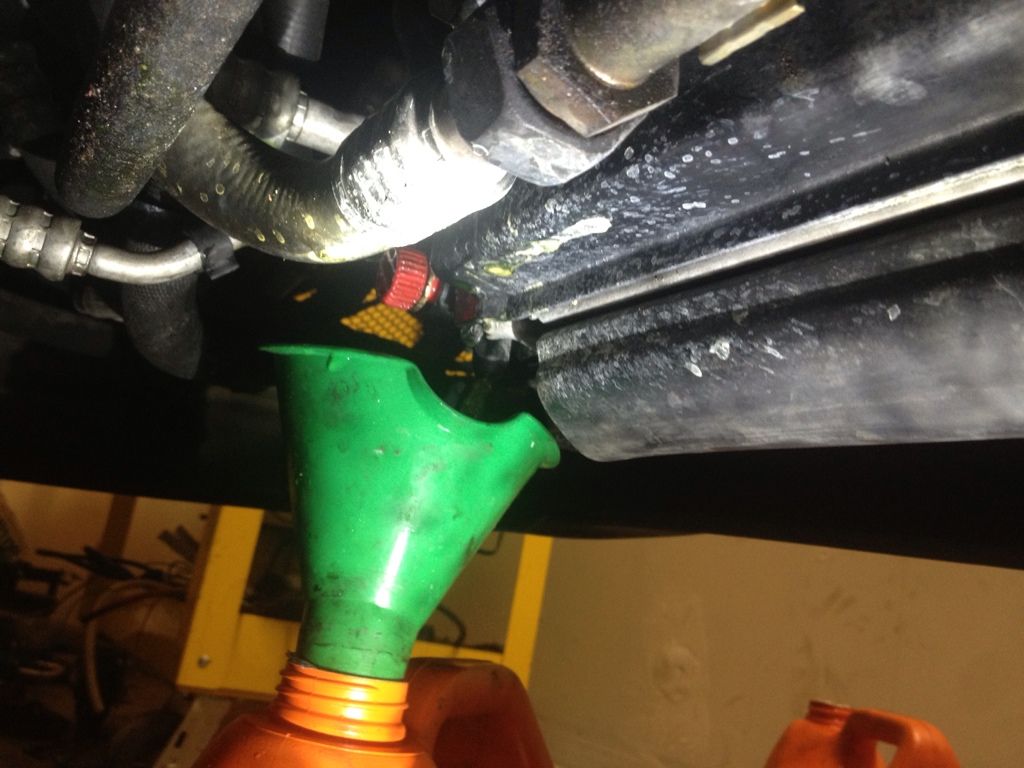
Oil Change
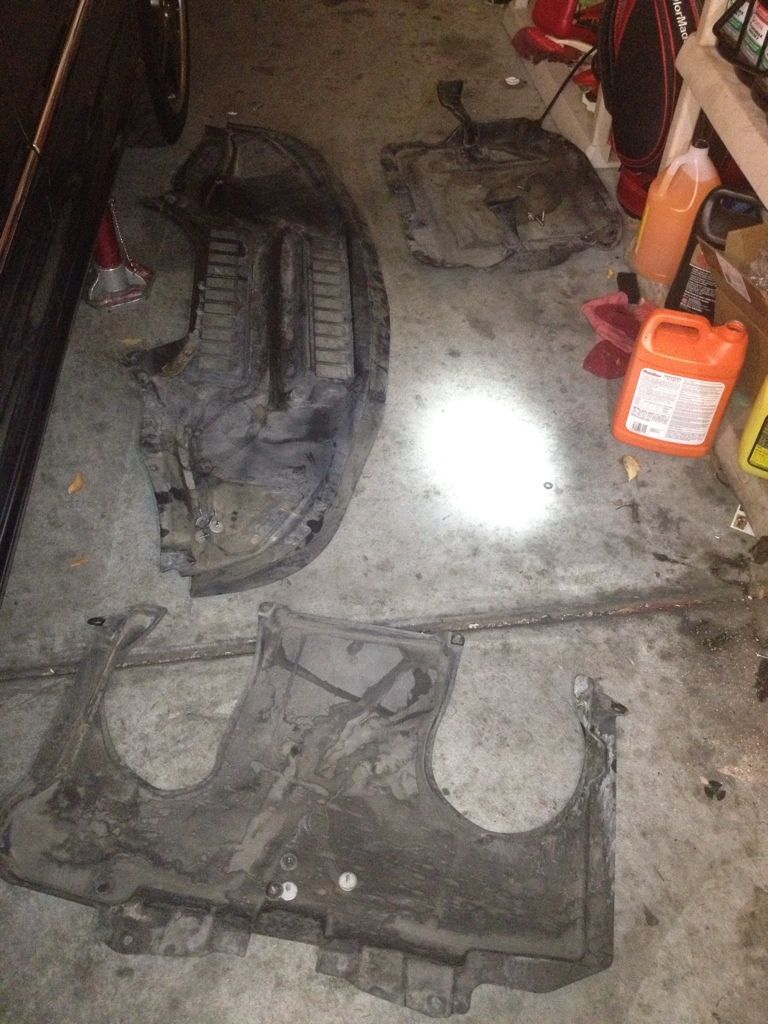
-Remove all lower covers underneath vehicle
-using 13mm wrench, losen and remove drain
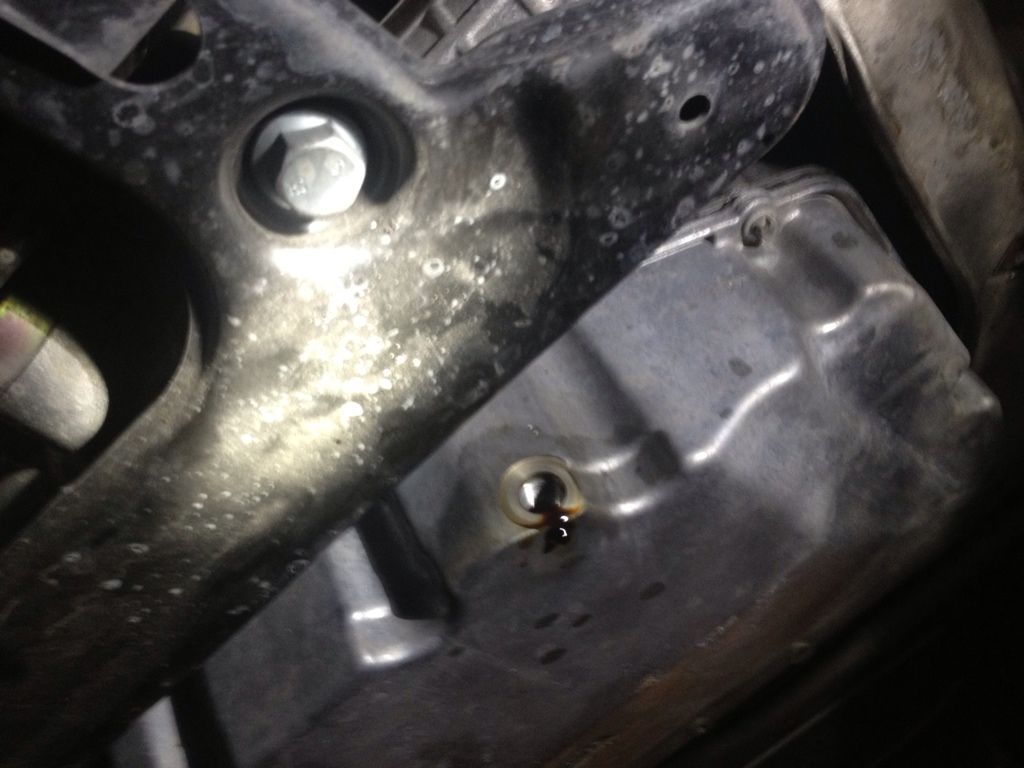
-once drained, reinstall plug
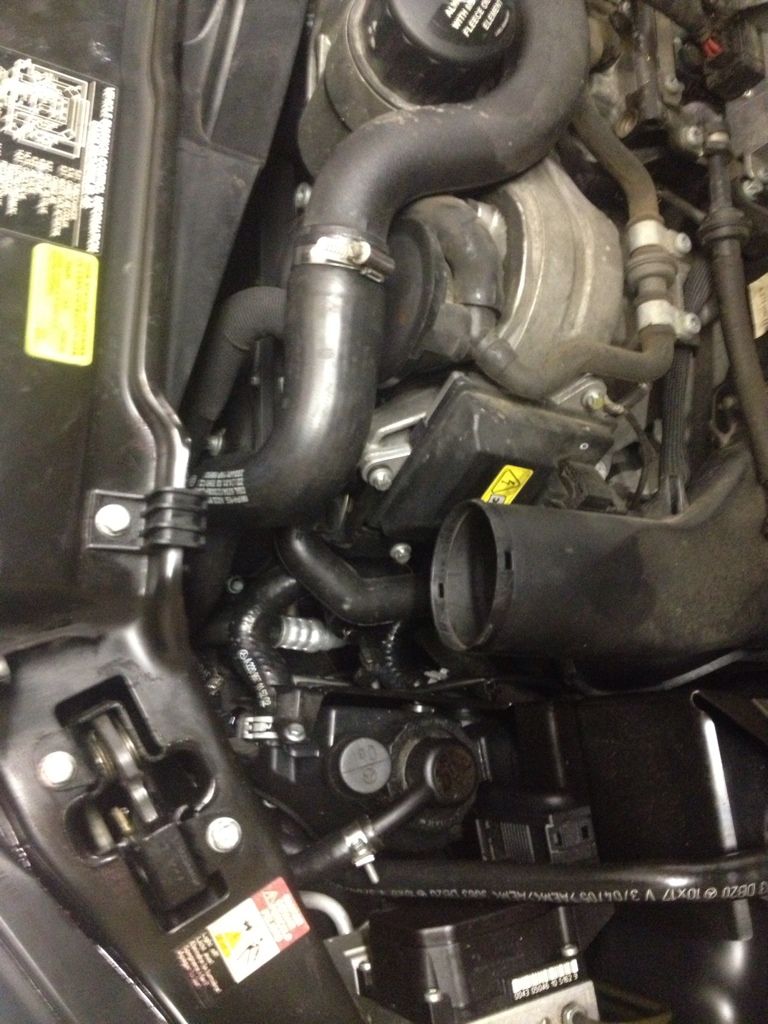
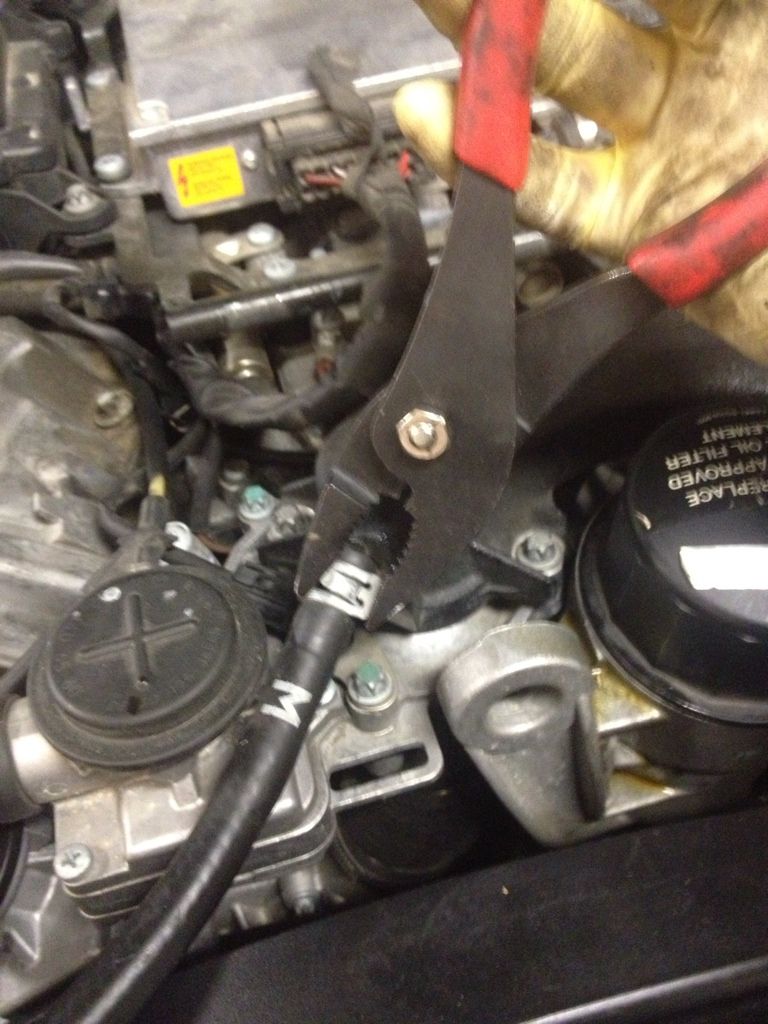
-remove oil filter assembly from top of the motor
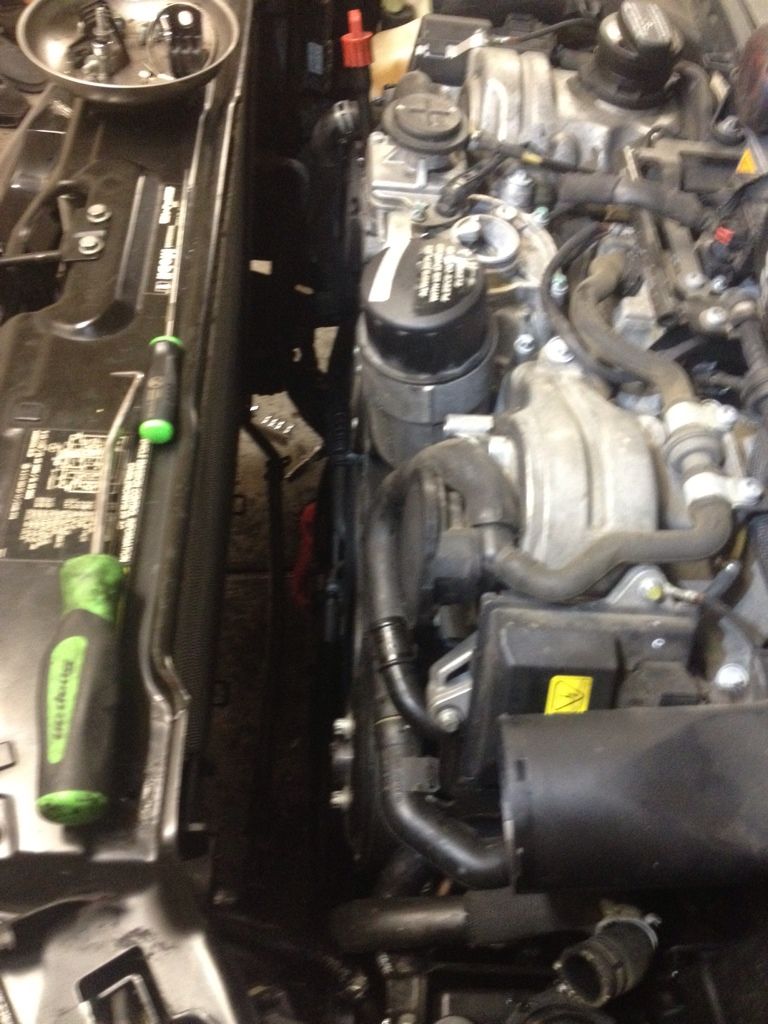
- new filter comes with 4 o-rings that need to be removed and replaced using a small pick tool.
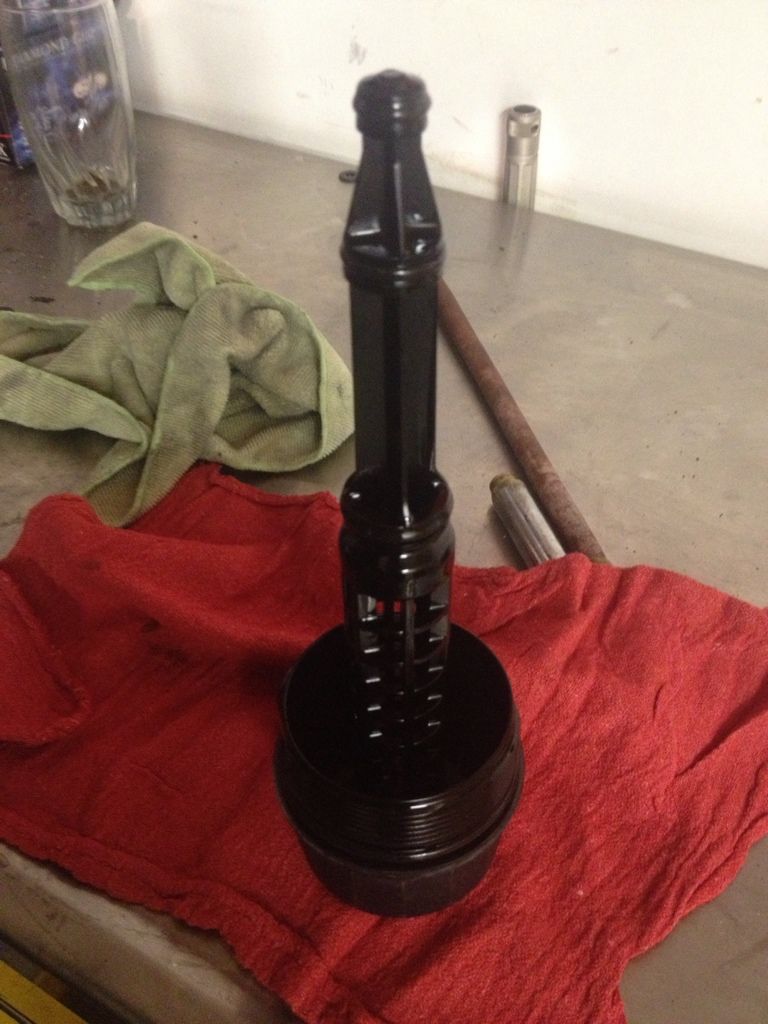
-lube all of the o-rings and reinstall the filter assembly into the motor and hand tighten.
Transmission service with conductor plate
-unclip oxygen sensor wires from plate on transmission pan
-drain fluid using 5mm allen socket

-using a E12 inverted torx, remove the 2 bolts that hold the bracket onto the pan/transmission so it is out of the way.
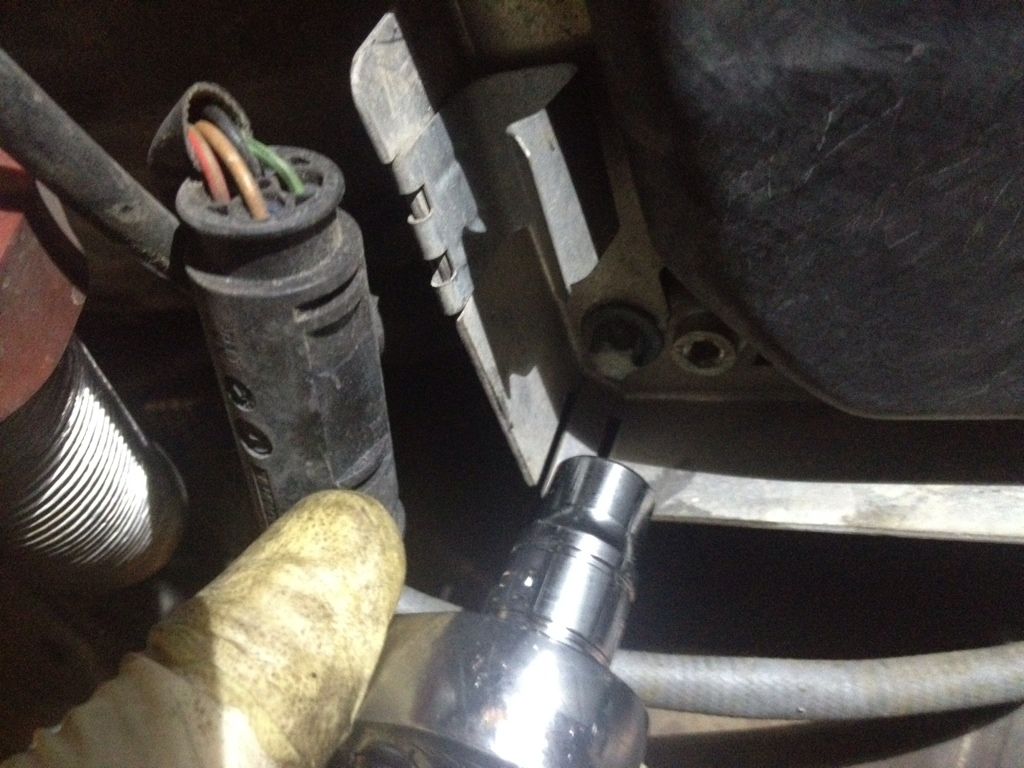
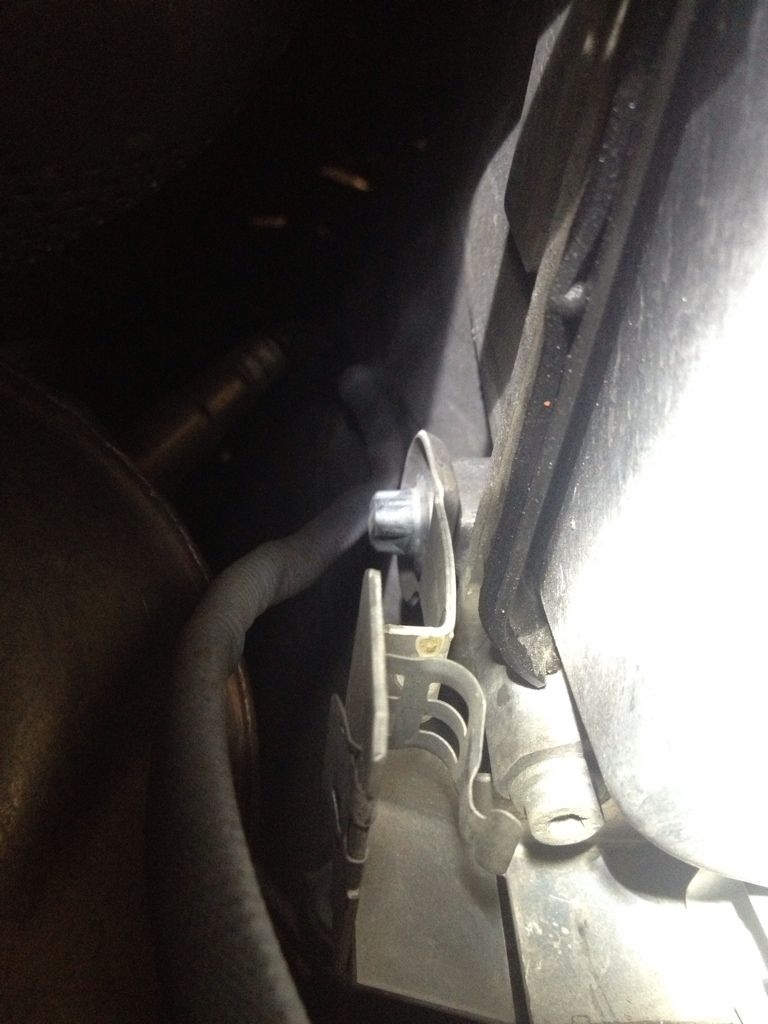
-remove the 6 torx bolts with holding brackets and remove the trans pan
-now you need to remove the connector plug. It is in the front/passenger side of the trans. there is a lever that turns to loosen the harness from the plug, then, using a 7mm deep socket, unbolt the connector from the conductor plate(the bolt is in the center of the connector. then just pop the connector out with a screwdriver or small prybar.
-now you can remove the valve body/conductor plate assembly by loosening the 9 bolts that hold it up to the trans. be careful, this is messy.
-once you get the assembly on the bench, you can remove the T brackets that hold the solenoids.
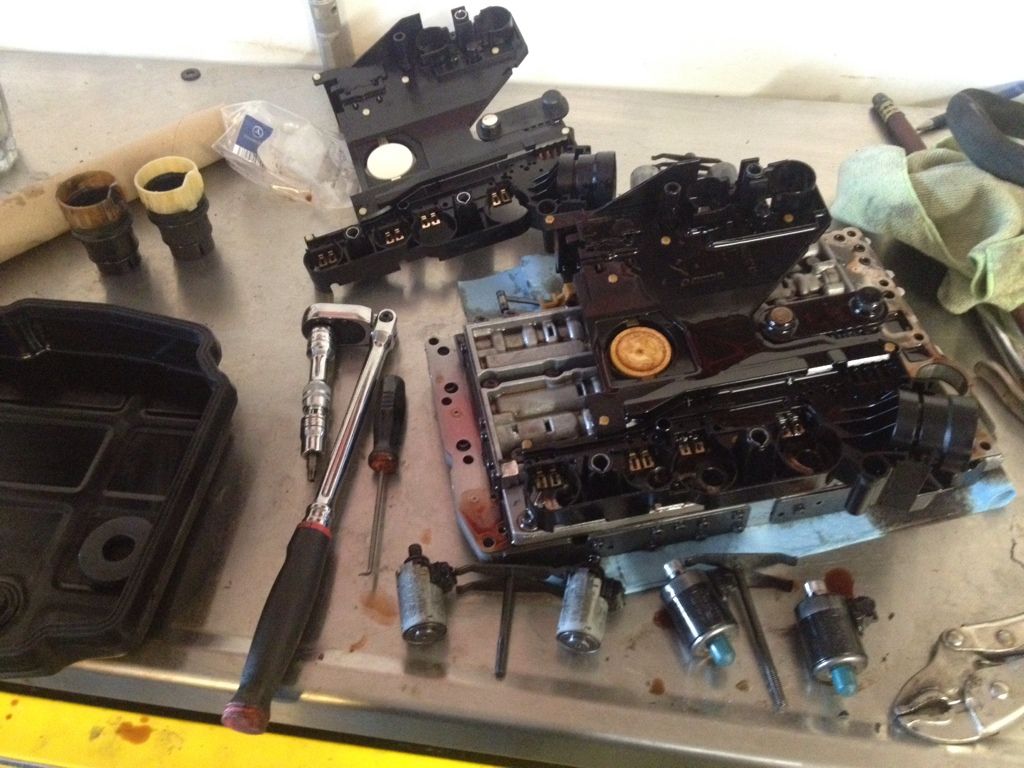
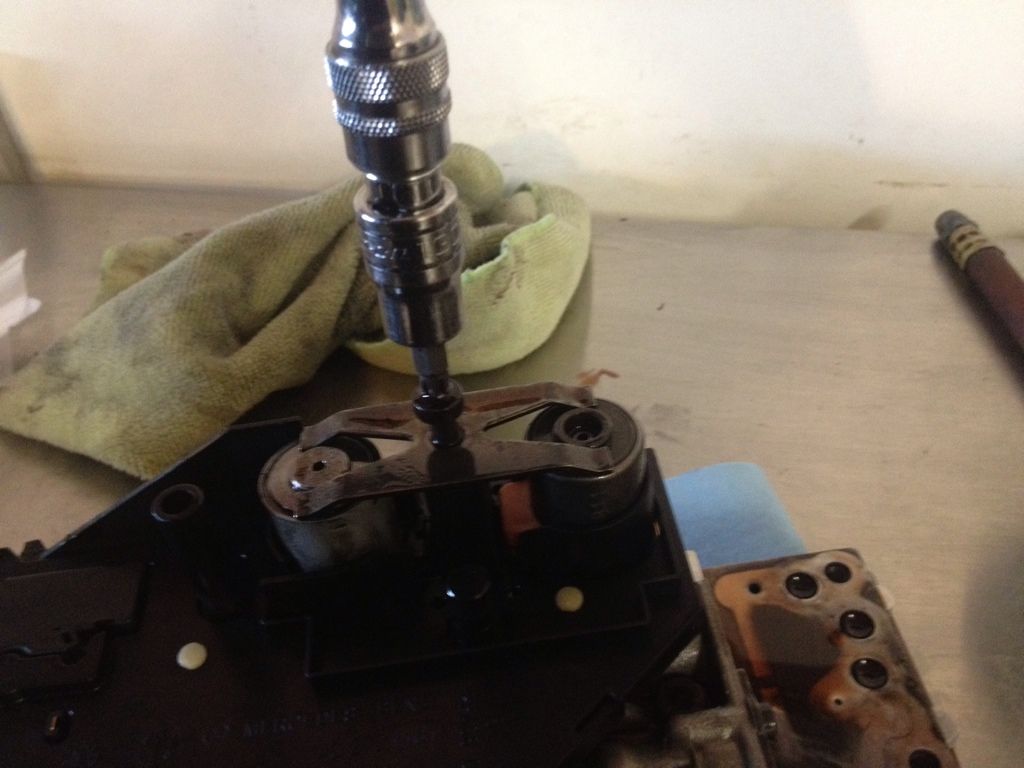
-remove the solenoids being aware of location so they go back the same.
-remove the conductor plate and install new one.
-replace the solenoids and bolt down the brackets to 6nm
-replace the assembly in the transmission and tighten valve body to 8nm
-replace the new connector and tighten the 7mm center bolt to 2.5nm
-replace the pan with new gasket and tighten to 8nm
-replace O2 sensor bracket and clip wires back up.
-fill and warm up and check transmission. I started with 4 quarts of MB fluid and warmed up the car. went from D to R a few time and then checked it. I had to add 2 quarts for a total of 6. I will recheck it in a few days.
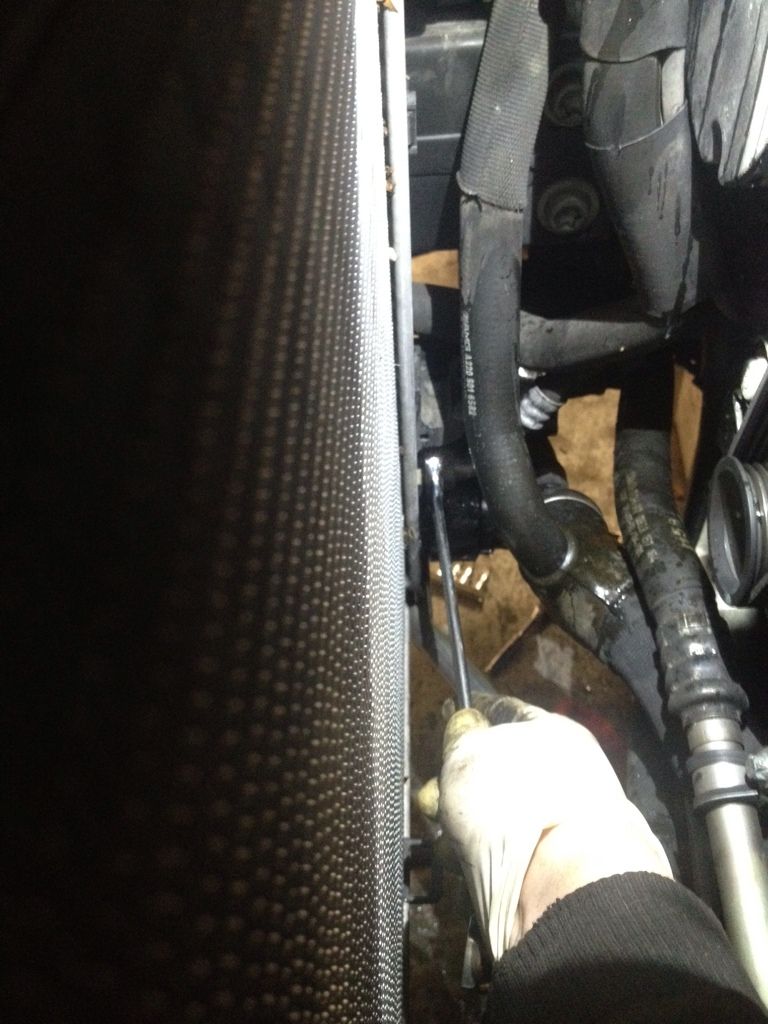
Radiator Replacement
-This is a pretty big job where the Benz instructions say to take off the bumper, headlights and radiator support but i was able to get it out the regular way without doing all that.
-remove the lower cover
-drain the coolant. I found draining into gallon containers is less messy than a pan that splatters everywhere.
-remove the upper radiator hose. there is a hose clamp on top, large clip on the radiator connection and the lower hose clamp on the cooler. pull the hose out.
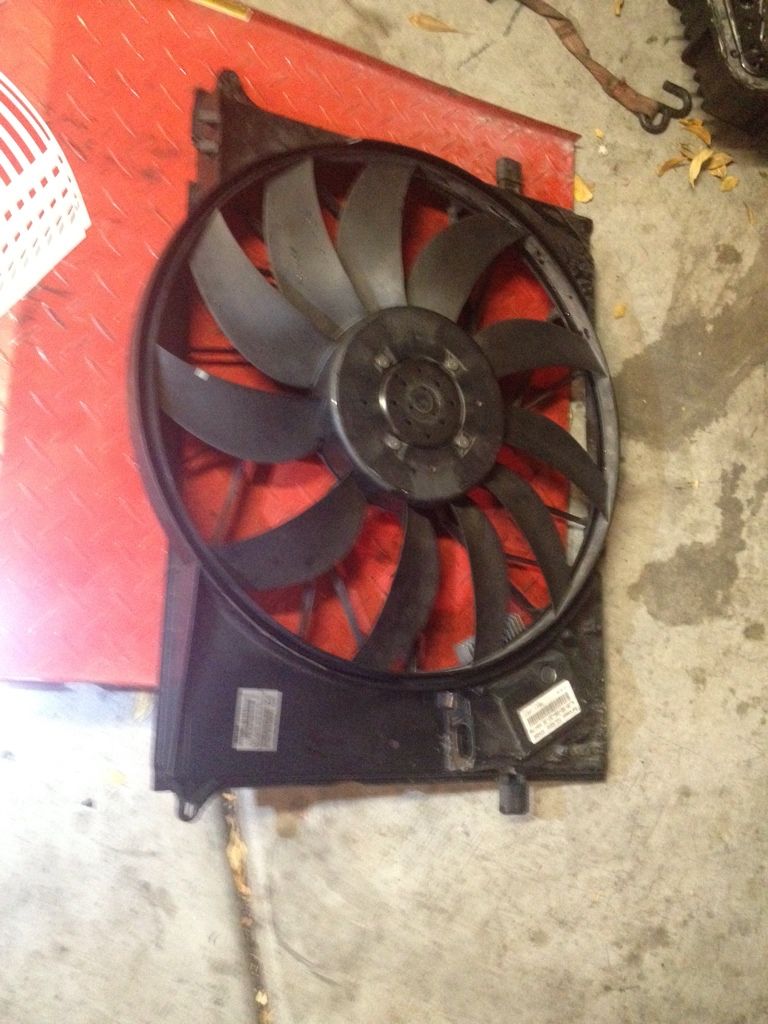
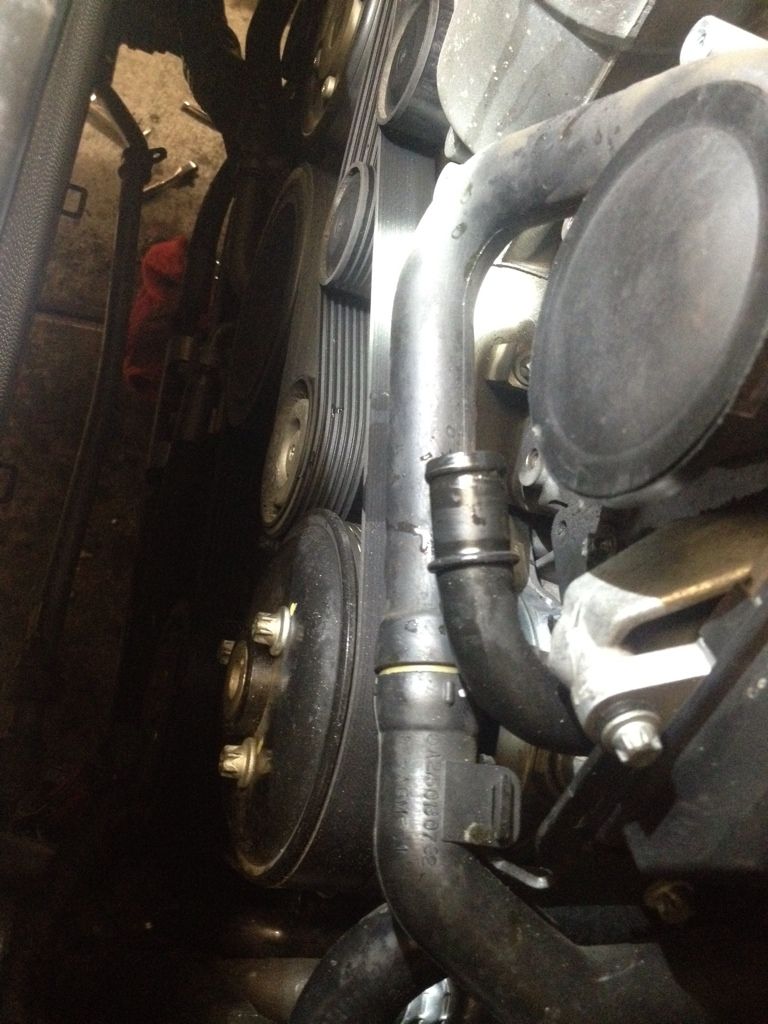
-now you can remove the cooling fan. Start by removing the small hoses, from the overflow.
-then remove the hard line from the lower part of the fan. there are 2 t25 torx screws.
-remove the 2 small brackets on the top of the radiator holding it to the radiator support each with one 10mm bolt
-remove the electric connector by squeezing and pulling out and move out of the way.
-remove the 2 upper 10 mm bolts that hold the fan to the radiator and remove fan.
-now to start removal of radiator.
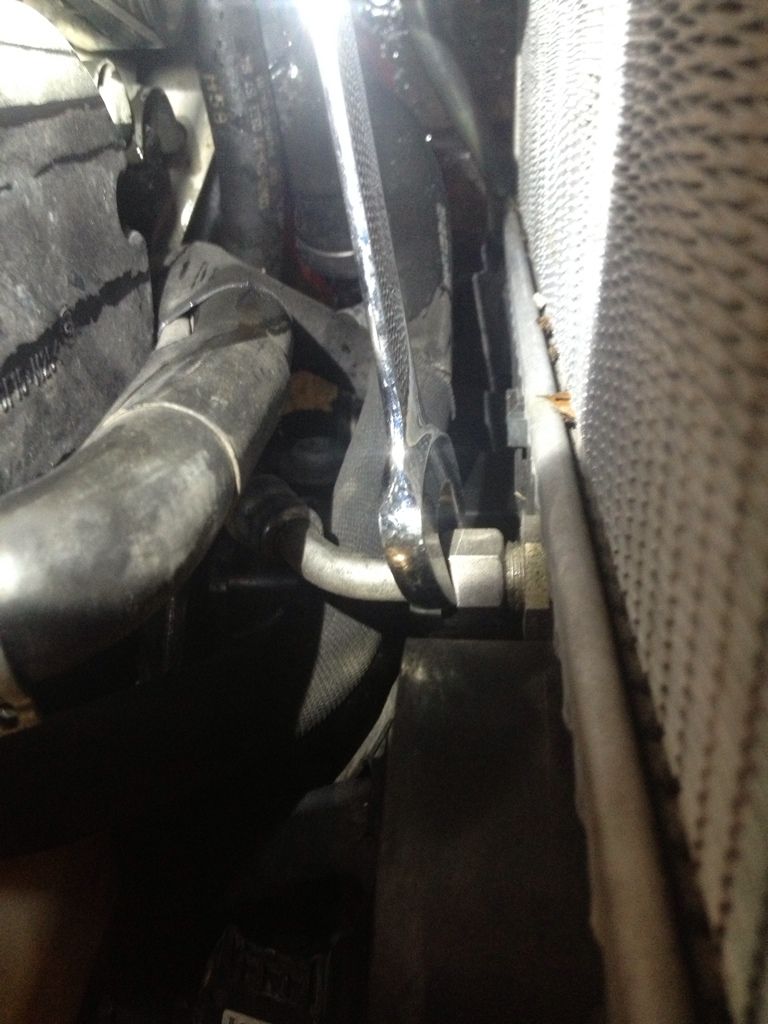
-remove the 2 10 mm bolts in the front top of the radiator that hold the assembly of coolers to the radiator.
-remove the 2 10 mm bolts in the front middle of the radiator that hold the assembly of coolers. these are extremely difficult to get to. I used a long 1/4 drive extension and a 10mm universal socket.
-remove the 2 transmission cooler lines using a 19mm wrench and move them out of the way.
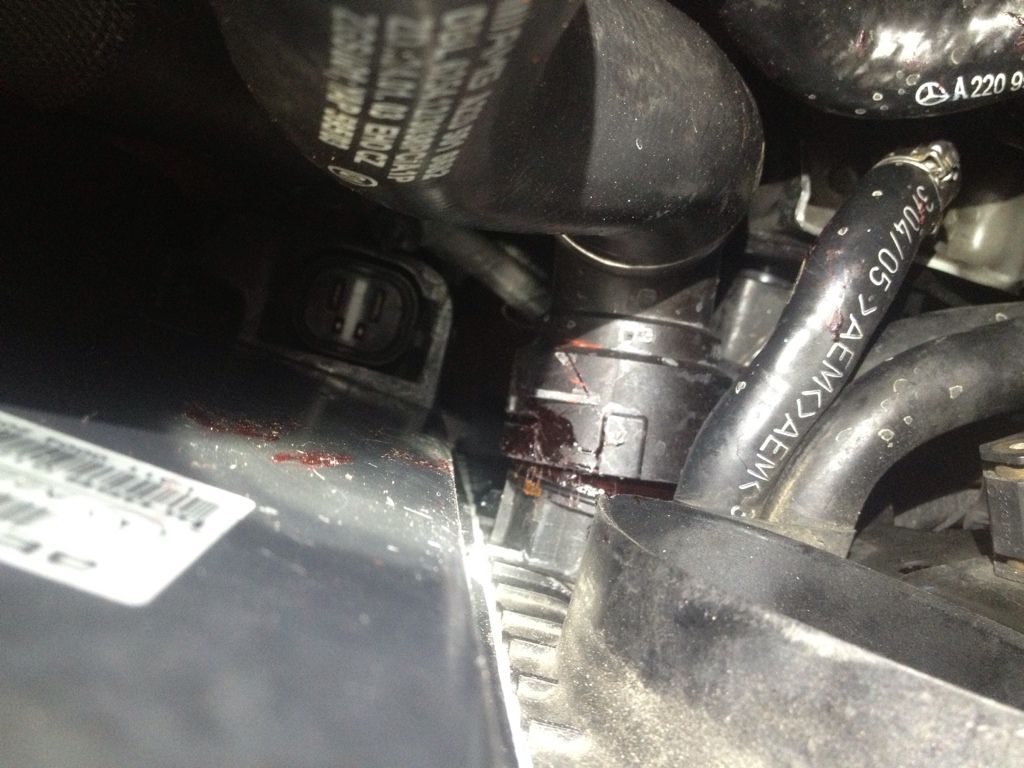
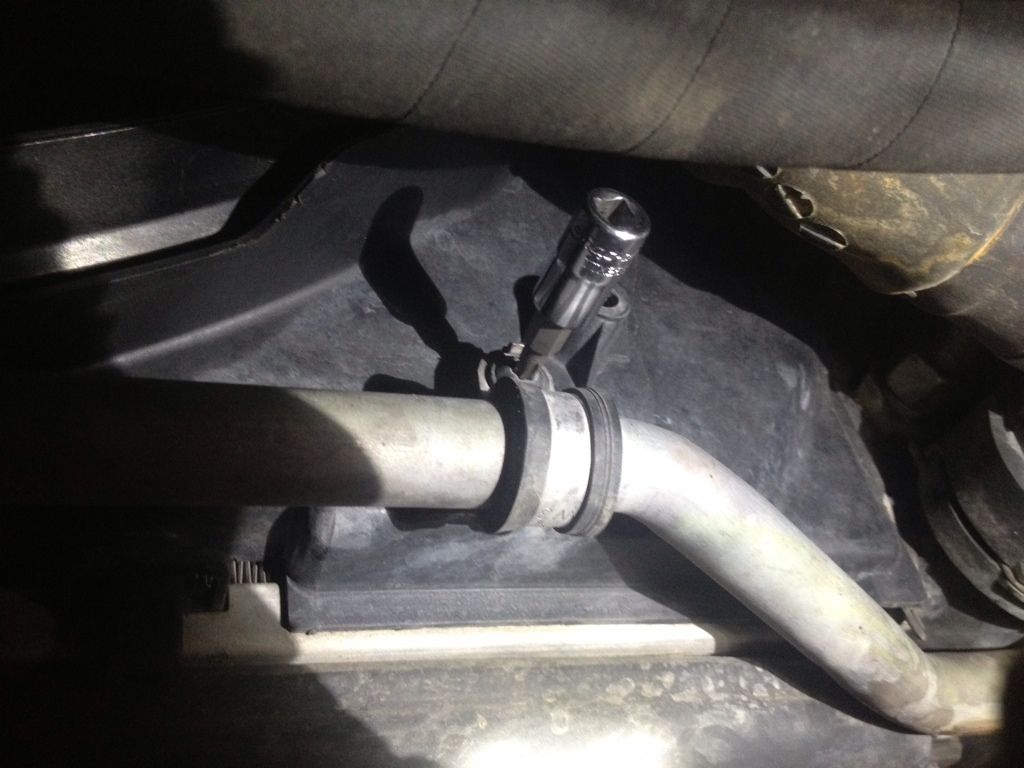
-remove the hose connections on the front of the motor
-remove the black thermostat cover from the motor using the 3 E12 inverted torx bolts.
-remove the oil filter assembly and cover the hole
-unclip and remove the lower radiator hose from the radiator
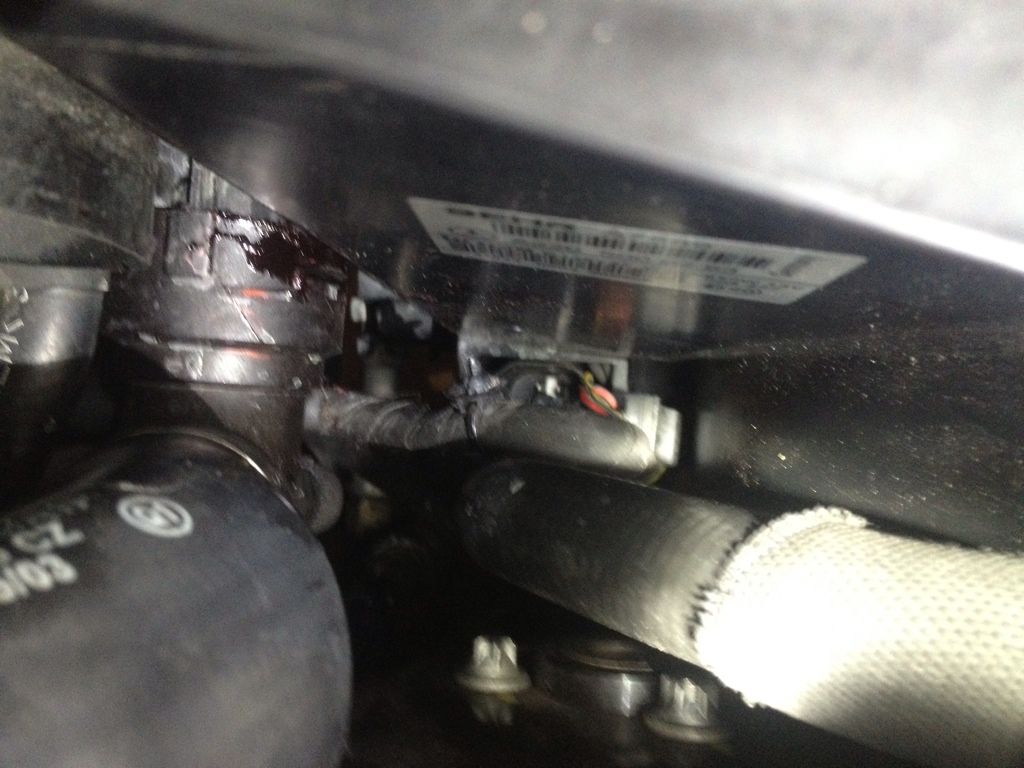
-remove hose from the bottom of the coolant overflow and move out of the way.
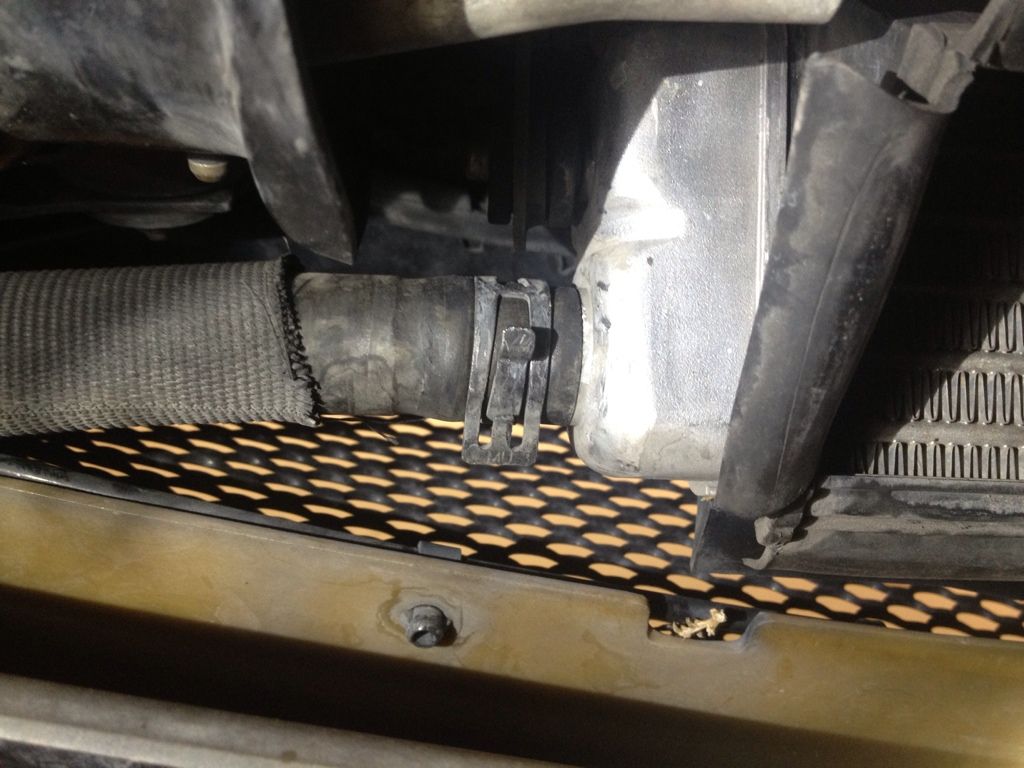
-remove the intercooler pump from the passenger side of the radiator by unbolting the 3 10mm bolts.
-loosen the 2 air intake pieces
-make sure that everything is out of the way and lift the radiator out. It does fit, just be careful.
-you must swap the small square nuts from the top of the old radiator to the new one.
-reverse everything to reinstall and fill and check coolant after driving the car and getting everything hot.
Hope this helps out some of you fellow DIY'ers out there!
This included:
-Radiator replacement
-oil change with filter
-transmission service including filter, conductor plate, and connector
-engine air filters
-cabin filters
-hood struts
-trunk struts
from easy to hard
Hood and trunk Struts-
-Hold the hood/trunk up with some vice grips or a broom handle
-use a small screwdriver to pop off the metal clips on the ends and just push the new ones on. done
Engine Air Filters
-Remove engine covers
-use a T25 torx to unscrew the filter covers
-remove old filters, vacuum out filter box, install new filter
-retighten torx and reinstall the engine covers
Cabin Filters
-open glove box
-using small screwdriver, pop out and unhood the light
-remove 2 top and 2 bottom phillips screws
-pull out glove box
-lift white handle on filter box and open filter door
-pull out old filters and install new ones
-reinstall glove box
Oil Change
-Remove all lower covers underneath vehicle
-using 13mm wrench, losen and remove drain
-once drained, reinstall plug
-remove oil filter assembly from top of the motor
- new filter comes with 4 o-rings that need to be removed and replaced using a small pick tool.
-lube all of the o-rings and reinstall the filter assembly into the motor and hand tighten.
Transmission service with conductor plate
-unclip oxygen sensor wires from plate on transmission pan
-drain fluid using 5mm allen socket
-using a E12 inverted torx, remove the 2 bolts that hold the bracket onto the pan/transmission so it is out of the way.
-remove the 6 torx bolts with holding brackets and remove the trans pan
-now you need to remove the connector plug. It is in the front/passenger side of the trans. there is a lever that turns to loosen the harness from the plug, then, using a 7mm deep socket, unbolt the connector from the conductor plate(the bolt is in the center of the connector. then just pop the connector out with a screwdriver or small prybar.
-now you can remove the valve body/conductor plate assembly by loosening the 9 bolts that hold it up to the trans. be careful, this is messy.
-once you get the assembly on the bench, you can remove the T brackets that hold the solenoids.
-remove the solenoids being aware of location so they go back the same.
-remove the conductor plate and install new one.
-replace the solenoids and bolt down the brackets to 6nm
-replace the assembly in the transmission and tighten valve body to 8nm
-replace the new connector and tighten the 7mm center bolt to 2.5nm
-replace the pan with new gasket and tighten to 8nm
-replace O2 sensor bracket and clip wires back up.
-fill and warm up and check transmission. I started with 4 quarts of MB fluid and warmed up the car. went from D to R a few time and then checked it. I had to add 2 quarts for a total of 6. I will recheck it in a few days.
Radiator Replacement
-This is a pretty big job where the Benz instructions say to take off the bumper, headlights and radiator support but i was able to get it out the regular way without doing all that.
-remove the lower cover
-drain the coolant. I found draining into gallon containers is less messy than a pan that splatters everywhere.
-remove the upper radiator hose. there is a hose clamp on top, large clip on the radiator connection and the lower hose clamp on the cooler. pull the hose out.
-now you can remove the cooling fan. Start by removing the small hoses, from the overflow.
-then remove the hard line from the lower part of the fan. there are 2 t25 torx screws.
-remove the 2 small brackets on the top of the radiator holding it to the radiator support each with one 10mm bolt
-remove the electric connector by squeezing and pulling out and move out of the way.
-remove the 2 upper 10 mm bolts that hold the fan to the radiator and remove fan.
-now to start removal of radiator.
-remove the 2 10 mm bolts in the front top of the radiator that hold the assembly of coolers to the radiator.
-remove the 2 10 mm bolts in the front middle of the radiator that hold the assembly of coolers. these are extremely difficult to get to. I used a long 1/4 drive extension and a 10mm universal socket.
-remove the 2 transmission cooler lines using a 19mm wrench and move them out of the way.
-remove the hose connections on the front of the motor
-remove the black thermostat cover from the motor using the 3 E12 inverted torx bolts.
-remove the oil filter assembly and cover the hole
-unclip and remove the lower radiator hose from the radiator
-remove hose from the bottom of the coolant overflow and move out of the way.
-remove the intercooler pump from the passenger side of the radiator by unbolting the 3 10mm bolts.
-loosen the 2 air intake pieces
-make sure that everything is out of the way and lift the radiator out. It does fit, just be careful.
-you must swap the small square nuts from the top of the old radiator to the new one.
-reverse everything to reinstall and fill and check coolant after driving the car and getting everything hot.
Hope this helps out some of you fellow DIY'ers out there!
Thread Starter
Member
Joined: Sep 2012
Posts: 190
Likes: 47
From: Las Vegas
2016 S65 AMG coupe, 2010 E63, 2015 Z06/z07 m7 vert 735rwhp, 2000 f-350 crewcab w/ 16" kelderman kit
i got a deal on a kit that had it and the connector so i figured i would do it while i was in there.
Trending Topics
MB World Stories
The Best of Mercedes & AMG

Manual Mercedes? 6 Times Sindelfingen Let Drivers Have All The Fun
Verdad Gallardo
Mercedes SLR McLaren 722 S Is Extremely Rare Example Modified by McLaren
Verdad Gallardo
8 Classic Boxy Mercedes Designs That Have Aged Like Fine Wine
Verdad Gallardo
Flawlessly Restored Mercedes 190E Evo II Heads to Auction
Verdad Gallardo
Electric Mercedes C-Class Unveiled: 11 Things You Need to Know
Verdad Gallardo
Mercedes EQS Gets A Major Update: Everything You Need to Know
Verdad Gallardo
5 Underrated Mercedes-Benz Models That Don't Get the Love They Deserve
Verdad Gallardo
Mercedes 300D Has Pushed Well Past 1 Million Miles and It Ain't Stopping
Verdad Gallardo


