


SL55/63/65/R230 AMG: New side vents for my SL65

Thread Starter
Member
Joined: Mar 2009
Posts: 211
Likes: 1
From: SF Bay Area
2001 Lamborghini Diablo, 2009 SL65 (sold), 1998 CL600 (sold), 1989 560SEL (sold)
New side vents for my SL65
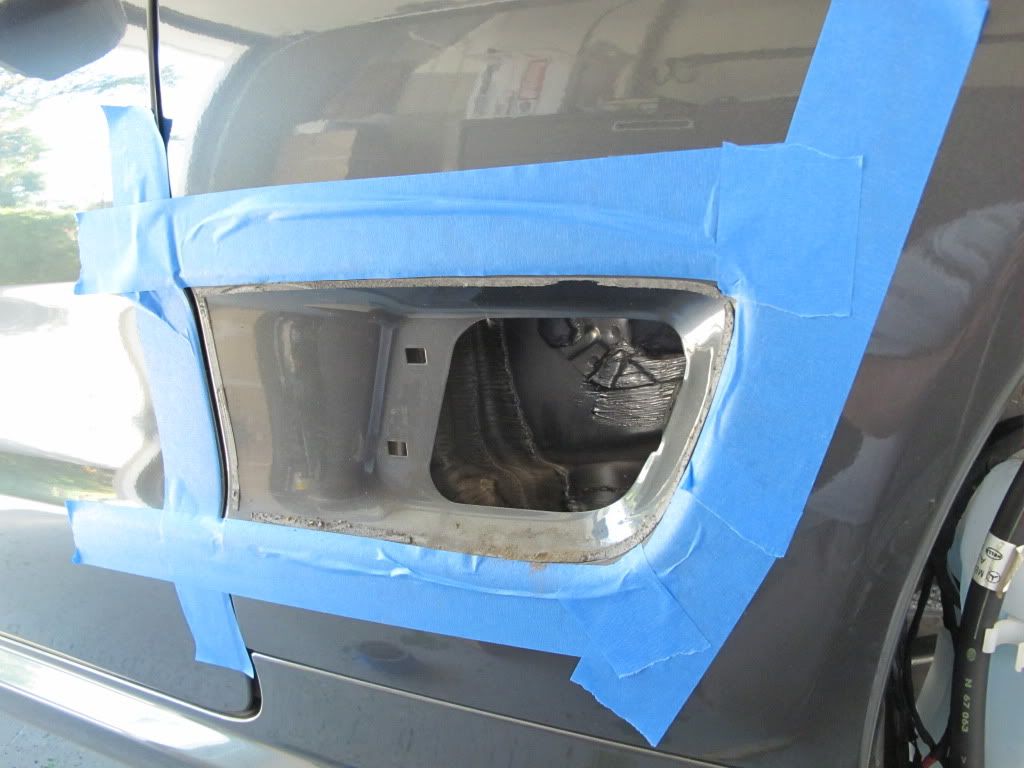
Just recieved new side vents custom made with carbon fiber by Ivan at DCT Motorsports. Going to install them later today. Looks like they are held on with double side tape. Any advice on removing the old ones? I'm going to try some heat and dental floss to brake the adhesive.

Last edited by falconsprint; Oct 27, 2011 at 02:02 PM.
MBWorld Fanatic!
Joined: Dec 2007
Posts: 1,862
Likes: 5
From: Sin City
2005 E55 AMG - - 2005 SL55 AMG - - - - - - 2006 SLK55 AMG - - - - - - 2013 Ducati Diavel AMG -
Looks outstanding, but not surprised. DCT does some amazing work every time! 
I guess some heat and dental floss would work to brake the adhesive.
I guess some heat and dental floss would work to brake the adhesive.
Thread Starter
Member
Joined: Mar 2009
Posts: 211
Likes: 1
From: SF Bay Area
2001 Lamborghini Diablo, 2009 SL65 (sold), 1998 CL600 (sold), 1989 560SEL (sold)
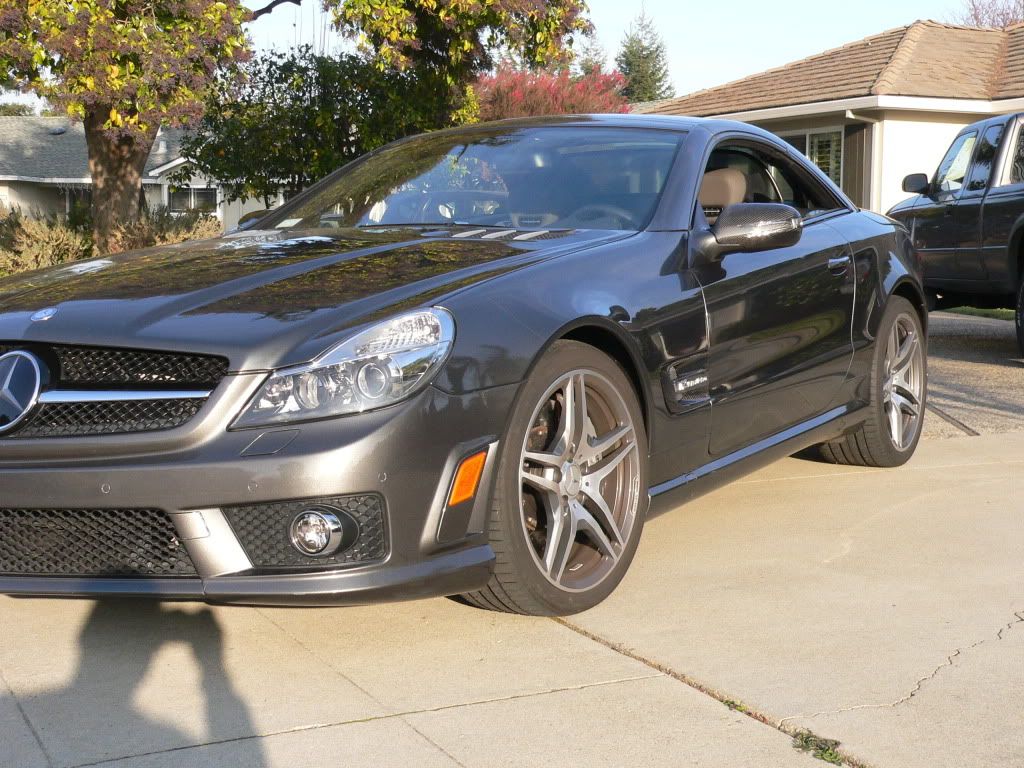
Here's a photo of the new side vent on the car.
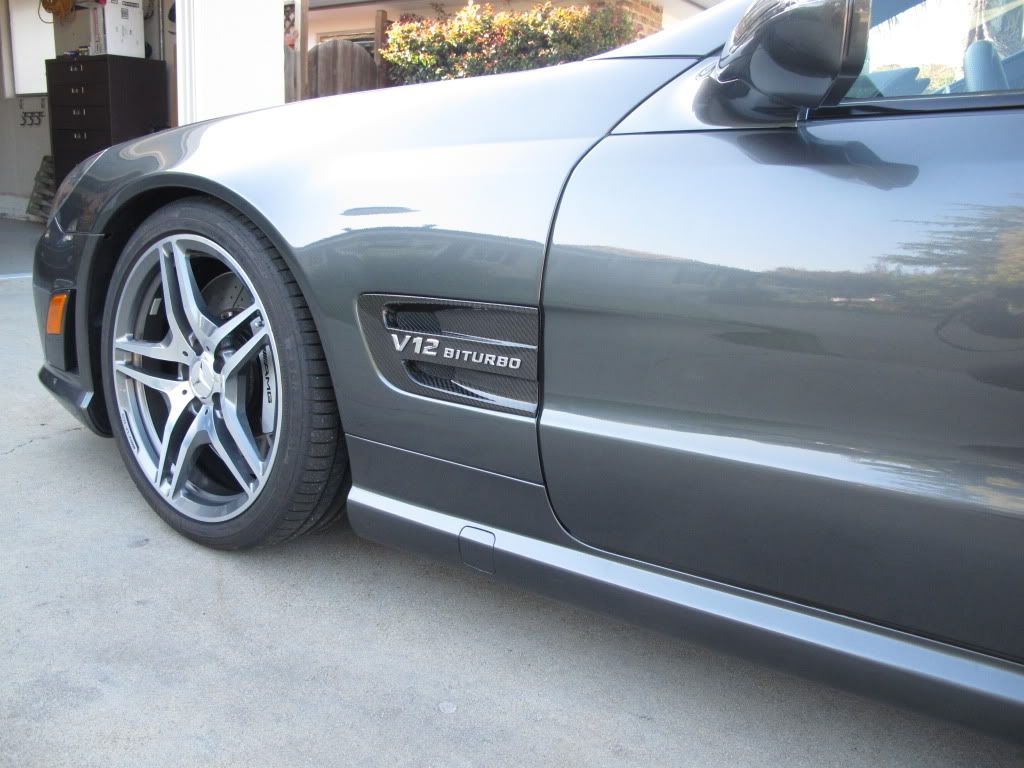
It wasn't too diffcult getting the old ones off. I used some narrow fishing line.
It wasn't too diffcult getting the old ones off. I used some narrow fishing line.
MBWorld Fanatic!
Joined: Dec 2007
Posts: 1,862
Likes: 5
From: Sin City
2005 E55 AMG - - 2005 SL55 AMG - - - - - - 2006 SLK55 AMG - - - - - - 2013 Ducati Diavel AMG -
Member
Joined: Sep 2011
Posts: 171
Likes: 0
2008 SL65, 2006 SLK55(sold)
Thread Starter
Member
Joined: Mar 2009
Posts: 211
Likes: 1
From: SF Bay Area
2001 Lamborghini Diablo, 2009 SL65 (sold), 1998 CL600 (sold), 1989 560SEL (sold)
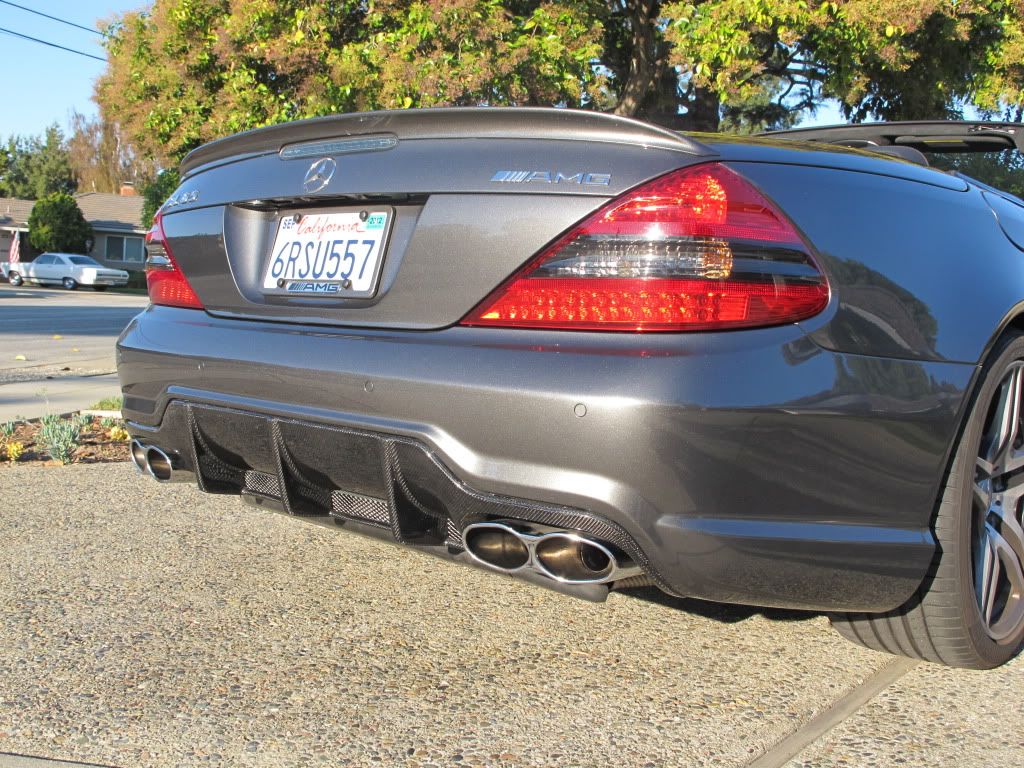
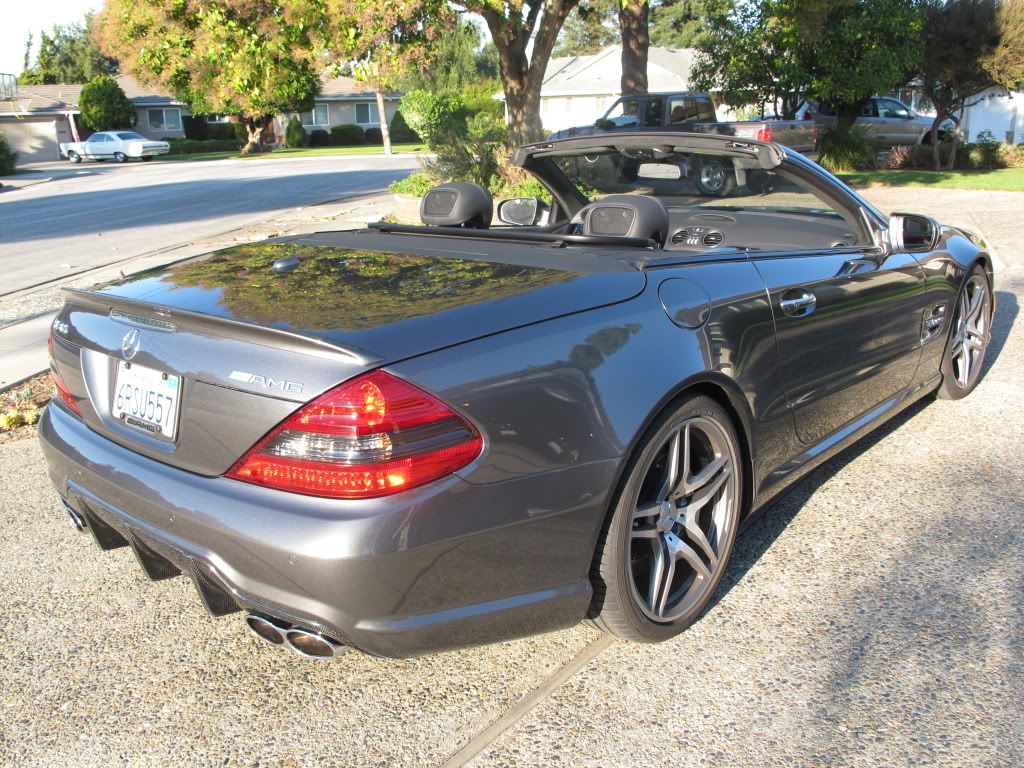
I'm having a carbon fiber rear diffusor installed today (also DCT Motorsports). Over the winter I'm going to CF the hood vents, door handles and maybe the side mirrors and rear spoiler. Come spring I'll be putting on new wheels.
Trending Topics

SPONSOR
Joined: Feb 2009
Posts: 2,409
Likes: 29
From: Cupertino
W211 Estate
Thanks for the business!
Beautiful SL65


MB World Stories
The Best of Mercedes & AMG

Manual Mercedes? 6 Times Sindelfingen Let Drivers Have All The Fun
Verdad Gallardo
Mercedes SLR McLaren 722 S Is Extremely Rare Example Modified by McLaren
Verdad Gallardo
8 Classic Boxy Mercedes Designs That Have Aged Like Fine Wine
Verdad Gallardo
Flawlessly Restored Mercedes 190E Evo II Heads to Auction
Verdad Gallardo
Electric Mercedes C-Class Unveiled: 11 Things You Need to Know
Verdad Gallardo
Mercedes EQS Gets A Major Update: Everything You Need to Know
Verdad Gallardo
5 Underrated Mercedes-Benz Models That Don't Get the Love They Deserve
Verdad Gallardo
Mercedes 300D Has Pushed Well Past 1 Million Miles and It Ain't Stopping
Verdad Gallardo
10 Most Reliable Mercedes-Benz Models You Can Buy Used
Verdad GallardoMBWorld Fanatic!
Joined: Dec 2007
Posts: 1,862
Likes: 5
From: Sin City
2005 E55 AMG - - 2005 SL55 AMG - - - - - - 2006 SLK55 AMG - - - - - - 2013 Ducati Diavel AMG -

Thread Starter
Member
Joined: Mar 2009
Posts: 211
Likes: 1
From: SF Bay Area
2001 Lamborghini Diablo, 2009 SL65 (sold), 1998 CL600 (sold), 1989 560SEL (sold)
Thread Starter
Member
Joined: Mar 2009
Posts: 211
Likes: 1
From: SF Bay Area
2001 Lamborghini Diablo, 2009 SL65 (sold), 1998 CL600 (sold), 1989 560SEL (sold)
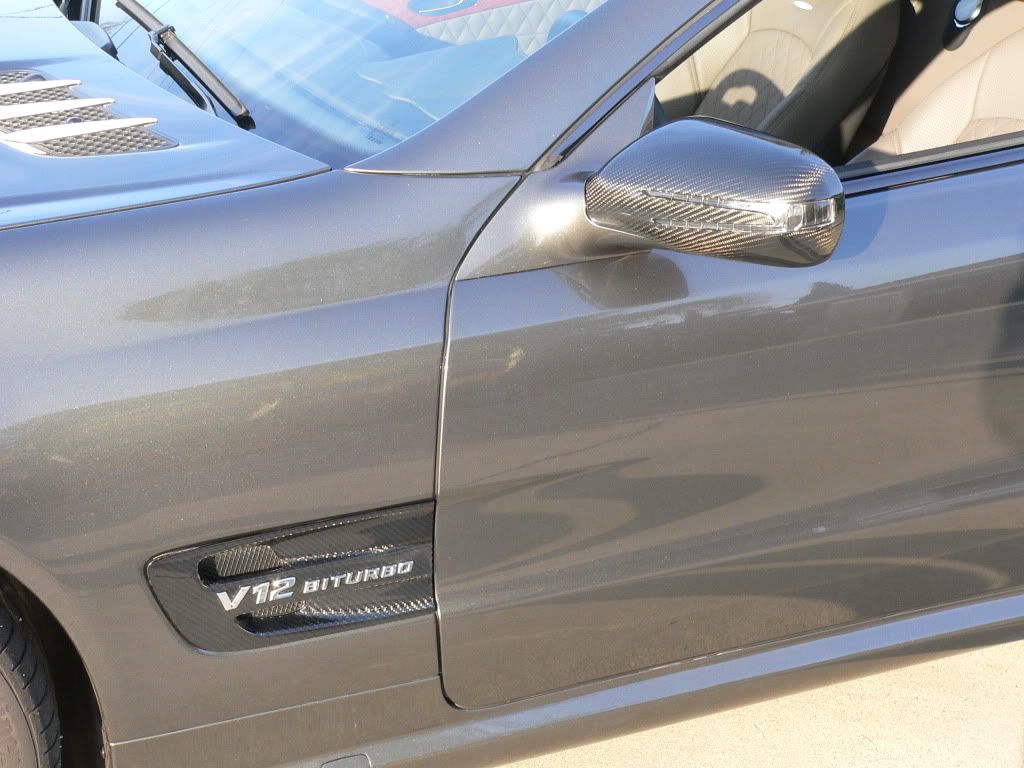
Installed a pair of carbon fiber side mirrors today. Also from Ivan at DCT Motorsports. Here are some pictures. I have a few more pieces from DCT on their way. I highly recommend Ivan at DCT. Very pleasant to deal with, very knowledgeable and always top notch products.

Thread Starter
Member
Joined: Mar 2009
Posts: 211
Likes: 1
From: SF Bay Area
2001 Lamborghini Diablo, 2009 SL65 (sold), 1998 CL600 (sold), 1989 560SEL (sold)
I did the install myself. I'd rate this as medium difficulty because of the care needed to not break the mirror glass or damage the paint. I didn't take photos of the installation, but I'll summarize the steps.
1. carefully pry off mirror glass. The glass is held on by eight little tabs. I tried releasing the tabs with a hook but ultimately the glass came off by gradually increasing the pressure with a pair of no-scratch (nylon) wedges.
2. disconnect wires to glass and remove glass
3. remove three screws holding the motor to the bracket. Disconnect wires and remove motor.
4. remove four screws holding back of mirror housing to bracket. Disconnect wires to signal light.
5. using no-scratch wedges, pry neck of housing off of bracket. Look at the new housing to see the tabs that need to be released. It takes about an 1/8-1/4 inch of prying before the tabs release and the housing slides away from the car and off the bracket.
Installing new housing in reverse steps.
Here's an example of what I mean by no-scratch pry bars.
http://www.amazon.com/Bojo-4-Piece-G...9&sr=8-3-fkmr2
Last edited by falconsprint; Dec 10, 2011 at 07:53 PM.


Super Member
Joined: Jul 2009
Posts: 603
Likes: 2
From: Asheville, Atlanta
SL 65 AMG, Porsche 911 (993), 2014 Cayenne GTS, 2013 Toyota Highlander Limited
Fantastic upgrade!!!
Side vents look like they really fit the car versus OEM that look out of place........as mentioned great color for your car color......
Downplays the "bling" toy effect of OEM silver colored vents that seem to interrupt the flow with the car's lines/door, etc. IMHO.....
Every 2009 plus SL should have these! Should have come from the factory this way......very cool....
Thread Starter
Member
Joined: Mar 2009
Posts: 211
Likes: 1
From: SF Bay Area
2001 Lamborghini Diablo, 2009 SL65 (sold), 1998 CL600 (sold), 1989 560SEL (sold)
Thread Starter
Member
Joined: Mar 2009
Posts: 211
Likes: 1
From: SF Bay Area
2001 Lamborghini Diablo, 2009 SL65 (sold), 1998 CL600 (sold), 1989 560SEL (sold)
Thread Starter
Member
Joined: Mar 2009
Posts: 211
Likes: 1
From: SF Bay Area
2001 Lamborghini Diablo, 2009 SL65 (sold), 1998 CL600 (sold), 1989 560SEL (sold)
Member
Joined: Sep 2011
Posts: 171
Likes: 0
2008 SL65, 2006 SLK55(sold)
Excellent job and thanks for the description on the mirror upgrades. I have been watching your thread about the CF upgrades very closely since our cars are the same color; mine is one year older. I added the rear diffuser but was reluctant to attempt the mirrors myself; maybe soon. Would really like to see that front CF lip. Ivan is currently working on a steering wheel and shift knob for me.

Member
Joined: Jan 2007
Posts: 216
Likes: 0


