
SL55/63/65/R230 AMG: Just painted headlights and added led's
 10-01-2012, 09:33 PM
#1
MBWorld Fanatic!
Thread Starter
Just painted headlights and added led's
Took some time and did some stuff to the new to me SL55.
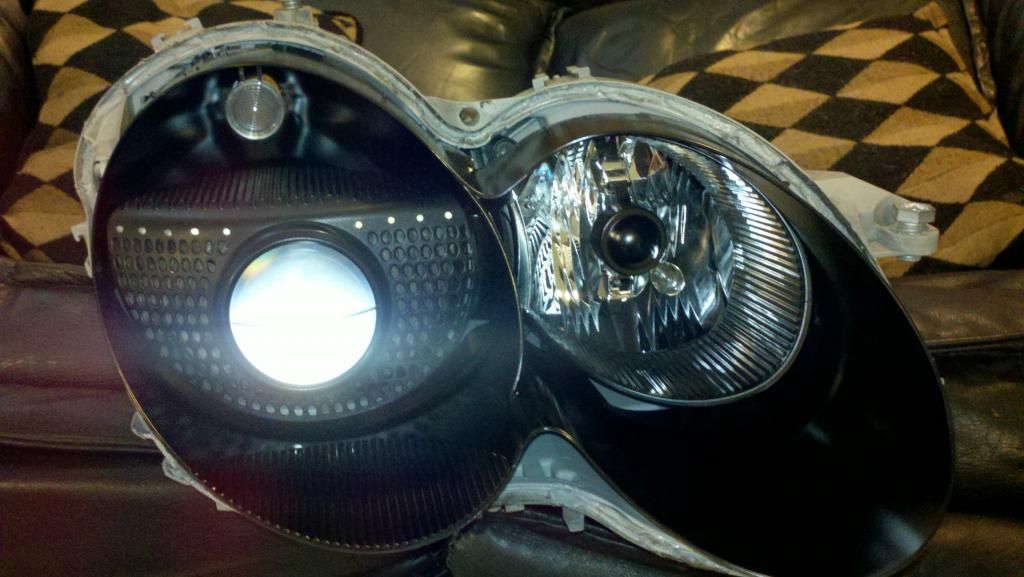
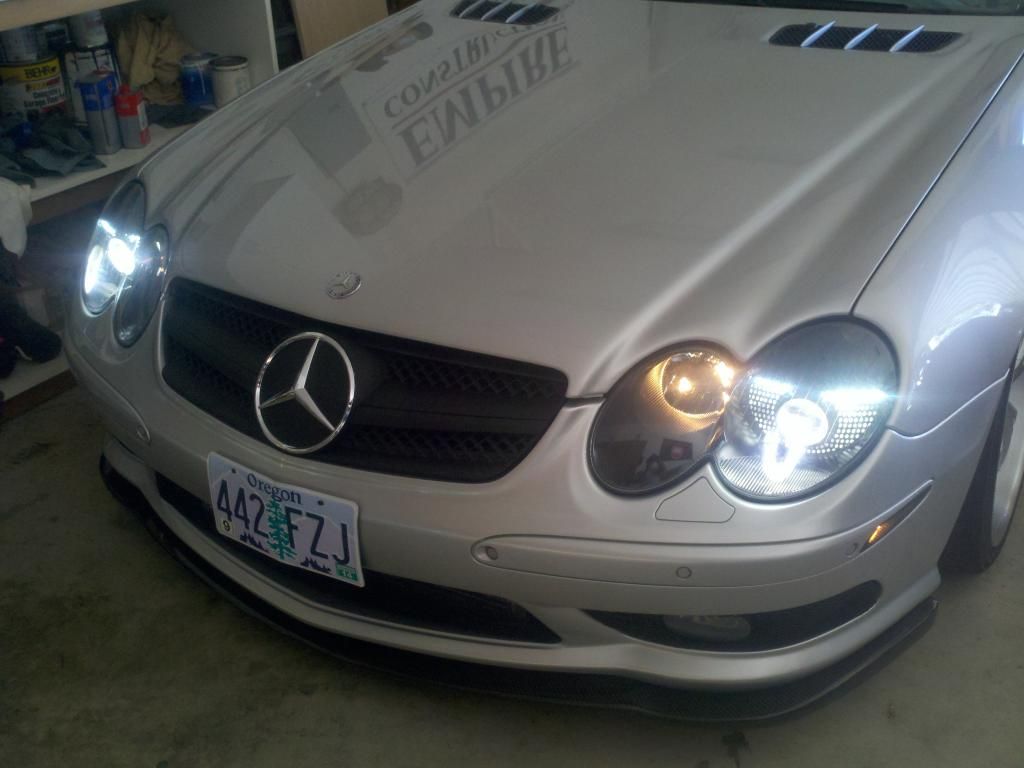
Removed headlights, pulled them apart, painted inside black, and added a row of leds to the hid cover area. The leds are wired to an ignition on circuit, so they are on when ever the car is. I think it came out looking pretty good. Not over done, but can see them for sure. I think they look best when headlights are on, it just adds a little cool detail.
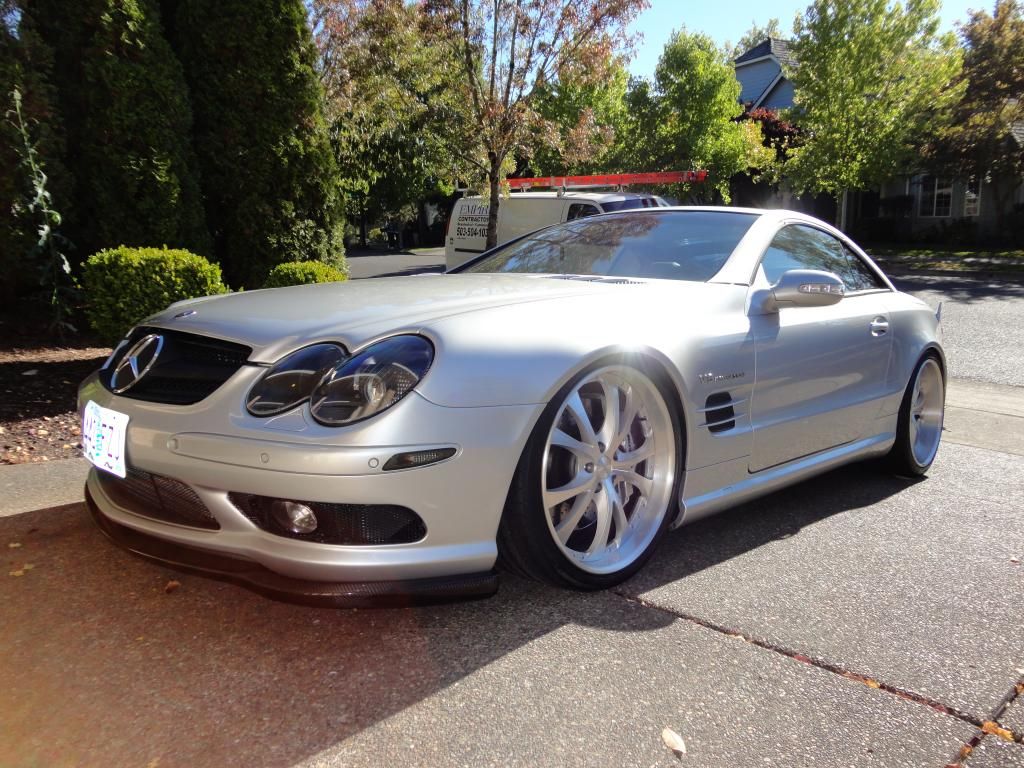
While the bumper was off, added in smoked side markers, a cf front spoiler, black single blade grill, new johnson pump, and an aux he. I should be receiving my 180mm pulley any day now. Cf rear spoiler went on last week, and resonators removed. Been a busy couple weeks since owning it. But getting close to personalized the way I want it. Wheels will be going satin black very soon.
I was shooting into the sun in these shots, so the lights look not as bright as they are in person.
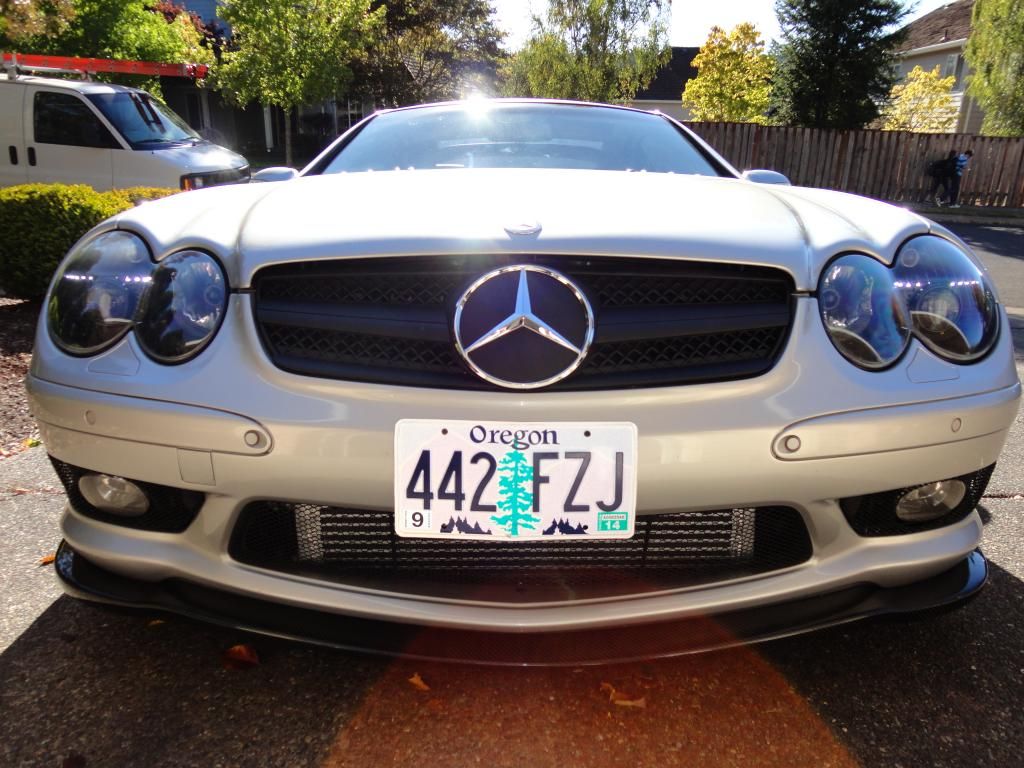
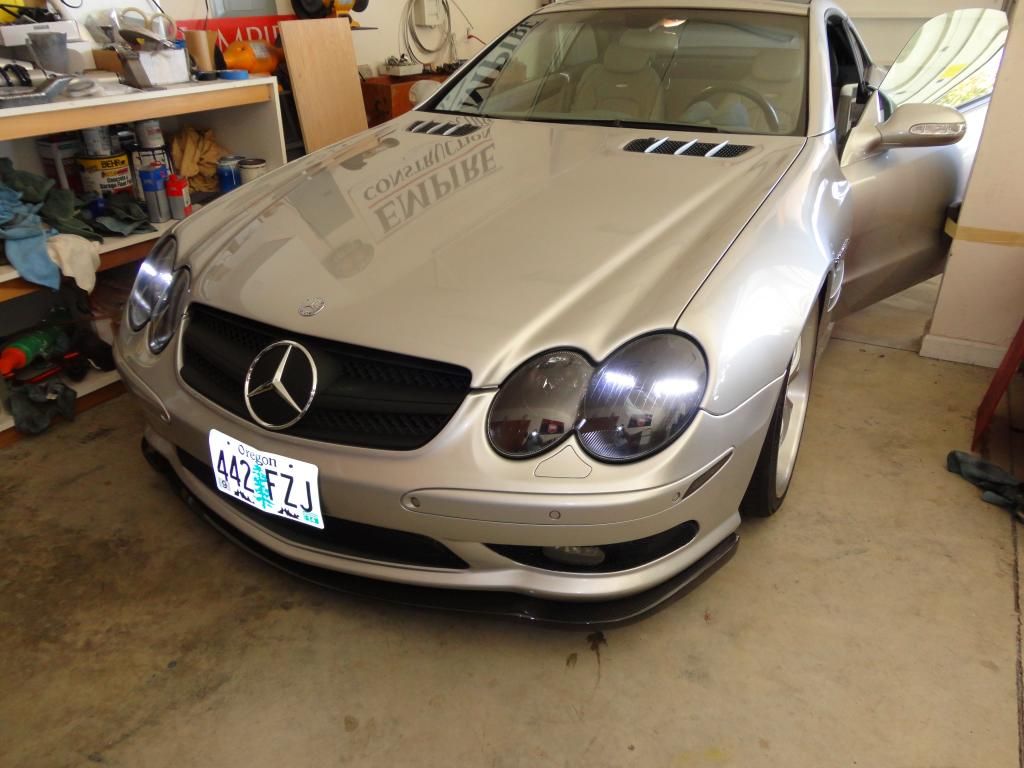
Removed headlights, pulled them apart, painted inside black, and added a row of leds to the hid cover area. The leds are wired to an ignition on circuit, so they are on when ever the car is. I think it came out looking pretty good. Not over done, but can see them for sure. I think they look best when headlights are on, it just adds a little cool detail.
While the bumper was off, added in smoked side markers, a cf front spoiler, black single blade grill, new johnson pump, and an aux he. I should be receiving my 180mm pulley any day now.
Cf rear spoiler went on last week, and resonators removed. Been a busy couple weeks since owning it. But getting close to personalized the way I want it. Wheels will be going satin black very soon.I was shooting into the sun in these shots, so the lights look not as bright as they are in person.
 10-01-2012, 11:31 PM
#2
Junior Member
Join Date: Jun 2012
Posts: 50
Likes: 0
Received 0 Likes
on
0 Posts
SL55 AMG
Those are some of the nicest looking wheels on this car I've seen. I'm going from Vossen deep dish wheels on mine to some custom Iforged wheels when the widebody conversion is done. Just saying your car looks great!
. Just saying your car looks great!
 10-02-2012, 01:19 AM
#5
MBWorld Fanatic!
Thread Starter
Thanks guys. The wheels are Maya's. Don't even know what model they are. A black set came on the car, but had a couple dents in the barrels. In a stroke of pure luck, I found a local guy selling the exact wheels but with brushed barrels and silver centers and tires with only 200 miles! If anyone is interested, I still have the original black set for sale cheap. Just needs a couple barrels replaced. Barrels are about $150.
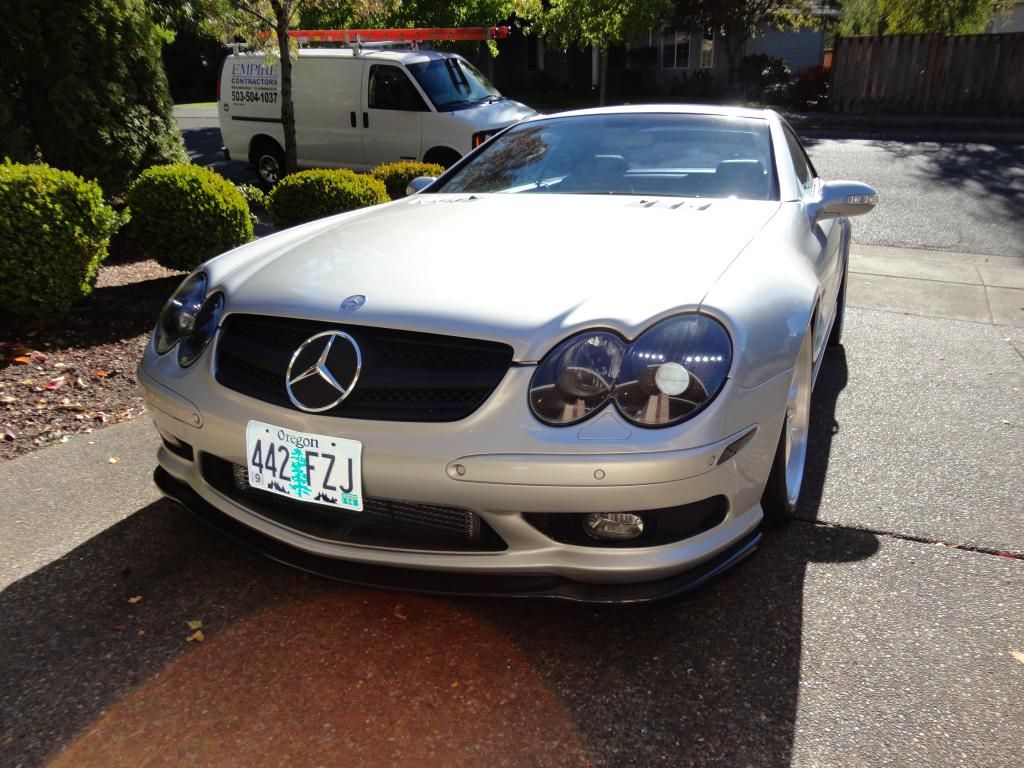
Ronnie- ya, the dam plate! the bumper already had the holes in it, and law requires front plates in Oregon. I have enough tickets at the moment that I don't need more excuses for the coppers to pull me over. Lol. I will pull it off in another 1.5 years. Haha
Ronnie- ya, the dam plate! the bumper already had the holes in it, and law requires front plates in Oregon. I have enough tickets at the moment that I don't need more excuses for the coppers to pull me over. Lol. I will pull it off in another 1.5 years. Haha
10-02-2012, 01:48 AM
#6
Junior Member
Join Date: Jun 2012
Posts: 50
Likes: 0
Received 0 Likes
on
0 Posts
SL55 AMG
not sure he was ripping on the plate on the front bumper...but rather the fact that you posted without photoshopping out the plate...very ledgible. Many argue that you shouldn't want that personal info bouncing around on the net. Just food for thought in future.
10-02-2012, 09:17 AM
#7


Trending Topics
10-02-2012, 09:38 AM
#8

Thanks guys. The wheels are Maya's. Don't even know what model they are. A black set came on the car, but had a couple dents in the barrels. In a stroke of pure luck, I found a local guy selling the exact wheels but with brushed barrels and silver centers and tires with only 200 miles! If anyone is interested, I still have the original black set for sale cheap. Just needs a couple barrels replaced. Barrels are about $150.
Ronnie- ya, the dam plate! the bumper already had the holes in it, and law requires front plates in Oregon. I have enough tickets at the moment that I don't need more excuses for the coppers to pull me over. Lol. I will pull it off in another 1.5 years. Haha
Ronnie- ya, the dam plate! the bumper already had the holes in it, and law requires front plates in Oregon. I have enough tickets at the moment that I don't need more excuses for the coppers to pull me over. Lol. I will pull it off in another 1.5 years. Haha
is painting the headlights reduces their brightness?
also, where do you get barrels for the maya wheels? i need some too, but i cannot find a source.
thank you
10-02-2012, 10:07 AM
#9
MBWorld Fanatic!
The headlights look great. Did you do all the work yourself? I want to do something similar but don't really trust any local shops.
And to whoever mentioned the plate, I think he was saying he doesn't like the front plate- not to blur out the characters.
And to whoever mentioned the plate, I think he was saying he doesn't like the front plate- not to blur out the characters.
10-02-2012, 10:09 AM
#10
MBWorld Fanatic!
Thread Starter
10-02-2012, 10:16 AM
#11
MBWorld Fanatic!
Thread Starter
every barrel i know of is only made by bbs. i think they are only available in 32 and 40 hole, step lip and smooth. in other words, all barrels are the same. just each wheel manufacturer buys the blanks for the centers (also bbs) and machines them to their own specs. maybe they will do something trick with the bolts, like work imprints "work" on their bolt heads. nothing special about the maya ones though.
10-02-2012, 10:18 AM
#12
MBWorld Fanatic!
Thread Starter
i do all of it myself. it is tedious though. these headlights were very hard to figure out how to pull apart! lots of parts in them. a heat gun around the edges loosens the adhesive to pull the lense out though.
10-02-2012, 10:20 AM
#13
Member
Join Date: May 2010
Location: Clermont, FL
Posts: 177
Likes: 0
Received 0 Likes
on
0 Posts
2007 E550 4-Matic, 2004 SL600
Looks great, how hard is it to pull the lenses off of the headlights?? I'd be worried about snapping a tab off or something....
EDIT::Looks like I was posting as you were, so it's a PITA ??
EDIT::Looks like I was posting as you were, so it's a PITA ??
Last edited by mkhurley; 10-02-2012 at 10:25 AM.
10-02-2012, 11:09 AM
#14
MBWorld Fanatic!

Join Date: Jul 2010
Location: Colorado
Posts: 1,477
Likes: 0
Received 1 Like
on
1 Post
07' SL65, 04' E55, 03' Evo8, 08' GSXR, DSM's...
/\ It's not hard at all once you bake them. Getting the parts apart inside the light is another story though. I have done a set of SL lights, and a set of the W211 lights. The W211's are way easier as far as the internal chrome part disassembly.
Aaron
Aaron
10-02-2012, 01:58 PM
#15
Super Member
 I always like it when I see people doing things the right way and don't take corners
 For the headlights - I have been down that road and it's funny - this could help:
https://mbworld.org/forums/sl55-amg-...t-surgery.html
10-02-2012, 08:54 PM
#16
MBWorld Fanatic!
Thread Starter
getting the lens off of the assembly was the easy part. lowest my oven goes is 170, which i felt was a little too high, so just a heat gun worked best for me. the adhesive mb used for them has a very low temp to become pliable. others i have done were almost like silicone and ALOT harder. there is only 4 little spring clips and the ever pliable adhesive holding lens on, nothing to break really.
now for the insides! there is only one screw that needs to be removed that holds the main outer trim rings on. it is by the turn signal bulb. do not try to bend and manipulate the trim ring section off from the rest of the bulbs. you can get it off, but the chance of breaking it is pretty high, plus, if you are painting inside, you will scratch the hell out of your new paint putting it back together that way!
the rest of the innards are held in 3 places. if you look and wiggle you will see them. the upper can be popped out. the side has enough flex it can be bent and moved from it's mounting point. the lower middle (which is where you get your height adjustment) has a tab inside of the locking the ball adjuster in. insert a skinny screwdriver to drop tab. i did all of these things with a long set of needle nose plyers and used housing for leverage. first one took 2 hours to figure out. second one took 10 minutes!
just take your time and with patience and some good mechanical ingenuity, it isn't hard. make sure you allow paint to cure a couple days before assembly. if not, the heat from the bulbs could make them air out more and then you could get a film on inside of lens, thus having to pull lens again to clean.
i polished inside of my lenses, and sanded and polished outsides. headlights look almost new now with basically the cost of a can of spray paint! already had all the polishes.
10-02-2012, 09:25 PM
#18
MBWorld Fanatic!
Thread Starter
thanks for the compliments.
10-02-2012, 10:02 PM
#19
Super Member
Join Date: Mar 2004
Posts: 678
Likes: 0
Received 0 Likes
on
0 Posts
'05 SL 55 Black/Black w/mods from Eurocharged/Kleemann/BuckheadImports
very nice!
love your headlights man! i got different kinds of led lights from ebay but my mechanic shop,says they will not work with my sl because led's use a lot less voltage and the car can detect this and thus will not let them work....some rope style led light Ii got i wanted to put inside the headlights but they said you cant open the headlights without damaging them....you have now proven that as wrong, so great job! have you thought about also getting the carbon led side updated side mirrors from ebay, or carbon door panels with the lighted amg panels? that would be killer also! Your car is awesome 
p.s. - i am also waiting on the 180 mm pulley kit coming in from eurocharged.....i think they said its gonna be another two to three weeks....
p.s. - i am also waiting on the 180 mm pulley kit coming in from eurocharged.....i think they said its gonna be another two to three weeks....
10-02-2012, 11:18 PM
#20
MBWorld Fanatic!
Thread Starter
true, they work off less voltage, but you just match them with the right resistor. the car will not detect this if powered off a different fused circuit. i used 3mm 3.4v led's. you can wire 4 of them in series and create 13.2v. i still used a resistor, but only as a safety. one side of each light has a row of 4, the other has row of five. on the fifth last one, i used a resistor that limited the volts down to the 3.4v. if you get it wrong, the lights won't shine the same brightness. if you try directly wiring a 3.4v to 12v, you will almost instantly burn it up. after that, i could wire both rows of 4 and the single in parallel, equating to only one positive and negative coming from housing. not sure of the name of the connector i used, but it is very much like a mono headphone cable. after housings, i just wired each connector parallel again with sheathed 24ga double wire to the fuse box under hood. there was a couple 5a fuses that are ign switched on, and came off the fused side.
as far as the led stuff, it took about 5 minutes for a guy at an electronics hobbyist place to explain it to me. pretty simple really, they should be able to figure the resistor size you need too. if you have your design picked out, you can figure your grouping and what to wire in series and parallel. at this place the led's are $0.40 each, and resistors at $0.10 each. not a big investment. haha
so to correct my statement above about it costing me only a can of spray paint, i forgot to add $3.80 for the led stuff, lol.
10-02-2012, 11:36 PM
#21
MBWorld Fanatic!
Thread Starter
here is a couple more pics i got with my phone. a pic before lens went back on to see what part i painted and what part i didn't. the depth of the 3mm leds was about perfect for the thickness of the plastic. just used a drill bit that interference fit them, then a touch of superglue from the back side.
also, pic of the connector i used to keep housing sealed and a clean installation. then ofcourse, another shameless pic of the car.
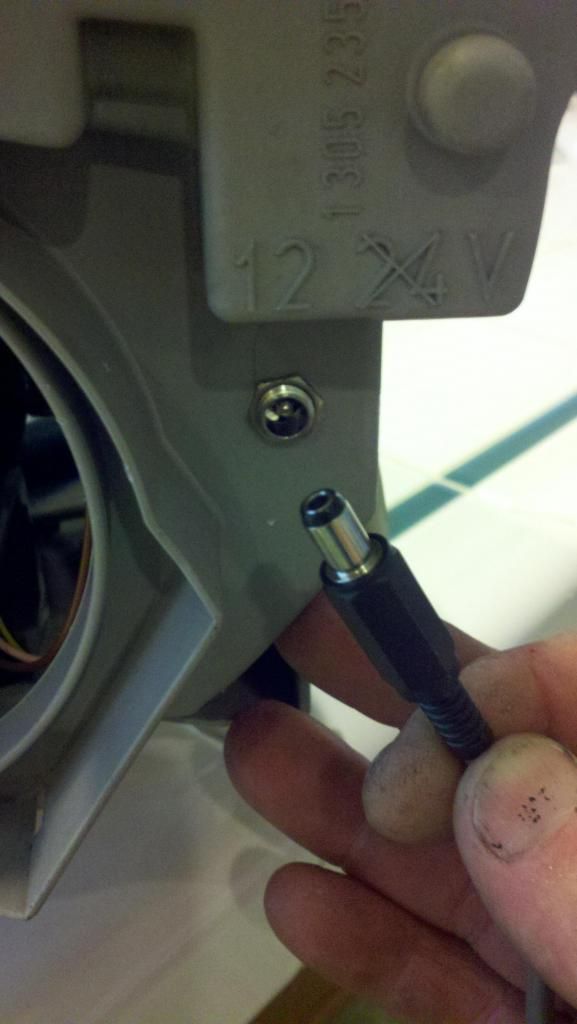
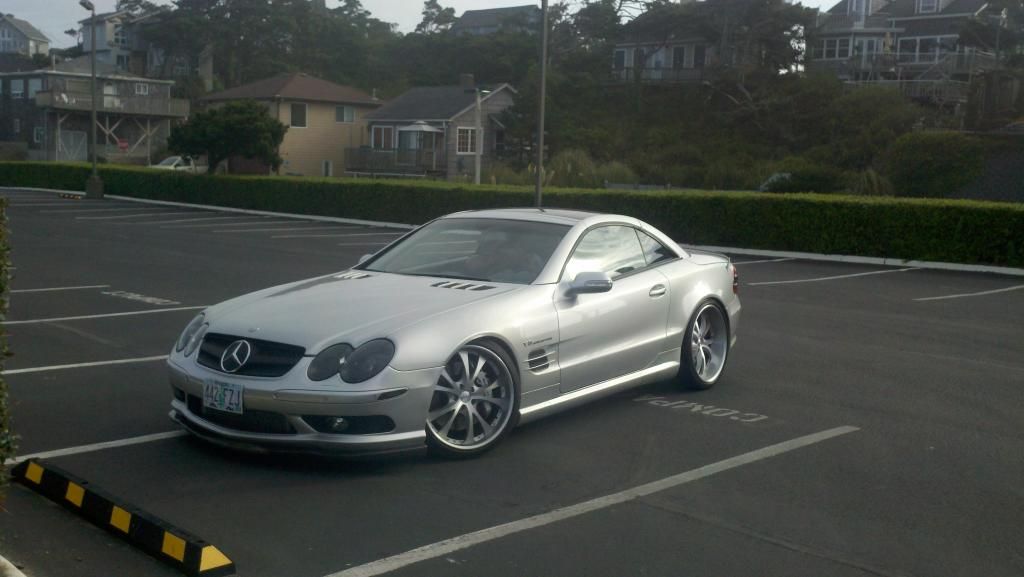
also, pic of the connector i used to keep housing sealed and a clean installation. then ofcourse, another shameless pic of the car.
10-02-2012, 11:41 PM
#22
MBWorld Fanatic!
Thread Starter
the straight lined area around the brights is painted also, it is just reflecting the chrome. hoping the little bulb in the brights area is available in led, the yellow light next to the led and hid looks kinda hideous.
10-03-2012, 02:13 AM
#23
Super Member
here is a couple more pics i got with my phone. a pic before lens went back on to see what part i painted and what part i didn't. the depth of the 3mm leds was about perfect for the thickness of the plastic. just used a drill bit that interference fit them, then a touch of superglue from the back side.
also, pic of the connector i used to keep housing sealed and a clean installation. then ofcourse, another shameless pic of the car.
also, pic of the connector i used to keep housing sealed and a clean installation. then ofcourse, another shameless pic of the car.
I see you have light on whiteout having the headlight in the car .... maybe a stupid question ... but how do you mange this?
and also .... did you take the plugs out of the housing? - I did and some some plastic taps went off - the only "step" I didn't figure out to take apart without breaking it ..... perhaps I have to invent a special tool to remove the plugs from the housing?

 10-03-2012, 10:07 AM
#25
MBWorld Fanatic!
Thread Starter
I see you have light on whiteout having the headlight in the car .... maybe a stupid question ... but how do you mange this?
and also .... did you take the plugs out of the housing? - I did and some some plastic taps went off - the only "step" I didn't figure out to take apart without breaking it ..... perhaps I have to invent a special tool to remove the plugs from the housing?
and also .... did you take the plugs out of the housing? - I did and some some plastic taps went off - the only "step" I didn't figure out to take apart without breaking it ..... perhaps I have to invent a special tool to remove the plugs from the housing?
which plugs are you talking about? if you mean the wiring, i didn't touch any of it.


