


Headlight turning yellow
Thread Starter
Super Member
Joined: Aug 2005
Posts: 514
Likes: 0
From: Normal, IL
02 E55; 99 CLK430 (Sold)
Headlight turning yellow
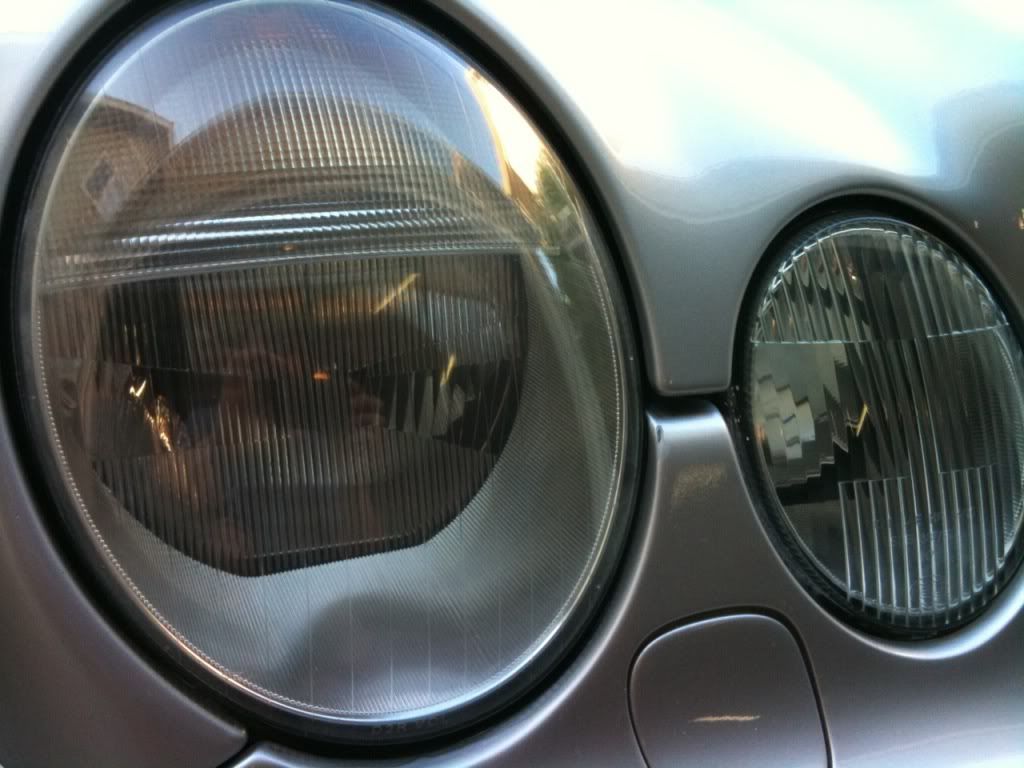
Like a lot of other people my headlight (one side only for some odd reason) and the inner light are turning yellow. I've used the Meguiar's Plastx or whatever it's called. Just put it on a towel and tried wiping for a long time. Didn't do a thing. I also tried using this stupid liquid clay bar junk I have. Seemed to have a little more grit to it and maybe put a slight dent in the yellow but no real results.
Things I haven't tried are:
Bluemagic plastic and plexiglass cleaner but that seems just like the PlastX to me. Also heard of the Mr. Clean Magic Eraser but I haven't tried that yet. If I recall correctly I've heard to use the oven cleaner easy off but make sure it doesn't get on the paint and work quick and then rinse it off so it doesn't do any damage.
What would you guys suggest? I do have a Porter Cable dual action I can use with something but was hoping this would be an easier "spend 10 minutes hand applying a product" kind of a thing.
Out Of Control!!
Joined: Apr 2008
Posts: 10,275
Likes: 10
From: Jerzy
04 CLK 320 > CLK32K
Thread Starter
Super Member
Joined: Aug 2005
Posts: 514
Likes: 0
From: Normal, IL
02 E55; 99 CLK430 (Sold)
Keep the ideas coming in. I'm open to more suggestions.
Thread Starter
Super Member
Joined: Aug 2005
Posts: 514
Likes: 0
From: Normal, IL
02 E55; 99 CLK430 (Sold)
This video was pretty good about detailing the wet sand process.
http://www.youtube.com/watch?v=GsHHBk-hZzk&feature=fvw
Won't wet sanding it though remove all the clearcoat or other protectants on the lenses? Of course I guess you could make the argument that's gone anyway once the lense yellows.
http://www.youtube.com/watch?v=GsHHBk-hZzk&feature=fvw
Won't wet sanding it though remove all the clearcoat or other protectants on the lenses? Of course I guess you could make the argument that's gone anyway once the lense yellows.

MBWorld Fanatic!
Joined: Sep 2010
Posts: 1,089
Likes: 6
From: Salt Lake City, UT
2010 Mercedes-Benz E350
I had to do this on my E39 BMW. I bought the McGuier's headlight restore kit, and it did a decent job, but I ended up taking some very fine sandpaper and wet sanding it, then using the restore kit again. That gave me really professional looking results.
Mike
Mike
Trending Topics
MB World Stories
The Best of Mercedes & AMG

Manual Mercedes? 6 Times Sindelfingen Let Drivers Have All The Fun
Verdad Gallardo
Mercedes SLR McLaren 722 S Is Extremely Rare Example Modified by McLaren
Verdad Gallardo
8 Classic Boxy Mercedes Designs That Have Aged Like Fine Wine
Verdad Gallardo
Flawlessly Restored Mercedes 190E Evo II Heads to Auction
Verdad Gallardo
Electric Mercedes C-Class Unveiled: 11 Things You Need to Know
Verdad Gallardo
Mercedes EQS Gets A Major Update: Everything You Need to Know
Verdad Gallardo
5 Underrated Mercedes-Benz Models That Don't Get the Love They Deserve
Verdad Gallardo
Mercedes 300D Has Pushed Well Past 1 Million Miles and It Ain't Stopping
Verdad Gallardo
10 Most Reliable Mercedes-Benz Models You Can Buy Used
Verdad GallardoMBWorld Fanatic!
Joined: Jan 2010
Posts: 1,073
Likes: 0
From: MICHIGAN
2001 E55 - 2008 CLS63 -2016 F-150
my buddy just did this over the weekend to his e60 beemr .. he had bought all the differnt sandpapers from 400 up to 2000 .. 400-600-800-1,000-2,000 did all of them then used turtle wax rubbing compound and polished with plastic polish i BS you not they came out like brand new .. and this was all by hand and then polished with a regular drill .. if you have the porter & cable they will come out looking **** . it even removed all the chips n spots that just a high grit will not remove .. but after so many differnt DIY 's out there you will find somthing that works for you .. Only thing i can suggest is if you gonna do it start from the bottom and work your way up cuz if you just do the 2000 grit you will still see spot specs on it .
After seeing him do it i figured lemme just try the polish and see if they clear up but all i did was got my car dirty from the polish flying around of the drill so make sure if you apply enough but not too much !
After seeing him do it i figured lemme just try the polish and see if they clear up but all i did was got my car dirty from the polish flying around of the drill so make sure if you apply enough but not too much !
MBWorld Fanatic!
Joined: Feb 2008
Posts: 1,803
Likes: 12
From: Charleston, SC
GL450
Sad that an e60 BMW needs headlights done already.
You can start gentle, with Meguiars Plast-X polish. Then, use a Mr. Clean Magic Eraser with Plast-X. Then go to a kit (Meguiars or Mothers) with a drill attachment. Then go to a sand paper kit (3M) or just buy the sandpaper yourself and wet sand.
Two theories here. When dealing with scraping layers off your car (clearcoat, headlight plastic, etc.) you can either start with the least aggressive and work your way up, stopping when you get the desired effect. Or you can go aggressive early. Working your way up does less damage (taking sandpaper to your headlights will really strip the plastic, and they're likely to turn yellow again since you took any protective layers off). Going aggressive early is cheaper, since you only buy one product.
On my headlights, Meguiars Plast-X and the occasional Mr. Clean have been enough. I've seen some, though, that are so bad they really need a wet sand and then a shot of clear coat to keep them from going bad again.

Member
Joined: Feb 2009
Posts: 110
Likes: 0
none
Like a lot of other people my headlight (one side only for some odd reason) and the inner light are turning yellow. I've used the Meguiar's Plastx or whatever it's called. Just put it on a towel and tried wiping for a long time. Didn't do a thing. I also tried using this stupid liquid clay bar junk I have. Seemed to have a little more grit to it and maybe put a slight dent in the yellow but no real results.
Things I haven't tried are:
Bluemagic plastic and plexiglass cleaner but that seems just like the PlastX to me. Also heard of the Mr. Clean Magic Eraser but I haven't tried that yet. If I recall correctly I've heard to use the oven cleaner easy off but make sure it doesn't get on the paint and work quick and then rinse it off so it doesn't do any damage.
What would you guys suggest? I do have a Porter Cable dual action I can use with something but was hoping this would be an easier "spend 10 minutes hand applying a product" kind of a thing.
Things I haven't tried are:
Bluemagic plastic and plexiglass cleaner but that seems just like the PlastX to me. Also heard of the Mr. Clean Magic Eraser but I haven't tried that yet. If I recall correctly I've heard to use the oven cleaner easy off but make sure it doesn't get on the paint and work quick and then rinse it off so it doesn't do any damage.
What would you guys suggest? I do have a Porter Cable dual action I can use with something but was hoping this would be an easier "spend 10 minutes hand applying a product" kind of a thing.
It has to do with effect a battery has on molecular current.
New thinking about the cause and solution of clouding headlight oxidation challenges the use of abrasive cleaners on acrylic lens.
The sanding method is always the last resort, when all else fails.
The polishing method was the safer process until recent years when the all liquid Acrylic lens deoxidizer proved to be the safest method of removing cloudy oxidation from the headlamps.
All of the kits mentioned previously are designed for resurfacing (scratch removal) the lens, Not all headlight lens need resurfacing.
A very small percent require resurfacing and many of those are the result of a sandpaper kit cleaning ( like the ones being suggested ) at one time in the past.
Suggestions to use abrasives such as sandpaper kits to remove cloudiness/oxidation from your headlight/head lamp lens may not be your best move.
Using sandpaper to remove cloudy oxidation is like filing your nails with a brick.

Former Vendor of MBWorld
Joined: Sep 2008
Posts: 1,935
Likes: 5
AMG
start at 2000 grit wet sand paper, dip it in water and sand the headlights in small circular motions.... when you are done it should be completely opaque.
Then go back with a plastic polish like Meguirs scratch X or Blue Magic. Using a small random-orbital buffer will greatly speed up this process. You will have to apply the polish like 10-15 times in small doses and work it into the plastic.
When done they should look 100% brand new.
Hope that helps
Then go back with a plastic polish like Meguirs scratch X or Blue Magic. Using a small random-orbital buffer will greatly speed up this process. You will have to apply the polish like 10-15 times in small doses and work it into the plastic.
When done they should look 100% brand new.
Hope that helps

Super Member
Joined: Sep 2010
Posts: 553
Likes: 3
From: Los Angeles
W210 E55
Hi All,
First post here. Just did it over the weekend. I used the 3M headlight kit. Excellent instructions. Worked beautifully. I am very happy with the results. I needed two kits. And I suggest triple layering the tape (you can see the nick between the headlight and high beam). Also, my lenses were bad but not horrible but I ended up running out of the first grit, 500, discs and needed a second kit. Next time I would special order some 320 discs to cut it a little faster. It took me about two hours for all four lights. The fogs are glass so the kit does not work for them.
This is what I ordered:
3M kit
Shipping can take a week.
Thread Starter
Super Member
Joined: Aug 2005
Posts: 514
Likes: 0
From: Normal, IL
02 E55; 99 CLK430 (Sold)
You can start gentle, with Meguiars Plast-X polish. Then, use a Mr. Clean Magic Eraser with Plast-X. Then go to a kit (Meguiars or Mothers) with a drill attachment. Then go to a sand paper kit (3M) or just buy the sandpaper yourself and wet sand.
Two theories here. When dealing with scraping layers off your car (clearcoat, headlight plastic, etc.) you can either start with the least aggressive and work your way up, stopping when you get the desired effect. Or you can go aggressive early. Working your way up does less damage (taking sandpaper to your headlights will really strip the plastic, and they're likely to turn yellow again since you took any protective layers off). Going aggressive early is cheaper, since you only buy one product.
On my headlights, Meguiars Plast-X and the occasional Mr. Clean have been enough. I've seen some, though, that are so bad they really need a wet sand and then a shot of clear coat to keep them from going bad again.
Former Vendor of MBWorld
Joined: Sep 2008
Posts: 1,935
Likes: 5
AMG
as I mentioned... use 2000-grit sand paper (aka color sanding paper). This will remove the "cataracts" crust built up on the headlights. Once you remove it all, then you will have to go back & polish. You only use polish AFTER you have completely sanded everything down to 2000 grit, without that step you are completely wasting your time.
You can apply the plastic polish by hand but you are going to get one hell of an upper body workout and it will probably take you a good 20 minutes per side. Random orbital buffer will greatly speed up this process.
Here is good PDF writeup on the subject, ignore all sandpapers except 2000-grit wet sand paper, no point in going through all those steps:
http://www.carlightz.com/Headlight%2...0Technique.pdf
hope that helps...
Last edited by AMS Performance; Sep 21, 2010 at 12:41 AM.
Thread Starter
Super Member
Joined: Aug 2005
Posts: 514
Likes: 0
From: Normal, IL
02 E55; 99 CLK430 (Sold)
Yeah, that pdf is pretty much the exact same thing that was in the youtube link I posted. I already have the sandpaper. I'll have to go get some rubbing compound and have at it with my PC this weekend.


