


DIY: SC Idler Pulley Bearing repair
Senior Member


Joined: Sep 2011
Posts: 384
Likes: 13
From: Sweden
E55 AMG V8 Kompressor 2004 E 55 AMG Type: 5,439 cc (5.439 L; 331.9 cu in) Supercharged V8 Powe
Torque? / Cover removal
As we all know, the OEM supercharger idler pulley bearing is prone to premature wear. The factory pulley is expensive as usual and the only item that goes south on these is the bearing which is readily available from many sources including Ebay for under $5.00.
First off, keep in mind that this can be done in the garage , a press is recommended though with perseverance it can be done without one. You will just need to get creative with large sockets and/or a vice.
Also, ASP is apparently working on a nice forged unit with a quality bearing for a great price and I would recommend the layman to go that route if you are not comfortable with the following.
The bearing number is a 6203 and I highly recommend purchasing a 6203ZZ which is rated to 17k rpm. I picked mine up for $4.99 to my door.
First thing is to remove the belts and there are xlnt write ups on those below.
Supercharger belt
Serpentine belt
Now on to removing the pulleys as both must be removed at the same time. They are held on with a long bolt and a T50 hex is required at this point. As space is limited I used the T50 with a 10mm box wrench to loosen the bolt and then removed it with my hand.
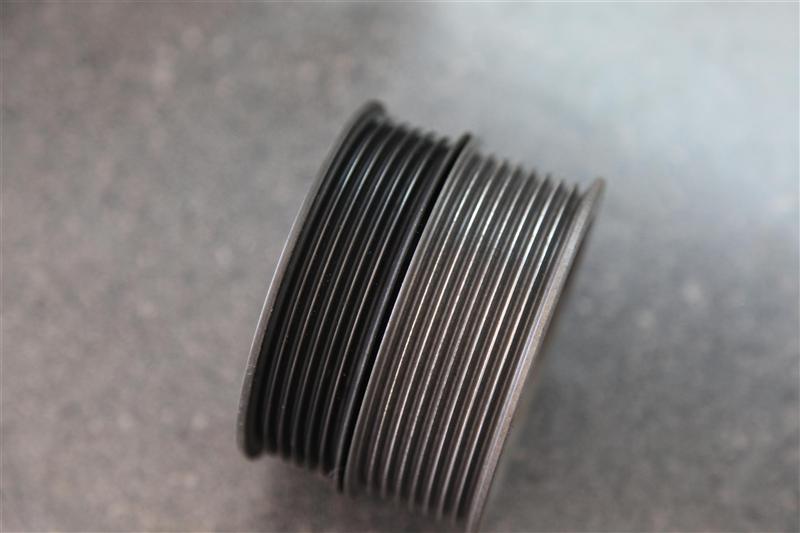
The entire assembly will come out and you will noticed the front SC idler will just slide off the sleeve.
Once you flip it over you will see a large c-clip. Large c-clip pliers are recommended as smaller or angled units are more prone to slip or bend. It should just take a few seconds. As always I wrap the middle with masking tape to keep the clip from flying away once removed.
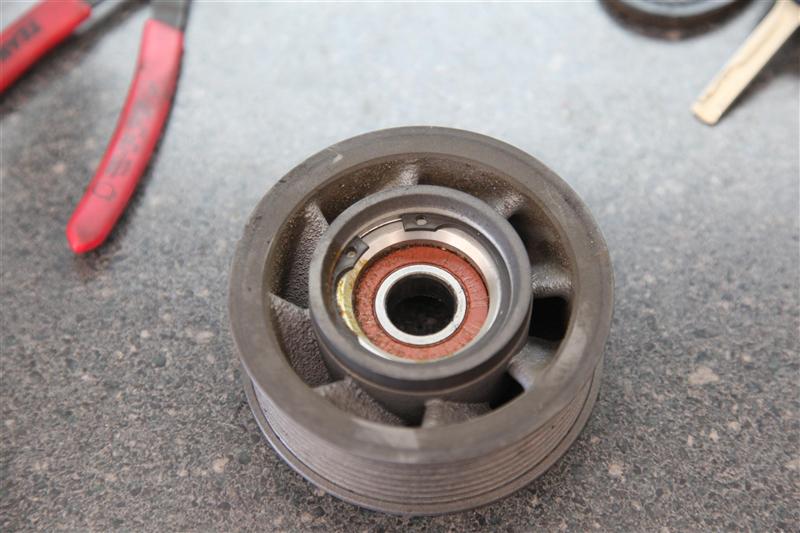
Once the c-clip is removed, it is now time to remove the bearing assembly from the pulley. I used a press though a large socket on one end and another socket on the other should allow you to to knock it out.
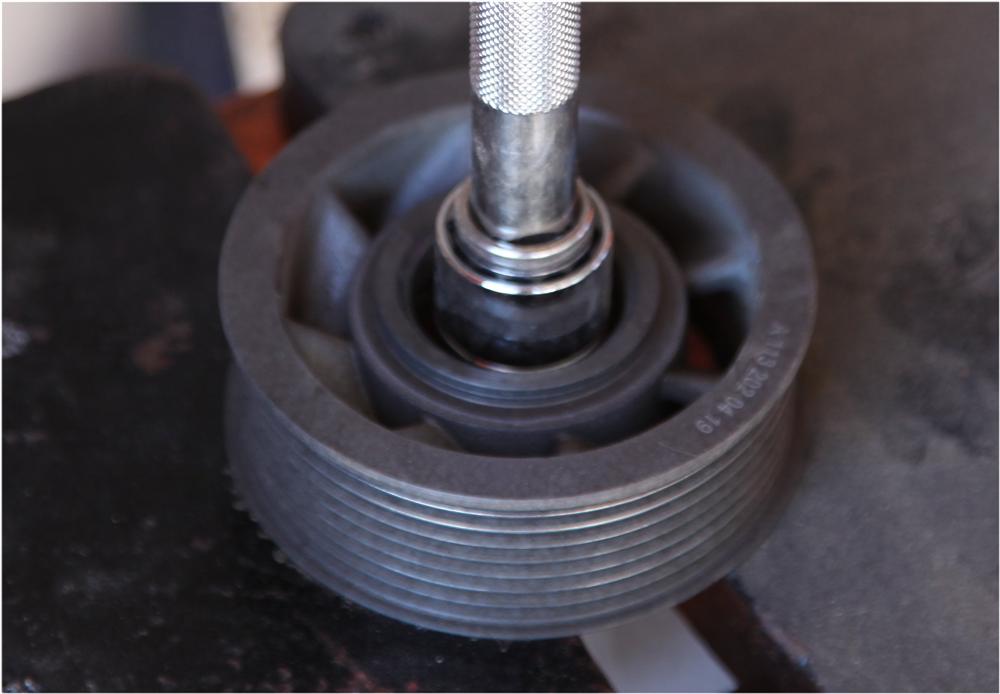
Once removed you will see the bearing assembly which is encased in a steel sleeve. This will be the most difficult part of the procedure. It is very easy with a press, though again, I suppose placing a large socket under the lip of the sleeve which will allow the bearing to come through would work. Either way, the bearing needs to be removed (you sure you would rather not just buy that ASP unit right now?).
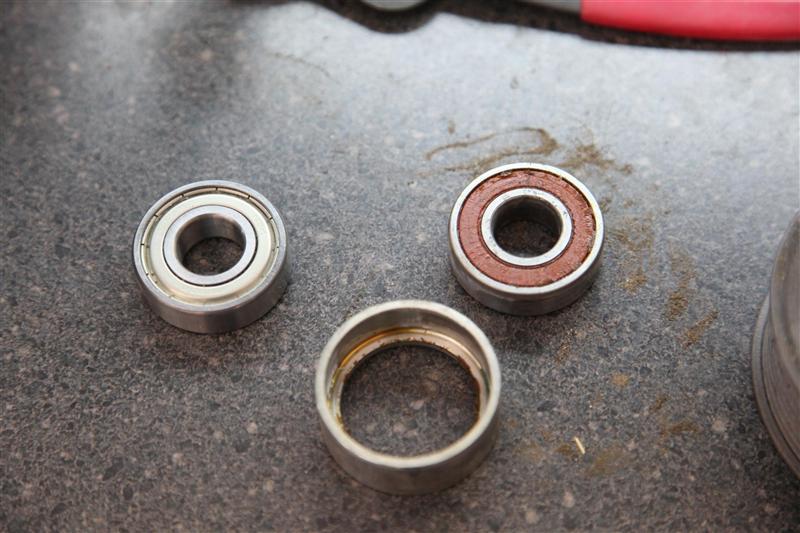
The old bearing in the steel sleeve.
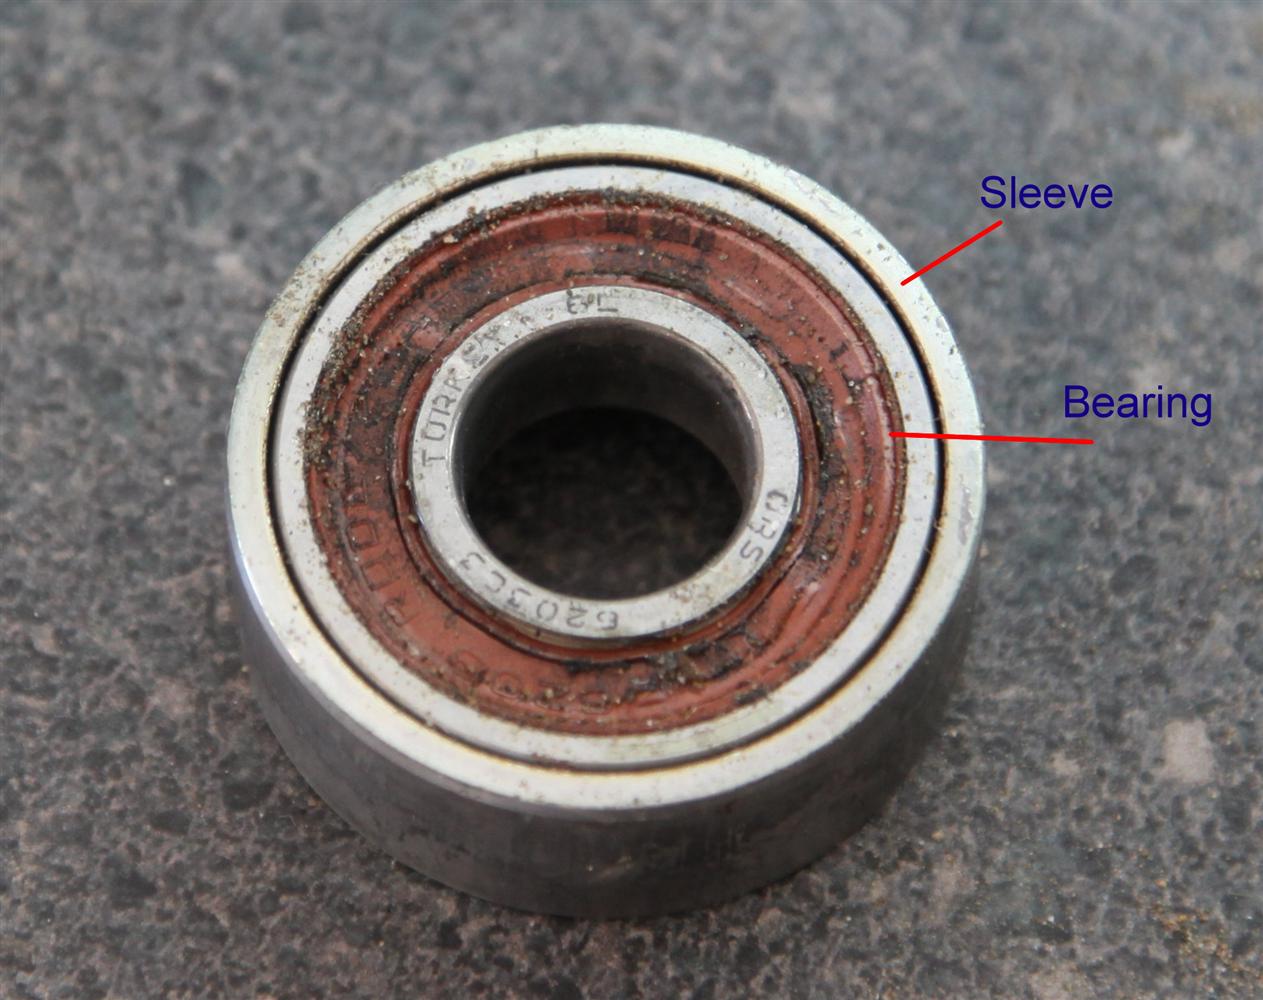
This is what the old bearing (upper right) appears when removed from the sleeve (bottom) and my new bearing (upper left).
The rest is easy.
Just tap the new bearing into the sleeve until it stops.
Install this assembly into the pulley until it stops. There is no exact measurement. Once you have enough room for the c-clip to fit, install it and your done.


First off, keep in mind that this can be done in the garage , a press is recommended though with perseverance it can be done without one. You will just need to get creative with large sockets and/or a vice.
Also, ASP is apparently working on a nice forged unit with a quality bearing for a great price and I would recommend the layman to go that route if you are not comfortable with the following.
The bearing number is a 6203 and I highly recommend purchasing a 6203ZZ which is rated to 17k rpm. I picked mine up for $4.99 to my door.
First thing is to remove the belts and there are xlnt write ups on those below.
Supercharger belt
Serpentine belt
Now on to removing the pulleys as both must be removed at the same time. They are held on with a long bolt and a T50 hex is required at this point. As space is limited I used the T50 with a 10mm box wrench to loosen the bolt and then removed it with my hand.
The entire assembly will come out and you will noticed the front SC idler will just slide off the sleeve.
Once you flip it over you will see a large c-clip. Large c-clip pliers are recommended as smaller or angled units are more prone to slip or bend. It should just take a few seconds. As always I wrap the middle with masking tape to keep the clip from flying away once removed.
Once the c-clip is removed, it is now time to remove the bearing assembly from the pulley. I used a press though a large socket on one end and another socket on the other should allow you to to knock it out.
Once removed you will see the bearing assembly which is encased in a steel sleeve. This will be the most difficult part of the procedure. It is very easy with a press, though again, I suppose placing a large socket under the lip of the sleeve which will allow the bearing to come through would work. Either way, the bearing needs to be removed (you sure you would rather not just buy that ASP unit right now?).
The old bearing in the steel sleeve.
This is what the old bearing (upper right) appears when removed from the sleeve (bottom) and my new bearing (upper left).
The rest is easy.
Just tap the new bearing into the sleeve until it stops.
Install this assembly into the pulley until it stops. There is no exact measurement. Once you have enough room for the c-clip to fit, install it and your done.
How to remove the plastic cover on the idlers?
Member
Joined: Aug 2010
Posts: 155
Likes: 5
From: michigan
04 E55/04 SL55/R35 GTR
There was no sleeve when i took the old bearing out and now the new bearing 6203zz I put in is loose and lots of play....I can push the bearing in or out of the pulley by hand force... I reinstalled and it has no noise but has lots of wiggle if i wiggle it. I'm baffled. Can anyone chime in on this?
Member
Joined: Aug 2010
Posts: 155
Likes: 5
From: michigan
04 E55/04 SL55/R35 GTR
Member
Joined: Oct 2014
Posts: 222
Likes: 2
From: Melbourne Australia
MY06 E55
There was no sleeve when i took the old bearing out and now the new bearing 6203zz I put in is loose and lots of play....I can push the bearing in or out of the pulley by hand force... I reinstalled and it has no noise but has lots of wiggle if i wiggle it. I'm baffled. Can anyone chime in on this?
MBWorld Fanatic!

Joined: Aug 2012
Posts: 1,790
Likes: 109
From: DownEast Maine
CLS 55 AMG E500 ML320
No, I don't know. I just read the numbers on my bearing and ordered one from amazon. I don't remember a sleeve, but that was two years ago.

MBWorld Fanatic!
Joined: Jun 2013
Posts: 1,517
Likes: 95
From: NZ
2004 E55 AMG, 2006 CLS63, 2004 ML55, 2014 E350 sport
There was no sleeve when i took the old bearing out and now the new bearing 6203zz I put in is loose and lots of play....I can push the bearing in or out of the pulley by hand force... I reinstalled and it has no noise but has lots of wiggle if i wiggle it. I'm baffled. Can anyone chime in on this?
MB World Stories
The Best of Mercedes & AMG

Manual Mercedes? 6 Times Sindelfingen Let Drivers Have All The Fun
Verdad Gallardo
Mercedes SLR McLaren 722 S Is Extremely Rare Example Modified by McLaren
Verdad Gallardo
8 Classic Boxy Mercedes Designs That Have Aged Like Fine Wine
Verdad Gallardo
Flawlessly Restored Mercedes 190E Evo II Heads to Auction
Verdad Gallardo
Electric Mercedes C-Class Unveiled: 11 Things You Need to Know
Verdad Gallardo
Mercedes EQS Gets A Major Update: Everything You Need to Know
Verdad Gallardo
5 Underrated Mercedes-Benz Models That Don't Get the Love They Deserve
Verdad Gallardo
Mercedes 300D Has Pushed Well Past 1 Million Miles and It Ain't Stopping
Verdad Gallardo
10 Most Reliable Mercedes-Benz Models You Can Buy Used
Verdad GallardoSenior Member
Joined: Aug 2015
Posts: 453
Likes: 50
From: East Coast, USA
Mercedes CLS 55 AMG

Member
Joined: Jan 2017
Posts: 91
Likes: 5
W108 3.5 - 2005 E55
Excellent thread, thank you.
For those in Australia, I couldn't get the Dayco 89130 easily, but it cross-references to a NuLine EP244 which is an all steel pulley which fits perfectly with no mods.
Mine cost $60.
For those in Australia, I couldn't get the Dayco 89130 easily, but it cross-references to a NuLine EP244 which is an all steel pulley which fits perfectly with no mods.
Mine cost $60.

Senior Member
Joined: Aug 2010
Posts: 329
Likes: 28
From: Virginia, USA
2005 c230
question: Why do people apologize for posting in an old thread,especially when their question is relevant to the information in the thread, regardless of the thread's age?

Junior Member
Joined: Aug 2019
Posts: 16
Likes: 1
G55, SL55


Junior Member
Joined: Aug 2019
Posts: 16
Likes: 1
G55, SL55
Senior Member


Joined: Jul 2018
Posts: 310
Likes: 49
From: AZ
Does anybody know what size the snap ring is for replacement? I replaced the plastic pulley although I had taken out the snap ring thinking it was necessary to remove the inner shaft to separate the two pulleys but it wasn't. I reused it but I didn't have another bearing to put in the aluminum pulley and I was thinking that I could order a new bearing for the metal pulley and put a new snap ring in there because I reused the slightly bent one.
Senior Member
Joined: Jul 2018
Posts: 310
Likes: 49
From: AZ
I paid $100 to order a pulley that had a sleeve and then I did all of that but when I got to the part to put the sleeved bearing back into the pulley, I started pressing it back in, and it went in sideways and I destroyed the whole pulley. What a waste. Now I am a little north of $350 in the hole considering I just ordered a Febi replacement double idler, and the cost of a brand new Mercedes part is around $450.


