


I took all the wooden trim off my car to paint them and figured it was complicated enough to perhaps let you all know how to do it without breaking anything ( I was also encouraged to by some of the members here so I hope this helps ).
I'll do this by part ( they are in no particular order although you can chose to do it in this order ):
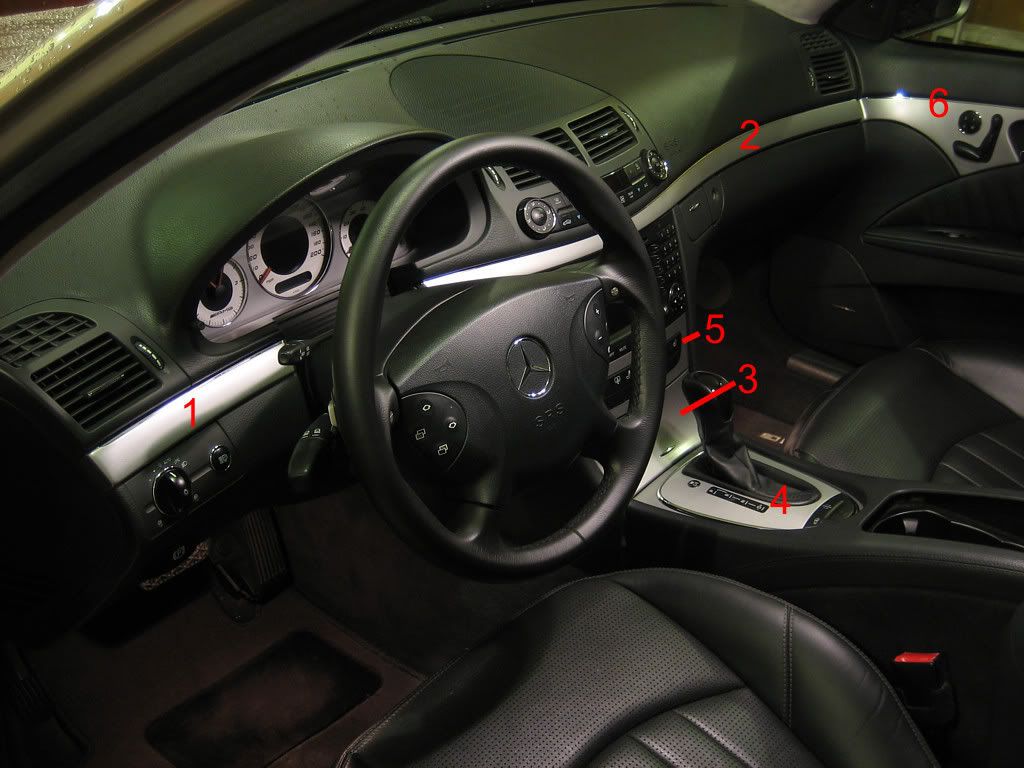
1) This part is easy, just pry it out. It feels like you're going to break it but it comes right out.
2) This is also easy, but not as obvious. The part closest to the steering wheel must be pried out. Once it's pried out, all you have to do is SLIDE IT toward the passenger side and it'll come out. You must have the passenger door open for this.
3) Open the ash tray and pull it right out. Disconnect the 12v socket. I did this AFTER I removed the shifter trim ( #4 ) so I don't know if you can do this in reverse order.
4) Just pull it up ( with decent force ) and it'll pop right out. You must unplug the wires leading to the buttons and then you can pull it up high enough to unlock the shifter knob. To unlock it, just TWIST off the lower locking mechanism. You'll see it when you get there.
5) ( this can only be removed AFTER the ash tray is removed ) Unplug all the wires below and remove two TORX screws below the CD Changer. Once the screws are removed, the CD changer will come right out. To remove the trim on the CD changer you must disassemble the changer a good amount. I would recommend against it unless you feel comfortable with it. It's to complex to explain so if anyone has any trouble just PM me. You will probably be better off masking the buttons off.
6) To remove the door trim you MUST remove the door panel. This consists of removing two Torx screws under the arm rest where the door pull is ( remove a plastic panel and they will reveal themselves ). You must also remove a plastic panel where the door meets the dash ( just pull it out ) and remove a torx screw there and unclip the white harness. The you must remove the sail panel ( pull it out ), remove a cover where the striker meets the door lock ( small torx screw ) and unscrew the door lock pin. Once completed, you can pry the door panel off starting from the bottom and once complete you must lift the door panel off the door. Then you can unplug the cables.
The rear panel is similar. The only difference is that once of the torx screws is under the AIRBAG ( I think that's what it says...lol ) logo in the door panel ( just pry it out ) and the other in the ash trays on the doors ( also must be pried out, but be careful as it's tricky ).
After this it becomes obvious on how to remove the trim so I won't get into it. I must say it's a PITA to remove the clips holding the trim so I decided to break them and just put some new clips on.
Anyways, hope I didn't miss anything. If so, let me know. I have yet to do the sliding door in the center console so bare with me...lol.
I'll do this by part ( they are in no particular order although you can chose to do it in this order ):
1) This part is easy, just pry it out. It feels like you're going to break it but it comes right out.
2) This is also easy, but not as obvious. The part closest to the steering wheel must be pried out. Once it's pried out, all you have to do is SLIDE IT toward the passenger side and it'll come out. You must have the passenger door open for this.
3) Open the ash tray and pull it right out. Disconnect the 12v socket. I did this AFTER I removed the shifter trim ( #4 ) so I don't know if you can do this in reverse order.
4) Just pull it up ( with decent force ) and it'll pop right out. You must unplug the wires leading to the buttons and then you can pull it up high enough to unlock the shifter knob. To unlock it, just TWIST off the lower locking mechanism. You'll see it when you get there.
5) ( this can only be removed AFTER the ash tray is removed ) Unplug all the wires below and remove two TORX screws below the CD Changer. Once the screws are removed, the CD changer will come right out. To remove the trim on the CD changer you must disassemble the changer a good amount. I would recommend against it unless you feel comfortable with it. It's to complex to explain so if anyone has any trouble just PM me. You will probably be better off masking the buttons off.
6) To remove the door trim you MUST remove the door panel. This consists of removing two Torx screws under the arm rest where the door pull is ( remove a plastic panel and they will reveal themselves ). You must also remove a plastic panel where the door meets the dash ( just pull it out ) and remove a torx screw there and unclip the white harness. The you must remove the sail panel ( pull it out ), remove a cover where the striker meets the door lock ( small torx screw ) and unscrew the door lock pin. Once completed, you can pry the door panel off starting from the bottom and once complete you must lift the door panel off the door. Then you can unplug the cables.
The rear panel is similar. The only difference is that once of the torx screws is under the AIRBAG ( I think that's what it says...lol ) logo in the door panel ( just pry it out ) and the other in the ash trays on the doors ( also must be pried out, but be careful as it's tricky ).
After this it becomes obvious on how to remove the trim so I won't get into it. I must say it's a PITA to remove the clips holding the trim so I decided to break them and just put some new clips on.
Anyways, hope I didn't miss anything. If so, let me know. I have yet to do the sliding door in the center console so bare with me...lol.

Former Vendor of MBWorld
shardul
Former Vendor of MBWorld
close
Jul 18, 2024
- Join DateMay 2008
- LocationHouston
- Posts:12,139
-
iTrader Positive Feedback100
-
iTrader Feedback Score(1)
- Vehicle(s) I drive2003 W211 E55, 2003 W220 S600
-
Likes:389
-
Liked:295 Times in 244 Posts
NICE DIY.
Mods should make this a sticky, but that will probably never happen
Mods should make this a sticky, but that will probably never happen
Quote:
Mods should make this a sticky, but that will probably never happen
Thanks, although a lot of things don't ever make it there even though they should.Originally Posted by shardul
NICE DIY.Mods should make this a sticky, but that will probably never happen

MBWorld Fanatic!
Quote:
Mods should make this a sticky, but that will probably never happen
lol so true...Originally Posted by shardul
NICE DIY.Mods should make this a sticky, but that will probably never happen
Good write up man!
Super Member
thanks so much for this, it'll make tackling my next project alot easier!
Quote:
The paint was custom made so it has no brand per say ( at least the can doesn't have a brand ). Originally Posted by Hellzno
interior looks great. what brand of paint u use for steering wheel

Thank guys, If you have any questions on disassembly let me know. I'm still trying to figure out how to remove the center console sliding door without breaking anything...lol.

MBWorld Fanatic!
thanks for the writerup, add to my favorites and also printed out this.
MB World Stories
The Best of Mercedes & AMG
Explore

Manual Mercedes? 6 Times Sindelfingen Let Drivers Have All The Fun
Verdad Gallardo
Mercedes SLR McLaren 722 S Is Extremely Rare Example Modified by McLaren
Verdad Gallardo
8 Classic Boxy Mercedes Designs That Have Aged Like Fine Wine
Verdad Gallardo
Flawlessly Restored Mercedes 190E Evo II Heads to Auction
Verdad Gallardo
Electric Mercedes C-Class Unveiled: 11 Things You Need to Know
Verdad Gallardo
Mercedes EQS Gets A Major Update: Everything You Need to Know
Verdad Gallardo
5 Underrated Mercedes-Benz Models That Don't Get the Love They Deserve
Verdad Gallardo
Mercedes 300D Has Pushed Well Past 1 Million Miles and It Ain't Stopping
Verdad Gallardo
10 Most Reliable Mercedes-Benz Models You Can Buy Used
Verdad Gallardo
Quote:
You must pry it off the wood trim. When you are done, you can glue it back on. It'll become more obvious once you see it when removed. It looks easy to break but it's not. Originally Posted by Husaberger
Hi GT ER- how did you deal with chrome strip on dash trim when painting it?
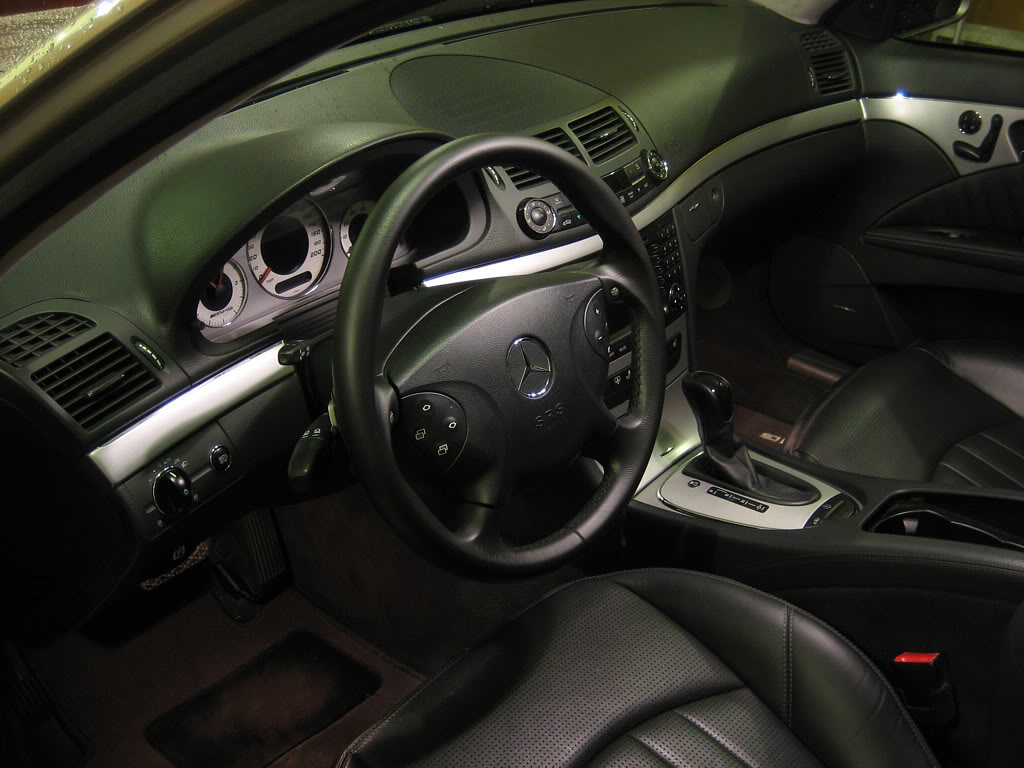
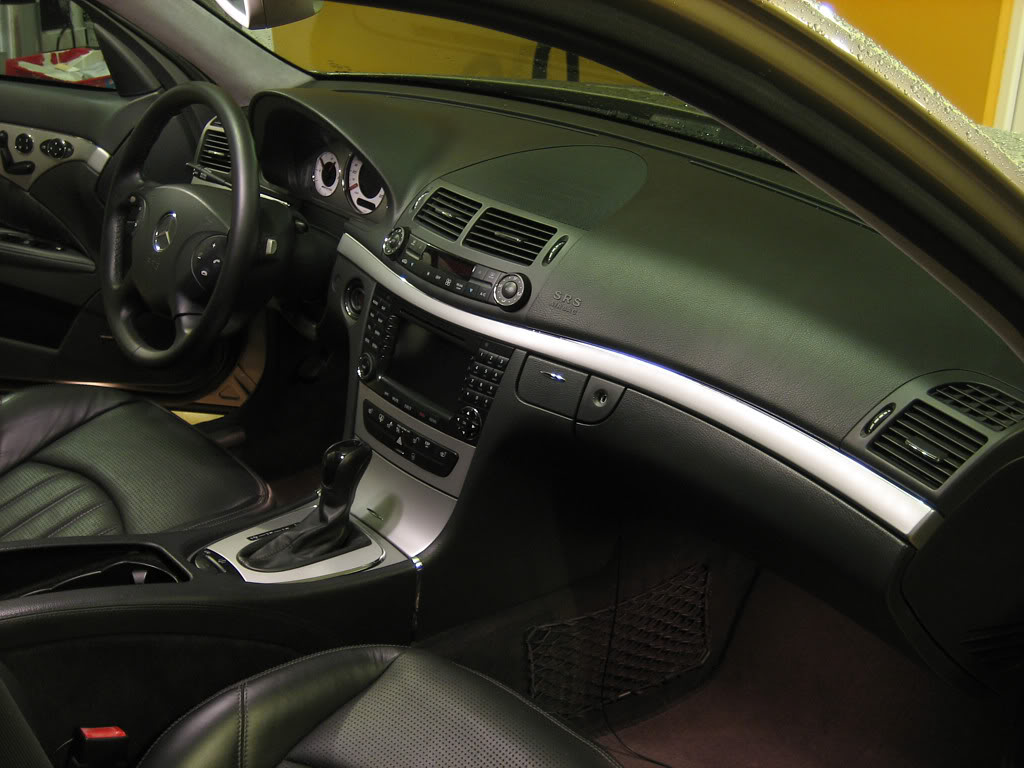
As for more pics, here are the two I took:

Newbie
Thanks for the quick reply GT-ER
Two more questions
1. What was your solution for the sliding/rolling center console cover? I see that it is open in all of your pictures
2. How durable in terms of scratching, etc have you found the painted trim pieces to be?
The silver looks better than anything else I've seen by the way
Two more questions
1. What was your solution for the sliding/rolling center console cover? I see that it is open in all of your pictures
2. How durable in terms of scratching, etc have you found the painted trim pieces to be?
The silver looks better than anything else I've seen by the way
Senior Member
Top class write up I'm looking to re-do all of mine in CF so this is a big help!!!!
+1000 000
+1000 000
Quote:
Two more questions
1. What was your solution for the sliding/rolling center console cover? I see that it is open in all of your pictures
2. How durable in terms of scratching, etc have you found the painted trim pieces to be?
The silver looks better than anything else I've seen by the way
I took the sliding door out by prying the center console out, it's a PITA but if I remember correctly it's just two screws in the front ( where the gear selector is ) and pry it upward from the rear vents. Then it's pretty obvious as to how to remove the sliding door. I painted it matte black to give it contrast.Originally Posted by Husaberger
Thanks for the quick reply GT-ERTwo more questions
1. What was your solution for the sliding/rolling center console cover? I see that it is open in all of your pictures
2. How durable in terms of scratching, etc have you found the painted trim pieces to be?
The silver looks better than anything else I've seen by the way
As for durability, it's still in mint condition and I've hit it with a few things but the paint has held up flawlessly.
Quote:
+1000 000
Thanks. Originally Posted by jay_55
Top class write up I'm looking to re-do all of mine in CF so this is a big help!!!!+1000 000

MBWorld Fanatic!
Thread revival from the dead. GT-ER did you paint your sliding door on your center console as well? If so how did you get it out?
Quote:
Read the post right above yours...lolOriginally Posted by SterlingE55
Thread revival from the dead. GT-ER did you paint your sliding door on your center console as well? If so how did you get it out?
MBWorld Fanatic!
Quote:
Hurrr durrr. Thanks mang.Originally Posted by GT-ER
Read the post right above yours...lol
Quote:
Haha...no problem. Originally Posted by SterlingE55
Hurrr durrr. Thanks mang.

Newbie
Hi, I read the post and I am trying to remove my item 2 (in your picture) without success. To pry the trim near the steering wheel, I use a bunch of force and was finally afraid that it would break. I tried sliding it at the passenger door and I could get it to slide about 1/2" and again, it stopped. Any hint will be greatly appreciated. Thanks. Rob.
Quote:
That's pretty much it...I just pulled near the steering wheel pretty hard and it came out and then I slid the rest toward the pass. side to remove it.Originally Posted by flysrv10
Hi, I read the post and I am trying to remove my item 2 (in your picture) without success. To pry the trim near the steering wheel, I use a bunch of force and was finally afraid that it would break. I tried sliding it at the passenger door and I could get it to slide about 1/2" and again, it stopped. Any hint will be greatly appreciated. Thanks. Rob.


Niceeeeeeeeee
Newbie
Thank you. I will give it another shot. I'll take a shot before hand though to muster the courage. Rob.

Junior Member
Just did this. Couldn't have done it without this thread so thanks!! Also painted mine silver metallic. Looks amazing. I love it. I screwed up the CD changer cover and ash tray cover and have to redo those because I put them back on too soon before the clear coat completely dried, but the rest looks amazing. I started around 2 today and finished around 10. So it took me nearly 8 hours. Most of that time was waiting for coats of primer, paint and clear to dry for the next coat.
If I had purchased the parts and just did an exchange of parts vs. painting mine, I think this job would have taken less than 2 hours. It is a very simple and easy job, just tedious. The most PITA parts were taking the cover off the CD changer and the brackets off the door trim. I didn't break them so I was able to reuse them. Just hammer them flat and they'll go on again, no problem. Also, the chrome trim on the wood trim has to be broken off. I didn't bother gluing them back on because once everything is tightened down or pushed in, they'll stay in place tight, but I did use double sided tape to hold them in place so I could get the trim back on.
Thanks for the write up. My car looks great and so does yours!
Quote:
If I had purchased the parts and just did an exchange of parts vs. painting mine, I think this job would have taken less than 2 hours. It is a very simple and easy job, just tedious. The most PITA parts were taking the cover off the CD changer and the brackets off the door trim. I didn't break them so I was able to reuse them. Just hammer them flat and they'll go on again, no problem. Also, the chrome trim on the wood trim has to be broken off. I didn't bother gluing them back on because once everything is tightened down or pushed in, they'll stay in place tight, but I did use double sided tape to hold them in place so I could get the trim back on.
Thanks for the write up. My car looks great and so does yours!
Thanks, and please post pics when you're done.Originally Posted by squawbum
Just did this. Couldn't have done it without this thread so thanks!! Also painted mine silver metallic. Looks amazing. I love it. I screwed up the CD changer cover and ash tray cover and have to redo those because I put them back on too soon before the clear coat completely dried, but the rest looks amazing. I started around 2 today and finished around 10. So it took me nearly 8 hours. Most of that time was waiting for coats of primer, paint and clear to dry for the next coat.If I had purchased the parts and just did an exchange of parts vs. painting mine, I think this job would have taken less than 2 hours. It is a very simple and easy job, just tedious. The most PITA parts were taking the cover off the CD changer and the brackets off the door trim. I didn't break them so I was able to reuse them. Just hammer them flat and they'll go on again, no problem. Also, the chrome trim on the wood trim has to be broken off. I didn't bother gluing them back on because once everything is tightened down or pushed in, they'll stay in place tight, but I did use double sided tape to hold them in place so I could get the trim back on.
Thanks for the write up. My car looks great and so does yours!


mine should be wrapped this week too.......CF/white


