When you click on links to various merchants on this site and make a purchase, this can result in this site earning a commission. Affiliate programs and affiliations include, but are not limited to, the eBay Partner Network.
w211 E63 Intake Manifold Gasket and Bolt Replacement
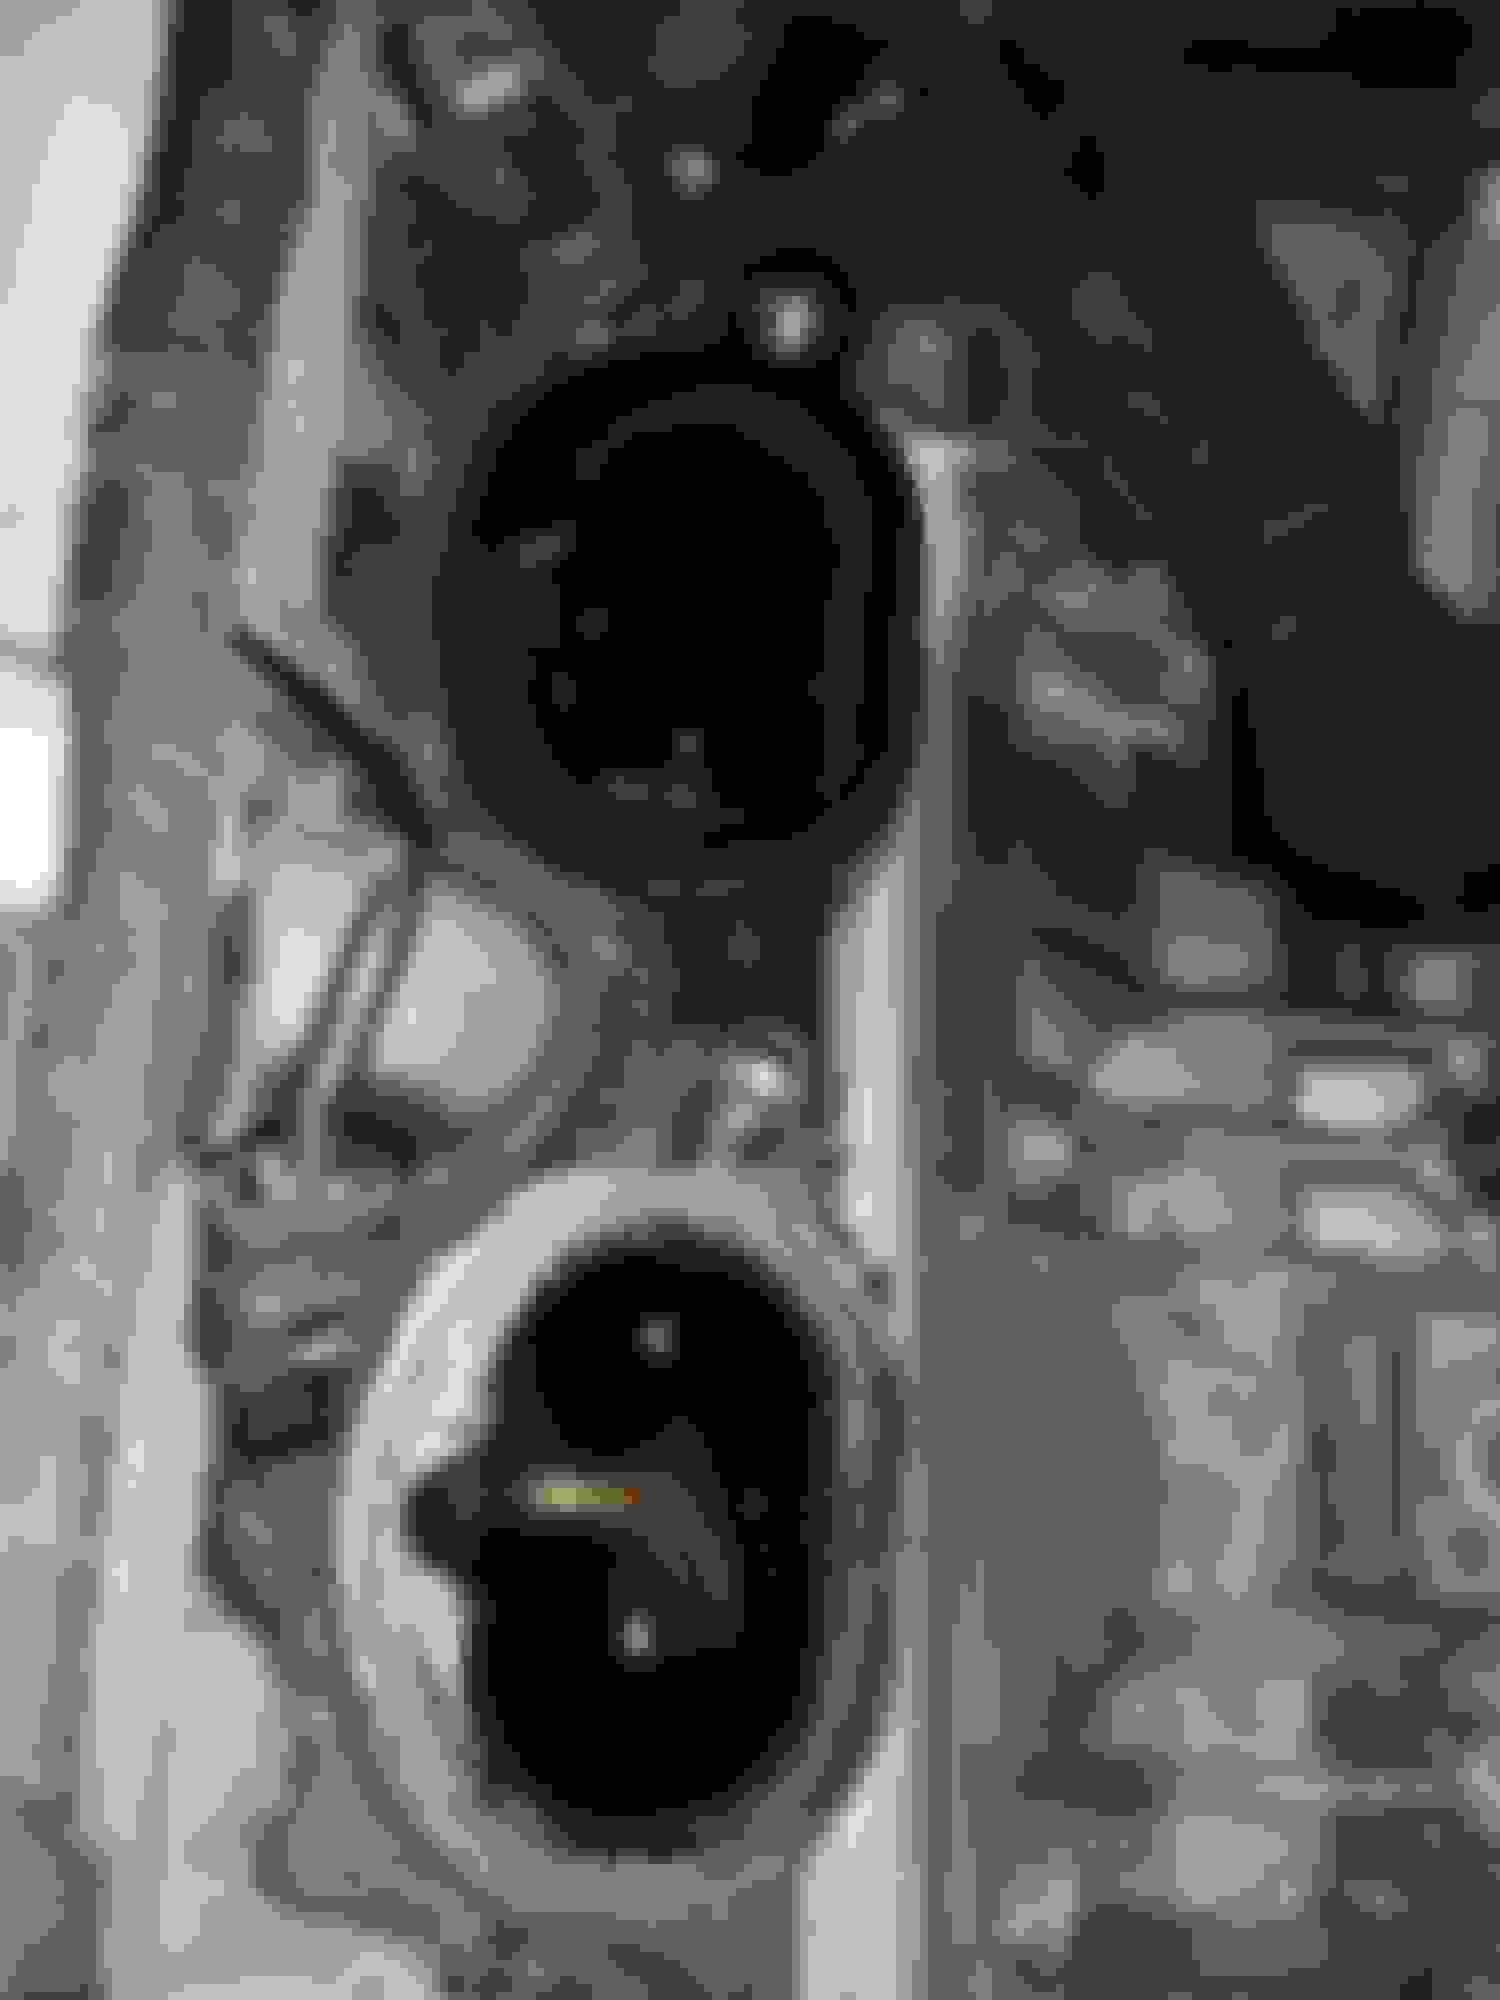
Replaced my intake manifold bolts and gaskets this weekend. Procedures and a few photos are attached. Let me know if you are a DIYer and have any questions.
Part numbers are
bolts 004-990-53-12 (tip - they are soft aluminum and threads require care during assembly; buy a couple of extras - I got it done but could have used them; heads are T-45)
gaskets 159-141-05-80 (both sides are the same)
breather pipe 156-010-03-70 (not mandatory but a wear item and almost impossible to do without removing the manifold; I paid $99)
Last edited by bultaco956; 06-05-2016 at 01:20 PM.
I let the car sit for 6 months and when I started it back up it had a rough idle and check engine light came on - it coded P2187 System too lean at idle bank 1 & P0171 System too lean bank 1. I cleared the codes a couple of times but they kept coming back on during the next several hundred miles usually when pulling off the highway on an exit ramp and slowing to idle. Car is at 77k, I am the second owner I have all records -- the manifold bolts loosening and causing intake leaks are a known problem on this (M156) motor and had never been replaced. Mercedes changed both the bolts and gasket material. The original bolts were also aluminum but seemed a bit harder to me than the new bolts. The bolts elongate when torqued and are one time use only. The bolts are torqued to 10 nm, then 90 degrees then 10 degrees more. It is a bit unusual but when you do it those feel like natural yield points for the bolts and it was no issue.
One of the original bolts on bank 1 was loose and could be unscrewed with fingers and that bolt hole in the manifold and another bolt hole on the bank1 side were slightly elongated indicating the bolts had been loose for some time. My conclusion was that the leak was inevitable and letting the car sit for six months probably let the gasket dry just enough to break the seal.
This was a fairly easy fix but some of the electrical and vacuum connections on the rear of the manifold required a bit of care and patience to disconnect. So far the CEL has stayed off.
Last edited by bultaco956; 06-07-2016 at 11:25 PM.
I let the car sit for 6 months and when I started it back up it had a rough idle and check engine light came on - it coded P2187 System too lean at idle bank 1 & P0171 System too lean bank 1. I cleared the codes a couple of times but they kept coming back on during the next several hundred miles usually when pulling off the highway on an exit ramp and slowing to idle. Car is at 77k, I am the second owner I have all records -- the manifold bolts loosening and causing intake leaks are a known problem on this (M156) motor and had never been replaced. Mercedes changed both the bolts and gasket material. The original bolts were also aluminum but seemed a bit harder to me than the new bolts. The bolts elongate when torqued and are one time use only. The bolts are torqued to 10 nm, then 90 degrees then 10 degrees more. It is a bit unusual but when you do it those feel like natural yield points for the bolts and it was no issue.
One of the original bolts on bank 1 was loose and could be unscrewed with fingers and that bolt hole in the manifold and another bolt hole on the bank1 side were slightly elongated indicating the bolts had been loose for some time. My conclusion was that the leak was inevitable and letting the car sit for six months probably let the gasket dry just enough to break the seal.
This was a fairly easy fix but some of the electrical and vacuum connections on the rear of the manifold required a bit of care and patience to disconnect. So far the CEL has stayed off.
i have the same errors codes on my 2007 E63 AMG with 74000 KM on it after i put a fuel injector clean in the tank the codes showed up
Replaced my intake manifold bolts and gaskets this weekend. Procedures and a few photos are attached. Let me know if you are a DIYer and have any questions.
Part numbers are
bolts 004-990-53-12 (tip - they are soft aluminum and threads require care during assembly; buy a couple of extras - I got it done but could have used them; heads are T-45)
gaskets 159-141-05-80 (both sides are the same)
breather pipe 156-010-03-70 (not mandatory but a wear item and almost impossible to do without removing the manifold; I paid $99)
Join Date: Nov 2017
Posts: 6 Thanks: 1
Thanked 1 Time in 1 Post
07' E63 Hose fitting in Intake Base with rubber showing in photo???
Quote:
Originally Posted by Ingenieur
Here's a picture
Does it have a sealing gasket or sealant bead or just a mechanical fit? Looks like a rubber gasket
Perhaps the bolts are loose?
I personally would clean it up and try rtv, new gasket or something before forking over 3400 plus labor!
I thought I had all disconnected when I put my my foot on the Valve Cover, leaned into the engine bay to grab the Intake by the fuel rails lifting forcibly
yet deliberately taking care NOT to damage the fuel injectors WHEN suddenly I realized I was still connected at the back!!!
Yikes! I had to think quickly and decided to balance the Intake on the cam cover and Oil cap!!!! How on earth does one remove the rather pliable
"throttle body" hose connected on driver side of the base of the Intake where the Y-pipe would feed into??
This is the hose in question. There is a clamp visible around its base but you can rotate it side to side and when you look inside the Intake, the rubber
Mushroom shaped plug fitting rotates with it yet the tube which attaches to it inside leading up to presumably the throttle does NOT rotate.
It seems the hose and the rubber fitting are one unit, so How do you remove the hose from the rubber fitting?
Do you cut clasp with wire cutters to remove and then affix a clamp upon refitting?? Or do you get needle nose pliers and try to loosen this clasp?
How do you disconnect this?
Here's what it looks like from above peering into the Intake...
Rubber fitting rotates with outer hose. The hose that internally "connects" or emanates from the rubber fitting leading
into "throttle Body" does NOT Rotate, so the rubber fitting and the internal hose are indeed separate while it appears the rubber fitting and the outer hose are "connected" to each other.
Any clue how to remove the hose from the rubber fitting????
2/07/17
Well, I after a few inquiries with no reply, I forged ahead. I must say that I relied mostly on deductive reasoning here even though such use of it can sometimes go awfully wrong! Anyhow, being that the "throttle hose??" was crimped to the fitting, and the fitting would rotate by twisting the hose from the outside and when doing so one can see that the separate hose inside the Intake leading further still towards the throttle body doesn't itself rotate, I conclude that one simply had to undo the crimp. To do so, I initially use snub nosed curved pliers to hook into the largest loop where the crimp itself was doubled over, but really seemed to only mangle the crimp, no release. Then, I went at it smaller wire cutters and then larger, but all this really managed to do was basically slightly loosen the crimp. The final blow was my using a scratch awl to get under that top loop and once I applied some leverage, it let go! So then I applied some soapy water to it with an old toothbrush and with a couple twists later it pulled out. The hose has an inward bulge in it that the crimp logically kept the hose from releasing. Nothing a common hose clamp can't replicate upon refitting!!
It's now June and I'm just getting around to installing the Intake Manifold after having sent out the Heads to be rebuilt. It turned out that 8 of 16 Intake Valves were bent!! Unbelievably, this was most likely due to both Cam Adjusters having been taken apart with the inner sprocket being installed upside down! I noticed this upon installing the Cams. This caused the Cam Adjusters to NOT mate with the end of the Camshaft because with the inner sprocket of the CA installed upside down makes the depression deeper such that the inner race of the CA was butting up against the timing guide and somewhat supported from below by the Cam Gear!! This caused for the end of the Cam to wobble on the inside and created a slot inside the edge of the race as a result of the countless miles that were driven on the car before I purchased it!! Not to mention it also internally makes any input of oil from the solenoid side irrelevant due to the Oil channel on that sprocket being upside down. Nonetheless, It's no wonder my timing was way off when I dismantled everything!
As for using RTV on the Intake Manifold gaskets, no I'm using new gaskets which should be all I need. I didn't cut any corners and also replaced the Headbolts, added Shorty Headers, SLS Buckets, new diamond washers and bolts for the Cam Adjusters, new front suspension complete with newly refurbished Airmatic Struts, lower Control Arms, F1 Fab Upper Control Arms to correct Camber, Racing Brake front Rotors, New Power Steering Pump and had the High Pressure Hose rebuilt. I might mention I also sent out my IM to be refurbished by RMT and they did a great job. I started down this road because after my purchase of the car I experienced 1200 rpm idle. It turned out that the Intake Plenum which the TB's mount to were deteriorated with visible holes especially in the channel where the cables run to the TB's. I'm days away from finally starting her up for the first time since December!!!
I've been working on and off on my 2007 E63 literally since the day I bought it!!! In short I had both Heads rebuilt (8 of 16 Intake valves were bent) as well as the Intake Manifold along with New Headbolts. I installed new front torque Arms and Adjustable Upper Control Arms, New P/S Pump and Reservior, Racing Brake Rotors and Pads, Bled the brakes, two new Ignition Coils, new Sparks, filters, VRP Shorty Headers, SLS Valve Tappets, etc. I finally got it off the jack stands, adjusted the height/stance settings and programmed them in since I had the replace a front ride height sensor, and then, perhaps a little too enthusiastically trying starting her up. Since I replaced bunch of sensors (including the Crank Position Sensor), I did a few resets of the STAR after testing various "actuations" and troubleshooting the "Quick" Scan" faults that appeared such as the 9.7 Engine" (IIRC). I went through bunch of the menus regarding Adaptations etc, (such as the the second test for the CPS and the Camshaft Timing Adaptation) but those required me to take it from idle up to 3000rpm or higher. Other "tests" include the fuel pump, but that requires the car to be idling already. Of course there is the "Cold Start" Test, but that just tells you various vitals like coolant temp, oil temp, etc. NOT Fuel Pressure nor spark and also requires it to be running.
So I went ahead gave it go and it seemingly started right up with high idle but then started to get really grumbly and low idle and stayed there. In the back of my mind I inherently thought it may be a lack of fuel pressure, since it has been sitting idle for 9 months since December 2017', but my worries got the best of me and before it grumbled too much more I turned the key off! I pulled up the "quick test" in STAR and clicked on the "f" in 9.7 Engine?? Then selected fault codes and waited, as DAS was reading them all then the barrage of faults were presented, 6 of 8 misfires resulting from either faulty injectors (I had all my injectors professionally tested with readouts of the performance of each-so I can confidently say that's most likely not the issue, but I was wrong on this assessment-more on this later!), or STAR suggested it may be compression-but even with whacked out timing before I took her apart, she ran fairly well, with the exception of the rediculously high idle (1200rpm).
So being that I also had the Intake rebuilt, I went through the menus to test the throttles max openings (each of these test require you to switch off the ignition for ten seconds before re-engaging in order for STAR to clear and reset. Several other adaptation tests, as I mentioned, require a running engine, so until I get there, I cannot adapt the Camshafts Positions, the CPS, Test the Fuel Pump by turning them off individually (I was able to determine that each of them were operating within the appropriate voltage values given in those tests). One of the menus even confirmed that my CA's were set at 0 degrees and something like 80 maybe 180, not sure, but it's cool to see both set 0 and the other two set at exactly the same value. Of course I used the proper Cam Locking tools, but it's cool to see in STAR regardless!
Has anyone else had a rough 1st Start after the months offline doing a rebuild??? If so, some reassurance would be greatly appreciated. It's not like I'm a newbie either having rebuilt my other cars (SAAB Areo-Jeep Grand Cherokee) but neither of those have what equates to being a $20-40+k Engine if all goes wrong!!!!
8/21/18
A little Update...
The next day I went Start her up and there was NO Start, No Crank!!! I took out my wrench and applied torque to the Crankshaft and there was no budging it going clockwise. However, it smoothly turned back the other way and felt as it would with the drive belt still on. Being that the fan was still on, I could only manage to turn it 10-15 degrees, if that, per turn, but of if had to guess I may have turned it back maybe enough to drive one piston down away from TDC maybe 3/4 of the way?? Then going clockwise again, it would go smoothly until it hit that certain point were there was no budging it!!! Yikes!!! I'm thinking somehow maybe the camshaft refuses to budge perhaps because of the timing chain being somehow locked up?? Dunno, maybe I didn't seat those chain guides up properly, but I know the pins were in their proper holes and since I never pulled the chainrails after removing the heads, I didn't erroneously swap one for another or something???? As for the teeth not lining up or there being awkward tension somewhere, when installing the cam gears there certainly was no excess slack when setting them in their respective places with the dowels?? As for the Cam Adjusters, they all were solidly engaged with the teeth below them?? Man oh man??? I just cannot imagine what could have bricked the engine. My guess though since I could turn the crank smoothly backwards and the again forwards to that certain point is that if there is some damage, it's most certainly somewhere on the top end or it's timing chain related, but not the bottom end, hopefully that is!!!
10/10/18
Just did a trip up north to see some family, but now I'm back at it again! I took off the Valve Covers to find that not only was everything out of timing slightly, but also two of four of the Cam Adjusters Seem to have loosened (i.e.-I could see that the screws keeping them together were slightly loose! So I loosened up all the Cam Bolts using the tool in place. I also removed all the spark plugs. When I turned the Crank Manually clockwise I was surprised to notice some gas come out from Driver Side #2 Piston Chamber, which I quickly absorbed with shop towels. Then to make sure, I sucked the rest out with my trusty suction tube. I did the same for chamber #1 as it too had a bunch of gas! This certainly explaines the impossibility (i.e.-hydrolock) I had turning the Crank with the Spark Plugs in!! This must have caused the spark plugs in those cylinders to foul. The STAR reporting misfires all around upon that first startup gave me pause but in hindsight, it seems those first two fuel injectors were robbing all the gas upon startup and flooding the first two chambers closest to the fuel inlet hose. I've read somewhere on these forums that "ignition on" without starting should have primed the fuel rail and there's no question I spent much time with STAR engaged before that first startup which should have filled up the rail, but now I'm left wondering if that is the case?? Since there is no way to bleed the fuel rail seemingly in-situ, I'm scratching my head wondering if I should have manually filled up the rail when I had the chance after installing the Intake?? I can see a nut at the end of the rail on passenger side, however I can't imagine it being a good idea to break it open to bleed. Am I supposed to pull the entire rail and fill it up manually otherwise how does the fuel manage to get over to passenger side if the rail is dry? If injectors are blowing out air for the first few turns, my understanding is STAR will label that as a misfire and the ECU will automatically shut down that cylinder. I don't want to go through that again! At least now I relieved to know that it wasn't a bent valve or something worse that kept the engine from turning over!
10/14/18
I ended up removing each Cam Adjuster, brakleening the surfaces of the diamond washers, end of Cams and internal threads of the Cams and used Dustoff to dry. Then rotated the Crank several times to test for play, of which there was none. Then installed the Cam Adjusters tightening each then backing off enough to allow the timing discs to rotate freely. Before setting the timing, I rotated the Crank again several times to check for any binding with the Cam Adjusters on the teeth of the intermediate Cam Gears, again None. Set the timing, tightened everything up and then again rotated the Crank numerous times testing for anything that felt weird. Nothing other than the freeness associated between the valves and the strength required to pull through the valves being depressed by the Camshafts! However when I would stop at TDC (40*), only on a couple occasions did the tools slide in on the back easily? I mean I would carefully pull the Crank when approaching TDC with one hand and with the other pull on the locking bar at the back of the Cams eyeballing the slots to see whether they lined up each time and it seemed like when I got very close, I would sometimes slip the front locking tool no problem, but the rear, 9 out of 10 times would have to be finagled a lot in order to set the rear lock bar?? I mean looking directly at the rear slots it appears the Exhaust Cam over and the Intake is under rotated sometimes, yet the front locking tool goes on no problem? Or the reverse occurs whereby I lock up the rear, but the front tool will take some effort to get on due to the offset angles of the front of the Cams?? I set and reset the Cams several times carefully to 40*, but have encountered this same result unfortunately over and over. It makes me think that either the Cams are twisted perhaps or the timing chain is stretched? However, other times, and I have bloody knuckles from doing this over and over, it seems if I rotate it just right and land on just the right spot, all will line up, so that would cancel,out the possibility of the timing chain being the issue, would it not? Or is the stress imposed on the Cams just normal enough to cause what I'm outlining?? Hmmm???
I am getting engine too lean codes and would like to replace the IM gaskets as well as the PCV valve. FCP sells the whole unit: gaskets, the PCV and bolts. But I also would like to open the IM up and clean inside. Does anyone know the bolt numbers that keep the two parts of the IM together? Also want to remove the throttle bodies and clean them. Does anyone know part number for those bolts?
Hello there! I think I may have mentioned in my previous post that I chose to have my IM rebuilt by RMT (Rebuild Master Tech) south of me. The little magnesium posts holding the breather tube topside on mine were disintegrated and RMT had another one top to swap. In addition, I had previously noticed they sold a TB Plenum surround that is more beefy than OEM, not that you can buy an OEM even, and they said they would include that in the price! They showed me mine that they removed and it was riddled with holes!!! Also, they used new TB Gaskets, installed a new plastic Hose adaptor that enters frontside which I unintentionally broke, I supplied a new topside hose which they implemented in the rebuild, replaned the surface which attach to the heads, and they also repainted it! I was so impressed that when I went I pick it up, I ended buying two remanned OEM Front Airstruts for less than the cost of one Arnott!
As as for the bolts separating the case, yes you�ll need those as well as new ones to reattach the IM to the block as the are one-time use aluminum bolts. I having serious issues with getting my DAS/Xentry up and running after dropping my Dell 630 on the floor of the garage! I bought a used E6430 which accepts the same SSD which came supplied with the 630, but the drivers to connect to the I-net are all �not recognized�?? So I can�t give you part #�s at this time.
I might also mention that after I had discovered that gas hydro-lock and after sucking out gas from the Spark plug holes of each chamber, I used a borometer to view wirelessly on my iPad whether there was leakage in the IM bottom chamber and thank god I did because there was maybe half a pint pooled up down there! I ended up using a wire hanger wrapped with blue shop towels duct taped to get the rest of it out after sucking up what could with my suction tool-pump!!! I also added some heat shield to the underside the IM...And to keep the IM clean, I made a Catch-Can placed in back of the passenger headlight with 1� heater hose running to it from the Crank case and back to the PCV after having removed the PCV hose and attaching the hoses to each of the fittings.
Take a look at this interesting video from DarthVaderpa which is about an Arnott strut for a GL-Class (164) but it may help explain the differences between remanufacturers and the value Arnott builds into our products. They may cost more but there is a reason...
In the video you will note that Arnott has improved upon the OE design by adding the bottom isolator seal and replaced the top seal. Arnott uses tier one (OE Quality) components such as oil resistant o-rings and a multi-ply, cross hatch, Continental ContiTech rubber air spring along with heavy duty crimping rings. Like Arnott's E-Class struts - the internal damper is recharged with high-performance shock oil and worn components such as the rod guides and seal pack are replaced. The clean finish on the Arnott strut is thanks to a process that steam cleans and then media blasts (like sand blasting) the strut which removes all paint and corrosion before the strut is repainted with corrosion resistant paint. They are also computer dyno tested to assure full OE damping functionality.
If your rear air spring ever develops a leak - Arnott also has innovated replacement air springs for AMG and non-AMG models which install up to 90% faster than the OE. Of course all Arnott shocks, springs and both new and reman struts come with a Limited Lifetime Warranty (for as long as you own the vehicle) in North America and a 2 - Year warranty elsewhere. You also have access to our installation resources (Video and detailed manual) and free tech support.
I bought Arnott front air strut for AMG. The strut was making thumping/knocking sound over bumps immediately after installation. I contacted them and they sent another one which has been great. I replaced them myself, but would have been really upset if had to pay someone twice.
The quality is good, but not flawless. But I guess even brand new could have issues. Arnott should offer labor reimbursement for cases like this.
But the Arnot guy is hi-jacking the thread here, doesn�t he ?
I've been having lead codes on both banks. I followed this DIY and replaced intake manifold gasket and the PCV valve. I also opened up the IM and cleaned it inside, including the throttle bodies. Now I am getting P0108 Manifold Absolute Pressure/Barometric Pressure circuit High Input error. Any ideas what I could have done wrong?
I put it all back together carefully and torqued everything to 8-10 Newton Meter.
Yes, @rovel, you are correct.. just because Arnott was briefly mentioned shouldn't have prompted @arnottdoug to capitalize on it, so please don't encourage him by continuing to mention it
With nothing much but time on my hands, these days, I'm finally getting around to replacing my IM. I have a question for you guys, and anyone else who reads this and wants to chime in: I did my best to clean around the base of the manifold before lifting it off. Obviously, I could've done a better job, as the pics reveal. This sandy, gritty dirt scares me more than the condition of the piston chambers, in terms of the oily/fuel/carbon deposits. The question is, what is the best way to clean this out? Carb cleaner? How deep should I go with the cleaning? If I miss any, and if any got down into where the pistons move around, is this a problem?
Sorry for hijacking the OP's thread, but this is fairly related. It looks a lot worse than it does in this pic
I just had my intake manifold rebuilt by RMT about a month ago and had all sensors/etc replaced, as well as the all metal internals installed.
My car is only 2 owners, and the previous owners drove the car a ton out in the desert here in California.... I had dirt and sand everywhere, it cleaned up easy enough.
I'd suggest a two step cleaning process that I did.
First, get 2-3 dozen micro fiber towels from Amazon....
Put one towel snuggly in each intake hole, try not to push that crap in the hole... if need be look at step A below.
1.) Use a brush, or better yet a small vaccuum to suck up all the dirt
2.) Use any liquid engine or carb cleaner (Spray on the micro-fiber towel) then scrub all that crud off the engine and in the valley underneath the intake manifold
Take the intake manifold gaskets off and throw them in the trash (as you will need new ones)
Cleaning the holes, I used Carb Cleaner for this step
A.) Now pull out the rag in an intake hole, drench a fresh microfiber towel. put your finger in the towel and put it in the hole scooping up.
B.) Mine had a lot of soot like yours so it takes some scrubbing, but you will get it all up... just have a lot of fresh new rags so you don't contaminates back in the holes. It should look brand new when you're done... just take your time
C.) Close up each hole with a fresh towel as you go along to close it off from any other debris getting in.
D.) Grab a mag light or some super bright light source and shine into the ports, make sure nothing is down there... I had to cut micorfiber cloth and put it on small popsicle sticks to coax a few bits of dirt.
Put everything back together and you should be fine... that first cold start is going to sound so good.... just let the car idle and the oil warm up and take her for a spin.
Last edited by almostordinary; 04-07-2020 at 06:31 PM.
I just had my intake manifold rebuilt by RMT about a month ago and had all sensors/etc replaced, as well as the all metal internals installed.
My car is only 2 owners, and the previous owners drove the car a ton out in the desert here in California.... I had dirt and sand everywhere, it cleaned up easy enough.
I'd suggest a two step cleaning process that I did.
First, get 2-3 dozen micro fiber towels from Amazon....
Put one towel snuggly in each intake hole, try not to push that crap in the hole... if need be look at step A below.
1.) Use a brush, or better yet a small vaccuum to suck up all the dirt
2.) Use any liquid engine or carb cleaner (Spray on the micro-fiber towel) then scrub all that crud off the engine and in the valley underneath the intake manifold
Take the intake manifold gaskets off and throw them in the trash (as you will need new ones)
Cleaning the holes, I used Carb Cleaner for this step
A.) Now pull out the rag in an intake hole, drench a fresh microfiber towel. put your finger in the towel and put it in the hole scooping up.
B.) Mine had a lot of soot like yours so it takes some scrubbing, but you will get it all up... just have a lot of fresh new rags so you don't contaminates back in the holes. It should look brand new when you're done... just take your time
C.) Close up each hole with a fresh towel as you go along to close it off from any other debris getting in.
D.) Grab a mag light or some super bright light source and shine into the ports, make sure nothing is down there... I had to cut micorfiber cloth and put it on small popsicle sticks to coax a few bits of dirt.
Put everything back together and you should be fine... that first cold start is going to sound so good.... just let the car idle and the oil warm up and take her for a spin.
Honestly, almostordinary, I'm happy to know I'm not the only one who had this experience. I'm pretty handy with doing my own work on these cars, but it's always good to get an opinion from someone who experienced it. I did plan on using a few cans of Carb Cleaner and I already have a nice stack of microfiber rags. I'll have this done before the end of the week, and will keep you informed.
I opened up my IM last November or 7000 miles ago. The car 60K on it back then. It certainly had oil inside but clean oil. Could be because the breather valve had just broke a week before opening up. I cleaned the intake holes with a paper towel and break cleaner. Paper towel leaves paper fibers (dust) which I assumed burned down. Microfibers are better. I'd be curios to know what the condition of the IM is now 7K miles later, but I am not opening it up just to check.
If you open the IM up I'd suggest you paint, especially that middle plate that corrodes all the way through.


 06-05-2016, 01:15 PM


 Today, 03:12 AM


")