
How I Refreshed My Benz Interior Using Dupli-Color Spray Paint.
 01-11-2013, 12:33 AM
#1
Junior Member
Thread Starter
Join Date: Jun 2012
Location: Kingston Jamaica
Posts: 21
Likes: 0
Received 2 Likes
on
1 Post
1999 CLK 230K
How I Refreshed My Benz Interior Using Dupli-Color Spray Paint.
Hello All,
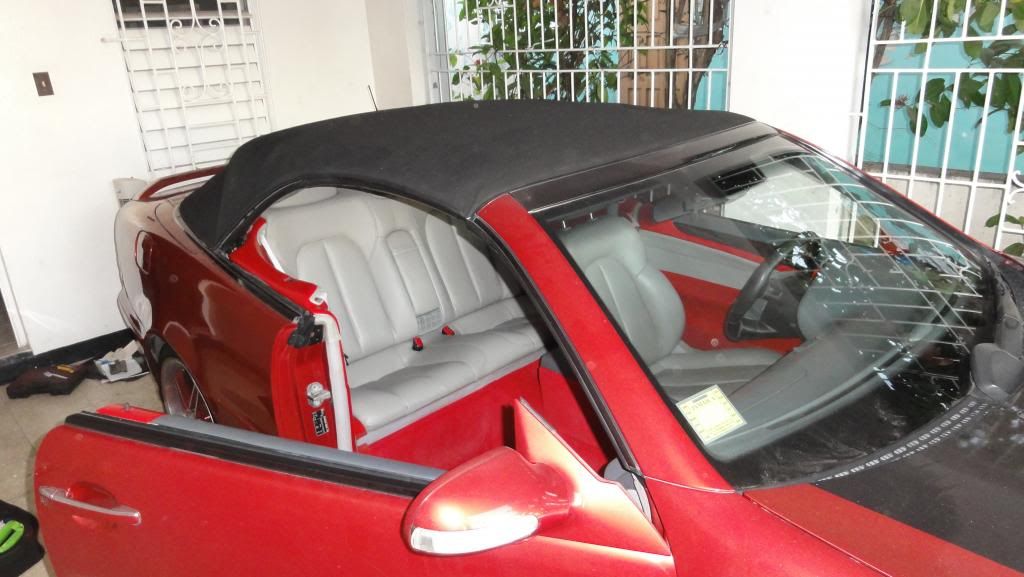
Over the past 6 months i have been contemplating what i could do to spruce up my interior. I felt as though my interior became lifeless and was growing quite dull with each passing day. The mixture of light grayish white interior(Carpet and Door Panels) was quite difficult to keep clean and required regular vacuuming and occasional de-greasing to rid the tough stains.
Frustrated, that i was, i decided to treat my girl (Mercedes) with a little make up for her Christmas. Additionally i must say she is an engineering beauty but naturally over the years beauty will fade. Shes now 14 years old and the time came for her to look young again.
Attached are some pictures with relatively simple steps, totaling 3-4 days that i have used to rejuvenate,replenish and remodel my interior.
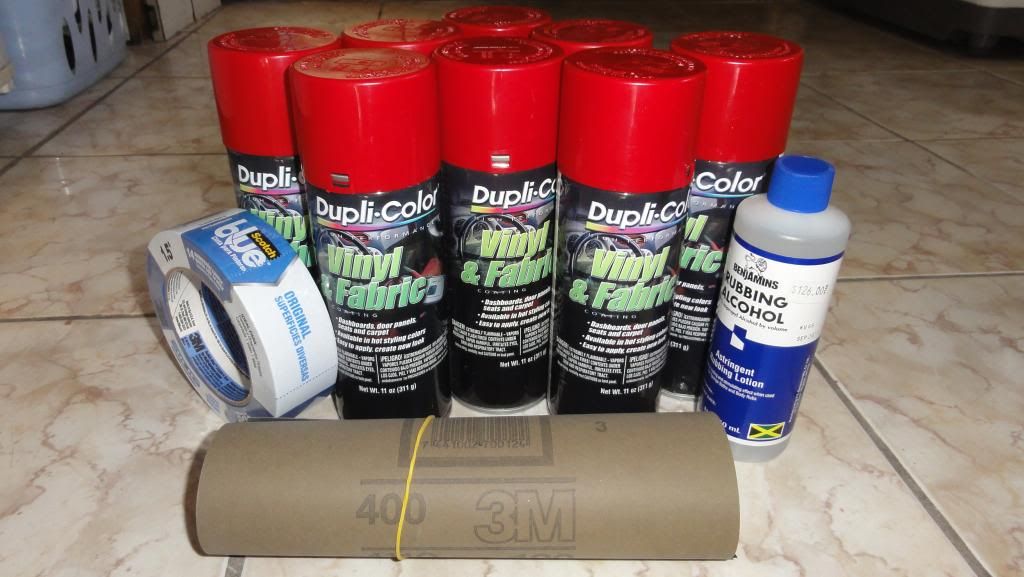
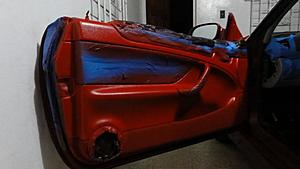
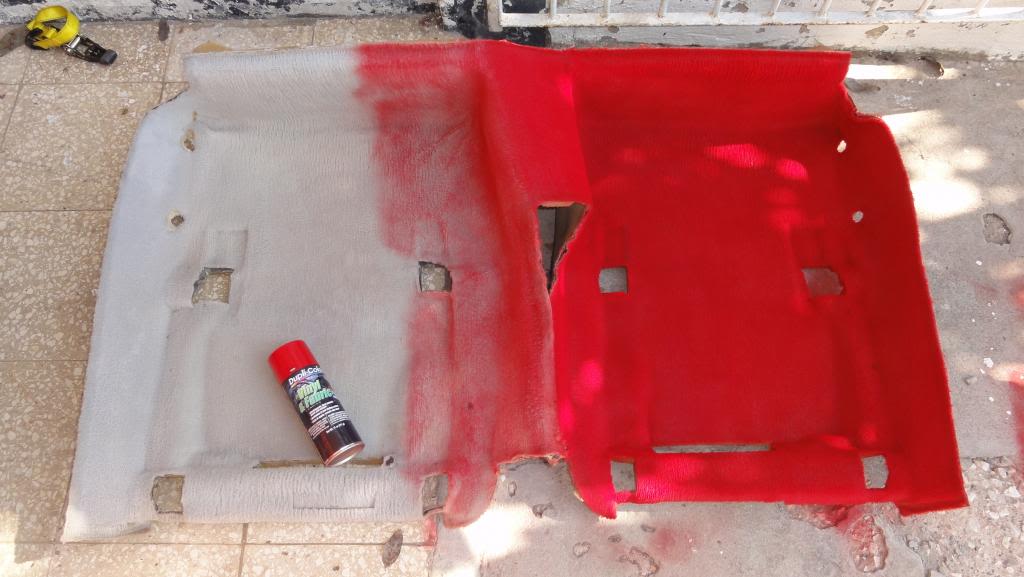
Step 1: Acquire your desired paint (I bought 8 cans of Dupli-Color HVP100 RED Vinyl and Fabric Paint),400 grit sandpaper,alcohol,Stiff Scrubbing Brush, Painters Tape along with disposable Gloves and a clean microfiber towel.
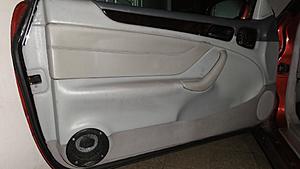
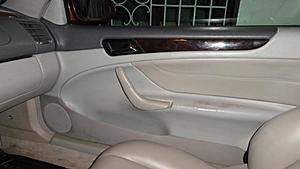
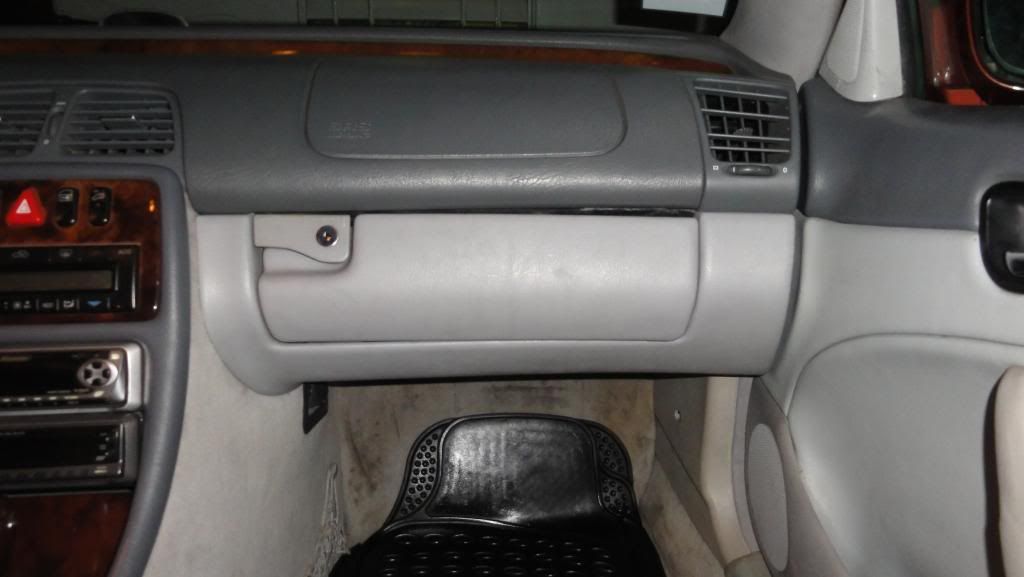
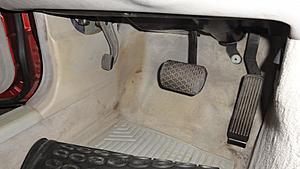
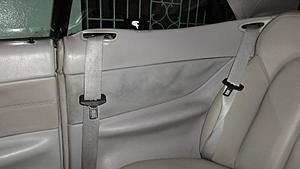
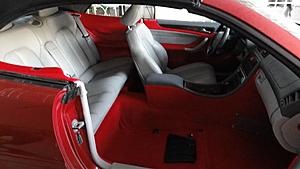
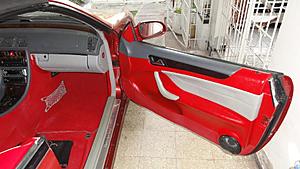
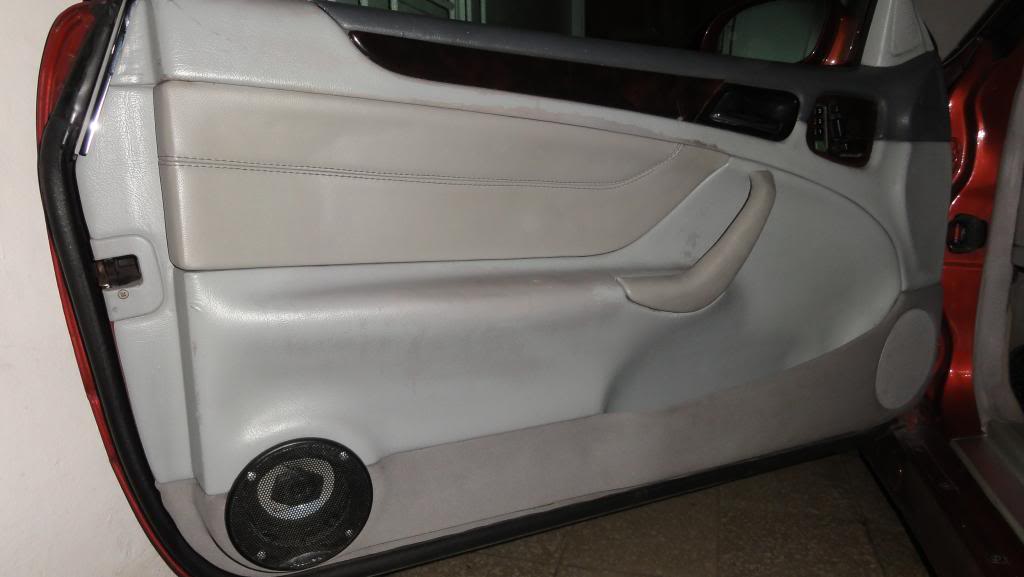
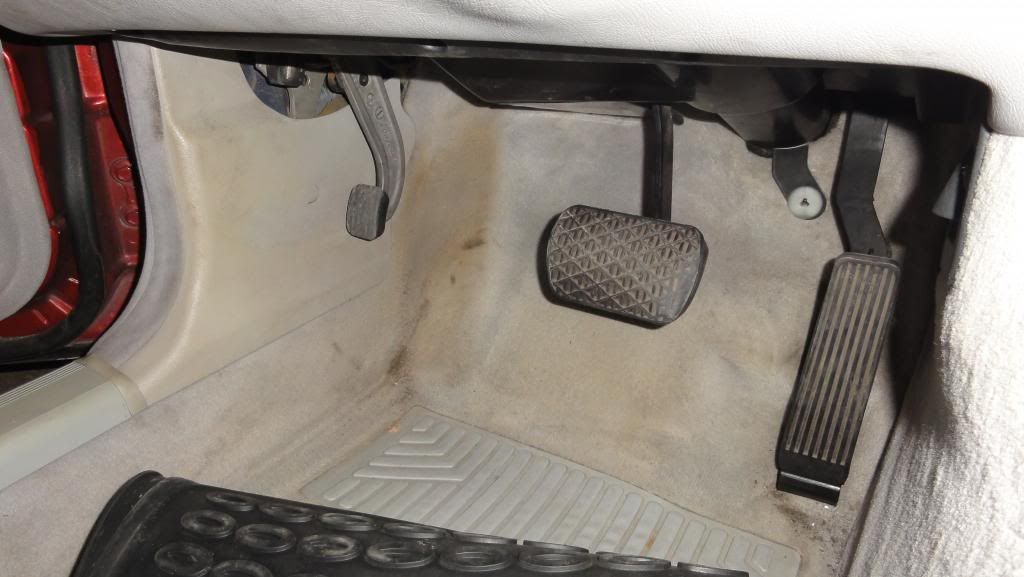
This is what my interior looked like with the fading paint.
Step 2: Disconnect and Remove all seats from the vehicle. Be careful as they are quite heavy. NOTE--The center console has carpeting on its sides. However i did not find it necessary as the area could be easily masked off.

Step 3: Remove both Kick Panels,Floor Heating Ducts and Floor Carpeting.
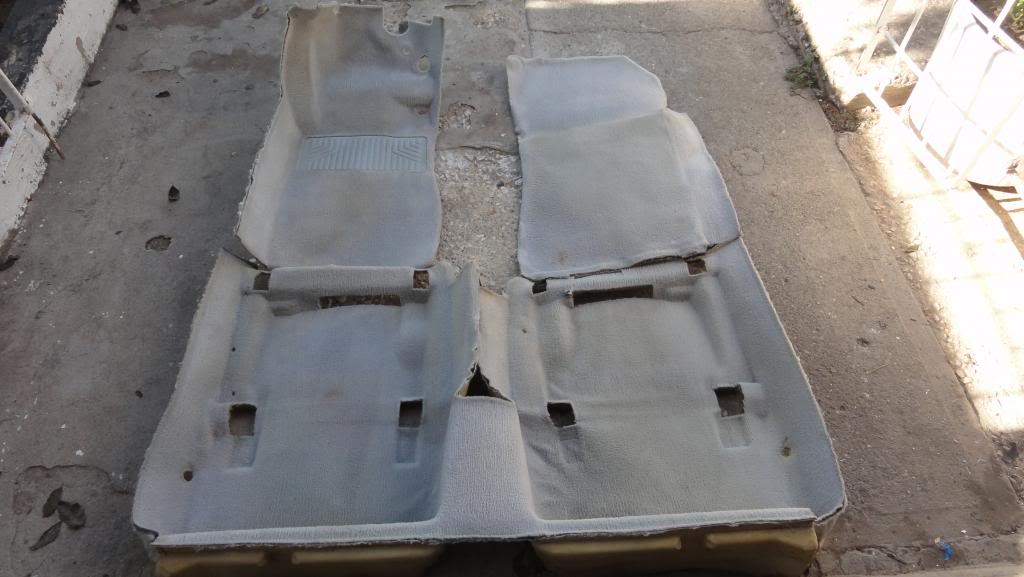
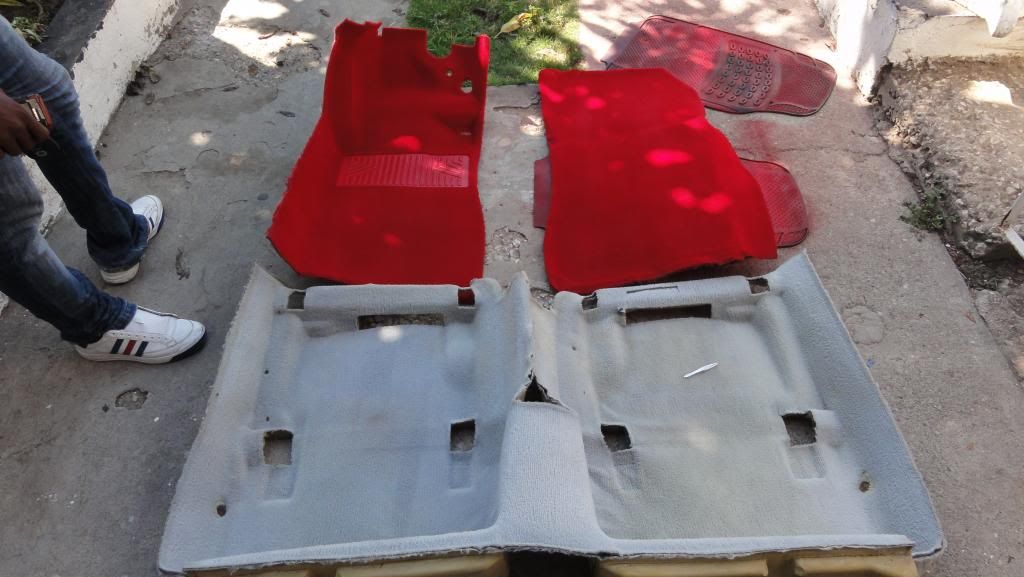
Step 4: WASH/Powerwash and SCCRRRUBBBBB carpet VIGOROUSLY!!!! I cannot emphasize with enough exclamation marks how important this step is. Dry thoroughly in raging sunshine and vacuum after. NOTE--- due to the Thick foam/sponge backing drying might take a complete day. However after that is complete your carpets should look almost if not better than this when clean.


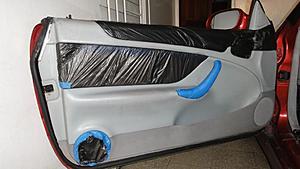
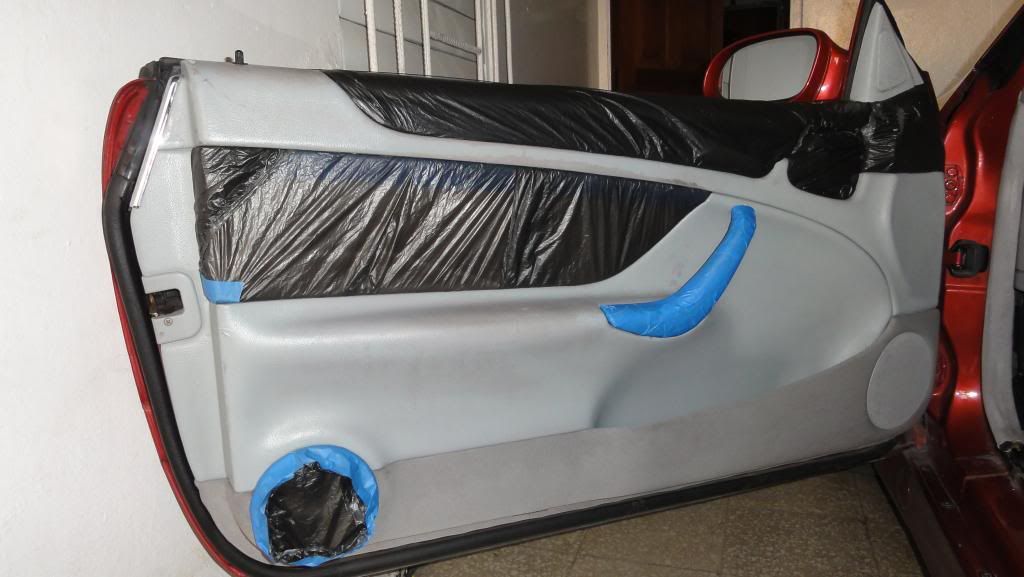
Step 4.5: While carpet is being dried, begin masking off door panels and the center console and the dashboard and begin sanding lightly by hand the areas to be sprayed.
Step 5: After sanding and wiping all surfaces to be sprayed in alcohol. Its SPRAY TIME!!!! I know, I couldn't wait either. NOTE-- This step is where one should exercise patience and for several reasons.
1) Over-spraying causes the paint to run.
2) The first two coats should be extremely light.
3) Saturating the carpet causes the fibres to be almost inseparable.
I begun with the Kick Panels first as they were the easiest (3 Coats).

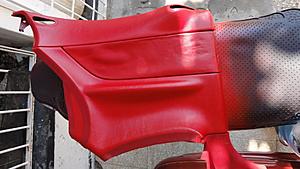
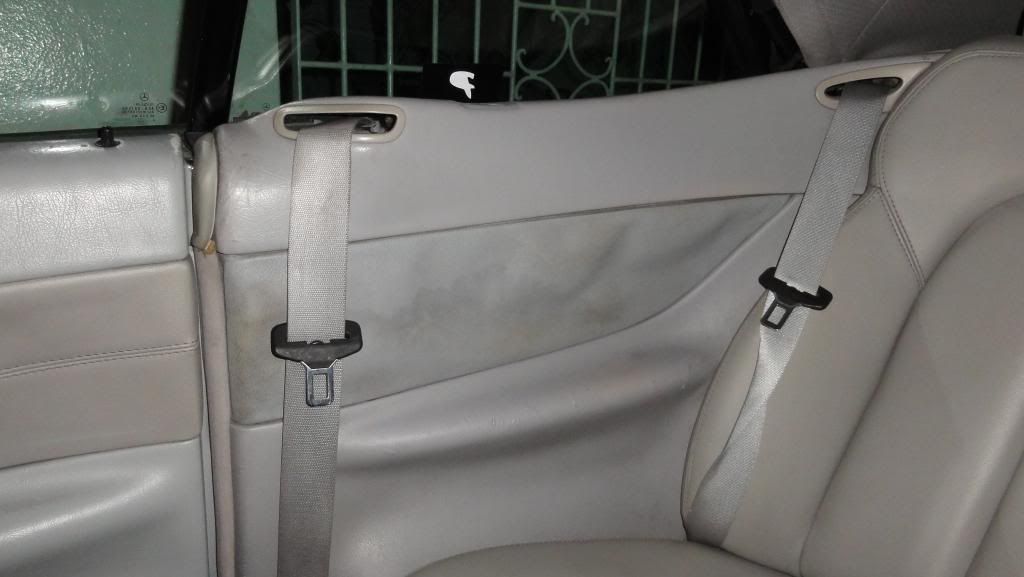
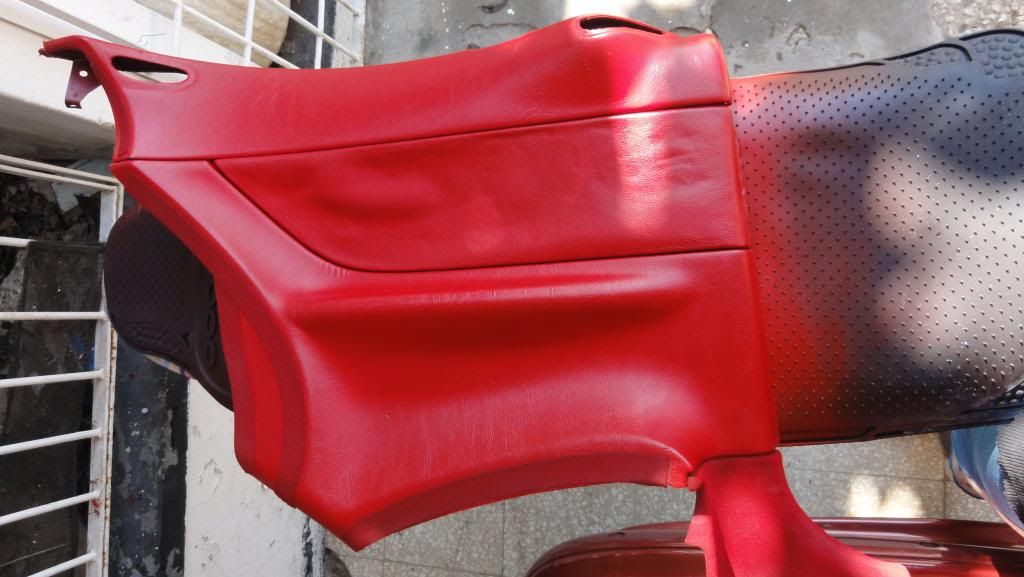
Continued unto the Rear Quarter Panels. (3 Coats)

Moved to the Carpet. (9 Light Coats) Yes that is correct nine LIGHT COATS!!
Doing the carpets is easier than it looks especially following these simple steps. 1) Spray Lightly. 2) Allow 5-10 Mins drying time between each coat. 3)Brush Vigorously in all 4 directions immediately after applying each coat - This exposes unsprayed areas and stops the fibers from sticking together. NOTE AGAIN -- Brush vigorously after light spraying. Forgive my repetition, its really emphasis.


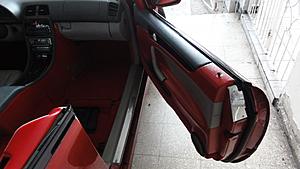
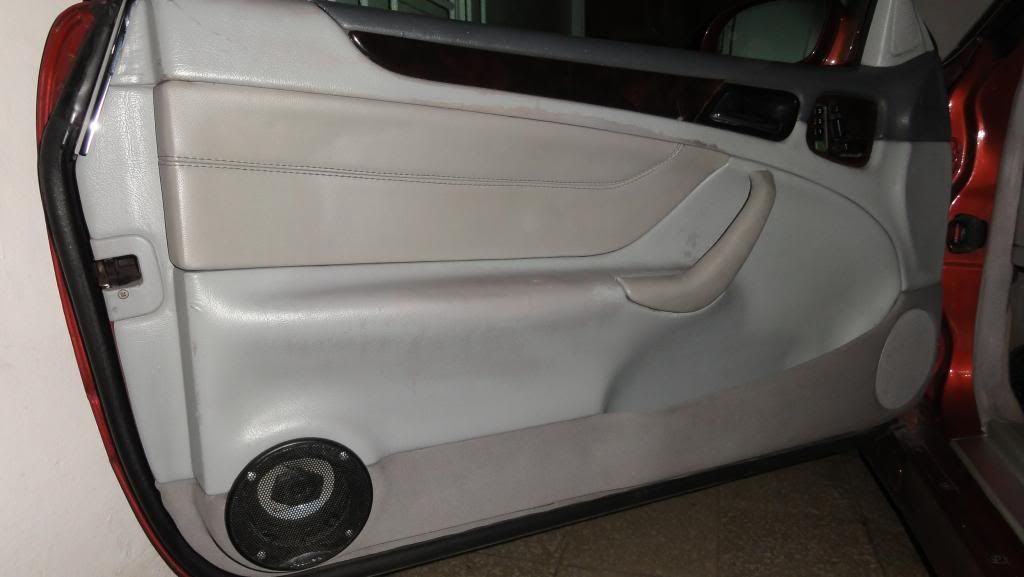
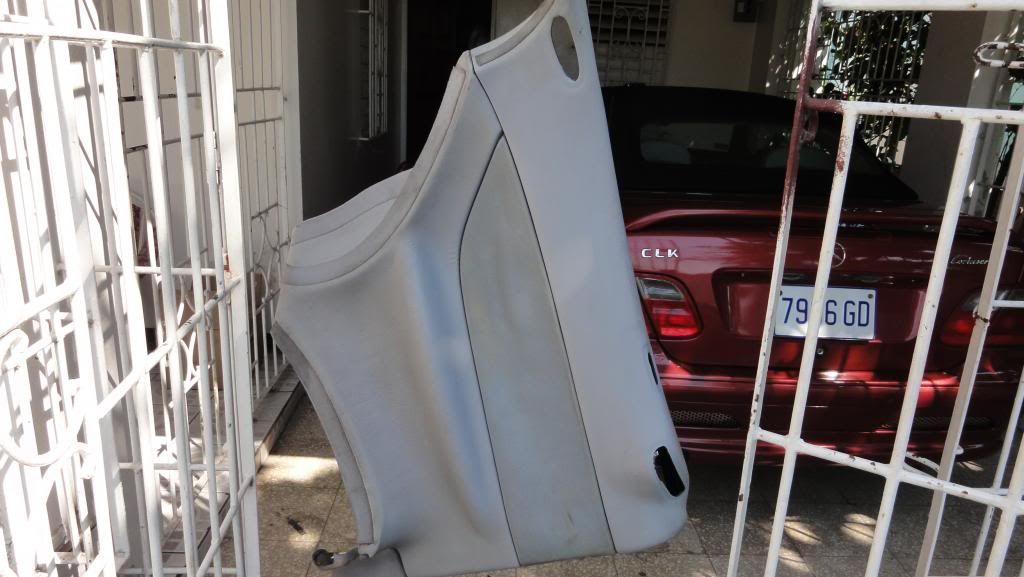
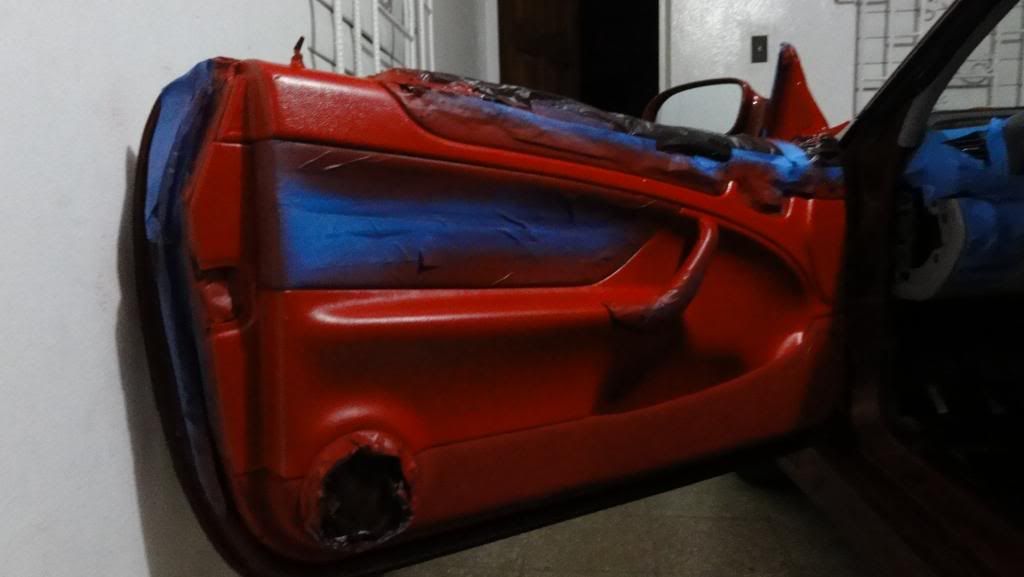
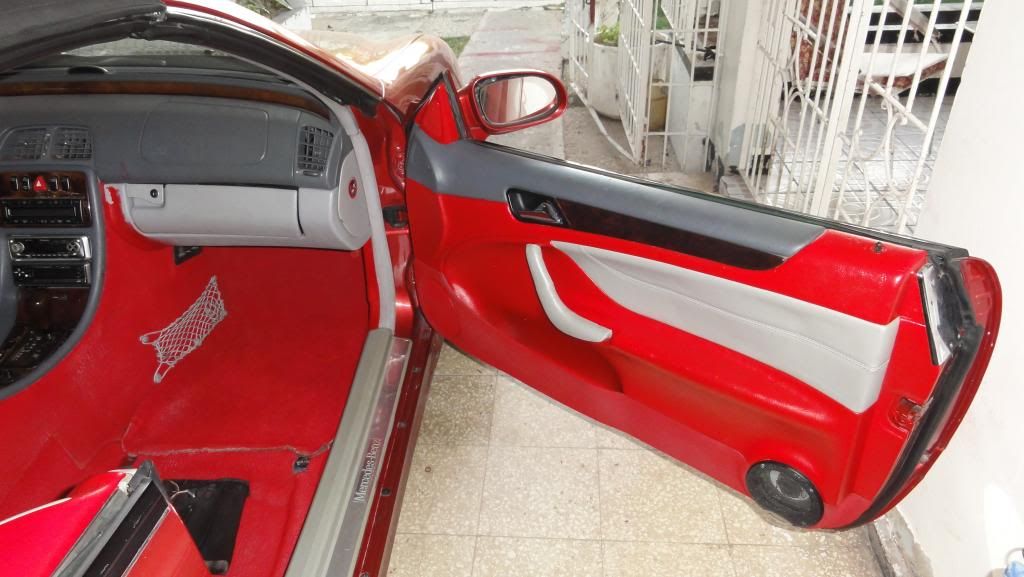
Step 6: Door Panels and the Center Console.


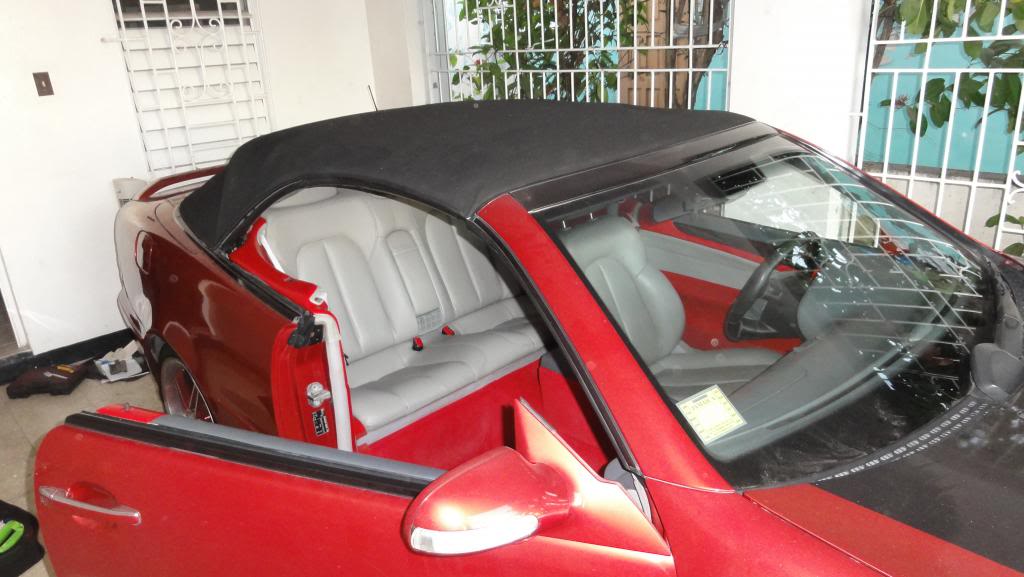
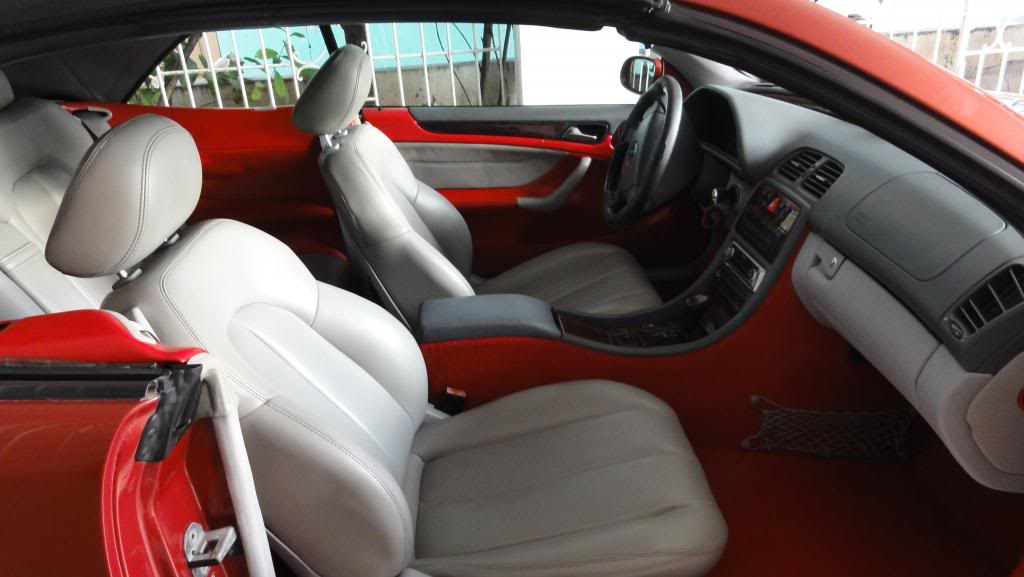
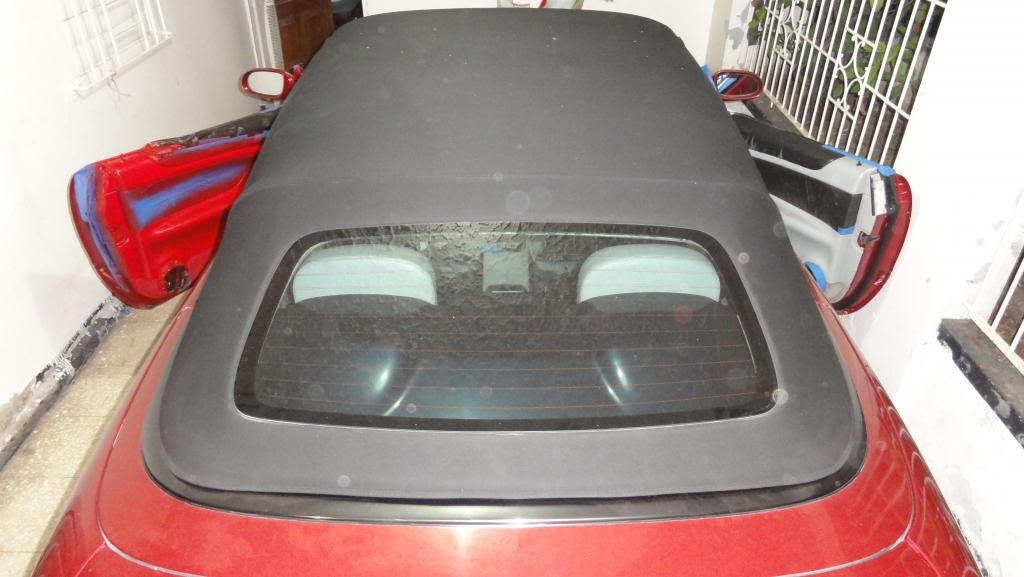
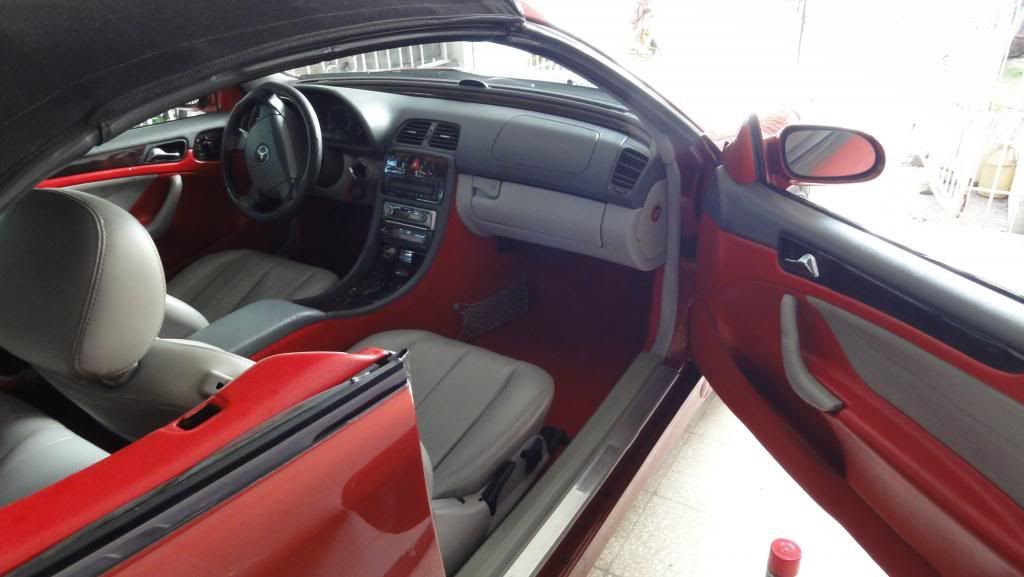
Step 7: Begin placing your seats and carpeting where they rightfully belong.
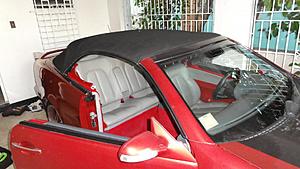


Step 8: GOOD LUCK!!! lol. I am very pleased with the results and have been receiving a tsunami of compliments and "do it for me's" Ultimately, the most important step is preparation. I am now in the process of acquiring a good quality fabric paint marker so i can paint the stitching in the seats red. Oh well thats another project by itself but ill definitely keep forum members posted. Thanks for taking the time out to read this post and if you ever decide to undertake and have questions i'll be honored to assisst in any way i can.
Till then my friends.
Over the past 6 months i have been contemplating what i could do to spruce up my interior. I felt as though my interior became lifeless and was growing quite dull with each passing day. The mixture of light grayish white interior(Carpet and Door Panels) was quite difficult to keep clean and required regular vacuuming and occasional de-greasing to rid the tough stains.
Frustrated, that i was, i decided to treat my girl (Mercedes) with a little make up for her Christmas. Additionally i must say she is an engineering beauty but naturally over the years beauty will fade. Shes now 14 years old and the time came for her to look young again.
Attached are some pictures with relatively simple steps, totaling 3-4 days that i have used to rejuvenate,replenish and remodel my interior.
Step 1: Acquire your desired paint (I bought 8 cans of Dupli-Color HVP100 RED Vinyl and Fabric Paint),400 grit sandpaper,alcohol,Stiff Scrubbing Brush, Painters Tape along with disposable Gloves and a clean microfiber towel.
This is what my interior looked like with the fading paint.


Step 2: Disconnect and Remove all seats from the vehicle. Be careful as they are quite heavy. NOTE--The center console has carpeting on its sides. However i did not find it necessary as the area could be easily masked off.
Step 3: Remove both Kick Panels,Floor Heating Ducts and Floor Carpeting.
Step 4: WASH/Powerwash and SCCRRRUBBBBB carpet VIGOROUSLY!!!! I cannot emphasize with enough exclamation marks how important this step is. Dry thoroughly in raging sunshine and vacuum after. NOTE--- due to the Thick foam/sponge backing drying might take a complete day. However after that is complete your carpets should look almost if not better than this when clean.

Step 4.5: While carpet is being dried, begin masking off door panels and the center console and the dashboard and begin sanding lightly by hand the areas to be sprayed.

Step 5: After sanding and wiping all surfaces to be sprayed in alcohol. Its SPRAY TIME!!!! I know, I couldn't wait either. NOTE-- This step is where one should exercise patience and for several reasons.
1) Over-spraying causes the paint to run.
2) The first two coats should be extremely light.
3) Saturating the carpet causes the fibres to be almost inseparable.
I begun with the Kick Panels first as they were the easiest (3 Coats).
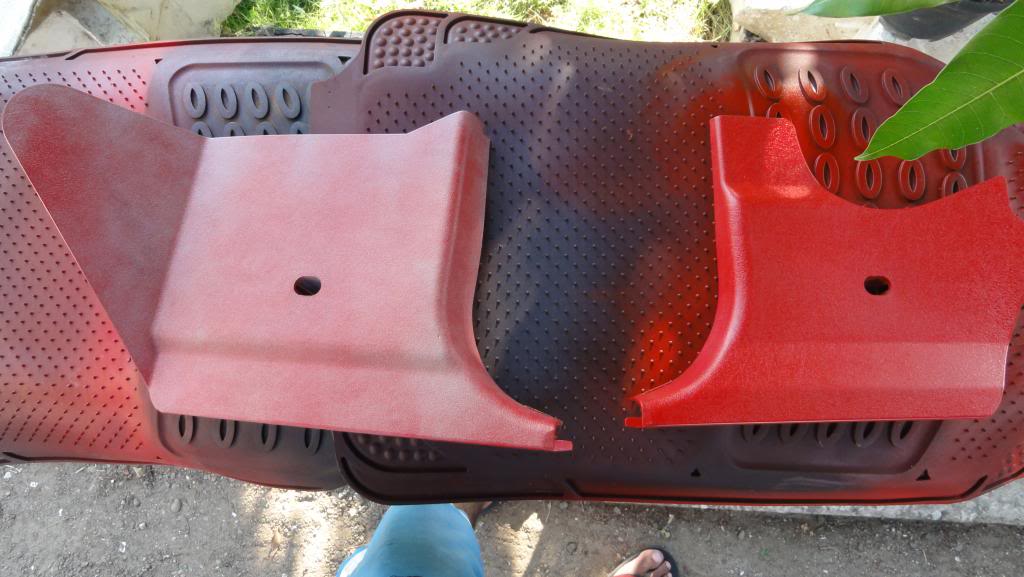
Continued unto the Rear Quarter Panels. (3 Coats)


Moved to the Carpet. (9 Light Coats) Yes that is correct nine LIGHT COATS!!
Doing the carpets is easier than it looks especially following these simple steps. 1) Spray Lightly. 2) Allow 5-10 Mins drying time between each coat. 3)Brush Vigorously in all 4 directions immediately after applying each coat - This exposes unsprayed areas and stops the fibers from sticking together. NOTE AGAIN -- Brush vigorously after light spraying. Forgive my repetition, its really emphasis.

Step 6: Door Panels and the Center Console.


Step 7: Begin placing your seats and carpeting where they rightfully belong.


Step 8: GOOD LUCK!!! lol. I am very pleased with the results and have been receiving a tsunami of compliments and "do it for me's" Ultimately, the most important step is preparation. I am now in the process of acquiring a good quality fabric paint marker so i can paint the stitching in the seats red. Oh well thats another project by itself but ill definitely keep forum members posted. Thanks for taking the time out to read this post and if you ever decide to undertake and have questions i'll be honored to assisst in any way i can.
Till then my friends.
Last edited by ChenZheng; 01-11-2013 at 12:50 AM. Reason: Load Images rather than URL
 01-11-2013, 01:28 AM
#2
Senior Member
congrats on the diy. glad you are happy with the result.. Was is tough taking the entire interior apart? I am not interested in painting my interior but do want to dynamat the entire car and this looks like a good start. Did you just follow directions found on here for removal of all the seats and door panels front and rear?
01-11-2013, 01:55 AM
#3
Junior Member
Thread Starter
Join Date: Jun 2012
Location: Kingston Jamaica
Posts: 21
Likes: 0
Received 2 Likes
on
1 Post
1999 CLK 230K
congrats on the diy. glad you are happy with the result.. Was is tough taking the entire interior apart? I am not interested in painting my interior but do want to dynamat the entire car and this looks like a good start. Did you just follow directions found on here for removal of all the seats and door panels front and rear?
Yes i did for the front door panels but for removal of everything else it was pretty straight forward. Both front seats are held in by 4 torx head screws to the floor. (9 or 10mm i think). The rear base seat just lifts right up and is not held in by any screws. However the back is held in by 2 bolts (15mm i think) at the bottom. 1 screw holds in the kick panels each and the rear quarter panels are held in by push clips and are quite easy to pry off..be careful though as they are designed to break easily. The carpeting can then be removed with ease to dynomat. View the attached document for removing a door panel.
01-11-2013, 12:04 PM
#4
Senior Member

Join Date: Oct 2012
Location: Lodi, CA
Posts: 335
Likes: 0
Received 3 Likes
on
3 Posts
2001 CLK55 AMG
Very Detailed work.... The only thing I would add is that I, and many others have found Dupli-color to not be the sturdiest of product, and tends to flake in high traffic areas such as door pulls and where you rest your arm on the door, basically, areas that flex. I would recommend that you use an adhesive promoter product as a base coat on vinyls, or use SEM dye instead of duplicolor paints, SEM seems to bond better, and hold longer. The other option is that pretty much any auto upholstery shop will sell you a bottle of actual profession grade product for about $18 bucks... Yes, it's more expensive, but like with any professional product, you use much less and get much more. Another Caveat for a project like this is generally you want to perform this in weather of about 72 degrees F or above. Other than that, enjoy the fruits of your labor.
01-11-2013, 05:22 PM
#5
Junior Member
Thread Starter
Join Date: Jun 2012
Location: Kingston Jamaica
Posts: 21
Likes: 0
Received 2 Likes
on
1 Post
1999 CLK 230K
Very Detailed work.... The only thing I would add is that I, and many others have found Dupli-color to not be the sturdiest of product, and tends to flake in high traffic areas such as door pulls and where you rest your arm on the door, basically, areas that flex. I would recommend that you use an adhesive promoter product as a base coat on vinyls, or use SEM dye instead of duplicolor paints, SEM seems to bond better, and hold longer. The other option is that pretty much any auto upholstery shop will sell you a bottle of actual profession grade product for about $18 bucks... Yes, it's more expensive, but like with any professional product, you use much less and get much more. Another Caveat for a project like this is generally you want to perform this in weather of about 72 degrees F or above. Other than that, enjoy the fruits of your labor.


Trending Topics
01-17-2013, 12:22 PM
#8
Junior Member
Thread Starter
Join Date: Jun 2012
Location: Kingston Jamaica
Posts: 21
Likes: 0
Received 2 Likes
on
1 Post
1999 CLK 230K
Thanks ThatsMyDawg...i really appreciate the compliment. i'll be working on painting the stitching of the seats next just to top it off.  I have been doing some research about Elmers Paint marker and based on the feed back i am getting and the results i've seen (over the internet of course) i am willing to give it a try.lol
I have been doing some research about Elmers Paint marker and based on the feed back i am getting and the results i've seen (over the internet of course) i am willing to give it a try.lol

 06-21-2013, 11:43 AM
#10
Newbie
Join Date: Jun 2013
Posts: 13
Likes: 0
Received 0 Likes
on
0 Posts
2002 C230 Coupe
haha you are such a great taper. and very patient.
cant say the same for myself
I rushed it a bit and now its taking me much longer than I thought it would.
but I am also swapping out the ugly Subaru fabric with some white leatherette that I got from my local fabric store and they are melted into the door panels, so yeah :/
if anyone is interested, check it out let me know what you think.
loving the red!!! superb!
http://s1304.photobucket.com/user/Mu...?sort=6&page=1
Last edited by Mtagani; 06-21-2013 at 01:13 PM. Reason: bad link
06-24-2013, 09:41 PM
#11
MBWorld Fanatic!
Join Date: Oct 2012
Location: Florida
Posts: 1,425
Received 98 Likes
on
88 Posts
2002 CLK 55 AMG cabriolet Eurocharged
I saw the headline and had to chime in. Hoping you were using a Dye type of paint.
Lacquer based dyes and for small jobs shoe leather dye.
Preparation predicts the life of the finish. I have some interior parts on an old cougar 20 years still holding.
Jamaica - cool, have a bud from Kingston Alcoa chemical industry, raced Lotus there.
Stay away from the ganga. Good Rum. LOL
Cheers, Gator
06-28-2013, 10:22 PM
#13
Junior Member

Join Date: Jul 2012
Location: Erie
Posts: 61
Likes: 0
Received 0 Likes
on
0 Posts
2002 CLK55 AMG 2002 c230k 02 Triumph America 1992 300e
That came out absolutely Awesome. I am seriously jealous and impressed. How would that spray work on cloth seats?
06-29-2013, 12:25 PM
#14
Newbie
Join Date: Jun 2013
Posts: 13
Likes: 0
Received 0 Likes
on
0 Posts
2002 C230 Coupe
Tried black on cloth seats, already fading, haven't decided what I'm going to so yet but I would not reccomend it. At first it looked awesome, you know what you should try, try the simply spray and let us know how that works. I have a feeling it would be better. I like the concept of rubbing it in with your hands. Sounds legit,
06-29-2013, 12:54 PM
#15
Junior Member
Thread Starter
Join Date: Jun 2012
Location: Kingston Jamaica
Posts: 21
Likes: 0
Received 2 Likes
on
1 Post
1999 CLK 230K
I saw the headline and had to chime in. Hoping you were using a Dye type of paint.
Lacquer based dyes and for small jobs shoe leather dye.
Preparation predicts the life of the finish. I have some interior parts on an old cougar 20 years still holding.
Jamaica - cool, have a bud from Kingston Alcoa chemical industry, raced Lotus there.
Stay away from the ganga. Good Rum. LOL
Cheers, Gator
Lacquer based dyes and for small jobs shoe leather dye.
Preparation predicts the life of the finish. I have some interior parts on an old cougar 20 years still holding.
Jamaica - cool, have a bud from Kingston Alcoa chemical industry, raced Lotus there.
Stay away from the ganga. Good Rum. LOL
Cheers, Gator
Yup its die paint alright. The carpets soaked the paint up like butter on bread.
Prep work is key for a long lasting finish. Stay away from ganja huh? hahahaha i have no comments on that one. Why drink and drive when i could smoke and fly. The rum is great also, sometimes even a bit too strong for me.
06-29-2013, 12:59 PM
#16
Junior Member
Thread Starter
Join Date: Jun 2012
Location: Kingston Jamaica
Posts: 21
Likes: 0
Received 2 Likes
on
1 Post
1999 CLK 230K
Tried black on cloth seats, already fading, haven't decided what I'm going to so yet but I would not reccomend it. At first it looked awesome, you know what you should try, try the simply spray and let us know how that works. I have a feeling it would be better. I like the concept of rubbing it in with your hands. Sounds legit,
 If i had farbic seats i'm not sure i would have attempted it, but have you looked into using SEM paint dyes rather than dupli-color?
08-15-2014, 04:48 PM
If i had farbic seats i'm not sure i would have attempted it, but have you looked into using SEM paint dyes rather than dupli-color?
08-15-2014, 04:48 PM
#17
Newbie

Join Date: May 2014
Posts: 10
Likes: 0
Received 0 Likes
on
0 Posts
2000 CLK 320 BLACKOUT
resurrection of your thread.
Hello All,
Over the past 6 months i have been contemplating what i could do to spruce up my interior. I felt as though my interior became lifeless and was growing quite dull with each passing day. The mixture of light grayish white interior(Carpet and Door Panels) was quite difficult to keep clean and required regular vacuuming and occasional de-greasing to rid the tough stains.
Frustrated, that i was, i decided to treat my girl (Mercedes) with a little make up for her Christmas. Additionally i must say she is an engineering beauty but naturally over the years beauty will fade. Shes now 14 years old and the time came for her to look young again.
Attached are some pictures with relatively simple steps, totaling 3-4 days that i have used to rejuvenate,replenish and remodel my interior.
Step 1: Acquire your desired paint (I bought 8 cans of Dupli-Color HVP100 RED Vinyl and Fabric Paint),400 grit sandpaper,alcohol,Stiff Scrubbing Brush, Painters Tape along with disposable Gloves and a clean microfiber towel.
This is what my interior looked like with the fading paint.

Step 2: Disconnect and Remove all seats from the vehicle. Be careful as they are quite heavy. NOTE--The center console has carpeting on its sides. However i did not find it necessary as the area could be easily masked off.
Step 3: Remove both Kick Panels,Floor Heating Ducts and Floor Carpeting.
Step 4: WASH/Powerwash and SCCRRRUBBBBB carpet VIGOROUSLY!!!! I cannot emphasize with enough exclamation marks how important this step is. Dry thoroughly in raging sunshine and vacuum after. NOTE--- due to the Thick foam/sponge backing drying might take a complete day. However after that is complete your carpets should look almost if not better than this when clean.


Step 4.5: While carpet is being dried, begin masking off door panels and the center console and the dashboard and begin sanding lightly by hand the areas to be sprayed.
Step 5: After sanding and wiping all surfaces to be sprayed in alcohol. Its SPRAY TIME!!!! I know, I couldn't wait either. NOTE-- This step is where one should exercise patience and for several reasons.
1) Over-spraying causes the paint to run.
2) The first two coats should be extremely light.
3) Saturating the carpet causes the fibres to be almost inseparable.
I begun with the Kick Panels first as they were the easiest (3 Coats).

Continued unto the Rear Quarter Panels. (3 Coats)
Moved to the Carpet. (9 Light Coats) Yes that is correct nine LIGHT COATS!!
Doing the carpets is easier than it looks especially following these simple steps. 1) Spray Lightly. 2) Allow 5-10 Mins drying time between each coat. 3)Brush Vigorously in all 4 directions immediately after applying each coat - This exposes unsprayed areas and stops the fibers from sticking together. NOTE AGAIN -- Brush vigorously after light spraying. Forgive my repetition, its really emphasis.

Step 6: Door Panels and the Center Console.


Step 7: Begin placing your seats and carpeting where they rightfully belong.


Step 8: GOOD LUCK!!! lol. I am very pleased with the results and have been receiving a tsunami of compliments and "do it for me's" Ultimately, the most important step is preparation. I am now in the process of acquiring a good quality fabric paint marker so i can paint the stitching in the seats red. Oh well thats another project by itself but ill definitely keep forum members posted. Thanks for taking the time out to read this post and if you ever decide to undertake and have questions i'll be honored to assisst in any way i can.
Till then my friends.
Over the past 6 months i have been contemplating what i could do to spruce up my interior. I felt as though my interior became lifeless and was growing quite dull with each passing day. The mixture of light grayish white interior(Carpet and Door Panels) was quite difficult to keep clean and required regular vacuuming and occasional de-greasing to rid the tough stains.
Frustrated, that i was, i decided to treat my girl (Mercedes) with a little make up for her Christmas. Additionally i must say she is an engineering beauty but naturally over the years beauty will fade. Shes now 14 years old and the time came for her to look young again.
Attached are some pictures with relatively simple steps, totaling 3-4 days that i have used to rejuvenate,replenish and remodel my interior.
Step 1: Acquire your desired paint (I bought 8 cans of Dupli-Color HVP100 RED Vinyl and Fabric Paint),400 grit sandpaper,alcohol,Stiff Scrubbing Brush, Painters Tape along with disposable Gloves and a clean microfiber towel.
This is what my interior looked like with the fading paint.
Step 2: Disconnect and Remove all seats from the vehicle. Be careful as they are quite heavy. NOTE--The center console has carpeting on its sides. However i did not find it necessary as the area could be easily masked off.
Step 3: Remove both Kick Panels,Floor Heating Ducts and Floor Carpeting.
Step 4: WASH/Powerwash and SCCRRRUBBBBB carpet VIGOROUSLY!!!! I cannot emphasize with enough exclamation marks how important this step is. Dry thoroughly in raging sunshine and vacuum after. NOTE--- due to the Thick foam/sponge backing drying might take a complete day. However after that is complete your carpets should look almost if not better than this when clean.
Step 4.5: While carpet is being dried, begin masking off door panels and the center console and the dashboard and begin sanding lightly by hand the areas to be sprayed.
Step 5: After sanding and wiping all surfaces to be sprayed in alcohol. Its SPRAY TIME!!!! I know, I couldn't wait either. NOTE-- This step is where one should exercise patience and for several reasons.
1) Over-spraying causes the paint to run.
2) The first two coats should be extremely light.
3) Saturating the carpet causes the fibres to be almost inseparable.
I begun with the Kick Panels first as they were the easiest (3 Coats).
Continued unto the Rear Quarter Panels. (3 Coats)
Moved to the Carpet. (9 Light Coats) Yes that is correct nine LIGHT COATS!!
Doing the carpets is easier than it looks especially following these simple steps. 1) Spray Lightly. 2) Allow 5-10 Mins drying time between each coat. 3)Brush Vigorously in all 4 directions immediately after applying each coat - This exposes unsprayed areas and stops the fibers from sticking together. NOTE AGAIN -- Brush vigorously after light spraying. Forgive my repetition, its really emphasis.
Step 6: Door Panels and the Center Console.
Step 7: Begin placing your seats and carpeting where they rightfully belong.
Step 8: GOOD LUCK!!! lol. I am very pleased with the results and have been receiving a tsunami of compliments and "do it for me's" Ultimately, the most important step is preparation. I am now in the process of acquiring a good quality fabric paint marker so i can paint the stitching in the seats red. Oh well thats another project by itself but ill definitely keep forum members posted. Thanks for taking the time out to read this post and if you ever decide to undertake and have questions i'll be honored to assisst in any way i can.
Till then my friends.

 08-26-2014, 06:45 PM
#20
MBWorld Fanatic!
Join Date: Oct 2012
Location: Florida
Posts: 1,425
Received 98 Likes
on
88 Posts
2002 CLK 55 AMG cabriolet Eurocharged
Quote: Ruined a decent looking car... SMH
It all depends on what part of the earth you are standing. I think it is a bikini melter in Jamaica.
LA, NY, Miami maybe a target for DEA none the less you will be judged for the star wherever you live. Best to just enjoy and forget the haters.
Gator
It all depends on what part of the earth you are standing. I think it is a bikini melter in Jamaica.
LA, NY, Miami maybe a target for DEA none the less you will be judged for the star wherever you live. Best to just enjoy and forget the haters.
Gator


