When you click on links to various merchants on this site and make a purchase, this can result in this site earning a commission. Affiliate programs and affiliations include, but are not limited to, the eBay Partner Network.
m271 DIY - Belt tensioner replacement and remove supercharger
I have been looking everywhere for a D.I.Y thread for a replacement for a belt tensioner but I only found information about replacing the pulley , so I decided to make one.
Tools you will need
Torx Socket set
E-Torx socket set
Breaker Bar
A long flat head screw driver
Loctite
Ratchet with a long and short wobble attachment
Magnet (in case you drop a bolt)
Zip ties incase you break anything lol
Car jack
Jack stands
and patience...a lot of patience
Umm leave a comment if forgot anything.
Step 1.
Disconnect the battery as you will need to remove the super charger which is near the starter motor and you do not want to short circuit anything.
Step 2.
Jack the car up as you will need to go underneath the car to access bolts of the supercharger as well as the wideband
Step 3.
Remove air box and air filter (There are multiple threads on this)
Attachment Below
Step 4
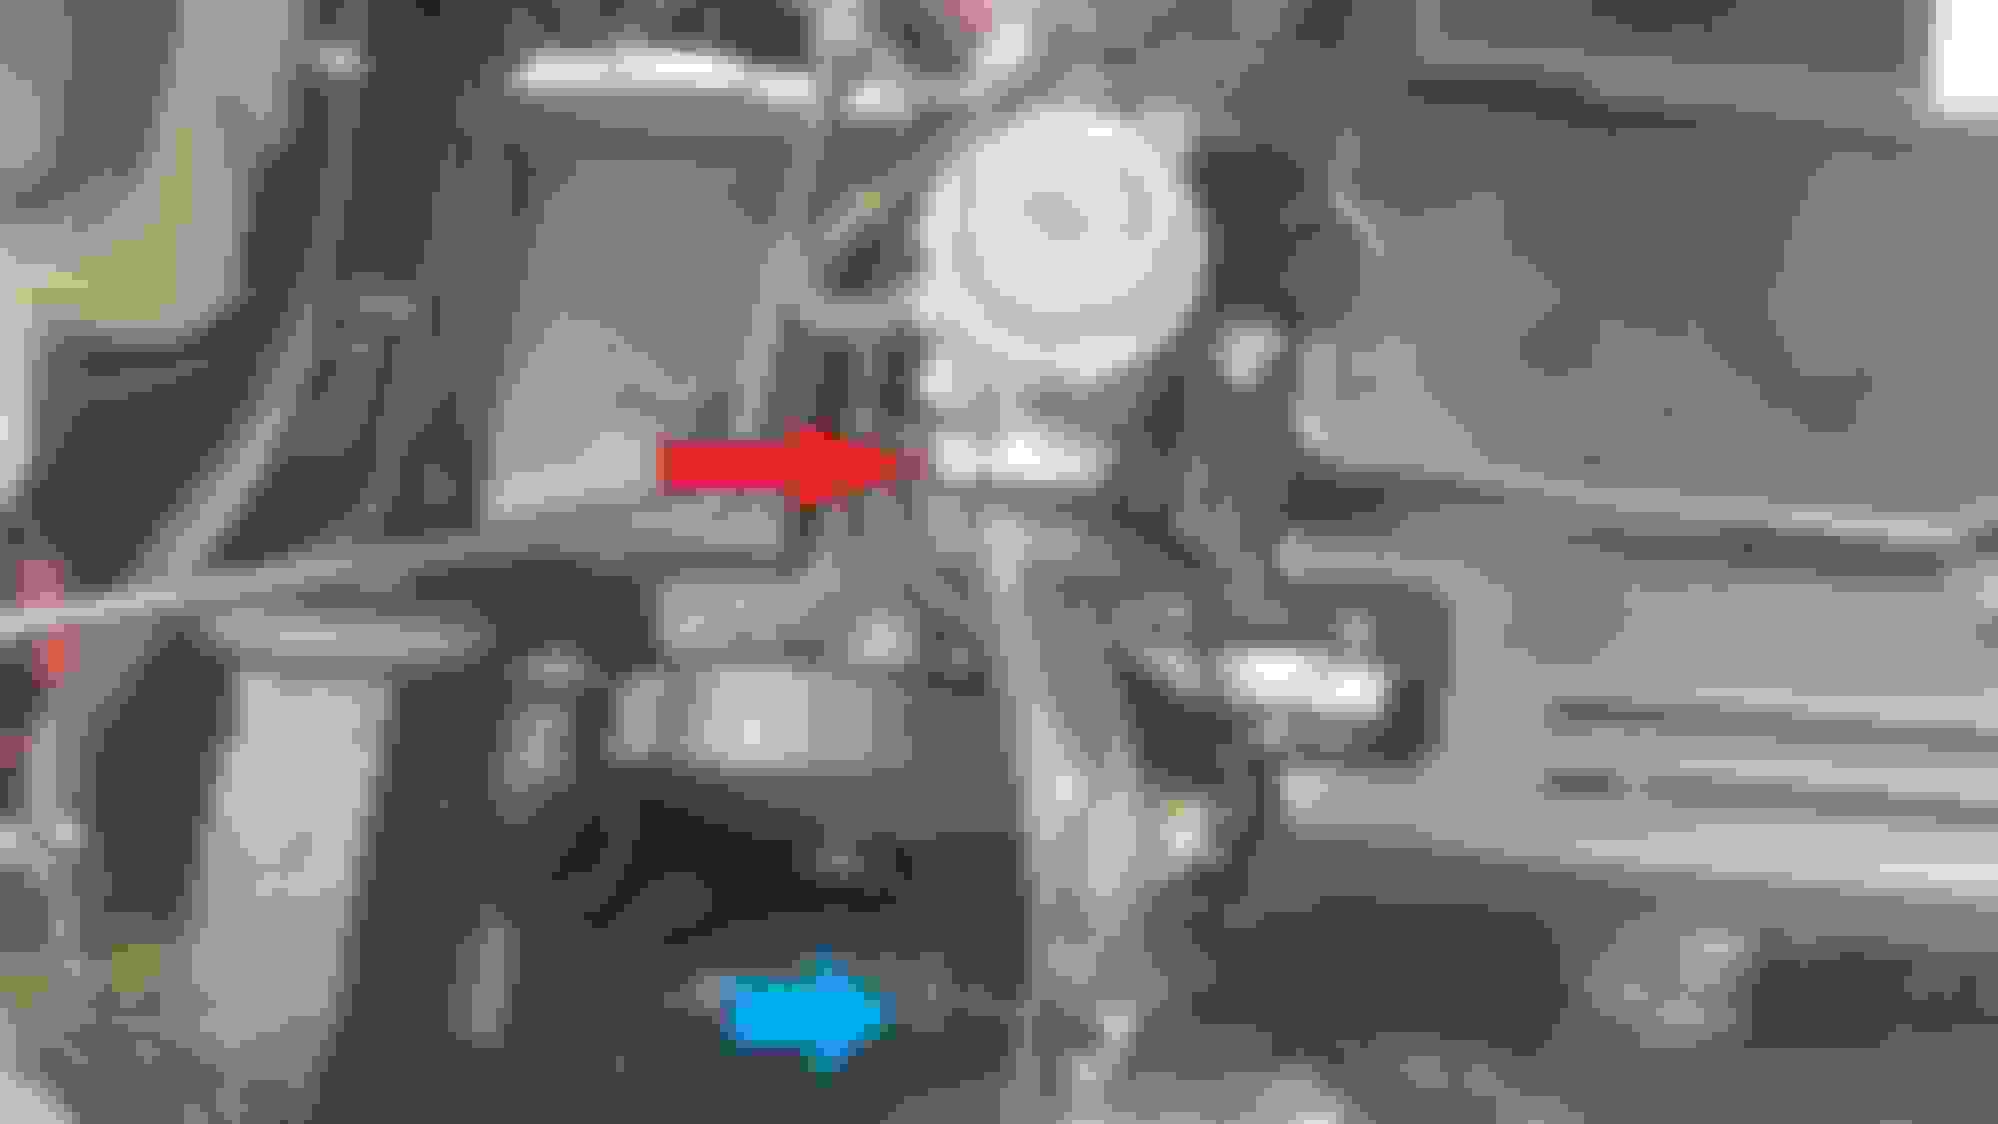
You now need to remove the wide band first in order to get access to the belt tensioner to remove the belt.
Red: Unscrew hose clamp
Blue: Unclip intercooler hose from wideband
Red: Unscrew hose clamp from wideband to supercharger
Red: Unscrew both bolts holding in the wideband however you will need to get under the car to access the bottom one (lucky you jacked your car up)
Now remove the wideband (it can be a bit*h to take out of the engine bay )and you should have access to the belt tensioner.
Step 5
Remove belt but you will need Torx bit (Can't remember the size off the top of my head) on a breaker bar and insert it in the belt tensioner and make sure you go Underneath the belt not ontop!. now turn anti clockwise and the belt should loosen and be easy to remove
Step 6.
Now you need to remove the intake manifold, There are 7 bolts in order to remove the intake manifold and the can be annoying! so make sure you have a magnet on a wire ready to catch the bolts. A good tip when putting it back to together would be to hold the bolt in place with a magnet while you try to put through the socket in between the gaps.
Step 7.
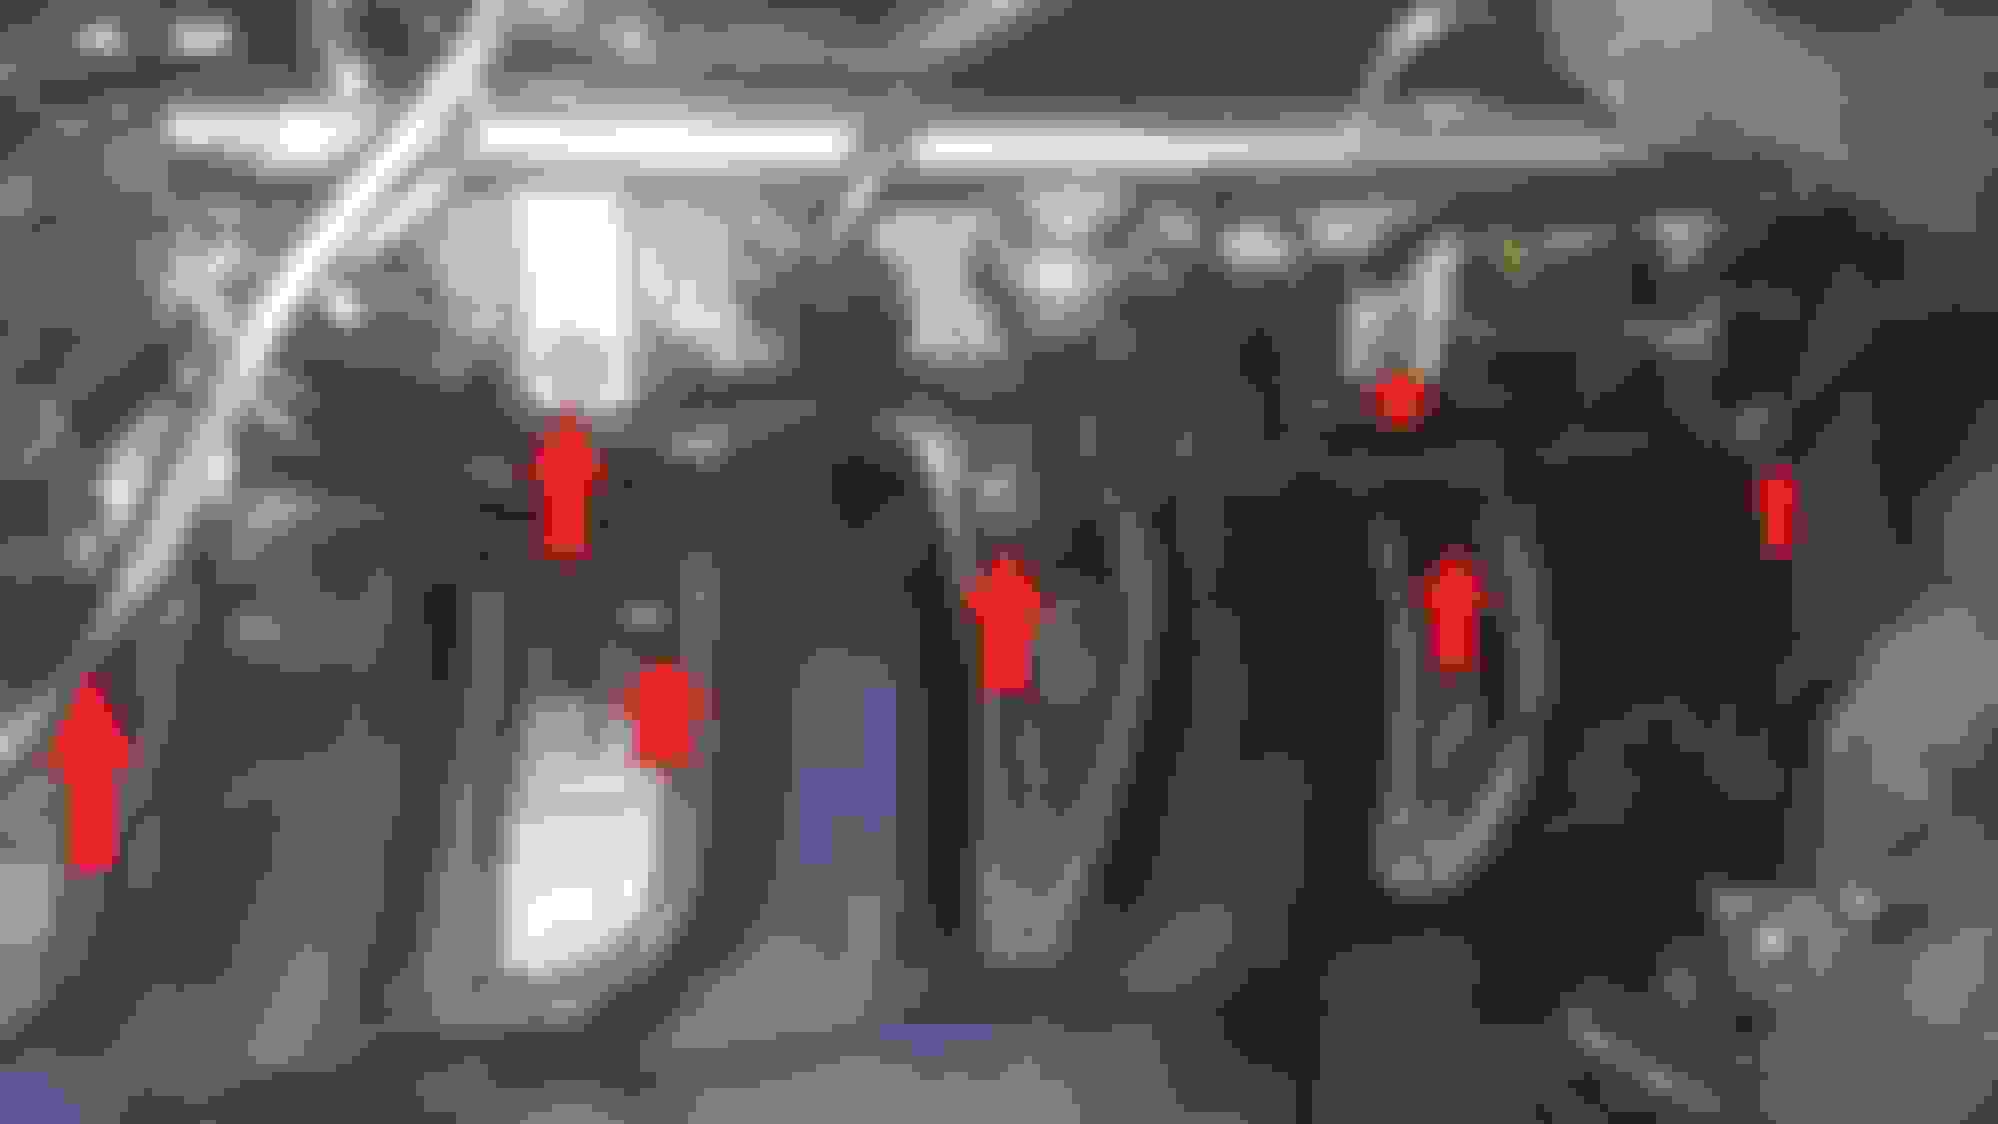
Now you are close to removing the intake manifold but be sure you disconnect everything from the throttle bottle first, don't want to tear any hoses or break any connectors
Blue: Unclip connector
Yellow: Unbolt these 2 bolts
Red: Remove all hoses from intake manifold
Green: unscrew and Remove intake pipe
Step 8.
Remove intake manifold and now you are up to the supercharger
Tip* when removing I suggest to tilt up the right side of the manifold (side closest to the wheel of the car) so you can move under neath the fuel rail and lift out.
Step 9.
Now you need to get underneath the car so lucky you already jacked up the car. From underneath you need to bolt a few bolts.
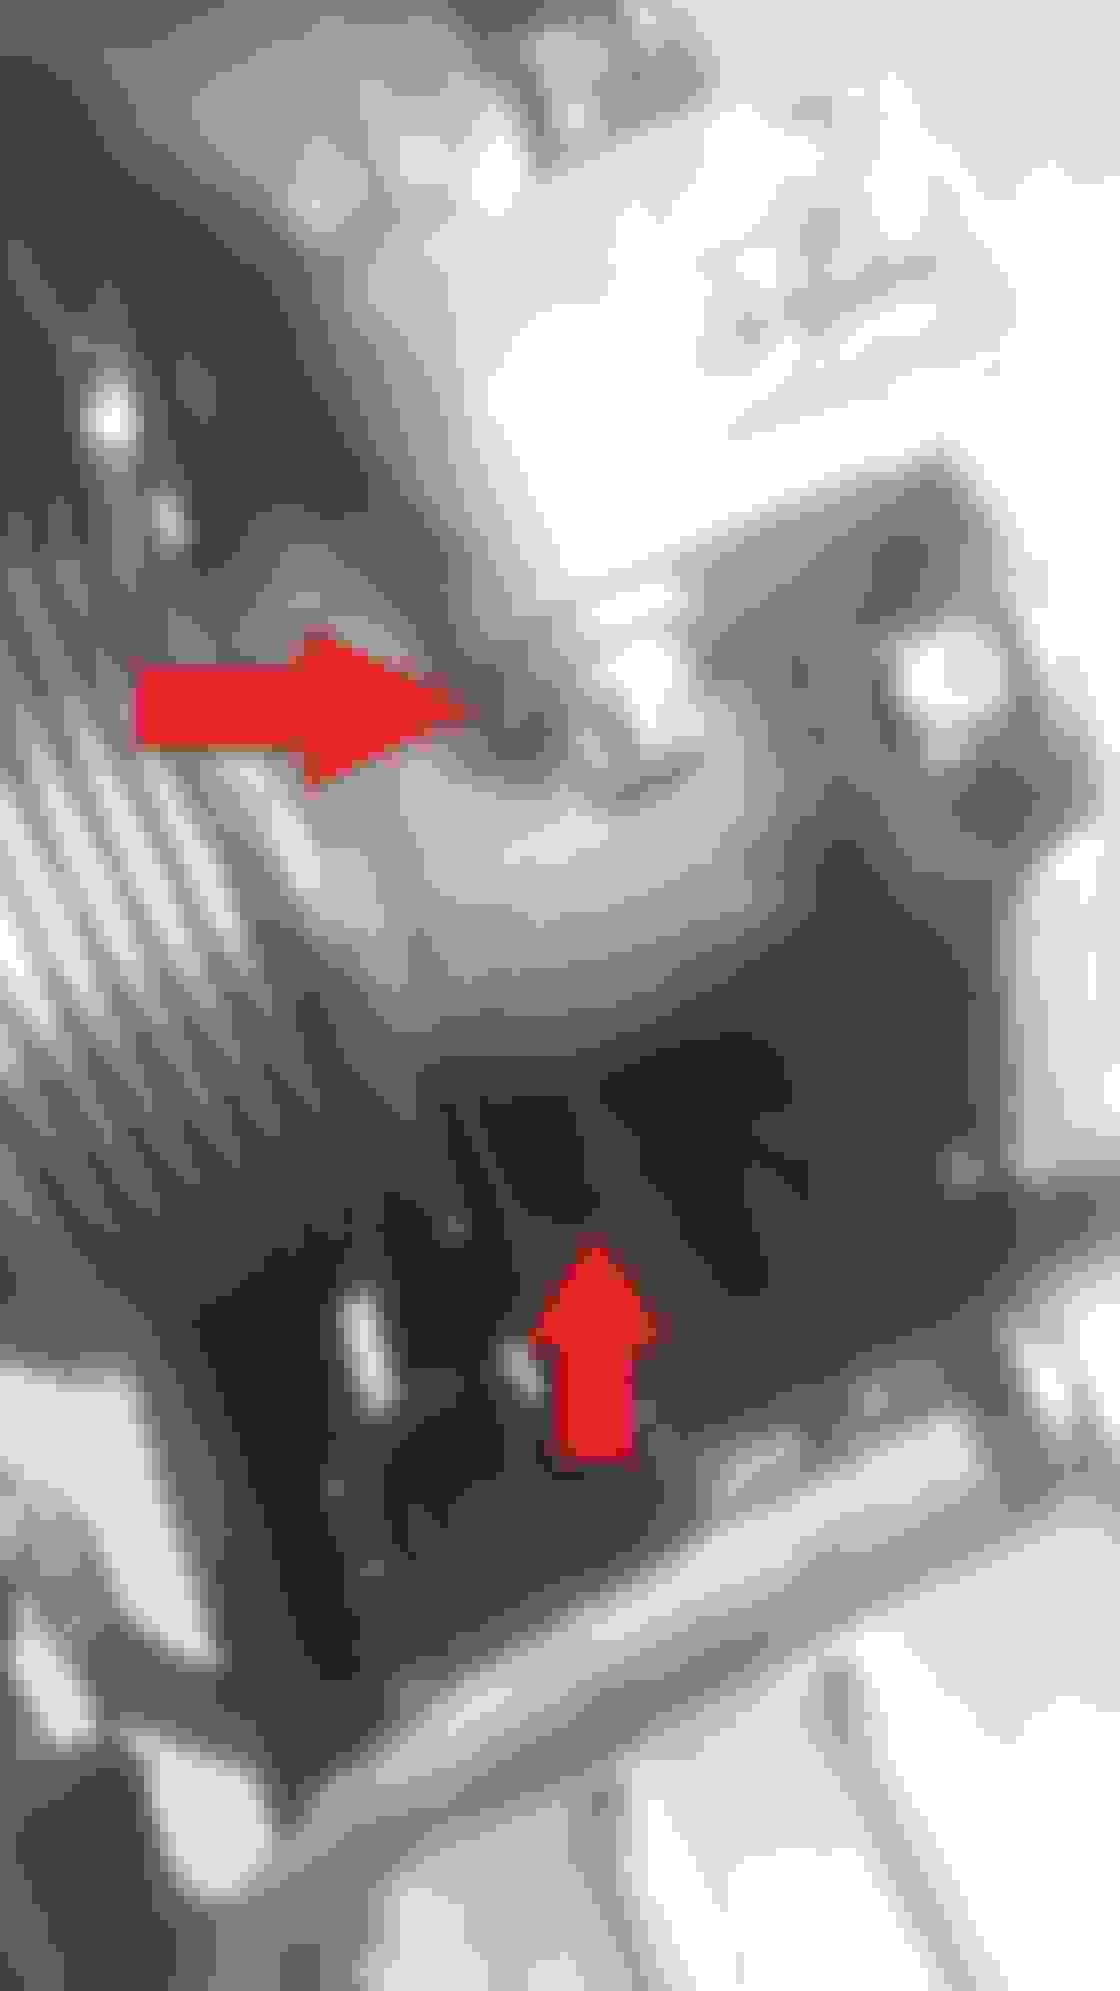
Red: Unbolt Super charger bolt
Yellow: Unbolt intake bolt (its easier to unbolt both of the bolts on the intake but its your choice. the second bolt is further up)
Also there is a connector that is connected on the supercharger itself, it is above the red arrow and make sure you unclip it
Step 10.
Now you got get back up on your feet and look at your engine bay
Red: Unbolt top and bottom bolts on the supercharger (the bottom bolt is hard to get as it is longer than the top one, I suggest unscrewing until it is loose enough to do it by hand then use your hand the rest of the way otherwise your ratchet will get stuck. I hope you have small hands otherwise its gonna be a cramp after cramp)
Step 11.
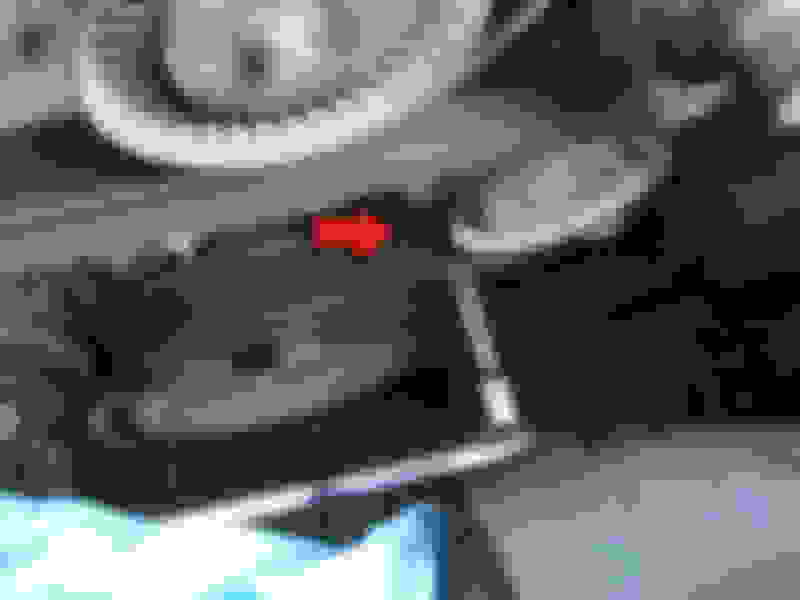
Now remove the Supercharger which does require some elbow grease to get out. Now you should be able to see the bolt that is connected to the belt tensor that is near the "$12 hose" while you are there check if your engine mount , oil pump gasket, oil filter gasket, $12 hose and your A/C compressor are all fine
Red: Now you just need to remove the bolt
Step 12.
remove the belt tensioner and clean the housing
Belt tensioner only goes in one way so replace the old with the new.
Add Loctitie 243 on bolt before install but only a little bit
Step 13.
Now reinstall everything, opposite order of removal however, insure you add loctite on supercharger bolts and air intake manifold bolts
Also you should put on a new belt as well, most likely it has been flexed or warped due to a bad belt tensioner
I have included some Attachments below that will help.
Last edited by B3Hulk; Feb 25, 2021 at 05:17 PM.
Reason: Change title of thread
Awesome write up, while there I would also replace that 12$ hose and check valve , engine mount if you have the funds, I just did my eng mounts , wow what a difference it makes, like new car.... all little creaks and vibrations are gone ( one of my eng mounts was totally collapsed). Cheers
Excellent!
What was the hardest part? Any gotchas? How long did it all take?
Hardest part was probably the reassemble as the intake manifold is an a**hole to put back in other then that would be just the hose clamps moving around while trying to tighten them.
It does take a while especially if it is your first time, Lucky for me I've been down there before and had all the tools. It took me 2-3 hours but I was cleaning the engine bay as well
Awesome write up, while there I would also replace that 12$ hose and check valve , engine mount if you have the funds, I just did my eng mounts , wow what a difference it makes, like new car.... all little creaks and vibrations are gone ( one of my eng mounts was totally collapsed). Cheers
Yea I was thinking maybe it was time I replaced my engine mounts as well maybe next time , but the car does sound a lot better then before, no more belt squealing
I was thinking of replacing the tensioner as well because my engine has run 170000km but it is so much work and the rollers of the tensioner feels ok. Did you replace the tensioner because it was worn out? or..
Comment on this very nice explanation using good pictures.
I have used your very nice explanation with good pictures. But I have one comment regarding your TIP. at step 8. I did not remove the fuel rail as you suggested. And to"tilt up the right side of the manifold". When doing this I heard a soft TICK en than I could move under neath the fuel rail and lift out. But this TICK was a nock in the middle op the intake manufold that was broken off. see picture. I used super glue to fix it. So I suggest to take off the fuel tail to be sure not to break anything. Hope this extra info will help the next home mechanic.
2019 C300 Wagon; '75 Triumph TR6; previous: 2004 C230 6spd sold after 17 years of driving
MB-271 How did you make out after all, is everything running fine and no engine codes? I think my tensioner is done and looks like quite the job just to get at one bolt. How long did it take you? While I am very mechanically inclined this task looks quite daunting
Question though ... is that bolt below the supercharger or next to it?
I am planning to replace my AC compressor sooner than the supercharger, and I'm wondering if the bolt will be accessible from underneath once the AC compressor is removed. It's hard to tell from the angle of your photos.
The engine is running fine. It started with no fault codes and I have had no fault codes until now.
Yes it is very much work, if you do this for the first time, because you don't want to damage any parts. I had my car in my garage for one week and had to go to the tool shop several times for torx tools. I have replaced the belt tensioner, the two engine mounts and the starter motor. I would suggest to take off the fuel rail before removing the intake manifold.(I also replaced all o-rings 2x4 of the injectors) Good luck.
Thank you & quick question I've been having a yearly issue with my check engine light P0420 & I have replaced almost everything including cat conv...
Any ideas in what it can be
Thanks,RB
Thanks for the great writeup! It looks like this was written for a right hand drive car. I've got a left hand drive US car and it's really tough to access the bottom supercharger/intake elbow bolts because the steering column is in the way. (I kept asking myself why the pictures seem to make it so much easier until I figured that out!) I'm having difficulty aligning the intake hole especially with the bolt to the supercharger to put it back together. Has anyone done this with a LHD car? Was it necessary to remove the steering column? Did you take that rectangular intake elbow out (that was listed as optional in the writeup)?
Also, to add to the discussion above- I was also able to carefully remove the intake manifold without removing the fuel rail and it didn't seem to damage anything. We'll see if it will go back together.
Just to follow up on my own post- I did remove the steering column and it made everything much easier. From my experience with the left hand drive setup, it is best to remove the intake elbow (called the Intake Muffler in Mercedes parlance) completely. When re-installing, install the supercharger and all 3 of its bolts first and then you can slip the intake muffler into place from above. With the steering column undone and leaned out of the way, both of the intake muffler bolts can then be reinstalled relatively easily.
Yes, very helpful- thanks B3Hulk! I have it all back together now and so far it has been running fine. One thing I would add would be to leave the aforementioned intake muffler loose until you connect the MAF hose to it from above and get it clamped. It's nice to have a little extra play in it to get the hoses to line up given that you can't actually reach them when doing it. That was quite frustrating to attempt to get them attached together before I realized it would be easier with the intake muffler unit loosened back up again!
It remains to be seen whether it was worth putting all this effort into an older C-class, but we need to #savethemanuals right?!
What are the signs of a bad tensioner? Mine still looks fine and works fine at this point? (mileage at 234k km)
When my belt started squeaking during hot days (AC on, car in gear but not rolling), the problem was actually traced to a seized alternator pulley. Squeak went away as soon as the pulley was replaced.
I replaced mine due to a loud intermittent squeak. It seemed related to when I would engage or disengage the clutch so I originally suspected the clutch. However, posts on this forum led me to suspect the tensioner. I also had a minor grinding sound from the alternator bearings, so I pulled the alternator had those bearings replaced at the same time as I did the tensioner. I put a new idler pulley and belt on it for good measure. Once I put it all back together, no more squeaks!
Hi thanks for the DIY, well explained, i get stuck at step 9, i can reach the bottom supercharger screws but my arm is so contoured that i have no strength to unscrew it, i already order long wrench and all kinds of tool to try with different approach to remove it.
That's the hardest part for me, between the ac compressor, steering column and engine mount there's so few space to work but i will try again next week and maybe this time i will be able to do it.
Akluin - Are you working from above or below? For my left-hand-drive car, I needed to disconnect the steering column then I was able to remove those hard to reach bolts from below.
Akluin - Are you working from above or below? For my left-hand-drive car, I needed to disconnect the steering column then I was able to remove those hard to reach bolts from below.
From below, i don't know how to remove the steering column, I'm going to try with long wrench to maybe be able to remove them this weekend, but i will begin with these screws, so if I can't do it i won't have to reinstall everything this time
From below, i don't know how to remove the steering column, I'm going to try with long wrench to maybe be able to remove them this weekend, but i will begin with these screws, so if I can't do it i won't have to reinstall everything this time
In my experience, you do not need to remove the steering column, you just need to disconnect the upper from the lower part, then you can pivot the two halves away from each other to get access to the supercharger and intake muffler bolts. In my recollection from a few years ago, the upper and lower parts of the steering column are held together with a piece resembling a band clamp with a single bolt holding the shafts together and the clamp in place. That joint in the steering column is very near the bottom supercharger bolts and the intake muffler and should be readily visible while you're working there (and probably are in your way!).
Unfortunately, I don't have a picture of the joint and the steering column is not present in B3Hulk's pictures as he had a right hand drive car.
Thanks, i will try it too this weekend, i really want to change the belt tensioner, the engine mount and check the hose and valve below supercharger, my car is 20 years old and it's time to check them all
Personally I find the tensioner doesn't really go bad. If you think about it, it's just a torsion spring. I found nothing wrong with mine when I had the supercharger out. Still rolling on the original one. The pulley itself can be replaced separately, but personally I found mine was fine too.
Mercedes SLR McLaren 722 S Is Extremely Rare Example Modified by McLaren
Slideshow: A one-of-one U.S.-spec Mercedes-Benz SLR McLaren Roadster became even rarer after a factory-backed transformation at McLaren's headquarters.


 The pulley itself can be replaced separately, but personally I found mine was fine too.


