
C63 Diffuser w/OEM C350 Tip (Quad) Install & *Pics

MBWorld Fanatic!


Joined: Mar 2012
Posts: 1,395
Likes: 26
From: Alberta
This and that.
How about other things say such as if i change the license plate lights to LED's. Could that void it? How about the side marker lights in the front? I wanna get rid of that yellow marker and install a white one.


Super Member


Joined: Sep 2009
Posts: 710
Likes: 15
C63
i actually have some brand new brackets i bought for my c63 that i had bought to use with my new diffuser, but it turns out i didn't need them after all. the total came out to $77.79 shipped from parts.com which is OEM products. i was going to ship them back, but wouldn't mind helping out a fellow forum member. if you're interested in $55, then PM me (because I probably won't check this thread again) and I can send you pictures and whatnot. they're still wrapped in the original protective sleeves with the Mercedes parts number sticker on them.

Junior Member
Joined: Jul 2013
Posts: 48
Likes: 0
2013 C300
syrAMG, KuiDaCroat22, aowhaus, PolePosition & Stryder04 ..... Thanks!
The Diffuser is a 'No-Fuss Bolt-In' process with no alignment issues.
Here was the price breakdown;
Tips were $84 each x2= $168 .........(204 490 63 27 & 204 490 64 27)
Brackets $24....each x2= $48 .........(A204 885 23 14 & A204 885 24 14)
Diffuser ......................$264 .........(A204 885 45 25)
Rivets......................... Free! ........(had some lying around)
Exhaust custom welding $275
........Grand total: $755
Using all factory parts..... Priceless!
Thank you,
John

Senior Member
Joined: Aug 2010
Posts: 277
Likes: 0
From: So Cal
W204
You can just weld it and not have the extra tips functional, but most members on the board just buy the quad tips off ebay or have their local shops fabricate a Y pipe like how VaderSS did it
MBWorld Fanatic!

Joined: Aug 2007
Posts: 1,543
Likes: 86
From: San Jose, CA
2010 c300
Thanks I think ill weld it then. I was mainly concerned with losing power so I figured I shouldn't mess with stock. Car is already slow as it is.
 [/URL]

Member
Joined: Feb 2013
Posts: 86
Likes: 4
From: Toronto, Ontario
2013 C63 w/PP, 2014 ML63 AMG w/PP
Hey guys I just got a 2012 c350 and have a question. Do I need c63 brackets as well? I got a new diffuser and it didn't come with brackets. If I do, will the part numbers already listed work for my model year? If not can anyone help me with the correct part numbers for the 2012 model year? 
MBWorld Fanatic!
Joined: Aug 2007
Posts: 1,543
Likes: 86
From: San Jose, CA
2010 c300
https://mbworld.org/forums/c-class-w...w204-pics.html
What I wonder is if the existing one can be reused. I assume no since every DIY I see always mentions buying the bracket. Mines a 2010 so brackets might be different from 2012.
Last edited by aznmode; Feb 26, 2014 at 07:53 PM.
MBWorld Fanatic!
Joined: Aug 2007
Posts: 1,543
Likes: 86
From: San Jose, CA
2010 c300
Ended up buying my brackets for my 2010 from here. $31.60 each. Looks like they're from Monterey, CA so I should get them by next week. But it sucks that I can only ship to the billing address.
http://www.benzpartswholesale.com/
http://www.benzpartswholesale.com/
MBWorld Fanatic!
Joined: Aug 2007
Posts: 1,543
Likes: 86
From: San Jose, CA
2010 c300
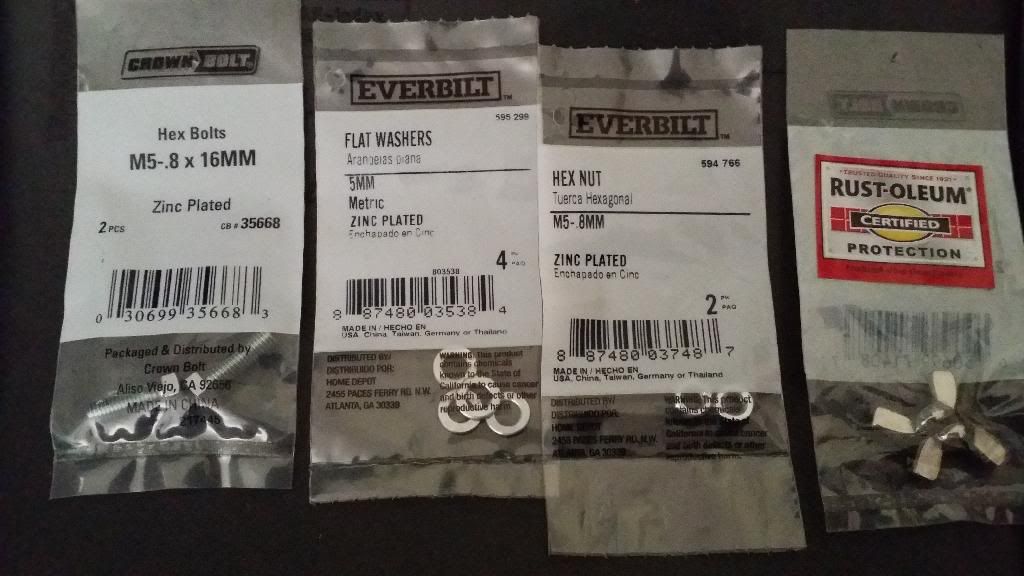
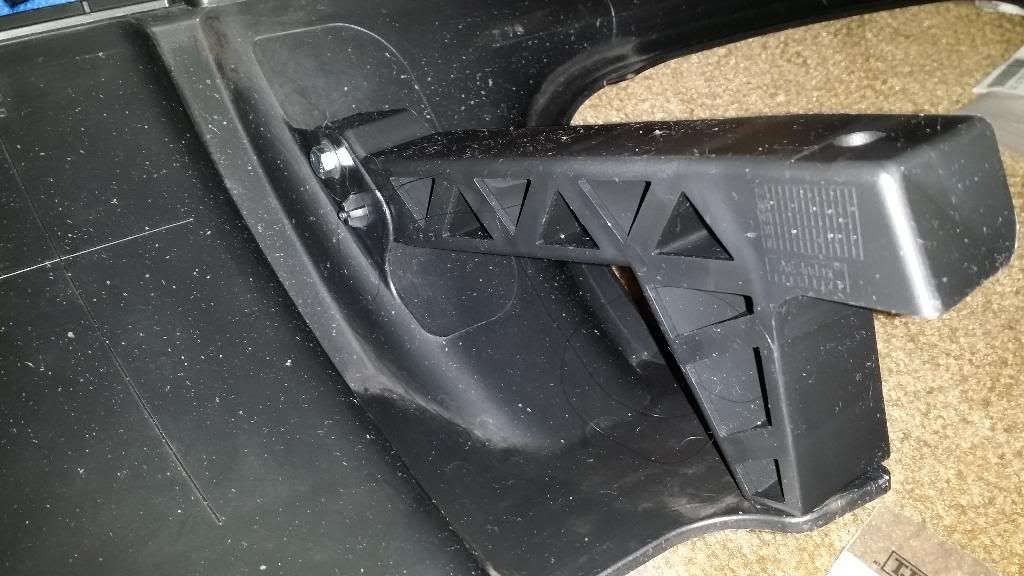
Just a slight update on mine. For anyone still wondering on pre facelift, the brackets are recommended and you cannot reuse the old one since it is stuck on there's and no way for you to reattach it to the c63 diffuser. If you don't install the brackets the diffuser is wobbly. But here is how I installed the brackets into the diffuser that costs me about $6. I didn't have a riveting tool and I think this just works just as well. See below image for parts and sizes. I went with M5 metric since it was just slightly bigger size as the hole but just big enough so it can still thread through making it more secure IMO. You cant screw it in (thats what she said) by hand so you will need a socket wrench.
4 bolts, 8 washers, 2 wing nut, 2 nuts. Bought at Home Depot.
Here I threaded the bolt all the way through first with washer in place, but stopped as soon as it felt tight. I didn't want to keep tightening it so it wouldn't strip the hole.
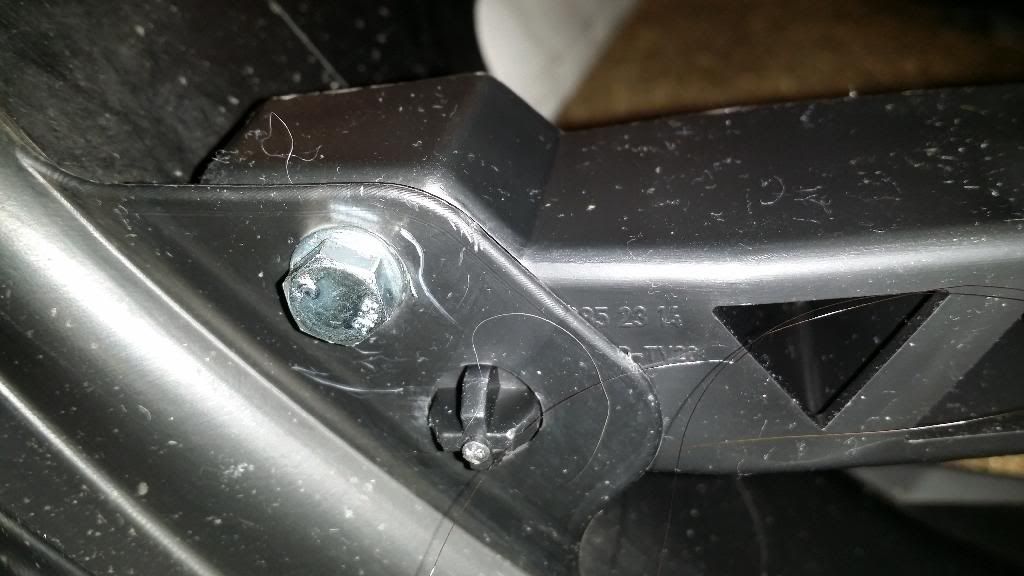
On this side I put a washer also and used a socket wrench to screw in the nut while using another socket wrench to keep the other side still to prevent it from spinning and stripping the hole when I tighten this side.

I used wing nut here since there was no way I can get a socket wrench in. But here I first screwed in the bolt just enough so the wing nut can meet with the bolt and held the wing nut in place with a long nose pliers as I tightened the bolt all the way. Washers on both sides as well.
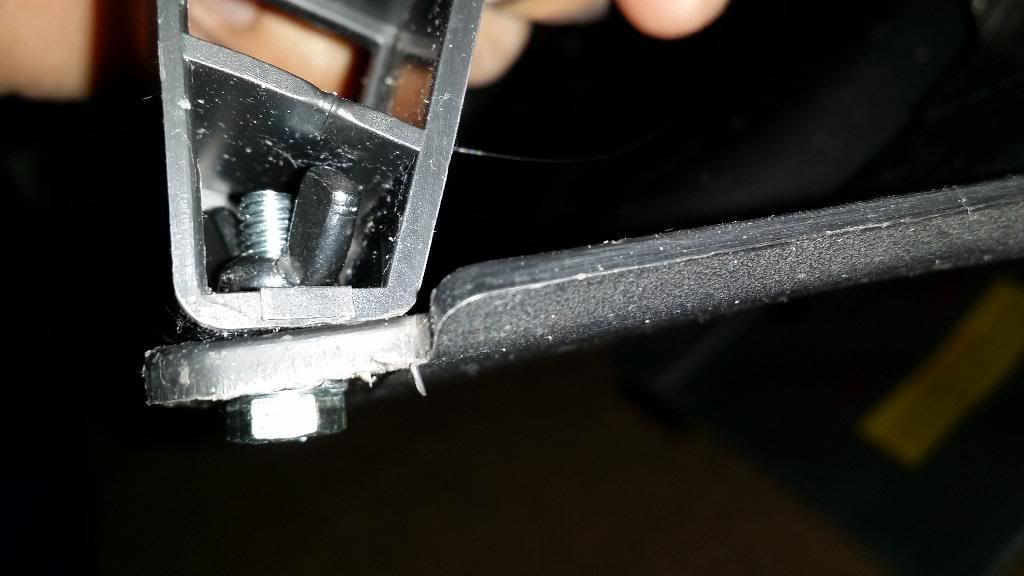
End result. Since the bolt is threaded into the bracket and also secured with nuts and wingnuts this should make it secure and will not allow the bolt to loosen over time. Hopefully anyways.
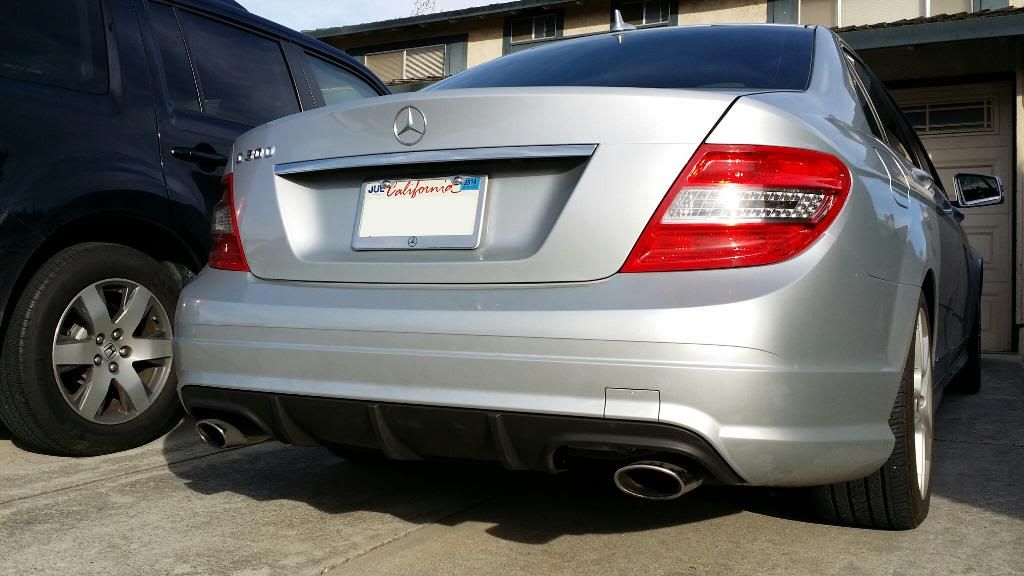
The removal and installation of the diffusers was fairly easy and there's already a thread on that so I didn't bother taking pictures as I did it exactly the same. But I did find that working your way from one side and go clip by clip was the best way and not just pull the whole diffuser out. Same goes for putting the diffuser back in. And I did I have to put my hand behind the bumper next to each clip so I can push the clips in place better...one at a time.
Now I just need to get my tips done but in the mean time I have to drive it this way.

Last edited by aznmode; Mar 8, 2014 at 08:35 PM.

Newbie
Joined: Jan 2009
Posts: 4
Likes: 0
C 350 4matic 2012
Installed the Carbon Fiber Diffuser
Hello,
Yesterday I installed the Carbon Fiber Diffuser on my C 350 2012.
Actually for the carbon fiber one you don't need to buy Brackets.
You can use the original Brackets.
Removed the Old Diffuser:


Installing Original Brackets:

After Installing:

Thanks,
Minazih
Yesterday I installed the Carbon Fiber Diffuser on my C 350 2012.
Actually for the carbon fiber one you don't need to buy Brackets.
You can use the original Brackets.
Removed the Old Diffuser:
Installing Original Brackets:
After Installing:
Thanks,
Minazih
Senior Member
Joined: Mar 2014
Posts: 402
Likes: 6
C350
Newbie
Joined: Jan 2009
Posts: 4
Likes: 0
C 350 4matic 2012
http://www.ebay.ca/itm/C63AMG-Style-...vxp=mtr&_uhb=1
Thanks,
Minazih
Senior Member
Joined: Mar 2014
Posts: 402
Likes: 6
C350
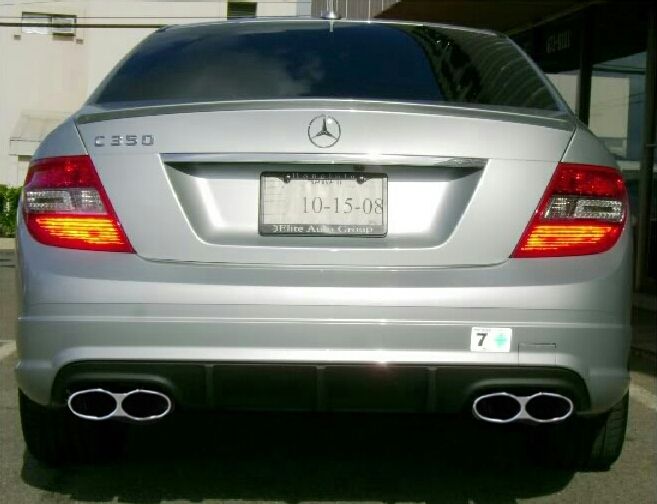
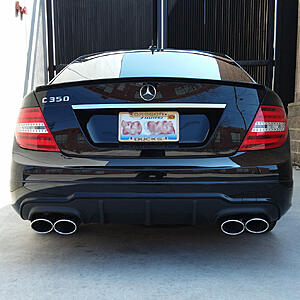
Just finished this up on my 2012 c350.
The AMG brackets and the originals *have* to be the same. Don't waste money on them if you have a facelift model. Its a pita to get the diffuser started coming off, easiest to pry from the inside near one of the exhaust pipes I found. The ebay h style tips are a little on the long side, but they can be but no problem. If you want them to stick out like an inch, no problem. Welding them in was about $100. You can get the same tips on aliexpress for just over $200 instead of the $285 or so on ebay. I'm using the OEM C63 diffuser.
Rear shot.
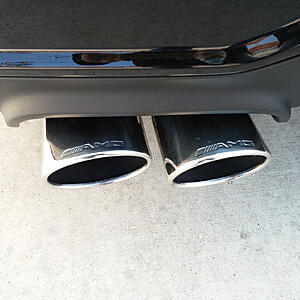
Tips. You can have them mounted in further if you like.


