When you click on links to various merchants on this site and make a purchase, this can result in this site earning a commission. Affiliate programs and affiliations include, but are not limited to, the eBay Partner Network.
I've been using my old trusty Compustar FT-MB204-DC module and DR-3100 (verizon cdma) drone mobile unit for a few years now. The FT-MB204-DC lets me remote start my 2011 C300 using the factory Key (press red [panic] button once) or using the drone mobile application on my phone (android or iphone). The drone mobile service requires a monthly or yearly plan. There are 2 consumer plans, one basic and one premium (includes all basic features, plus more alerts, extra status info, gps tracking, speed tracking, geo fencing and pois).
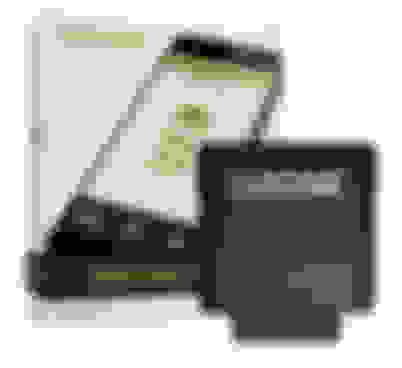
Compustar FT-MB204-DC and Drone mobile DR-3100
I've just recently discovered the new iDataStart ADS-BZ3 module. This module is more advanced and is programmable via a USB interface and weblink updater plugin. ADS-BZ3 also works with drone mobile units and a wide variety of aftermarket remote kits. THE BEST PART is it now includes one Antenna (AN2300A), one iDataStart (TR2310A) 2 way remote and one (TR1110A) 1 way remote in the box.
ADS-BZ3 box
Remote Kit, Module and Expansion Pack
T Harness, H Harness, Hood switch, Cables, Wires, Connectors and Stickers. Extra Shroud.
(NOTE. I am told that this is the new remote kit and the old remote kit has Slice JR type remotes in the box)
FEATURES (after install)
Remote Start/Stop from OEM Key ( Press lock 3 times )
Remote Start/Stop from Phone app using drone mobile.
Remote Start/Stop using iDataStart remotes ( 3000ft range. one with 2-way remote with feedback. blinks and chimes.)
Easy Valet Mode. (Turn key 5x to ON position to turn ON/OFF)
Trunk Open
Doors Lock/Unlock
ADDED BONUS. Heated Seat and Cooling Control!! (Finally! automatically turn ON after remote starting)
There are 3 types of programming/firmware update cables available $44 ADS-USB (PC) , $89 ADS-WLM-AP1 (iPhone + App) and $89 ADS-WLM-AN1 (Android + App)
ADS-BZ3 install methods:
These are install combinations that are listed on the website. Only 5 options were visible (in the weblink software) after connecting my ADS-BZ3 module to USB. I used the bold option, because the red option was not available. (it works fine)
Compustar RF Kit AND Drone
Audiovox RF Kit AND Carlink (POSSE)
Omega RF kit AND LINKR
DEI RF Kit AND SmartStart
CrimeStopper RF Kit
AKX RF Kit AND SmartStart
iDatastart RF kit AND SmartStart iDatastart RF kit AND Drone
iDatastart RF kit AND MyStart
iDatastart RF kit AND MyCar
iDatastart RF kit AND Autolink
Audiovox RF Kit AND Carlink (iData)
CONNECTED RF Kit AND MyStart
CONNECTED RF Kit AND SmartStart
CONNECTED RF Kit AND MyCar
Orbit RF Kit AND eOrbit
Orbit RF Kit AND SmartStart
(RS-BZ3 is the firmware, currently V4.4 Dec 13th 2017. The expansion pack also has firmware. v3.9 I think)
The install process of the ADS-BZ3 is similar to the Compustar FT-MB204-DC module. Unplug the 10 pin plug at the back of your EIS and plug it into the new T harness, then plug the T harness back into the EIS. This is the most difficult part of the STD (Key) install. You no longer need to swap the OEM cable shroud, like with the FT-MB204-DC module.
If you have PTS (push to start) there is an additional cable to your CAN connector. Some cars also require you to use the included H harness for TYPE 3 and TYPE 4 vehicles. (all parts are included in the box)
(NOTE. You will probably need an EIS removal tool (not included), to remove and access the second EIS cable plug. If the H harness is required)
Check the online install guides for the correct install type for your vehicle.
There are different ADS-BZ3 install guides on the site, mostly showing the different optional accessories you may use (aftermarket remotes, drone, factory key only, etc)
The actual installation instructions look to be the same in every guide. (input your year, model, trim and install method to see your guide)
This is a diagram of the Type 1 install instructions for my 2011 C300 Automatic with STD key. (I skipped the step 4 hood switch)
How remove the EIS cable (Mercedes Benz 2008-2011 C Class, 2010-2011 GLK, and 2010-2011 E Class Coupe)
Flashlight or an adjustable led headlamp (type for camping or hiking) Don't kill your battery.
Instructions
Remove (3) T-20 screws from the driver�s under dash and lower the panel. (For C300 : detach the hood switch (remove screw and turn sideways, thru hole), OBD plug (slide lock back, pull up) and one light bulb (twist gently) )
Tilt the steering column down as far as it will go and extend it out from the dash until it stops.
OPTIONAL. Using the EIS removal tool or two screwdrivers, remove the trim ring for the EIS. It unscrews counterclockwise. (GLK Only)
Using a panel removal tool, release the upper right edge of the instrument cluster bezel.
Release the upper left edge of the instrument cluster bezel.
Pull out on the bottom edge of the cluster bezel and remove. Note, the stalk in the lower left corner of the bezel will not come out with the bezel. Be careful not to damage it when the bezel is removed.
Pull the two upper edges of the steering column boot toward each other to release the clips and pull it outward.
Work your way around the plastic trim on the boot and release all the clips.
Pull the boot away from the dash as far as possible. At this point you should be able to see the rear of the EIS (ignition cylinder)
Reach in and remove the single white plug in the rear of the EIS. The release clip is on the top. (use the hook / pick tool set to make this part easier)
Pull the plug and corresponding harness out as far as possible to ease connecting the new harness.
ADS-BZ3 Module
Expansion Pack (attached)
Always plug in the Black 20 Pin connector first and remove last.
An additional 5 button 2-way remote can be purchased from Lockdown Security (very nice people) for $65 USD
TR2350AC Remote
Android Weblink Software
Device Information (Main Module)
Device Information (Expansion Pack)
Flash By Vehicle
Adjust your options.
Last edited by benzdude; Jan 14, 2018 at 02:07 PM.
nah, had so many problems they didn�t tell me so I guess I�m still in the market
What was wrong with it? Not surprising, I guess. When trying to buy a car like that on a budget generally they either have high miles or some other story, like an accident or needing some kind of expensive maintenance or they are twenty-footers, where they look great from 20 feet, but when you get closer you see a loot of issues. Doing the homework ahead of time is the key and I would never buy one over the internet and have it shipped without inspecting it in person first.
Thanks for posting the pics! I'm probably not gonna need the Drone capability, but definitely like that it comes with the upgraded RF antenna and transmitters. That should cover my needs well. Let's see if the procedure is appreciably different for the Facelift models. I know the dash removal is different, but hopefully all harnesses are the same. I also have to run the harness for the Keyless Go module, but that looks pretty easy.
I've been using my old trusty Compustar FT-MB204-DC module and DR-3100 (verizon cdma) drone mobile unit for a few years now. The FT-MB204-DC lets me remote start my 2011 C300 using the factory Key (press red [panic] button once) or using the drone mobile application on my phone (android or iphone). The drone mobile service requires a monthly or yearly plan. There are 2 consumer plans, one basic and one premium (includes all basic features, plus more alerts, extra status info, gps tracking, speed tracking, geo fencing and pois).
Compustar FT-MB204-DC and Drone mobile DR-3100
I've just recently discovered the new iDataStart ADS-BZ3 module. This module is more advanced and is programmable via a USB interface and weblink updater plugin. ADS-BZ3 also works with drone mobile units and a wide variety of aftermarket remote kits. THE BEST PART is it now includes one Antenna (AN2300A), one iDataStart (TR2310A) 2 way remote and one (TR1110A) 1 way remote in the box.
ADS-BZ3 box
Remote Kit, Module and Expansion Pack
T Harness, H Harness, Hood switch, Cables, Wires, Connectors and Stickers. Extra Shroud.
(NOTE. I am told that this is the new remote kit and the old remote kit has Slice JR type remotes in the box)
FEATURES (after install)
Remote Start/Stop from OEM Key ( Press lock 3 times )
Remote Start/Stop from Phone app using drone mobile.
Remote Start/Stop using iDataStart remotes ( 3000ft range. one with 2-way remote with feedback. blinks and chimes.)
Easy Valet Mode. (Turn key 5x to ON position to turn ON/OFF)
Trunk Open
Doors Lock/Unlock
ADDED BONUS. Heated Seat and Cooling Control!! (Finally! automatically turn ON after remote starting)
There are 3 types of programming/firmware update cables available $44 ADS-USB (PC) , $89 ADS-WLM-AP1 (iPhone + App) and $89 ADS-WLM-AN1 (Android + App)
ADS-BZ3 install methods:
These are install combinations that are listed on the website. Only 5 options were visible (in the weblink software) after connecting my ADS-BZ3 module to USB. I used the bold option, because the red option was not available. (it works fine)
Compustar RF Kit AND Drone
Audiovox RF Kit AND Carlink (POSSE)
Omega RF kit AND LINKR
DEI RF Kit AND SmartStart
CrimeStopper RF Kit
AKX RF Kit AND SmartStart
iDatastart RF kit AND SmartStart iDatastart RF kit AND Drone
iDatastart RF kit AND MyStart
iDatastart RF kit AND MyCar
iDatastart RF kit AND Autolink
Audiovox RF Kit AND Carlink (iData)
CONNECTED RF Kit AND MyStart
CONNECTED RF Kit AND SmartStart
CONNECTED RF Kit AND MyCar
Orbit RF Kit AND eOrbit
Orbit RF Kit AND SmartStart
(RS-BZ3 is the firmware, currently V4.4 Dec 13th 2017. The expansion pack also has firmware. v3.9 I think)
The install process of the ADS-BZ3 is similar to the Compustar FT-MB204-DC module. Unplug the 10 pin plug at the back of your EIS and plug it into the new T harness, then plug the T harness back into the EIS. This is the most difficult part of the STD (Key) install. You no longer need to swap the OEM cable shroud, like with the FT-MB204-DC module.
If you have PTS (push to start) there is an additional cable to your CAN connector. Some cars also require you to use the included H harness for TYPE 3 and TYPE 4 vehicles. (all parts are included in the box)
(NOTE. You will probably need an EIS removal tool (not included), to remove and access the second EIS cable plug. If the H harness is required)
Check the online install guides for the correct install type for your vehicle.
There are different ADS-BZ3 install guides on the site, mostly showing the different optional accessories you may use (aftermarket remotes, drone, factory key only, etc)
The actual installation instructions look to be the same in every guide. (input your year, model, trim and install method to see your guide)
This is a diagram of the Type 1 install instructions for my 2011 C300 Automatic with STD key. (I skipped the step 4 hood switch)
How remove the EIS cable (Mercedes Benz 2008-2011 C Class, 2010-2011 GLK, and 2010-2011 E Class Coupe)
Flashlight or an adjustable led headlamp (type for camping or hiking) Don't kill your battery.
Instructions
Remove (3) T-20 screws from the driver�s under dash and lower the panel. (For C300 : detach the hood switch (remove screw and turn sideways, thru hole), OBD plug (slide lock back, pull up) and one light bulb (twist gently) )
Tilt the steering column down as far as it will go and extend it out from the dash until it stops.
OPTIONAL. Using the EIS removal tool or two screwdrivers, remove the trim ring for the EIS. It unscrews counterclockwise. (GLK Only)
Using a panel removal tool, release the upper right edge of the instrument cluster bezel.
Release the upper left edge of the instrument cluster bezel.
Pull out on the bottom edge of the cluster bezel and remove. Note, the stalk in the lower left corner of the bezel will not come out with the bezel. Be careful not to damage it when the bezel is removed.
Pull the two upper edges of the steering column boot toward each other to release the clips and pull it outward.
Work your way around the plastic trim on the boot and release all the clips.
Pull the boot away from the dash as far as possible. At this point you should be able to see the rear of the EIS (ignition cylinder)
Reach in and remove the single white plug in the rear of the EIS. The release clip is on the top. (use the hook / pick tool set to make this part easier)
Pull the plug and corresponding harness out as far as possible to ease connecting the new harness.
ADS-BZ3 Module
Expansion Pack (attached)
Always plug in the Black 20 Pin connector first and remove last.
An additional 5 button 2-way remote can be purchased from Lockdown Security (very nice people) for $65 USD
TR2350AC Remote
Android Weblink Software
Device Information (Main Module)
Device Information (Expansion Pack)
Flash By Vehicle
Adjust your options.
i'm looking to install in my 2010 w212. can you tell me what tools you needed? what is that blue pick tool you used called and where did you get it? TIA
i'm looking to install in my 2010 w212. can you tell me what tools you needed? what is that blue pick tool you used called and where did you get it? TIA
Those pictures are not actually me. The blue tool is just a generic trim tool. you can find them on Amazon.
I�m trying to do this on my 2013 c300 and every time I go to program it with my oem key the light flashes green then red saying my car is a pts which it isn�t. Any idea?
I�m trying to do this on my 2013 c300 and every time I go to program it with my oem key the light flashes green then red saying my car is a pts which it isn�t. Any idea?
Who programmed the module for you? I suspect they may have selected the wrong year, model or trim. (There are six options for trim).
Also, C-CLass and C-Class AMG are different selections under model.
Last edited by benzdude; Nov 18, 2018 at 08:08 PM.
I�m trying to do this on my 2013 c300 and every time I go to program it with my oem key the light flashes green then red saying my car is a pts which it isn�t. Any idea?
I still have this Android cable available if you need to reprogram and/or firmware update your modules. iDatastart ADS-WLM-AN1 Weblink Moblie Programming cable for ADS-BZ3 - $50
I would need it for Apple. But I went up to Best Buy and my guy programmed it. I have the c lass 6cyl sedan and that�s what he chose. The red light comes on and when I go to program with me oem key it tells it the cars pts
So I called and the guy told me it�s because of the hood pins. So I connected the hood pin wire they gave me and held the pin on the wires and the remote start worked. Then I tried it again and it didn�t. Any one else have a problem with hood pins ?
So I called and the guy told me it�s because of the hood pins. So I connected the hood pin wire they gave me and held the pin on the wires and the remote start worked. Then I tried it again and it didn�t. Any one else have a problem with hood pins ?
when I try the remote start my car alarm goes off. The guy at idatalink said it�s cause of my hood pins and that these cars are real senstaive and if the hood is off a little it will set the alarm off. He told me to douse the hood pins in wd40 or to unplug them from the car
I�m trying to do this on my 2013 c300 and every time I go to program it with my oem key the light flashes green then red saying my car is a pts which it isn�t. Any idea?
To answer a few of my own questions
1) You can get a login to flash on their website. Just tell them you are an independent installer
2) The EIS removal tool is useless. I got one for like $10 and remove the ring and after the ignition wouldn't move anyways. Don't bother.
3) You can get a USB programming tool for like $30 on ebay. You must have some programming tool to do this. Mount the expansion pack on the module BEFORE you flash. I flashed the module and expansion separately and had to go back and reflash with both mounted. I did this with a desktop. You don't need to be mobile unless you want to change stuff after installation. You can also flash the 2cs module that's part of the antenna kit.
For the face-lift model the install is a little different
1) remove the trim that contains your center vents and goes all the way over the glove box. You just need to get it loose. The area around the vents is tricky, but look up backup cam installs if you want help. Its easiest to start near the glove box and it'll pull off.
2) The gauge surround is in two pieces. You only need to take off the bottom.
3) The wheel column shroud just pulls loose. Its a little different, but not hard.
4) the wires from the back of the ignition were a pita to get loose. The white thing that kind looks like a button on the top... that is the plug release.
I had a PTS system
1) The door jam trim is harder to get off than it looks, but it'll come off with some prying.
2) The canbus junction is way to the front and hooked to the floor. Only two connections on mine so it was easy to find. brown and brown/red. There is another one that is easier to see with blue wires. That's not it.
3) You'll need to use the alternate plug they give you in the kit and have instructions for repinning. Its not a big deal, but you'll need something like jewerly screwdrivers to get the pins out. Maybe something thin and sharp.
general
1) When you hook up the antenna, its the same port as the programmer. (black) Blue wire, I assumed blue port. That's where the drone unit goes if you have one.
2) IF you're at the end and you can lock and unlock stuff and the car won't start, start it manually and let it run 15s then shut it down. You have to do this a couple times in the process, but its easy to miss.
Hello,
I am stuck and can not program my module. despite resetting the module. nothing changes. when I connect the cables and put the ignition on ON position all LEDs are off. the only thing happens is blinking red, green, red after a few seconds after the start. my car is not PST and I do not need to connect the harness to the junction underneath the seat. However, I checked and there is only one cable in that junction. any suggestion?
Thanks
did you get the ads-bz3 module. I ordered one and it was an older version so I had to buy the new one from Best Buy and swap them and return the older version then everything worked for me
Mercedes SLR McLaren 722 S Is Extremely Rare Example Modified by McLaren
Slideshow: A one-of-one U.S.-spec Mercedes-Benz SLR McLaren Roadster became even rarer after a factory-backed transformation at McLaren's headquarters.