When you click on links to various merchants on this site and make a purchase, this can result in this site earning a commission. Affiliate programs and affiliations include, but are not limited to, the eBay Partner Network.
2013 C250 SPORT, 2014 WRX STI SEDAN, 2017 E300 4MATIC
Originally Posted by Kelvin Bellrose
How's your head?
The head is still at the machine shop. The turn around time is a week and a half so I am at a standstill right now until I get the head back. I am optimistic however because the car was running normally and my personal inspection and checks indicated it was not warped or cracked.
2013 C250 SPORT, 2014 WRX STI SEDAN, 2017 E300 4MATIC
Originally Posted by Kelvin Bellrose
Considering you only popped a had gasket I think you have a good chance of getting it running again.
Are you going to put new cans and lifters in?
Not planning to at this time. There is no scoring on the cams/cam housing and lifters also have no deformities. I kept track where each lifter came from and will return it to the same place.
Please buy a white Coat for when working on the car and look professional, just for the hell of it, I want to compare your white coat to the ones worked on my car.
Please buy a white Coat for when working on the car and look professional, just for the hell of it, I want to compare your white coat to the ones worked on my car.
Or at the very least he can use the white gloves that come with the car to change a tire,
It is disgusting to look at the final result of your "experiment" and yes, it is your own business how you maintain your own car, however people like you can get other, innocent people in big trouble. Imagine you had sold your car 2 months prior to the problem and then someone else would have had to do all the repairs for his "new" car.
2013 C250 SPORT, 2014 WRX STI SEDAN, 2017 E300 4MATIC
It has a while since I did anything on this experiment as I was waiting for some parts I ordered to get here and time was also in short supply. Anyway I now have all the parts I need and started the build this evening. This is what I have gotten done so far.
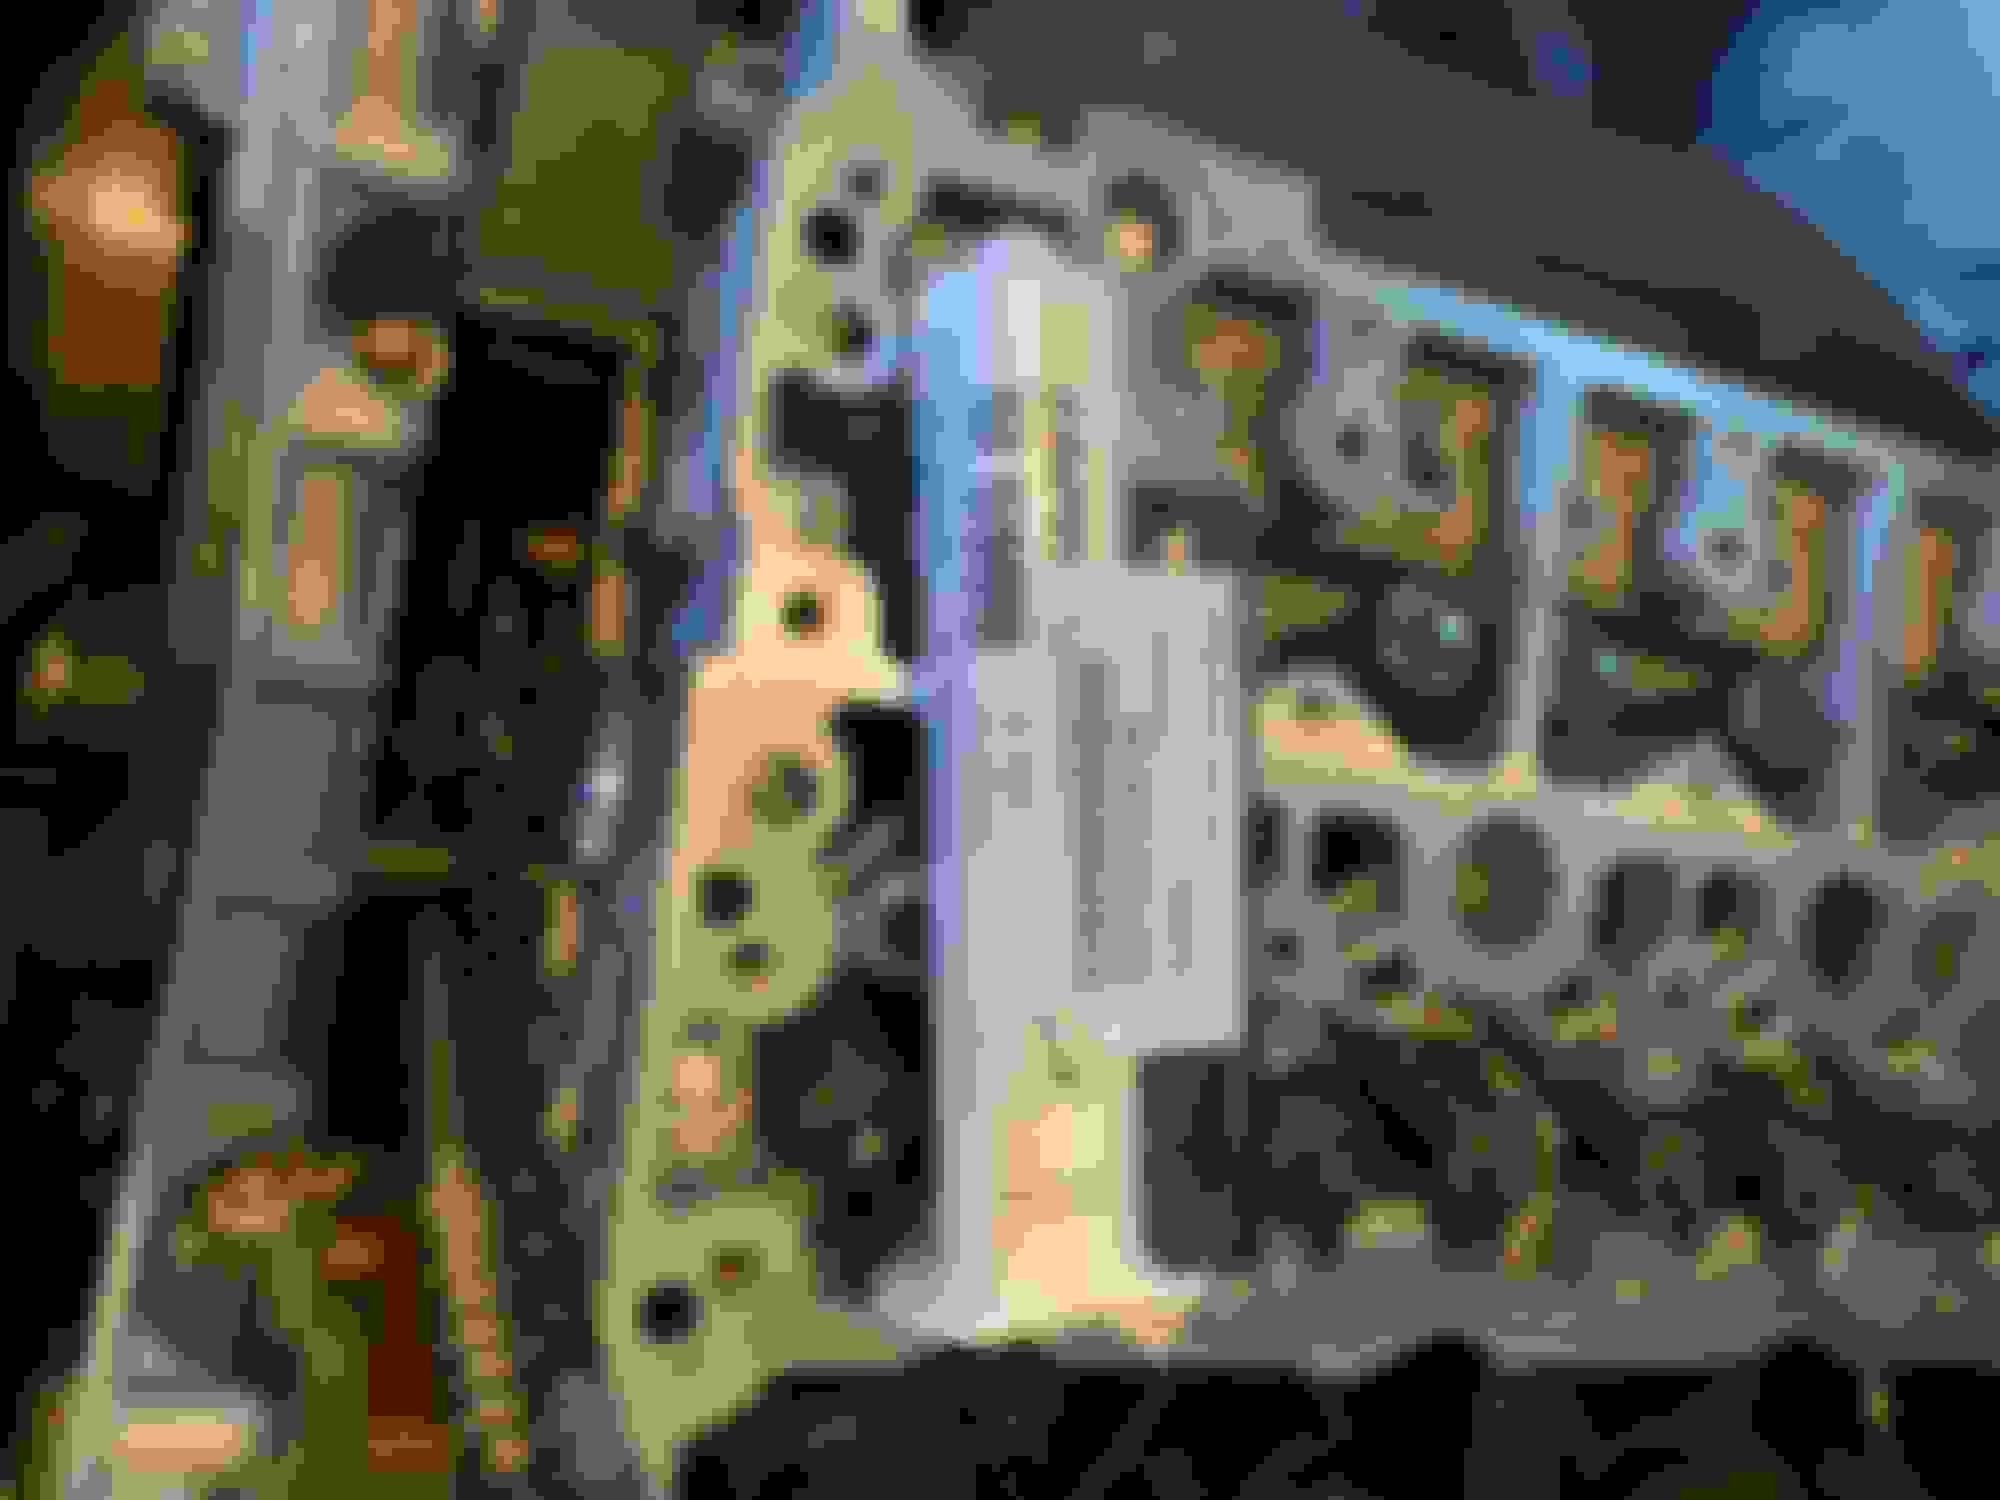
Torque specs and pattern
All parts ordered are here and reusable parts are cleaned and prepped. Ready to start the build
Head gasket and exhaust gasket placed. Zip ties are being used to temporarily align and hold in place the exhaust gasket.
Head placed and aligned.
New head bolts placed on their holes. Hand tighten until snag.
A 3 step torque is required to torque the head bolts:
1. The first step is torque to 45 N-m following the pattern on spec above.
2. Wait 10 minutes then then torque each bolt 90 degrees further following the same pattern again for step 2.
3. Wait 10 minutes then then torque each bolt 90 degrees further following the same pattern again for step 3.
* torque is set for 45.4 N-m because my torque wrench has a tolerance of +/- 1%.
Incredible to me how neat, precise and organized you are with this. All the more puzzling how someone with those personality traits got the engine to the state it is in. Hope it all works out when you are done. From the pictures it looks like you are putting together a new engine from scratch.
Next I will install the cam housing. There is an RTV gasket between the head and the cam housing. I used Loctite 5900 which MB also uses.
Before applying the RTV thoroughly clean the sealing surfaces. I used a razor blade to scrape the surfaces and used a lint-free cloth soaked in acetone to wipe away any oil and dust. When surface was clean and dry, I traced the RTV path with a sharpie and then applied the RTV silicone. I did not take any picture of the applied RTV as it starts to cure quickly. Anyway after aligning and installing CAM housing. I clamped the front and the back to apply pressure and I will leave the clamps(vice grips) on overnight.
2013 C250 SPORT, 2014 WRX STI SEDAN, 2017 E300 4MATIC
While waiting for the RTV to fully cure I reinstalled the timing chain guides and pins. I also reinstalled the cam lifters and rocker arms. Since i decided right away that I was going to re use these i kept track of where each came from and I returned each to the same spot. I used sandwich bags marked E1/I1 for exhaust 1/ intake 1 and so forth. Apply assembly lube to the cam cradles. Be generous since it will dissolve in the engine oil and the engine will start dry before oil makes its way up. Both cams installed. Make sure the correct cam goes to the correct side. Not sure if you can swap them anyway. Lube the cam cradles on cam housing covers with assmbly lube and then reinstall reinstall the cover bolts and torque to spec. The torque spec and pattern attached below. Torque spec for cam housing
Next I will set the timing and reconnect the timing chain. When that is completed it will be down hill from there.
it takes 15 minutes to do an oil change and it only costs 50$ a change, this repair has to be in the thousand dollar range and taking you more than 15 minutes. even through 50,000miles you'd end up with less time/ money spent just changing the oil.
I hope you don't sell this car to some poor kid down the road.....
Mercedes SLR McLaren 722 S Is Extremely Rare Example Modified by McLaren
Slideshow: A one-of-one U.S.-spec Mercedes-Benz SLR McLaren Roadster became even rarer after a factory-backed transformation at McLaren's headquarters.