
I resealed the leaking valve cover (recirculation cover leak)
 10-16-2010, 12:46 PM
#1
Junior Member
Thread Starter

Join Date: Aug 2010
Posts: 25
Likes: 0
Received 0 Likes
on
0 Posts
02 C32
I resealed the leaking valve cover (recirculation cover leak)
My C32 has 114K miles and I noticed that these little covers on the valve covers are leaking. There is already a great DIY thread on this forum:
https://mbworld.org/forums/c-class-w...ing-cover.html
My post is to reassure anyone that it is indeed an easy job to perform.
** Be sure to clean out ALL of the old gasket material from the bolt holes in both the cover and the threads on the valve cover.
**Do not over tighten the small bolts. They are made of aluminum and break very very very easily. If you feel premature resistance on these small bolts, its a sign that there is OLD gasket material getting caught in there.
**I installed the covers as soon as the new gasket maker was applied and I torqued down the bolts right away. When using any silicone RTV gasket maker, you want to fully assemble the parts right away.
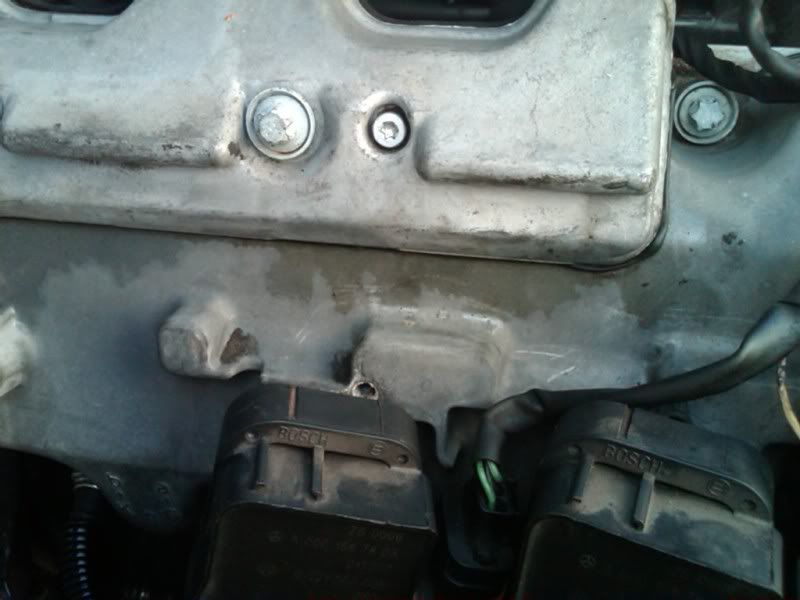
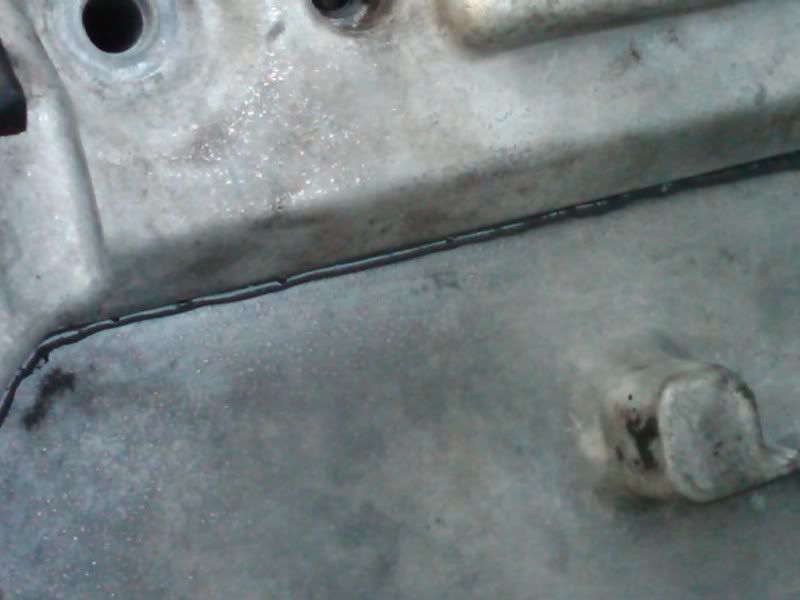
I cleaned off my valve covers very well, drove it only 30 miles over the course of a week and this is how much oil is leaking already.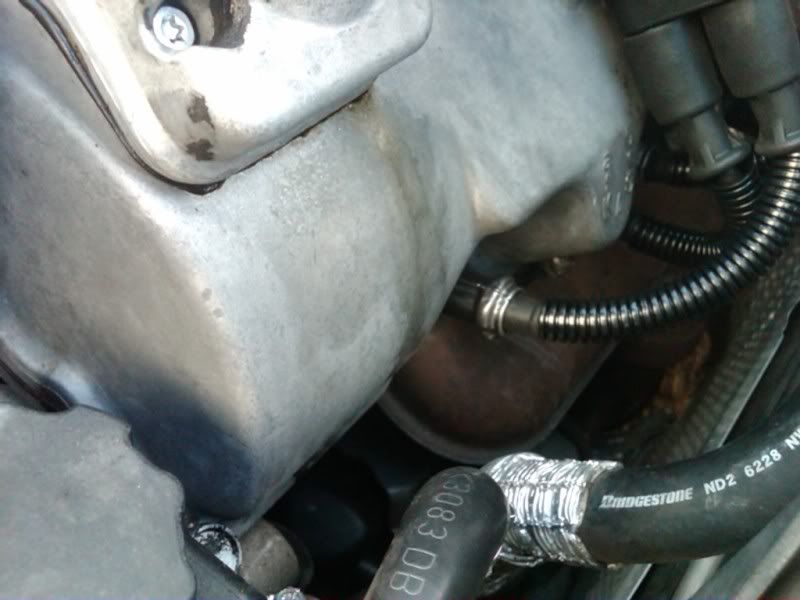
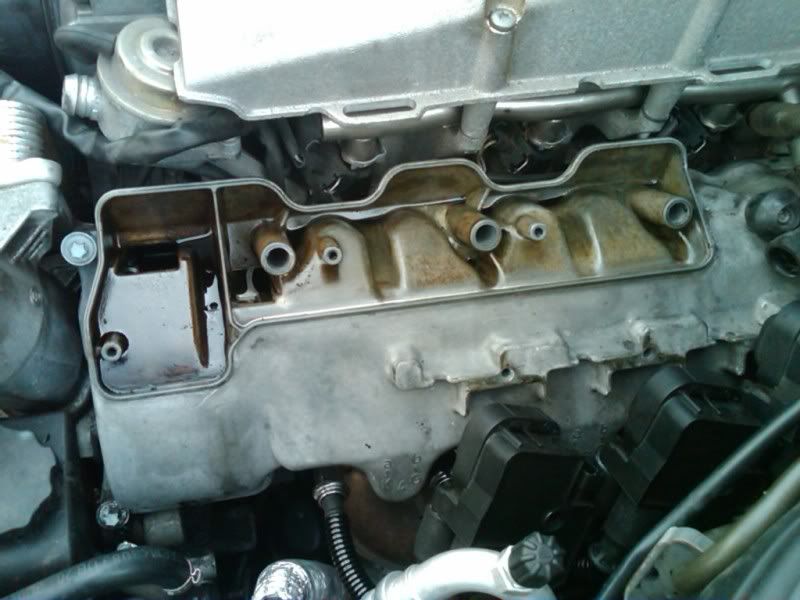
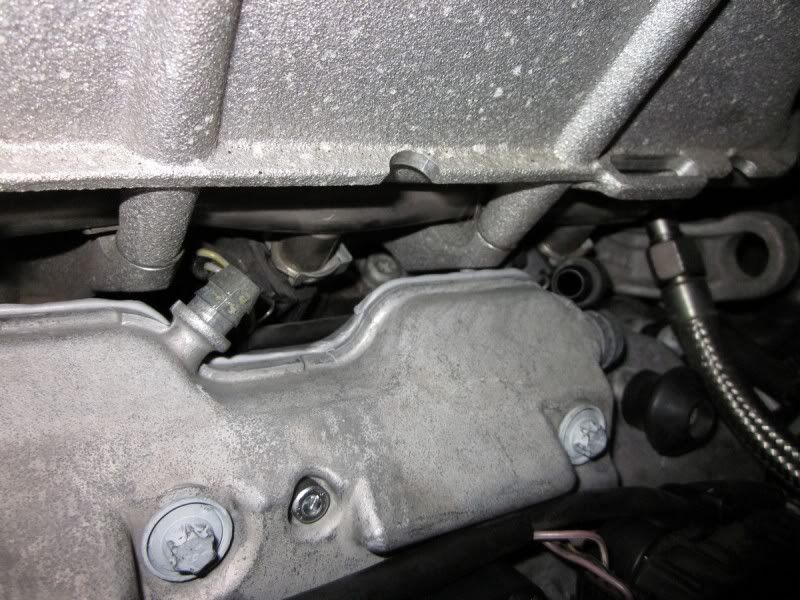
Cover is off and mating surface is inspected and cleaned. Make sure you take your time and remove all the old gasket material.
Go down to your auto parts store and pick up some gasket maker.
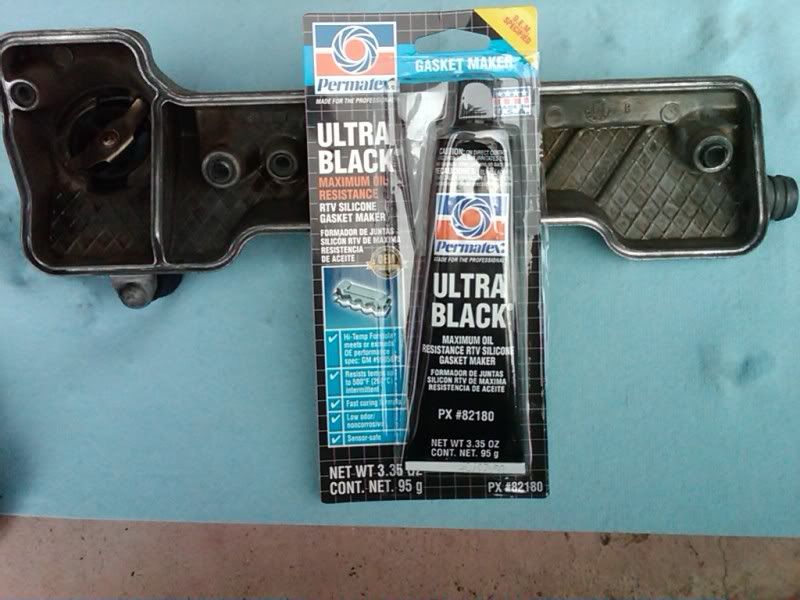
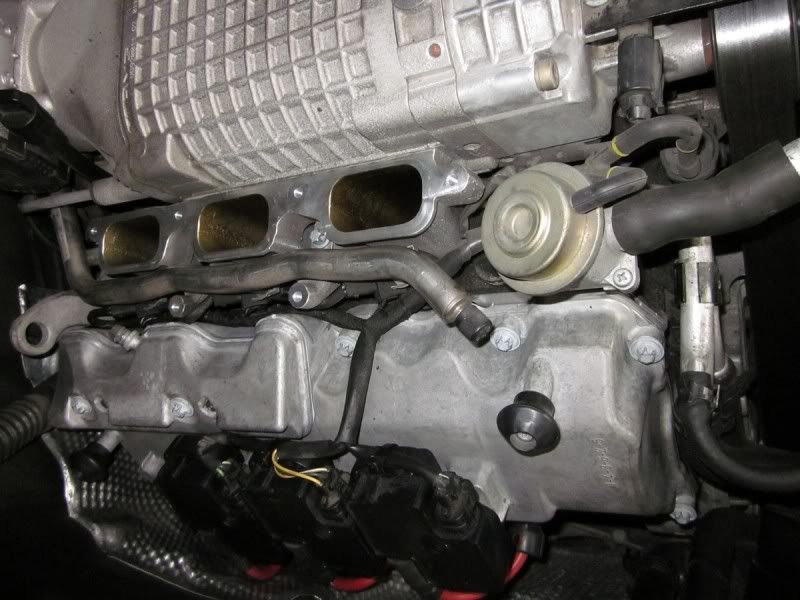
Your gasket maker tube will have a nozzle that needs to be cut open. Start by cutting a VERY small section off the tip of the nozzle, then adjust as needed. You want to be able to squeeze out a nice section of gasket maker that is about 1/8" wide. You are going to squeeze the gasket material into the mating surface and also don't forget to apply the gasket material around the bolt holes. I applied enough gasket maker to fill the small "valley" if the mating surface and once I installed the cover, it supplied enough coverage and looked like the factory seal.
Easy job. Took me about an hour to complete. Most of the time was spent cleaning the old gasket material.

https://mbworld.org/forums/c-class-w...ing-cover.html
My post is to reassure anyone that it is indeed an easy job to perform.
** Be sure to clean out ALL of the old gasket material from the bolt holes in both the cover and the threads on the valve cover.
**Do not over tighten the small bolts. They are made of aluminum and break very very very easily. If you feel premature resistance on these small bolts, its a sign that there is OLD gasket material getting caught in there.
**I installed the covers as soon as the new gasket maker was applied and I torqued down the bolts right away. When using any silicone RTV gasket maker, you want to fully assemble the parts right away.
I cleaned off my valve covers very well, drove it only 30 miles over the course of a week and this is how much oil is leaking already.
Cover is off and mating surface is inspected and cleaned. Make sure you take your time and remove all the old gasket material.
Go down to your auto parts store and pick up some gasket maker.
Your gasket maker tube will have a nozzle that needs to be cut open. Start by cutting a VERY small section off the tip of the nozzle, then adjust as needed. You want to be able to squeeze out a nice section of gasket maker that is about 1/8" wide. You are going to squeeze the gasket material into the mating surface and also don't forget to apply the gasket material around the bolt holes. I applied enough gasket maker to fill the small "valley" if the mating surface and once I installed the cover, it supplied enough coverage and looked like the factory seal.
Easy job. Took me about an hour to complete. Most of the time was spent cleaning the old gasket material.


 10-06-2012, 04:59 PM
#5
MBWorld Fanatic!
I thought I would post my experiences as I have just finished this job. I did the breather covers and the seals for the whole valve cover. This job sucks... heaps. It took me about 5-6 hours to do it all but I am very fussy about getting everything clean. The valve cover on the right hand side of the car was a piece of cake, no problems. I taped the coil packs out of the way since I don't like pulling the leads off more often than I have to.
I used a can of degreaser on each cover. There was heaps of caked on **** in there, the tiny breather holes into the vaccum hose were blocked completely. I used a screw to poke all the crud out. Getting the old form-in-place-gasket out was fairly difficult. I needed a flat head screwdriver to run along the edges to get a lot of it off.
I used 5Nm of torque on the larger valve cover bolts. They can't have been any tighter when I undid them, they only needed a tiny tweak to come undone. The 5x tiny aluminum ones I put the torx bit in there and tightened them as hard as I could only using my hands ie no leverage at all. I bought brand new ones ex germany for NZ$12 for all through the dealer. I reused the bigger ones. The valve cover seals were NZ$45 each and I used ultra grey for the breather covers.
I made the breather cover bolts finger tight so the stuff squishes out and then went back after an hour to tighten them more.
The left side of the car cover (with the oil fill) was a *****. At least the last coil pack has to come out. The 17mm nut holding the fuel return hose has to come off which will obviously put fuel everywhere. One of the PCV hoses had a 5cm split along the bottom and had actually corroded from the inside out (everyone- CHECK THESE). This cover also has ~6cm long metal pipes attached to the bottom. All in all very difficult to get out and back in again. There is also a small metal tab holding some... stuff near the firewall, also very annoying. Make sure the seal is in the grooves when you put the valve cover back on. It is very easy to get it caught and ruin it. My car is RHD so these might not apply to everyone.
Good luck and wear old clothes, you will get covered in it.
Last edited by tw2; 10-06-2012 at 05:02 PM.
10-08-2012, 04:14 AM
#6
Super Member

Join Date: Jun 2011
Location: I liva at da land down under
Posts: 601
Likes: 0
Received 4 Likes
on
4 Posts
Porsche 2004 911

Did you get new hoses? If so are these the ones? 1120180182. 282. 382.482
 I will be having an adventure into oil most likely this weekend
 .
. May be able to ship before then.
10-09-2012, 01:45 AM
#7
MBWorld Fanatic!
I just went to repco and got some 9.5mm ID (3/8") transmission oil hose and used that. I figured it should be resistant to corrosion. I would hate to think how much MB would charge for those hoses + it was Sunday and I needed the car going again.
Trending Topics
 10-10-2012, 01:35 AM
#9
MBWorld Fanatic!
Haha yeah they are good like that. Is that just for the two hoses?
Only been 3 days but no problems and not even a hint of a leak at this stage. It looks so much better. I almost wish I had painted them with high temp stuff but it always turns out bad when it starts to chip here and there.
Only been 3 days but no problems and not even a hint of a leak at this stage. It looks so much better. I almost wish I had painted them with high temp stuff but it always turns out bad when it starts to chip here and there.
 10-16-2012, 07:48 PM
#11
MBWorld Fanatic!
This is my replacement. 10mm ID would be best but 9.5mm will work if you use some detergent and put the hose end un boiling water just before jamming it on.
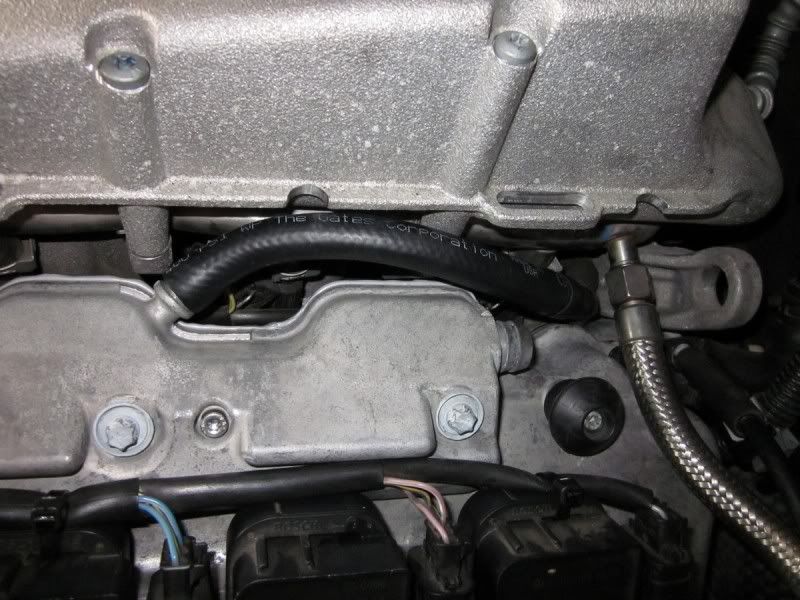
You need to remove the intake manifold to replace the one on the right side of the car. Good time to check for a leaking intercooler anyway.
10-23-2012, 03:29 PM
#13
MBWorld Fanatic!


